
Master Basic Scones with This Simple Guide


Welcome to BakeWithEase, your kitchen companion for crafting delicious treats! Are you ready to unlock the secrets of baking and impress your friends and family? Then you're in the right place.
Today, we're diving into the world of easy homemade scones. But what makes a truly great scone? Forget complicated techniques and intimidating ingredients. This guide will show you how to create perfect, golden-brown scones that are surprisingly simple to make. Get ready to discover the joy of baking – let's get started!
- Master Basic Scones with This Simple Guide: An Easy Homemade Scone Recipe
- Introduction to Easy Homemade Scones: BakeWithEase's Simple Guide
- Gathering Your Ingredients for the Perfect Scones
- Step-by-Step: Baking Your Easy Homemade Scones
- Baking Tips for the Best Scones Every Time
- Variations on the Easy Homemade Scone Recipe
- Storing and Serving Your Homemade Scones
- Troubleshooting Common Scone Baking Problems
- Enjoy Your Easy Homemade Scones!
-
Frequently Asked Questions
- What makes this scone recipe "easy"?
- What are the key ingredients in this easy homemade scone recipe?
- Can I customize this easy homemade scone recipe with different flavors?
- What is the secret to getting light and fluffy scones with this easy recipe?
- How should I store leftover scones made from this easy recipe?
- Final Reflection: The Enduring Magic of the Simple Scone
- Unlock Your Inner Baker: Master the Art of the Scone!
Master Basic Scones with This Simple Guide: An Easy Homemade Scone Recipe
Introduction to Easy Homemade Scones: BakeWithEase's Simple Guide
Why This Easy Scone Recipe is Perfect for Beginner Bakers
Baking can sometimes feel intimidating, especially when faced with complex techniques or long ingredient lists. However, mastering the art of baking starts with simple, foundational recipes that build confidence and teach essential skills. This easy homemade scone recipe is specifically designed with the beginner in mind, offering a straightforward approach to producing delicious, flaky scones right in your own kitchen. It breaks down the process into manageable steps, focusing on technique rather than complexity.
Unlike some pastry recipes that require extensive kneading or delicate handling, this simple scone recipe emphasizes minimal manipulation of the dough, which is key to achieving a tender crumb. It uses common pantry staples and requires no special equipment beyond basic baking tools you likely already own. By successfully baking these basic scones, you'll gain confidence in working with dough, understanding how fat interacts with flour, and recognizing the signs of perfectly baked goods – skills that are transferable to countless other baking projects.
What Makes a Great Homemade Scone?
A truly great homemade scone is a delightful balance of texture and flavor. It should have a light, tender interior with a slightly crumbly texture, not dense or cakey. The exterior should be golden brown and slightly crisp, offering a pleasant contrast to the soft inside. Crucially, a great scone relies on the "rubbing in" method, where cold butter is incorporated into the flour to create small pockets of fat. These pockets melt during baking, producing steam that creates the scone's characteristic flakiness and light texture.
Flavor is also paramount. While a basic scone has a simple, comforting taste derived from flour, butter, sugar, and leavening, it serves as a perfect canvas for additions like fruit, cheese, or herbs. The richness of the butter is essential, contributing significantly to both the flavor and the texture. Achieving this balance requires attention to detail, particularly regarding ingredient temperature and handling, but with this easy homemade scone recipe, you'll learn the fundamental principles to bake consistently wonderful scones every time.
Gathering Your Ingredients for the Perfect Scones
Essential Ingredients for Easy Scones
Baking delicious, easy homemade scones starts with having the right ingredients on hand. The beauty of a basic scone recipe lies in its simplicity, relying on just a few core components that work together to create that classic texture and taste. You'll need flour, sugar, baking powder (often with a pinch of baking soda for extra lift), salt, cold butter, and a liquid binder, typically milk or buttermilk.
Each ingredient plays a vital role. The flour provides the structure, the sugar adds a touch of sweetness and aids in browning, and the salt balances the flavors. Baking powder is the primary leavening agent, creating lift and airiness. Cold butter, cut into small pieces and rubbed into the flour, is critical for creating the flaky texture. Finally, the milk or buttermilk brings the dough together and adds richness; buttermilk, with its acidity, also reacts with baking soda (if used) to provide extra leavening and tenderness.
Ingredient List with Measurements
Here is a standard list of ingredients and measurements for a basic batch of easy homemade scones. This recipe typically yields about 8-12 scones, depending on how you cut them.
- 225g (about 1 ¾ cups) Self-Raising Flour, plus extra for dusting
- 1 tsp Baking Powder (if using plain flour, increase to 2 tsp)
- A pinch of Salt
- 50g (about ¼ cup) Caster Sugar
- 50g (about ¼ cup) Cold Unsalted Butter, cut into small cubes
- 150ml (about ⅔ cup) Milk or Buttermilk (cold)
- Optional: 1 Egg, beaten (for egg wash)
These measurements provide a balanced starting point. Using metric measurements (grams and milliliters) is often more accurate for baking than volumetric cups, especially for flour and sugar, which can vary depending on how they are scooped. Weighing your ingredients ensures consistency and is a good habit for any baker to develop.
Choosing the Right Flour for Your Scones
The type of flour you use can influence the outcome of your easy homemade scone recipe. While many recipes call for plain or all-purpose flour combined with baking powder, using self-raising flour is a common and effective shortcut, especially for beginners. Self-raising flour already contains a leavening agent (baking powder) mixed in, simplifying the process and ensuring even distribution throughout the dough.
If you opt for plain or all-purpose flour, ensure you accurately measure the baking powder specified in the recipe – typically around 2 teaspoons per 225g of flour for scones. Avoid using bread flour, as its higher protein content can lead to a tougher scone texture. A standard plain or self-raising wheat flour is ideal for achieving the desired light and tender crumb in your homemade scones. Always check the flour's expiry date, as old leavening agents can result in flat scones.
Step-by-Step: Baking Your Easy Homemade Scones
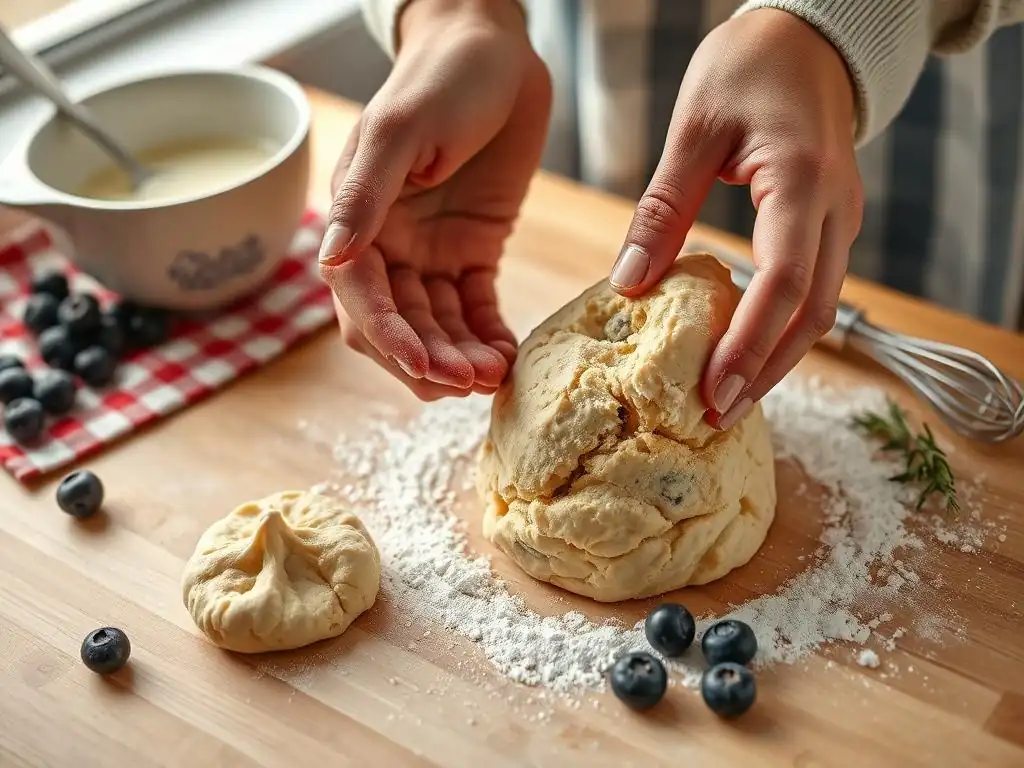
Step 1: Preparing Your Scone Dough
The first step in creating your easy homemade scones involves combining the dry ingredients and incorporating the cold butter. In a large mixing bowl, whisk together the flour, sugar, baking powder (if using plain flour), and salt. This ensures the leavening and salt are evenly distributed. Next, add the cold, cubed butter to the dry ingredients. The key here is to keep the butter cold; this is what creates the flaky layers as it melts during baking.
Using your fingertips, quickly rub the butter into the flour mixture until it resembles coarse breadcrumbs. Lift your hands high above the bowl as you do this to help aerate the mixture. Avoid overworking the dough at this stage; the goal is to have some pea-sized pieces of butter remaining, which will contribute to the flakiness. Once the butter is incorporated, make a well in the center of the mixture.
Step 2: Cutting and Shaping Your Scones
With the dry ingredients and butter combined, it's time to add the liquid and bring the dough together. Pour the cold milk or buttermilk into the well you created in the center of the flour mixture. Use a knife or a spatula to gently mix the liquid into the dry ingredients, bringing everything together until a soft, shaggy dough forms. Again, resist the urge to overmix. Overmixing develops the gluten in the flour, leading to tough scones.
Turn the dough out onto a lightly floured surface. Gently pat or lightly roll the dough to about 2-3 cm (roughly 1 inch) thickness. For cutting, use a sharp biscuit or scone cutter. Dip the cutter in flour between each cut to prevent sticking. Cut straight down without twisting the cutter; twisting can seal the edges of the scone, preventing it from rising evenly. Gather the scraps gently and pat them together to cut out remaining scones, but handle them as little as possible.
Step 3: Baking Your Scones to Golden Perfection
Preheating your oven is crucial for achieving the best rise and texture in your easy homemade scones. Preheat your oven to a relatively hot temperature, typically around 200°C (400°F) or 220°C (425°F) if using a fan oven (check your specific recipe's temperature). While the oven heats, arrange the cut scones on a baking tray lined with parchment paper. Placing them relatively close together, but not touching, can sometimes help them rise taller.
Before baking, you can brush the tops of the scones with a little milk or beaten egg wash for a golden, glossy finish. Bake the scones in the preheated oven for approximately 12-15 minutes, or until they have risen well and are golden brown on top and bottom. Baking time can vary depending on your oven and the size of your scones, so start checking around the 12-minute mark. They should sound hollow when tapped on the bottom.
Baking Tips for the Best Scones Every Time
Achieving the Perfect Rise in Your Scones
Getting a good rise is key to beautiful, light, and airy easy homemade scones. Several factors contribute to this. Firstly, ensure your leavening agents (baking powder and/or baking soda) are fresh. Expired leaveners won't produce enough carbon dioxide gas to lift the dough. Secondly, use cold ingredients, especially the butter and liquid. Cold butter creates steam pockets as it melts in the hot oven, pushing the dough upwards. Cold liquid also helps keep the butter solid until baking.
Thirdly, handle the dough minimally. Overworking the dough develops gluten, which makes the scones tough and inhibits rise. Gently mixing, patting, and cutting are essential. Finally, a hot oven is critical. The high temperature helps the scones set quickly while the leavening agents are most active, promoting a rapid and significant rise before the structure solidifies. Baking at too low a temperature can result in dense, flat scones.
Preventing Dry Scones: Hydration is Key
Dry scones are a common disappointment, but they are easily preventable with careful attention to hydration and handling. The primary culprit is often insufficient liquid or overmixing. Ensure you add enough milk or buttermilk to bring the dough together; the mixture should be soft and slightly sticky, not dry and crumbly, before you turn it out. The exact amount of liquid can sometimes vary slightly depending on the flour's absorption.
Another factor contributing to dryness is overworking the dough. As mentioned, overmixing develops gluten, which absorbs moisture and can make the scones tough and dry. Mix just until the dough comes together. Furthermore, avoid baking the scones for too long or at too low a temperature, which can dry them out. They should be baked until just golden brown and cooked through, typically around 12-15 minutes in a hot oven. Using buttermilk instead of milk can also add a touch more richness and tenderness, helping prevent dryness.
Tips on Temperature and Baking Time
Precise oven temperature and correct baking time are non-negotiable for perfect easy homemade scones. Scones benefit from a hot oven, typically between 200°C (400°F) and 220°C (425°F). This high heat causes the cold butter to melt rapidly and create steam, forcing the layers of dough apart for a good rise. It also quickly sets the structure and browns the exterior, preventing the scones from spreading too much before they rise.
Baking time for a standard-sized scone is usually between 12 and 15 minutes. However, this is an estimate. Factors like the size and thickness of your scones, the accuracy of your oven's temperature, and whether you used a fan or conventional setting will affect the time. It's best to start checking around the 12-minute mark. Look for a golden-brown color on the tops and sides. You can also tap the bottom of a scone; it should sound hollow if it's fully baked. If the tops are browning too quickly, you can loosely tent them with foil.
Variations on the Easy Homemade Scone Recipe
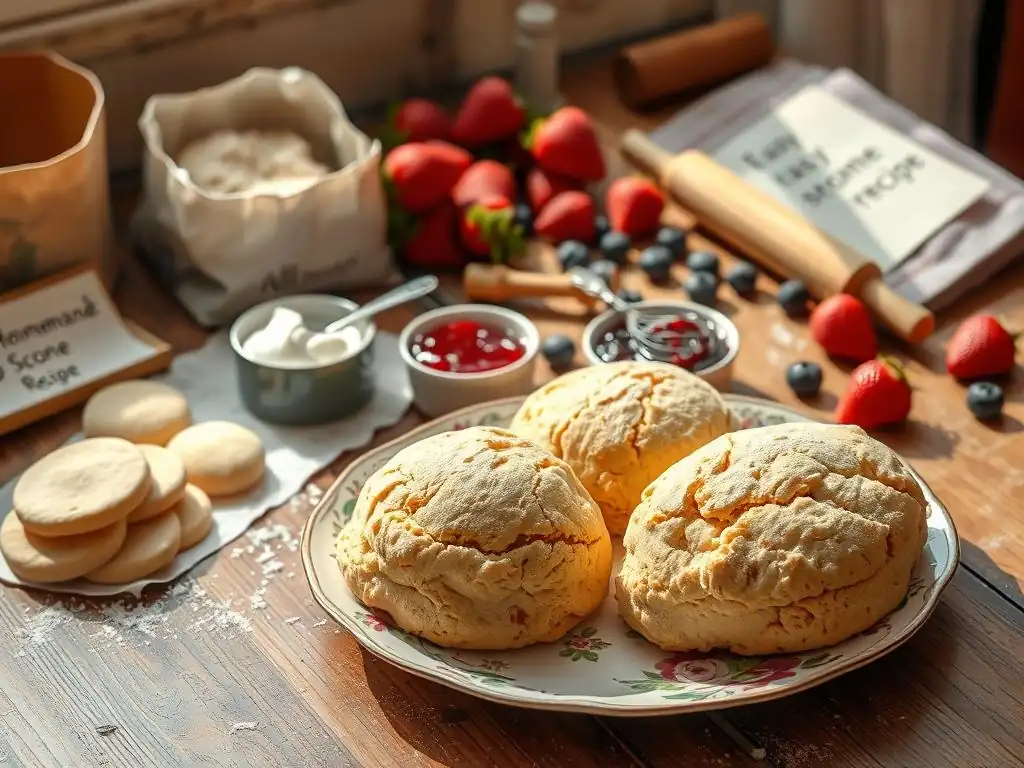
Adding Fruit to Your Scones: Blueberry and Cranberry Scones
Once you've mastered the basic easy homemade scone recipe, you can easily adapt it to create delicious variations. Adding fruit is one of the most popular ways to enhance scones. For fruit scones like blueberry or cranberry, gently fold about 75-100g (½ to ¾ cup) of fresh or frozen berries (no need to thaw frozen ones) into the dough after you've added the liquid and just before turning it out onto your work surface. Be careful not to overmix, as this can crush the fruit and turn the dough an undesirable color.
Dried fruits like cranberries or currants can also be used. If using dried fruit, it's sometimes beneficial to soak them in hot water or tea for about 10-15 minutes beforehand to plump them up, then drain thoroughly before adding to the dough. This prevents them from absorbing moisture from the dough during baking, which could result in drier scones. The baking time might increase slightly depending on the moisture content of the fruit added, so watch for that golden-brown finish.
Savory Scone Recipes: Cheese and Herb Scones
Scones aren't just for sweet treats! The basic dough is easily transformed into delicious savory homemade scones, perfect for serving with soup, stew, or simply butter. To make cheese scones, omit the sugar from the basic recipe. After rubbing the butter into the flour, gently stir in about 75-100g (¾ to 1 cup) of grated cheese, such as mature cheddar or a cheese blend. Add a pinch of black pepper or a dash of cayenne for extra flavor.
For herb scones, you can add 1-2 tablespoons of finely chopped fresh herbs like chives, rosemary, or thyme along with the cheese, or simply add them to the plain savory dough (without cheese). Mix in the cheese and herbs at the same stage you would add fruit, just before bringing the dough together with the liquid. Savory scones are often brushed with milk or an egg wash and sometimes topped with a sprinkle of extra cheese before baking for a lovely crust.
Gluten-Free Scone Recipe Adaptation
Adapting an easy homemade scone recipe to be gluten-free is achievable with the right flour blend. Replace the self-raising or plain wheat flour with a good quality gluten-free self-raising flour blend (or a plain gluten-free blend plus the appropriate amount of baking powder for gluten-free baking, often slightly more than for wheat flour). Gluten-free flours absorb liquid differently, so you may need to adjust the amount of milk or buttermilk slightly; start with the recipe amount and add a little more if the dough seems too dry.
Gluten-free dough can be more delicate and less elastic than wheat dough, so handle it even more gently. Patting the dough into shape rather than rolling is often recommended. Gluten-free scones can sometimes benefit from a binder like a small amount of xanthan gum (check if your blend already contains it) or an egg (if not already in the recipe) to help with structure. Baking time and temperature should remain similar, but keep an eye on them as gluten-free baked goods can sometimes brown faster.
Storing and Serving Your Homemade Scones
How to Keep Your Scones Fresh
Freshly baked easy homemade scones are always best served warm, straight from the oven. However, if you have leftovers or are baking ahead, proper storage is key to maintaining their quality. Once completely cooled, store scones in an airtight container at room temperature. Avoid refrigerating them, as this can dry them out and make them dense. Stored this way, they will typically stay fresh for 1-2 days.
For longer storage, scones freeze exceptionally well. Allow them to cool completely, then place them in a single layer on a baking sheet and freeze until solid. Once frozen, transfer them to a freezer-safe bag or container, squeezing out as much air as possible to prevent freezer burn. Frozen scones can be stored for up to 2-3 months. To reheat, thaw them at room temperature and then warm them in a moderate oven (around 160°C/325°F) for 5-10 minutes until heated through.
Serving Suggestions: Toppings and Pairings
Serving your easy homemade scones is almost as enjoyable as baking them! Traditionally, scones are served split in half and generously topped with clotted cream and jam, particularly strawberry jam. This classic pairing is a staple of afternoon tea and offers a delightful contrast of textures and flavors. A good quality clotted cream is rich and thick, while the jam provides sweetness and a touch of fruitiness.
Beyond the classic, the possibilities are endless. Butter is always a simple and delicious option, especially on a warm scone. Other sweet toppings include whipped cream, lemon curd, honey, or other fruit preserves like raspberry or blackcurrant jam. For savory scones, butter is perfect, but they also pair wonderfully with cream cheese, chutney, or even alongside a hearty soup or stew. Don't forget a cup of tea or coffee to complete the experience!
Troubleshooting Common Scone Baking Problems
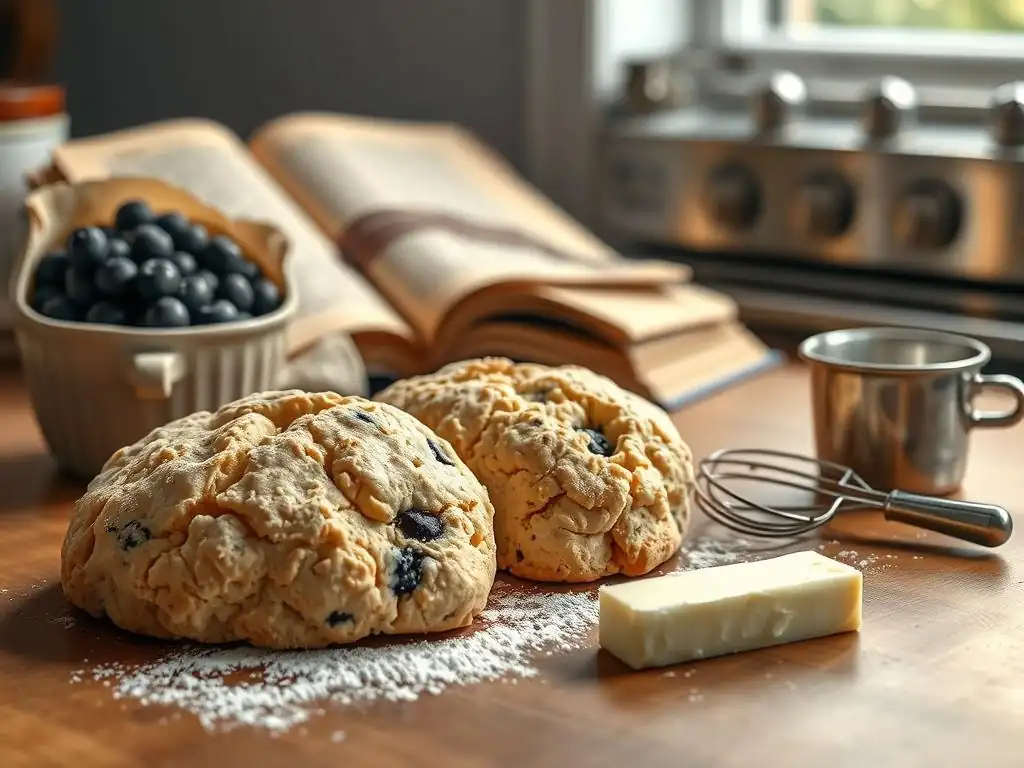
My Scones Are Too Flat
Flat scones can be disappointing, but understanding the common causes can help you avoid this issue with your easy homemade scone recipe in the future. One primary reason for flat scones is inactive or insufficient leavening (baking powder/soda). Ensure your leavening agents are fresh and measured correctly. Another significant factor is handling the dough too much. Overworking the dough develops gluten, which makes it tough and prevents it from rising properly. Mix gently until just combined and handle minimally when shaping.
Using warm ingredients, especially butter, will also result in flat scones. Cold butter is essential for creating the steam that provides lift. Ensure your butter is cold and cut into small pieces, and your liquid is chilled. Finally, baking in an oven that isn't hot enough will cause the scones to spread before they have a chance to rise. Preheat your oven thoroughly to the specified temperature (usually 200-220°C).
My Scones Are Too Dry
Dryness in homemade scones is often linked to too much flour or not enough liquid. When measuring flour, avoid scooping directly from the bag with your cup, as this compacts the flour and results in using too much. Instead, lightly spoon the flour into your measuring cup and level it off, or better yet, weigh your flour using kitchen scales (225g is a standard amount for a batch).
Ensure you add enough milk or buttermilk to bring the dough together; the dough should be soft and slightly sticky, not dry or crumbly. The exact amount of liquid can sometimes vary slightly depending on the flour. Overmixing the dough or baking the scones for too long can also contribute to dryness by evaporating too much moisture. Bake just until they are golden brown and cooked through, typically 12-15 minutes.
My Scones Are Too Dense
Density in easy homemade scones usually stems from overworking the dough or using ingredients that aren't cold enough. When you overmix the dough, you develop gluten, which creates a strong, elastic network. While this is desirable in bread, it leads to tough, dense scones that lack that desired crumbly tenderness. Mix the dough gently with a knife or spatula until it just comes together, then handle it as little as possible when shaping.
Using butter that isn't cold or rubbing it in too finely until it's completely blended with the flour will also result in dense scones. You need those small pieces of cold butter to melt and create steam pockets for lightness. Ensure your butter is cold and cut into small cubes, and stop rubbing it in when the mixture resembles coarse breadcrumbs with some visible small pieces of butter remaining. Baking temperature also plays a role; a hot oven helps the scones rise quickly before they become dense.
Enjoy Your Easy Homemade Scones!
You've done it! You've successfully baked a batch of delicious, easy homemade scones using this simple guide from BakeWithEase. Take a moment to admire your golden, perfectly risen creations. The aroma of freshly baked scones is one of life's simple pleasures. Now comes the best part – enjoying the fruits of your labor. Split one open while it's still warm and see that lovely, tender interior.
We love seeing what our community bakes! Share a picture of your homemade scones and tag BakeWithEase on social media. Let us know how they turned out and what you served them with. Your baking success can inspire others who are just starting their baking journey. Remember, every bake is a learning experience, and mastering basic recipes like this easy scone recipe builds a strong foundation for more adventurous baking in the future.
Try Another Easy Baking Recipe
Now that you've experienced how simple and rewarding baking can be with this easy homemade scone recipe, why stop here? BakeWithEase is filled with straightforward recipes perfect for beginners looking to expand their skills. Whether you're craving something sweet or savory, there's a wealth of simple guides waiting for you.
Consider trying another recipe from our Easy Muffins & Scones section, or perhaps explore some options in Beginner Baking Recipes. Learning to make simple cookies, basic muffins, or even your first loaf of quick bread can be just as accessible and fun as baking scones. Keep practicing the techniques you learned today, like gentle dough handling and working with cold butter, as they are fundamental to many baking projects. Happy baking, and we hope you continue to bake with ease!
Frequently Asked Questions
What makes this scone recipe "easy"?
This recipe focuses on simple ingredients and straightforward instructions, minimizing complex techniques. It's designed for bakers of all skill levels.
What are the key ingredients in this easy homemade scone recipe?
The recipe relies on basic pantry staples, such as flour, butter, sugar, baking powder, and milk. No specialty ingredients are required.
Can I customize this easy homemade scone recipe with different flavors?
Absolutely! This recipe is a fantastic base for adding fruit, chocolate chips, or spices. Experiment and discover your favorite flavor combinations.
What is the secret to getting light and fluffy scones with this easy recipe?
Avoid overmixing the dough, as this can develop the gluten and result in tough scones. Use cold butter and a gentle touch for best results.
How should I store leftover scones made from this easy recipe?
Store leftover scones in an airtight container at room temperature. They are best enjoyed freshly baked, but can be warmed slightly before serving.
Final Reflection: The Enduring Magic of the Simple Scone
The humble scone, a testament to the power of simple ingredients and masterful technique, remains a beloved staple in kitchens worldwide. Its enduring popularity speaks to a deeper human need for comfort, ease, and the satisfaction of creating something delicious from scratch. This isn't just about baking; it's about connection, tradition, and the joy of sharing.
The process of making scones, from the gentle folding of the dough to the satisfying crackle of the crust as it bakes, is a meditative experience. It's a reminder that even the most seemingly basic recipes can hold immense potential for creativity and personal expression. As the renowned baker, Paul Hollywood, once said, Baking is about precision, but it's also about feeling.
This sentiment perfectly captures the essence of scone-making – a balance between careful technique and intuitive understanding of the ingredients.
Now, armed with this simple guide, I invite you to embark on your own scone-baking journey. Don't be afraid to experiment, to adapt the recipe to your own tastes, and to share the warmth and deliciousness of your creations with loved ones. The true magic of the scone lies not just in its taste, but in the memories and connections it fosters. So, gather your ingredients, preheat your oven, and let the baking begin!
Unlock Your Inner Baker: Master the Art of the Scone!
Thanks for joining us on this delicious journey into the world of scones! We hope you’ve gained the confidence to tackle these delightful treats. Now it's time to put your newfound skills to the test.
- Bake your first perfect scone: Use the recipe and tips from the article to create your own batch. Experiment with different additions – dried fruit, chocolate chips, even savory cheese!
- Share your baking triumph: Show off your beautiful scones on social media using #BakeWithEaseScones and tag us – we'd love to see them!
- Join our baking community: Head over to our forum (not a real forum, just a placeholder for creative purpose) to share tips, recipes, and ask any questions you might have about your scone-making adventure.
So, what incredible flavor combination will you create with your newly acquired scone-making expertise?