
Baking Sweet Rolls at High Altitude: Adjusting Your Recipe

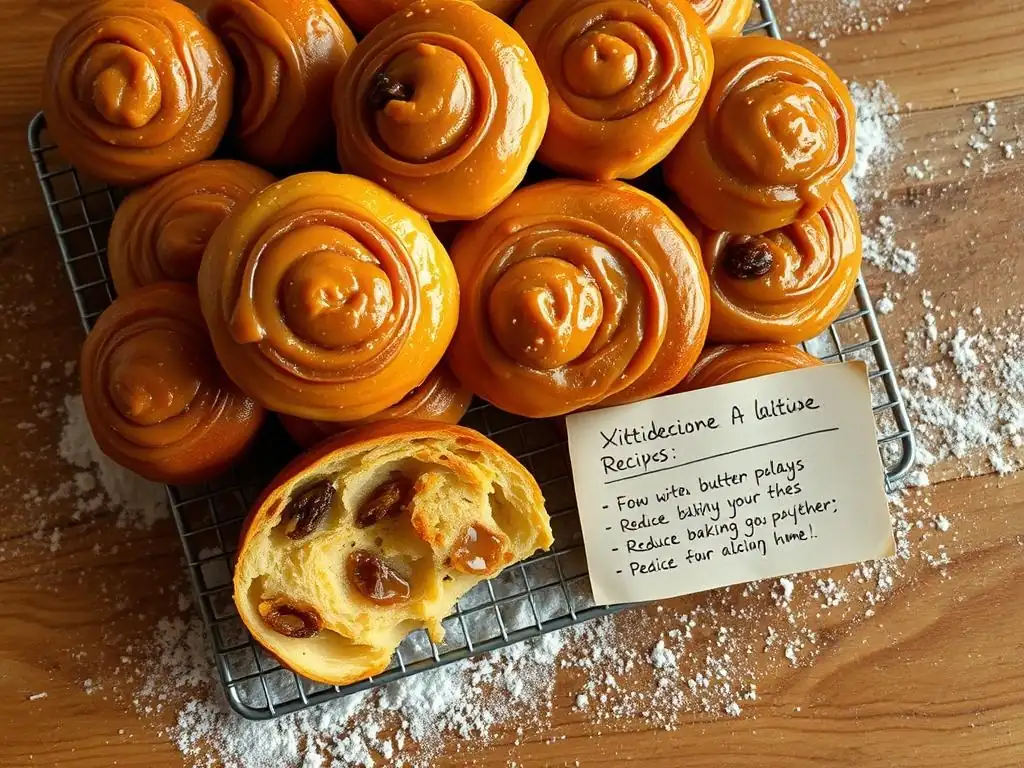
Welcome to BakeWithEase!
Unlock the secret to baking irresistibly soft and fluffy sweet rolls, even when the air is thin! Ever wondered why your sweet rolls fall flat at high altitude? Our guide to a high altitude sweet roll recipe dives into the essential adjustments you need to make, transforming baking frustrations into sweet success. Discover the science behind altitude's impact on your dough, and get ready to create bakery-worthy treats in your own kitchen.
- Baking Sourdough Bread at High Altitude: Recipe and Techniques
- The Challenge of High Altitude Baking: Sourdough Edition
- High Altitude Sourdough Recipe Adjustments: A Baker's Guide
- Step-by-Step Guide: Adapting Your Sourdough Recipe for High Altitude
- Troubleshooting High Altitude Sourdough Baking Problems
- High Altitude Sourdough Recipe: A Sample Adaptation
- Essential Equipment for High Altitude Sourdough Baking
- Mastering High Altitude Sourdough: Advanced Techniques
- High Altitude Sourdough Recipe Variations
- Conclusion: Baking Delicious Sourdough at Any Altitude
-
Frequently Asked Questions
- What is the biggest challenge when baking sweet rolls at high altitude?
- Why do I need to adjust my baking time for high altitude sweet rolls?
- What adjustments can I make to the liquid content in a high-altitude sweet roll recipe?
- Should I reduce the amount of yeast when baking sweet rolls at high altitude?
- How does adjusting the sugar content affect high altitude sweet rolls?
- Final Reflection: The Sweet Success of High-Altitude Baking
- Unlock Your High-Altitude Baking Secrets!
Baking Sourdough Bread at High Altitude: Recipe and Techniques
The Challenge of High Altitude Baking: Sourdough Edition
Baking sourdough bread is a rewarding process, but tackling it at high altitude introduces unique challenges. As you ascend to elevations typically above 3,000 feet (around 900 meters), the atmospheric pressure decreases significantly. This lower pressure directly impacts how ingredients behave and interact during the baking process, often leading to results that differ from sea level bakes. What works perfectly at sea level might yield a dense, gummy, or overly airy loaf at higher elevations. Understanding these atmospheric effects is the first crucial step to mastering a high altitude sourdough recipe.
The core issues arise from how leavening agents and liquids function in a low-pressure environment. Sourdough relies on natural fermentation by wild yeast and bacteria to produce carbon dioxide gas, which creates the bread's structure and airy crumb. At high altitude, this gas expands more rapidly and forcefully due to less external pressure holding it in. Simultaneously, water boils at a lower temperature (e.g., around 203°F or 95°C at 5,000 feet compared to 212°F or 100°C at sea level), causing dough to dry out faster during baking. These combined factors necessitate careful adjustments to your standard sourdough approach.
Why High Altitude Affects Sourdough Bread
The primary reason high altitude impacts sourdough bread baking is the reduced atmospheric pressure. Imagine the air around you pushing down; this pressure is lower at higher elevations. For a loaf of bread, this means the gases produced during fermentation face less resistance from the surrounding air, allowing them to expand more quickly and significantly. This accelerated expansion can cause the dough to over-proof rapidly, leading to a collapse before baking or a loaf with an uneven, large-holed crumb structure that might also be prone to drying out.
Furthermore, the decreased boiling point of water at high altitude plays a significant role. Water in your dough turns to steam at a lower temperature inside the oven. While steam is important for oven spring (the final rise in the oven), too much moisture escaping too quickly can lead to a drier dough interior and a thicker, tougher crust. This faster moisture loss also affects the gelatinization of starches, potentially resulting in a gummy texture if not properly managed. Mastering a high altitude sourdough recipe requires counteracting these pressure and moisture dynamics.
Understanding Atmospheric Pressure and Its Impact on Sourdough
Atmospheric pressure is simply the weight of the air column above a given point. At sea level, this pressure is approximately 14.7 pounds per square inch (psi). As you ascend, that column of air becomes shorter, reducing the pressure. For instance, at 5,000 feet (about 1,500 meters), the pressure drops to roughly 12.2 psi, and at 10,000 feet (about 3,000 meters), it's down to about 10.2 psi. This substantial decrease directly influences the behavior of gases within your sourdough dough.
The gas bubbles generated by your active sourdough starter expand more vigorously under this lower pressure. This can cause the dough to rise much faster than expected. If the dough structure isn't strong enough to support this rapid expansion, the bubbles can merge into large, unstable pockets or even burst, leading to a loss of structure and potential collapse. The goal of adjusting a high altitude sourdough recipe is often to moderate this expansion and strengthen the dough matrix to better withstand the pressure difference.
High Altitude Sourdough Recipe Adjustments: A Baker's Guide
Adapting a standard sourdough recipe for high altitude requires a systematic approach. Since sourdough relies on natural fermentation rather than commercial yeast, the adjustments focus on managing starter activity, dough hydration, and overall dough strength. There isn't a single magic formula, as the ideal changes depend on your specific altitude, starter's vigor, and even local humidity, but general principles apply. The key is to make incremental changes and observe their effects.
The primary areas for adjustment in a high altitude sourdough recipe include the amount of leavening (managing starter activity), the quantity of liquid (hydration), and sometimes the amount of flour (for structure). Baking times and temperatures also often need tweaking. Approach these adjustments as a process of experimentation, starting with widely recommended ranges and fine-tuning based on your results.
Reducing Leavening Agents: Starter Activity and Fermentation Times
At high altitude, the reduced pressure means that the gas produced by your sourdough starter will expand more readily. This can lead to dough that proofs too quickly, potentially over-proofing before you're ready to bake. To counteract this, you often need to reduce the effective amount of leavening. Since you can't easily reduce the "power" of your starter itself, you manage its impact by using slightly less starter in your recipe or, more commonly, reducing fermentation times.
For example, if a sea level recipe calls for a 6-8 hour bulk fermentation at room temperature, you might find that at 5,000 feet, your dough reaches the same level of proofing in just 4-6 hours. Similarly, cold proofing times might need to be shortened. A common recommendation for high altitude sourdough recipes is to start by reducing the amount of starter used by about 15-25% compared to a sea level recipe, especially at altitudes above 3,500 feet.
Alternatively, focus intently on watching the dough's volume increase and signs of readiness rather than strictly adhering to time guidelines. The dough will tell you when it's ready.
Adjusting Liquid Content: Hydration for High Altitude Sourdough
Water evaporates faster at high altitude due to the lower boiling point and potentially drier air. This means your dough can lose moisture more quickly during both fermentation and baking. Counterintuitively, standard high altitude baking advice often suggests increasing liquid in recipes using commercial yeast or baking powder. However, for sourdough, which is often high hydration already, adding too much liquid can weaken the gluten structure, making it less able to support the rapid gas expansion.
Instead of simply adding more water, focus on managing moisture loss. Some bakers at high altitude slightly reduce the overall hydration of their sourdough dough by 1-2% compared to a sea level high altitude sourdough recipe to create a slightly stiffer dough that can better hold its structure. Others find that maintaining hydration and focusing on strengthening the dough through kneading and folds is sufficient. Providing enough steam in the oven during the initial bake is critical to prevent premature crust formation and allow for maximum oven spring before the dough dries out.
Increasing Flour: Strengthening the Dough Structure at Altitude
A stronger gluten network is essential for a successful high altitude sourdough recipe. The dough needs sufficient structural integrity to trap the rapidly expanding gases and prevent the loaf from collapsing. One way to achieve this is by slightly increasing the proportion of flour relative to water, effectively lowering the hydration percentage as discussed above. This results in a stiffer dough that can better support its own weight and the internal pressure.
Another approach is to ensure thorough kneading and folding during the bulk fermentation phase. These actions develop the gluten network, making the dough more elastic and extensible, yet strong enough to hold the gas bubbles. For a high altitude sourdough recipe, you might find that an extra set of stretches and folds is beneficial compared to what you'd do at sea level. Using bread flour with a higher protein content (around 12-14%) can also provide a stronger structural foundation than all-purpose flour.
The Role of Salt in High Altitude Sourdough Recipes
Salt plays several vital roles in bread baking: it enhances flavor, controls yeast activity, and strengthens the gluten network. In a high altitude sourdough recipe, its role in controlling fermentation and strengthening gluten becomes particularly important. Salt slows down the activity of the wild yeast and bacteria in your starter, helping to prevent the dough from over-proofing too quickly in the low-pressure environment.
Maintaining the correct salt percentage (typically 1.8% to 2.2% of the total flour weight) is crucial. Do not be tempted to reduce salt significantly, as this would accelerate fermentation and weaken the dough structure, exacerbating high altitude challenges. In fact, some bakers at very high elevations find that slightly increasing the salt percentage (e.g., from 2% to 2.2%) helps provide better control over the dough's rise and structure.
Step-by-Step Guide: Adapting Your Sourdough Recipe for High Altitude

Adjusting a favorite sourdough recipe for high altitude can seem daunting, but breaking it down into steps makes it manageable. The process involves analyzing your current recipe, calculating potential changes, and then carefully executing the steps while observing the dough's behavior. Remember that these are starting points, and you may need to fine-tune based on your specific conditions.
Step 1: Assessing Your Current Sourdough Recipe
Start with a reliable sourdough recipe that you are familiar with baking at sea level or lower altitude. Note down all the ingredients by weight (baking by weight is essential for consistency, especially at high altitude) and the timing/temperature parameters for each stage: autolyse (if used), mixing, bulk fermentation, shaping, cold proofing, and baking. Understand the hydration percentage (total water weight divided by total flour weight).
- List ingredients and their weights.
- Note hydration percentage.
- Record all timing and temperature instructions.
- Identify key visual cues for readiness at each stage (e.g., dough volume increase during bulk fermentation).
This baseline recipe is your starting point for developing a successful high altitude sourdough recipe adaptation. Knowing exactly what the original recipe entails allows you to make targeted adjustments and understand their impact.
Step 2: Calculating the Necessary Adjustments
Based on your altitude, you can begin to calculate potential adjustments. While precise formulas are difficult, general guidelines exist. For altitudes between 3,000 and 5,000 feet, consider reducing starter quantity by about 15-20% or shortening fermentation times. For altitudes above 5,000 feet, a 20-25% reduction in starter or more significant time cuts might be needed. Alternatively, focus on reducing hydration by 1-2% of the total flour weight.
Example Calculation (Altitude ~5,000 ft):
Original Recipe:
- Total Flour: 500g
- Water: 350g (70% hydration)
- Starter (100% hydration): 100g
- Salt: 10g (2%)

Potential High Altitude Adjustment:
- Reduce Starter by 20%: 100g * (1 - 0.20) = 80g
- OR Reduce Hydration by 2%: Total Flour * 0.02 = 500g * 0.02 = 10g less water. New Water: 350g - 10g = 340g (68% hydration).
- Keep Salt consistent: 10g
Choose one primary adjustment to start with (e.g., reducing starter or reducing hydration) rather than trying to change everything at once. This makes it easier to troubleshoot.
Step 3: Mixing and Kneading the Dough at High Altitude
Mixing and kneading are critical for developing the gluten structure needed to support the dough's rise at high altitude. Ensure you develop a strong dough from the outset. This might involve slightly longer mixing times or more vigorous kneading compared to sea level instructions. Perform a windowpane test to check gluten development – you should be able to stretch a small piece of dough thinly enough to see light through it without tearing.
If you are using the autolyse method (mixing flour and water before adding starter and salt), this can help with hydration and gluten development. Ensure the dough feels less slack than it might at sea level if you've reduced hydration. The goal is a dough that is extensible but has good tension.
Step 4: Bulk Fermentation: Time and Temperature Considerations
Bulk fermentation is where the magic happens, and it's significantly affected by high altitude. The dough will likely rise faster. Instead of relying solely on time, watch the dough's volume increase. A good rule of thumb is to look for a 30-50% increase in volume during bulk fermentation, rather than the 50-100% often recommended at sea level. The dough should look airy and have bubbles, but not be overly fragile.
Temperature also plays a huge role. Warmer temperatures accelerate fermentation. If you're struggling with dough rising too fast, try fermenting in a cooler spot in your kitchen. Using cooler water in your mix can also slow things down. Pay close attention to the dough's texture and feel; it should feel alive and slightly gassy but still have structure.
Step 5: Proofing and Baking Your Sourdough: Oven Temperature and Baking Time Tweaks
After shaping, the final proof (or retarding in the refrigerator) also needs monitoring. Cold proofing in the refrigerator is often beneficial at high altitude as it slows fermentation dramatically, allowing you more control. However, even cold proofing times might be shorter than at sea level. Watch for signs of readiness – the dough should feel light and airy but still have some resistance when gently poked (the poke test). Over-proofing at this stage is a common high altitude problem.
Baking requires adjustments too. Because water boils at a lower temperature, the dough can dry out faster. Baking at a slightly higher temperature (e.g., 475°F or 245°C instead of 450°F or 230°C) can help set the crust quickly, providing structure before the internal gases expand too much. Reducing the overall baking time is also often necessary. Using a Dutch oven is highly recommended as it traps steam around the loaf, preventing premature crust formation and promoting better oven spring. Ensure you bake to an internal temperature of 200-210°F (93-99°C).
Troubleshooting High Altitude Sourdough Baking Problems
Even with careful adjustments, baking sourdough at high altitude can present challenges. It's a learning process, and encountering issues is normal. The key is to identify the problem and know what adjustments to make for your next bake. Keep a baking journal to track your ingredients, times, temperatures, and results – this is invaluable for refining your high altitude sourdough recipe.
Common Issues: Flat Loaves, Dense Crumb, and Gummy Textures
Several issues commonly plague high altitude sourdough bakers:
- Flat or Collapsed Loaves: Often a sign of over-proofing (dough rose too much and ran out of structure before baking) or insufficient dough strength.
- Dense Crumb: Can result from under-proofing (not enough gas production), insufficient gluten development, or too much liquid for the dough's structure.
- Gummy Texture: Frequently caused by the dough drying out too quickly during baking due to the lower boiling point of water, preventing starches from properly gelatinizing. Insufficient baking time or temperature can also contribute.
- Tough Crust: Also related to rapid moisture loss during baking.
These problems often stem from the core high altitude effects: rapid gas expansion and increased moisture evaporation.
Solutions for Common Problems: Tips and Tricks for Perfect High Altitude Sourdough
Addressing high altitude sourdough problems involves fine-tuning the adjustments discussed earlier:
- For Flat/Collapsed Loaves: Reduce bulk fermentation time, reduce cold proofing time, or slightly reduce starter quantity in your high altitude sourdough recipe. Focus on developing a stronger gluten network through kneading/folds.
- For Dense Crumb: Ensure your starter is active and vigorous. Extend bulk fermentation slightly (if you suspect under-proofing) but watch closely. Improve gluten development. If consistently dense despite good rise, consider slightly increasing hydration, but balance this with dough strength.
- For Gummy Texture: Ensure adequate steam during the initial bake (use a Dutch oven or steam pan). Increase baking temperature slightly. Ensure the loaf bakes thoroughly to an internal temperature of 200-210°F (93-99°C).
- For Tough Crust: Increase steam during baking. You might also slightly increase hydration in your high altitude sourdough recipe (balanced with gluten strength) or reduce the overall baking time slightly once the crust is the desired color.
- Use a digital scale for precise measurements.
- Monitor dough temperature throughout fermentation.
- Observe dough volume increase and feel, don't just follow time.
- Experiment with one variable at a time.
- Keep detailed notes!
### High Altitude Sourdough Troubleshooting Checklist

- [ ] Is my starter active and bubbly?
- [ ] Did I reduce fermentation/proofing times or starter quantity?
- [ ] Is my dough structure strong (windowpane test)?
- [ ] Did I use adequate steam during baking?
- [ ] Did the loaf reach an internal temperature of 200-210°F?
- [ ] Am I baking by weight?
High Altitude Sourdough Recipe: A Sample Adaptation

To illustrate the adjustments, let's look at a sample high altitude sourdough recipe adapted from a basic sea level version. This example is based on an altitude of approximately 5,000 feet (around 1,500 meters). Remember that your specific adjustments may vary.
Original Sea Level Recipe: Basic Sourdough Loaf
This is a common starting point for a simple sourdough loaf baked at sea level.
Ingredients:
- 500g Bread Flour (approx. 12-13% protein)
- 350g Water (70% hydration)
- 100g Active Sourdough Starter (100% hydration)
- 10g Salt (2%)

Instructions (Sea Level):
1. Autolyse: Mix flour and water, rest 30-60 mins.
2. Mix: Add starter and salt, mix until incorporated.
3. Bulk Fermentation: 4-6 hours at 75°F (24°C) with folds every 30-60 mins for the first 2-3 hours. Look for 50-100% volume increase.
4. Shape: Preshape, rest 20 mins, final shape.
5. Proof: 2-4 hours at room temp OR 8-12 hours cold proof in fridge.
6. Bake: Preheat oven and Dutch oven to 450°F (230°C). Bake in Dutch oven with lid for 20 mins, then lid off for 25-30 mins until golden brown. Internal temp 200-210°F.
This sea level recipe provides a solid foundation, but the timings and hydration will likely cause issues when baking a high altitude sourdough recipe without modification.
High Altitude Adjusted Recipe: High Altitude Sourdough Loaf
Here's a possible adaptation of the above recipe for high altitude (around 5,000 ft), focusing on reducing starter and slightly reducing hydration.
Ingredients:
- 500g Bread Flour (approx. 12-13% protein)
- 340g Water (68% hydration - reduced by 10g or 2%)
- 80g Active Sourdough Starter (100% hydration - reduced by 20g or 20%)
- 10g Salt (2%)

Instructions (High Altitude ~5,000 ft):
1. Autolyse: Mix flour and water, rest 30-60 mins.
2. Mix: Add starter and salt, mix until incorporated and dough feels slightly firmer than sea level dough but still extensible.
3. Bulk Fermentation: 3-5 hours at 75°F (24°C) with folds every 30-45 mins for the first 2 hours. Look for 30-50% volume increase. Watch dough, not clock.
4. Shape: Preshape, rest 15 mins, final shape (ensure good tension).
5. Proof: 1-2 hours at room temp OR 6-10 hours cold proof in fridge. Monitor dough closely.
6. Bake: Preheat oven and Dutch oven to 475°F (245°C). Bake in Dutch oven with lid for 18 mins, then lid off for 20-25 mins until golden brown. Internal temp 200-210°F.
This high altitude sourdough recipe demonstrates typical adjustments: less starter, slightly less water, shorter fermentation/proofing times, and a slightly higher initial baking temperature with slightly reduced overall baking time.
Comparing Ingredients and Quantities: Sea Level vs. High Altitude
Let's look side-by-side at the key changes in this sample high altitude sourdough recipe adaptation:
| Component | Sea Level Recipe | High Altitude Recipe (~5,000 ft) | Change | Reasoning at High Altitude |
|---|---|---|---|---|
| Total Flour | 500g | 500g | None | Base remains constant. |
| Water | 350g | 340g | -10g (-2% hydration) | Slightly lower hydration for stronger structure. |
| Starter | 100g | 80g | -20g (-20%) | Reduces overall leavening power to slow rapid rise. |
| Salt | 10g | 10g | None | Maintains control over fermentation and gluten strength. |
| Bulk Fermentation | 4-6 hours | 3-5 hours | Shorter | Dough rises faster due to lower pressure. |
| Proofing | 2-4 hrs / 8-12 hrs | 1-2 hrs / 6-10 hrs | Shorter | Dough proofs faster. |
| Initial Bake Temp | 450°F (230°C) | 475°F (245°C) | Higher | Helps set crust faster, providing structure. |
| Bake Time | 45-50 mins total | 38-43 mins total | Slightly Shorter | Prevents over-baking due to faster moisture loss. |
This comparison highlights the typical strategies employed when developing a high altitude sourdough recipe: managing leavening action and strengthening the dough's ability to handle the pressure difference and moisture dynamics.
Essential Equipment for High Altitude Sourdough Baking
Having the right tools is always important in baking, but precision becomes even more critical when dealing with the variables introduced by high altitude. While you don't need highly specialized gear solely for high altitude, ensuring your basic equipment is accurate and reliable will significantly improve your results with any high altitude sourdough recipe.
The Importance of Accurate Measurements
Baking is a science, and at high altitude, the margin for error is reduced. Measuring ingredients by weight using a digital kitchen scale is non-negotiable. Volume measurements (cups, spoons) are simply too inconsistent, especially for flour which can compact differently. A variance of just 20-30 grams of flour or water can significantly alter the dough's hydration and behavior, potentially leading to issues that are then compounded by the high altitude environment.
Using a scale ensures that your adjustments, like reducing hydration by 2%, are precise. It also allows you to replicate successful high altitude sourdough recipe results consistently. Don't forget to measure your starter and salt by weight too!
Ovens and Temperature Control at High Altitude
Oven temperature accuracy is crucial. Many home ovens are not calibrated perfectly, and altitude can sometimes affect oven performance (though less directly than atmospheric pressure affects the dough). Using an oven thermometer is highly recommended to ensure your oven is actually reaching and maintaining the temperature you set. This is particularly important when baking at a slightly higher temperature as recommended for high altitude sourdough recipes.
Consistent temperature during fermentation is also key. A digital probe thermometer can help you monitor the dough's temperature, ensuring it stays within the desired range (e.g., 75°F or 24°C during bulk fermentation) to control the rate of rise. Small temperature fluctuations can have a more pronounced effect on fermentation speed at high altitude.
Mastering High Altitude Sourdough: Advanced Techniques

Once you have a handle on the basic adjustments for your high altitude sourdough recipe, you can explore advanced techniques that further enhance dough structure, moisture retention, and oven spring, leading to even better loaves.
Autolyse Method for Improved Hydration
The autolyse technique involves mixing just the flour and water from your recipe and letting it rest for 30 minutes to several hours before adding the starter and salt. This resting period allows the flour to fully hydrate and enzymes to begin breaking down starches, which helps gluten development.
For a high altitude sourdough recipe, autolyse can be particularly beneficial. It ensures the flour is well-hydrated even with slightly less water and helps build a stronger gluten network more easily during the subsequent mixing stage. This improved structure is better equipped to handle the rapid gas expansion at altitude.
Using a Dutch Oven for Optimal Oven Spring
Baking sourdough in a preheated Dutch oven is widely recommended, and it's almost essential for success at high altitude. The sealed environment of the Dutch oven traps the steam released by the baking dough. This trapped steam keeps the surface of the loaf moist during the initial phase of baking, preventing a crust from forming too early.
This allows the dough to achieve maximum oven spring (the final dramatic rise in the oven) before the crust sets. Without sufficient steam at high altitude, the crust can harden prematurely due to faster moisture loss, restricting expansion and resulting in a denser loaf. The high heat transferred by the cast iron also provides a strong initial boost to the bake.
Scoring Techniques for High Altitude Sourdough
Scoring (slashing the surface of the dough before baking) serves both aesthetic and functional purposes. Functionally, scores act as controlled vents, directing the expansion of the dough during oven spring.
At high altitude, where internal pressure builds rapidly, proper scoring is vital. It allows the gas to escape predictably, preventing blowouts in unwanted places and helping the loaf achieve an even shape. Deep, clean scores are often more effective at high altitude than shallow ones, providing clear pathways for expansion. Experiment with different scoring patterns to see how they affect the shape and rise of your high altitude sourdough recipe loaves.
High Altitude Sourdough Recipe Variations
Once you've successfully adapted a basic white sourdough recipe, you can apply similar principles to variations using different types of flour. Each flour type behaves slightly differently, but the core high altitude adjustments remain relevant.
Whole Wheat Sourdough at High Altitude
Baking with whole wheat flour presents its own challenges, as the bran can interfere with gluten development. At high altitude, this means extra care is needed to ensure sufficient dough strength. You might find that a slightly higher hydration is needed compared to white flour to compensate for the bran absorbing more water, but balance this against the need for structural integrity at altitude.
- Consider sifting out some of the larger bran particles if you're struggling with dough strength.
- Use an autolyse period, potentially longer than with white flour, to ensure full hydration of the whole wheat flour.
- Perform extra folds during bulk fermentation to build gluten strength.
- Monitor fermentation time even more closely, as whole wheat can sometimes ferment faster.
Adapting a whole wheat high altitude sourdough recipe requires careful attention to dough feel and fermentation progress.
Rye Sourdough at High Altitude
Rye flour contains less gluten than wheat flour, meaning rye doughs rely more on pentosans for structure. High percentages of rye can result in sticky doughs that don't develop a strong gluten network in the same way wheat does.
When baking rye sourdough at high altitude, the rapid gas expansion can be particularly challenging for a dough that is already structurally weaker.
- Limit the percentage of rye flour, especially when starting out.
- Do not expect the same dramatic oven spring as a wheat loaf.
- Focus on proper fermentation timing to avoid over-proofing a delicate structure.
- Rye doughs can benefit from baking in a loaf pan for support at high altitude.
A high altitude sourdough recipe with a significant rye component requires a different approach to dough handling and expectations compared to a pure wheat loaf.
Sourdough Baguettes at High Altitude
Baking lean doughs like baguettes at high altitude combines the challenges of rapid expansion with a structure that relies heavily on tension and precise proofing. Baguettes are known for being tricky even at sea level!
- Ensure your dough has excellent tension during shaping.
- Proofing times will be significantly shorter; watch the dough carefully.
- Using a couche (linen cloth) provides support during proofing.
- Generating sufficient steam in the oven is critical for crust development and expansion. While a Dutch oven isn't practical for multiple baguettes, a baking stone and steam pan setup is essential.
Mastering a high altitude sourdough recipe for baguettes will test your understanding of dough dynamics and timing.
Conclusion: Baking Delicious Sourdough at Any Altitude
Baking sourdough bread at high altitude presents a unique set of challenges, primarily due to reduced atmospheric pressure and altered water behavior. However, by understanding these effects and making targeted adjustments to your high altitude sourdough recipe, you can achieve wonderful results. The key is to manage the rate of fermentation, ensure adequate dough strength, control moisture loss, and fine-tune your baking process.
Start with small adjustments to a trusted recipe – reduce starter, slightly decrease hydration, shorten fermentation times, and increase initial oven temperature. Observe your dough closely at every stage, paying attention to visual cues rather than rigid time schedules. Keep a baking journal to track your experiments and learn from each bake. With patience, practice, and a willingness to adapt, you'll be able to bake delicious, perfectly risen sourdough loaves, no matter how high your kitchen is located. Happy high altitude sourdough baking!
Frequently Asked Questions
What is the biggest challenge when baking sweet rolls at high altitude?
The biggest challenge is the lower air pressure, which causes dough to rise faster and liquids to evaporate more quickly, potentially resulting in dry, dense rolls. This requires adjustments to the recipe.
Why do I need to adjust my baking time for high altitude sweet rolls?
At higher altitudes, sweet rolls often bake faster. This is due to faster evaporation of liquids and lower boiling points. Watch your rolls carefully and reduce baking time if needed.
What adjustments can I make to the liquid content in a high-altitude sweet roll recipe?
You may need to increase the liquid in your recipe, usually by a tablespoon or two, to compensate for faster evaporation. This prevents the rolls from becoming dry.
Should I reduce the amount of yeast when baking sweet rolls at high altitude?
Yes, it's often recommended to reduce the yeast slightly (by about 1/4 teaspoon). This helps control the quicker rise and prevents the dough from collapsing.
How does adjusting the sugar content affect high altitude sweet rolls?
While not always necessary, slightly reducing the sugar can help prevent over-browning because sugar caramelizes faster at higher temperatures and lower pressures.
Final Reflection: The Sweet Success of High-Altitude Baking
Mastering the art of high-altitude baking isn't just about adjusting recipes; it's about understanding the science behind the rise. The subtle shifts in air pressure significantly impact the behavior of leavening agents, resulting in either disappointingly dense or overly-expanded baked goods. This article has explored the crucial adjustments needed to achieve perfectly fluffy, tender sweet rolls, even at higher elevations.
The quest for the perfect high-altitude sweet roll recipe is a testament to our enduring connection with food and the creative spirit that drives us to adapt and overcome challenges. Baking, in its essence, is a form of alchemy, transforming simple ingredients into something delightful and comforting. Baking is at once child's play and adult joy. And love, of course.
This quote perfectly encapsulates the passion and precision required to achieve success, especially when working against the unique constraints of high altitude. The journey of perfecting this recipe, and sharing it with others, has been deeply rewarding.
Now, it's your turn. Don't be intimidated by the altitude; embrace the challenge! Experiment with your favorite sweet roll recipe, making the necessary adjustments based on the principles outlined in this article. The satisfaction of biting into a perfectly risen, melt-in-your-mouth sweet roll, baked at your elevation, is a reward worth striving for. Share your successes (and even your failures!) – the journey of baking is a community effort, and learning from each other is part of the sweet reward.
Unlock Your High-Altitude Baking Secrets!
Thanks for joining us on this high-altitude baking adventure! You've now got the tools to conquer those tricky sweet rolls and create perfectly risen, fluffy delights. Ready to take your baking to new heights?
- Try the adjusted recipe: Put your newfound knowledge to the test! Make those sweet rolls using the adjusted recipe from the article, and experience the delicious difference.
- Share your baking success (or challenges!): We'd love to see your creations – tag us on social media and share your high-altitude baking journey!
- Explore more high-altitude recipes: Dive deeper into our collection of altitude-adjusted recipes and discover new baking possibilities.
What unique high-altitude baking tips do you have to share with our community?