
Simple Sponge Cake Recipe: The Perfect Birthday Base

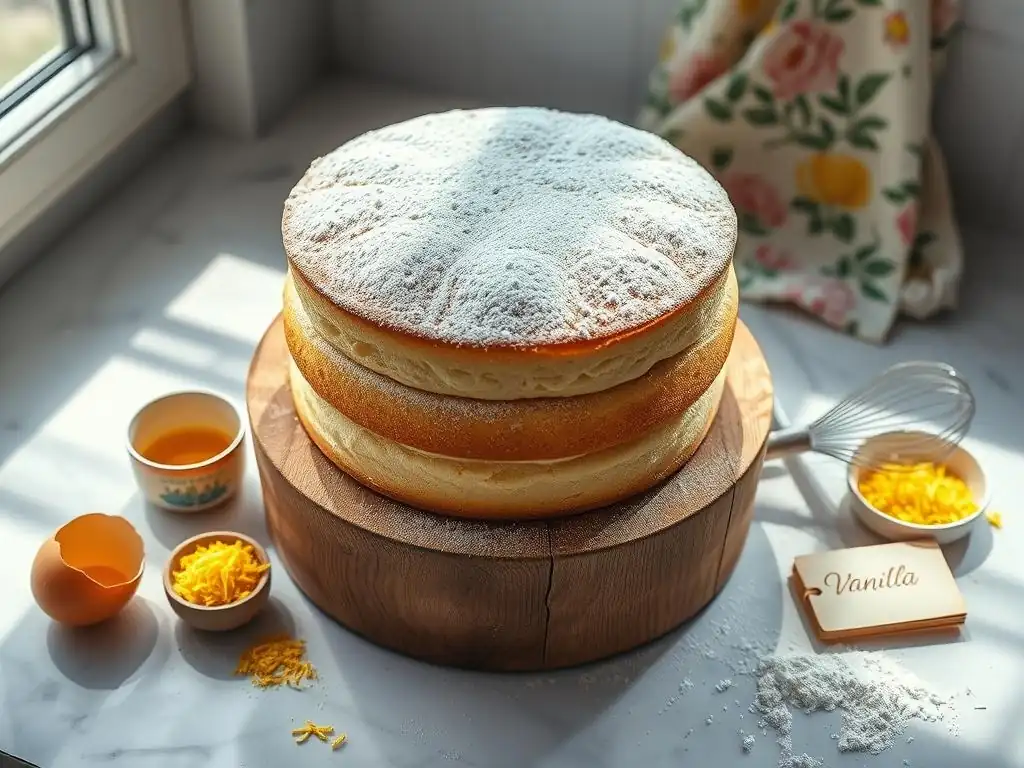
Welcome to BakeWithEase, your guide to stress-free baking! Are you ready to create a light and airy masterpiece? Dive into our article and discover the secrets to an easy sponge cake recipe for beginners, the perfect foundation for any celebration. But that's just the beginning – we'll also explore tips and tricks to elevate your baking game, ensuring every cake is a triumph. What makes our sponge cake so special? Keep reading to find out!
- BakeWithEase Presents: Your Go-To Easy Sponge Cake Recipe
- Why This Easy Sponge Cake Recipe is Perfect for Beginners
- Ingredients for Your Beginner-Friendly Sponge Cake
- Step-by-Step: Baking the Perfect Sponge Cake (Easy Version!)
- Cooling and Preparing Your Sponge Cake for Decoration
- Birthday Cake Decoration Ideas Using Your Sponge Cake Base
- Troubleshooting Your Sponge Cake: Common Problems and Solutions
- Storing Your Sponge Cake: Keeping It Fresh
- Elevate Your Baking: Tips for Perfecting Your Sponge Cake Recipe
- Enjoy Your Homemade Birthday Sponge Cake!
-
Frequently Asked Questions
- What makes this sponge cake recipe "easy" for beginners?
- What are the key ingredients I'll need for this sponge cake recipe?
- How do I ensure my sponge cake rises properly and avoids being flat?
- Can I customize this sponge cake recipe with different flavors?
- How long will this sponge cake stay fresh after baking?
- Final Reflection: The Enduring Joy of a Simple Sponge Cake
- Unlock Your Inner Baker: Create Cake Magic Today!
BakeWithEase Presents: Your Go-To Easy Sponge Cake Recipe
Welcome, aspiring bakers! If you've ever dreamed of creating a beautiful birthday cake from scratch but felt intimidated, you've come to the right place. At BakeWithEase, we believe baking should be a joyous and accessible experience for everyone, especially when it comes to celebratory treats.
That's why we've perfected an easy sponge cake recipe designed specifically with beginners in mind. This simple sponge cake provides the ideal base for countless decorations and fillings, making it the perfect canvas for your next birthday masterpiece. Forget complicated techniques; we'll guide you through each step to ensure success and confidence in the kitchen.
This recipe focuses on fundamental baking principles, breaking down the process into manageable steps. You'll learn how simple ingredients, when combined correctly, can transform into a light, airy, and delicious cake. We'll cover everything from preparing your pan to the tell-tale signs of a perfectly baked sponge. By the end, you'll have not only a fantastic easy sponge cake ready to decorate but also a foundational understanding that will empower you to tackle more baking adventures. Get ready to impress your friends and family with a homemade birthday cake that tastes as good as it looks!
Why This Easy Sponge Cake Recipe is Perfect for Beginners
Bake a Delicious Birthday Cake from Scratch, Even if You're a Beginner
Embarking on your baking journey can feel daunting, especially when the goal is a show-stopping birthday cake. However, this easy sponge cake recipe simplifies the process dramatically. We focus on techniques that are straightforward and forgiving, minimizing common pitfalls that beginners often encounter. Instead of complex methods involving separating eggs or intricate folding, this recipe uses a more direct approach that yields excellent results with minimal fuss. Think of it as your friendly introduction to classic cake-making, building confidence one step at a time.
The beauty of starting with an easy sponge cake recipe for beginners is that it lays a solid foundation. You'll learn essential skills like accurate measuring, proper mixing, and understanding oven temperatures – skills transferable to countless other baking projects. Many beginners worry about cakes not rising or being dry, but our detailed instructions and tips are specifically designed to help you avoid these issues. Plus, the satisfaction of presenting a delicious, homemade birthday cake that you made yourself is incredibly rewarding, proving that even novice bakers can achieve impressive results.
Achieve a Light and Fluffy Sponge Cake with Our Simple Instructions
The hallmark of a great sponge cake is its light and airy texture, and achieving this might seem like a mystery to beginners. Our easy sponge cake recipe demystifies this by focusing on key steps that contribute to lift and tenderness. We'll guide you on the correct way to incorporate air into your batter, often through the whisking of eggs and sugar, and how to gently combine other ingredients without deflating that precious volume. Using the right leavening agent in the correct proportion is also crucial, and we ensure you have precise guidance on this.
Following our simple instructions means paying attention to details like ingredient temperature and mixing consistency. For instance, achieving maximum volume when whisking eggs often requires them to be at room temperature, typically around 68-72°F (20-22°C). We'll explain why this is important and how it contributes to the light, fluffy crumb you're aiming for. By focusing on these accessible techniques and providing clear visual cues, you'll build the intuition needed to consistently bake a sponge cake that is wonderfully light, tender, and ready to absorb delicious flavors from fillings and frostings.
The Versatility of Sponge Cake: More Than Just a Birthday Cake
While our focus is on its use as a perfect birthday cake base, the easy sponge cake recipe beginners learn here has incredible versatility. Once you've mastered this simple technique, you'll find yourself using it for various desserts. It's the classic foundation for trifles, absorbing liquids beautifully and adding a delicate texture. It can be sliced and layered with fruit and cream for a simple yet elegant dessert like a Victoria Sponge. Cut it into fingers, and it becomes the base for tiramisu or charlottes.
Beyond traditional applications, a simple sponge cake can be adapted with flavorings or served simply dusted with powdered sugar and fresh berries for a quick treat. The neutral, slightly sweet flavor pairs well with almost any filling or topping – from rich chocolate ganache and tangy lemon curd to fresh berries and whipped cream. Mastering this easy sponge cake recipe means unlocking a world of dessert possibilities, making it a valuable addition to any beginner baker's repertoire, far beyond just crafting a single birthday cake.
Ingredients for Your Beginner-Friendly Sponge Cake
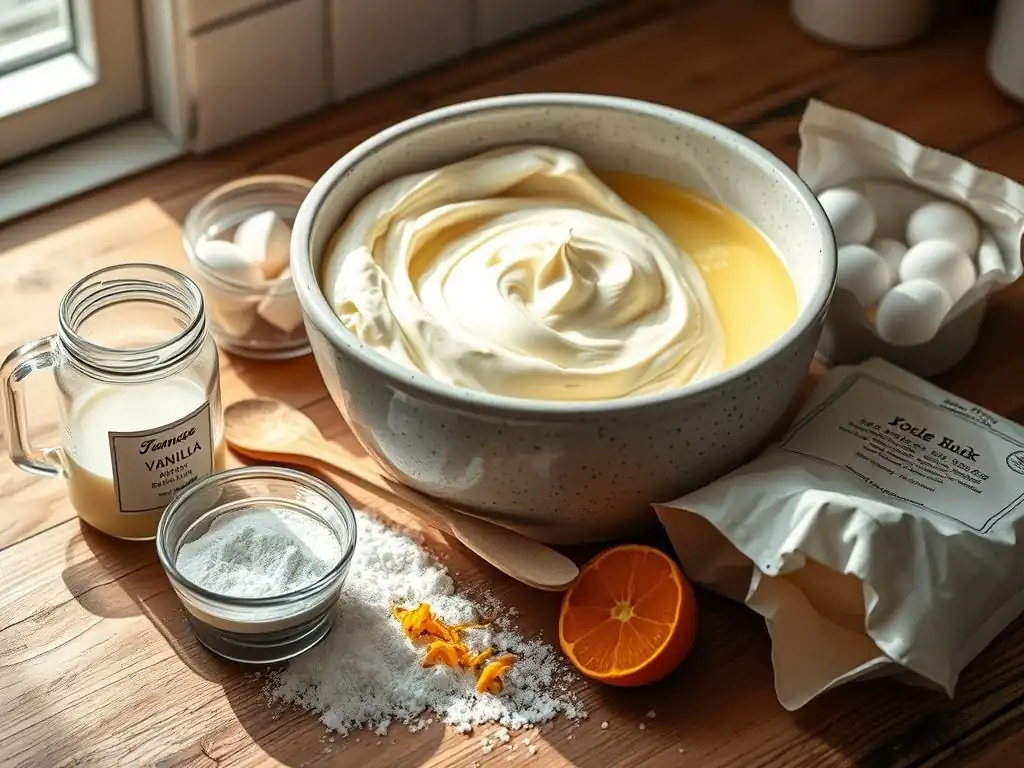
Essential Ingredients for a Light and Airy Sponge Cake
Creating a light and airy sponge cake doesn't require a long list of exotic ingredients. In fact, its beauty lies in its simplicity, relying on kitchen staples you likely already have or can easily find. The core components are flour, sugar, eggs, and often a leavening agent like baking powder, plus a touch of flavoring like vanilla. The magic happens in how these simple elements are combined. Using fresh ingredients is always recommended for the best results; for example, ensure your baking powder hasn't expired, as its effectiveness is key to achieving a good rise.
The quantities in an easy sponge cake recipe for beginners are usually balanced to ensure a reliable outcome. For a standard 8 or 9-inch cake, you might typically use around 150-200 grams each of flour and sugar, combined with 3-4 large eggs. The specific ratios can vary slightly depending on the recipe's technique, but the principle remains the same: simple, quality ingredients handled correctly. Having all your ingredients measured and ready before you start mixing, a practice known as mise en place, is a simple step that significantly reduces stress and potential errors for beginners.
All-Purpose Flour: The Foundation of Your Cake
All-purpose flour is the workhorse of many beginner baking recipes, and it serves as the primary structural component in our easy sponge cake. It provides the gluten necessary to create the framework that traps the air incorporated during the mixing process, allowing the cake to rise and hold its shape.
Using standard all-purpose flour with a protein content typically ranging from 10-12% is ideal for this recipe, as it provides enough structure without making the cake tough. Sifting the flour before use is a common practice that helps aerate it and remove any lumps, contributing to a smoother batter and a finer crumb.
While other flours like cake flour (lower protein, around 8-10%) can yield an even tenderer cake, they can be less forgiving for beginners. All-purpose flour offers a good balance of structure and tenderness, making it the reliable choice for an easy sponge cake recipe.
Ensure you measure your flour correctly, ideally by weight using a kitchen scale (e.g., 150g or 200g as specified in the recipe), as scooping directly from the bag can result in too much flour, leading to a dry or dense cake. If you must measure by volume, gently spoon the flour into your measuring cup and level it off without packing it down.
Eggs: Room Temperature is Key
Eggs play multiple crucial roles in an easy sponge cake recipe, acting as a leavener, binder, and contributor to richness and color. In many sponge cake methods, whipping the eggs (often with sugar) is the primary way air is incorporated into the batter, creating the light texture. For optimal whipping volume, eggs should always be at room temperature.
Cold eggs do not emulsify or whip up as effectively, meaning you won't achieve the same airy volume needed for a fluffy sponge. To quickly bring eggs to room temperature, you can place them in a bowl of warm (not hot) water for 5-10 minutes.
Typically, a standard easy sponge cake recipe for beginners might call for 3 or 4 large eggs. These eggs, when properly whipped, can triple or even quadruple in volume, creating a foamy, pale mixture known as the "ribbon stage" (where the mixture falls from the whisk in a ribbon-like stream that holds its shape briefly on the surface). This volume is critical for the cake's rise. The egg yolks also contribute fat and moisture, while the whites provide structure when heated, working together to create the delicate crumb characteristic of a sponge cake.
Sugar: Granulated for Even Sweetness
Granulated sugar is the standard choice for an easy sponge cake recipe, and it does more than just provide sweetness. It plays a vital role in the cake's structure and texture. When whipped with eggs, the sugar crystals help to aerate the mixture by creating small pockets of air.
It also helps to tenderize the cake by interfering with gluten development and contributes to the cake's moistness by attracting and holding onto water molecules. The size of the sugar crystal matters; granulated sugar dissolves gradually during the whipping process, preventing the eggs from collapsing and contributing to a stable foam.
Using the correct amount of granulated sugar, often in roughly equal weight proportion to the flour (e.g., 150g or 200g), ensures balanced sweetness and optimal texture. While finer sugars like caster sugar can dissolve more quickly and create an even finer crumb, granulated sugar works perfectly well for a beginner-friendly recipe and is more commonly available. Ensure the sugar is fully dissolved in the egg mixture before adding other ingredients; this is typically achieved during the whipping process when the mixture becomes pale and thick. Undissolved sugar can lead to a grainy texture.
Baking Powder: The Leavening Agent for a Light Texture
While traditional sponge cakes rely solely on the air whipped into eggs for leavening, many easy sponge cake recipes for beginners incorporate a little baking powder. This provides an extra boost of lift, acting as an insurance policy to help ensure a light and airy texture, even if the egg whipping isn't absolutely perfect. Baking powder is a chemical leavening agent that produces carbon dioxide gas when mixed with liquid and heated. This gas creates bubbles within the batter, causing it to expand and rise in the oven.
Adding a small amount of baking powder, typically around 1 to 1.5 teaspoons for a standard 8 or 9-inch cake recipe, makes the process more forgiving for beginners. It helps create a more reliable rise and contributes to a tender crumb structure. Ensure you use fresh baking powder; check the expiration date on the container, as old baking powder loses its potency and won't provide the necessary lift. It's usually added along with the flour, distributed evenly throughout the dry ingredients before being combined with the wet mixture.
Vanilla Extract: Enhancing the Flavor
Vanilla extract is a classic flavoring for sponge cake, adding a warm, aromatic note that complements its simple sweetness. A good quality pure vanilla extract will significantly enhance the overall flavor profile of your easy sponge cake recipe. While it doesn't directly impact the cake's structure, its role in making the cake taste delicious is undeniable, especially when it serves as a base for other flavors in fillings and frostings.
Typically, 1 to 2 teaspoons of vanilla extract are sufficient for a standard cake batter. Add it towards the end of mixing to preserve its delicate flavor, as prolonged heat can diminish its potency. Avoid using imitation vanilla extract if possible, as it often has a less complex flavor profile compared to pure vanilla, which is made by steeping vanilla beans in alcohol and water. A touch of vanilla ensures your easy sponge cake is not just light and fluffy but also wonderfully fragrant and flavorful, making it a perfect foundation for any birthday celebration.
Step-by-Step: Baking the Perfect Sponge Cake (Easy Version!)
Preparing Your Baking Pan for Success
Proper pan preparation is a critical first step in any cake recipe, and it's especially important for an easy sponge cake recipe beginners are tackling. A well-prepared pan ensures your cake doesn't stick, allowing you to easily remove it without damage once baked. For a standard 8 or 9-inch round cake pan, you'll want to grease and flour it meticulously. Start by coating the inside of the pan with softened butter, shortening, or a non-stick baking spray, ensuring you get into all the corners and up the sides.
Once greased, add a tablespoon or two of all-purpose flour to the pan. Tilt and rotate the pan, tapping gently, to coat the greased surfaces evenly with a thin layer of flour. Pour out any excess flour. For extra security, especially for delicate sponge cakes, you can also line the bottom of the pan with a circle of parchment paper after greasing but before flouring. This creates a non-stick barrier specifically for the cake's base. Proper pan prep takes only a few minutes but saves immense frustration when it's time to unmold your perfectly baked easy sponge cake.
Mixing the Sponge Cake Batter: A Detailed Guide for Beginners
Mixing the batter for this easy sponge cake recipe focuses on incorporating air and then gently combining ingredients to maintain that air. The core technique often involves vigorously whisking eggs and sugar together until they become pale, thick, and significantly increased in volume – reaching that "ribbon stage" mentioned earlier. This can be done using an electric mixer (stand mixer or hand mixer) on medium-high speed for several minutes, perhaps 5-10 minutes depending on the mixer's power and egg temperature. The mixture should fall from the whisk in a thick ribbon that slowly dissolves back into the bowl.
Once the egg mixture is properly aerated, the dry ingredients (flour, baking powder, salt if using) are typically added gently. This is where technique matters for a light sponge cake. The goal is to combine the dry ingredients just until no streaks of flour remain, without overmixing. Overmixing develops gluten excessively, leading to a tough cake.
Use a spatula or a whisk on the lowest speed, folding the dry ingredients into the wet mixture carefully. Some recipes also incorporate melted butter or milk at this stage; if so, fold it in gently as well. The final batter should be smooth but still airy.
Baking Time and Temperature: Getting it Just Right
Getting the baking time and temperature correct is crucial for a successful easy sponge cake. Baking at the right temperature allows the cake to rise properly before the structure sets, resulting in a light texture. A common temperature range for sponge cakes is around 325°F to 350°F (160°C to 175°C). Lower temperatures often result in a flatter cake, while temperatures that are too high can cause the cake to rise too quickly, potentially crack on top, or even sink in the middle if the inside doesn't set before the outside is done.
The baking time will vary depending on your oven, the pan size, and the specific recipe proportions, but a standard 8 or 9-inch sponge cake typically bakes for approximately 25 to 35 minutes. It's important not to open the oven door during the first 20-25 minutes of baking, as the sudden temperature change can cause the delicate structure to collapse. Observe the cake through the oven door; it should be golden brown around the edges and starting to pull away slightly from the sides of the pan when it's nearing completion.
Testing for Doneness: The Toothpick Trick
Knowing exactly when your easy sponge cake is perfectly baked is key to preventing it from being either undercooked (gummy) or overcooked (dry). The most reliable method for beginners is the toothpick test. Once the cake looks golden and appears set, gently insert a clean wooden toothpick or a thin metal skewer into the center of the cake. Be careful not to poke through to the bottom of the pan if you can help it.
If the toothpick comes out clean, with no wet batter attached, your sponge cake is done. You might see a few moist crumbs clinging to the toothpick, which is fine, but you shouldn't see liquid batter. If the toothpick comes out with wet batter, the cake needs more time in the oven. Check again in 2-3 minute intervals. Another sign of doneness is that the top of the cake will spring back lightly when gently pressed with a fingertip. The toothpick test, however, is the most definitive indicator for beginners.
Baking Temperature Guide:
Standard Sponge: 325°F - 350°F (160°C - 175°C)
Typical Time (9-inch pan): 25-35 minutes
Cooling and Preparing Your Sponge Cake for Decoration
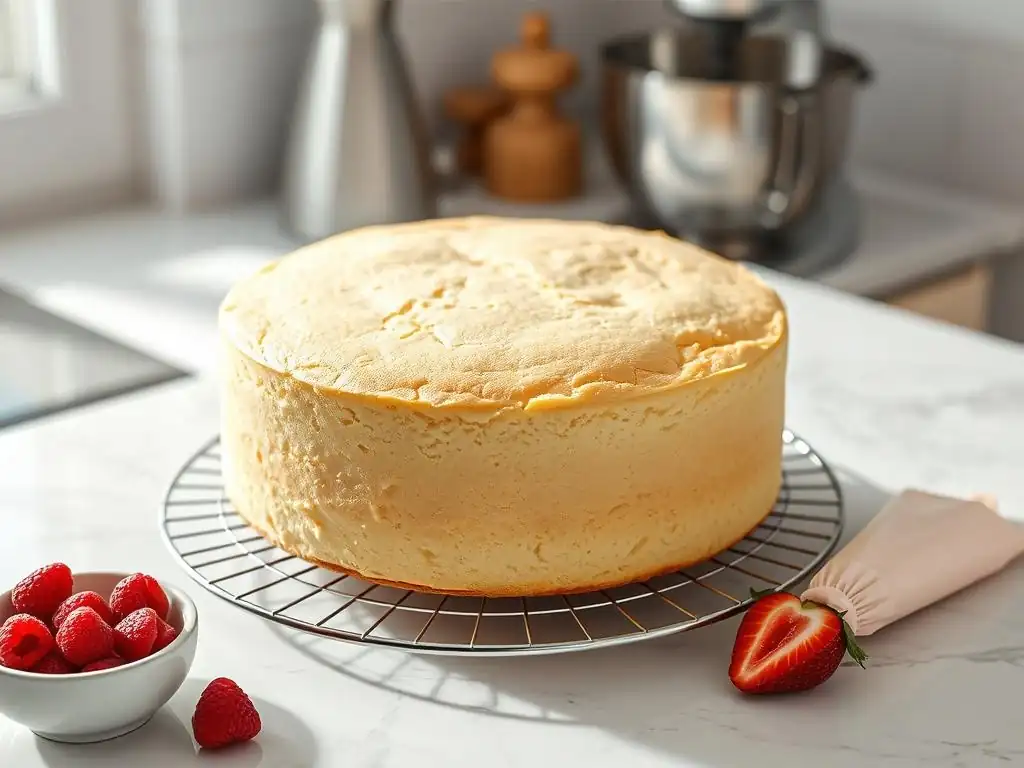
Cooling the Cake Properly to Avoid Cracking
Proper cooling is just as important as baking for an easy sponge cake recipe beginners will master. Once your cake is baked and passes the toothpick test, resist the urge to remove it from the pan immediately. Allowing the cake to cool in the pan for 5-10 minutes helps its delicate structure firm up. During this time, the cake continues to cook slightly from the residual heat of the pan, and the risk of it breaking or collapsing upon removal is significantly reduced.
After the initial cooling period in the pan, invert the cake onto a wire cooling rack to cool completely. Cooling racks allow air to circulate around the entire cake, preventing moisture from accumulating on the bottom, which can make the cake soggy. Ensure the cake is fully cooled to room temperature before attempting to frost or decorate it.
This can take 1-2 hours depending on the size of the cake and the ambient temperature. Frosting a warm cake will cause the frosting to melt and slide off. Patience during the cooling phase ensures your beautiful easy sponge cake base is ready for its finishing touches.
Leveling the Cake: Achieving a Professional Finish
For a professional-looking birthday cake, you'll often want a flat, even surface for stacking or frosting. Sponge cakes sometimes bake with a slight dome in the center. Leveling the cake involves carefully slicing off this dome to create a flat top. Once the cake is completely cool, use a long serrated knife or a cake leveler. Place the cake on a flat surface and hold the knife parallel to the counter. Using a gentle sawing motion, slowly slice through the cake horizontally to remove the domed top.
You can discard the removed dome or save it for cake pops or trifles. The goal is to create a perfectly flat surface for easy frosting and stacking layers if your birthday cake design requires it. While not strictly necessary for taste, leveling significantly improves the presentation of your easy sponge cake, making it easier to achieve smooth, even layers of frosting and a neat overall appearance. It's a simple technique that elevates a beginner's cake to the next level visually.
Simple Syrup: Adding Moisture and Flavor
Sponge cakes, by nature, can sometimes lean towards the drier side compared to butter-based cakes. A simple way to add moisture and boost flavor to your easy sponge cake base is by brushing it with simple syrup. Simple syrup is incredibly easy to make: combine equal parts granulated sugar and water (e.g., 100g sugar and 100ml water) in a saucepan, heat gently while stirring until the sugar is dissolved, then let it cool completely. You can also infuse it with flavors like vanilla, lemon zest, or a splash of liqueur once it's off the heat.
Once your cake is completely cool and leveled, use a pastry brush or a spoon to lightly moisten the top surface with the cooled simple syrup. Don't oversaturate the cake; you want it moist, not soggy. The cake will absorb the syrup, adding moisture and a hint of sweetness or infused flavor throughout the crumb. This step is optional but highly recommended, especially if you plan to frost the cake ahead of time, as it helps keep the easy sponge cake moist and delicious for longer, making it an even better birthday base.
Birthday Cake Decoration Ideas Using Your Sponge Cake Base
Easy Frosting Recipes for Your Sponge Cake
Once you have your perfectly baked and cooled easy sponge cake base, it's time for the fun part: decorating! The right frosting can transform a simple sponge into a celebratory masterpiece. Here are a few beginner-friendly frosting options that pair wonderfully with sponge cake.
Classic Vanilla Buttercream
This is a go-to for many birthday cakes. It's creamy, easy to make, and pipes beautifully. A basic recipe involves creaming softened butter (typically 1 cup or around 225g) with powdered sugar (start with 3-4 cups, about 350-450g), a splash of milk or cream (2-4 tablespoons), and vanilla extract (1-2 teaspoons). Beat until light and fluffy. It's stable and holds shape well, making it ideal for frosting the entire cake and adding simple piped borders.
Chocolate Ganache
For chocolate lovers, a simple chocolate ganache is elegant and delicious. Made from just two ingredients: chocolate and heavy cream. A common ratio for a pourable ganache is 1 part chocolate (e.g., 200g chopped chocolate) to 1 part hot heavy cream (200ml). Pour the hot cream over the chocolate, let it sit for a few minutes, then stir until smooth. For a thicker, spreadable ganache, use a ratio of 2 parts chocolate to 1 part cream. Let it cool and thicken before spreading. It creates a smooth, rich coating on your easy sponge cake.
Whipped Cream
For a lighter option, stabilized whipped cream is fantastic, especially when paired with fruit. Whip cold heavy cream (typically 1-2 cups, 240-480ml) with powdered sugar (2-4 tablespoons) and vanilla extract until stiff peaks form. To make it more stable for frosting a cake, you can add a little cornstarch or a small amount of softened gelatin dissolved in hot liquid. This creates a light, airy frosting that complements the delicate texture of the sponge cake beautifully.
Simple Decoration Techniques for a Stunning Birthday Cake
You don't need to be a professional decorator to make your easy sponge cake look festive. Here are some simple techniques using your chosen frosting:
Sprinkles and Candies
This is perhaps the easiest way to add instant birthday cheer. Apply a layer of frosting to the cake, then press sprinkles, nonpareils, or small candies onto the sides or top. You can cover the whole cake or just the edges for a fun effect. A typical 9-inch cake might use anywhere from a few tablespoons to a full container (around 100-200g) of sprinkles depending on coverage.
Fresh Fruit Arrangement
Fresh berries (like strawberries, raspberries, blueberries) or sliced fruits (like kiwis or peaches) make a beautiful and delicious topping. Frost your easy sponge cake with whipped cream or vanilla buttercream, then arrange the fruit in patterns, concentric circles, or simply scattered artfully on top. Use about 1-2 cups (150-300g) of mixed berries for a single layer cake top.
Simple Piping Designs
Even with a basic piping bag and a few simple tips (like a star tip or a round tip), you can add elegant touches. Pipe simple borders around the top and bottom edges of the cake, create rosettes, or write a short birthday message. Practice on a piece of parchment paper first if you're new to piping. A single batch of buttercream is usually sufficient for frosting a single layer cake and piping simple decorations.
Troubleshooting Your Sponge Cake: Common Problems and Solutions
Why is My Sponge Cake Dense and Heavy?
A dense or heavy sponge cake is a common issue for beginners, and it usually relates to how air is incorporated or retained. The most frequent culprit is not whipping the eggs and sugar long enough. Remember, you need to achieve that thick, pale "ribbon stage" where the mixture has significantly increased in volume (often 3-4 times its original size). If this step is rushed, there simply isn't enough air introduced to make the cake light. Try whipping for a full 5-10 minutes on medium-high speed with an electric mixer.
Another reason for density is overmixing after adding the flour. Vigorous mixing at this stage develops the gluten in the flour, making the cake tough and heavy rather than tender and airy. Always fold in the dry ingredients gently, just until no streaks of flour are visible. Use a spatula or whisk on the lowest speed. Ensure your baking powder (if using) is fresh, as expired leavening won't provide the necessary lift. Using ingredients that are too cold, especially the eggs, can also hinder proper aeration.
Why Did My Sponge Cake Sink in the Middle?
A sinking sponge cake is often heartbreaking after watching it rise beautifully in the oven. This typically happens when the cake's internal structure hasn't fully set before it's removed from the heat or exposed to a sudden temperature change. Opening the oven door too early (especially in the first 20-25 minutes of baking) is a major cause. A rush of cooler air can cause the delicate, still-setting structure to collapse. Trust the recommended baking time and use the oven light to check on progress without opening the door.
Underbaking is another common reason. If the center hasn't reached a high enough internal temperature (around 200-210°F or 93-99°C, though the toothpick test is easier for beginners) to set the proteins and starches, it won't be able to support itself once out of the oven. Always perform the toothpick test in the very center of the cake. Ensure your oven temperature is accurate; consider using an oven thermometer to verify it matches your dial setting, as oven temperatures can vary by as much as 25-50°F (15-30°C).
My Sponge Cake is Dry: What Did I Do Wrong?
A dry sponge cake can happen for several reasons, primarily related to overbaking or incorrect ingredient ratios. Overbaking is the most common cause; leaving the cake in the oven for too long evaporates too much moisture. Use the toothpick test and remove the cake as soon as it comes out clean. The edges might look slightly more golden than the center, which is normal, but the center should be just done.
Incorrect measuring, particularly too much flour, can also lead to a dry cake. Flour absorbs moisture, and excess flour will soak up too much of the liquid in the batter. Measuring by weight (e.g., 150g flour instead of relying on cup measures) is the most accurate way to avoid this. Ensure your oven temperature isn't too high, which can cause the cake to bake too quickly and dry out. Finally, consider using the simple syrup trick mentioned earlier; it's a fantastic way to add moisture back into any sponge cake, whether it's slightly dry or perfectly baked.
Storing Your Sponge Cake: Keeping It Fresh
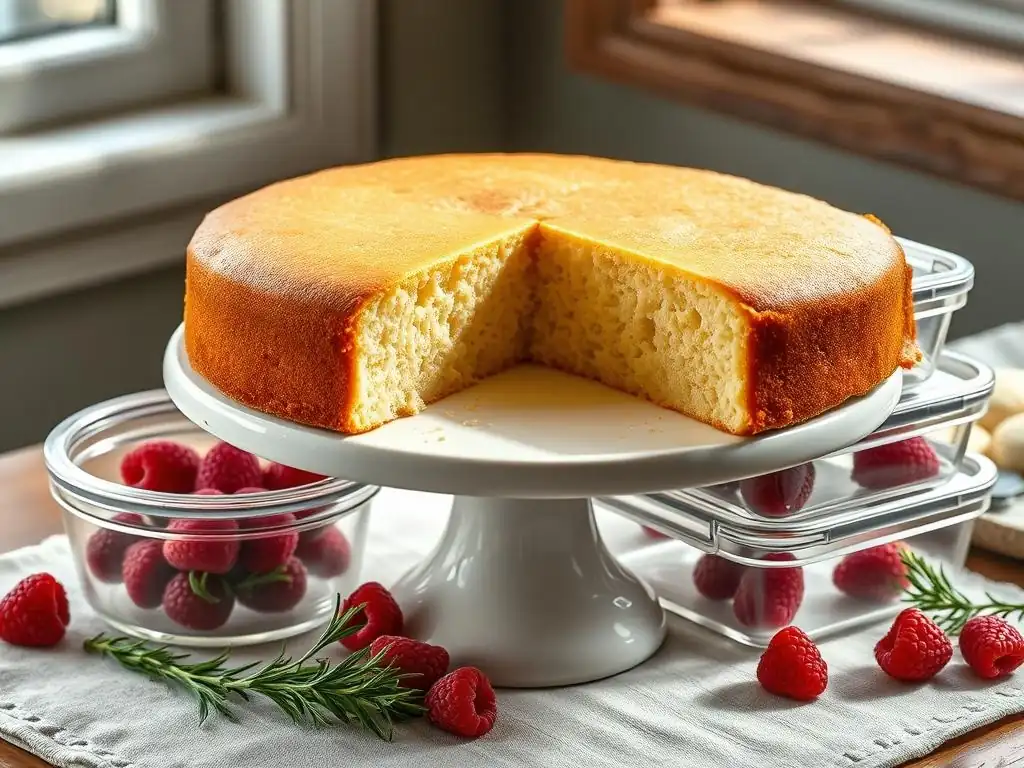
How to Store Unfrosted Sponge Cake
If you bake your easy sponge cake base ahead of time and plan to frost it later, proper storage is key to keeping it fresh and moist. Once the cake is completely cooled on a wire rack, wrap it tightly in plastic wrap. Ensure the entire cake is covered with no exposed areas, as air is the enemy of freshness and moisture. You can then store the wrapped cake at room temperature for 1-2 days.
For longer storage, unfrosted sponge cake freezes beautifully. Wrap the completely cooled cake first in plastic wrap, then in a layer of aluminum foil, or place it in a freezer-safe bag. Label with the date. Frozen unfrosted sponge cake can last for up to 2-3 months. Thaw it overnight in the refrigerator or for a few hours at room temperature, still wrapped, before unwrapping and decorating.
Storing a frosted birthday sponge cake depends on the type of frosting used. Cakes frosted with buttercream (made with butter and powdered sugar) or ganache can typically be stored at cool room temperature for 1-2 days, provided the room isn't excessively warm or humid. Cover the cake loosely with plastic wrap or store it in a cake carrier to protect it from drying out and environmental factors. If your buttercream contains cream cheese or uses a significant amount of milk/cream, refrigeration is safer.
Cakes frosted with whipped cream (unless stabilized significantly) or those containing fresh fruit fillings or perishable components must be stored in the refrigerator. Cover the cake lightly to prevent it from absorbing odors from the fridge. Refrigerated frosted sponge cake is best consumed within 2-3 days. While refrigeration can sometimes slightly alter the texture of sponge cake, it's necessary for food safety with certain frostings and fillings.
Elevate Your Baking: Tips for Perfecting Your Sponge Cake Recipe
Weighing Ingredients for Accuracy
One of the simplest yet most impactful ways to elevate your easy sponge cake recipe results is to start weighing your ingredients, especially flour and sugar, instead of using volume measures like cups. Baking is a science, and precise measurements lead to consistent outcomes. The weight of a cup of flour can vary significantly depending on how it's scooped (packed vs. spooned), potentially differing by 20% or more. For example, a cup of all-purpose flour is typically cited as weighing 120-130 grams, but scooping can easily result in 150 grams or more.
Using a simple digital kitchen scale provides exact measurements every time (e.g., precisely 150g of flour or 200g of sugar). This eliminates variability and greatly reduces the risk of issues like a dry or dense cake caused by incorrect ratios. While volume measures work for some recipes, for delicate cakes like sponge, weighing is the gold standard for achieving that perfect, consistent texture. It's a small change that makes a big difference for beginners aiming for perfection.
Whipping Eggs to the Right Consistency
Achieving the correct consistency when whipping the eggs and sugar is paramount for a light and airy easy sponge cake. You're aiming for the "ribbon stage" or "trace stage." This means whipping the mixture until it is very pale yellow, thick, and significantly increased in volume. When you lift the whisk, the mixture should fall back into the bowl in a thick stream (a "ribbon") that holds its shape on the surface for several seconds before slowly disappearing.
This stage typically takes anywhere from 5 to 10 minutes of continuous whipping with an electric mixer on medium-high speed, depending on the quantity of eggs and the power of your mixer. Don't stop too early; under-whipped eggs won't incorporate enough air, leading to a dense cake. Conversely, whipping for an excessive amount of time (like 15-20 minutes) can sometimes cause the mixture to become too stiff and difficult to fold ingredients into without deflating. Practice makes perfect, but aiming for that visible ribbon is the key indicator for this easy sponge cake recipe beginners need to watch for.
Folding Ingredients Gently
After the eggs and sugar are perfectly whipped, the way you incorporate the remaining ingredients, particularly the flour, is critical for maintaining the airy volume you've created. This is where the technique of "folding" comes in, and it's essential for a truly light easy sponge cake. Folding means gently combining ingredients by cutting down through the mixture with a spatula, sweeping it across the bottom of the bowl, and bringing it up and over the mixture on top. You then rotate the bowl slightly and repeat the motion.
The goal is to combine the dry ingredients into the wet mixture with minimal stirring or beating, which would deflate the air bubbles. Add the dry ingredients in stages (often 2 or 3 additions), folding just until no dry streaks of flour are visible before adding the next batch. Avoid the urge to stir vigorously. This gentle technique ensures that the air you worked hard to incorporate during the whipping stage remains in the batter, resulting in a beautifully light and tender sponge cake.
Enjoy Your Homemade Birthday Sponge Cake!
Frequently Asked Questions
What makes this sponge cake recipe "easy" for beginners?
This recipe is designed for beginners because it uses simple ingredients, provides clear step-by-step instructions, and avoids complex techniques often found in other sponge cake recipes.
What are the key ingredients I'll need for this sponge cake recipe?
You'll primarily need eggs, sugar, flour, and a small amount of baking powder. The recipe emphasizes readily available ingredients for convenience.
How do I ensure my sponge cake rises properly and avoids being flat?
The key is to whip the eggs and sugar until light and airy. Also, avoid overmixing the flour, as this can develop gluten and make the cake tough.
Can I customize this sponge cake recipe with different flavors?
Yes, you can easily customize it! Consider adding vanilla extract, lemon zest, or other flavorings to the batter. You can also layer it with different fillings like fruit preserves or whipped cream.
How long will this sponge cake stay fresh after baking?
The sponge cake will typically stay fresh for 2-3 days if stored properly in an airtight container at room temperature. For longer storage, consider freezing it.
Final Reflection: The Enduring Joy of a Simple Sponge Cake
The seemingly simple act of baking a sponge cake transcends mere culinary skill; it's a celebration of connection, creativity, and the enduring power of a classic recipe. In a world obsessed with complex techniques and elaborate desserts, the humble sponge cake stands as a testament to the beauty of simplicity. Its ease of preparation makes it accessible to everyone, regardless of baking experience, while its versatility allows for endless creative flourishes.
This recipe, and the joy it brings, reminds me of countless childhood birthdays, the scent of vanilla and sugar filling the air, a tangible symbol of love and celebration. The best things in life are simple.
This adage rings especially true when considering the enduring appeal of the sponge cake. Its ability to evoke such strong positive emotions, generation after generation, speaks volumes about its cultural significance and its power to connect us to cherished memories. It's a recipe that transcends generations, passed down through families, each baker adding their own personal touch.
Now, I invite you to embrace the simplicity and joy of this recipe. Don't be afraid to experiment, to add your own personal twist, to create a cake that reflects your unique style and taste. Whether it's for a birthday, an anniversary, or simply a Tuesday afternoon treat, let the act of baking this sponge cake be a moment of mindful creation, a chance to connect with yourself and those you share it with. The perfect base awaits your creative touch – go forth and bake!
Unlock Your Inner Baker: Create Cake Magic Today!
Thanks for joining us on this delicious journey! We hope you’ve gained the confidence to bake a truly stunning sponge cake. Ready to take your baking skills to the next level?
- Bake your perfect sponge: Grab your ingredients and try out the recipe today! It's easier than you think.
- Share your creation: Post a picture of your masterpiece on social media and tag us @BakeWithEase – we’d love to see it!
- Explore our other recipes: Discover more amazing cake recipes and baking tips on our website.
What delicious adventure will your sponge cake base lead to? Let us know in the comments below!