
Simple Scones for Afternoon Tea (Beginner Recipe)

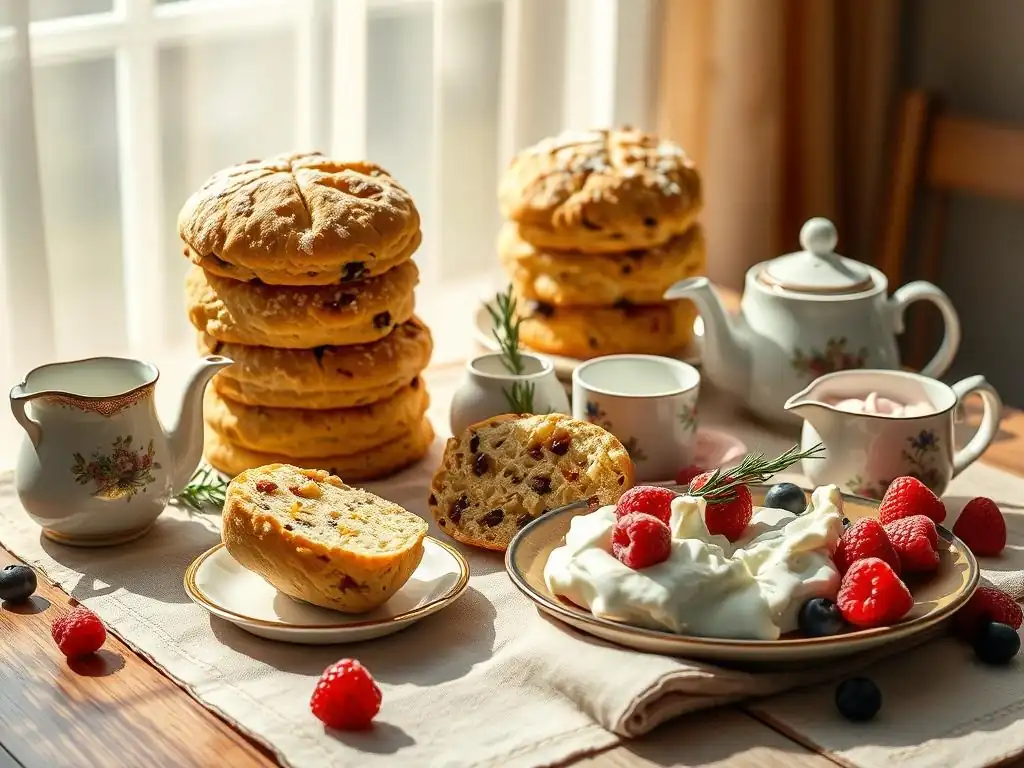
Welcome to BakeWithEase, your haven for all things baking! Ever dreamed of serving up a delightful afternoon tea? Our guide to easy beginner afternoon tea scones unlocks the secrets to perfectly light and fluffy scones, even if you're just starting your baking journey. Curious about the simple steps and readily available ingredients that will transform your kitchen into a charming tea room? Let's get baking!
- Simple Scones for Afternoon Tea (Beginner Recipe) - BakeWithEase
- Introduction: Bake Easy Beginner Afternoon Tea Scones
- What Makes These Scones Perfect for Beginner Bakers?
- Gathering Your Scone Baking Essentials
- Step-by-Step Guide to Making Easy Beginner Afternoon Tea Scones
- Tips for Baking the Best Easy Beginner Scones
- Serving Suggestions: Elevate Your Afternoon Tea with Homemade Scones
- Troubleshooting Common Scone Baking Problems
- Conclusion: Enjoy Your Homemade Easy Beginner Afternoon Tea Scones
- Frequently Asked Questions
- Final Reflection: The Enduring Charm of a Simple Scone
- Unleash Your Inner Baker: Scone Success Awaits!
Simple Scones for Afternoon Tea (Beginner Recipe) - BakeWithEase
Introduction: Bake Easy Beginner Afternoon Tea Scones
Welcome to BakeWithEase, your friendly guide to simple baking! There's something incredibly comforting and classic about a warm scone, fresh from the oven, especially when paired with a lovely cup of tea. If you've ever dreamt of creating that perfect afternoon tea experience at home but felt intimidated by baking, you're in the right place. We believe baking should be enjoyable and accessible to everyone, and this recipe for easy beginner afternoon tea scones is designed specifically with you in mind.
Forget complicated steps and fancy techniques. This guide will walk you through creating delicious, light, and fluffy scones that are perfect for a relaxing afternoon treat. Whether you're hosting a small gathering or simply indulging in a moment of self-care, mastering these simple scones will give you a wonderful sense of accomplishment and a delightful reward. Let's get started on your journey to baking easy beginner afternoon tea scones!
What Makes These Scones Perfect for Beginner Bakers?
Embarking on your baking journey can feel daunting, but this specific scone recipe is tailored to build confidence from the ground up. It strips away complexity, focusing on fundamental techniques that are easy to grasp and execute. The forgiving nature of scone dough, when handled correctly, means that even small errors are unlikely to ruin your final product. This makes them an ideal starting point before tackling more intricate pastries.
Furthermore, the relatively short preparation and baking time mean you get to see tangible, delicious results quickly. This instant gratification is a powerful motivator for beginners. Unlike yeast breads that require long proofing times or elaborate cakes with multiple layers and frostings, you can mix, shape, and bake these easy beginner afternoon tea scones from start to finish in under 45 minutes, making them perfect for spontaneous baking urges.
Simple Ingredients for Effortless Scones
One of the hallmarks of this recipe is its reliance on basic pantry staples that are readily available and affordable. You won't need specialty flours or obscure leavening agents. The core ingredients typically include all-purpose flour, sugar, baking powder, butter, and milk or cream. These are items many households already keep on hand, eliminating the need for a special shopping trip just to bake.
Using simple, accessible ingredients also helps beginners focus on technique rather than ingredient sourcing. For instance, the recipe calls for standard granulated sugar, providing just the right amount of sweetness without altering the texture dramatically. The use of baking powder as the primary leavening agent is straightforward; unlike yeast, it reacts quickly when combined with liquid and heat, providing a reliable rise that is easy for novices to control and understand.
Quick and Easy Scone Baking Process
The process for making these easy beginner afternoon tea scones is designed to be intuitive and fast-paced, minimizing opportunities for overthinking or getting bogged down in complex steps. The key stages involve quickly rubbing cold butter into dry ingredients, adding liquid, bringing the dough together with minimal handling, shaping, and baking. Each step builds upon the last logically and swiftly.
For example, the step of cutting cold butter into the flour mixture can be done easily with fingertips, a pastry blender, or even a food processor for maximum speed, creating a texture resembling coarse crumbs. This quick incorporation of cold fat is crucial but not overly technical. The subsequent addition of liquid requires just enough mixing to bring the dough together – typically less than 30 seconds of gentle work – preventing the development of tough gluten. This emphasis on speed and minimal handling simplifies the process considerably for anyone new to baking.
Delicious Scones for Afternoon Tea: A Beginner's Delight
Ultimately, the true test of any recipe is the taste, and these easy beginner afternoon tea scones deliver on deliciousness. They offer a classic scone flavor and texture – slightly crisp on the outside, soft and tender within. This simple base is incredibly versatile, providing a perfect canvas for traditional toppings like clotted cream and jam, or allowing for creative variations.
The satisfaction of pulling warm, golden-brown scones from your own oven is immense, especially when you know you created them with minimal fuss. Imagine serving these alongside a pot of your favorite tea; the aroma alone is inviting. Even with just a few simple steps, you can achieve a result that rivals those from a bakery, making these easy beginner afternoon tea scones a truly rewarding project for any aspiring baker.
Gathering Your Scone Baking Essentials
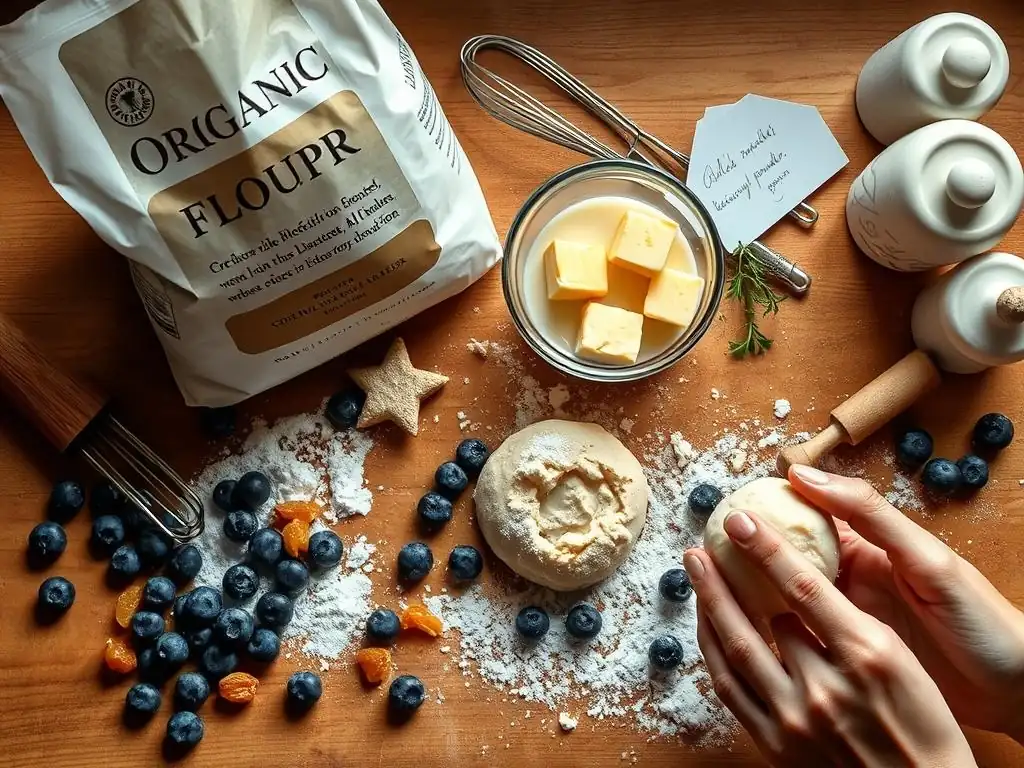
Before you tie on your apron and preheat the oven, it's helpful to gather everything you'll need. Having all your ingredients measured and equipment ready ensures a smooth and stress-free baking experience, which is key when you're starting out. This preparation step is often called "mise en place" in professional kitchens, and it significantly reduces the chance of making mistakes or forgetting something crucial mid-recipe.
Taking a few minutes to organize before you begin also allows you to double-check quantities and confirm you have everything required. For easy beginner afternoon tea scones, the list is short and simple, focusing on standard kitchen tools and common ingredients. This makes the preparation phase just as accessible as the baking itself, setting you up for success right from the start.
Ingredients List: Easy Afternoon Tea Scones Recipe
Here are the typical ingredients you'll need for a batch of simple scones. Exact quantities might vary slightly depending on the specific recipe variation, but these provide a good baseline for about 8-10 scones:
- 2 cups (about 250g) All-Purpose Flour
- 1/4 cup (about 50g) Granulated Sugar
- 2 teaspoons Baking Powder
- 1/4 teaspoon Salt
- 1/2 cup (about 115g) Cold Unsalted Butter, cut into small cubes
- 3/4 cup (about 180ml) Milk or Heavy Cream
- 1 large Egg (for egg wash, optional)
Using cold butter is critical for achieving a light, flaky texture. The small pieces of cold butter melt in the oven, creating steam pockets that help the scones rise. Ensure your butter is straight from the refrigerator and cut into roughly 1/2-inch cubes just before you're ready to use it.
Essential Baking Equipment for Beginner Scones
You don't need a professional kitchen setup to bake easy beginner afternoon tea scones. Most basic kitchens already have the necessary tools. Here is a checklist of the essential equipment:
- [ ] Large Mixing Bowl
- [ ] Measuring Cups and Spoons
- [ ] Pastry Blender, Fork, or Fingertips (for cutting in butter)
- [ ] Wooden Spoon or Rubber Spatula
- [ ] Baking Sheet
- [ ] Parchment Paper (optional, but recommended for easy cleanup)
- [ ] Round Cookie Cutter or Knife
- [ ] Pastry Brush (if using egg wash)
A standard baking sheet, approximately 13x18 inches, is perfect for baking a single batch. Covering it with parchment paper prevents sticking and makes transferring the baked scones easy. While a round cutter (about 2-3 inches in diameter) gives a classic scone shape, a sharp knife can also be used to cut the dough into squares or wedges, which works just as well and requires one less tool.
Step-by-Step Guide to Making Easy Beginner Afternoon Tea Scones
Baking these simple scones is a straightforward process when you follow the steps one by one. Don't rush, and remember that the goal is gentle handling of the dough to keep it tender. This guide breaks down the process into manageable stages, perfect for anyone making easy beginner afternoon tea scones for the first time.
Step 1: Preparing the Scone Dough Ingredients
Begin by preheating your oven to 400°F (200°C). If you plan to use parchment paper, line your baking sheet now. In your large mixing bowl, whisk together the dry ingredients: the all-purpose flour, granulated sugar, baking powder, and salt. Whisking ensures that the baking powder and salt are evenly distributed throughout the flour, which is important for even rising and flavoring.
Next, add the cold, cubed butter to the dry ingredients. Use your fingertips, a pastry blender, or two forks to cut the butter into the flour mixture. Work quickly until the mixture resembles coarse crumbs, with some pea-sized pieces of butter still visible. Avoid overworking the mixture; the goal is to coat the butter pieces with flour, not to fully incorporate them. This step is crucial for creating those lovely pockets of flakiness in your easy beginner afternoon tea scones.
Step 2: Combining Dry and Wet Ingredients for Scones
In a separate small bowl or measuring cup, whisk together the milk (or cream) and any other wet ingredients your specific recipe calls for, such as an egg if it's incorporated into the dough rather than used as a wash. Ensure the milk is cold; cold ingredients help keep the butter firm before baking, contributing to a better rise.
Create a well in the center of the dry ingredients in your large mixing bowl. Pour the liquid mixture into the well. This method helps prevent pockets of dry flour and ensures the liquid is distributed relatively evenly before you start mixing.
Step 3: Gently Mixing the Scone Dough
Using a wooden spoon or rubber spatula, gently stir the wet ingredients into the dry ingredients until just combined. The mixture will look shaggy and might still have some dry patches of flour – this is perfectly fine and desired. The key here is minimal mixing. Overmixing develops gluten, which results in tough, dense scones instead of light, tender ones.
Once the dough mostly comes together, turn it out onto a lightly floured surface. Knead it very gently, just a few times (no more than 5-10 short presses), until it forms a cohesive dough. Again, the less you handle the dough, the better the texture of your easy beginner afternoon tea scones will be. If adding mix-ins like dried fruit or chocolate chips, gently fold them in during this brief kneading step.
Step 4: Shaping and Cutting the Scones
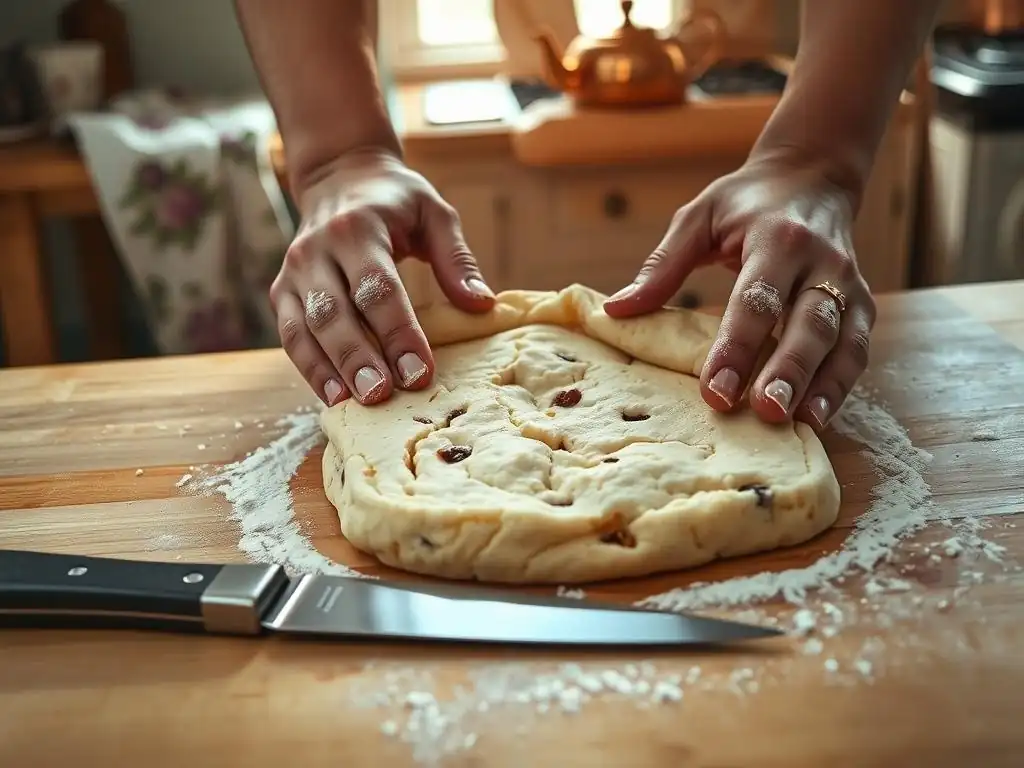
Pat the dough gently into a circle or rectangle about 3/4 to 1 inch thick. Avoid using a rolling pin, as this can compress the dough too much. The thickness is important for achieving a good rise and a tender interior. For classic round scones, use a sharp cookie cutter to cut out shapes, dipping the cutter in flour between cuts to prevent sticking. Press straight down; twisting the cutter can seal the edges and prevent them from rising properly.
If you don't have a cutter, you can shape the dough into a roughly 8-inch circle and cut it into 8 wedges using a sharp knife. Alternatively, pat the dough into a rectangle and cut it into squares. Place the cut scones onto your prepared baking sheet, spacing them about 1-2 inches apart.
Step 5: Baking Your Easy Beginner Scones to Golden Perfection
If using an egg wash (whisked egg with a splash of milk or water), gently brush the tops of the scones. This gives them a lovely golden-brown color and a slightly glossy finish. Be careful not to let the wash drip down the sides, as this can also hinder the rise.
Bake in the preheated oven for 12-15 minutes, or until the scones are well-risen and golden brown on top and bottom. The exact baking time will depend on your oven and the size of your scones. You can test for doneness by inserting a toothpick into the center of one; it should come out clean. Transfer the baked easy beginner afternoon tea scones to a wire rack to cool slightly before serving.
Tips for Baking the Best Easy Beginner Scones
Even with a simple recipe, a few key tips can elevate your scones from good to absolutely fantastic. Paying attention to temperature, handling, and oven consistency can make a significant difference in the final outcome of your easy beginner afternoon tea scones. These pointers address common areas where beginners can improve their results.
Achieving the Perfect Scone Texture
The secret to light and tender scones lies in two main factors: cold butter and minimal handling. As mentioned earlier, cold butter creates steam pockets during baking, which helps lift the dough and create flaky layers. Ensure your butter is as cold as possible when you cut it into the flour. Some bakers even chill their flour beforehand!
Equally important is avoiding overmixing the dough. Once the wet ingredients are added, stir only until the dry ingredients are just moistened. Overworking the dough develops gluten, leading to a tough, bread-like texture rather than the desired tender crumb. Think of it as persuading the ingredients to come together, not forcing them.
Variations: Adding Flavors to Your Easy Scones
While the basic easy beginner afternoon tea scones are delicious on their own, you can easily add flavor variations. Common additions include:
- Dried fruits like currants, raisins, or cranberries (about 1/2 cup)
- Citrus zest, such as orange or lemon (about 1 tablespoon)
- Chocolate chips or white chocolate chunks (about 1/2 cup)
- Spices like cinnamon or nutmeg (about 1/2 teaspoon)
- Fresh herbs like rosemary or chives (for savory scones, adjust sugar and salt accordingly)
Add these mix-ins during the final, brief kneading step after the dough has just come together. Gently fold them in a few times until they are relatively evenly distributed. Be careful not to over-knead in an attempt to distribute them perfectly, as this will still lead to tough scones.
Storing Your Freshly Baked Scones
Scones are best enjoyed fresh and warm from the oven, ideally within an hour or two of baking. However, if you have leftovers, you can store them. Allow the scones to cool completely on a wire rack before storing.
Store cooled scones in an airtight container at room temperature for up to 2 days. To reheat, place them on a baking sheet in a preheated oven at 300°F (150°C) for 5-8 minutes until warmed through. Avoid microwaving, as this can make them rubbery. You can also freeze baked scones for up to 1 month; wrap them tightly in plastic wrap and then foil before freezing. Thaw at room temperature and reheat as directed.
Serving Suggestions: Elevate Your Afternoon Tea with Homemade Scones
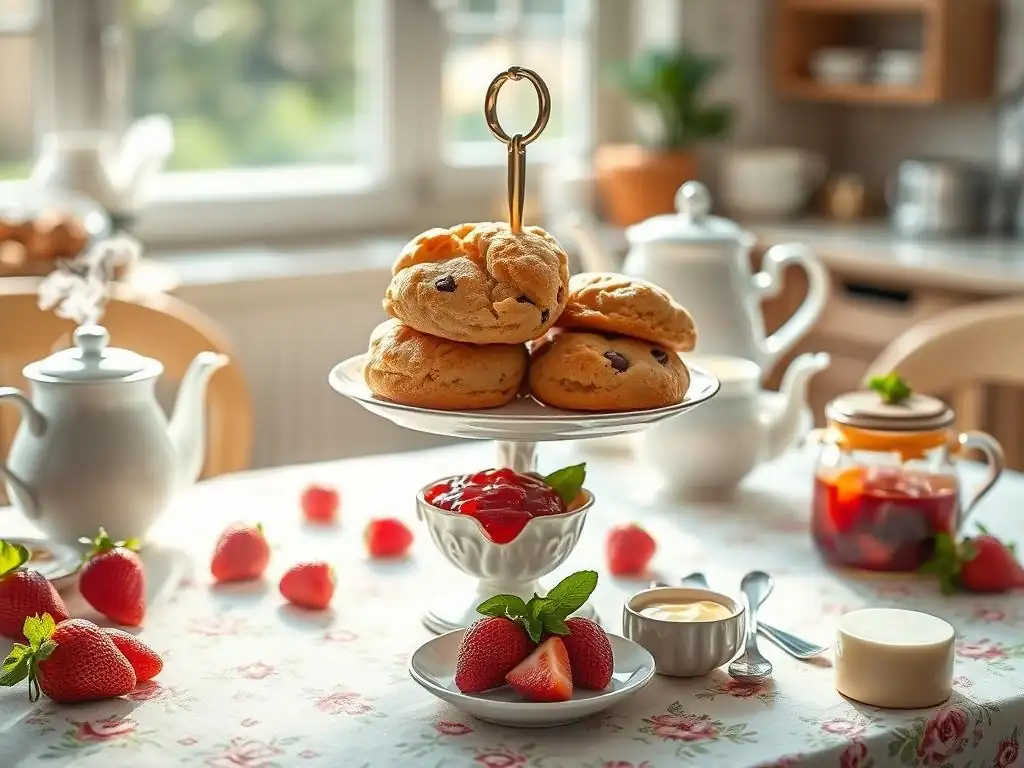
Baking easy beginner afternoon tea scones is just the first step; serving them is where the real fun begins! The simple, buttery flavor of these scones makes them incredibly versatile for pairing with various toppings and beverages. Creating a beautiful presentation enhances the experience for yourself and any guests.
Consider arranging the warm scones on a nice plate or cake stand. Providing a selection of accompaniments allows everyone to customize their perfect bite. A pot of freshly brewed tea is, of course, essential to complete the classic afternoon tea setting. Don't forget the teacups and saucers for that authentic feel.
Classic Afternoon Tea Scone Pairings
The most traditional way to enjoy scones, particularly in the UK, is with clotted cream and jam. Clotted cream is a thick, rich cream that is spooned generously onto a split scone, followed by a dollop of fruit jam, typically strawberry or raspberry.
- Clotted Cream: This is the ultimate indulgence. If you can't find clotted cream, whipped heavy cream (sweetened or unsweetened) or even good quality crème fraîche can serve as delicious alternatives.
- Jam: Strawberry jam is a classic, but feel free to experiment with other flavors like raspberry, apricot, or blackcurrant. A good quality preserve with visible fruit chunks is always a treat.
The order of cream and jam is a topic of much debate! In Cornwall, jam is traditionally applied first, then cream. In Devon, it's cream first, then jam. Try both ways and see which you prefer!
Creative Scone Toppings and Spreads
Beyond the classic pairings, your easy beginner afternoon tea scones can be enjoyed with a variety of other delicious toppings:
- Butter: Simple, good quality butter spread on a warm scone is heavenly.
- Lemon Curd: A tangy and sweet alternative to jam.
- Honey or Maple Syrup: For a touch of natural sweetness.
- Cream Cheese: Especially good with savory scone variations, but also nice with fruit jams.
- Fruit Compote: Warm berry or apple compote adds a lovely texture and flavor contrast.
- Whipped Butter with Herbs: For savory scones, whip butter with chives, rosemary, or garlic.
Don't be afraid to get creative! The beauty of baking easy beginner afternoon tea scones is that they are a versatile base for countless flavor combinations, allowing you to tailor them to your personal taste or the theme of your tea party.
Troubleshooting Common Scone Baking Problems
Even with a simple recipe, baking can sometimes present challenges. Knowing how to identify and fix common issues can save you frustration and help you learn from your experiences. These troubleshooting tips are specifically aimed at problems beginners might encounter when making easy beginner afternoon tea scones.
Dry Scones: How to Avoid Them
If your scones turn out dry and crumbly, the most common culprit is too much flour or overmixing. When measuring flour, spoon it lightly into your measuring cup and level off the excess with a straight edge; scooping directly from the bag can compact the flour, resulting in using more than the recipe intends (sometimes up to 25% more! ).
Additionally, overmixing the dough develops gluten, which absorbs moisture and leads to a dry, tough texture. Remember to mix only until the dough just comes together. The dough should feel soft and slightly sticky before baking, not dry or stiff. If your dough feels very dry during the mixing stage, you might need to add a tiny splash more milk (a teaspoon at a time) to bring it together, but be cautious not to add too much.
Flat Scones: Achieving a Good Rise
Flat scones can be disappointing. Several factors can contribute to this:
- Expired Baking Powder: Baking powder loses its potency over time. Check if yours is still active by adding a teaspoon to a few tablespoons of hot water; it should fizz vigorously.
- Warm Butter: If the butter melts before baking, it won't create the necessary steam pockets for lift. Ensure your butter is cold and work quickly.
- Overworking the Dough: Again, too much handling can compress the dough and prevent a good rise.
- Twisting the Cutter: If you used a cutter, twisting it can seal the edges, preventing the layers from separating and rising properly. Press straight down.
- Oven Temperature: An oven that isn't hot enough might not activate the baking powder sufficiently before the butter melts completely. Ensure your oven is properly preheated, perhaps using an oven thermometer to check accuracy.
Ensuring your ingredients are cold, your leavening is fresh, and you handle the dough minimally are the best defenses against flat easy beginner afternoon tea scones.
Unevenly Baked Scones: Ensuring Consistent Results
Sometimes, scones on one side of the baking sheet might be darker than those on the other, or the tops might be too dark while the bottoms are pale. This is often due to uneven oven temperature or hot spots.
- Know Your Oven: Ovens often have hotter and cooler spots. If you notice consistent uneven baking, try rotating the baking sheet halfway through the baking time (around the 7-minute mark).
- Spacing: Ensure your scones are spaced evenly on the baking sheet, not touching each other. This allows hot air to circulate around each scone, promoting even baking.
- Baking Sheet: Darker baking sheets absorb more heat and can lead to darker bottoms. Shiny aluminum sheets reflect heat and provide more even baking. Using parchment paper can also help regulate the heat transfer.
By paying attention to these details, you can help ensure that all your easy beginner afternoon tea scones bake up beautifully and consistently.
Conclusion: Enjoy Your Homemade Easy Beginner Afternoon Tea Scones
Congratulations! You've successfully baked your very own batch of easy beginner afternoon tea scones. This recipe is a fantastic starting point for anyone new to baking, proving that delicious, homemade treats are well within reach. You've learned fundamental techniques like cutting in butter and gentle mixing, skills that will serve you well in future baking adventures.
Whether you're enjoying them hot with classic clotted cream and jam or experimenting with other toppings, take a moment to savor the simple pleasure of your accomplishment. Baking should be a joyful and rewarding experience, and these easy beginner afternoon tea scones embody that spirit perfectly. Keep practicing, keep exploring, and most importantly, keep baking with ease!
Frequently Asked Questions
What makes this scone recipe suitable for beginners?
This recipe focuses on simple techniques and easily accessible ingredients, minimizing the complexity often associated with baking. It provides clear, step-by-step instructions.
What key ingredients are needed for these "Easy beginner afternoon tea scones"?
The core ingredients are typically flour, baking powder, butter, sugar, and milk. These are common pantry staples, making the recipe convenient.
How can I ensure my scones rise properly?
Use cold butter and avoid overmixing the dough. The cold butter creates steam when baking, which aids in leavening and a light, fluffy texture.
Can I add any variations to the basic scone recipe?
Absolutely! Consider adding raisins, currants, or dried cranberries for added flavor and texture. You can also experiment with different flavor extracts.
What's the best way to serve these scones for afternoon tea?
Serve them warm with clotted cream and jam, or alongside other afternoon tea treats like finger sandwiches and cakes. A cup of tea is, of course, essential!
Final Reflection: The Enduring Charm of a Simple Scone
The seemingly simple act of baking a scone connects us to a rich culinary history, and yet, its accessibility makes it a perfect entry point for aspiring bakers today. More than just a recipe, mastering a perfect scone offers a tangible sense of accomplishment and a delicious reward, proving that even the most basic recipes can yield extraordinary results. This accessibility is key to fostering a love of baking, regardless of skill level.
The joy of sharing homemade scones, warm from the oven, with loved ones is a timeless tradition that transcends generations. It's a small act of hospitality, a gesture of warmth and care, that resonates deeply. Baking is at once child's play and adult joy. And love, of course.
This quote perfectly encapsulates the experience of baking these simple scones; it's a process that can be enjoyed by all ages, and the resulting treat is a testament to the love and care put into its creation.
Now, I invite you to roll up your sleeves, gather your ingredients, and embark on your own scone-baking adventure. Don't be intimidated by the simplicity of the recipe; embrace the process, savor the aroma of baking dough, and relish the satisfaction of creating something delicious and meaningful. The perfect scone awaits – and so does the joy of sharing it with those you cherish.
Unleash Your Inner Baker: Scone Success Awaits!
Thanks for taking the time to explore this simple scone recipe! We hope you've gained the confidence to tackle baking with ease. Now, let's put those new skills to the test!
- Bake a batch of scones today! Use the recipe as a starting point, and experiment with different add-ins – cranberries, chocolate chips, even savory cheese! This is your chance to truly personalize your scones.
- Share your scone creations! Snap a photo and tag us on social media – we'd love to see your baking triumphs (and even your learning curves! ).
- Challenge yourself: Try adapting this recipe to create a different type of quick bread – muffins, biscuits, or even savory scones! The possibilities are endless.
So, what delicious adventure will your baking journey take you on next?