
Create Dazzling Metallic Effects on Your Cookies

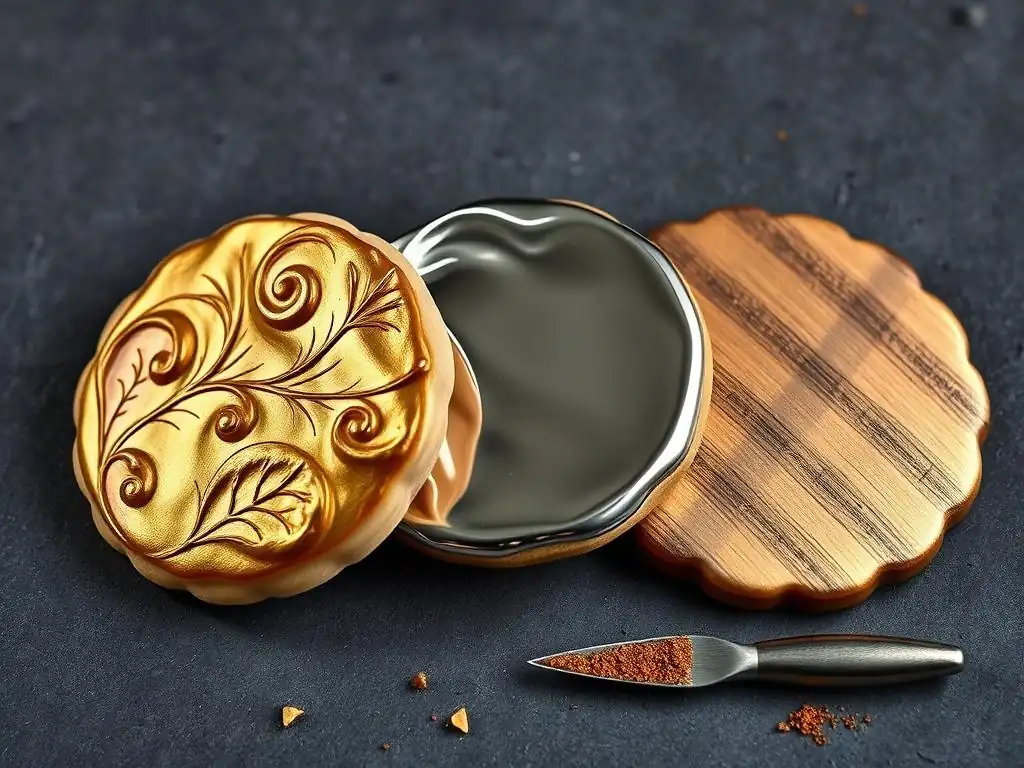
Welcome to BakeWithEase, your haven for all things baking! Ever dreamed of crafting cookies that shimmer and shine? This week, we’re diving into the captivating world of metallic cookie decorating techniques. Prepare to transform ordinary treats into edible masterpieces with our easy-to-follow guide. Intrigued? Let’s explore how to add a touch of dazzling metallic magic to your next baking creation...
- Creating Eye-Catching Metallic Effects on Cookies: A Comprehensive Guide
- Introduction to Metallic Cookie Decorating
- Essential Supplies for Metallic Cookie Designs
- Preparing Cookies for Metallic Finishes
- Metallic Cookie Decorating Techniques: A Step-by-Step Guide
- Advanced Metallic Cookie Decorating Tips and Tricks
- Troubleshooting Common Metallic Cookie Decorating Problems
- Metallic Cookie Design Ideas and Inspiration
- Caring for Your Metallic Decorated Cookies
- Conclusion: Mastering Metallic Cookie Decoration
-
Frequently Asked Questions
- What are the most common metallic edible paints used for cookie decorating?
- Can I use regular craft paint for a metallic effect on cookies?
- What's the best way to apply metallic luster dust to cookies for a smooth finish?
- How do I prevent metallic edible paint from smudging or rubbing off easily?
- Are there alternatives to metallic paint for achieving a similar shiny effect on cookies?
- Final Reflection: The Enduring Allure of Metallic Cookies
- Unleash Your Inner Cookie Artist: Master Metallic Magic!
Adding metallic finishes to your cookies is a fantastic way to transform simple baked goods into stunning edible art. Whether it's the gleam of gold on a holiday snowflake or the subtle shimmer of silver on a delicate floral design, metallic cookie decorating techniques introduce a level of sophistication and visual interest that traditional icing alone often can't achieve. These techniques allow bakers to replicate the look of precious metals, adding a touch of luxury and elegance that makes cookies perfect for special occasions like weddings, anniversaries, or high-end parties.
Beyond just aesthetics, incorporating metallic elements can highlight specific details in your cookie designs, drawing the eye and adding depth. A simple outline painted in gold can make a design pop, while a full coverage of silver or copper can turn a basic shape into a dazzling statement piece. Mastering these metallic cookie decorating techniques opens up a new realm of creative possibilities, enabling you to craft cookies that are not only delicious but also breathtakingly beautiful and memorable.
The allure of shimmer and texture in cookie art lies in its ability to engage more than just the taste buds; it creates a multi-sensory experience. The way light catches the metallic particles, whether from a fine dust or a vibrant paint, adds a dynamic quality to the cookie's surface. This shimmer can range from a subtle, almost pearlescent glow achieved with dry dusting to an intense, mirror-like shine from carefully applied paints. This visual texture adds interest and complexity to the overall design.
Furthermore, combining metallic finishes with different textures, such as smooth royal icing, piped details, or even edible glitter, creates layers of visual and tactile appeal. For instance, a section of a cookie covered in smooth, metallic paint juxtaposed with a textured, matte area provides a striking contrast. Exploring these combinations is a key aspect of advanced metallic cookie decorating techniques, allowing bakers to create truly unique and captivating edible masterpieces that stand out from standard decorated cookies.
Food-Safe Luster Dust: Selecting Colors and Brands
Food-safe luster dust is a fundamental component for achieving metallic effects on cookies. This fine powder, typically made from mica-based pigments, is specifically manufactured for use on edible items. When selecting luster dust, it's crucial to ensure it is labeled as "food-safe" or "edible," as not all craft dusts are safe for consumption. Luster dust comes in a wide spectrum of metallic colors, including various shades of gold (from pale yellow gold to deep antique gold), silver, copper, bronze, and even vibrant metallic blues, greens, and reds.
Choosing the right brands can also make a significant difference in the quality and intensity of the metallic finish. Some popular and reliable brands known for their vibrant and food-safe luster dusts include Rolkem, Sugarflair, and Wilton (specifically their edible ranges). When building your collection, starting with primary metallic colors like gold, silver, and copper is a good approach, as these are versatile and widely used in many metallic cookie decorating techniques. Look for dusts with fine particle size for a smoother finish.
Edible Metallic Paints: Brushes, Palettes, and Application
Edible metallic paints offer an alternative or complementary method to luster dust for creating metallic cookie designs. These paints are typically pre-mixed liquids or gels that contain metallic pigments suspended in a base medium (often alcohol, water, or lemon extract). They provide a more opaque and intense metallic coverage compared to dusts, making them ideal for painting detailed designs, borders, or achieving solid metallic blocks of color.
To effectively apply edible metallic paints, you'll need a set of dedicated food-only brushes. Synthetic brushes with fine tips are excellent for detailed work, while wider, flat brushes are useful for covering larger areas smoothly. A small palette, such as a ceramic plate or a plastic palette specifically for food use, is helpful for mixing colors or thinning paint if needed. The application technique depends on the desired effect; thin coats applied with a brush or sponge can build up opaque coverage, while a fine brush allows for intricate lines and patterns, showcasing advanced metallic cookie decorating techniques.
Stencils and Tools for Intricate Metallic Patterns
Stencils are invaluable tools for adding intricate and consistent metallic patterns to your cookies with ease. They come in countless designs, from geometric shapes and damask patterns to florals and holiday motifs. Using stencils allows you to apply metallic dust or paint precisely, creating clean lines and repeatable designs across multiple cookies, which is particularly useful for large batches for events.
Beyond stencils, other tools can enhance your metallic cookie decorating techniques. Small spatulas or palette knives can be used to spread thicker metallic paints or pastes evenly over stenciled areas. Airbrushes, when used with edible metallic airbrush colors, allow for quick, even application over large surfaces or for creating gradient effects. Precision tools like scribers or toothpicks can be used to remove excess dust or paint and refine details, ensuring your metallic finishes are sharp and professional.
Royal Icing: Achieving the Right Consistency
Royal icing is the standard base for most metallic cookie decorating techniques because it dries hard and smooth, providing an ideal surface for metallic application. Achieving the correct royal icing consistency is paramount. For flooding the cookie surface (creating a smooth base layer), you need a "flood" consistency, which is typically described as counting to 10-15 seconds as a line of icing disappears back into the bowl after being drizzled. If it disappears faster, it's too thin; slower, it's too thick.
For outlining or piping details before applying metallics, a slightly thicker "outline" consistency is needed – it should hold its shape when piped but still be smooth enough to flow without breaking. Using meringue powder or paste as the base, along with powdered sugar and water, is common. The precise ratio of water to powdered sugar will determine the consistency, and tiny adjustments can make a big difference. Practice is key to mastering these consistencies for successful metallic cookie decorating.
Creating a Smooth Icing Base for Metallic Application
A perfectly smooth and level royal icing surface is crucial for metallic finishes to look their best. Any bumps, craters, or unevenness in the base icing will be highlighted by the metallic sheen. After outlining your cookie with outline-consistency icing, flood the area with flood-consistency icing. Use a scribe tool or toothpick to gently spread the icing to the edges and pop any air bubbles. Tapping the cookie gently on the counter also helps the icing settle smoothly and removes trapped air.
Allowing the royal icing to crust or fully dry before applying metallic finishes is absolutely essential. Applying dust or paint to wet or even slightly damp icing will cause smudging, bleeding, and an uneven, dull finish. Aim for a surface that is dry to the touch and firm. For best results with metallic cookie decorating techniques, a full 24 hours of drying time at room temperature is often recommended, especially in humid conditions.
Drying Considerations for Optimal Metallic Adhesion
Proper drying conditions significantly impact how well metallic dusts and paints adhere to the royal icing surface. Humidity is the enemy of dry royal icing. High humidity can prolong drying times and even cause the icing to become sticky, making metallic application difficult and prone to smudging. Drying cookies in a room with a fan circulating air (not blowing directly on the cookies) or using a dehumidifier can drastically speed up the process and ensure a hard, dry surface.
Ideally, cookies should be dried flat on a cooling rack or parchment paper. For metallic cookie decorating techniques involving multiple layers or intricate details, ensuring each layer of icing is sufficiently dry before proceeding is vital. Rushing the drying process can lead to disappointing results, such as cracked icing or metallic finishes that don't adhere properly. Allowing ample drying time, often 6-8 hours for a crusted surface suitable for light dusting, and 24 hours for full durability, is a non-negotiable step for successful metallic effects.
Applying Luster Dust for a Subtle Metallic Glow
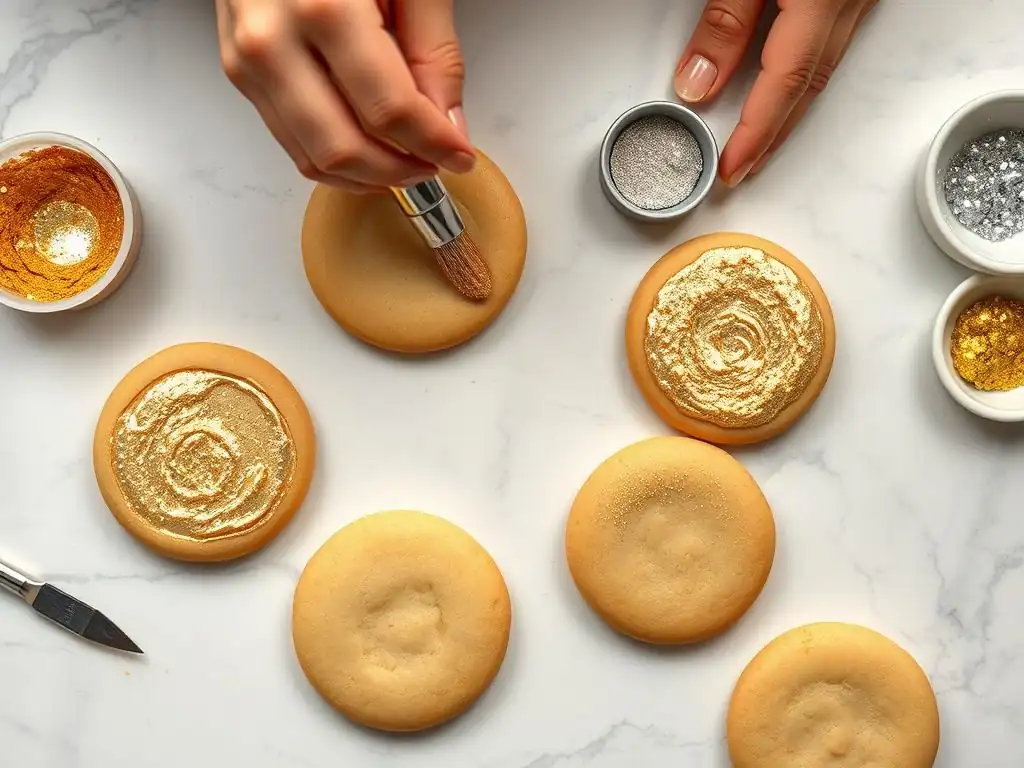
Luster dust can be applied in two primary ways to achieve metallic effects: dry or wet. Dry dusting is perfect for a delicate sheen.
- Gather your supplies: dry, fully-dried royal iced cookie, food-safe luster dust, a soft, dry brush (like a fluffy eyeshadow brush dedicated to food use).
- Dip the tip of your brush into the luster dust, tapping off any excess.
- Gently brush the dust onto the dry royal icing surface using a light hand. Use swirling or back-and-forth motions, depending on the desired effect.
- Build up the color gradually. You can add more layers for a more intense shimmer.
- Use a clean, dry brush to gently brush away any excess dust from areas where you don't want the metallic effect.
Dry dusting is excellent for highlighting textures, adding a subtle shimmer to details like flowers or leaves, or covering a large area with a soft glow. It works best on smooth, fully dried royal icing. The result is a beautiful, slightly translucent metallic finish that catches the light gracefully.
Dry Dusting for a Delicate Sheen
Dry dusting is the simplest method for applying luster dust and yields a beautiful, subtle metallic sheen. It's ideal for adding a touch of glamour without overpowering the design. The key is to use a very soft brush and a light touch. Too much pressure can scratch the dry icing or apply the dust unevenly.
Imagine dusting a delicate white snowflake cookie with a fine silver luster dust using this dry method. The white base remains visible, but the surface shimmers softly, creating a magical, frosty effect. It's a quick technique, perfect for adding a final touch of elegance to a large batch of cookies, like adding a gold shimmer to the edges of graduation cap cookies or a bronze glow to autumn leaf cookies.
Wet Dusting for Intense Color
Wet dusting, also known as painting with luster dust, provides a much more intense and opaque metallic color than dry dusting. This technique involves mixing the luster dust with a liquid medium before applying it with a brush.
- Place a small amount of luster dust onto your palette.
- Add a few drops of clear alcohol (like vodka or grain alcohol, which evaporates quickly) or lemon extract. Avoid water, as it can dissolve the royal icing.
- Mix the dust and liquid with a brush until you achieve a paint-like consistency. It should be smooth and free of lumps, not too thick or too watery.
- Apply the metallic paint mixture to your fully dried royal iced cookie using a brush. Use even strokes to cover the area.
- Allow the first coat to dry completely (alcohol-based paints dry very quickly).
- Apply additional coats as needed to achieve desired opacity and intensity.
- Clean brushes immediately after use with alcohol or a brush cleaner.
Wet dusting is the preferred method for achieving solid gold, silver, or copper areas, painting metallic details, or writing metallic text. It provides a vibrant, metallic finish that truly stands out. For example, painting a solid gold frame around a cookie design or creating bold silver stripes requires this wet application method for maximum impact and shine.
Painting Metallic Details with Edible Paints
Edible metallic paints are pre-mixed and ready to use, offering convenience and consistent color. They are excellent for adding sharp details, fine lines, and opaque metallic coverage.
- Ensure your cookie's royal icing base is completely dry.
- Shake or stir the metallic paint well according to the product instructions.
- Pour a small amount onto your palette.
- Use a dedicated food-only brush to pick up the paint.
- Apply the paint directly to the cookie surface, following your design.
- Allow each coat to dry completely before applying subsequent coats if needed.
- Clean brushes promptly after use.
Painting allows for precision and control. You can create intricate patterns, paint small elements like stars or dots, or add metallic accents to specific parts of your design. This is where metallic cookie decorating techniques can get very detailed and artistic.
Achieving Opaque Coverage with Multiple Coats
For a truly opaque and vibrant metallic finish, particularly with edible metallic paints, applying multiple thin coats is often necessary. A single coat may appear streaky or slightly translucent, especially over darker icing colors.
- Apply a thin, even first coat of metallic paint over the desired area.
- Allow this coat to dry completely. Drying time depends on the paint and humidity, but alcohol-based paints typically dry within minutes.
- Once the first coat is dry, apply a second thin coat in the same manner.
- Repeat with a third coat if necessary until the desired level of opacity and metallic shine is achieved.
- Using multiple thin coats, rather than one thick coat, prevents pooling, dripping, and ensures a smoother, more professional-looking finish.
Consider painting a solid gold heart on a cookie. The first coat might look patchy, but after two or three thin, dry coats, it will have a rich, solid gold appearance. This layering technique is fundamental to achieving high-quality metallic effects with paints.
Creating Fine Lines and Intricate Details
Edible metallic paints are ideal for adding fine lines and intricate details to cookie designs. Their fluid consistency (when thinned correctly) allows for precise application with fine-tipped brushes.
- Use a very fine detail brush (size 000, 00, or 0) specifically for edible paints.
- Ensure the paint is the correct consistency – thin enough to flow smoothly but not so thin that it bleeds. You may need to thin thicker paints with a drop of alcohol or lemon extract.
- Dip just the tip of the brush into the paint.
- Steady your hand (resting your pinky on the cookie or table helps).
- Apply the paint using controlled strokes to create lines, dots, swirls, or other intricate patterns.
- Practice on a piece of parchment paper first to get a feel for the consistency and brush control.
Examples include painting delicate silver veins on a marble-effect cookie, adding tiny gold dots around a border, or writing a personalized message in shimmering copper. These fine details using metallic cookie decorating techniques add incredible value and artistry to your baked creations.
Stencils offer a quick and effective way to apply metallic patterns. They require a completely dry royal icing base.
Applying Luster Dust with Stencils
Applying luster dust with a stencil creates a soft, shimmery pattern.
- Place the dry stencil carefully over your fully dried royal iced cookie. Hold it firmly in place or use stencil holders/magnets.
- Dip a soft, dry brush into food-safe luster dust (like silver or gold). Tap off excess dust.
- Gently pounce or swirl the brush over the open areas of the stencil. Use light pressure.
- For a more intense look, use the wet dusting method (mix dust with alcohol) and gently pounce a brush or sponge over the stencil.
- Carefully lift the stencil straight up to reveal the metallic pattern.
This method is great for creating intricate backgrounds or repeating motifs. Imagine using a damask stencil and gold luster dust to create an elegant pattern on a wedding cookie or a snowflake stencil with silver dust for a holiday cookie. The result is a beautifully patterned, shimmery surface.
Painting Metallic Designs with Stencils
Painting with metallic paints through a stencil yields a more opaque and defined metallic pattern.
- Secure the dry stencil firmly over the fully dried royal iced cookie.
- Place a small amount of edible metallic paint on your palette.
- Use a stencil brush or a small, firm sponge wedge. Dip it into the paint, then dab off excess on the palette or a paper towel until it is almost dry (this prevents bleeding under the stencil).
- Gently pounce or dab the brush/sponge over the open areas of the stencil, applying the paint. Use an up-and-down motion rather than brushing sideways.
- Apply multiple thin layers, allowing each to dry slightly, until the desired opacity is reached.
- Carefully lift the stencil straight up while the paint is still slightly damp but not wet. If you wait until it's completely dry, it might pull.
- Clean the stencil immediately.
This technique is excellent for bold, graphic metallic patterns, such as geometric shapes in copper or a bold silver initial. Using a sponge or a firm stencil brush helps push the paint just enough to cover the area without seeping under the stencil edges, ensuring crisp lines for your metallic cookie decorating techniques.
Combining Metallic Accents with Other Decorating Styles
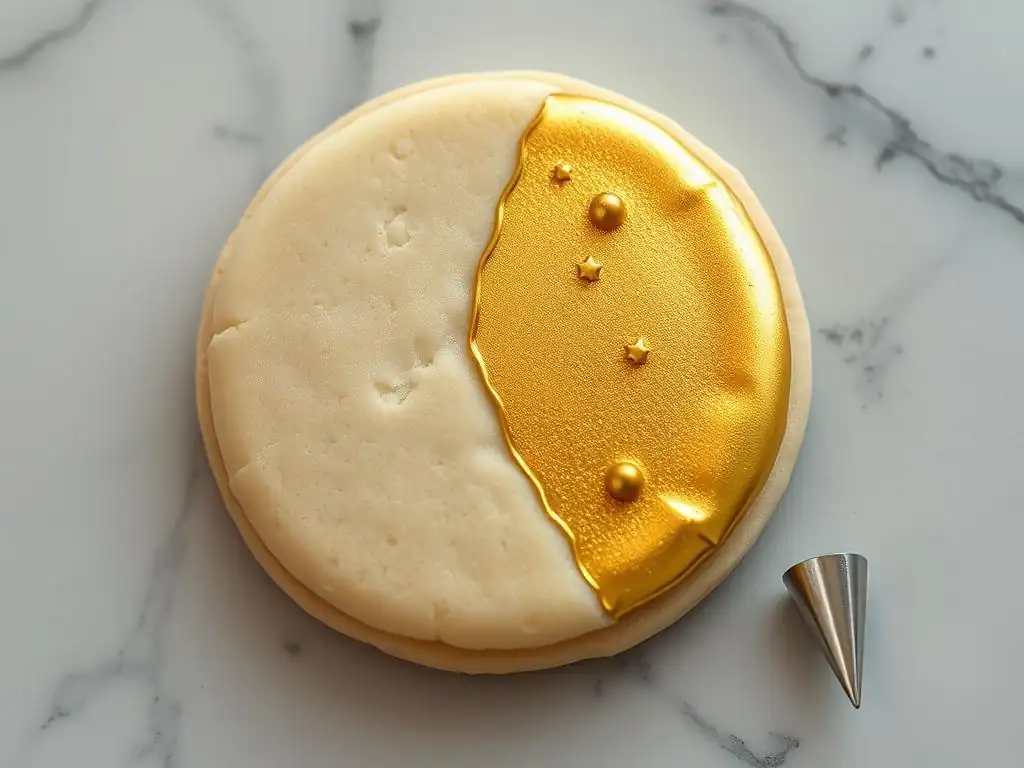
One of the most exciting aspects of metallic cookie decorating techniques is combining them with other decorating styles to create complex and visually rich cookies. For example, you can use metallic paint to add highlights to fondant details, creating a realistic effect on edible flowers or sculpted elements. Pairing matte royal icing sections with shimmering metallic areas provides a striking contrast in texture and finish.
Consider a cookie decorated with a combination of techniques: a base of smooth royal icing, piped details using a different consistency icing, and then selectively applying gold luster dust to highlight the piped swirls. Or, use metallic paints to add details to a cookie decorated with edible markers or airbrushing. This layering of techniques, including metallic finishes, allows for greater artistic expression and results in more dynamic and interesting cookie designs.
Creating Gradient Metallic Effects
Gradient metallic effects add a sophisticated touch, transitioning from a lighter metallic shade to a darker one or from a matte color to a metallic one. This can be achieved using luster dusts or metallic paints.
- For a dust gradient: Apply a darker metallic dust (e.g., antique gold) more heavily on one part of the cookie, then transition to a lighter metallic dust (e.g., pale gold) or even just a shimmering dust on another part, blending them in the middle using a soft brush.
- For a paint gradient: Apply a darker metallic paint on one end and a lighter one on the other. While the paint is still wet, use a clean brush or sponge to gently blend the two colors where they meet. You can also start with a base color (like brown icing) and paint metallic copper over it, applying more copper in one area and less in another to create a gradient effect.
Achieving a smooth gradient requires careful blending. Practice on a plain surface first. This technique is particularly effective on shapes like leaves, feathers, or abstract designs, adding depth and dimension to your metallic cookie decorating.
Marbling Metallic Colors
Marbling with metallic paints creates beautiful, organic patterns reminiscent of stone or abstract art.
- Start with a base of fully dried royal icing.
- Apply drops or lines of two or more metallic edible paint colors (e.g., silver and copper) onto the surface while they are still wet.
- Use a scribe tool, toothpick, or small brush to gently swirl the colors together. Be careful not to dig into the icing base.
- Swirl just enough to create a marbled effect without completely mixing the colors.
- Allow the marbled paint to dry completely.
This technique results in unique patterns on every cookie. For example, marbling gold and silver paints can create an elegant, almost celestial look, perfect for anniversary or New Year's Eve cookies. Marbling adds a touch of unpredictability and artistry to your metallic cookie decorating techniques.
Achieving a Realistic Metallic Texture
Sometimes, you might want your metallic finish to look like actual metal, complete with texture.
- One method is to create texture in the royal icing before applying the metallic finish. For example, use a palette knife to create swirls or rough patches in slightly thicker royal icing and let it dry completely. Then, apply metallic luster dust using the dry brush method, which will highlight the raised textures.
- Alternatively, you can mix luster dust with less liquid to create a thicker paint or paste. Apply this thicker mixture using a brush or palette knife, dabbing or stippling it onto the dry icing to create a textured surface. Once dry, the metallic paste will have a tactile quality.
For instance, creating a distressed copper look on a cookie can involve applying a base color, adding texture with icing, and then dusting with copper luster dust, perhaps adding darker brown or black dust in crevices for an aged effect. These advanced metallic cookie decorating techniques push the boundaries of edible art.
Preventing Smudging and Streaking
Smudging and streaking are common frustrations when working with metallic finishes. The most frequent cause is applying the metallic dust or paint to royal icing that is not fully dry.
- Ensure your royal icing base is completely dry – ideally 24 hours, especially for wet application methods. Test by gently touching an inconspicuous area. It should feel hard and not sticky.
- For wet dusting or painting, use alcohol or lemon extract as your liquid medium, not water. Alcohol evaporates much faster, reducing the risk of dissolving the icing and causing streaks.
- When applying paint with a stencil, use the "dry brush" or "pouncing" method with very little paint on your brush/sponge to prevent bleeding under the stencil, which can look like streaks.
- Handle cookies with metallic finishes carefully once applied. The metallic layer can be delicate.
If you encounter smudging while working, stop and let the area dry completely before attempting to touch it up. Prevention through proper drying is the best strategy for flawless metallic cookie decorating techniques.
Correcting Uneven Metallic Coverage
Uneven coverage can result in patchy or dull metallic areas.
- When dry dusting, ensure your brush is evenly loaded with dust and use consistent pressure over the surface. Build up color gradually with multiple light layers rather than one heavy application.
- For wet dusting or painting, mix your paint to a smooth, consistent consistency. If it's too thick, it can leave brush strokes; if too thin, it might not cover evenly.
- Apply metallic paints in thin, even coats, allowing each coat to dry fully before applying the next. This layering technique helps build opaque, even coverage.
- If you have small patchy areas after drying, you can often gently touch them up with a fine brush and a bit more paint or dust. For large uneven areas, sometimes the best solution is to re-flood that section with royal icing (if possible) and start the metallic application over once it's dry.
Patience and practice are key to achieving smooth, even results with metallic cookie decorating techniques.
Avoiding a Dull or Chalky Finish
A dull or chalky metallic finish is usually a sign that the metallic particles haven't bonded or are obscured.
- Using water instead of alcohol/lemon extract for wet dusting can sometimes lead to a dull finish because water can react differently with the icing or the dust itself. Always use an alcohol-based liquid for the brightest shine.
- Applying metallic finishes to icing that isn't fully dry can result in a chalky appearance as the dust/paint mixes with the still-soft icing.
- Using too much dust in dry dusting can sometimes look chalky rather than shimmery. Use a light hand and build up layers.
- Ensure you are using high-quality, food-safe luster dust or metallic paint specifically designed for this purpose. Craft dusts will not provide the same vibrant, non-chalky finish.
If your metallic finish looks dull, sometimes a very light second coat applied correctly can improve the shine. For painted areas, ensuring the paint is well-mixed and applied in thin coats helps maintain its vibrancy.

Gold and silver are classic choices for wedding cookies, symbolizing elegance and celebration.
- Imagine heart-shaped cookies flooded in white royal icing, with delicate silver lace stenciled over them using silver luster dust. Add a single gold painted initial in the center.
- Another idea is hexagon cookies marbled with white and pale gray royal icing, then edged entirely in bright gold metallic paint.
- Consider tiered "cake" cookies, with each layer iced in white and adorned with different metallic cookie decorating techniques – perhaps a base layer with a stenciled silver pattern, a middle layer with gold painted scrolls, and a top layer with a simple gold border and silver dragees.
These designs leverage the timeless appeal of gold and silver to create sophisticated edible favors or dessert table features that perfectly complement wedding themes.
Copper and bronze metallic finishes bring warmth and a touch of rustic charm, perfect for autumn or holiday themes.
- Think of leaf-shaped cookies flooded in deep red or orange royal icing, then dry dusted with copper luster dust to highlight the veins and edges, giving them a beautiful autumnal glow.
- Gingerbread man cookies can have their buttons painted in metallic bronze, or their outlines traced in shimmering copper paint.
- Pinecone-shaped cookies iced in brown can be dry dusted with bronze luster dust to mimic the texture and color of real pinecones.
These earthy metallic tones add a cozy, inviting feel to holiday baking, showcasing versatile metallic cookie decorating techniques beyond traditional gold and silver.
Metallic finishes are ideal for creating striking, modern geometric cookie designs.
- Flood square or hexagonal cookies in a solid color like black, white, or a vibrant jewel tone. Once dry, use painter's tape or straight-edge stencils to mask off sections and paint bold metallic triangles or stripes in silver, gold, or even a metallic blue.
- Create patterns using multiple metallic colors within a single geometric shape. For instance, a large circle cookie could be divided into segments with royal icing lines, and each segment painted with a different metallic color – gold, silver, copper, bronze – for a segmented metallic look.
- Use stencils with intricate geometric patterns and apply metallic paint or dust for a detailed, modern effect on a smooth icing base.
These designs emphasize clean lines and graphic impact, using metallic cookie decorating techniques to create bold, contemporary edible art.
Storage for Longevity
Proper storage is essential to maintain the appearance of your metallic decorated cookies. Once the metallic finishes are completely dry (which can take 24 hours or more), store the cookies in a single layer within an airtight container. If you must stack them, place a layer of parchment paper or wax paper between each cookie to prevent the metallic finish from sticking or smudging.
Store the container at room temperature, away from direct sunlight or heat, which can affect both the cookie's freshness and the metallic finish. Avoid refrigerating or freezing cookies with metallic finishes if possible, as condensation upon thawing can dull or damage the metallic sheen. If refrigeration is necessary, ensure the cookies are very well sealed and allow them to come to room temperature slowly in the sealed container before opening.
Handling to Prevent Damage
Metallic finishes, especially those applied with luster dust, can be delicate and prone to smudging or scratching if not handled carefully.
- Always handle metallic decorated cookies by their edges or from the bottom, avoiding touching the decorated surface directly.
- When packaging cookies individually, use cellophane bags or boxes that prevent the cookie surface from rubbing against the packaging or other cookies.
- If transporting cookies, ensure they are packed securely in a box to prevent shifting, which can cause damage to the metallic details. Placing a non-slip mat or crumpled paper around the cookie container can help.
Educating recipients on how to handle the cookies is also a good idea, especially for gifts or favors. Gentle handling preserves the beauty and integrity of your metallic cookie decorating techniques.
Mastering metallic cookie decorating techniques adds a dazzling dimension to your baking repertoire. From subtle shimmers achieved with dry luster dusting to bold, opaque statements painted with edible metallics, the possibilities are vast. By understanding the essential supplies, preparing your cookies properly, practicing various application methods, and learning troubleshooting tips, you can confidently create cookies that sparkle and shine.
Experiment with different colors, combinations, and advanced techniques like gradients and marbling. The world of metallic cookie decorating is limited only by your imagination. With patience and practice, you'll be creating eye-catching, edible metallic masterpieces that impress everyone who sees (and eats!) them. Happy baking and dazzling decorating!
Frequently Asked Questions
The most common metallic edible paints include luster dust mixed with a liquid like lemon extract or vodka, and pre-made edible metallic paints. These provide a shimmery, metallic finish.
No, you should never use regular craft paint on cookies. Only use edible metallic paints or luster dusts specifically designed for food consumption to avoid serious health risks.
For a smooth finish, mix luster dust with a high-proof alcohol or lemon extract. Apply thin layers using a soft brush, allowing each layer to dry before applying the next. This prevents a streaky or uneven look.
How do I prevent metallic edible paint from smudging or rubbing off easily?
Allow the metallic paint to fully dry before handling the cookies. You can also use a food-safe sealant spray to help protect the finish, although this may slightly alter the color and sheen.
Yes, you can use edible glitter applied to wet icing for a sparkly effect. Another option is using metallic edible markers for detailed lines and accents, but these won't provide the same overall metallic sheen.
The art of creating dazzling metallic effects on cookies isn't just a fleeting trend; it's a testament to the enduring human desire to transform the ordinary into the extraordinary. These shimmering, eye-catching treats offer a unique way to elevate baking from a simple hobby to a form of artistic expression, bringing joy and wonder to both the baker and the recipient. The techniques explored in this article, from luster dust application to edible metallic paints, provide a gateway to unlocking a world of creative possibilities.
The impact of metallic cookie decorating extends beyond the individual creation; it's woven into the fabric of celebrations and special occasions. These cookies aren't just desserts; they're visual statements, adding a touch of glamour and sophistication to any gathering. They represent a commitment to detail and artistry, a desire to make something beautiful and memorable. As the saying goes, We don't eat just to live; we live to eat.
And these metallic cookies elevate the "eating" experience to a whole new level of sensory delight.
Now, it's your turn. Don't just admire these shimmering creations; create them! Experiment with the techniques outlined in this article, let your imagination run wild, and discover the joy of transforming simple cookies into miniature works of art. Embrace the sparkle, the shine, the sheer magic of metallic cookie decorating. The possibilities are as limitless as your creativity. So, grab your supplies, and let the metallic magic begin!
Thanks for joining us on this delicious journey into the world of metallic cookie decorating! We hope you've gained some fantastic new techniques to elevate your baking game. Ready to put your newfound skills to the test?
- Create your masterpiece! Try out one of the metallic techniques from the article – we especially recommend the gold leaf effect on those chocolate chip cookies!
- Share your sparkly creations! Post a picture of your metallic cookies on social media and tag us – we’d love to see your dazzling results!
- Dive deeper into our metallic icing recipes by exploring our extensive recipe library (on bakewithease.com). You might discover a new favorite!
What stunning metallic effect will you try first?