
Achieving Golden Brown Edges: Beginner Baking Time Tips


Welcome to BakeWithEase, your kitchen companion for all things baking! Ever wondered how to achieve those coveted, irresistible golden brown edges that elevate a simple bake to something truly special? You're in the right place. We're diving deep into simple techniques and timings perfect for beginner bakers, unlocking the secrets to that professional-looking finish. Curious to learn more and transform your baking? Let's get started!
- Introduction to Beginner Baking Golden Brown Edges: Why It Matters for Classic Cookies
- Essential Beginner Baking Time Tips for Achieving Golden Brown Edges
- Techniques to Master Golden Brown Edges in Classic Cookie Baking
- Common Challenges Beginners Face When Aiming for Golden Brown Edges
- Enhancing Golden Brown Edges: Ingredients and Their Impact on Baking Time
- Step-by-Step Guide to Baking Classic Cookies with Perfect Golden Brown Edges
- Tips for Maintaining Golden Brown Edges After Baking
- Conclusion: Mastering Beginner Baking Golden Brown Edges for Classic Cookies
-
Frequently Asked Questions
- What's the best oven temperature for achieving golden brown edges in beginner baking?
- How can I prevent my baked goods from burning while trying to achieve golden brown edges?
- What type of baking pan is best for achieving even golden brown edges?
- How does the placement of the baking rack in the oven affect the browning of edges?
- What ingredients contribute most to achieving golden brown edges in baked goods?
- Final Reflection: The Sweet Science of Golden Brown
- Unlock Your Inner Baker: Take the Next Step!
Achieving those perfect golden brown edges on your classic cookies isn't just about aesthetics; it's a key indicator of successful baking. For beginner bakers, understanding this visual cue is fundamental to mastering cookie texture and flavor. It signals that the edges have caramelized just right, creating that delightful crispness that contrasts beautifully with a soft, chewy center.
Focusing on beginner baking golden brown edges helps you learn how to control your oven and understand the baking process. It's a tangible result you can see and feel, providing immediate feedback on your baking time and temperature. By paying attention to this specific aspect, beginners can significantly improve the consistency and quality of their classic cookie recipes.
Understanding the Importance of Golden Brown Edges in Baking
Golden brown edges are a sign that the Maillard reaction and caramelization have occurred. The Maillard reaction is a complex chemical process involving amino acids and reducing sugars that gives browned foods their distinctive flavor and aroma. Caramelization, on the other hand, is the browning of sugars through heat, contributing sweetness and a slightly nutty flavor. Both reactions happen as the edges of the cookie, which heat up fastest due to their thinner profile compared to the center, reach specific temperature thresholds.
This browning isn't merely cosmetic; it's a crucial indicator of doneness. When the edges turn golden, it means enough moisture has evaporated from that part of the cookie, and the sugars and proteins have transformed. For beginner baking golden brown edges, this visual cue is more reliable than relying solely on a timer, as oven temperatures can vary. Learning to spot this color change helps prevent underbaking (pale, soft edges) or overbaking (dark, burnt edges).
How Perfect Edges Enhance Texture and Flavor in Beginner Baking Recipes
The contrast between a crispy, golden brown edge and a softer, often chewy center is a hallmark of many beloved classic cookies, like chocolate chip or peanut butter cookies. The fully baked edges provide structure and a satisfying crunch, while the slightly less baked interior remains tender and moist. This textural interplay is a significant part of the eating experience.
Furthermore, the caramelization that creates the golden color also develops deeper, more complex flavors. The sugars in the cookie dough transform from simple sweetness into richer, more nuanced notes. This enhanced flavor at the edges complements the overall taste of the cookie, adding depth that wouldn't be present if the cookie were uniformly pale and soft. Mastering beginner baking golden brown edges directly contributes to a more delicious final product.
Essential Beginner Baking Time Tips for Achieving Golden Brown Edges
Optimizing baking time is paramount for achieving those coveted golden brown edges. It's a skill that comes with practice, but starting with a few key principles can set beginners on the right path. Understanding how long different cookies typically take and what factors influence that time is essential.
The goal is to bake the cookie just long enough for the edges to brown and set while the center remains slightly soft or chewy, depending on the recipe. This balance is often achieved within a specific time window, which can be surprisingly narrow. Paying close attention to the clock, but more importantly, to the visual cues as the timer approaches the minimum suggested time, is crucial for successful beginner baking golden brown edges.
For many standard drop cookies, such as chocolate chip or oatmeal raisin cookies, the ideal baking time at 350°F (175°C) often falls between 8 and 12 minutes. Thinner cookies, like shortbreads or some sugar cookies, might bake faster, potentially in 10-15 minutes at a slightly lower temperature like 325°F (160°C). Larger or thicker cookies will naturally require longer baking times, perhaps 12-15 minutes or more.
It's vital to remember that these are general guidelines. Factors like the exact size and thickness of your cookies, the type of baking sheet used, and the accuracy of your oven temperature will all influence the actual time needed. Always start checking your cookies at the lower end of the suggested time range. For instance, if a recipe suggests 10-12 minutes, check at 10 minutes to see if the beginner baking golden brown edges are starting to form.
How Oven Temperature Affects Browning and Edges in Beginner Baking
Oven temperature is a critical factor in how quickly and evenly your cookie edges brown. Baking at the commonly recommended temperature of 350°F (175°C) usually provides a good balance, allowing the cookie to bake through while the edges brown steadily. If the oven is too hot (e.g., 375°F or 190°C), the edges can brown or even burn rapidly before the center is fully baked, resulting in a cookie that's crispy or burnt on the outside but raw inside.
Conversely, baking at too low a temperature (e.g., 300°F or 150°C) will slow down the browning process significantly. While this might result in more evenly baked cookies, they can spread excessively and become thin or dry before the edges achieve a golden color. Using an oven thermometer is highly recommended for beginners, as many home ovens can be off by as much as 25-50°F (approx. 15-30°C), which makes a huge difference in achieving perfect beginner baking golden brown edges.
Recognizing Visual and Tactile Cues for Perfectly Baked Edges
Learning to trust your eyes is key to mastering beginner baking golden brown edges. As cookies bake, the edges will typically be the first part to change color. Look for a noticeable shift from pale dough to a light or medium golden brown hue around the perimeter of the cookie. The color should be consistent around the edge, and the edges may appear slightly set or firmer than the center.
Beyond the visual, a gentle tactile test (using a spatula, not your finger!) can help. If the edges feel relatively firm when gently nudged or lifted slightly with a thin spatula, while the center still looks a bit soft or puffy, they are likely done or very close. Remember that cookies continue to bake slightly from residual heat after being removed from the oven, so it's often best to take them out when the edges are golden but the center still looks just a tiny bit underdone.
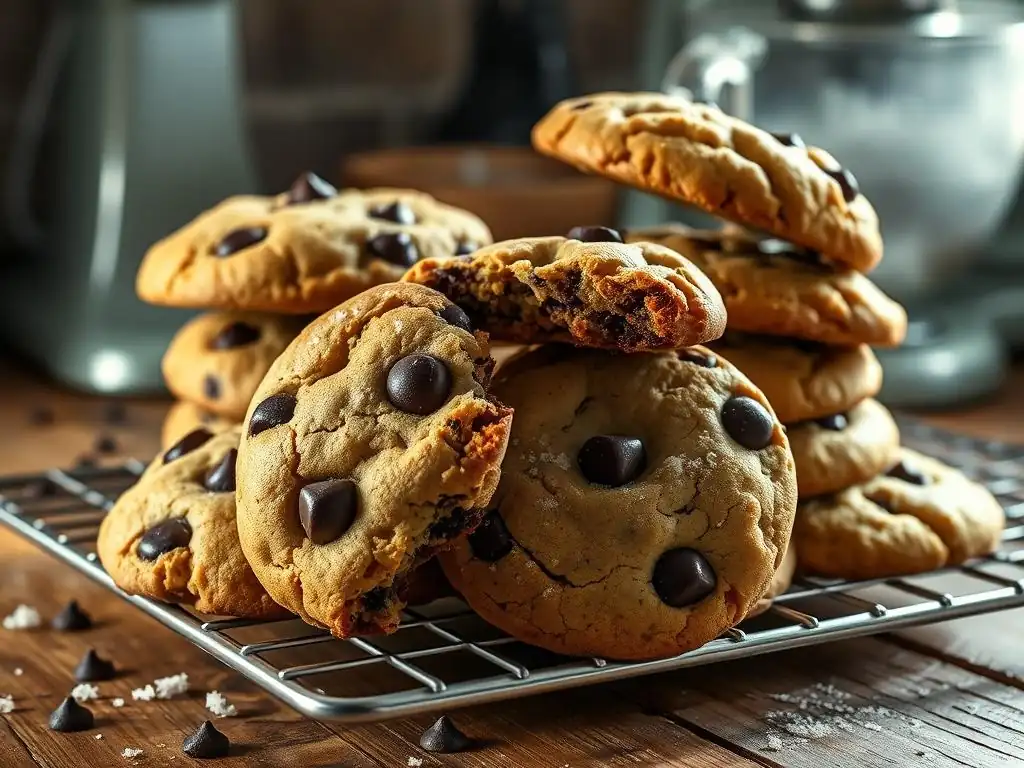
Beyond just time and temperature, several techniques related to dough preparation and equipment can significantly influence your ability to achieve consistent beginner baking golden brown edges. Attention to detail before the cookies even hit the oven can make a big difference in the final outcome.
These techniques focus on ensuring the cookies bake evenly and that the heat is distributed optimally. From how you shape the dough to the surface you bake on, each step plays a role in promoting uniform browning and achieving that desirable crispness around the edges.
Preparing Dough Consistently for Even Browning of Edges
Consistency in dough preparation is fundamental for achieving uniform beginner baking golden brown edges. The most important aspect is ensuring that each cookie is roughly the same size and thickness. Using a cookie scoop is an excellent way to achieve this; a 1.5-inch diameter scoop yields approximately 1.5-ounce cookies, which will bake more evenly than irregularly sized ones.
Additionally, chilling cookie dough is a technique that greatly helps with achieving consistent browning. Chilling the dough for at least 30 minutes (or even several hours) allows the fats to firm up. This slows down the rate at which the cookies spread in the oven, giving the edges and centers more time to bake through evenly before the edges become too thin and burn. Chilled dough results in thicker cookies that often develop better beginner baking golden brown edges.
The dimensions of your cookies have a direct impact on how they bake and where the browning occurs. Thinner cookies, like those pressed flat or made from very soft, spreadable dough, will heat up and bake through quickly. This means their edges can become golden brown very fast, potentially before the center is fully cooked if they are too thick, or they can become uniformly crispy if they are thin enough.
Thicker cookies, such as those scooped high or made from chilled dough, take longer for heat to penetrate to the center. This allows the edges more time to brown and crisp up while the interior bakes to a soft or chewy consistency. Understanding that a 1/4-inch thick cookie bakes differently than a 1/2-inch thick one is crucial for adjusting baking time and achieving the desired beginner baking golden brown edges for your specific recipe.
Using Baking Sheets and Parchment for Optimal Edge Crispness
The type of baking sheet you use significantly affects how the bottom and edges of your cookies brown. Light-colored, heavy-gauge aluminum baking sheets are generally recommended because they reflect heat, promoting even baking and preventing the bottoms and edges from browning too quickly or burning. Darker or thinner sheets absorb more heat, which can lead to overly dark or burnt bottoms and edges.
Using parchment paper or a silicone baking mat to line your baking sheets is also highly beneficial. These liners prevent cookies from sticking, which is especially important for delicate cookies. More importantly, they provide an even surface that helps regulate heat transfer from the sheet to the cookie, contributing to more consistent beginner baking golden brown edges and preventing excessive spread, which can make edges too thin and prone to burning.
Common Challenges Beginners Face When Aiming for Golden Brown Edges
Even with the right techniques, beginners can encounter issues when trying to achieve perfect golden brown edges. These challenges often relate to timing, temperature accuracy, or inconsistencies in dough handling. Identifying these common problems and knowing how to troubleshoot them is key to improving your baking results.
Understanding what went wrong when cookies don't turn out as expected is a valuable part of the learning process. Whether the edges are too pale, too dark, or unevenly colored, there are usually specific reasons and straightforward solutions to get you back on track towards mastering beginner baking golden brown edges.
Avoiding Overbaking: Signs and Solutions for Beginners
One of the most common challenges is overbaking, which results in edges that are too dark, potentially even black, and a cookie that is hard or crumbly throughout. The primary sign is the color – the edges will be darker than the desired golden brown, perhaps even deep brown or black. The cookie will also feel firm when gently pressed, not just at the edges, but towards the center as well.
The solution is to reduce the baking time and ensure you are checking the cookies earlier than the recipe's maximum suggested time. If your recipe says bake for 10-12 minutes, start checking at 9 minutes. If your oven runs hot (use an oven thermometer to check! ), you might need to reduce the temperature by 25°F (approx. 15°C) or significantly decrease the baking time. Always remove cookies when the beginner baking golden brown edges look just right, even if the center seems slightly underdone, as they will continue to set on the hot pan.
Underbaked cookies are typically pale, soft, and may collapse or look greasy when moved from the baking sheet. If you catch this immediately after removing them from the oven, you can sometimes save them. Carefully slide the cookies back onto the hot baking sheet and return them to the oven for an additional 1-3 minutes, checking frequently for those developing golden brown edges.
However, once cookies have cooled significantly, it's very difficult to "re-bake" them to achieve the desired texture without drying them out completely. The best approach is prevention: rely on visual cues (the golden brown edges!) and tactile checks before removing them from the oven. If an entire batch is underbaked, it's a sign you need to increase your baking time slightly or verify your oven temperature for the next batch to ensure better beginner baking golden brown edges.
Troubleshooting Uneven Browning and Edge Texture Issues
Uneven browning, where some cookie edges are golden and others are pale or burnt on the same sheet, is often caused by hot spots in your oven or inconsistent cookie sizing. If cookies are placed too close together, they can also steam rather than bake and brown properly.
To troubleshoot uneven browning, try rotating your baking sheet halfway through the baking time (e.g., if baking for 10 minutes, rotate the sheet after 5 minutes). This helps expose all sides of the sheet to the oven's heat more evenly. Ensure cookies are spaced at least 1-2 inches apart on the baking sheet to allow for proper air circulation and spread.
Double-check that your cookies are uniformly sized and shaped before baking. Persistent unevenness might indicate a need to calibrate your oven or use an oven thermometer to understand its hot and cool zones, which is helpful for consistent beginner baking golden brown edges.
Enhancing Golden Brown Edges: Ingredients and Their Impact on Baking Time

The ingredients you use in your cookie dough play a significant role in how the cookies bake, spread, and brown. Different types of sugar, fats, and leavening agents affect the dough's structure, moisture content, and how it reacts to heat, all of which influence the development of golden brown edges.
Understanding the function of key ingredients helps you predict how a recipe will behave and make adjustments if needed. This knowledge is valuable for beginners looking to consistently achieve specific textures, including that desirable crispness around the perimeter provided by well-formed beginner baking golden brown edges.
The type of sugar used has a direct impact on browning. Granulated sugar contributes to spread and crispness. When heated, it caramelizes, helping to create those firm, golden brown edges. Recipes using primarily granulated sugar often result in cookies that are crisp throughout or have very defined, crisp edges.
Brown sugar, which contains molasses, adds moisture and chewiness to cookies. The molasses also contains compounds that accelerate the Maillard reaction and caramelization, resulting in a richer, darker golden brown color at the edges and a chewier texture compared to cookies made only with granulated sugar. Many classic cookie recipes utilize a blend of brown and white sugar to achieve a balance of spread, chewiness, and optimal beginner baking golden brown edges.
The Effect of Butter and Fats on Achieving Crispy, Golden Edges
The state and type of fat used are crucial for cookie texture and edge formation. Creaming softened butter with sugar incorporates air, leading to puffier cookies that spread less and have softer centers, potentially with less pronounced golden brown edges.
Using melted butter, on the other hand, results in a denser dough with less air. This type of dough typically spreads more in the oven, creating thinner cookies with wider, crispier golden brown edges. The fat itself also helps tenderize the cookie by shortening gluten strands, preventing a tough texture and allowing the edges to crisp up properly during baking. The choice between softened and melted butter significantly influences the final beginner baking golden brown edges.
Using Leavening Agents to Control Texture and Edge Formation
Leavening agents like baking soda and baking powder affect how much cookies spread and rise, which in turn influences the thickness and structure of the edges. Baking soda, which requires an acidic ingredient (like brown sugar or molasses) to activate, promotes spread and creates a more open crumb structure. This can lead to thinner cookies with more surface area exposed to heat, encouraging the formation of golden brown edges.
Baking powder, often double-acting, provides lift and makes cookies puffier. Cookies made with baking powder tend to spread less than those made with baking soda, resulting in thicker cookies. This can mean the edges take longer to brown relative to the center baking through, impacting the final beginner baking golden brown edges texture. Understanding the role of each helps predict the cookie's structure and how it will bake.
Putting all the pieces together into a simple process can help beginners consistently achieve those beautiful golden brown edges. This step-by-step guide focuses on preparation, execution, and monitoring during the baking process, incorporating the tips discussed earlier.
Following a routine helps minimize variables and allows you to focus on the key indicators of doneness. By paying attention at each stage, you increase your chances of success in achieving perfect beginner baking golden brown edges on your classic cookies.
Preparing Your Workspace and Ingredients for Consistent Results
Before you even start mixing, prepare your baking environment. Preheat your oven to the temperature specified in the recipe (e.g., 350°F/175°C) and verify it with an oven thermometer. This step takes time, often 15-20 minutes, and is crucial for accurate baking. Line your baking sheets with parchment paper or silicone mats. Have your cookie scoop ready.
Ensure all your ingredients are measured accurately and are at the correct temperature as specified by the recipe (e.g., softened butter, room temperature eggs). Accurate measurements are foundational; for example, using too much flour can result in thicker cookies that don't spread enough for optimal beginner baking golden brown edges. Organize your workspace so ingredients and tools are easily accessible.
Setting the Right Oven Temperature and Using Timers Effectively
Set your oven to the recipe's temperature and give it ample time to fully preheat. Relying on the oven's indicator light isn't always sufficient; an external thermometer provides a more accurate reading. Baking in an oven that hasn't reached the correct temperature can lead to excessive spread or underbaking.
Set your timer for the minimum baking time suggested in the recipe. For instance, if the recipe says "bake for 10-12 minutes," set your timer for 10 minutes. Use the timer as a prompt to check the cookies, not as the definitive end point. This approach ensures you are observing the cookies' progress and can pull them out at the exact moment their beginner baking golden brown edges are perfectly formed.
Once the timer goes off at the minimum suggested time, open the oven door and carefully observe your cookies. Are the edges starting to turn golden brown? Do they look set? If not, close the door and set the timer for another 1-2 minutes. Continue checking in short increments until the edges reach the desired color.
Remember that thicker or larger cookies will take longer than thinner or smaller ones, even from the same batch of dough. If you've made different sizes, you'll need to adjust the baking time for each, or ideally, bake similar sizes together on one sheet. Pay attention to how your specific oven bakes and make mental notes or written records for future batches to fine-tune the process for consistent beginner baking golden brown edges.
Tips for Maintaining Golden Brown Edges After Baking

Achieving those perfect golden brown edges is only half the battle; maintaining their crispness after baking is just as important for the best cookie experience. Improper cooling or storage can quickly turn crispy edges soft and negate all your careful baking efforts.
Fortunately, there are simple techniques you can use once the cookies are out of the oven to help preserve that delightful texture. These steps ensure that the moisture content stabilizes correctly, keeping your beginner baking golden brown edges just right until you're ready to enjoy them.
Proper Cooling Techniques to Preserve Edge Crispness
Once you remove the baking sheet from the oven, do not immediately transfer the cookies to a cooling rack. Allow them to rest on the hot baking sheet for 2-5 minutes. During this time, the cookies continue to cook slightly from the residual heat of the pan, which helps the centers set while the golden brown edges solidify their crispness.
After the initial resting period on the baking sheet, carefully transfer the cookies to a wire cooling rack using a thin spatula. A wire rack allows air to circulate all around the cookie, including the bottom. This circulation prevents steam from getting trapped underneath, which can make the bottoms and edges soft or soggy. Let the cookies cool completely on the rack before storing them.
To keep cookies with crispy golden brown edges at their best, store them in an airtight container at room temperature. Ensure the cookies are completely cooled before storing, as storing warm cookies will create condensation in the container, making them soft.
For optimal crispness, store cookies with golden brown edges separately from soft or chewy cookies. Moisture from soft cookies will transfer to crisp ones, making them lose their texture. If you need to stack crispy cookies in a container, place a piece of parchment paper between the layers to prevent them from sticking and help maintain their beginner baking golden brown edges.
Mastering the art of baking delicious classic cookies often comes down to achieving that perfect balance of texture and flavor, and the golden brown edge is a key indicator of success. For beginners, focusing on this specific visual cue provides a tangible goal and helps demystify the baking process. It's about more than just following a recipe; it's about learning to read your cookies and understand how time, temperature, and ingredients interact.
Achieving beginner baking golden brown edges signifies that your cookies have undergone the necessary chemical transformations to develop complex flavors and achieve that desirable crisp-chewy contrast. By paying attention to the color and feel of the edges as they bake, you gain confidence and control in the kitchen, leading to more consistent and satisfying results with every batch of classic cookies.
Recap of Key Baking Time Tips for Achieving Perfect Edges
Let's quickly recap the essential tips for achieving perfect beginner baking golden brown edges:
- Always preheat your oven thoroughly and consider using an oven thermometer for accuracy.
- Set your timer for the minimum suggested baking time and start checking your cookies early.
- Learn to recognize the visual cue of golden brown edges – this is more reliable than the timer alone.
- Ensure consistent cookie size and thickness for even baking.
- Use appropriate baking sheets (light-colored) and line them with parchment paper.
- Understand how ingredients like different sugars and fats influence spread and browning.
- Allow cookies to cool briefly on the baking sheet before transferring to a wire rack.
- Store crispy cookies properly in an airtight container once completely cooled.
Encouragement to Practice and Experiment with Baking Times and Techniques
Baking is a skill that improves with practice. Don't be discouraged if your first batch doesn't have perfectly uniform beginner baking golden brown edges. Each attempt is a learning opportunity. Note what worked and what didn't. Was your oven temperature accurate? Did you check them soon enough?
Experiment with slight adjustments in baking time (30 seconds or a minute can make a difference!) or try rotating your baking sheet. Pay attention to how different recipes, even for the same type of cookie, might produce slightly different results due to ingredient ratios. Embrace the process of discovery – soon, you'll be consistently achieving those beautiful, delicious golden brown edges on all your classic cookies!
Frequently Asked Questions
What's the best oven temperature for achieving golden brown edges in beginner baking?
The ideal temperature often depends on the recipe, but generally, baking at a slightly higher temperature (around 375°F or 190°C) can help promote golden brown edges. Always check your recipe for specific instructions.
How can I prevent my baked goods from burning while trying to achieve golden brown edges?
Keep a close eye on your baked goods, and consider using parchment paper or a silicone baking mat. You can also tent the item with foil if the edges are browning too quickly.
What type of baking pan is best for achieving even golden brown edges?
Lighter-colored metal pans tend to promote more even browning. Avoid dark or nonstick pans, which can cause the edges to brown too quickly and potentially burn.
How does the placement of the baking rack in the oven affect the browning of edges?
Placing the baking rack in the center of the oven is usually best for even browning. However, moving it slightly higher can encourage browning on top and edges, but watch carefully.
What ingredients contribute most to achieving golden brown edges in baked goods?
Ingredients like butter, sugar, and eggs contribute significantly to browning. The Maillard reaction, a chemical reaction between amino acids and reducing sugars, is responsible for the desirable golden color.
Final Reflection: The Sweet Science of Golden Brown
The pursuit of the perfect golden-brown edge isn't just about aesthetics; it's a testament to understanding the fundamental principles of baking. Achieving that beautiful, caramelized crust signifies mastery over heat, timing, and ingredient interaction – a skill that elevates any baked good from good to truly exceptional. This journey into beginner baking, focusing on achieving those coveted golden edges, is more than just a recipe; it's a gateway to a deeper appreciation for the culinary arts.
The impact of mastering even this seemingly small detail extends far beyond the kitchen. It's about building confidence, embracing experimentation, and understanding the subtle nuances that transform ingredients into something truly delicious. The satisfaction of seeing that perfect color develop is incredibly rewarding, a tangible representation of patience and precision. As Julia Child wisely said, Find something you're passionate about and keep tremendously interested in it.
For me, that passion lies in the transformative power of baking, and the golden-brown edge is a symbol of that transformation.
Now, it's your turn. Don't be afraid to experiment with different oven temperatures, baking times, and even pan types. Embrace the occasional misstep – they're valuable learning experiences. Remember the joy of that first perfectly browned cookie, that first golden-brown crust on your loaf of bread. Let that feeling inspire you to continue exploring the world of baking, one golden-brown edge at a time. The journey is as rewarding as the destination, and the possibilities are endless.
Unlock Your Inner Baker: Take the Next Step!
Thanks for taking the time to explore the world of perfectly golden-brown edges! We hope you gained valuable insights into achieving that coveted bake. Ready to put your new knowledge into practice?
- Bake your dream creation: Choose your favorite recipe (or try a new one!) and focus on mastering those edge-browning techniques. Remember the importance of oven temperature and rotation!
- Share your baking triumph: Post a picture of your perfectly browned masterpiece on social media and tag us @BakeWithEase – we'd love to see your results!
- Explore our recipe archives: Dive into our collection of beginner-friendly recipes designed to build your confidence in the kitchen. You’ll find tons of inspiration there!
What delicious treat will you bake first to showcase your newfound baking mastery?