
Flaky Scones Made Easy: No Fuss Recipe


Welcome to BakeWithEase, your haven for effortless baking! Ever dreamt of perfectly flaky scones, but felt intimidated by the process? You're in the right place. Discover our easy flaky scone recipe and unlock the secrets to baking success, no matter your skill level. Get ready to impress your friends and family with these delightful treats – and the best part? It's simpler than you think. Intrigued? Let's get baking!
- BakeWithEase Presents: Your Guide to Perfect Easy Flaky Scones
- Why This Easy Flaky Scone Recipe Works
- The Secret to Extra Flaky Scones: Key Techniques
- Easy Flaky Scone Recipe: Step-by-Step Instructions
- Tips for Baking the Best Easy Flaky Scones
- Variations on the Easy Flaky Scone Recipe
- Troubleshooting Common Scone Baking Problems
- Serving and Storing Your Homemade Scones
- Enjoy Your Effortless and Delicious Flaky Scones!
- Frequently Asked Questions
- Final Reflection: The Enduring Allure of the Perfect Flaky Scone
- Unlock Your Inner Baker: Make Perfect Scones Today!
BakeWithEase Presents: Your Guide to Perfect Easy Flaky Scones
Welcome to BakeWithEase, where we believe baking should be a joy, not a chore! Today, we're diving into the wonderful world of scones, specifically how to create truly flaky, delicious scones with minimal fuss. Forget complicated techniques and endless steps; this easy flaky scone recipe is designed for success, even if you've never baked scones before. We'll walk you through the simple ingredients and straightforward process that guarantees delightful results every time.
Mastering an easy flaky scone recipe opens up a world of possibilities, from a delightful breakfast treat served with jam and cream to a savory accompaniment for soup. Our goal is to demystify the process, showing you that achieving that coveted light, flaky texture is entirely within reach. Get ready to bake scones that are tender on the inside, beautifully golden on the outside, and incredibly satisfying to make and eat. Let's get started on your journey to baking the perfect easy flaky scones!
Why This Easy Flaky Scone Recipe Works
This particular easy flaky scone recipe stands out because it focuses on simplicity without sacrificing quality. It relies on fundamental baking principles that are easy to understand and execute. By using readily available ingredients and minimizing complex steps, we ensure that anyone can achieve excellent results. The emphasis is on technique and understanding the role of each component, making the process intuitive even for beginners.
The effectiveness of this easy flaky scone recipe lies in its balance. It provides just the right amount of moisture and fat to create a tender crumb, while the leavening agents work efficiently to produce a good rise. The structure is designed to allow for the steam created during baking to lift the layers of dough, resulting in that characteristic flakiness. It's a robust recipe forgiving enough for small errors but precise enough to consistently yield delicious, flaky scones.
Simple Ingredients for Delicious Scones
One of the core reasons this easy flaky scone recipe is so popular is its reliance on basic pantry staples. You won't need to hunt for obscure ingredients. The foundation of this recipe typically includes all-purpose flour, sugar, baking powder (often a significant amount to ensure a good rise), salt, cold butter, and a liquid like milk or cream, sometimes with the addition of an egg for richness and binding. These are items most home bakers keep on hand, making spontaneous scone baking a real possibility.
For example, a standard batch of this easy flaky scone recipe might call for just 2 cups of all-purpose flour, a few tablespoons of sugar, 2-3 teaspoons of baking powder, a pinch of salt, 1/2 cup (1 stick) of very cold butter, and about 3/4 cup of milk or cream. The simplicity of this list means less time shopping and more time baking. Using high-quality versions of these basic ingredients, like European-style butter with a higher fat content, can subtly enhance the richness and flakiness, though standard ingredients work perfectly well.
Quick and Easy Baking Process
The entire process for this easy flaky scone recipe, from mixing the dough to pulling warm scones from the oven, is remarkably quick. Typically, preparing the dough takes no more than 10-15 minutes. This involves whisking dry ingredients, cutting in cold butter, and gently incorporating the wet ingredients until just combined. There's no need for extensive kneading or long proofing times, which significantly speeds up the process compared to many other baked goods.
Once the dough is prepared and shaped, the baking time is also relatively short, usually between 12 and 18 minutes, depending on the size and your oven. This means you can go from craving warm, flaky scones to enjoying them in under 30-40 minutes total. This efficiency makes the easy flaky scone recipe perfect for a last-minute breakfast treat or a quick addition to afternoon tea. The minimal steps and rapid turnaround are key to its "no fuss" appeal.
The Secret to Extra Flaky Scones: Key Techniques
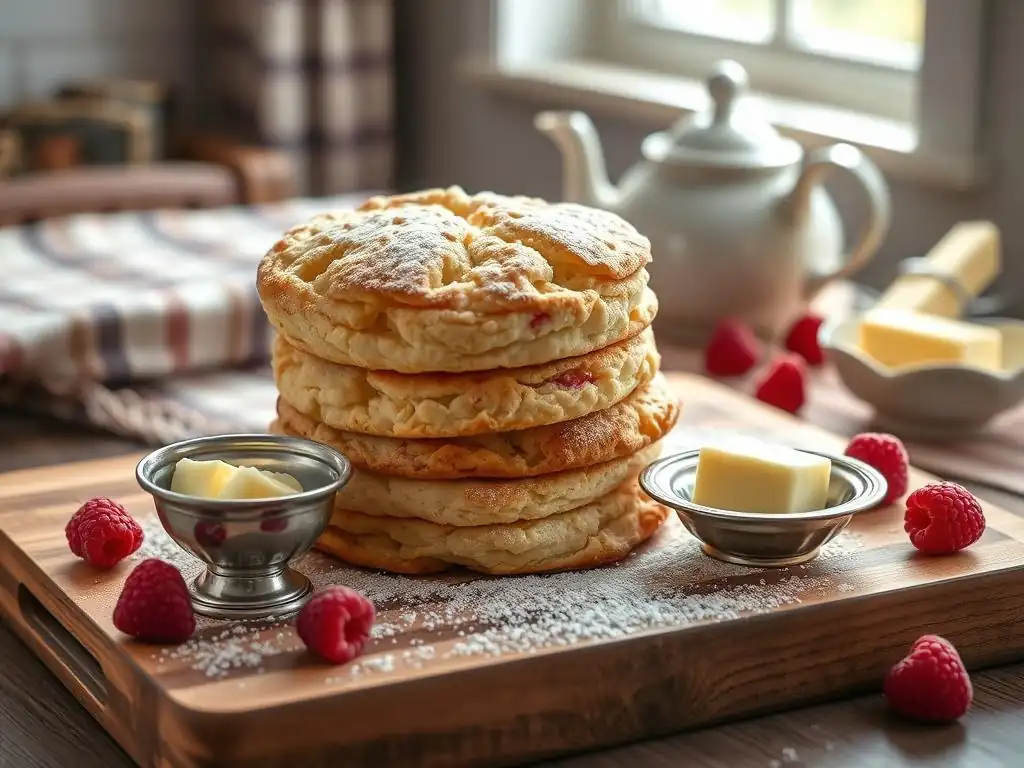
Achieving truly flaky scones isn't just about the ingredients; it's also about technique. Even with an easy flaky scone recipe, paying attention to a few key steps can elevate your results from good to absolutely exceptional. These techniques are simple but crucial for developing those desirable layers that define a perfect scone. They involve managing temperature and handling the dough with care.
The goal is to create pockets of fat within the dough that melt during baking, releasing steam. This steam pushes the layers of dough apart, resulting in a light, airy, and flaky texture. Understanding and applying these techniques consistently is the true secret behind mastering any easy flaky scone recipe and producing scones that are tender, tall, and beautifully layered.
Cold Ingredients are Crucial
Using cold ingredients, especially butter, is arguably the most critical factor in achieving flaky scones. When tiny pieces of cold butter are incorporated into the flour, they remain solid. As the scones bake in the hot oven, these butter pieces melt and release steam. This steam creates air pockets, separating the layers of dough and resulting in flakiness. If the butter is too warm, it melts into the flour before baking, leading to a more cake-like or crumbly texture rather than distinct layers.
It's best to start with butter straight from the refrigerator, ideally around 4°C (40°F) or colder. Some bakers even chill their flour and mixing bowl beforehand. The butter should be cut into small cubes or grated quickly using a box grater (which helps keep it cold). Working quickly to incorporate the butter into the dry ingredients also helps maintain its cold temperature. If your kitchen is warm, you might even pop the dry ingredients and butter mixture into the fridge for 10-15 minutes before adding the liquid.
Gentle Handling: Avoid Overmixing
Another vital technique for an easy flaky scone recipe is gentle handling. Overmixing the dough is the enemy of flakiness. Flour contains gluten, a protein network that develops when flour is mixed with liquid. While gluten is necessary for structure in bread, too much development in scones leads to a tough, dense texture, counteracting the desired flakiness. The goal is to mix the wet and dry ingredients just until they come together into a shaggy dough.
This typically means stirring with a fork or spatula only until no dry flour pockets remain. The dough should look slightly messy and not perfectly smooth. Avoid kneading it like bread dough. A few gentle folds might help bring it together on a lightly floured surface before shaping, but excessive handling will develop gluten and warm the butter, both detrimental to flakiness. Think of it as coaxing the ingredients together rather than forcing them into a smooth mass.
The Importance of the Right Scone Shape
The way you shape and cut your scones impacts both their appearance and how they bake. For this easy flaky scone recipe, maintaining a consistent thickness is important for even baking – usually around 1 to 1.5 inches thick. Whether you pat the dough into a circle and cut wedges or use a biscuit cutter for rounds, aim for uniform thickness.
If using a round cutter, press straight down without twisting. Twisting seals the edges of the scone layers, preventing them from rising properly and separating into flakes. Place the cut scones close together on the baking sheet for a softer edge or further apart for crispier sides. The shape itself (round or wedge) doesn't affect flakiness as much as the handling during shaping and cutting does.
Easy Flaky Scone Recipe: Step-by-Step Instructions
Ready to bake? This easy flaky scone recipe breaks down the process into simple, manageable steps. Follow these instructions carefully, paying attention to the details like ingredient temperature and gentle handling, and you'll be enjoying warm, flaky scones in no time.
Ingredients List for Easy Scones
Here's a typical list for a small batch of this easy flaky scone recipe, yielding about 8 medium scones:
- 2 cups (approx. 240g) all-purpose flour
- 1/4 cup (approx. 50g) granulated sugar
- 2 1/2 teaspoons baking powder
- 1/2 teaspoon salt
- 1/2 cup (1 stick, approx. 113g) unsalted butter, very cold, cut into small cubes or grated
- 3/4 cup (approx. 180ml) cold milk or heavy cream
- 1 large egg (optional, for richer dough and egg wash)
Step 1: Preparing the Dry Ingredients
Start by whisking together the dry ingredients in a large bowl. Combine the 2 cups of all-purpose flour, 1/4 cup granulated sugar, 2 1/2 teaspoons baking powder, and 1/2 teaspoon salt. Use a whisk to ensure the baking powder and salt are evenly distributed throughout the flour. This step is quick but essential for the leavening to work effectively throughout the dough.
Step 2: Cutting in the Cold Butter
Add the very cold, cubed or grated butter to the dry ingredients. Using your fingertips, a pastry blender, or a food processor (pulsing briefly), quickly work the butter into the flour mixture until it resembles coarse crumbs with some pea-sized pieces of butter still visible. This takes about 2-3 minutes by hand. Remember, those larger pieces of cold butter are key to flakiness in your easy flaky scone recipe.
Step 3: Adding the Wet Ingredients
If using the optional egg, whisk it into the cold milk or cream. Pour the cold liquid mixture into the dry ingredients with the butter. Stir gently with a fork or rubber spatula just until the ingredients are moistened and come together into a shaggy dough. Do not overmix! A few dry spots are okay; they will hydrate as you shape the dough.
Step 4: Shaping and Cutting the Scones
Turn the dough out onto a lightly floured surface. Gently bring the dough together and pat it into a circle or rectangle about 1 to 1.5 inches thick. Avoid kneading. For wedges, cut the circle into 6-8 triangles. For rounds, use a biscuit cutter, pressing straight down without twisting. Gather scraps gently and re-pat to cut any remaining scones.
Step 5: Baking to Golden Perfection
Preheat your oven to 400°F (200°C). Place the shaped scones on a baking sheet lined with parchment paper. For a golden top, you can brush the tops with a little milk or an egg wash (1 egg whisked with 1 tablespoon milk). Bake for 12-18 minutes, or until they are well-risen, golden brown on top, and cooked through.
Tips for Baking the Best Easy Flaky Scones

Beyond the basic steps of this easy flaky scone recipe, a few extra tips can make a significant difference in the final outcome. These small adjustments can enhance the texture, appearance, and overall deliciousness of your homemade scones. They are simple additions that require minimal extra effort but yield noticeable improvements.
Incorporating these tips into your baking routine will help you consistently produce scones that are not only flaky but also beautifully browned and perfectly tender. They address common areas where beginner bakers can enhance their results and achieve scones that look and taste like they came from a professional bakery.
Don't Skip the Egg Wash
Brushing the tops of your scones with an egg wash (a mixture of whisked egg and a little milk or water) or even just milk before baking serves multiple purposes. It helps the tops brown beautifully and evenly, giving them an appealing golden color and a slight sheen. It also contributes to a slightly crispier top crust, which contrasts nicely with the soft, flaky interior.
While optional, this step takes less than a minute and significantly improves the visual appeal of your easy flaky scones. A simple milk wash will give a matte, golden finish, while an egg wash provides a glossier look. It's a small detail that makes a big impact on the presentation of your baked goods.
Chilling the Scones Before Baking
Once you've shaped and cut your scones, placing them in the refrigerator for 15-20 minutes before baking can be a game-changer. This step re-chills the butter pieces that may have softened slightly during the shaping process. When these extra-cold butter pieces hit the hot oven, they create even more steam, leading to a better rise and enhanced flakiness.
Chilling also helps the scones hold their shape better in the oven, preventing them from spreading too much. This simple step is a technique often used by professional bakers to ensure maximum lift and tenderness in their pastries. It's an easy addition to your process for this easy flaky scone recipe that yields noticeable results.
Adjusting Baking Time for Your Oven
Ovens can vary significantly in temperature and heating patterns. The baking time provided in any easy flaky scone recipe (like 12-18 minutes) is a guideline. It's important to know your own oven. Using an oven thermometer can help you verify if your oven is running true to the temperature you set.
During baking, observe the scones. They should be well-risen, golden brown on the tops and bottoms, and a skewer inserted into the center should come out clean. If they are browning too quickly, you might need to reduce the temperature slightly or tent them loosely with foil. If they aren't browning after the suggested time, your oven might be running cool. Adjust the time and temperature in future batches based on your observations to perfect your easy flaky scones.
Variations on the Easy Flaky Scone Recipe
One of the joys of mastering a basic easy flaky scone recipe is the ability to customize it with different flavors. The simple base is a perfect canvas for adding sweet or savory ingredients, allowing you to create a wide variety of delicious scones. These variations are easy to implement and add exciting twists to the classic recipe.
Whether you're craving a sweet treat bursting with fruit or a savory bite perfect with cheese, adapting this easy flaky scone recipe is straightforward. The key is to incorporate additions without overworking the dough or adding too much moisture.
Adding Fruits and Berries to Your Scones
Incorporating fruits or berries is a popular way to add flavor and moisture to your easy flaky scones. Small, firm fruits like blueberries, cranberries, or chopped apples work best. For a batch using 2 cups of flour, you might add about 1/2 to 3/4 cup of fresh or frozen berries (don't thaw frozen berries beforehand). Gently fold them into the dough just before shaping.
Take care not to crush soft berries like raspberries, as this can release too much juice and make the dough sticky or the scones soggy. If using frozen fruit, they can help keep the dough cold, further aiding flakiness. You can also add zest from a lemon or orange for a bright citrus flavor alongside the fruit.
Savory Scone Options: Cheese and Herbs
Transforming your easy flaky scone recipe into a savory delight is as simple as omitting the sugar (or reducing it slightly) and adding ingredients like cheese, herbs, or even cooked bacon bits. Cheddar cheese and chives are a classic combination. For a batch with 2 cups of flour, try adding 1/2 to 1 cup of grated sharp cheddar cheese and 1-2 tablespoons of chopped fresh chives or other herbs like rosemary or thyme.
Fold the cheese and herbs into the dry ingredients along with the butter, or stir them in with the liquid. Savory scones are fantastic served warm with butter, alongside soup, or as part of a cheese board. The high fat content of cheese can even contribute to tenderness.
Glazing Your Scones for Extra Sweetness
For those with a sweet tooth, a simple glaze can add an extra layer of flavor and moisture to your easy flaky scones. A basic glaze can be made by whisking together powdered sugar with a little milk, lemon juice, or vanilla extract until it reaches a pourable consistency.
Once the scones have cooled slightly after baking, you can drizzle or dip the tops in the glaze. For a batch of 8 scones, you might use about 1 cup of powdered sugar mixed with 1-2 tablespoons of liquid. Allow the glaze to set before serving. This works particularly well with fruit variations of the easy flaky scone recipe.
Troubleshooting Common Scone Baking Problems

Even with an easy flaky scone recipe, sometimes things don't go exactly as planned. Understanding common issues and how to fix them can help you refine your technique and achieve perfect results every time. Don't be discouraged by less-than-perfect batches; baking is a learning process!
Identifying the cause of a problem, like dry or flat scones, is the first step to improving. Most issues with easy flaky scones relate back to ingredient temperature, handling, or oven inconsistencies.
Dry and Crumbly Scones: What Went Wrong?
If your easy flaky scones turn out dry and crumbly instead of tender, the most likely culprits are too much flour or not enough liquid. Measuring flour by volume (cups) can be inconsistent; using a scale (240g for 2 cups) is more accurate. Too much flour makes the dough dry and inhibits gluten development, resulting in a crumbly texture.
Alternatively, if you didn't add enough liquid, the dough won't hydrate properly. Ensure you're using the specified amount of cold milk or cream. Overworking the dough can also contribute to dryness by developing too much tough gluten. Remember to mix only until the ingredients are just combined.
Flat Scones: How to Achieve Height
Scones that don't rise well can be disappointing. Several factors can cause flat scones:
- Warm Butter: If the butter was too soft or melted before baking, it won't create steam pockets for lift.
- Old Baking Powder: Baking powder loses its potency over time. If yours is older than 6-12 months, it might not be effective. Test it by adding a teaspoon to hot water; it should fizz vigorously.
- Overmixing: Developing too much gluten creates a tough structure that resists rising.
- Dough Too Thin: If you pat the dough out too thin (less than 1 inch), there isn't enough mass for a good rise.
Ensure your ingredients are cold, your baking powder is fresh, you handle the dough gently, and you shape the scones to the correct thickness for optimal height in your easy flaky scone recipe.
Unevenly Baked Scones: Solutions
If some of your easy flaky scones are perfectly golden while others are pale or over-browned, it's often due to uneven heating in your oven. Many ovens have hot spots.
To mitigate this, you can:
- Rotate the baking sheet halfway through the baking time.
- Use an oven thermometer to check for temperature fluctuations and adjust accordingly.
- Avoid crowding the baking sheet; give scones enough space for air circulation (though placing them close can help them push each other up).
- Ensure your oven is fully preheated before putting the scones in.
Understanding your oven's quirks is key to achieving evenly baked goods. With a little observation and adjustment, you'll get consistently beautiful results from your easy flaky scone recipe.
Serving and Storing Your Homemade Scones
Once your beautiful, flaky scones are out of the oven, the best part begins – enjoying them! Knowing how to serve them for maximum enjoyment and how to store any leftovers properly ensures you get the most out of your delicious homemade treat.
Serving warm scones is always recommended, as this is when their texture is at its peak. Storing them correctly helps maintain their freshness and quality for as long as possible, although let's be honest, they're often eaten too quickly to worry about long-term storage!
Serving Suggestions for Freshly Baked Scones
The classic accompaniments for easy flaky scones, particularly in the UK, are clotted cream and jam. Strawberry jam is traditional, but any favorite preserves work wonderfully. Simply split a warm scone in half horizontally and dollop with cream and jam.
Other delicious serving options include:
- Just warm butter, which melts into the flaky layers.
- Lemon curd for a tangy twist.
- Whipped cream and fresh berries.
- Honey or maple syrup.
- For savory scones, serve with extra butter, cream cheese, or alongside soup or stew.
Serve them warm from the oven for the best experience, where the butter is still soft and the texture is incredibly tender and flaky.
How to Store Scones for Optimal Freshness
Homemade easy flaky scones are best enjoyed the day they are baked. However, if you have leftovers, they can be stored to maintain freshness for a day or two. Allow the scones to cool completely on a wire rack before storing.
Store cooled scones in an airtight container at room temperature. Avoid refrigerating them, as this can dry them out and make them tough. To refresh leftover scones, you can gently reheat them in a toaster oven or microwave for a few seconds until just warm. For longer storage, scones freeze very well. Once cooled, place them in a freezer-safe bag or container for up to 2-3 months. Thaw at room temperature or reheat gently from frozen.
Enjoy Your Effortless and Delicious Flaky Scones!
You've done it! Following this easy flaky scone recipe and incorporating a few key techniques has resulted in a batch of warm, tender, and beautifully flaky scones. Whether you chose a sweet or savory variation, you've experienced how simple ingredients and a straightforward process can yield impressive results.
Baking is about practice and patience, but with this no-fuss guide, you're well on your way to making perfect easy flaky scones a regular part of your baking repertoire. Share them with friends and family, enjoy them with your favorite toppings, and take pride in your homemade creations. Happy baking from all of us at BakeWithEase!
Frequently Asked Questions
What makes this scone recipe "easy"?
This recipe emphasizes simple techniques and readily available ingredients, minimizing complex steps for a quick and easy baking experience. It's designed to be fuss-free!
What's the secret to achieving flaky scones?
Achieving flaky scones relies on using cold ingredients, especially butter, and avoiding overmixing the dough. This creates pockets of butter that melt during baking, resulting in a layered, flaky texture.
Can I substitute ingredients in this scone recipe?
While substitutions are possible, they can affect the final texture and flavor. We recommend sticking to the recipe for the best results, especially for key ingredients like butter and flour.
How long do these flaky scones stay fresh?
These scones are best enjoyed fresh, ideally on the day they're baked. You can store them in an airtight container for up to two days, but they will be most flaky and delicious when freshly made.
What are some serving suggestions for these scones?
These scones are delicious on their own or with clotted cream and jam. They also pair well with tea or coffee and can be customized with different toppings like fruit or chocolate chips.
Final Reflection: The Enduring Allure of the Perfect Flaky Scone
The simple act of baking a scone, once mastered, unlocks a world of comforting warmth and delicious possibilities. It's more than just a recipe; it's a gateway to sharing joy, a testament to the power of simple ingredients transformed into something truly special. In a world often dominated by complex culinary creations, the humble scone reminds us of the beauty in simplicity.
This recipe, and the joy of baking in general, has profoundly impacted my life, fostering a sense of calm and accomplishment. It's a tangible connection to tradition, a link to generations past who also found solace and satisfaction in the rhythmic kneading and the golden-brown blush of a perfectly baked scone. Baking is at once child's play and adult joy. And love, of course.
- This sentiment perfectly captures the essence of this simple yet rewarding process.
Now, I invite you to roll up your sleeves, gather your ingredients, and embark on your own scone-baking journey. Don't be intimidated by the seemingly complex layers; embrace the process, savor the aroma, and relish the satisfaction of creating something delicious and beautiful with your own hands. The perfect flaky scone awaits – and the joy of sharing it with loved ones is even sweeter.
Unlock Your Inner Baker: Make Perfect Scones Today!
Thanks for spending some time with us – we hope you found our flaky scone recipe both helpful and inspiring! Now it’s time to put those baking skills to the test. Ready to create some deliciousness?
- Bake a batch of scones immediately! Use our recipe as a starting point and experiment with different add-ins. Imagine the possibilities!
- Share your baking journey! Post a picture of your scones on social media and tag us – we'd love to see your creations.
- Consider your next baking adventure: What other simple, yet delicious treats can you bake with ease? Maybe a loaf of bread? Let us know in the comments!
What delicious scone flavor will you create first?