
Creating Stunning Chocolate Decorations: Simple Techniques

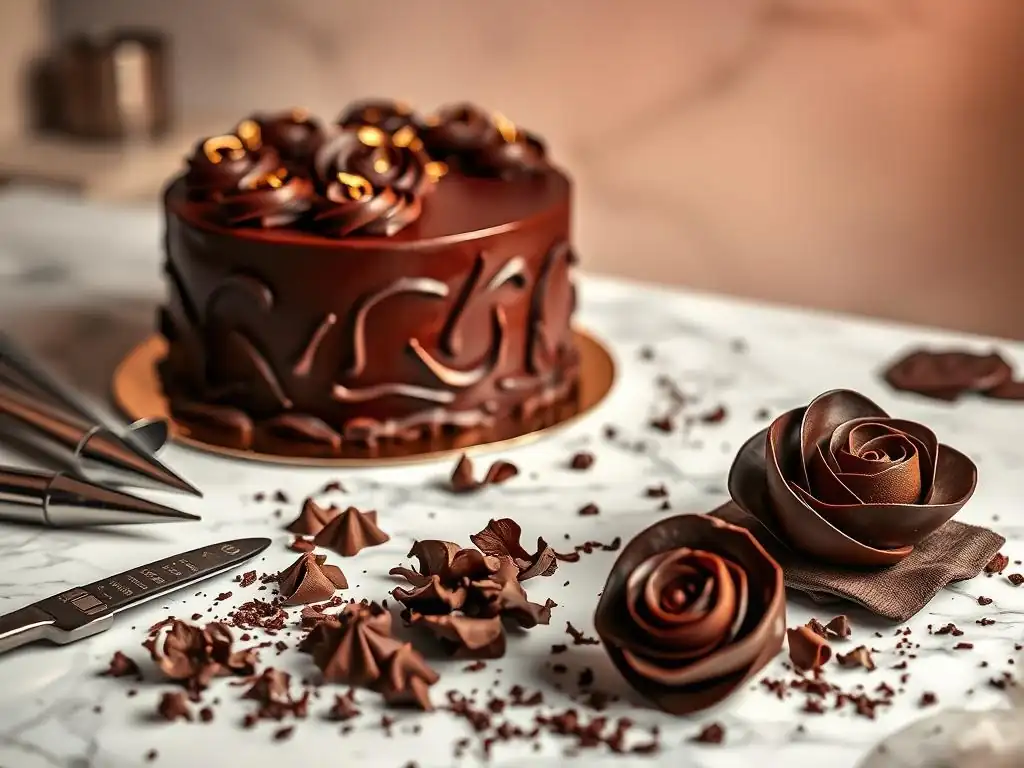
Welcome to BakeWithEase, your trusted companion on a delicious baking journey! Ever dreamed of transforming an ordinary cake into a masterpiece? This week, we're diving deep into easy chocolate decoration techniques that will elevate your desserts from simple to stunning. Discover how you can achieve professional-looking results with minimal effort and readily available ingredients. Ready to unlock the secrets? Let's get started!
- Creating Stunning Chocolate Decorations: Simple Techniques for BakeWithEase
- Introduction to Easy Chocolate Decoration Techniques
- Mastering Basic Chocolate Decoration Techniques
- Easy Chocolate Piping Techniques
- Simple Chocolate Shaving and Curls
- Making Chocolate Bark
- Creating Chocolate Ganache Drip
- Easy Chocolate Decorations: Transfer Sheets and Molds
- Advanced Chocolate Decoration Techniques
- Storing and Handling Your Chocolate Decorations
- Conclusion: Unleash Your Creativity with Chocolate Decoration
-
Frequently Asked Questions
- How can I easily create chocolate curls for decorating a cake?
- What is the easiest way to make chocolate shards or sails for decorations?
- Can I use melted chocolate to pipe simple designs onto cupcakes?
- What are some beginner-friendly ways to add texture to chocolate decorations?
- How do I prevent my chocolate from seizing when melting it for decorations?
- Final Reflection: The Enduring Allure of Chocolate Art
- Unleash Your Inner Chocolatier!
Creating Stunning Chocolate Decorations: Simple Techniques for BakeWithEase
Introduction to Easy Chocolate Decoration Techniques
Chocolate isn't just a delicious ingredient; it's also a fantastic medium for adding flair and artistry to your baked creations. From elegant drizzles to intricate patterns, mastering a few easy chocolate decoration techniques can transform a simple cake, cupcake, or cookie into a showstopper. At BakeWithEase, we believe that beautiful baking should be accessible to everyone, and that includes working with chocolate. This guide will walk you through some fundamental yet stunning ways to use chocolate to elevate your treats.
Whether you're looking to add a touch of sophistication or a burst of fun, incorporating chocolate decorations is a rewarding step in your baking journey. These simple techniques are perfect for beginners but also offer creative potential for more experienced bakers. Get ready to unlock the secrets to shiny, perfectly set chocolate decorations that will impress your friends and family, all while keeping the process enjoyable and straightforward.
Elevate Your Baked Goods with Chocolate: A BakeWithEase Guide
Adding chocolate decorations is one of the most impactful ways to enhance the visual appeal and flavor of your baked goods. Imagine a plain vanilla cake suddenly adorned with delicate chocolate curls or a batch of cookies featuring elegant piped designs. These simple additions not only look professional but also provide delightful textural and flavor contrasts. Our goal at BakeWithEase is to empower you with the skills to achieve these results with minimal fuss.
This guide focuses on easy chocolate decoration techniques that require basic tools and readily available ingredients. We'll cover everything from achieving that perfect sheen through simple tempering methods to creating fun shapes and textures. By the end, you'll feel confident grabbing a bar of chocolate and turning it into edible art, making your baking projects even more exciting and delicious.
Why Master Chocolate Decorations?
Mastering easy chocolate decoration techniques opens up a world of creative possibilities for your baking. Beyond simply making your desserts look good, these skills allow you to personalize treats for special occasions, add professional touches to homemade gifts, and experiment with different textures and flavors. It's a skill that adds significant value to your baking repertoire without requiring years of practice.
Furthermore, understanding how chocolate behaves is fundamental to many baking applications. Learning how to melt, temper, and shape chocolate builds confidence and prepares you for more complex recipes. It's a foundational skill that enhances everything from making truffles to coating candies. Plus, the sheer joy of seeing your baked goods transformed by beautiful chocolate work is incredibly rewarding.
Mastering Basic Chocolate Decoration Techniques
Before diving into specific designs, it's crucial to understand the basics of working with chocolate, particularly melting and, for some applications, tempering. Proper melting ensures a smooth, workable consistency, while tempering is key to achieving that desirable snap, shine, and stability in solid chocolate decorations. Don't be intimidated; there are easy methods even for tempering!
This section will cover the fundamental principles that underpin most easy chocolate decoration techniques. We'll discuss the importance of using quality chocolate, avoiding moisture contamination, and controlling temperature. Getting these basics right will make all subsequent decoration efforts much more successful and less frustrating.
Tempering Chocolate for Perfect Decorations: A Beginner's Guide
Tempering chocolate is the process of heating and cooling chocolate to specific temperatures to stabilize the cocoa butter crystals. This process ensures that the finished chocolate is hard, shiny, has a good snap when broken, and doesn't melt easily at room temperature or develop a dull, grayish appearance known as "bloom." While it sounds technical, mastering a simple tempering method is achievable for any home baker looking to create professional-looking solid chocolate decorations like shavings, curls, or molded shapes.
Untempered chocolate can be used for things like ganache or hot fudge, but for solid decorations, tempering is essential. Without it, your beautiful chocolate pieces might be soft, sticky, and prone to melting quickly, detracting from both the appearance and texture of your baked goods. Learning even a basic tempering method significantly elevates the quality and longevity of your chocolate decorations.
Understanding Chocolate Tempering: Science and Importance
Chocolate contains cocoa butter, which can crystallize into different forms depending on temperature. Tempering encourages the formation of the most stable crystal structure (known as Beta V crystals). When chocolate is melted and then cooled incorrectly, unstable crystals form, leading to bloom and poor texture. Proper tempering ensures that when the chocolate sets, it's full of these stable crystals, resulting in a firm, glossy finish.
The importance of tempering for solid decorations cannot be overstated. Imagine spending time piping delicate chocolate designs, only for them to melt in your hand or turn dull and splotchy after a few hours. Tempered chocolate, on the other hand, sets firmly, releases cleanly from molds, maintains its shape at typical room temperatures (around 68-72°F or 20-22°C), and retains its beautiful shine. This stability is crucial for easy chocolate decoration techniques that involve solid forms.
Simple Tempering Methods
There are several ways to temper chocolate at home. Two of the most accessible methods for beginners are the "seed" method and the microwave method.
- Seed Method:
- Finely chop about 2/3 of your chocolate.
- Gently melt the chopped chocolate over a double boiler (a bowl set over a pot of simmering water, ensuring the bottom of the bowl doesn't touch the water) or in the microwave on low power, stirring frequently, until it reaches its melting temperature (approx. 115°F/46°C for dark, 110°F/43°C for milk/white).
- Remove from heat/microwave and add the remaining 1/3 un-melted, finely chopped chocolate (the "seeds").
- Stir continuously until the seed chocolate is completely melted and the mixture cools down to the working temperature (approx. 88-91°F/31-33°C for dark, 86-88°F/30-31°C for milk, 82-84°F/28-29°C for white). Use a thermometer!
- Test temper by spreading a little chocolate on parchment paper; it should set within a few minutes with a shine.
- Microwave Method:
- Finely chop the chocolate.
- Place about 3/4 of the chopped chocolate in a microwave-safe bowl.
- Microwave on 50% power for 30-second intervals, stirring thoroughly after each interval.
- Continue until the chocolate is mostly melted, with a few small lumps remaining.
- Add the remaining 1/4 un-melted chocolate and stir continuously until the residual heat melts the remaining chocolate and the temperature drops to the working range (approx. 88-91°F/31-33°C for dark, 86-88°F/30-31°C for milk, 82-84°F/28-29°C for white). Stirring is key here to cool it down.
- Test temper as with the seed method.
Both methods rely on melting most of the chocolate and then using solid chocolate (the "seeds") to cool and introduce stable crystals. The key is precise temperature control and constant stirring.
Troubleshooting Tempering Issues
Even with simple tempering methods, you might encounter issues. The most common problem is the chocolate not setting properly or looking dull. This usually means the chocolate wasn't tempered correctly – either it didn't reach the correct working temperature, or it wasn't cooled down sufficiently with the seed chocolate. If your test patch doesn't set within a few minutes, you'll likely need to re-temper the batch.
Another issue is chocolate seizing, which happens when even a tiny amount of water or steam comes into contact with melted chocolate. Seized chocolate becomes thick, grainy, and unusable for most decorations.
Always ensure your bowls and utensils are completely dry, and be careful when using a double boiler to prevent steam from getting into the chocolate. If chocolate seizes, sometimes you can rescue it by stirring in a tablespoon or two of hot vegetable oil or melted butter, but it will no longer be suitable for tempering and should be used for things like a sauce or ganache instead.
Easy Chocolate Piping Techniques
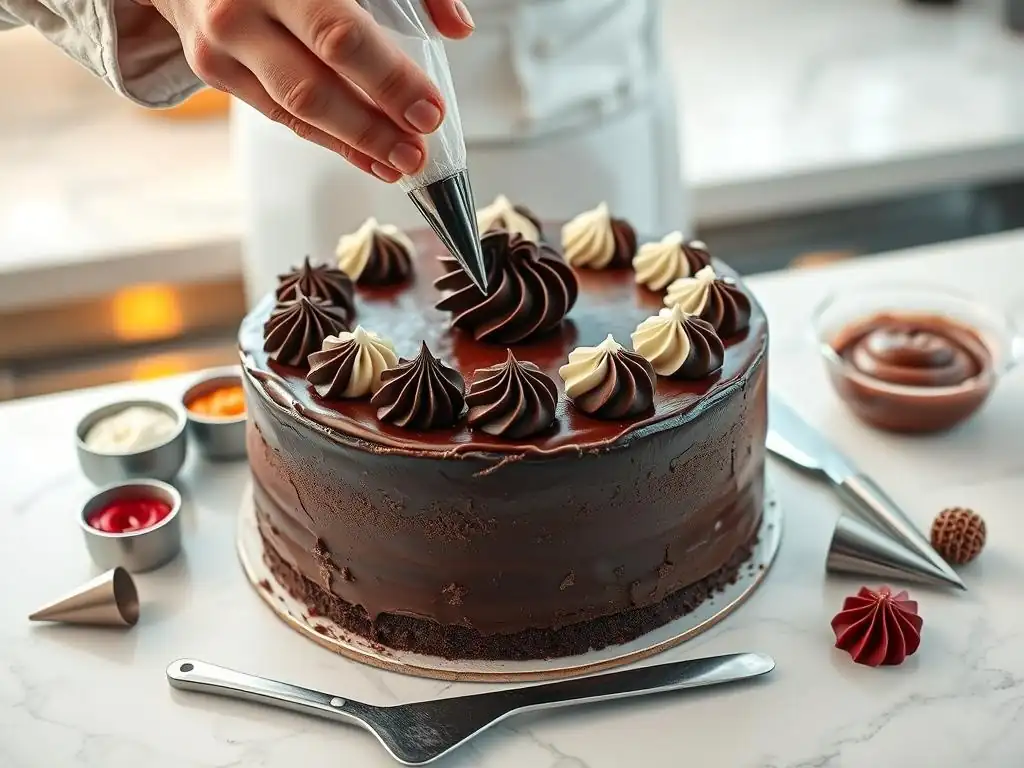
Piping is a versatile and easy chocolate decoration technique that allows you to create lines, dots, swirls, and even simple text or images directly onto your baked goods or onto parchment paper to create stand-alone decorations. It's a fundamental skill in cake decorating that translates beautifully to working with chocolate. With just a piping bag and a basic nozzle, you can achieve impressive results.
Mastering basic piping involves understanding how to fill a bag, apply even pressure, and control the flow of chocolate. Once you get the hang of it, you can use piped chocolate for outlines, filling in areas, creating borders, or adding intricate details to your cakes, cupcakes, and cookies.
Essential Piping Tools for Chocolate Decorations
To get started with easy chocolate piping techniques, you'll need a few basic tools. The most important are piping bags and nozzles (also called tips). Piping bags come in disposable plastic, reusable silicone, or fabric options. Disposable bags are convenient for chocolate as cleanup can be messy.
You'll also need a selection of piping nozzles. For simple chocolate decorations, a few round tips in different sizes (like a Wilton #3 or #4 for fine lines and lettering, and a #10 or #12 for thicker lines or dots) and perhaps a small star tip (like a #16 or #18) are sufficient. You might also find a coupler useful, which allows you to change nozzles on the same bag without emptying it.
Piping Bags and Nozzles
Piping bags are designed to hold melted chocolate (or other frostings/fillings) and allow you to control its flow through a fitted nozzle. To fill a piping bag, place it in a tall glass and fold the top edge over the rim. Spoon the melted, and preferably tempered, chocolate into the bag, filling it no more than two-thirds full. Push the chocolate down towards the tip, twist the top of the bag to seal it, and snip off the very end of the bag if using a disposable one without a coupler, or attach your desired nozzle.
Nozzles determine the shape of the piped chocolate. Round nozzles create smooth lines and dots, star nozzles create ribbed lines and star shapes, and there are many other specialized shapes available. For easy chocolate decoration techniques, start with round tips. A smaller tip is great for delicate lines or writing, while a larger tip is better for bolder designs or filling areas. Practice on a piece of parchment paper to get a feel for the pressure needed to create consistent lines and shapes before working on your baked goods.
Mastering Basic Piping Skills
Holding the piping bag correctly and applying consistent pressure are key to mastering basic piping. Hold the twisted end of the bag firmly in your dominant hand, using your other hand to guide the tip. Apply steady, even pressure with your dominant hand to push the chocolate through the nozzle. The speed at which you move the tip will determine the thickness and smoothness of your lines.
Practice piping straight lines, wavy lines, dots, and simple zigzags on parchment paper. Notice how changing the pressure or the speed of movement affects the result. For dots, hold the bag perpendicular to the surface, squeeze firmly, and then stop squeezing before lifting straight up. For lines, hold the bag at an angle, squeeze, and lift the tip slightly above the surface as you move, allowing the chocolate to fall naturally into place. Patience and practice are your best friends here!
Creating Chocolate Lettering and Simple Designs
Once you're comfortable with basic lines and dots, you can move on to creating chocolate lettering and simple designs. For lettering, a small round tip (like a #3 or #4) is ideal. Practice writing on parchment paper first. Hold the bag at a slight angle and use smooth, continuous motions for each letter. Aim for consistent pressure to keep the thickness even.
Simple designs like hearts, stars, or swirls are also easy to create with basic piping skills. You can pipe these directly onto cakes or cookies, or pipe them onto parchment paper placed on a flat surface (like a baking sheet) and let them set in the refrigerator before carefully peeling them off and placing them on your baked goods. This parchment paper method is great for creating delicate, free-standing decorations or practicing designs without risking your main dessert.
Simple Chocolate Shaving and Curls
Chocolate shavings and curls are classic, elegant, and surprisingly easy chocolate decoration techniques that add texture and visual appeal to cakes, cupcakes, and desserts. They require minimal tools and can be made from a block of tempered or untempered chocolate, though tempered chocolate will give you firmer, shinier results that hold their shape better at room temperature.
These simple additions can make any dessert look more refined. A sprinkle of dark chocolate shavings on a white frosting, or a few delicate milk chocolate curls atop a layer cake, instantly elevates its appearance.
The Art of Chocolate Shavings
Creating chocolate shavings is one of the simplest ways to decorate with chocolate. You need a block of chocolate (a standard baking bar works well) and a tool like a vegetable peeler, a sharp knife, or a cheese grater with large holes. If using a vegetable peeler or knife, work on the edge of a block of chocolate. For best results with a peeler, use the side of the chocolate block and draw the peeler down its length. The angle and pressure will determine the size and thickness of your shavings.
Using a cheese grater is even faster, yielding smaller, finer shavings. Simply grate the chocolate directly over your cake or into a bowl to collect them. For clean shavings, the chocolate should be firm but not too cold – slightly cooler than room temperature is usually ideal. If it's too cold, it will just crumble; if too warm, it will smear.
Creating Chocolate Curls
Chocolate curls are slightly more delicate than shavings but equally easy to make once you get the knack. For larger, more defined curls, you'll need a block of chocolate that is flat on one side. Some large chocolate bars work well, or you can melt and temper chocolate and pour it into a thin layer on the back of a baking sheet or a marble slab, letting it set until firm but still pliable (this is where tempering helps! ).
Once you have a flat, firm layer or block of chocolate, use a metal spatula, pastry scraper, or a wide, sharp knife. Hold the tool at about a 45-degree angle to the chocolate surface. Push the tool firmly but smoothly along the surface, scraping a thin layer of chocolate. As the chocolate lifts, it should curl naturally. If it crumbles, the chocolate is too cold; if it smears, it's too warm. You can gently warm the block slightly with your hands or a hairdryer on a low setting if it's too cold.
Tips for Perfect Chocolate Shavings and Curls
- Temperature is Key: As mentioned, the chocolate block should be firm but not rock hard. Around 65-70°F (18-21°C) is often a good range. Experiment with slightly warmer or cooler chocolate to see what works best with your tools and environment.
- Quality Chocolate: Higher quality chocolate with a good amount of cocoa butter tends to produce better curls and shavings.
- Tool Angle and Pressure: Practice varying the angle and pressure of your peeler, knife, or scraper to create different sizes and shapes of shavings and curls.
- Chill Briefly: Once you've made your shavings or curls, it's helpful to chill them in the refrigerator for a few minutes on parchment paper before handling and placing them on your dessert. This makes them more stable.
- Handle with Care: Chocolate shavings and curls are fragile. Use a small spatula or your fingers (quickly!) to transfer them to your baked goods.
Making Chocolate Bark
Chocolate bark is one of the most forgiving and easy chocolate decoration techniques out there, perfect for beginners. It involves simply spreading melted chocolate into a thin layer and sprinkling it with various toppings before letting it set. The result is a rustic, broken sheet of chocolate filled with delicious textures and flavors, which can be broken into pieces and used as a decoration or enjoyed on its own.
Bark is incredibly versatile. You can use different types of chocolate (dark, milk, white, or even swirled) and almost any kind of inclusion you like – nuts, dried fruit, candy pieces, sprinkles, crushed cookies, pretzels, or even sea salt.
The Versatility of Chocolate Bark
The appeal of chocolate bark lies in its simplicity and endless possibilities. It doesn't require tempering if you plan to store it in the refrigerator, although tempering will give it a better snap and shelf life at room temperature. You can customize it for any holiday or occasion by using themed sprinkles or candies.
For use as a decoration, bark pieces can be broken into shards of various sizes and inserted into the top of cakes, cupcakes, or even ice cream. Larger pieces can stand upright, creating a dramatic effect, while smaller crumbles can be sprinkled like confetti. It adds both visual interest and a satisfying crunch.
Easy Chocolate Bark Recipe
Here’s a basic outline for making chocolate bark:
- Melt Chocolate: Choose your favorite chocolate (chips or chopped bars work). Melt it gently using a double boiler or microwave until smooth. For about 1 pound (approx. 450g) of chocolate, this usually takes 5-10 minutes over a double boiler or 3-5 minutes in the microwave with stirring. If you are tempering, follow one of the simple methods described earlier.
- Prepare Surface: Line a baking sheet with parchment paper or a silicone mat.
- Spread Chocolate: Pour the melted chocolate onto the prepared baking sheet. Use an offset spatula or the back of a spoon to spread it into a thin, even layer, about 1/8 to 1/4 inch thick (approx. 3-6mm).
- Add Inclusions: While the chocolate is still wet, generously sprinkle your chosen inclusions over the surface. Gently press larger pieces into the chocolate slightly to ensure they adhere.
- Set: Let the bark set completely. This can take 1-2 hours at room temperature or about 30-45 minutes in the refrigerator.
- Break: Once fully set, break the chocolate into pieces of your desired size and shape.
Adding Inclusions
The fun part of making chocolate bark is adding inclusions! Aim for about 1/2 to 1 cup (approx. 75-150g) of inclusions per pound of chocolate, depending on how dense you want the toppings. Chop larger items like nuts or dried fruit into smaller pieces so they distribute evenly.
Popular inclusions include:
- Chopped nuts (almonds, pistachios, peanuts)
- Dried fruit (cranberries, cherries, raisins)
- Pretzels (crushed or whole mini ones)
- Crushed cookies (Oreos, graham crackers)
- Candy pieces (peppermint, toffee bits, M&Ms)
- Sprinkles
- Sea salt flakes (a sprinkle adds a lovely contrast)
You can use a single inclusion or mix several together for a custom flavor combination. Don't be afraid to experiment!
Creating Chocolate Ganache Drip
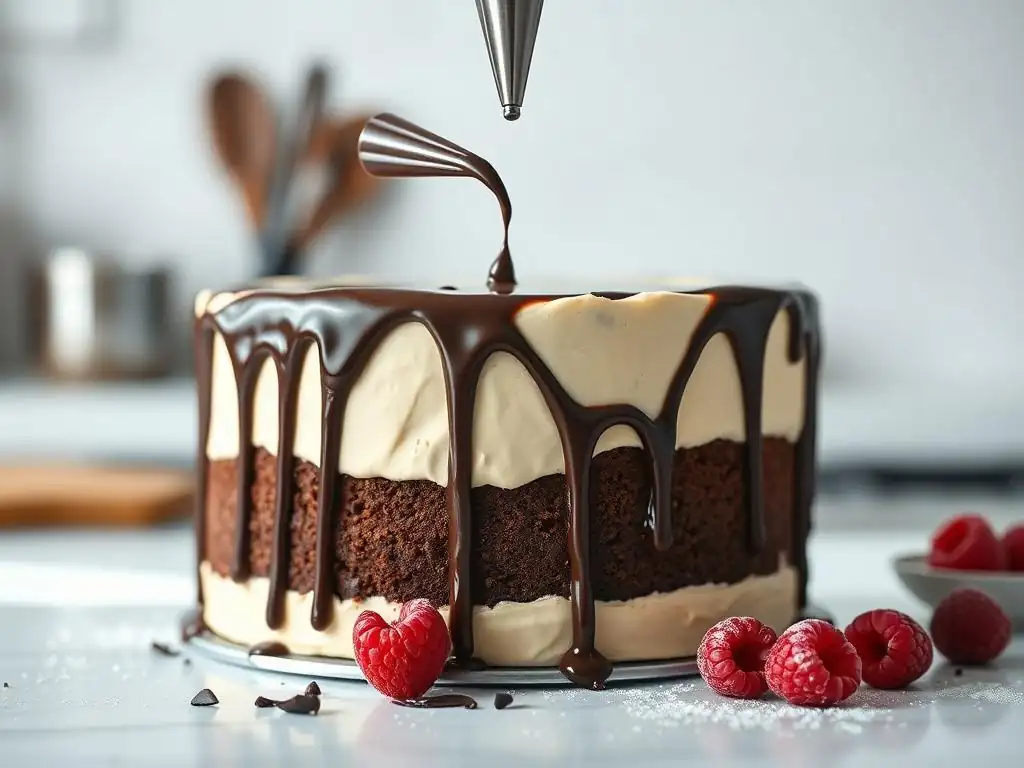
A chocolate ganache drip is a popular and relatively easy chocolate decoration technique that gives cakes a professional, elegant, and slightly decadent look. It involves pouring or piping a specific consistency of ganache around the edge of a chilled cake, allowing it to drip down the sides.
Achieving the perfect drip requires the right ganache consistency and a chilled cake. The contrast in temperature helps the ganache set as it flows, creating those lovely drip patterns.
Understanding Chocolate Ganache Ratios for Drips
Ganache is a simple mixture of chocolate and heavy cream. The ratio of chocolate to cream is crucial for determining the ganache's consistency, which in turn affects how it drips.
- Thicker Ganache (for firmer drips or filling): Use a 1:1 ratio of chocolate to heavy cream by weight (e.g., 8oz chocolate to 8oz cream).
- Medium Ganache (common for drips): Use a 1.5:1 or 2:1 ratio of chocolate to heavy cream by weight (e.g., 12oz chocolate to 8oz cream, or 16oz chocolate to 8oz cream). A higher chocolate ratio makes the ganache thinner and more fluid when warm, creating longer, thinner drips.
- Thinner Ganache (for a very fluid drip or glaze): Use a 2.5:1 or 3:1 ratio of chocolate to heavy cream by weight.
For a typical cake drip, a 2:1 ratio of chocolate to cream is often recommended, especially for dark chocolate. For milk or white chocolate, which contain less cocoa solids, you might need a 2.5:1 or even 3:1 ratio to achieve a fluid consistency suitable for dripping.
Achieving the Perfect Ganache Consistency for Drips
To make the ganache, finely chop your chocolate and place it in a heatproof bowl. Heat the heavy cream in a saucepan until it just begins to simmer (do not boil). Pour the hot cream over the chopped chocolate. Let it sit undisturbed for 5-10 minutes to allow the heat from the cream to melt the chocolate.
After 5-10 minutes, gently whisk or stir the mixture starting from the center and working outwards until it is completely smooth and emulsified. Avoid vigorous whisking, which can incorporate air bubbles. If a few chocolate pieces remain, you can gently heat the mixture over a double boiler or in the microwave for a few seconds, then stir again. The ganache should be smooth and glossy.
Let it cool slightly at room temperature until it reaches the correct consistency for dripping – it should be warm and fluid enough to flow, but not so hot that it melts the frosting on your cake. The ideal temperature is often around 85-90°F (approx. 30-32°C), but it varies depending on your ratio and desired drip effect. Test the consistency by letting a little drip off a spoon.
Applying Chocolate Ganache Drip
Applying the ganache drip requires a chilled cake. The cold surface helps the warm ganache set quickly as it runs down, creating defined drips. Ensure your cake is fully frosted and chilled in the refrigerator for at least 30 minutes before applying the drip.
You can apply the ganache using a squeeze bottle, a piping bag (with the tip snipped off), or even a spoon. For a controlled drip, start by piping or spooning a small amount of ganache around the top edge of the cake, allowing it to naturally run down the sides. Vary the amount of ganache at different points to create drips of varying lengths.
Once you've created the drips around the edge, pour or spread the remaining ganache over the top surface of the cake and gently spread it to meet the drips. Alternatively, you can apply the ganache to the top first and then push some over the edge with a spatula to create drips. Practice on a chilled glass or mug first if you're nervous!
Easy Chocolate Decorations: Transfer Sheets and Molds
Using chocolate transfer sheets and molds are fantastic easy chocolate decoration techniques that allow you to create professional-looking, detailed chocolate pieces with minimal effort. They take the guesswork out of intricate designs, letting you achieve impressive results quickly.
These methods are particularly useful for creating multiple identical decorations, perfect for cupcakes, cookies, or repeating patterns on a larger cake. They are a great way to add a polished finish without needing advanced artistic skills.
Using Chocolate Transfer Sheets
Chocolate transfer sheets are plastic sheets printed with a design using colored cocoa butter. When melted, tempered chocolate is spread over the sheet and allowed to set, the cocoa butter design transfers from the sheet onto the chocolate, leaving a beautiful pattern or image.
To use a transfer sheet, place it printed-side up on a flat surface (like a baking sheet). Spread a thin, even layer of tempered chocolate over the entire sheet using an offset spatula. Ensure the chocolate is evenly distributed and smooth. Let the chocolate set completely at room temperature or in the refrigerator until firm.
Once set, carefully peel the transfer sheet away from the chocolate. The design should be perfectly transferred onto the chocolate. You can then break or cut the chocolate into pieces of your desired shape (squares, rectangles, or even use cookie cutters before it's fully set).
Selecting and Using Chocolate Molds
Chocolate molds come in countless shapes and sizes, made from plastic or silicone. They are an excellent tool for creating uniform chocolate shapes like hearts, stars, flowers, or even complex 3D figures. Using molds is one of the most straightforward easy chocolate decoration techniques available.
To use chocolate molds, ensure they are clean and completely dry. Melt, and preferably temper, your chocolate. Pour or spoon the melted chocolate into the mold cavities, filling them completely. Gently tap the mold on your counter a few times to remove any air bubbles trapped in the chocolate. Use a spatula to scrape any excess chocolate off the top, leaving a clean back for your molded pieces.
Releasing Chocolate from Molds
Once the chocolate is in the molds, let it set completely. Setting time varies depending on the size of the mold and whether the chocolate was tempered, but it typically takes 30-60 minutes at room temperature or 15-30 minutes in the refrigerator. You'll know the chocolate is set when it looks dull and has pulled away slightly from the sides of the mold.
To release the chocolate from plastic molds, gently flex or tap the mold upside down over a clean surface. The chocolate pieces should pop out easily. For silicone molds, simply peel the mold away from the chocolate shapes. If the chocolate doesn't release easily, it might not be fully set, or it might not have been tempered (untempered chocolate can sometimes stick more). Place it back in the refrigerator for a bit longer and try again. Handle the released pieces carefully to avoid fingerprints or breakage.
Advanced Chocolate Decoration Techniques
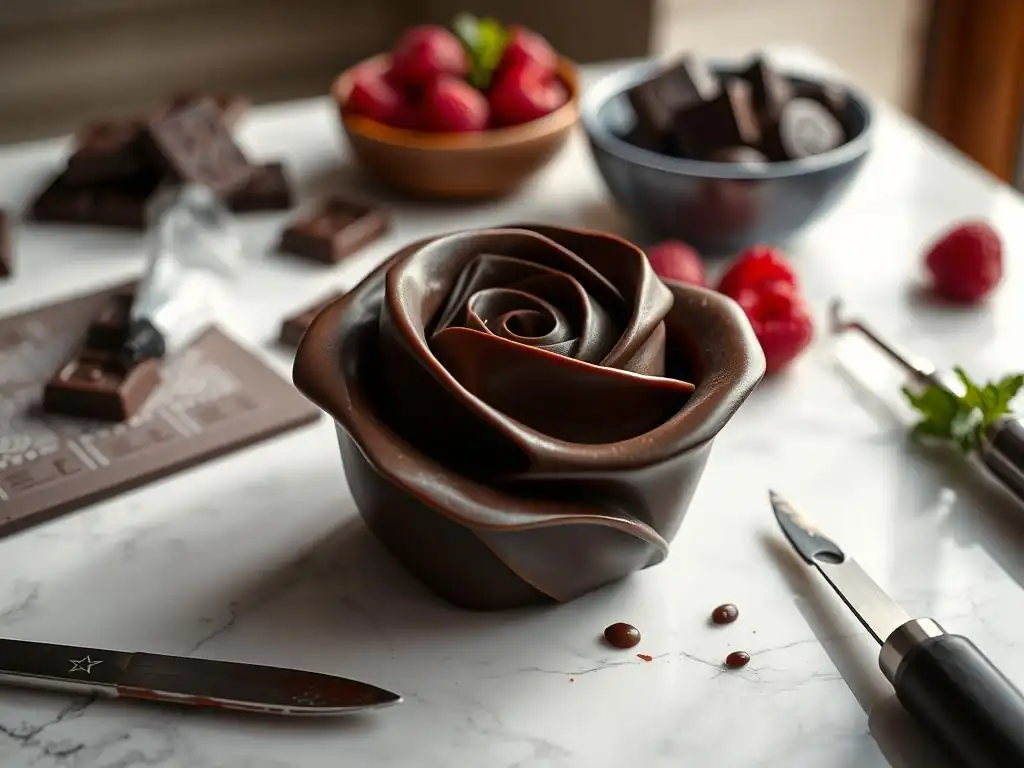
While this guide focuses on easy chocolate decoration techniques, it's worth noting that the world of chocolate artistry extends to more complex methods. These techniques are often used by professional chocolatiers and cake decorators to create stunning, intricate edible art.
Exploring advanced techniques can be a goal for those who feel comfortable with the basics and wish to push their skills further. They typically require more practice, specialized equipment, and a deeper understanding of chocolate properties, particularly precise tempering.
Introduction to More Complex Chocolate Designs
Beyond simple piping and molding, advanced chocolate work includes techniques like airbrushing on chocolate, creating delicate chocolate flowers or ribbons, and constructing complex 3D chocolate sculptures. These methods often involve working with larger quantities of perfectly tempered chocolate and require a steady hand and artistic vision.
For example, creating realistic chocolate flowers involves piping or spreading thin layers of chocolate onto templates and then shaping the pieces before they fully set. Chocolate sculpting can involve carving, molding, and assembling large blocks or pieces of chocolate. These techniques build upon the foundational skills of melting and tempering but add layers of complexity in handling and shaping the medium.
Airbrushing Chocolate
Airbrushing is an advanced technique used to add color and shading to chocolate decorations or molded pieces. It involves using a small airbrush tool to spray edible colored cocoa butter or specialized chocolate paints onto the surface of the chocolate. This allows for smooth gradients, detailed designs, and realistic effects that are difficult to achieve with other methods.
Airbrushing requires specific equipment, including an airbrush gun, compressor, and food-grade colors designed for chocolate (often cocoa butter-based). It also requires practice to control the spray and achieve the desired intensity and coverage. It's a technique often seen in high-end patisseries for adding unique finishes to showpiece chocolates and cakes.
Creating Chocolate Sculptures
Chocolate sculpting is perhaps the most advanced form of chocolate decoration, turning the medium into true edible art. Sculptures can range from small figures to large, elaborate centerpieces. This technique often involves working with modeling chocolate (a pliable paste made from chocolate and corn syrup or glucose) or assembling pieces of tempered chocolate.
Sculptors might carve details into solid blocks of chocolate, mold shapes by hand, or use armatures to support larger structures. Creating impressive chocolate sculptures requires not only a mastery of chocolate handling but also artistic skills akin to traditional sculpting or modeling. It's a time-consuming process often reserved for competitive events or high-profile culinary displays.
Storing and Handling Your Chocolate Decorations
Once you've created your beautiful chocolate decorations using easy chocolate decoration techniques, proper storage and handling are essential to keep them looking their best and prevent issues like melting or bloom. Chocolate is sensitive to temperature, humidity, and odors, so a little care goes a long way in preserving your hard work.
Whether your decorations are destined for immediate use or need to be stored for a short period, following a few simple guidelines will ensure they remain pristine until they grace your baked goods.
Best Practices for Storing Chocolate Decorations
The ideal storage conditions for chocolate decorations are cool, dry, and dark, with a consistent temperature. A pantry or cupboard away from heat sources (like ovens or sunny windows) is usually suitable. The recommended temperature range for storing chocolate is typically between 60-70°F (15-21°C).
Store chocolate decorations in an airtight container to protect them from moisture, odors, and dust. If storing different types of chocolate decorations together, layers separated by parchment paper can prevent them from sticking or damaging each other. Avoid storing chocolate in the refrigerator if possible, as the humidity can cause sugar bloom (white, dusty spots), unless the decorations are made from untempered chocolate or specifically require refrigeration (like some ganache components).
Preventing Bloom and Maintaining Shine
Bloom is the appearance of a grayish or white film on the surface of chocolate. There are two types: fat bloom (caused by improper tempering or temperature fluctuations, where cocoa butter crystals rise to the surface) and sugar bloom (caused by moisture condensation, where sugar crystals dissolve and recrystallize on the surface). Both affect appearance but not usually taste, though fat bloom can affect texture.
To prevent bloom, store chocolate at a stable, cool temperature and low humidity. Avoid moving chocolate frequently between different temperature environments (like bringing cold chocolate into a warm, humid room). Tempered chocolate is much less susceptible to fat bloom than untempered chocolate, which is why tempering is recommended for solid decorations intended to be stored at room temperature. Keeping decorations in airtight containers helps protect against humidity and sugar bloom.
Transporting Decorated Baked Goods Safely
Transporting cakes or desserts adorned with chocolate decorations requires careful consideration, especially in warmer conditions. If the decorations are tempered, they will be more stable, but direct sunlight or warm car interiors can still cause melting or softening.
For transport, ensure the baked good is secure in a box. If the weather is warm, consider using an insulated carrier or placing ice packs around the outside of the box (not directly touching the chocolate). Keep the transport time as short as possible and the environment cool. For decorations like chocolate shards or piped pieces that might be fragile, it's sometimes best to transport the dessert and the decorations separately and apply the decorations at the final destination if feasible.
Conclusion: Unleash Your Creativity with Chocolate Decoration
You've now explored several easy chocolate decoration techniques, from mastering simple tempering and piping to creating fun bark and elegant ganache drips. These methods provide a solid foundation for adding beautiful, edible chocolate elements to all your baked goods. Remember that practice makes perfect, and don't be afraid to experiment and adapt these techniques to suit your own style and the desserts you're making.
Whether you're celebrating a special occasion or simply want to make your everyday baking a little more extraordinary, chocolate decorations are a delightful way to do it. With the basic skills covered here, you're well-equipped to start transforming simple ingredients into stunning edible art.
Recap of Easy Chocolate Decoration Techniques
We've covered several approachable ways to decorate with chocolate:
- Basic Tempering: Essential for shiny, stable solid chocolate decorations.
- Piping: Using bags and nozzles for lines, dots, text, and simple shapes.
- Shavings and Curls: Creating elegant texture with simple tools.
- Chocolate Bark: A fun, customizable, and easy way to make decorative pieces.
- Ganache Drip: Achieving that popular, sophisticated cake finish.
- Transfer Sheets and Molds: Effortlessly creating detailed and uniform shapes.
These easy chocolate decoration techniques offer a range of options to add visual appeal and delicious chocolate flavor to your cakes, cupcakes, cookies, and more. Each technique is accessible and rewarding to learn.
Further Exploration: BakeWithEase Chocolate Recipes and Tutorials
Ready to put your new easy chocolate decoration techniques into practice? BakeWithEase.com offers a wealth of recipes and tutorials that incorporate chocolate in various ways. Explore our collection for inspiration on cakes, cookies, brownies, and pastries where your chocolate decorating skills can shine.
Look for recipes specifically designed for chocolate lovers or tutorials focusing on using ganache, melted chocolate, or tempered chocolate. Whether you want to bake a cake perfect for a ganache drip or find a cookie recipe that's ideal for piping designs, you'll find plenty of resources to continue your baking and chocolate decorating journey. Keep practicing, keep creating, and most importantly, keep baking with ease!
Frequently Asked Questions
How can I easily create chocolate curls for decorating a cake?
Simple chocolate curls can be made by gently dragging a vegetable peeler along the edge of a room-temperature chocolate bar. Adjust the pressure and angle for different curl sizes and thicknesses.
What is the easiest way to make chocolate shards or sails for decorations?
Melt chocolate, spread it thinly on parchment paper, and let it partially set. Then, use a knife to cut out desired shapes (shards, triangles) before it completely hardens. These crisp chocolate sails are easy and elegant.
Can I use melted chocolate to pipe simple designs onto cupcakes?
Yes! Melt chocolate, transfer it to a piping bag fitted with a small round tip, and pipe simple shapes like swirls, dots, or lines onto cupcakes. This method offers precise and customized decorations.
What are some beginner-friendly ways to add texture to chocolate decorations?
While the chocolate is still soft, sprinkle it with chopped nuts, sprinkles, or sea salt for added texture and visual appeal. These simple embellishments elevate the look.
How do I prevent my chocolate from seizing when melting it for decorations?
Avoid introducing water or steam to the melting chocolate. Use a double boiler or microwave in short intervals, stirring frequently to ensure smooth, consistent melting.
Final Reflection: The Enduring Allure of Chocolate Art
The art of chocolate decoration, once confined to professional pastry chefs, is now readily accessible to anyone with a passion and a little patience. This accessibility, fueled by readily available resources and a growing online community, has democratized a skill previously perceived as exclusive, transforming kitchens worldwide into miniature chocolate ateliers. The simple techniques explored in this article are not just about creating beautiful desserts; they're about unlocking creativity and finding joy in the process.
The impact of easily accessible chocolate decoration techniques extends far beyond the individual. It's fostered a vibrant online community where enthusiasts share their creations, inspire each other, and learn from both successes and failures. This shared passion transcends geographical boundaries, uniting people through a common love of chocolate and artistry. The best things in life are simple,
a sentiment perfectly encapsulates the beauty of creating stunning chocolate decorations with minimal fuss and maximum impact. The ease of execution allows for experimentation, fostering a sense of personal accomplishment and pride in the final product.
Now, it's your turn. Don't let the perceived complexity of chocolate artistry intimidate you. Pick up a bag of melting chocolate, gather a few simple tools, and let your creativity flow. Experiment with the techniques outlined in this article, adapt them to your own style, and most importantly, have fun! The journey of mastering chocolate decoration is as rewarding as the delicious results. Embrace the process, share your creations, and discover the joy of transforming simple ingredients into edible works of art.
Unleash Your Inner Chocolatier!
Thanks for joining us on this delicious journey into the world of chocolate decorating! We hope you've discovered some simple yet stunning techniques to elevate your baking. Now it's time to put your newfound skills to the test!
- Master a new chocolate technique: Choose one of the techniques we explored (think swirling, piping, or molding) and practice it today. Even a small improvement will make a big difference!
- Share your creations: Show off your chocolate masterpieces on social media – use #BakeWithEaseChocolate to connect with our community and inspire others.
- Experiment with flavors: Try incorporating unusual flavor pairings with your chocolate – think chili and dark chocolate, or lavender and white chocolate. What unexpected combinations will you discover?
Ready to transform your baking with beautiful, handcrafted chocolate? What's your favorite chocolate decorating technique, and what will you create first?