
Decode the World of Baking Chocolate: A Beginner's Guide

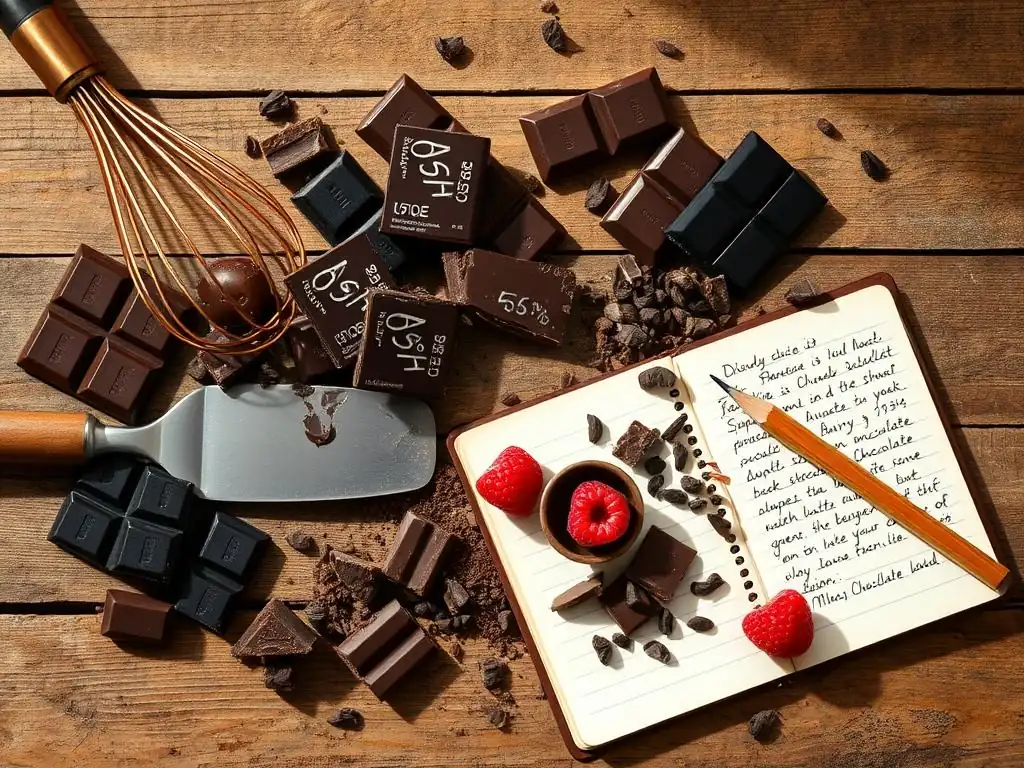
Welcome to BakeWithEase, where unlocking the joy of baking is our mission! Ever felt overwhelmed by the sheer variety of chocolate in the baking aisle? Decode the World of Baking Chocolate: A Beginner's Guide is here to demystify everything, from cocoa percentages to melting techniques. Ready to transform your treats with confidence? Discover the secrets to using baking chocolate for beginners and elevate your baking game today!
- Decoding Baking Chocolate: A Guide to Flavor and Function
- Introduction to Baking Chocolate
- Exploring Different Types of Baking Chocolate
- Understanding Cacao Percentage
- Tempering Chocolate
- Storing Baking Chocolate
- Common Mistakes
- Recipes for Beginners
- Advanced Techniques
- Conclusion
-
Frequently Asked Questions
- What are the main types of baking chocolate and when should I use them?
- How do I melt baking chocolate properly to avoid seizing?
- Can I substitute one type of baking chocolate for another in a recipe?
- What's the difference between baking chocolate and regular chocolate bars?
- How should I store baking chocolate to keep it fresh?
- Final Reflection: Unlocking the Sweet Science of Baking Chocolate
- Unlock Your Inner Pastry Chef: Start Baking Today!
Decoding Baking Chocolate: A Guide to Flavor and Function
Introduction to Baking Chocolate
Understanding Baking Chocolate's Impact on Baking
Baking chocolate is far more than just melted candy; it's a foundational ingredient that dictates the structure, flavor, and texture of countless desserts. Unlike eating chocolate, which is formulated for palatability straight from the wrapper, baking chocolate is designed to perform under heat and integrate seamlessly into batters, doughs, and sauces.
Its composition, specifically the ratio of cocoa solids, cocoa butter, and sugar, determines how it melts, emulsifies, and contributes to the final product. For instance, a higher cocoa butter content in good quality baking chocolate contributes to a smoother melt and a richer mouthfeel in brownies or a glossy finish on a ganache.
The specific type of baking chocolate chosen profoundly influences the depth and complexity of flavor in a baked good. Using unsweetened chocolate will yield an intensely bitter, pure cacao flavor, ideal for balancing sweetness in rich cakes, while milk chocolate will impart a creamy, milder, and sweeter profile, perfect for softer cookies or fillings.
Understanding these nuances is the first step for baking chocolate for beginners. The way the chocolate interacts with other ingredients, such as leavening agents or fats, is also critical; the acidity in some chocolates can even affect how baking soda reacts, influencing the rise and crumb of baked goods.
The Importance of Choosing the Right Chocolate
Selecting the appropriate baking chocolate is paramount to achieving the desired outcome in any recipe. Using the wrong type can lead to disappointing results, from a lack of chocolate flavor to textural failures like grainy ganache or dry cakes. Recipes are often calibrated to specific chocolate types because their sugar and fat content vary significantly. For example, substituting milk chocolate for bittersweet in a brownie recipe will result in a much sweeter, less intensely flavored brownie that may also have a different texture due to the increased sugar and milk solids.
Beyond the basic type (unsweetened, bittersweet, semi-sweet, milk, white), the quality of the baking chocolate matters. Higher quality chocolates typically contain more cocoa butter and fewer additives, leading to superior melting properties and a cleaner flavor.
While premium couverture chocolate (known for its high cocoa butter content, often 32-39%) is excellent for tempering and coatings, even for simple recipes like chocolate chip cookies, using a good quality bar of baking chocolate rather than chocolate chips (which contain stabilizers to hold their shape) can significantly improve the texture and melt of the chocolate chunks within the cookie. For baking chocolate for beginners, starting with readily available, good-quality bar chocolate from the baking aisle is a wise choice.
Exploring Different Types of Baking Chocolate
Unsweetened Chocolate: Pure Cacao Mass
Unsweetened chocolate, also known as bitter chocolate or baking chocolate 100% cacao, is the purest form of chocolate used in baking. It is made from solidified chocolate liquor – ground cocoa beans – with no added sugar. This means it contains approximately 95-100% cocoa solids and cocoa butter, resulting in an intensely bitter and robust chocolate flavor. It's not meant for eating on its own due to its bitterness but is a powerhouse ingredient for adding deep chocolate notes to baked goods while controlling the overall sweetness of the recipe.
Because of its high cocoa solid content and lack of sugar, unsweetened chocolate has unique properties when melted and incorporated into recipes. It requires sufficient sugar and often additional fat in the recipe to balance its bitterness and achieve a pleasant texture. Recipes calling for unsweetened chocolate, such as classic fudgy brownies or devil's food cake, rely on this ingredient to provide that signature deep, dark chocolate flavor that is often described as rich and complex. Its high cocoa butter content helps contribute to moisture and richness when properly balanced with other ingredients.
Applications: Deep, Intense Chocolate Flavor
Unsweetened chocolate is primarily used in recipes where a deep, intense, and slightly bitter chocolate flavor is desired, and the sugar content is carefully controlled by other ingredients. Classic examples include rich chocolate cakes, dense brownies, and certain types of chocolate custards or sauces. In a traditional American-style fudgy brownie recipe, unsweetened chocolate provides the backbone of the intense chocolate taste, while sugar and butter contribute sweetness and moisture.
Another common application is in recipes that combine chocolate with other strong flavors that can stand up to its intensity, such as coffee, chilies, or dark fruits. A mole sauce, for instance, often incorporates a small amount of unsweetened chocolate to add depth and bitterness that complements the savory and spicy elements. When used correctly, unsweetened baking chocolate is indispensable for achieving that pure, unadulterated cacao essence in baked goods and confections.
Bittersweet Chocolate: Rich and Moderately Sweet
Bittersweet chocolate is a popular choice for baking, offering a balance between the intensity of unsweetened chocolate and the sweetness of semi-sweet. By U.S. standards, bittersweet chocolate must contain at least 35% cocoa solids, but it typically ranges from 60% to 75% cacao. This higher percentage of cocoa solids compared to semi-sweet chocolate gives it a more pronounced chocolate flavor and less sweetness. The exact cacao percentage is often listed on the packaging and is a key indicator of its flavor profile.
The combination of a significant amount of cocoa solids and a moderate amount of sugar makes bittersweet chocolate incredibly versatile. It provides a rich, deep chocolate flavor without being overwhelmingly bitter or sweet. This makes it suitable for a wide range of applications, from melting into batters and ganaches to using as chunks in cookies or melting for dipping and coating. Its balanced nature is why it's frequently called for in sophisticated chocolate desserts.
Flavor Profile: Balanced Cacao and Sugar
The flavor profile of bittersweet chocolate is characterized by a strong presence of cacao notes, often with hints of fruit, nuts, or floral undertones depending on the origin of the cocoa beans. This is balanced by a noticeable but not dominant sweetness from the added sugar. The ratio of cacao to sugar directly impacts this balance; a 70% cacao bittersweet chocolate will taste richer and less sweet than a 60% cacao version. This spectrum allows bakers to fine-tune the chocolate intensity in their recipes.
Due to its balanced flavor, bittersweet chocolate pairs well with a variety of ingredients. It complements both sweet and slightly tart flavors. Consider pairing it with red fruits like raspberries or cherries, which benefit from the chocolate's depth. It also works beautifully with coffee, caramel, and various nuts. This versatility makes bittersweet baking chocolate a staple for many bakers, suitable for everything from molten lava cakes to rich chocolate tarts, and a good option for baking chocolate for beginners looking to explore deeper flavors.
Semisweet Chocolate: Versatile and Widely Used
Semisweet chocolate is arguably the most commonly called-for type of baking chocolate, especially in American recipes. Like bittersweet chocolate, it must contain at least 35% cocoa solids, but it typically has a lower cacao percentage, often ranging from 40% to 55%. This means it contains more sugar than bittersweet chocolate, resulting in a sweeter, milder chocolate flavor that is still distinct from milk chocolate. Its balance of chocolate flavor and sweetness makes it very approachable for many desserts.
The popularity of semisweet chocolate stems from its ease of use and broad appeal. It melts smoothly and has a pleasant flavor that complements a vast array of baked goods without overpowering other ingredients. It's the go-to choice for classic recipes where a moderate chocolate flavor is desired, providing enough richness without the intensity or bitterness of higher cacao options. Its consistent performance makes it reliable for beginner bakers.
Uses: Cookies, Cakes, and General Baking
Semisweet chocolate is incredibly versatile and finds its way into countless baking applications. It is perhaps most famous as the star of the classic chocolate chip cookie. Semisweet chocolate chips are specifically formulated to hold their shape when baked, providing delightful pockets of melted or partially melted chocolate within the cookie. Beyond chips, semisweet chocolate bars are frequently melted and incorporated into cake batters, muffin recipes, and quick breads.
It's also commonly used for making glazes, frostings, and simple chocolate sauces. Its moderate sweetness means it doesn't require as much additional sugar in these applications compared to unsweetened or bittersweet chocolate. For general baking purposes, if a recipe simply calls for "baking chocolate" without specifying the type, semisweet is often a safe and reliable assumption for baking chocolate for beginners. Its balanced profile makes it a crowd-pleaser in everything from brownies to chocolate muffins.
Milk Chocolate: Creamy and Sweet
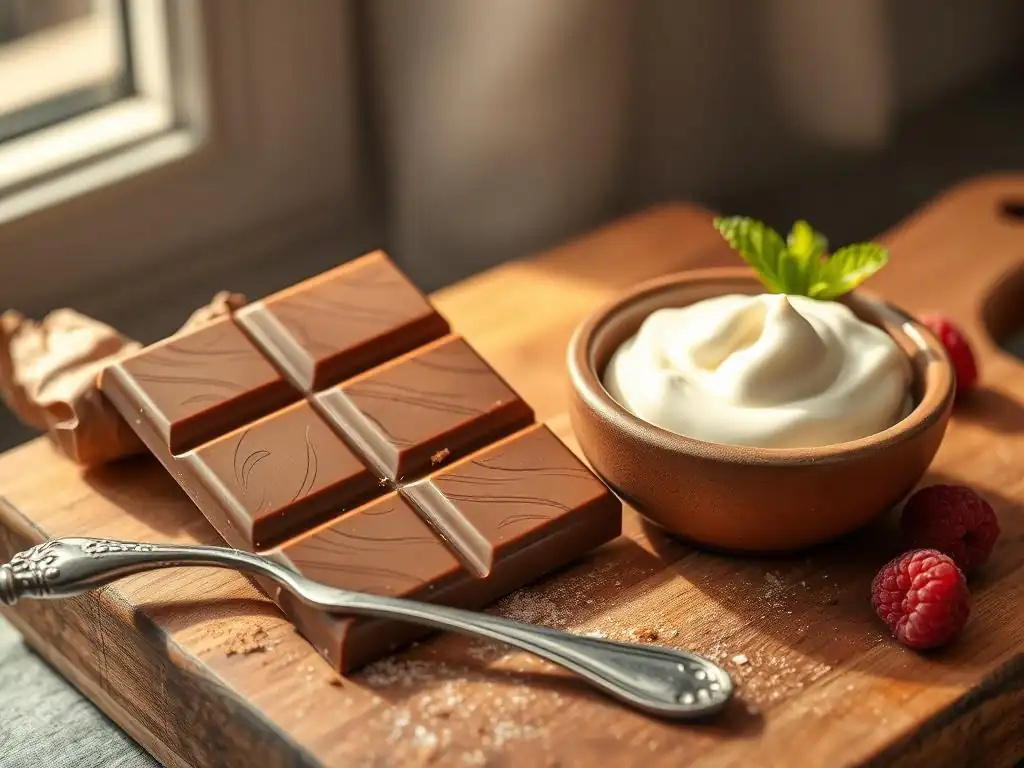
Milk chocolate is distinguished by the addition of milk solids (either in liquid, powder, or condensed form) to the chocolate liquor, cocoa butter, and sugar. By U.S. standards, milk chocolate must contain at least 10% cocoa solids and 12% milk solids. It typically contains a significantly higher percentage of sugar than dark chocolates, often making up 40-50% of the bar. This composition results in a much sweeter, creamier, and milder chocolate flavor compared to bittersweet or semisweet options.
While milk chocolate is the most popular chocolate for eating, its use in baking requires careful consideration. Its higher sugar and milk content mean it melts differently and is more prone to scorching than dark chocolates. It also imparts a distinctly sweet and milky flavor that may not be suitable for recipes requiring a deep, intense chocolate note. However, when used appropriately, it adds wonderful creaminess and sweetness to desserts.
Considerations: Higher Sugar Content, Lower Cacao
The primary considerations when using milk chocolate in baking are its sweetness and lower cacao percentage. Because it contains more sugar and fewer cocoa solids than dark chocolates, substituting it directly into recipes designed for bittersweet or semisweet chocolate will result in a much sweeter, less chocolatey, and potentially softer or greasier final product. The milk solids can also affect the texture and melting point.
Milk chocolate works best in recipes where its creamy texture and sweet flavor are assets. It's excellent for creating smooth, sweet ganaches (though often requires a different cream-to-chocolate ratio than dark chocolate ganache), fillings for pastries, or as chunks in cookies and blondies where its sweetness is desired. It's also commonly used in confections and as a coating for candies, though tempering can be slightly trickier due to its composition. For baking chocolate for beginners, it's important to note that milk chocolate is not a direct substitute for dark chocolate in most recipes.
White Chocolate: Cocoa Butter Based
White chocolate is unique in the chocolate family because it contains no cocoa solids. It is made from cocoa butter, sugar, milk solids, and often vanilla and lecithin. By U.S. standards, white chocolate must contain at least 20% cocoa butter, 14% total milk solids, and no more than 55% sugar. True white chocolate relies on cocoa butter for its structure and melting properties, while the flavor comes primarily from the milk solids, sugar, and vanilla.
Because it lacks cocoa solids, white chocolate does not have the characteristic "chocolatey" flavor of dark or milk chocolate. Instead, it offers a sweet, creamy, and milky flavor profile with subtle notes of vanilla. The quality of white chocolate is heavily dependent on the quality and amount of cocoa butter used; higher cocoa butter content results in a smoother melt and richer taste. Poor quality white chocolate may contain vegetable oils instead of cocoa butter, resulting in a waxy texture and less desirable flavor.
Flavor Pairings: Fruits, Nuts, and Spices
White chocolate's sweet and creamy profile makes it a versatile ingredient for pairing with a wide range of other flavors. It complements both tart and sweet fruits beautifully; think white chocolate raspberry scones, white chocolate lemon tarts, or white chocolate dipped strawberries. Its sweetness balances the acidity of fruits, while its creaminess provides a smooth counterpoint.
It also pairs exceptionally well with nuts like macadamia nuts (a classic cookie combination) and pistachios. Spices such as vanilla bean (often already present), cardamom, ginger, and even a hint of black pepper can be enhanced by white chocolate's creamy backdrop. Its mild flavor allows other ingredients to shine, making it excellent for creating flavored ganaches, fillings, or incorporating into baked goods where its sweetness and texture are desired rather than a strong chocolate flavor.
Understanding Cacao Percentage
Interpreting Cacao Percentage in Baking Chocolate
The cacao percentage listed on a bar of baking chocolate indicates the total proportion of ingredients derived directly from the cocoa bean. This includes cocoa solids (the non-fat part that gives chocolate its color and flavor) and cocoa butter (the fat extracted from the cocoa bean). For example, a bar labeled 70% cacao means that 70% of its weight comes from cocoa solids and cocoa butter combined, with the remaining 30% typically being sugar, and potentially vanilla or lecithin.
This percentage is a crucial piece of information for bakers because it provides a strong indication of the chocolate's bitterness, intensity of flavor, and even its texture and melting properties. Higher percentages mean more cocoa solids and cocoa butter relative to sugar, resulting in a more intense, less sweet, and often richer chocolate. Lower percentages mean less cacao content and usually more sugar, leading to a sweeter, milder flavor. This metric is particularly important when choosing baking chocolate for beginners who are learning to control sweetness and flavor.
Impact on Flavor, Texture, and Sweetness
The cacao percentage directly impacts the flavor profile of the chocolate and, subsequently, the baked good. A 70% cacao chocolate will impart a more robust, complex flavor with bitter undertones compared to a 50% cacao chocolate, which will be significantly sweeter and milder. This allows bakers to dial in the exact level of chocolate intensity they want in a recipe, from deeply dark and rich desserts (using 70%+) to moderately sweet and approachable treats (using 50-60%).
Beyond flavor, cacao percentage affects texture. Higher percentages generally mean higher cocoa butter content (though this can vary by manufacturer), which contributes to a smoother melt and richer mouthfeel. Chocolate with higher cacao percentages also tends to be less sweet and can interact differently with other ingredients like flour and leaveners. For instance, using a very high percentage chocolate in a recipe designed for a lower percentage might require adjusting the sugar or fat content to maintain the proper balance and texture.
Selecting the Right Percentage for Recipes
Choosing the right cacao percentage depends entirely on the specific recipe and the desired outcome. Most recipes that specify a percentage will call for a range, such as "60-70% bittersweet chocolate," giving you some flexibility. If a recipe simply says "bittersweet" or "semisweet," understanding the typical percentage ranges for these types (bittersweet often 60-75%, semisweet often 40-55%) helps you select an appropriate bar.
For baking chocolate for beginners, it's often easiest to start with the percentage range specified in the recipe. If experimenting, consider the role of the chocolate: for a very intense, less sweet dessert, aim for 70% or higher. For a balanced, moderately sweet result, 50-65% is usually a good range. Remember that chocolates from different brands, even with the same percentage, can taste different due to bean origin and processing, so finding a brand you like is also part of the process.
Tempering Chocolate
The Purpose of Tempering: Stability and Appearance
Tempering is a crucial process for certain chocolate applications, particularly when you want chocolate to set with a glossy finish, a firm snap when broken, and resistance to melting at room temperature. This is achieved by carefully controlling the temperature of the chocolate as it melts and cools, encouraging the cocoa butter crystals within the chocolate to form stable structures. Without tempering, melted chocolate will set into a dull, streaky, and soft state prone to "bloom" (a grayish, powdery surface caused by unstable fat crystals migrating to the surface).
Tempering is essential for making professional-looking chocolates, bonbons, dipped confections, and decorative elements. It ensures the chocolate contracts slightly as it cools, making it easy to release from molds, and gives it that satisfying snap. While not necessary for chocolate melted into batters or ganaches where structure isn't key, mastering tempering is a significant step for anyone wanting to advance their chocolate skills beyond basic baking. For baking chocolate for beginners focusing on simple recipes, tempering might be an advanced step, but understanding why it's done is helpful.
Tempering Methods: Seeding, Tabliering, and Using a Water Bath
There are several methods for tempering chocolate, each relying on heating, cooling, and reheating the chocolate to specific temperature ranges to encourage stable crystal formation. One common method is the seeding method: melt about two-thirds of the chocolate, then add the remaining one-third (finely chopped or in callets) and stir constantly until it melts and the mixture cools to the target temperature. The added solid chocolate "seeds" the melted chocolate with stable crystals.
Another method is tabliering (or marble slab method): melt the chocolate, pour about two-thirds onto a cool marble or granite surface, and spread and scrape it with a spatula until it cools and thickens slightly, indicating crystal formation. Scrape this cooled chocolate back into the remaining warm chocolate and stir until the mixture is uniform and at the working temperature.
A simpler method often used by beginners involves carefully melting chocolate over a double boiler (or water bath), removing it from the heat, cooling it while stirring, and then gently reheating it slightly to reach the correct working temperature. The specific temperatures vary depending on the type of chocolate (dark, milk, or white) and are critical for success, typically involving heating to around 115°F (46°C), cooling to 80-82°F (27-28°C), and reheating slightly to 88-90°F (31-32°C) for dark chocolate, with slightly lower temperatures for milk and white.
Troubleshooting Tempering Issues: Bloom and Seizing
Despite careful effort, tempering can sometimes go wrong, resulting in issues like bloom or seizing. Bloom is the appearance of grayish streaks or a powdery film on the surface of set chocolate. This is usually fat bloom, caused by improper cooling or storage temperatures that encourage unstable cocoa butter crystals to rise to the surface.
While visually unappealing, bloomed chocolate is generally still safe to eat and can be used in recipes where it will be melted and incorporated, like brownies or cakes, as the bloom disappears upon melting. Sugar bloom, a less common issue, appears as a gritty, white surface and is caused by moisture condensation on the chocolate.
Seizing is another common problem, occurring when even a tiny amount of water or steam comes into contact with melted chocolate. Chocolate is an emulsion of cocoa solids, sugar, and fat, and moisture causes the sugar particles to clump together, turning the chocolate from a smooth liquid into a thick, grainy, unusable paste.
To avoid seizing, ensure all equipment is completely dry and avoid getting any steam from a double boiler into the chocolate. If chocolate does seize, sometimes stirring in a small amount of hot liquid fat (like melted butter or oil) or hot cream can sometimes rescue it, but it won't be suitable for tempering applications anymore.
Storing Baking Chocolate
Optimal Storage Conditions: Temperature and Humidity
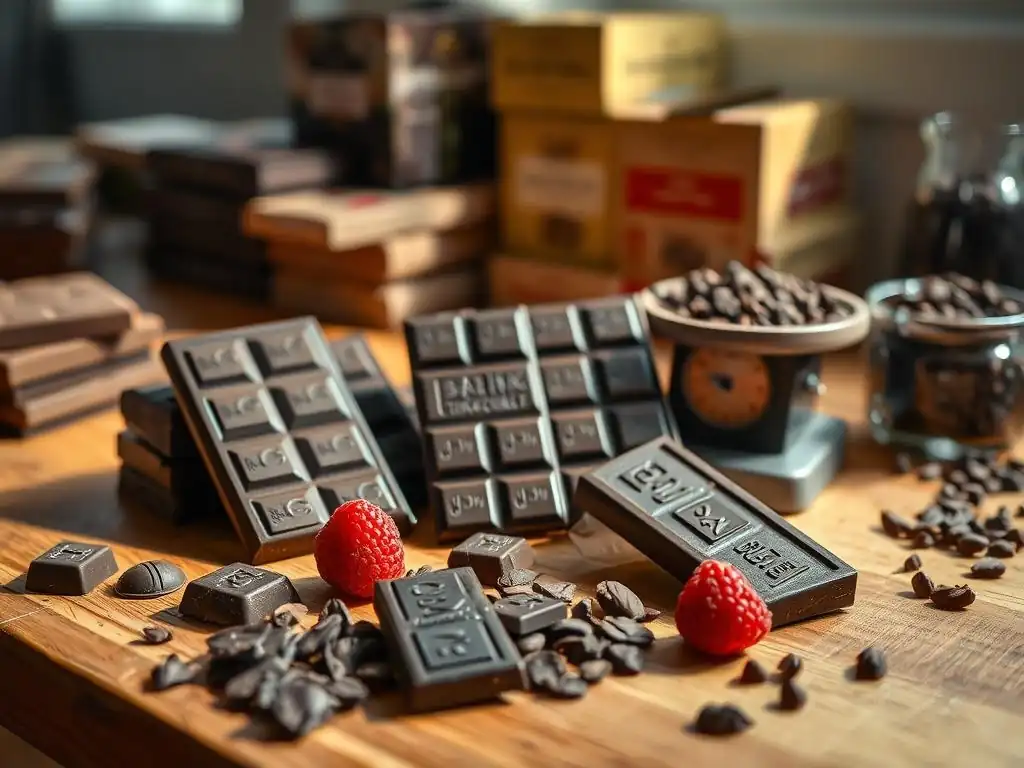
Proper storage is essential to maintain the quality and usability of baking chocolate. The ideal storage environment is cool, dark, and dry, with a consistent temperature between 60°F and 70°F (15°C and 21°C). Fluctuating temperatures are particularly detrimental as they can cause cocoa butter to melt and re-crystallize on the surface, leading to fat bloom. Storing chocolate in a cool pantry or cupboard away from heat sources like ovens or sunny windows is usually sufficient.
Humidity is also an enemy of chocolate. High humidity can cause sugar crystals on the surface to dissolve and re-crystallize, resulting in sugar bloom. It can also introduce moisture that could lead to mold or spoilage over time. Chocolate is also very susceptible to absorbing odors from its environment because of its fat content. Therefore, it's best stored in its original packaging or an airtight container, away from strongly scented items like spices or onions. Avoid refrigeration unless absolutely necessary in hot, humid climates, and if you do, wrap it extremely well to prevent condensation and odor absorption.
Impact of Improper Storage on Quality
Improper storage can significantly degrade the quality of baking chocolate, affecting its appearance, texture, and flavor. The most common issue is bloom, either fat or sugar bloom, which makes the chocolate look unappetizing and can slightly alter its melting properties. While bloomed chocolate is typically still usable in recipes where it's melted into a batter, it's not ideal for applications requiring a smooth melt or tempering.
Beyond bloom, exposure to heat can cause the chocolate to melt and seize, rendering it unusable for most baking purposes. Exposure to light and air can cause the fats in the chocolate to oxidize over time, leading to stale or off flavors. Absorbing odors from storage can also give the chocolate an unpleasant taste. Properly stored baking chocolate, especially dark chocolate with higher cocoa solid content, can last for a year or more, while milk and white chocolate have shorter shelf lives due to their milk and sugar content, typically lasting 6-12 months.
Recognizing Signs of Spoilage
Recognizing signs of spoilage in baking chocolate is important to ensure you're using ingredients that will yield the best results. The most obvious sign is mold, which indicates moisture contamination and spoilage; any chocolate with mold should be discarded. While bloom (fat or sugar) makes chocolate look bad, it doesn't necessarily mean it's spoiled in terms of safety, though its quality is diminished.
Other signs of spoilage include a rancid odor, which indicates the fats have oxidized, or a significantly changed texture that isn't related to melting or bloom (e.g., excessively crumbly or greasy). If the chocolate smells off, tastes stale or unpleasant when sampled (even unsweetened should have a clean, bitter taste), or shows mold, it's best to discard it and use fresh chocolate for your baking projects. For baking chocolate for beginners, focusing on proper storage from the start prevents most issues.
Common Mistakes
Avoiding Overheating and Seizing
One of the most common pitfalls when working with baking chocolate for beginners is overheating it. Chocolate burns easily, especially when melted directly over high heat. Overheated chocolate becomes grainy and can even seize, turning into a thick, unusable paste. This is particularly true for white and milk chocolate due to their higher sugar and milk content, but dark chocolate can also seize.
The best way to avoid overheating and seizing is to melt chocolate gently using indirect heat, such as a double boiler (a heatproof bowl set over a pot of simmering, not boiling, water) or in the microwave on low power in short intervals (30 seconds at a time, stirring well after each interval). When using a double boiler, ensure the bottom of the bowl doesn't touch the water, and be vigilant about preventing any steam or water droplets from entering the chocolate, as even a tiny amount can cause it to seize.
Stirring constantly while melting helps distribute heat evenly and prevents scorching.
Understanding Chocolate Substitutions
Substituting one type of baking chocolate for another without understanding the differences in composition (sugar, cocoa solids, cocoa butter) is a common mistake that can derail a recipe. As discussed earlier, substituting milk chocolate for bittersweet will drastically change the sweetness and chocolate intensity. Substituting unsweetened for semisweet will result in a much more bitter product.
While sometimes substitutions are possible with adjustments (e.g., adding more sugar when using higher cacao chocolate), it's generally best to stick to the type of chocolate specified in the recipe, especially for baking chocolate for beginners. If a recipe calls for "chocolate chips," note that they contain stabilizers and melt differently than bar chocolate. Using chopped bar chocolate often provides a superior melt and texture in applications like cookies or brownies. If you must substitute, look for reliable substitution guides that offer ratios for adjusting other ingredients like sugar or fat.
Accurate Measurement Techniques
Accurate measurement is crucial in baking, and this extends to baking chocolate. Using measuring cups designed for liquids versus dry ingredients can lead to inaccuracies. For solid baking chocolate, it's best to measure by weight using a kitchen scale whenever possible, as this is the most precise method. Recipes often specify "ounces" or "grams" of chocolate for this reason.
If measuring by volume, especially for chopped bar chocolate or chips, avoid packing the chocolate tightly into the measuring cup. Spoon it lightly into the cup and level it off. For melting, chopping chocolate into uniform, small pieces (like 1/2 inch or smaller) ensures it melts evenly and quickly, reducing the risk of overheating. Using properly measured and prepared chocolate is a fundamental step for successful baking.
Recipes for Beginners
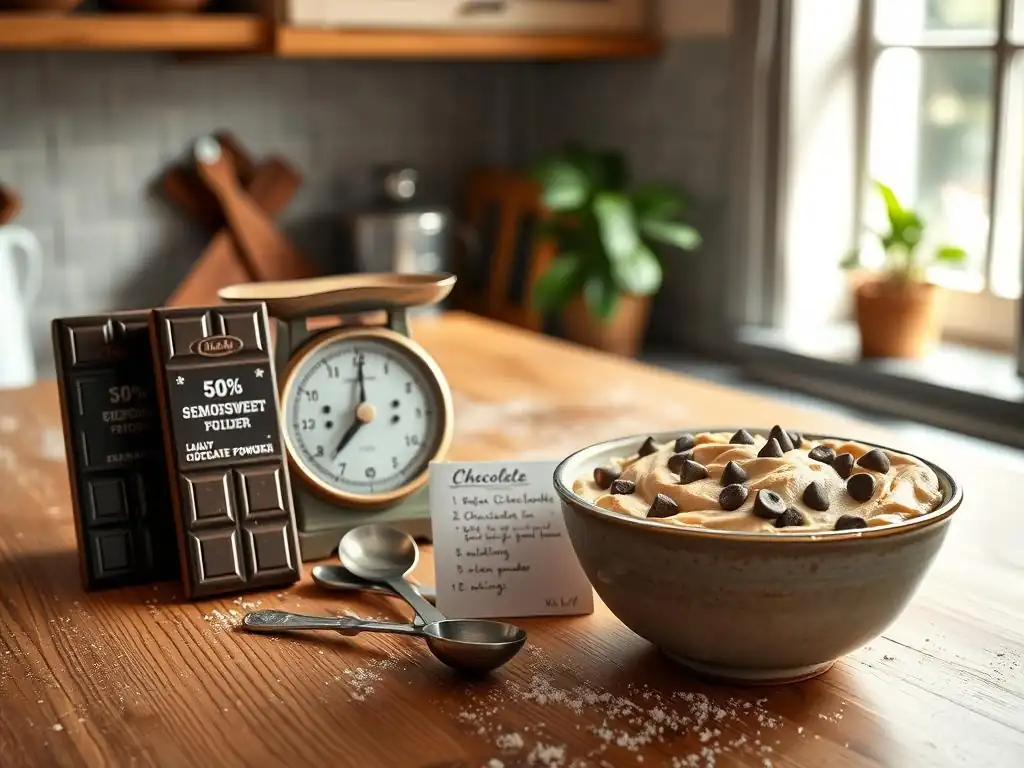
These cookies are a fantastic starting point for baking chocolate for beginners, showcasing how different forms of chocolate work together. They typically use cocoa powder for the dough's base flavor and large chunks of baking chocolate for gooey pockets.
- Ingredients: Standard cookie ingredients (butter, sugar, eggs, flour, vanilla, baking soda, salt) plus unsweetened or Dutch-process cocoa powder for the dough, and a generous amount of chopped bittersweet or semisweet baking chocolate (around 60-70% cacao works well) for the chunks. Some recipes might call for chocolate chips, but chopped bar chocolate melts more smoothly.
- Process: Cream butter and sugars, add eggs and vanilla. Whisk dry ingredients (flour, cocoa powder, baking soda, salt) separately. Combine wet and dry ingredients, then fold in the chopped chocolate chunks. Chill the dough for at least 30 minutes (this improves texture and flavor). Scoop dough balls onto a baking sheet and bake at around 350°F (175°C) for 10-12 minutes, or until edges are set but the center is still slightly soft. The generous amount of melting chocolate chunks creates a rich, decadent cookie.
Fudgy Chocolate Brownies
A classic fudgy brownie recipe relies heavily on baking chocolate for its dense texture and intense flavor, making it a perfect project for beginners to learn about melting chocolate.
- Ingredients: Often uses melted unsweetened or bittersweet baking chocolate (around 60-70% cacao) and cocoa powder, butter, sugar, eggs, flour, vanilla, and salt. Some recipes might use only melted chocolate or a combination.
- Process: Melt the chocolate and butter gently (using a double boiler or microwave). Whisk in sugar, then add eggs one at a time, followed by vanilla. Stir in the dry ingredients (flour, salt) until just combined – do not overmix, as this can lead to cakey brownies. Pour batter into a greased and floured or parchment-lined baking pan. Bake at around 325°F to 350°F (160°C to 175°C) for 25-35 minutes, depending on desired fudginess. The key is to not overbake; a toothpick inserted should come out with moist crumbs, not completely clean. The high ratio of fat and chocolate to flour contributes to the fudgy texture.
Simple Chocolate Cake
A straightforward chocolate cake recipe can demonstrate how melted baking chocolate or cocoa powder integrates into a batter to create a moist crumb and rich flavor. Many beginner recipes use cocoa powder, but some incorporate melted chocolate for extra richness.
- Ingredients: Standard cake ingredients (flour, sugar, cocoa powder or melted baking chocolate, eggs, milk or buttermilk, butter or oil, leavening agents like baking soda and powder, vanilla, salt). Recipes using melted chocolate might call for semisweet or bittersweet (around 50-65% cacao).
- Process: Cream butter and sugar, add eggs and vanilla. In a separate bowl, whisk dry ingredients. If using melted chocolate, melt it gently and whisk into the wet ingredients. Alternate adding dry ingredients and liquid (milk or buttermilk) to the wet mixture, starting and ending with dry. Mix until just combined. Pour batter into prepared cake pans and bake at around 350°F (175°C) for 30-40 minutes, or until a toothpick inserted comes out clean. The type of fat and liquid used, along with the chocolate component, greatly influences the cake's moisture and richness.
Advanced Techniques
Chocolate Ganache Applications
Ganache, a simple mixture of chocolate and hot cream, is incredibly versatile. While making basic ganache is suitable for baking chocolate for beginners, advanced techniques involve varying the ratios and applications. A basic pouring ganache might use a 1:1 ratio of chocolate to cream (by weight), while a thicker truffle ganache might use a 2:1 or even 3:1 ratio.
Advanced applications include using ganache as a filling for macarons or tarts, whipping it into a fluffy frosting, or using it as a glaze that sets up firmly. Achieving the perfect consistency requires precise measurement and understanding how different chocolate types (dark, milk, white) require different cream ratios due to their varying fat content. For example, white chocolate ganache often uses a 2:1 ratio of chocolate to cream because white chocolate has a lower percentage of cocoa solids than dark chocolate, but high cocoa butter.
Creating Chocolate Decorations and Garnishes
Moving beyond simple chocolate chips involves using tempered chocolate to create beautiful and stable decorations. This requires mastering tempering techniques to ensure the chocolate sets correctly with a snap and shine.
Techniques include piping intricate designs onto parchment paper, creating chocolate curls by scraping a block of chocolate, making chocolate shards or bark by spreading tempered chocolate thinly and breaking it, or using molds to create shapes like leaves or spheres. These decorations can elevate the presentation of cakes, pastries, and plated desserts. Using high-quality tempered baking chocolate is key for clean edges and a professional finish.
Exploring Chocolate Coatings and Enrobing
Coating or enrobing items like truffles, candies, or even fruit in a smooth, even layer of chocolate is another advanced skill that relies on properly tempered chocolate. This ensures a thin, crisp shell that sets quickly and has a beautiful sheen.
Methods range from simple hand-dipping using a fork or dipping tools to using specialized enrobing machines for larger batches. Maintaining the tempered chocolate at the correct working temperature throughout the dipping process is crucial. Issues like streaks, thick coatings, or foot (excess chocolate pooling at the base) are common problems when the chocolate is out of temper. Mastering enrobing allows for the creation of professional-quality confections.
Conclusion
Key Takeaways for Baking with Chocolate
Embarking on the journey of baking with chocolate is rewarding and delicious. The key takeaways for baking chocolate for beginners include understanding the fundamental differences between types of baking chocolate – unsweetened, bittersweet, semisweet, milk, and white – and how their varying compositions of cocoa solids, cocoa butter, and sugar impact flavor and function in a recipe. Recognizing the importance of cacao percentage helps in predicting intensity and sweetness.
Proper handling and storage are also critical; melting chocolate gently to avoid seizing and storing it correctly to prevent bloom maintain its quality. While advanced techniques like tempering offer exciting possibilities, starting with simple recipes allows beginners to build confidence and understand how chocolate behaves in different applications. Baking is a science and an art, and mastering chocolate is a significant step in that journey.
Encouragement for Further Exploration
The world of baking chocolate is vast and fascinating, offering endless possibilities for creativity in the kitchen. Don't be afraid to experiment with different types and percentages of chocolate as you become more comfortable. Try a recipe with a higher cacao percentage than you're used to, or explore the unique properties of white chocolate.
As you gain experience, consider delving into tempering for making homemade candies or exploring single-origin chocolates to taste the subtle flavor differences based on where the cocoa beans were grown. Baking with chocolate is a skill that improves with practice, and each attempt, successful or not, offers a valuable learning opportunity. Keep baking, keep exploring, and enjoy the delicious results!
Frequently Asked Questions
What are the main types of baking chocolate and when should I use them?
There are several types, including unsweetened, bittersweet, semi-sweet, and milk chocolate. Unsweetened chocolate is pure chocolate and used for intense flavor. Sweeter varieties like milk chocolate are ideal for milder desserts.
How do I melt baking chocolate properly to avoid seizing?
The best methods are using a double boiler or microwaving in short intervals, stirring frequently. Avoid getting any water in the chocolate, as this is a common cause of seizing.
Can I substitute one type of baking chocolate for another in a recipe?
Substituting can work, but it affects the sweetness and cocoa content of the final product. You may need to adjust the sugar in the recipe accordingly, especially when switching between unsweetened and semi-sweet.
What's the difference between baking chocolate and regular chocolate bars?
Baking chocolate is formulated specifically for baking, with a higher cocoa butter content. Regular chocolate bars often contain additives that can affect their melting properties and how they perform in baked goods.
How should I store baking chocolate to keep it fresh?
Store baking chocolate in a cool, dry, and dark place in an airtight container. Properly stored, it can last for a considerable time, but be aware of bloom, a white coating that appears, although it doesn't affect the flavor.
Final Reflection: Unlocking the Sweet Science of Baking Chocolate
The world of baking chocolate, once a mysterious realm of percentages and cocoa butter ratios, is now more accessible than ever. Understanding the nuances of baking chocolate isn't just about achieving perfectly fudgy brownies; it's about empowering yourself to create delicious, customized treats from scratch. This knowledge unlocks a world of culinary creativity, allowing you to tailor your baking to your exact preferences.
The journey through different types of baking chocolate—from unsweetened to bittersweet to milk—has profoundly impacted my own baking. It's not just about following recipes; it's about understanding the why behind each ingredient. The best bakers are the ones who understand the science behind the art.
This quote resonates deeply, as mastering the fundamentals of baking chocolate allows for greater flexibility and innovation in the kitchen. The subtle differences in flavor profiles and textures, once confusing, now feel like exciting possibilities.
Now, it's your turn to embark on this delicious adventure. Don't be intimidated by the seemingly complex world of baking chocolate. Experiment with different types, explore various recipes, and most importantly, have fun! The joy of creating something delicious with your own hands, using ingredients you truly understand, is a reward in itself. So, grab your apron, choose your chocolate, and let the baking begin!
Unlock Your Inner Pastry Chef: Start Baking Today!
Thanks for taking the time to explore the wonderful world of baking chocolate with us! We hope you now feel more confident and excited to experiment with different types and create delicious treats. Ready to put your newfound knowledge into action?
- Bake your dream dessert: Choose a recipe that excites you – maybe those decadent brownies or a rich chocolate cake – and give it a try! Remember what you've learned about choosing the right chocolate for the best results.
- Share your baking journey: Snap a photo of your creation and share it on social media using #BakeWithEaseChocolate. We'd love to see what you bake!
- Dive deeper into chocolate: Explore our other articles on baking techniques and recipes – you might find inspiration for your next culinary adventure!
What delicious chocolate creation will you bake first? Let us know in the comments!