
Vanilla Bean Ice Cream: The Classic Perfected, Simply

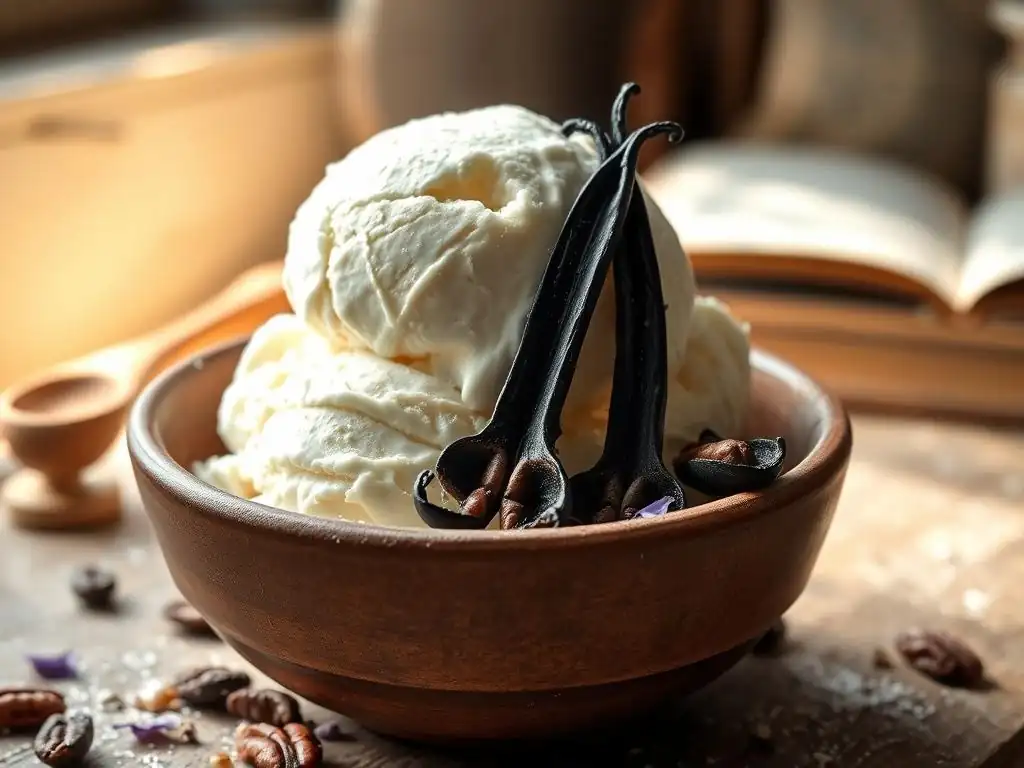
Welcome to BakeWithEase, where baking dreams become delicious realities! Ever wondered how to achieve that perfect scoop of creamy, intensely flavorful ice cream without the fuss? Our latest guide unravels the secrets to a stunning Vanilla Bean Ice Cream Recipe, simplifying the process and guaranteeing exceptional results. Get ready to ditch the store-bought stuff and discover the joy of homemade indulgence – your freezer (and taste buds) will thank you! So, grab your ingredients and let's get churning, shall we?
- BakeWithEase Presents: The Ultimate Vanilla Bean Ice Cream Recipe
- Why Vanilla Bean Ice Cream Is a Baking Essential
- Mastering the Vanilla Bean Ice Cream Recipe: A Step-by-Step Guide
- Tips and Tricks for the Best Vanilla Bean Ice Cream Recipe
- Serving Suggestions for Your Homemade Vanilla Bean Ice Cream
- Storing Your Vanilla Bean Ice Cream for Optimal Freshness
- Beyond the Recipe: Exploring Vanilla Bean Flavor
-
Frequently Asked Questions
- How easy is this Vanilla Bean Ice Cream recipe for a beginner baker?
- What makes this Vanilla Bean Ice Cream recipe "perfected"?
- Can I substitute other flavors for Vanilla Bean in this recipe?
- What equipment do I absolutely need to make this Vanilla Bean Ice Cream?
- Where can I find high-quality Vanilla Beans for this recipe?
- Final Reflection: The Enduring Allure of Simple Perfection
- Unlock Your Inner Ice Cream Maestro!
BakeWithEase Presents: The Ultimate Vanilla Bean Ice Cream Recipe
Welcome to BakeWithEase, where we believe that mastering the classics is the foundation of great baking. And what's more classic, more universally loved, than vanilla bean ice cream? It's the perfect canvas for countless desserts, a comforting treat on its own, and a true test of simple, quality ingredients handled with care. This guide will walk you through crafting a vanilla bean ice cream recipe that is rich, creamy, and bursting with that unmistakable, complex vanilla flavor. Forget store-bought; homemade is always better, and with our simple steps, you'll achieve perfection.
Crafting the perfect vanilla bean ice cream recipe at home is a rewarding experience. It allows you to control the quality of every ingredient, from the dairy to the star of the show – the vanilla bean itself. Unlike many commercial versions that rely heavily on stabilizers and artificial flavors, your homemade creation will be pure, showcasing the true essence of vanilla.
This article provides a comprehensive guide, ensuring that even if you're new to ice cream making, you can achieve a result that rivals the finest scoop shops. Get ready to elevate your dessert game with this essential recipe.
Why Vanilla Bean Ice Cream Is a Baking Essential
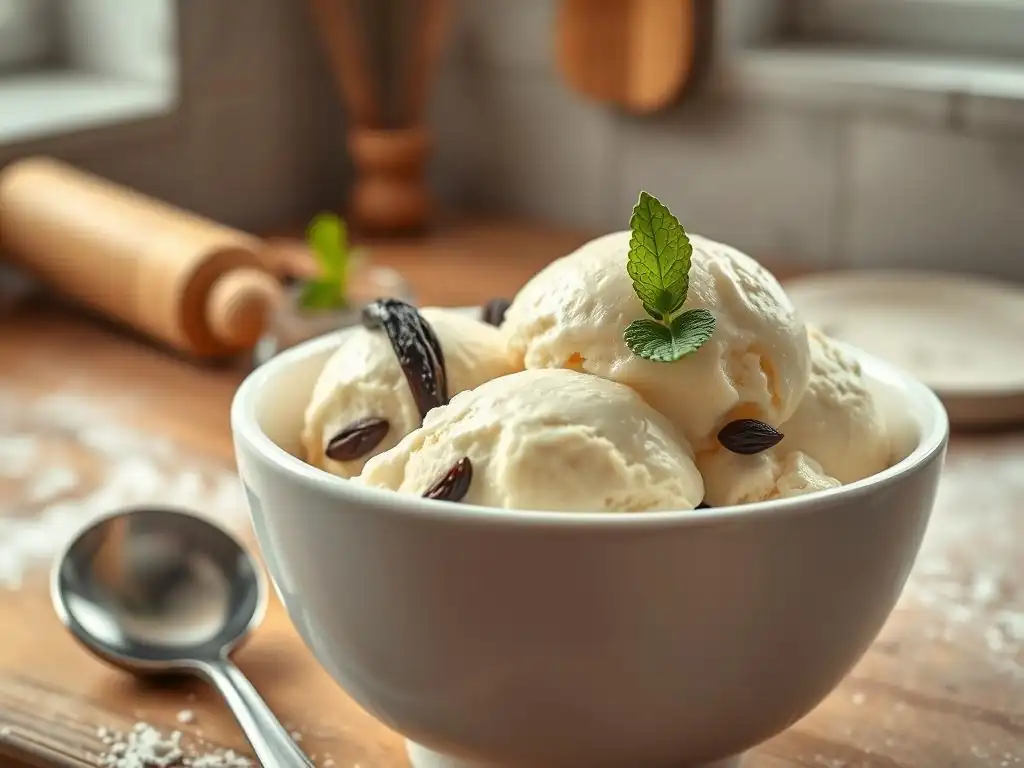
The Allure of Homemade Vanilla Ice Cream
There's a certain magic to homemade vanilla ice cream that store-bought simply can't replicate. It starts with the incredibly fresh taste, free from preservatives or artificial flavors. When you make it yourself, you control the texture – achieving a richness and creaminess that comes from using high-quality dairy and properly chilling and churning the base.
Furthermore, the flavor is paramount. Using real vanilla beans provides a depth and complexity that vanilla extract, while useful, cannot fully deliver. You'll notice subtle floral, woody, or even smoky notes depending on the origin of your vanilla bean, creating a far more nuanced flavor profile.
Beyond the superior taste and texture, making your own vanilla bean ice cream is a deeply satisfying process. It connects you to your food and allows for customization. You can adjust the sweetness level slightly, add a pinch of salt to enhance the flavor, or incorporate other elements precisely to your liking.
Serving a scoop of your own perfectly crafted vanilla bean ice cream alongside a warm slice of apple pie or a fudgy brownie is an unparalleled joy, proving that simple ingredients, when treated with respect, can create extraordinary results. It’s more than just a dessert; it’s an experience.
Why Choose Vanilla Bean Over Vanilla Extract?
The primary reason to opt for vanilla bean in your vanilla bean ice cream recipe is the unparalleled flavor complexity and intensity it provides. A single vanilla bean contains hundreds of aromatic compounds, such as vanillin, but also piperonal, guaiacol, and eugenol, among many others.
These compounds contribute to a much richer, more nuanced flavor profile than the single compound (primarily vanillin) typically found in vanilla extract. While good quality vanilla extract is made by steeping vanilla beans in alcohol and water, the process doesn't extract the full spectrum of flavors available in the bean itself, especially the non-soluble compounds.
Furthermore, using a vanilla bean introduces those beautiful, tiny black specks into your ice cream. These specks are visual proof of the real ingredient and add to the gourmet appeal of the finished product. While some high-quality extracts might contain "vanilla bean seeds," they often don't provide the same robust flavor infusion that comes from simmering the entire scraped bean pod in the cream base. For the ultimate, pure, and complex vanilla flavor that truly defines a premium vanilla bean ice cream, the bean is the undisputed champion.
Mastering the Vanilla Bean Ice Cream Recipe: A Step-by-Step Guide
Ingredients for the Perfect Vanilla Bean Ice Cream
Crafting the perfect vanilla bean ice cream recipe begins with selecting the finest ingredients. The quality of each component directly impacts the final flavor and texture of your ice cream. Aim for fresh, high-fat dairy, the best vanilla beans you can source, and your preferred sweetener. A typical recipe might call for about 2 cups (approximately 470ml) of heavy cream, 1 cup (approximately 240ml) of whole milk, 3/4 cup (approximately 150g) of granulated sugar, 4-6 large egg yolks, and 1-2 high-quality vanilla beans.
Using fresh ingredients is paramount. Check the dates on your dairy and eggs. For the sweetener, while granulated sugar is standard, a small amount of liquid sweetener like corn syrup or honey (around 1/4 cup or 60ml) can actually improve the texture by inhibiting ice crystal formation, resulting in a smoother mouthfeel. However, for a classic, pure vanilla flavor, sugar is often preferred. Remember, the simplicity of this vanilla bean ice cream recipe means each ingredient plays a crucial role.
High-Quality Vanilla Beans: The Key to Flavor
The quality of your vanilla beans is the single most important factor in this vanilla bean ice cream recipe. Look for beans that are plump, moist, and flexible – not dry or brittle. They should have a rich, sweet aroma. Vanilla beans are primarily sourced from a few regions globally, with Madagascar Bourbon, Tahitian, and Mexican varieties being the most common and distinct. Madagascar beans (Vanilla planifolia) are typically creamy, sweet, and classic. Tahitian beans (Vanilla tahitensis) are often more floral and fruity. Mexican beans (Vanilla planifolia) tend to be smoky and spicy.
For a classic vanilla bean ice cream, Madagascar beans are a popular choice due to their familiar, rich flavor profile. Using one large or two smaller beans per batch is usually sufficient to impart a strong vanilla flavor. The cost of vanilla beans can vary significantly based on global supply, but investing in good quality beans is essential for a truly outstanding result. You'll split the bean lengthwise and scrape out the tiny seeds, adding both the seeds and the pod to your dairy for maximum flavor extraction during the heating process.
Fresh Dairy: Cream and Milk Selection
The richness and texture of your vanilla bean ice cream come largely from the dairy. Using heavy cream (which typically contains 36-40% milk fat) is crucial for a creamy, smooth consistency. This high fat content helps prevent the formation of large ice crystals during freezing, which can make ice cream seem icy or grainy. Combining heavy cream with whole milk (around 3-3.5% milk fat) provides the right balance of fat and liquid to create a custard base that is both rich and churnable.
Avoid using low-fat milk or half-and-half, as they will result in an ice cream that is less creamy and more prone to developing ice crystals. Ultra-pasteurized dairy, while convenient for longer shelf life, can sometimes have a slightly cooked flavor that might subtly impact the delicate vanilla notes. While not always available, using pasteurized-only dairy can contribute to an even fresher taste in your vanilla bean ice cream recipe. Ensure your dairy is cold before starting the process, as this will help temper the egg yolks more safely.
Sweeteners: Sugar and Honey
Sugar in ice cream serves multiple purposes beyond just providing sweetness. It lowers the freezing point of the mixture, which is essential for achieving a scoopable texture rather than a solid block of ice. It also contributes to the overall body and smoothness of the ice cream. Granulated sugar is the most common choice for a vanilla bean ice cream recipe because it has a neutral flavor that allows the vanilla to shine. A typical amount is around 3/4 cup (150g) per quart of base, but this can be adjusted slightly to personal preference.
While granulated sugar is standard, incorporating a small amount of liquid sweetener like corn syrup or honey can have textural benefits. About 1/4 cup (60ml) of corn syrup, for example, can help keep the ice cream softer and less icy straight from the freezer. Honey can add a subtle floral note that pairs beautifully with certain types of vanilla, but its distinct flavor will be noticeable.
Using too much liquid sweetener, however, can make the ice cream too soft. Stick primarily to granulated sugar for a classic vanilla bean ice cream recipe, perhaps experimenting with a touch of liquid sweetener once you've mastered the basic technique.
Equipment Needed for Homemade Ice Cream
Making homemade vanilla bean ice cream doesn't require a professional kitchen, but having the right tools makes the process much smoother and ensures better results. The most essential piece of equipment is an ice cream maker, which churns and freezes the base simultaneously, breaking up ice crystals as they form to create a smooth texture. Beyond the maker, standard kitchen tools are needed for preparing the custard base.
Having a good set of measuring cups and spoons is fundamental for accuracy in any vanilla bean ice cream recipe. A sturdy whisk is necessary for tempering the egg yolks and ensuring a smooth custard. A heatproof spatula is invaluable for stirring the custard as it thickens. You'll also need saucepans for heating the dairy and cooking the custard, and bowls for mixing ingredients and chilling the finished base. Investing in quality tools will not only make ice cream making easier but also improve consistency.
Ice Cream Maker Essentials
An ice cream maker is the heart of the process for this vanilla bean ice cream recipe. There are generally two main types: those with a freezer bowl that needs to be pre-frozen for at least 12-24 hours, and those with a built-in compressor that freezes the mixture as it churns. Freezer bowl models are more affordable and compact, making them a popular choice for home bakers. Ensure your freezer is cold enough (ideally 0°F or -18°C) to properly freeze the bowl.
Compressor models are more expensive but offer the convenience of being ready to use at any time, as they don't require pre-freezing. This is ideal if you plan to make multiple batches or spontaneous ice cream. Regardless of the type, the function is the same: to churn the base while simultaneously freezing it, which incorporates air and prevents large ice crystals from forming. This mechanical process is what gives ice cream its characteristic smooth and creamy texture, vital for a perfect vanilla bean ice cream.
Other Helpful Tools: Whisk, Spatula, Measuring Cups
Beyond the ice cream maker, several common kitchen tools are indispensable for successfully executing this vanilla bean ice cream recipe. A sturdy whisk is crucial for beating the egg yolks until pale and slightly thickened, a process often called "ribboning." It's also essential for whisking a small amount of hot dairy into the egg yolks during tempering, ensuring they don't scramble. Choose a whisk that feels comfortable in your hand and is appropriately sized for your mixing bowls.
A heatproof rubber or silicone spatula is perfect for stirring the custard base as it cooks, allowing you to scrape the bottom and sides of the saucepan to prevent scorching. It's also ideal for scraping every last bit of that precious vanilla bean ice cream base into your ice cream maker. Accurate measuring cups and spoons are non-negotiable for consistency. Precision in measuring ingredients, especially sugar and dairy, is key to achieving the desired texture and sweetness balance in your homemade vanilla bean ice cream.
Detailed Instructions: Crafting Your Vanilla Bean Ice Cream Base
The base for this vanilla bean ice cream recipe is a classic French-style custard, known as crème anglaise. This involves heating the dairy, infusing it with vanilla, whisking egg yolks with sugar, tempering the yolks with the hot dairy, and then gently cooking the mixture until it thickens. This process creates a rich, stable base that churns into incredibly creamy ice cream. Patience and attention to detail are key during this stage.
Here are the core steps for crafting the custard base:
- Heat the dairy and vanilla.
- Whisk egg yolks and sugar.
- Temper the egg yolks.
- Cook the custard until thickened.
- Strain and chill thoroughly.
Following these steps carefully will ensure a smooth, flavorful base ready for churning into perfect vanilla bean ice cream.
Infusing the Cream with Vanilla Bean Flavor
The first critical step in this vanilla bean ice cream recipe is extracting the maximum flavor from your high-quality vanilla bean. Start by splitting the vanilla bean lengthwise with a sharp knife. Use the back of the knife blade or a spoon to scrape out the tiny, oily seeds (often called "vanilla caviar"). Place both the scraped seeds and the empty bean pod into a saucepan with your heavy cream and whole milk.
Gently heat the dairy mixture over medium heat, stirring occasionally, until it just barely simmers around the edges. Do not bring it to a rolling boil. Heating helps the fat in the dairy absorb the fat-soluble flavor compounds from the vanilla bean, creating a deeply aromatic infusion.
Once it reaches a gentle simmer, remove the pan from the heat, cover it, and let it steep for about 15-30 minutes. This steeping time allows the flavors to meld and intensify, saturating the dairy with that pure vanilla essence before you move on to the next step of the vanilla bean ice cream recipe.
Creating the Custard Base: Tempering the Eggs
While the vanilla-infused dairy is steeping, whisk together your egg yolks and sugar in a separate bowl until the mixture is pale yellow and forms a ribbon when the whisk is lifted. This process incorporates air and begins to dissolve the sugar. Tempering the egg yolks is a crucial step to prevent them from scrambling when added to the hot dairy. It involves gradually raising the temperature of the egg yolks by slowly incorporating some of the hot liquid.
Remove the vanilla pod from the steeped dairy (you can rinse and dry it for future use in sugar or extract). Reheat the dairy gently until it is hot but not simmering again. Slowly drizzle about half a cup of the hot dairy into the whisked egg yolk mixture, whisking continuously and vigorously. This slowly warms the yolks. Once tempered, pour the warmed yolk mixture back into the saucepan with the remaining hot dairy. This gradual addition ensures a smooth transition without cooking the eggs instantly, setting you up for a successful vanilla bean ice cream base.
Cooking and Chilling the Base: Ensuring a Smooth Texture
After tempering the eggs and combining the mixtures, return the saucepan to low to medium-low heat. Stir the custard constantly with a heatproof spatula, scraping the bottom and sides of the pan. Do not let the mixture boil, as this can cause the eggs to curdle. Cook until the custard thickens enough to coat the back of a spoon, meaning if you run your finger across the back of the coated spoon, the line remains distinct. This typically happens when the custard reaches a temperature between 170°F and 175°F (approximately 77°C to 79°C).
Once thickened, immediately remove the custard from the heat and strain it through a fine-mesh sieve into a clean bowl. Straining removes any potential small bits of cooked egg or residual vanilla bean pod fibers, ensuring a perfectly smooth texture for your vanilla bean ice cream. This is a vital step for achieving that silky mouthfeel.
Place plastic wrap directly onto the surface of the custard to prevent a skin from forming as it cools. Chill the base thoroughly in the refrigerator for at least 4-6 hours, or preferably overnight, until it is very cold (ideally below 40°F or 4°C). Proper chilling is essential for the ice cream maker to churn effectively and produce small ice crystals.
Churning and Freezing Your Vanilla Bean Ice Cream
Once your vanilla bean ice cream base is thoroughly chilled, it's time for the exciting part: churning! This is where the liquid base transforms into soft, scoopable ice cream as air is incorporated and ice crystals are kept small by the churning paddle. The process is relatively quick, usually taking between 15 and 30 minutes depending on your ice cream maker and the temperature of your base.
Preparing your ice cream maker according to the manufacturer's instructions is crucial before adding the base. Churning to the correct consistency is key – you want it to be the texture of soft-serve ice cream. Finally, transferring the churned ice cream to a container and freezing it completes the process, allowing it to harden to a scoopable consistency. This stage of the vanilla bean ice cream recipe is straightforward but requires attention to timing and temperature.
Preparing Your Ice Cream Maker
Proper preparation of your ice cream maker is essential for successful churning of your vanilla bean ice cream. If you have a freezer bowl model, ensure the bowl has been in the freezer for the recommended time, typically 12-24 hours or until completely frozen solid. A common test is to shake the bowl; if you hear liquid sloshing inside, it's not fully frozen and won't churn the ice cream properly. Place the frozen bowl into the ice cream maker base and attach the churning paddle and lid according to the manufacturer's instructions.
If you have a compressor model, simply ensure the machine is clean and assembled correctly. Turn on the machine before adding the chilled vanilla bean ice cream base. Starting the churning process first helps prevent the base from freezing solid onto the sides of the bowl before the paddle can begin moving. Carefully pour the well-chilled base into the churning bowl through the opening, ensuring it doesn't overflow.
Churning to Perfection: Achieving the Right Consistency
Once the vanilla bean ice cream base is in the running ice cream maker, let it churn according to your machine's instructions. This usually takes between 15 and 30 minutes. During this time, the paddle continuously scrapes the freezing mixture off the sides of the bowl while incorporating air. You will see the mixture gradually thicken and increase in volume as air is introduced.
The ice cream is ready when it has the consistency of soft-serve ice cream. It should be thick and relatively firm, but still soft enough to easily scoop with a spatula. Avoid over-churning, as this can sometimes negatively affect the texture. The goal is to reach a point where it's too firm to churn effectively but not yet fully hard. This soft stage is perfect for transferring to a container for the final freezing step in your vanilla bean ice cream recipe.
Final Freezing: Hardening the Ice Cream
After churning, your vanilla bean ice cream will be soft, similar to soft-serve. To achieve a scoopable, firm texture, it needs to harden in the freezer. Transfer the churned ice cream to an airtight container. A shallow, wide container can sometimes help the ice cream freeze more evenly and quickly than a deep, narrow one. Press plastic wrap directly onto the surface of the ice cream to minimize exposure to air and prevent freezer burn.
Place the sealed container in the coldest part of your freezer (usually the back) for at least 4-6 hours, or until it is firm enough to scoop easily. Freezing allows the remaining water in the mixture to solidify, giving the ice cream its structure. While waiting is tough, this final freezing step is essential for the texture of your homemade vanilla bean ice cream. For best results, let the ice cream sit at room temperature for a few minutes before scooping.
Tips and Tricks for the Best Vanilla Bean Ice Cream Recipe
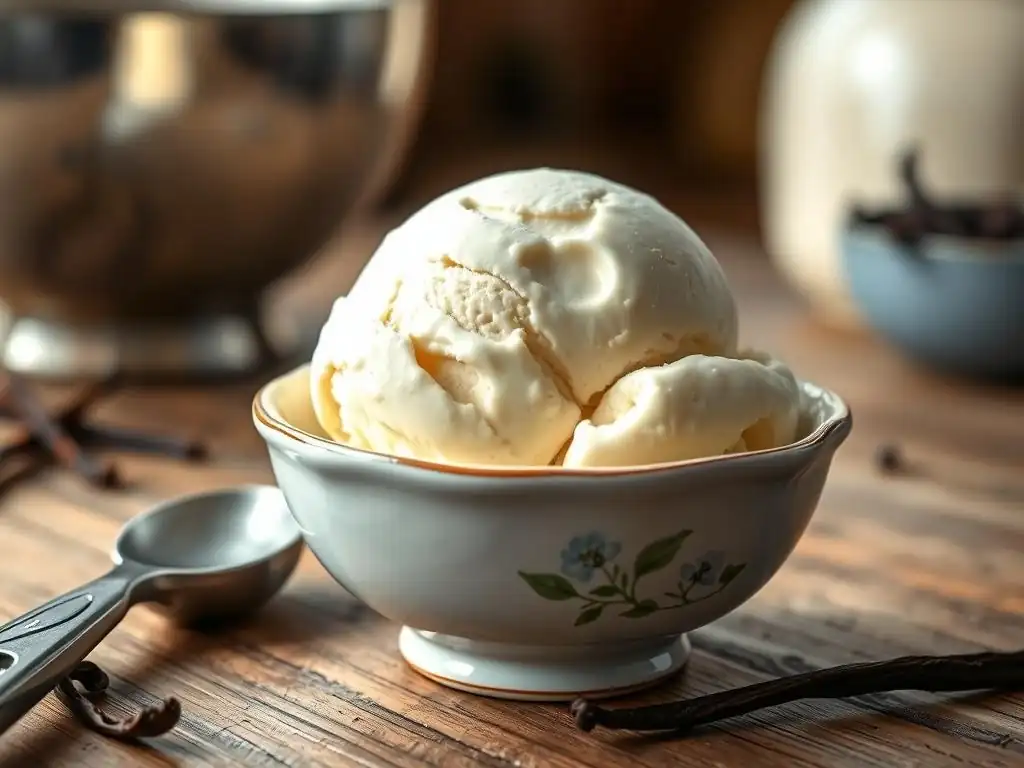
Achieving truly outstanding vanilla bean ice cream involves more than just following the steps; it's also about understanding the nuances and troubleshooting potential issues. A smooth, creamy texture is the hallmark of great ice cream, and there are several factors that contribute to this. Knowing how to handle common problems like graininess or iciness is also key to perfecting your craft.
Furthermore, while a classic vanilla bean ice cream recipe is perfect on its own, vanilla's versatility means it pairs beautifully with countless additions. Don't be afraid to experiment with simple enhancements to elevate your base recipe. These tips and tricks will help you consistently produce delicious results and confidently tackle any challenges that arise during your ice cream making journey.
Achieving a Smooth and Creamy Texture
The secret to a smooth and creamy vanilla bean ice cream lies in minimizing the size and number of ice crystals. This is primarily achieved through three factors: fat content, sugar content, and rapid freezing/churning. The high fat content from heavy cream and egg yolks interferes with ice crystal formation, making the ice cream richer and smoother. Sufficient sugar also lowers the freezing point, contributing to a softer texture.
Crucially, churning the base in an ice cream maker breaks up ice crystals as they form and incorporates air, which further prevents the crystals from growing large. Ensuring your base is very cold before churning (ideally 40°F or 4°C or below) allows the ice cream maker to freeze it more quickly and efficiently, resulting in smaller crystals.
Freezing the churned ice cream rapidly in a very cold freezer also helps set the texture before large crystals have a chance to develop. Using a small amount of alcohol (like a tablespoon of vodka) or a liquid sweetener can also slightly lower the freezing point and improve scoopability.
Troubleshooting Common Ice Cream Making Problems
Even with the best vanilla bean ice cream recipe, sometimes things don't go perfectly. Two of the most common issues are grainy and icy textures. Understanding the causes can help you prevent them or even salvage a batch. Graininess often relates to the custard base not being cooked properly, while iciness is usually a freezing or churning issue.
Don't be discouraged if your first batch isn't absolutely perfect. Ice cream making, like any baking skill, improves with practice. By identifying what went wrong, you can adjust your technique for the next attempt. Armed with a little knowledge about common pitfalls, you'll be better equipped to consistently produce smooth, delicious vanilla bean ice cream.
Grainy Ice Cream: Causes and Solutions
Grainy ice cream is often a sign that something went wrong with the custard base, specifically the egg yolks. One primary cause is undercooking the custard; if it doesn't reach the proper thickening temperature (around 170-175°F or 77-79°C), the egg proteins haven't fully cooked and emulsified properly, leading to a less smooth texture. Another cause is scrambling the egg yolks during tempering or cooking, which leaves tiny bits of cooked egg throughout the base.
To prevent graininess, ensure you temper the egg yolks slowly and whisk constantly when adding the hot dairy. Cook the custard gently over low heat, stirring continuously, and watch for it to thicken enough to coat the back of a spoon. Using a thermometer provides accuracy. If your custard does seem slightly grainy after cooking, straining it through a very fine-mesh sieve or even cheesecloth multiple times can help remove small particles and improve smoothness before chilling the base for your vanilla bean ice cream recipe.
Icy Ice Cream: Preventing Ice Crystals
Icy ice cream, characterized by large, noticeable ice crystals, is typically caused by factors that allow water to freeze slowly or form large crystals. Too much water in the base (e.g., using low-fat dairy), not enough fat or sugar (which interfere with freezing), or slow freezing can all contribute. If the base isn't thoroughly chilled before churning, the ice cream maker works less efficiently, resulting in larger crystals. Similarly, if the churned ice cream freezes slowly in the freezer, crystals have more time to grow.
To prevent iciness in your vanilla bean ice cream, use full-fat dairy and the recommended amount of sugar. Ensure the base is very cold (below 40°F/4°C) before churning. Churn the ice cream until it reaches the proper soft-serve consistency. Finally, transfer it to an airtight container and freeze it as quickly as possible in the coldest part of your freezer. Avoiding frequent thawing and refreezing also helps maintain a smooth texture.
Enhancing Your Vanilla Bean Ice Cream: Flavor Variations
While the classic vanilla bean ice cream recipe is perfect as is, its neutral yet complex flavor makes it an ideal base for simple enhancements. These additions can transform your basic batch into a gourmet treat without overwhelming the delicate vanilla notes. Think of it as adding a flourish to an already beautiful painting.
Simple mix-ins or swirls can add texture and complementary flavors. Some popular variations include incorporating chocolate, caramel, or fresh fruit. The key is to add these elements towards the end of the churning process or layer them in during the final freezing step to ensure they are evenly distributed without being completely blended in.
Adding Chocolate Shavings, Salted Caramel Swirls, Fresh Berries
One delightful variation on the vanilla bean ice cream recipe is adding mix-ins after churning. For instance, finely chopped chocolate or chocolate shavings can be stirred in during the last minute or two of churning or folded in just before transferring to the freezer. About 1/2 cup (approximately 85g) of chopped dark or milk chocolate works well for a standard batch. The chocolate adds bursts of flavor and texture.
A salted caramel swirl is another popular choice. You can make your own salted caramel sauce (using about 1 cup/200g sugar, 1/2 cup/120ml cream, and a pinch of salt) and let it cool completely. Drizzle the cooled caramel sauce into the churned ice cream as you layer it into your freezer container, creating beautiful ribbons of flavor.
Approximately 1/4 to 1/2 cup of sauce is usually sufficient. Fresh berries, like raspberries or strawberries, can also be gently folded in at the end, adding a burst of freshness and slight tartness that contrasts wonderfully with the sweet, creamy vanilla bean ice cream.
Serving Suggestions for Your Homemade Vanilla Bean Ice Cream
Your perfectly crafted homemade vanilla bean ice cream is a dessert in itself, but its versatility truly shines when paired with other baked goods. Its clean, classic flavor makes it the ideal accompaniment to warm, rich, or fruity desserts, providing a cool, creamy contrast. Serving it slightly softened allows the textures and flavors to meld beautifully with its partners.
Whether you stick to time-honored pairings or get creative with new combinations, presenting your homemade vanilla bean ice cream is part of the joy. A simple scoop can elevate a basic dessert to something special, or form the foundation of a more elaborate creation.
Few dessert pairings are as iconic or satisfying as vanilla bean ice cream served alongside warm baked goods. A generous scoop melting into a slice of warm apple pie is a quintessential comfort. The cool, creamy sweetness cuts through the tartness of the apples and the richness of the pastry, creating a harmonious bite. A standard slice of pie might be served with 1-2 scoops (approximately 1/4 - 1/2 cup) of ice cream.
Similarly, a warm, fudgy brownie or a freshly baked chocolate chip cookie is elevated by a dollop of vanilla bean ice cream. The contrast in temperature and texture – the gooey warmth of the brownie or cookie against the cold, smooth ice cream – is simply delightful. This classic vanilla bean ice cream recipe is designed to complement, not overpower, these beloved desserts, making it an indispensable addition to your baking repertoire.
Creative Dessert Ideas with Vanilla Bean Ice Cream
Beyond the classics, vanilla bean ice cream can inspire numerous creative dessert ideas. Its clean flavor profile makes it an excellent base for sundaes with various toppings like hot fudge, nuts, whipped cream, and cherries. You could build a sophisticated sundae with toasted pecans, a drizzle of bourbon caramel sauce, and a sprinkle of sea salt over your homemade vanilla bean ice cream.
Consider using it in ice cream sandwiches with homemade cookies, or blending it into milkshakes. A simple scoop can transform a fruit crumble or cobbler into a decadent treat. You could even use it to make an affogato – pouring a shot of hot espresso over a scoop of cold vanilla bean ice cream. The possibilities are vast, showcasing the incredible versatility of this fundamental vanilla bean ice cream recipe.
Storing Your Vanilla Bean Ice Cream for Optimal Freshness
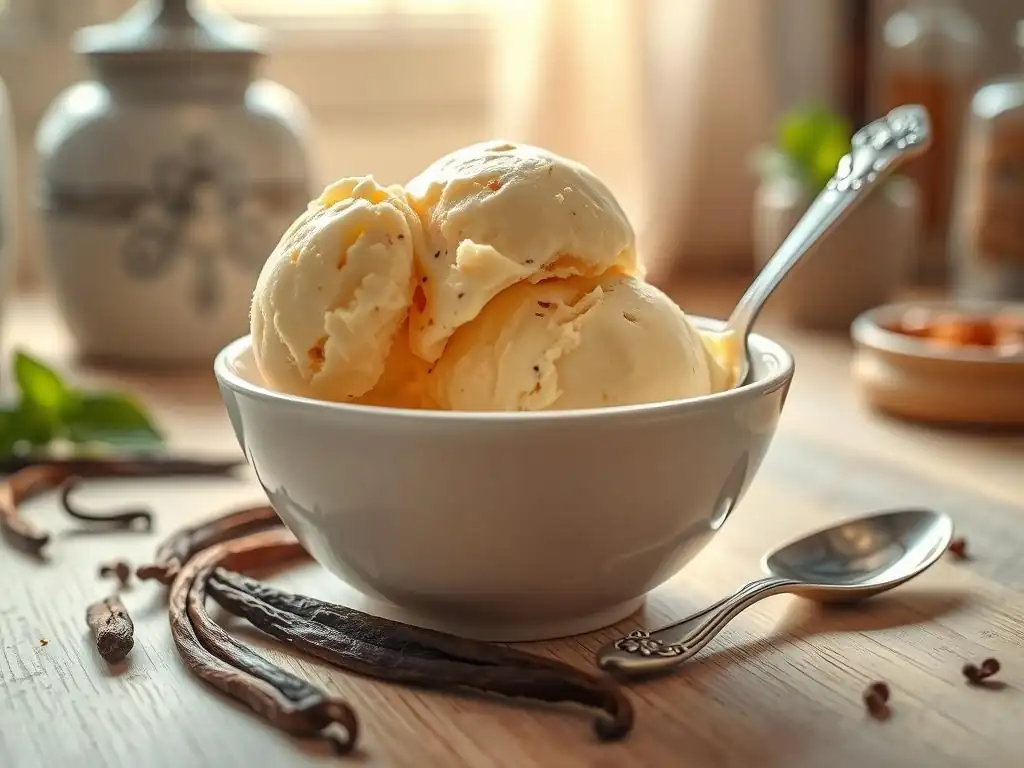
Proper storage is key to maintaining the quality, texture, and flavor of your homemade vanilla bean ice cream. While it's tempting to eat it all immediately, storing it correctly ensures that subsequent servings are just as delicious as the first. The main goals are to prevent ice crystals from forming and to avoid freezer burn.
Using the right container and minimizing air exposure are the most effective strategies for preserving your vanilla bean ice cream. Following these simple storage tips will help keep your ice cream tasting fresh and creamy for as long as it lasts (which, if it's truly great vanilla bean ice cream, might not be very long! ).
Proper Container Selection
Selecting the right container is crucial for storing your homemade vanilla bean ice cream. Airtight containers are best because they minimize the ice cream's exposure to air, which is the primary cause of freezer burn and the formation of large ice crystals on the surface. Plastic freezer containers with tight-fitting lids are a popular choice.
Alternatively, you can use a loaf pan or other dish and press plastic wrap firmly against the surface of the ice cream before covering the entire pan tightly with foil or a lid. Ideally, use a container that is just large enough to hold the amount of ice cream you've made, minimizing the amount of air space above the ice cream. Dark-colored containers are sometimes preferred as they absorb less light and can help the ice cream stay colder more consistently.
Preventing Freezer Burn
Freezer burn occurs when moisture evaporates from the surface of the ice cream and forms ice crystals elsewhere in the freezer. It results in a dry, icy, and often off-flavored layer on the ice cream. Preventing freezer burn is essential for maintaining the quality of your vanilla bean ice cream. The most effective method is to minimize the ice cream's exposure to air.
After transferring your churned ice cream to an airtight container, press a layer of plastic wrap directly onto the surface of the ice cream, ensuring there are no air pockets between the wrap and the ice cream. Then, seal the container tightly with its lid or foil.
Storing the ice cream in the coldest part of your freezer, where temperatures are most stable, also helps prevent the slight thawing and refreezing cycles that contribute to freezer burn. With proper storage, your vanilla bean ice cream should remain fresh and delicious for several weeks, though it's often best within the first week or two.
Beyond the Recipe: Exploring Vanilla Bean Flavor
The journey with vanilla bean doesn't have to end with this classic vanilla bean ice cream recipe. The distinctive, aromatic flavor of vanilla bean is incredibly versatile and can enhance a wide range of frozen desserts and baked goods. Understanding the full potential of this ingredient opens up a world of delicious possibilities in your kitchen.
Exploring how vanilla bean behaves in different contexts, from other frozen treats to various baking applications, highlights why it remains one of the most prized and widely used flavors in the culinary world. It's a flavor that complements both rich and light ingredients, sweet and even savory dishes.
Vanilla Bean in Other Frozen Desserts
The rich, complex flavor of vanilla bean is a natural fit for many other frozen desserts beyond traditional ice cream. It can form the base for luxurious gelato, which typically uses more milk and fewer eggs than ice cream, resulting in a denser texture. A vanilla bean gelato recipe would follow a similar custard process but with different dairy ratios.
Vanilla bean also shines in sorbets or granitas made with fruit. While not a primary flavor, a small amount of vanilla bean steeped in the liquid base for a strawberry or raspberry sorbet can add a subtle depth that elevates the fruit flavor. Even simple frozen yogurt can be enhanced with the addition of vanilla bean seeds for flavor and visual appeal. The principles learned from making this vanilla bean ice cream recipe can often be applied or adapted to these other frozen treats.
The Versatility of Vanilla Bean in Baking
Vanilla bean is a fundamental flavor in countless baking recipes. Its role is often to enhance and complement other flavors without overpowering them, but it can also stand proudly on its own. In custards, puddings, and crème brûlée, vanilla bean is often the star, providing its signature speckled appearance and rich aroma.
It's also frequently used in cakes, cookies, muffins, and pastries, where it adds warmth and complexity to the overall flavor profile. A simple vanilla bean cake recipe, for example, showcases the ingredient beautifully. Even in recipes where chocolate or fruit are the main flavors, a touch of vanilla bean can round out the taste and add depth. Understanding how to properly extract flavor from the bean, whether by steeping in liquids or incorporating seeds directly into batters, is a valuable skill for any baker looking to elevate their creations.
Frequently Asked Questions
How easy is this Vanilla Bean Ice Cream recipe for a beginner baker?
This recipe is designed with simplicity in mind, making it very accessible for beginners. We provide step-by-step instructions and focus on easy-to-find ingredients, ensuring a smooth baking experience.
What makes this Vanilla Bean Ice Cream recipe "perfected"?
The "perfected" aspect comes from our focus on optimal ratios and precise techniques, resulting in a creamy, flavorful ice cream. We've refined the process for consistent results.
Can I substitute other flavors for Vanilla Bean in this recipe?
While this recipe is specifically for Vanilla Bean, you can certainly experiment. However, be mindful of how other flavors might affect the overall texture and sweetness of the ice cream.
What equipment do I absolutely need to make this Vanilla Bean Ice Cream?
You'll need a good quality ice cream maker, a saucepan, and basic kitchen tools like measuring cups and spoons. A blender or immersion blender can be helpful for a smoother texture.
Where can I find high-quality Vanilla Beans for this recipe?
Look for Vanilla Beans at specialty spice shops, well-stocked grocery stores, or online retailers. Ensure they are plump and fragrant for the best flavor in your ice cream.
Final Reflection: The Enduring Allure of Simple Perfection
The seemingly simple act of making vanilla bean ice cream reveals a profound truth about culinary artistry: sometimes, the purest flavors, achieved with meticulous care, offer the most profound satisfaction. This recipe, explored in detail throughout this article, isn't just about achieving a creamy, delicious dessert; it's about understanding the power of quality ingredients and precise technique to elevate the ordinary to the extraordinary. The pursuit of the perfect vanilla bean ice cream speaks to a deeper human desire for both comfort and excellence.
The enduring popularity of vanilla bean ice cream, a flavor seemingly ubiquitous yet endlessly nuanced, reflects our collective yearning for a taste of home, a sense of nostalgia, and a reminder of simpler times. The simplest things are often the most beautiful.
This quote, while not directly about ice cream, perfectly encapsulates the essence of this recipe and its enduring appeal. The subtle variations in bean quality, the careful balancing of cream and sugar, the precise timing of churning – these details, often overlooked, are what transform a basic dessert into a truly memorable experience. It's a testament to the power of mindful creation.
Now, consider your own culinary journey. What seemingly simple dish holds a special place in your heart? I encourage you to take the lessons learned here – the emphasis on quality ingredients, the attention to detail, and the appreciation for the beauty of simplicity – and apply them to your own cooking. Whether it's perfecting a classic recipe or venturing into new culinary territory, remember that the pursuit of excellence, even in the most familiar of dishes, is a rewarding and enriching experience. Embrace the process, savor the results, and discover the magic that lies within the seemingly simple.
Unlock Your Inner Ice Cream Maestro!
Thanks for joining us on this creamy journey into the world of perfect vanilla bean ice cream! We hope you've gained some valuable tips and tricks to elevate your dessert game. Now it's time to put your newfound knowledge to the test.
- Whip up a batch of your own vanilla bean ice cream: Use our recipe (or your own, inspired by what you've learned!) and experience the joy of homemade deliciousness. This is your chance to truly master the craft!
- Share your creations: Tag us on social media with your homemade ice cream masterpieces – we'd love to see your results! Use #BakeWithEaseVanilla.
- Experiment with unique flavor additions: What unexpected ingredient will you add to your next batch? Think cardamom, lavender, or even a hint of sea salt. Let your creativity flow!
Ready to take the plunge and craft your own perfect scoop? What exciting flavor combinations will you be experimenting with next?