
From Zero to Dessert Hero: Your Easy NoBake Journey

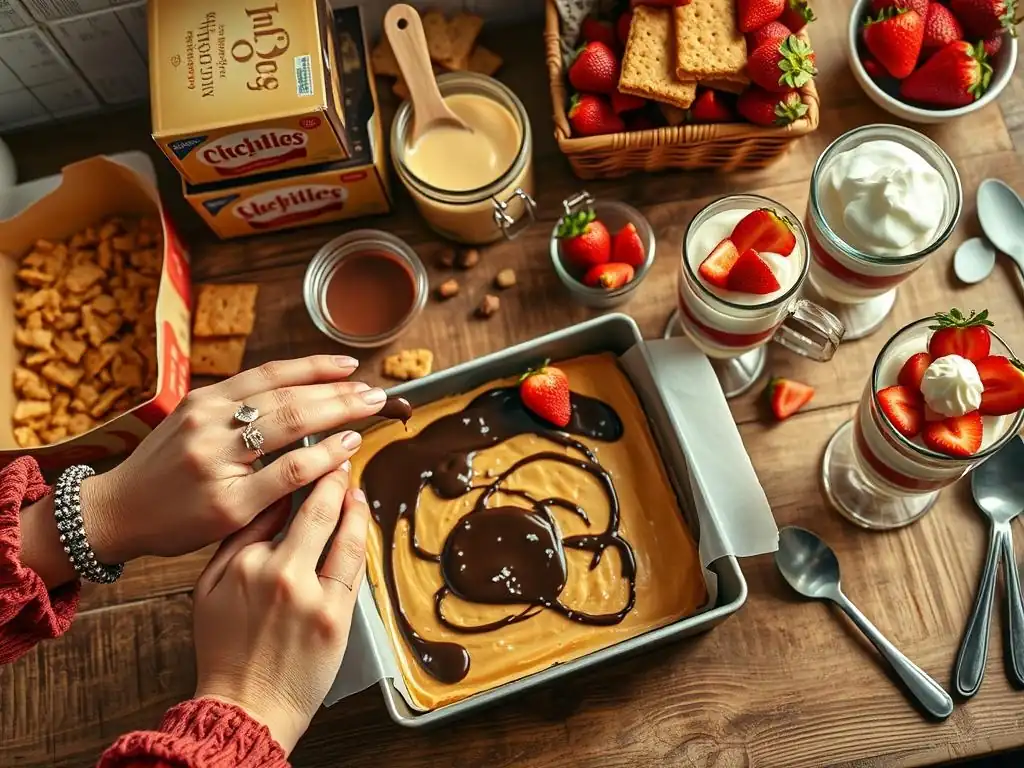
Welcome to BakeWithEase, your trusted companion in the world of delightful desserts! Ever dreamed of whipping up something sweet without even turning on the oven? You're in the right place. Dive into our collection of Nobake dessert recipes for beginners and discover how incredibly easy it is to create impressive treats. Intrigued? Let's get started – your no-bake adventure awaits!
- BakeWithEase Presents: Mastering No-Bake Desserts for Beginners
- Why Choose No-Bake Desserts? A Beginner's Paradise
- Essential Ingredients for Your No-Bake Dessert Adventure
- Top 5 Easy No-Bake Dessert Recipes for Beginners
- Essential Tools for No-Bake Dessert Success
- Tips & Tricks for Perfect No-Bake Desserts Every Time
- Elevating Your No-Bake Dessert Game: Advanced Techniques
- Conclusion: Your No-Bake Dessert Journey Begins Now!
-
Frequently Asked Questions
- What exactly is a no-bake dessert, and why are they good for beginners?
- What are some essential ingredients I should have on hand for making no-bake desserts?
- Can I adapt a baked dessert recipe to make it no-bake?
- What are some common mistakes beginners make when making no-bake desserts?
- Where can I find reliable and easy-to-follow no-bake dessert recipes for beginners?
- Final Reflection: The Sweetness of Simplicity and the Joy of Baking (Without the Oven!)
- Unleash Your Inner Dessert Master!
BakeWithEase Presents: Mastering No-Bake Desserts for Beginners
Welcome to the exciting world of no-bake desserts! If you've ever felt intimidated by preheating ovens, tricky temperature controls, or complex baking techniques, you're in the right place. BakeWithEase is here to guide you on a delicious journey where stunning and delectable treats can be made without ever turning on the oven. This guide is specifically crafted for beginners looking to dip their toes into the sweet side of the kitchen, offering simple, foolproof no-bake dessert recipes that promise impressive results with minimal effort. Get ready to transform simple ingredients into dessert masterpieces!
This article will walk you through the absolute essentials: why no-bake is your new best friend, the key ingredients you'll need, step-by-step instructions for five incredibly easy no-bake dessert recipes perfect for beginners, the simple tools that will aid your success, and helpful tips to ensure every creation is a triumph. We'll cover everything from classic chocolate peanut butter bars to elegant parfaits and creamy fudge.
By the end of this guide, you'll have the confidence and the recipes to become a true dessert hero, all without breaking a sweat or needing an oven. Let's get started on your easy no-bake journey!
Why Choose No-Bake Desserts? A Beginner's Paradise
The Simplicity of No-Bake: Perfect for New Bakers
No-bake dessert recipes are the ultimate starting point for anyone new to the kitchen or those looking for quick, satisfying results. The primary advantage lies in their inherent simplicity – they typically involve fewer steps compared to traditional baked goods. You bypass critical baking stages like creaming butter and sugar precisely, worrying about gluten development, or ensuring cakes rise evenly. Instead, you'll focus on straightforward processes like melting, mixing, chilling, and layering, which are much more forgiving and easier to master.
This simplified approach significantly reduces the chances of common baking pitfalls such as burnt bottoms, undercooked centers, or collapsed structures. Many no-bake desserts rely on ingredients that set through refrigeration or simple reactions, like how melted chocolate hardens or how gelatin thickens liquids. This makes the process predictable and less stressful, allowing beginners to build confidence quickly with successful outcomes. You'll find that tackling easy no-bake recipes is a fantastic way to develop basic kitchen skills and understand ingredient interactions before venturing into more complex baking projects.
No Oven? No Problem! Easy Dessert Solutions
One of the most obvious, yet incredibly practical, benefits of no-bake dessert recipes is the complete elimination of oven use. This is a game-changer for anyone who doesn't have access to a traditional oven, lives in a dorm room, has a small kitchen, or simply wants to avoid heating up their living space, especially during warm weather. It opens up a world of dessert possibilities that were previously inaccessible without this major appliance.
Furthermore, not needing an oven simplifies the process by removing variables like oven calibration, hot spots, and the need to monitor baking times and temperatures meticulously. You don't have to worry about preheating times or energy consumption related to high-temperature baking. This makes no-bake treats incredibly convenient for spontaneous dessert cravings or last-minute gatherings. Whether you're whipping up a batch of no-bake cookies or assembling a layered parfait, the freedom from the oven means more flexibility and less equipment dependency, making easy no-bake recipes truly accessible to everyone.
Quick & Easy Dessert Recipes: Satisfaction in Minutes
Beyond their simplicity and lack of oven requirement, no-bake desserts are renowned for their speed. Many recipes can be prepared from start to finish in under 30 minutes of active time, with chilling being the main requirement for setting. This makes them ideal for busy schedules or when you need a delicious treat without spending hours in the kitchen. Imagine craving a decadent chocolate fix and being able to prepare it almost instantly, just waiting for it to chill.
The rapid turnaround time means you can enjoy the fruits of your labor much faster than with traditional baking. This instant gratification is highly motivating for beginners. Instead of waiting an hour or more for something to bake and cool, you can mix, assemble, and pop your creation into the fridge, often ready to enjoy within an hour or two (or sometimes even less!). This efficiency makes easy no-bake recipes perfect for weeknight desserts, potlucks, or whenever time is of the essence but you still want something homemade and delightful.
Essential Ingredients for Your No-Bake Dessert Adventure
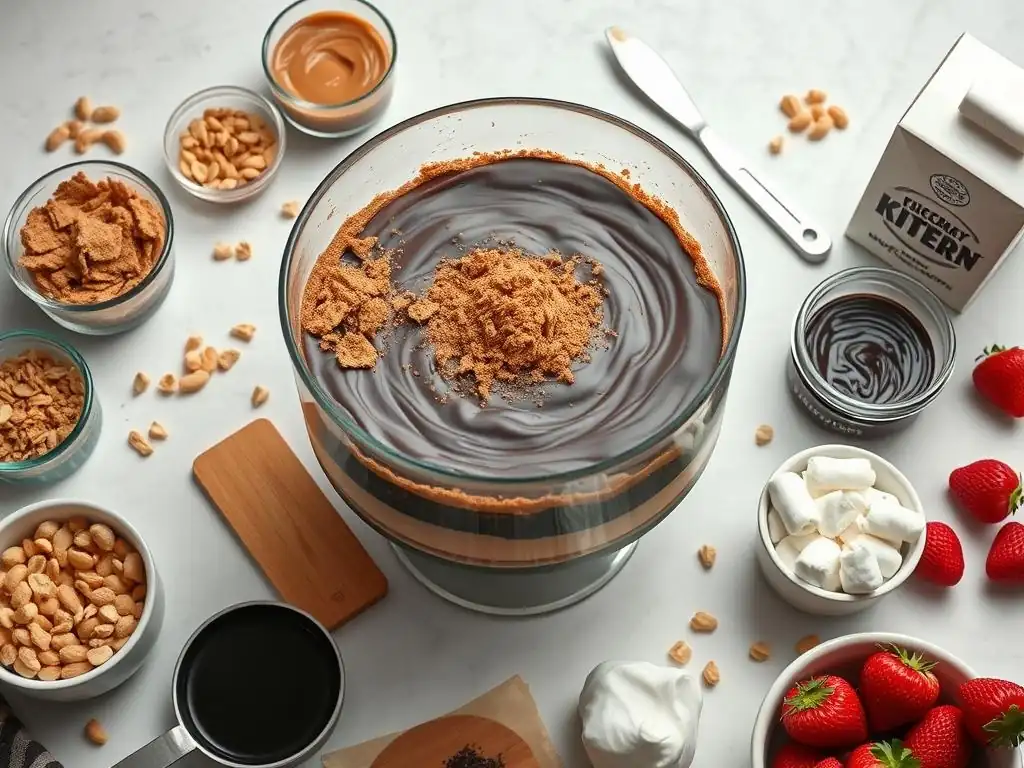
Embarking on your no-bake dessert journey requires stocking up on a few key ingredients. The beauty of many easy no-bake recipes is that they often use common pantry staples and fresh items that are readily available at any grocery store. Having these on hand means you can whip up a delicious treat whenever the mood strikes.
Must-Have Pantry Staples for No-Bake Treats
Certain items form the backbone of many easy no-bake dessert recipes. Graham crackers or other crushed cookies (like vanilla wafers or Oreos) are fundamental for creating quick, press-in crusts for cheesecakes and pies or adding texture to layered desserts. Butter, especially melted butter, is crucial for binding these crumb crusts together firmly. Sweetened condensed milk is another versatile ingredient, acting as a binder and sweetener in fudges, bars, and fillings, providing a rich, creamy texture without cooking.
Other essential staples include various types of sugar (granulated, powdered), which provide sweetness and can affect texture, and vanilla extract, a flavor enhancer that complements almost any dessert. Keep gelatin on hand if you plan on making molded desserts or need extra setting power for lighter mousses or cheesecakes. A touch of salt can also be important to balance sweetness and enhance other flavors. These foundational ingredients will enable you to tackle a wide array of easy no-bake dessert recipes for beginners.
Dairy Delights: Cream Cheese, Whipped Cream, and More
Dairy products play a vital role in achieving the creamy, luscious textures characteristic of many no-bake desserts. Cream cheese is indispensable for no-bake cheesecakes, providing that signature tang and rich density. Ensure it's softened to room temperature for smooth mixing, avoiding lumps. Heavy cream, when whipped, becomes a light and airy base or topping for parfaits, mousses, and pies. It adds richness and volume without the need for baking.
Other dairy items like sour cream or Greek yogurt can be used in smaller quantities to add a slight tang and creamy consistency to fillings, offering a lighter alternative in some recipes. Butter, as mentioned, is key, but using good quality butter makes a difference in flavor, especially in simple crusts. Always check the recipe for specific dairy requirements, but having cream cheese and heavy cream available will open up a world of delicious possibilities for beginner no-bake dessert recipes.
Chocolate Lovers Rejoice: Cocoa Powder, Chocolate Chips, and Beyond
For those who adore chocolate, no-bake desserts offer countless ways to indulge. Unsweetened cocoa powder is essential for adding deep chocolate flavor to fudges, sauces, and mixes without adding extra sweetness. It's perfect for controlling the intensity of the chocolate. Chocolate chips (semi-sweet, milk, or dark) are incredibly versatile; they can be melted down for ganaches, sauces, or as a primary ingredient in bars and fudges, or simply folded into mixtures for added texture and flavor.
Beyond chips and powder, blocks of baking chocolate or chocolate melts can be used for more refined textures or for dipping and coating. Even chocolate hazelnut spread (like Nutella) finds its way into many easy no-bake recipes, providing instant flavor and creaminess. Having a selection of chocolate forms on hand means you're always ready to whip up a chocolatey treat. From rich no-bake chocolate fudge to layered parfaits, chocolate is a cornerstone ingredient for many delightful beginner no-bake dessert recipes.
Sweeten the Deal: Sugar, Honey, and Other Natural Sweeteners
Sweetness is key to any dessert, and no-bake recipes utilize various sweeteners. Granulated sugar is the most common, providing clean sweetness. Powdered sugar (confectioners' sugar) is often used in frostings and fillings because it dissolves easily and contributes to a smooth texture. Brown sugar can add moisture and a hint of caramel flavor, especially in bar recipes.
Beyond traditional sugars, liquid sweeteners like honey, maple syrup, or corn syrup are frequently used. Corn syrup, for instance, helps prevent crystallization in fudges, ensuring a smooth consistency. Honey and maple syrup offer distinct flavors and can be used as alternatives for different taste profiles. Sweetened condensed milk, mentioned earlier, is a powerful sweetener and binder. Some recipes might also call for artificial sweeteners or natural alternatives like agave or stevia, depending on dietary needs. Understanding how different sweeteners function is helpful, but for most easy no-bake dessert recipes, granulated and powdered sugar will be your primary tools.
Top 5 Easy No-Bake Dessert Recipes for Beginners
Ready to put those ingredients to use? Here are five incredibly simple and delicious no-bake dessert recipes perfect for beginners. Each recipe is designed to be straightforward, requiring minimal effort for maximum reward. These are classic, crowd-pleasing treats that will make you feel like a dessert pro in no time.
Recipe 1: Classic No-Bake Chocolate Peanut Butter Bars
These bars are a timeless favorite, combining the irresistible duo of chocolate and peanut butter. They require no baking whatsoever and set up beautifully in the refrigerator. This is one of the easiest no-bake dessert recipes beginners can start with.
Ingredients for No-Bake Chocolate Peanut Butter Bars
- 1 and 1/2 cups graham cracker crumbs (about 10-12 full sheets)
- 1/2 cup unsalted butter, melted
- 1 cup creamy peanut butter
- 1 cup powdered sugar
- 1 cup semi-sweet chocolate chips
- 1 tablespoon shortening or coconut oil
Step-by-Step Instructions: No-Bake Peanut Butter Bar Perfection
- In a medium bowl, combine the graham cracker crumbs and melted butter. Press this mixture firmly into the bottom of an 8x8 inch square pan lined with parchment paper (leaving an overhang for easy lifting).
- In another bowl, mix together the peanut butter and powdered sugar until well combined and crumbly. Spread this mixture evenly over the graham cracker crust, pressing down gently.
- In a microwave-safe bowl, melt the chocolate chips and shortening/coconut oil together. Heat in 30-second intervals, stirring until smooth.
- Pour the melted chocolate evenly over the peanut butter layer.
- Refrigerate for at least 2-3 hours, or until the chocolate layer is firm.
- Use the parchment paper overhang to lift the bars out of the pan. Cut into squares.
- [ ] Combine crumbs and butter.
- [ ] Press crumb mixture into pan.
- [ ] Mix peanut butter and powdered sugar.
- [ ] Spread peanut butter mixture over crust.
- [ ] Melt chocolate and shortening.
- [ ] Pour chocolate over peanut butter layer.
- [ ] Refrigerate until firm.
- [ ] Lift and cut into bars.
Tips & Tricks for the Best Chocolate Peanut Butter Bars
Ensure your melted butter is cooled slightly before mixing with crumbs so it doesn't make them soggy. For the peanut butter layer, if the mixture is too dry, add a tiny splash of milk (start with a teaspoon) until it comes together, but be careful not to make it too wet. When melting chocolate, stirring frequently prevents burning. If you don't have shortening or coconut oil, you can omit it, but the chocolate layer will be firmer and potentially harder to cut cleanly. Using parchment paper is key for easy removal.
Recipe 2: Simple No-Bake Strawberry Cheesecake Parfaits
These individual parfaits are elegant, easy, and endlessly customizable. They layer a creamy no-bake cheesecake filling with fresh strawberries and crunchy graham cracker crumbs. They are among the most visually appealing no-bake dessert recipes beginners can master.
Ingredients for Individual Strawberry Cheesecake Parfaits
- 8 ounces cream cheese, softened
- 1/2 cup powdered sugar
- 1/4 cup milk (whole milk works best)
- 1 teaspoon vanilla extract
- 1 cup heavy cream, whipped to soft peaks
- 1 and 1/2 cups fresh strawberries, hulled and sliced or diced
- 3/4 cup graham cracker crumbs
Assembling Your No-Bake Strawberry Cheesecake Parfaits
- In a large bowl, beat the softened cream cheese and powdered sugar until smooth and creamy.
- Gradually beat in the milk and vanilla extract until the mixture is smooth and pourable.
- Gently fold in the whipped cream until just combined, being careful not to deflate the mixture.
- Arrange 4-6 glasses or jars. Spoon a layer of graham cracker crumbs into the bottom of each.
- Add a layer of sliced or diced strawberries over the crumbs.
- Spoon or pipe a generous layer of the no-bake cheesecake filling over the strawberries.
- Repeat the layers: crumbs, strawberries, and cheesecake filling, ending with cheesecake filling.
- Chill in the refrigerator for at least 1 hour before serving.
- [ ] Beat cream cheese and powdered sugar.
- [ ] Mix in milk and vanilla.
- [ ] Fold in whipped cream.
- [ ] Layer crumbs in glasses.
- [ ] Add strawberry layer.
- [ ] Add cheesecake layer.
- [ ] Repeat layers.
- [ ] Chill parfaits.
Variations: Adding Chocolate Shavings, Graham Cracker Crumbs, or Different Berries
Feel free to get creative with your parfaits! Instead of just strawberries, try mixed berries like blueberries, raspberries, or a combination. You can also layer in different elements – a sprinkle of mini chocolate chips or chocolate shavings adds a delightful crunch and richness. A drizzle of chocolate sauce or caramel between layers is also a fantastic addition. For a different crust texture, crushed shortbread cookies or even crumbled brownie pieces could replace the graham cracker crumbs.
Recipe 3: Easy No-Bake Chocolate Fudge
This recipe is incredibly simple, requiring just a few ingredients and yielding smooth, rich chocolate fudge without the need for a candy thermometer or tricky stovetop cooking. It's a foolproof method for making quick no-bake chocolate fudge.
Ingredients for Creamy Chocolate Fudge
- 1 (14 ounce) can sweetened condensed milk
- 2 cups (about 12 ounces) semi-sweet chocolate chips
- 1 teaspoon vanilla extract
- Pinch of salt (optional, enhances flavor)
- Optional add-ins: 1/2 cup chopped nuts, mini marshmallows, or sprinkles
Making the No-Bake Chocolate Fudge: A Simple Guide
- Line an 8x8 inch square pan with parchment paper, leaving an overhang.
- In a medium microwave-safe bowl, combine the sweetened condensed milk and chocolate chips.
- Microwave on high for 1 minute. Stir the mixture.
- Continue microwaving in 30-second intervals, stirring well after each, until the chocolate is completely melted and the mixture is smooth and glossy. This usually takes 1.5 to 2.5 minutes total microwave time.
- Stir in the vanilla extract and salt (if using). If adding nuts or marshmallows, stir them in now.
- Pour the fudge mixture into the prepared pan and spread evenly.
- Refrigerate for at least 2 hours, or until completely set.
- Use the parchment paper overhang to lift the fudge out of the pan. Cut into small squares.
- [ ] Line pan with parchment paper.
- [ ] Combine condensed milk and chocolate chips.
- [ ] Microwave and stir until smooth.
- [ ] Stir in vanilla, salt, and add-ins.
- [ ] Pour fudge into pan.
- [ ] Refrigerate until set.
- [ ] Lift and cut fudge.
Storing Your Delicious No-Bake Fudge
Store the no-bake chocolate fudge in an airtight container at room temperature for up to a week. For longer storage, you can refrigerate it for up to 2-3 weeks. If stacking layers of fudge, place parchment paper between them to prevent sticking. Fudge can also be frozen for several months; wrap it tightly in plastic wrap and then place it in a freezer-safe container or bag. Thaw at room temperature before serving.
Recipe 4: Quick No-Bake Tiramisu
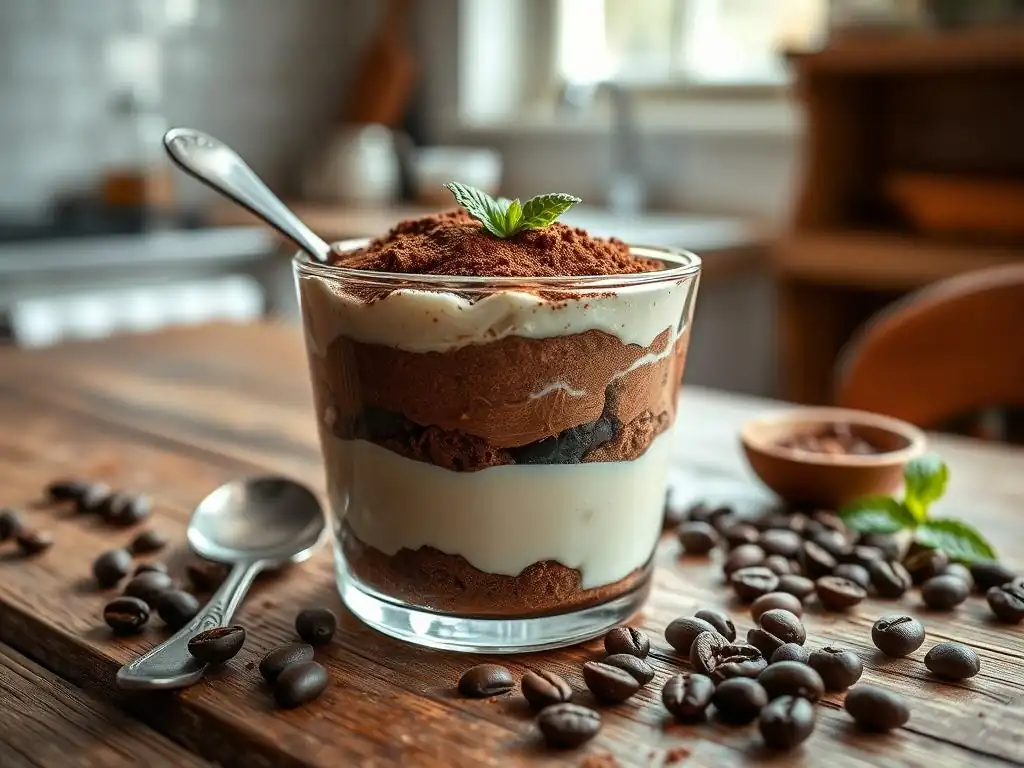
This simplified, no-bake version of the classic Italian dessert captures the essence of coffee-soaked ladyfingers and creamy mascarpone without the need for eggs or baking. It's a sophisticated yet easy no-bake recipe for beginners.
Ingredients for Tiramisu Dessert
- 1 and 1/2 cups strong brewed coffee or espresso, cooled
- 1/4 cup coffee liqueur or dark rum (optional)
- 1 (8 ounce) package cream cheese, softened
- 1/2 cup powdered sugar
- 1 teaspoon vanilla extract
- 1 and 1/2 cups heavy cream, whipped to soft peaks
- 1 (7 ounce) package ladyfingers (crisp or soft, crisp work well for structure)
- Unsweetened cocoa powder, for dusting
Layering Your No-Bake Tiramisu Treat
- Combine the cooled coffee/espresso and liqueur (if using) in a shallow dish.
- In a large bowl, beat the softened cream cheese, powdered sugar, and vanilla extract until smooth and creamy.
- Gently fold in the whipped cream until just combined. This is your creamy filling.
- Quickly dip each ladyfinger into the coffee mixture (do not soak, just a quick dip on each side) and arrange a single layer in the bottom of an 8x8 inch square dish. You may need to break some to fit.
- Spread half of the creamy filling evenly over the layer of ladyfingers.
- Repeat the dipping process with the remaining ladyfingers and create a second layer over the filling.
- Spread the remaining half of the filling over the second layer of ladyfingers.
- Cover the dish and refrigerate for at least 4 hours, or preferably overnight, to allow the flavors to meld and the ladyfingers to soften.
- Before serving, dust the top generously with unsweetened cocoa powder.
- [ ] Combine coffee and liqueur.
- [ ] Beat cream cheese, sugar, and vanilla.
- [ ] Fold in whipped cream.
- [ ] Dip ladyfingers in coffee.
- [ ] Arrange first layer of ladyfingers.
- [ ] Spread half of filling.
- [ ] Arrange second layer of ladyfingers.
- [ ] Spread remaining filling.
- [ ] Chill for at least 4 hours.
- [ ] Dust with cocoa powder before serving.
Tiramisu Dessert Variations: Adding Chocolate, Different Liquors
While coffee liqueur or rum is traditional, you can experiment with other flavors. A splash of amaretto adds an almond note, or skip the alcohol entirely if preferred. For a chocolate twist, sprinkle mini chocolate chips between layers or grate dark chocolate over the top along with the cocoa powder. You can also add a thin layer of chocolate ganache over the first filling layer. Ensure your coffee is strong; the flavor is crucial for this dessert.
Recipe 5: No-Bake Key Lime Pie
Capture the bright, tangy flavor of Key lime pie without the oven. This easy recipe uses a simple graham cracker crust and a creamy, zesty filling that sets up beautifully in the fridge. It's a refreshing addition to your collection of beginner no-bake dessert recipes.
Ingredients for Zesty Key Lime Pie
- 1 and 1/2 cups graham cracker crumbs
- 1/3 cup unsalted butter, melted
- 1 (14 ounce) can sweetened condensed milk
- 1/2 cup fresh or bottled Key lime juice (regular lime juice works too, but Key lime is preferred)
- 1 teaspoon lime zest (optional, but adds extra flavor)
- Whipped cream or cool whip, for topping
Assembling the No-Bake Key Lime Pie
- In a medium bowl, combine the graham cracker crumbs and melted butter. Press this mixture firmly into the bottom and slightly up the sides of a 9-inch pie plate. Refrigerate the crust for at least 15 minutes while you make the filling.
- In a separate bowl, whisk together the sweetened condensed milk, Key lime juice, and lime zest (if using) until well combined. The mixture will thicken slightly as the acid from the lime reacts with the condensed milk.
- Pour the filling into the chilled graham cracker crust.
- Cover the pie loosely with plastic wrap and refrigerate for at least 2-3 hours, or until the filling is completely set.
- Top with whipped cream or cool whip before slicing and serving.
- [ ] Combine crumbs and butter.
- [ ] Press crust into pie plate.
- [ ] Chill crust.
- [ ] Whisk condensed milk, lime juice, and zest.
- [ ] Pour filling into crust.
- [ ] Chill pie until set.
- [ ] Top with whipped cream before serving.
Tips for a Perfect Key Lime Pie
Using fresh Key lime juice provides the best, most authentic flavor, but bottled Key lime juice is a convenient alternative. If using regular lime juice, you might need slightly less as it can be more acidic; taste and adjust. Ensure the crust is pressed firmly so it doesn't crumble when sliced. Allow ample chilling time; this is crucial for the filling to set properly. For an extra touch, garnish with thin lime slices or extra lime zest.
Essential Tools for No-Bake Dessert Success
You don't need a professional kitchen setup to create amazing no-bake desserts. Many of the tools required are standard items found in most kitchens. Having these basic implements will make the process smooth and enjoyable.
Mixing Bowls: Choosing the Right Size and Material
You'll need a variety of mixing bowls for combining ingredients. Having at least two or three bowls of different sizes (small, medium, large) is helpful. Stainless steel, glass, or plastic bowls all work well. Stainless steel is lightweight and durable, while glass allows you to see the ingredients from the side. Ensure your bowls are clean and dry before starting, especially when whipping cream or working with chocolate, as moisture can interfere with consistency.
Consider bowls with non-slip bottoms for stability while mixing. For melting chocolate in the microwave, a microwave-safe glass bowl is ideal. For whipping cream, a medium to large bowl is best to allow for expansion, and chilling the bowl beforehand can aid in achieving stiff peaks faster.
Spatulas and Whisks: Your Best Friends in the Kitchen
A good set of spatulas and whisks is indispensable for no-bake dessert recipes. Silicone spatulas are perfect for scraping down the sides of bowls, folding in delicate ingredients like whipped cream, and ensuring you get every last bit of delicious mixture out of the bowl. Their flexibility and heat resistance make them versatile.
Whisks are necessary for incorporating air into mixtures (like whipping cream or whisking cream cheese fillings) and for smoothly combining liquid ingredients. A balloon whisk is standard for whipping, while a smaller whisk can be useful for sauces or smaller quantities. Having both a spatula and a whisk readily available will make mixing and combining ingredients much easier and more efficient.
Measuring Cups and Spoons: Accuracy is Key
While no-bake recipes are often more forgiving than baking, accurate measurements are still important for consistent results. Have a set of dry measuring cups (for ingredients like graham cracker crumbs, powdered sugar, chocolate chips) and liquid measuring cups (for milk, melted butter, lime juice, coffee).
Measuring spoons are essential for smaller quantities like vanilla extract, salt, or shortening. Using the correct tools ensures that the ratio of ingredients is right, which is crucial for achieving the desired texture and flavor in your no-bake creations. For example, too little melted butter in a crust might make it crumbly, while too much liquid in a filling could prevent it from setting properly.
Baking Pans and Dishes (That Don't Need an Oven!)
Even though you're not baking, you'll need pans and dishes to assemble and chill your desserts. An 8x8 inch square pan is perfect for bars and fudges. A 9-inch pie plate is necessary for pies. Loaf pans or smaller individual ramekins can also be used for certain types of no-bake treats like mousses or layered desserts.
For parfaits, individual glasses, jars, or small bowls work wonderfully. Choose dishes that are suitable for refrigeration and serving. Lining pans with parchment paper is highly recommended for easy removal and clean-up, especially for solid desserts like bars and fudge. Ensure your dishes fit comfortably in your refrigerator!
Tips & Tricks for Perfect No-Bake Desserts Every Time
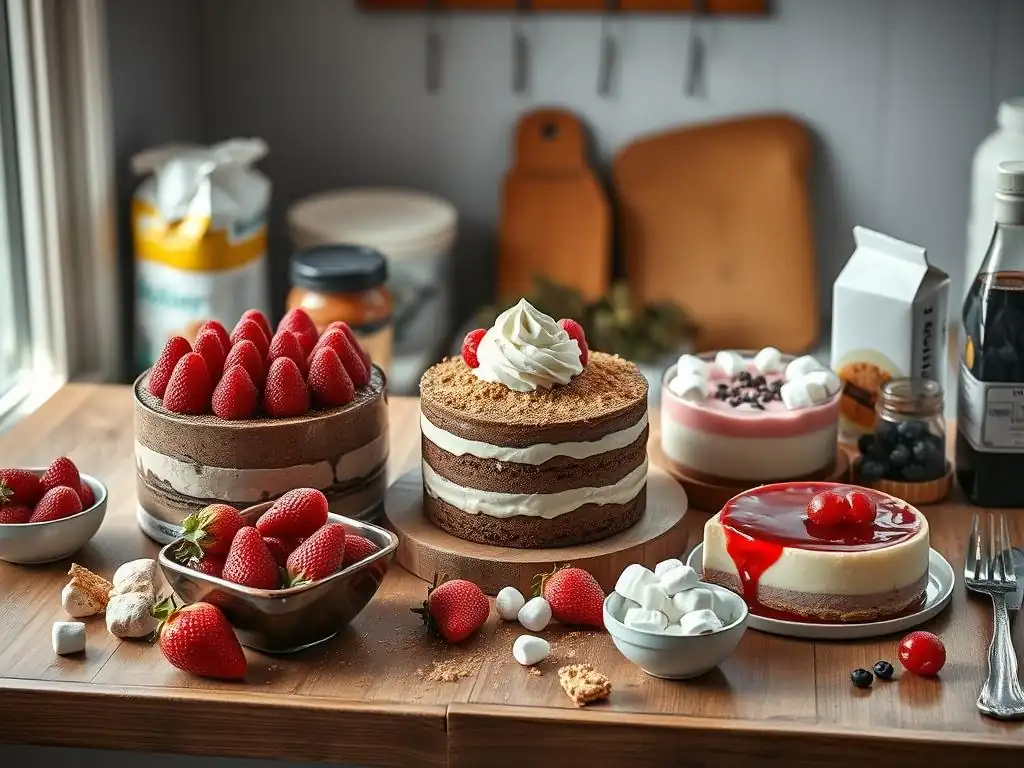
Even with simple no-bake recipes, a few insider tips can elevate your results from good to absolutely fantastic. Pay attention to these details to ensure your no-bake dessert journey is filled with success.
Mastering the Art of Setting: Achieving the Right Consistency
The key to most no-bake desserts is proper setting, which usually happens in the refrigerator. Don't rush the chilling time! Recipes specify minimum chilling durations (often 2-4 hours, sometimes overnight) for a reason. This time allows ingredients to firm up, flavors to meld, and textures to stabilize. Cutting into a no-bake bar or pie too early can result in a messy, unset dessert.
Ensure your refrigerator is set to the correct temperature (around 35-40°F or 1.7-4.4°C) for efficient chilling. If a recipe calls for gelatin, make sure it's properly dissolved according to package instructions before adding it to your mixture; undissolved gelatin can result in a grainy texture. For cream cheese-based fillings, starting with properly softened cream cheese and whisking until smooth is vital for a lump-free set.
No-Bake Dessert Storage Secrets: Keeping Your Treats Fresh
Proper storage is crucial for maintaining the quality and safety of your no-bake desserts. Because many rely on dairy or fresh fruit, they must be stored in the refrigerator. Use airtight containers or cover the dessert dish tightly with plastic wrap to prevent drying out and absorbing odors from other foods in the fridge.
Layered desserts or those with whipped cream toppings are best enjoyed within 2-3 days. Fudges and bars can often last longer, up to a week or more, when stored correctly. If a recipe is freezable (like some fudges or certain types of bars), wrap portions tightly in plastic wrap and then foil or place in a freezer bag to prevent freezer burn. Label with the date!
Troubleshooting Common No-Bake Dessert Problems
Encountering issues? Don't worry, they're usually easy to fix.
- Crumb crust crumbling? You likely needed more melted butter or didn't press it firmly enough into the pan. Next time, ensure the crumbs are evenly moistened and compact the crust well using the bottom of a glass or measuring cup.
- Filling not setting? This could be due to insufficient chilling time, incorrect ingredient ratios (especially with condensed milk or gelatin), or not using softened cream cheese blended smoothly. Double-check the recipe measurements and allow more chilling time. If using gelatin, ensure it was fully dissolved.
- Chocolate layer cracking? This often happens if the chocolate layer is too thick or the dessert is cut before the chocolate is fully set. Cutting with a hot, dry knife (dip in hot water, wipe clean) can help get cleaner slices. Adding a bit of shortening or coconut oil to the melting chocolate, as in the peanut butter bars recipe, helps make it less brittle.
Elevating Your No-Bake Dessert Game: Advanced Techniques
Once you've mastered the basics with easy no-bake dessert recipes for beginners, you might want to explore ways to add more complexity and flair to your creations. These aren't strictly "beginner" techniques, but they are accessible next steps that use your foundational no-bake skills.
Exploring Different No-Bake Dessert Flavors: Coffee, Caramel, Raspberry
Beyond the classic flavors, no-bake desserts are a canvas for creativity. Introduce coffee extract or instant espresso powder into chocolate or cream fillings for a mocha twist. Swirl caramel sauce into cheesecake fillings or layer it in parfaits. Incorporate fruit purees or extracts like raspberry, lemon, or almond into your bases.
Consider using different types of crushed cookies for your crusts – shortbread, speculoos, or even crushed pretzels for a sweet and salty base. Infuse liquids like milk or cream with flavors like mint or citrus zest before using them in your fillings. Experimenting with extracts, spices (like cinnamon or cardamom), or even a touch of liqueur can dramatically change the profile of a simple no-bake treat.
Adding Decorations and Garnishes: Making Your Desserts Shine
Presentation matters! Simple decorations can turn an easy no-bake dessert into a showstopper. Fresh fruit is a classic choice – berries, kiwi slices, or citrus twists add color and freshness. A dusting of cocoa powder, powdered sugar, or cinnamon can make a simple top look elegant.
Melted chocolate can be drizzled or piped over desserts. Toasted nuts or shredded coconut add texture and visual appeal. Edible glitter or sprinkles are fun additions, especially for celebratory treats. Consider adding a dollop of whipped cream or a sprig of mint just before serving. Even something as simple as a few chocolate shavings can make a big difference in how appealing your dessert looks.
No-Bake Dessert Presentation: Making a Statement
Think about how you're serving your no-bake creations. Individual parfaits in clear glasses are inherently attractive. For pies and bars, clean, precise cuts make them look professional. Use a hot, dry knife for cutting fudges and bars to get sharp edges.
Serving on nice plates or platters elevates the experience. If bringing a no-bake dessert to a gathering, consider using a decorative dish or container. For layered desserts, using straight-sided glasses or jars allows the beautiful layers to be seen. Taking a moment to think about how the final product will be seen and served can significantly enhance the enjoyment of your easy no-bake dessert recipes.
Conclusion: Your No-Bake Dessert Journey Begins Now!
You've reached the end of this guide, equipped with the knowledge, recipes, and confidence to start your no-bake dessert adventure. We've explored why no-bake is the perfect entry point for beginners, highlighted the essential ingredients and tools, walked through five delicious and easy no-bake dessert recipes, and shared tips for success and elevation. Remember, the goal is to have fun and create something delicious without stress!
Embrace the Ease of No-Bake Baking
Forget the fear of the oven and embrace the simplicity and speed of no-bake desserts. These recipes prove that you don't need complex techniques or fancy equipment to make incredibly satisfying treats. They are forgiving, fast, and perfect for building your confidence in the kitchen. Start with one of the easy no-bake dessert recipes we've shared, get comfortable with the process, and then feel free to experiment and make them your own.
We love seeing what our community creates! As you make your easy no-bake dessert recipes, take photos and share your successes (and even your learning moments!) with us. Your journey from a total beginner to a no-bake dessert hero is inspiring, and we're here to support you every step of the way. Happy no-baking!
Frequently Asked Questions
What exactly is a no-bake dessert, and why are they good for beginners?
No-bake desserts are treats that don't require an oven. They are perfect for beginners because they often involve simple mixing and chilling, minimizing the chance of burning or complex techniques.
What are some essential ingredients I should have on hand for making no-bake desserts?
Common ingredients include graham crackers, condensed milk, cream cheese, and chocolate. Having these basics allows you to whip up a variety of quick and easy desserts.
Can I adapt a baked dessert recipe to make it no-bake?
Sometimes, but not always. It depends on the recipe. Focus on recipes specifically designed for no-bake, as they are formulated to set properly without heat.
What are some common mistakes beginners make when making no-bake desserts?
A frequent mistake is not allowing enough chilling time. Another is using ingredients that aren't at the correct temperature, particularly with cream cheese and butter.
Where can I find reliable and easy-to-follow no-bake dessert recipes for beginners?
BakeWithEase.com offers a variety of step-by-step guides and recipes specifically designed for beginner bakers. Look for the "no-bake" category for options.
Final Reflection: The Sweetness of Simplicity and the Joy of Baking (Without the Oven!)
The accessibility of no-bake desserts is revolutionizing the way we approach baking, proving that delicious treats don't require hours of oven time or complex techniques. Anyone, regardless of their skill level, can create stunning and flavorful desserts, fostering a sense of accomplishment and joy in the kitchen. This democratization of dessert-making empowers a new generation of bakers to explore their creativity and share their culinary passions.
The enduring appeal of no-bake recipes lies not just in their convenience, but in their ability to connect us to simpler times and cherished memories. These recipes often evoke a sense of nostalgia, reminding us of childhood summers and family gatherings centered around easy, delightful treats. The best things in life are simple,
a sentiment perfectly captured by the ease and satisfaction of creating a no-bake masterpiece. This simplicity allows us to focus on the process, the shared experience, and the pure pleasure of enjoying the fruits (or should I say, desserts!) of our labor.
Now, it's your turn. Don't let the fear of baking hold you back from exploring the world of delicious, no-bake possibilities. Pick a recipe, gather your ingredients, and embrace the joy of creating something sweet and satisfying without ever turning on your oven. You might just surprise yourself with your newfound dessert-making prowess, and discover a hidden talent that brings you immense satisfaction and joy. So, what are you waiting for? Let the baking (or rather, no-baking) begin!
Unleash Your Inner Dessert Master!
Thanks for joining me on this delicious no-bake adventure! You've just unlocked the secret to effortless, amazing desserts. Now it's time to put your newfound skills to the test.
- Whip up your first no-bake masterpiece: Choose your favorite recipe from the article and get baking (or rather, assembling!) right away. It's easier than you think!
- Share your creation: Show off your delicious results on social media – tag us @BakeWithEase (imaginary tag) and inspire others! We'd love to see your dessert hero journey unfold.
- Explore more no-bake wonders: Dive deeper into our recipe collection on BakeWithEase.com (imaginary domain) and discover even more exciting possibilities.
What's your favorite no-bake ingredient, and what delicious treat will you create next?