
Beginner’s Guide: 5 Essential NutFree Flours and How to Use Them

Welcome to BakeWithEase, your guide to effortless baking! Ever wondered how to navigate the world of nut-free baking without sacrificing flavor or texture? Our NutFree Baking Flour Guide unveils 5 essential alternatives and how to use them. Discover the secrets to delicious, safe, and allergy-friendly treats – let's get baking!
- Beginner’s Guide: 5 Essential Nut-Free Flours and How to Use Them (BakeWithEase)
- Nut-Free Baking Flour Guide: Introduction to Allergy-Friendly Baking
-
Top 5 Nut-Free Flour Alternatives for Baking
- 1. Gluten-Free Oat Flour: A Versatile Nut-Free Option
- 2. Buckwheat Flour: A Nutritious and Flavorful Nut-Free Choice
- 3. Tapioca Flour (Tapioca Starch): A Key Ingredient for Gluten-Free Nut-Free Baking
- 4. Sorghum Flour: A Mild and Adaptable Nut-Free Flour
- 5. Cassava Flour: A Versatile and Grain-Free Nut-Free Option
- Mastering Nut-Free Baking: Tips and Techniques
- Finding Nut-Free Flours: Where to Buy and What to Look For
- Conclusion: Embrace the Possibilities of Nut-Free Baking with BakeWithEase
-
Frequently Asked Questions
- What is the primary benefit of using nut-free flours in baking?
- What are some examples of essential nut-free flours highlighted in the guide?
- Can nut-free flours be substituted directly for wheat flour in recipes?
- Are nut-free flours suitable for all types of baking, or are they better for specific items?
- Where can I find the nut-free flours mentioned in the Beginner's Guide?
- Final Reflection: Unlocking the Nut-Free Baking World
- Unleash Your Inner Baker: Flour Power Awaits!
Beginner’s Guide: 5 Essential Nut-Free Flours and How to Use Them (BakeWithEase)
Nut-Free Baking Flour Guide: Introduction to Allergy-Friendly Baking
Baking is a joy that should be accessible to everyone, regardless of dietary restrictions or allergies. For many, navigating nut allergies can make finding safe and delicious baking options feel challenging. Nuts are common ingredients in many traditional recipes and flour blends, posing a significant risk for those with sensitivities.
This nut-free baking flour guide is designed to help you confidently explore alternatives that are safe, versatile, and just as delightful to bake with. At BakeWithEase, we believe that understanding your ingredients is the first step to mastering any baking challenge, and choosing the right nut-free flours is crucial for creating treats everyone can enjoy without worry.
Embarking on your nut-free baking journey opens up a world of possibilities beyond traditional wheat and nut flours. The market now offers a wide array of alternatives derived from grains, seeds, roots, and legumes, each bringing unique textures, flavors, and nutritional profiles to your baked goods. From light and airy cakes to dense and chewy breads, selecting the appropriate nut-free flour or blend is key to achieving desired results. This guide will introduce you to five essential nut-free flours that are readily available and easy to work with, providing a solid foundation for your allergy-friendly baking adventures.
Why Choose Nut-Free Flours? Understanding Nut Allergies in Baking
Nut allergies are among the most common food allergies, affecting millions worldwide. For individuals with these allergies, even trace amounts of nuts can trigger severe, potentially life-threatening reactions, including anaphylaxis. This necessitates extreme caution not only with obvious nut-containing foods but also with cross-contamination risks in production and preparation. When baking for someone with a nut allergy, using certified nut-free flours and ensuring a nut-free baking environment is paramount for safety. It removes the anxiety associated with potential exposure, allowing everyone to partake in the pleasure of freshly baked goods.
Beyond safety, choosing nut-free flours can also be a culinary exploration. Many alternative flours offer unique characteristics that can enhance flavor, texture, and nutritional value. For example, some provide higher fiber content, while others contribute a distinct earthy or sweet note. Experimenting with these different flours allows bakers to expand their repertoire and cater to a wider audience, ensuring no one feels left out. A comprehensive nut-free baking flour guide empowers you to make informed choices, creating delicious treats that are safe and inclusive for all.
Bake With Ease: Your Source for Nut-Free Baking Success
At BakeWithEase, we are dedicated to simplifying baking for everyone, including those with specific dietary needs like nut allergies. Our platform offers a wealth of resources, from easy-to-follow recipes to detailed guides on ingredients and techniques. We understand the challenges of baking without nuts and aim to provide reliable information and inspiration. This nut-free baking flour guide is just one example of how we strive to make allergy-friendly baking approachable and enjoyable. We focus on clear instructions, readily available ingredients, and practical tips to help you achieve consistently great results in your nut-free kitchen.
Our commitment extends to helping you navigate the nuances of using alternative flours. We provide insights into how different nut-free flours behave in various recipes, offering guidance on hydration, leavening, and blending. Whether you're making your first batch of nut-free cookies or attempting a complex layered cake, BakeWithEase is here to support you every step of the way. We encourage you to explore our collection of nut-free recipes, specifically developed and tested to ensure both safety and deliciousness. Baking nut-free doesn't mean compromising on taste or texture, and we're here to prove it.
Top 5 Nut-Free Flour Alternatives for Baking
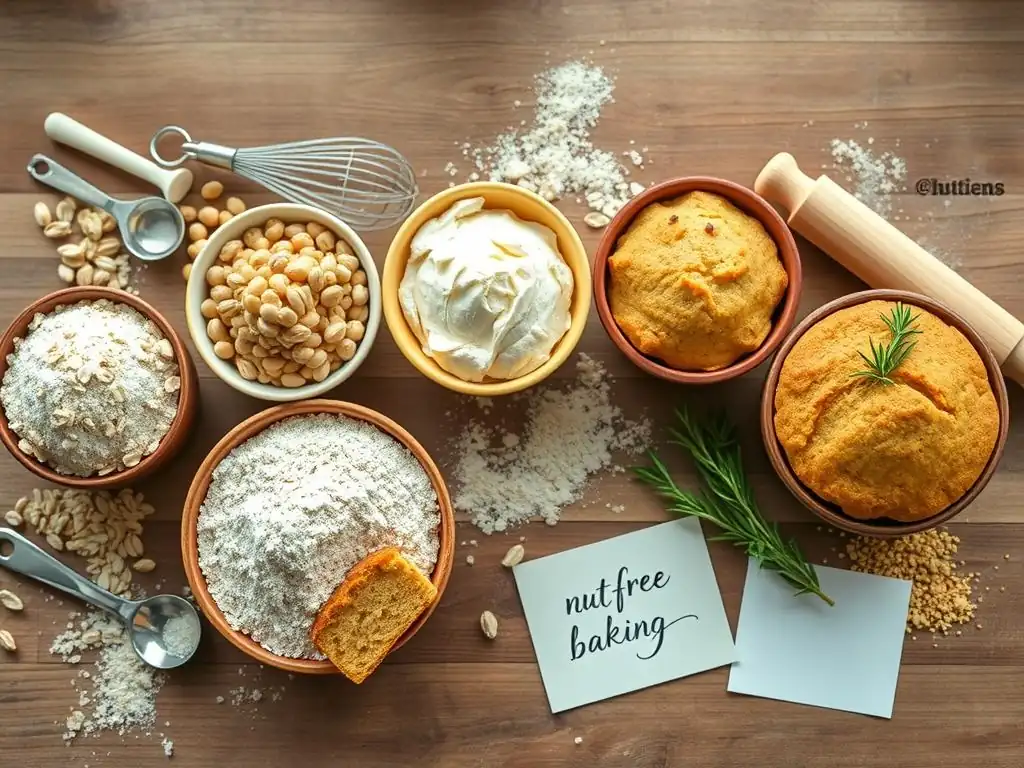
Selecting the right flour is fundamental to successful baking, and this holds true for nut-free creations. The world of alternative flours is vast, but focusing on a few versatile options is a great starting point for any nut-free baking flour guide. Here are five essential nut-free flours that are widely available and offer excellent performance in various baked goods.
1. Gluten-Free Oat Flour: A Versatile Nut-Free Option
Oat flour is a popular choice for nut-free baking due to its mild flavor, soft texture, and versatility. It's made from ground oats and provides a good source of fiber, including beta-glucans, which can contribute to a moist crumb in baked goods. When choosing oat flour for nut-free baking, it is absolutely critical to select certified gluten-free oats, as conventional oats are often processed in facilities that handle wheat, barley, or rye, leading to cross-contamination. Similarly, ensure the oat flour is certified nut-free, as oats can sometimes be processed near nuts.
Using oat flour can add a delightful chewiness and subtle sweetness to recipes. It absorbs more liquid than wheat flour, so recipes may need slight adjustments. A common ratio for substituting oat flour for wheat flour is approximately 1:1 by weight, though volume measurements might differ. For instance, 1 cup of wheat flour weighs around 120 grams, while 1 cup of oat flour can weigh closer to 90-100 grams. Always weigh your ingredients for accuracy, especially when working with alternative flours. Oat flour works well in muffins, quick breads, cookies, and even pancakes.
Baking with Oat Flour: Tips and Tricks for Optimal Results
When baking with oat flour, allow the batter or dough to rest for 10-15 minutes before baking. This resting period allows the flour to properly absorb the liquid, resulting in a more even texture and preventing a crumbly outcome. Since oat flour lacks gluten, it won't provide the same structure as wheat flour. You may need to incorporate a binder, such as psyllium husk powder (about 1 teaspoon per cup of flour) or xanthan gum (about 1/4 teaspoon per cup of flour), especially in recipes requiring more structure, like breads or cakes.
Oat flour can sometimes produce a slightly denser result than wheat flour. To combat this, consider combining it with lighter flours like tapioca starch or rice flour. For example, a blend of 70% oat flour and 30% tapioca starch can yield a lighter texture in cookies. Ensure your baking powder or soda is fresh, as proper leavening is key to achieving a good rise with oat flour. Using medium-fine ground oat flour is generally best for baking, as overly coarse flour can result in a gritty texture.
Oat Flour Recipes: Nut-Free Oatmeal Raisin Cookies
These cookies are a classic, made safe and delicious with certified nut-free oat flour.
- Mix 1 cup (approx. 100g) nut-free oat flour, 1/2 tsp baking soda, 1/4 tsp salt, and 1/2 tsp cinnamon.
- In a separate bowl, cream 1/2 cup (113g) softened nut-free butter or dairy-free alternative with 1/4 cup granulated sugar and 1/2 cup packed brown sugar until light and fluffy.
- Beat in 1 large egg and 1 tsp vanilla extract.
- Gradually add the dry ingredients to the wet ingredients, mixing until just combined.
- Stir in 3/4 cup nut-free rolled oats and 1/2 cup raisins.
- Drop rounded tablespoons onto a baking sheet lined with parchment paper.
- Bake at 350°F (175°C) for 10-12 minutes, or until edges are golden brown.
Yields approximately 18 cookies. These cookies showcase how oat flour can provide a lovely chewiness and classic cookie texture in a nut-free format, making this a great starting point for your nut-free baking flour guide exploration.
2. Buckwheat Flour: A Nutritious and Flavorful Nut-Free Choice
Despite its name, buckwheat is not a type of wheat but a pseudocereal, making it naturally gluten-free and a great addition to a nut-free baking flour guide. Buckwheat flour has a distinctive earthy, slightly nutty flavor (though it contains no actual nuts) and a darker color, ranging from light brown to grey. It's highly nutritious, offering protein, fiber, and minerals like magnesium and manganese. Its robust flavor pairs well with ingredients like chocolate, molasses, and spices.
Buckwheat flour's unique flavor and density mean it's often best used in combination with other flours, especially for lighter baked goods. Using 100% buckwheat flour can result in a dense or crumbly texture and a very pronounced flavor that might not be desirable in all recipes. A common approach is to use buckwheat flour for 25-50% of the total flour blend. For instance, in a pancake recipe using 2 cups of flour, substituting 1/2 to 1 cup with buckwheat flour can add nutritional value and flavor without overwhelming the dish.
Using Buckwheat Flour in Baking: Achieving the Right Texture
Buckwheat flour absorbs liquid differently than wheat flour, often requiring more hydration. Start by incorporating it into recipes where a slightly denser texture is acceptable, such as pancakes, waffles, blinis, or certain quick breads. When using it in cakes or muffins, blending it with lighter flours like rice flour or sorghum flour (which we'll discuss later in this nut-free baking flour guide) can help achieve a better crumb structure.
The strong flavor of buckwheat flour can be managed by pairing it with complementary ingredients. Maple syrup, berries, apples, and even savory herbs work well. Buckwheat flour batters can sometimes be stickier than wheat batters. Using non-stick pans or parchment paper is recommended. Consider sifting buckwheat flour before use, as it can sometimes be clumpy.
Buckwheat Flour Recipes: Nut-Free Buckwheat Crepes
These thin, delicate crepes are traditionally made with buckwheat and are naturally nut-free and gluten-free.
- Whisk together 1 cup (approx. 120g) buckwheat flour, 1/4 tsp salt, and 1 tbsp sugar (optional).
- In a separate bowl, whisk 2 large eggs with 1 3/4 cups milk (dairy or non-dairy nut-free alternative) and 2 tbsp melted nut-free butter or oil.
- Gradually whisk the wet ingredients into the dry ingredients until a smooth batter forms. The batter should be thin, like heavy cream.
- Let the batter rest for at least 30 minutes (or up to 2 hours) at room temperature. This rest is crucial for texture.
- Heat a lightly greased non-stick crepe pan or skillet over medium heat.
- Pour about 1/4 cup of batter into the hot pan, swirling quickly to coat the bottom evenly.
- Cook for 1-2 minutes until the edges are set and the bottom is golden brown.
- Flip and cook for another 30-60 seconds.
- Serve immediately with your favorite nut-free fillings like berries, maple syrup, or nut-free chocolate spread.
This recipe demonstrates how buckwheat flour shines in thin batters, offering a unique flavor profile that's a valuable addition to your nut-free baking repertoire.
3. Tapioca Flour (Tapioca Starch): A Key Ingredient for Gluten-Free Nut-Free Baking
Tapioca flour, also known as tapioca starch, is derived from the cassava root. It is a fine, white powder that is naturally gluten-free and nut-free, making it an indispensable ingredient in many allergy-friendly baking recipes. Tapioca flour acts primarily as a thickener and binder. It creates a chewy texture and a crispy crust when baked, making it excellent for pies, tarts, and cookies. It also helps to lighten denser flour blends.
Unlike many other flours, tapioca flour doesn't have much nutritional value on its own, as it's mostly starch. However, its functional properties in baking are invaluable. It gelatinizes when heated in the presence of liquid, contributing to structure and moisture retention. A typical use in gluten-free and nut-free flour blends is around 20-30% of the total flour weight. For example, in a blend of 500g total flour, you might use 100-150g of tapioca starch.
Tapioca Flour as a Binder: Improving Texture in Nut-Free Recipes
Tapioca flour is particularly effective at improving the texture of gluten-free and nut-free baked goods, which can sometimes be prone to crumbling. When used as part of a flour blend, it helps to bind ingredients together, providing elasticity and chewiness. This is especially noticeable in recipes like pizza dough, bread, or cookies. Adding just a tablespoon or two of tapioca flour to a recipe can significantly improve the structure and mouthfeel.
Furthermore, tapioca flour contributes to a desirable crispy exterior on baked goods like crackers or pie crusts. When mixed with other flours and baked, it creates a light, slightly glassy finish. It's also an excellent thickener for sauces, gravies, and fruit fillings used in pies and tarts, preventing them from being watery. Its neutral flavor makes it highly versatile, blending seamlessly into both sweet and savory applications. Understanding its role as a binder and texturizer is vital for mastering any nut-free baking flour guide.
Tapioca Flour Recipes: Nut-Free Tapioca Pudding
While not a baked good, tapioca pudding is a classic way to showcase tapioca flour's thickening properties and is a simple, naturally nut-free dessert.
- In a medium saucepan, whisk together 1/3 cup small pearl tapioca (not instant), 1/2 cup sugar, and 1/4 tsp salt.
- Stir in 3 cups nut-free milk (dairy or alternative) and 1 large egg, lightly beaten.
- Let the mixture stand for 30 minutes to soften the tapioca pearls.
- Cook over medium heat, stirring constantly, until the mixture comes to a full boil.
- Reduce heat to low and simmer, stirring frequently, for 15-20 minutes, or until the tapioca pearls are translucent and the pudding has thickened.
- Remove from heat and stir in 1 tsp vanilla extract.
- Pour into serving dishes and cool. Pudding will thicken further as it cools.
- Serve warm or chilled.
This recipe highlights how tapioca starch creates a smooth, creamy texture, demonstrating its effectiveness as a binder and thickener in a delicious nut-free treat.
4. Sorghum Flour: A Mild and Adaptable Nut-Free Flour
Sorghum flour is a grain flour made from the ancient grain sorghum. It has a mild, slightly sweet flavor and a fine texture, making it one of the most adaptable nut-free flours for baking, particularly beneficial for those following a nut-free baking flour guide. Sorghum is naturally gluten-free and is often used in blends for breads, cakes, and cookies. It's also a good source of fiber and protein.
Sorghum flour is known for its ability to create a tender crumb in baked goods. It doesn't absorb as much liquid as some other gluten-free flours, which can sometimes lead to a slightly wetter batter. Recipes using sorghum flour may require minor adjustments to liquid content compared to wheat-based recipes. It's often used in combination with starches like tapioca or potato starch and other whole grain flours like brown rice flour to achieve balanced texture and structure. A common starting point in a blend might be using sorghum flour for 25-40% of the total flour weight.
Incorporating Sorghum Flour: Best Practices for Baking
When working with sorghum flour, sifting is recommended to ensure a light texture and remove any clumps. Sorghum flour can sometimes give baked goods a slightly purple hue, especially when combined with certain ingredients like baking soda. This is a natural reaction and doesn't affect taste or safety. To improve the structure of baked goods made with sorghum flour, consider using binders like xanthan gum (about 1/4 to 1/2 teaspoon per cup of sorghum flour in a blend) or psyllium husk.
Sorghum flour works well in a variety of recipes, including muffins, quick breads, pancakes, and even yeast breads when used as part of a blend. Its mild flavor makes it a versatile base that doesn't overpower other ingredients. For best results, measure sorghum flour by weight rather than volume, as it can pack easily. Approximately 1 cup of sorghum flour weighs around 115 grams.
Sorghum Flour Recipes: Nut-Free Sorghum Molasses Bread
This quick bread uses sorghum flour to create a moist, flavorful loaf that's naturally nut-free.
- Preheat oven to 350°F (175°C). Grease and flour a loaf pan.
- In a large bowl, whisk together 1 1/2 cups (approx. 170g) sorghum flour, 1 tsp baking soda, 1/2 tsp salt, 1/2 tsp ground ginger, and 1/4 tsp ground cloves.
- In a separate bowl, whisk together 1/2 cup nut-free milk (dairy or alternative), 1/4 cup molasses, 1/4 cup vegetable oil, and 1 large egg.
- Pour the wet ingredients into the dry ingredients and stir until just combined. Do not overmix.
- Pour batter into the prepared loaf pan.
- Bake for 45-55 minutes, or until a toothpick inserted into the center comes out clean.
- Let cool in the pan for 10 minutes before transferring to a wire rack to cool completely.
This recipe demonstrates how sorghum flour contributes moisture and a tender crumb to quick breads, making it a valuable flour in your nut-free baking flour guide journey.
5. Cassava Flour: A Versatile and Grain-Free Nut-Free Option
Cassava flour is derived from the entire cassava root, unlike tapioca starch which is just the starch. This makes cassava flour more fibrous and gives it different baking properties. It is a popular choice for grain-free and nut-free baking because it can often be substituted for wheat flour in recipes at a 1:1 ratio by volume or slightly less by weight, though results can vary. It has a mild flavor and a fine, powdery texture.
One of the key benefits of cassava flour is its versatility. It works well in a wide range of recipes, from cookies and brownies to breads and tortillas. It is highly absorbent, which is a crucial factor to consider when baking with it. While it shares an origin with tapioca, its higher fiber content means it behaves differently, often requiring more liquid than expected. A cup of cassava flour typically weighs around 120 grams, similar to wheat flour, but its absorbency means you might need to increase liquid by 10-20% in some recipes.
Baking with Cassava Flour: Hydration and Texture Considerations
Due to its high absorbency, cassava flour batters and doughs can thicken considerably as they sit. It's often best to mix and bake relatively quickly, or be prepared to add more liquid if the mixture becomes too dry. Hydration levels are critical when working with cassava flour; too little liquid will result in a dry, crumbly texture, while too much can make the baked good gummy. Starting with recipes specifically developed for cassava flour is recommended before attempting conversions.
Cassava flour provides a good structure without the need for additional binders like xanthan gum in many recipes, particularly those that are less reliant on gluten for structure, such as pancakes, muffins, and certain cookies. For recipes requiring more stretch or elasticity, like bread or pizza dough, combining cassava flour with a small amount of tapioca starch (around 10-15% of the total flour) can improve the texture. Using a scale for accuracy is particularly important with cassava flour due to its variable absorbency depending on the brand and batch.
Cassava Flour Recipes: Nut-Free Cassava Flour Tortillas
These flexible, grain-free, and nut-free tortillas are a simple way to use cassava flour.
- In a bowl, combine 1 cup (approx. 120g) cassava flour and 1/2 tsp salt.
- Gradually add about 3/4 cup warm water, mixing with a fork or spoon until a shaggy dough forms.
- Knead the dough lightly for 1-2 minutes until it comes together into a smooth ball. The dough should be soft and pliable but not sticky. Add a tiny bit more water if too dry, or a tiny bit more cassava flour if too sticky.
- Divide the dough into 6-8 equal pieces and roll them into balls.
- Place each ball between two pieces of parchment paper and flatten using a tortilla press or rolling pin until very thin (about 6-7 inches in diameter).
- Heat a dry cast iron skillet or griddle over medium-high heat.
- Carefully peel the tortilla from the parchment paper and place it onto the hot skillet.
- Cook for 1-2 minutes per side, until lightly browned and puffed in spots.
- Stack cooked tortillas and cover with a clean towel to keep them soft.
This simple recipe showcases cassava flour's ability to create a pliable dough, demonstrating its versatility beyond traditional baked goods and proving its value in your nut-free baking flour guide.
Mastering Nut-Free Baking: Tips and Techniques
Successfully baking without nuts involves more than just swapping out ingredients. Understanding how different nut-free flours behave and implementing specific techniques is key to achieving delicious results. This section of the nut-free baking flour guide covers essential tips to help you master allergy-friendly baking.
Understanding Flour Blends for Nut-Free Baking
While some recipes can use a single nut-free flour, many gluten-free and nut-free baking recipes rely on a blend of different flours and starches to mimic the properties of wheat flour. Wheat flour contains gluten, a protein network that provides structure and elasticity. Without gluten, alternative flours need support from starches (like tapioca or potato starch) for binding and lightness, and sometimes binders like xanthan gum or psyllium husk for structure and chewiness.
A typical gluten-free, nut-free flour blend might consist of 40% whole grain flour (like brown rice, sorghum, or millet), 30% starch (like tapioca or potato starch), and 30% lighter flour (like white rice flour or oat flour). For example, a blend could be 100g brown rice flour, 75g tapioca starch, and 75g white rice flour, plus a binder. Using a blend provides a more balanced nutritional profile and better texture than using a single flour. Many pre-made nut-free flour blends are available, but understanding how to create your own gives you more control and flexibility.
Converting Traditional Recipes to Nut-Free: A Simple Guide
Converting a traditional recipe that calls for wheat flour or nut flour into a nut-free version requires careful consideration. A simple 1:1 substitution with a single nut-free flour rarely yields optimal results, especially for recipes heavily reliant on gluten structure like yeast breads. For cakes, muffins, and cookies, starting with a high-quality nut-free, all-purpose flour blend is often the easiest approach. Substitute the blend volume or weight as you would wheat flour, but be prepared to make slight adjustments to liquid.
If using individual flours, analyze the original recipe's structure. For a light cake, you'll need a blend with starches and lighter flours. For a chewy cookie, you might use oat or rice flour with tapioca starch.
Adding a binder (like 1/4 to 1/2 tsp xanthan gum per cup of flour blend) can help provide structure, especially in recipes with higher liquid content. Start by trying conversions with simpler recipes like muffins or quick breads before tackling more complex ones. Remember that temperature and baking time might need slight adjustments as nut-free baked goods can sometimes brown faster or require longer baking to set in the center.
Storing Your Nut-Free Flours: Maintaining Freshness and Quality
Proper storage is essential for keeping your nut-free flours fresh and preventing them from going rancid or absorbing moisture and odors. Most nut-free flours, especially whole grain alternatives like oat, buckwheat, and sorghum, contain natural oils that can oxidize over time, leading to off-flavors. Store flours in airtight containers in a cool, dark pantry. Glass, metal, or sturdy plastic containers with tight-fitting lids are ideal.
For extended freshness, particularly for flours you don't use frequently or those with higher fat content (like oat or buckwheat), consider storing them in the refrigerator or freezer. This significantly slows down the oxidation process. Before using refrigerated or frozen flour, allow it to come to room temperature to ensure accurate measurement and optimal results in your baking. Check the expiration date on packaging and try to use flours within 6-12 months of purchase for best quality, referring to this nut-free baking flour guide whenever needed.
Finding Nut-Free Flours: Where to Buy and What to Look For
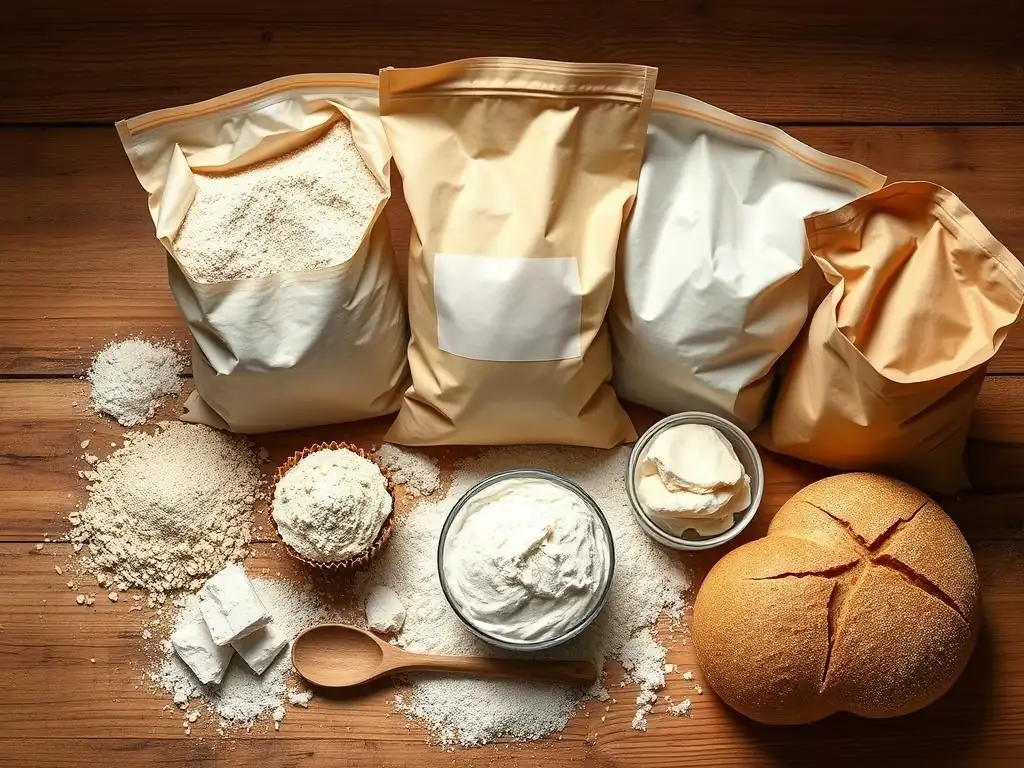
Locating truly nut-free flours requires diligence, especially if you are baking for someone with a severe allergy. Cross-contamination is a significant concern, so understanding how flours are processed and packaged is crucial. This section of the nut-free baking flour guide helps you navigate the market.
Reading Labels Carefully: Ensuring Nut-Free Certification
The most important step when purchasing nut-free flours is reading labels thoroughly. Look for explicit statements like "nut-free," "processed in a dedicated nut-free facility," or certifications like "certified gluten-free" if also avoiding gluten, as these facilities often have strict allergen control protocols. Do not rely solely on ingredient lists; even if nuts are not listed, the product may have been processed on shared equipment with nuts.
Be wary of terms like "may contain nuts" or "processed in a facility that also processes nuts." For severe allergies, these warnings indicate a high risk of cross-contamination and the product should be avoided. Some brands specialize in allergy-friendly products and have robust testing procedures. Researching brands and their manufacturing practices provides an extra layer of confidence when building your nut-free baking flour guide pantry.
Online and Local Retailers: Your Go-To Sources for Nut-Free Ingredients
Nut-free flours are becoming increasingly available. Local grocery stores often carry a selection in their baking or natural foods aisle. Larger supermarkets or health food stores typically offer a wider variety of individual flours and certified nut-free blends. Don't hesitate to ask store staff about their allergen protocols and sourcing.
Online retailers offer the largest selection of specialty nut-free flours and brands that cater specifically to allergy needs. Websites specializing in gluten-free or allergy-friendly foods are excellent resources. When ordering online, check the retailer's and the manufacturer's policies regarding allergen handling and shipping. Buying directly from manufacturers who guarantee nut-free facilities is often the safest option for severe allergies. Comparing prices and shipping costs across different platforms will help you find the best value for your nut-free baking flour guide ingredients.
Conclusion: Embrace the Possibilities of Nut-Free Baking with BakeWithEase
Navigating the world of nut-free baking might seem daunting at first, but with the right knowledge and ingredients, you can create an abundance of delicious and safe treats. This nut-free baking flour guide has introduced you to five versatile flours – oat, buckwheat, tapioca, sorghum, and cassava – providing a solid foundation for your allergy-friendly baking adventures. Understanding their unique properties and how to use them, either individually or in blends, empowers you to bake with confidence and creativity.
Baking without nuts is not about limitations; it's about exploring exciting new ingredients and techniques. The mild sweetness of sorghum, the earthy depth of buckwheat, the binding power of tapioca, the soft texture of oat, and the versatility of cassava flour each bring something special to your baked goods. By prioritizing safety through careful sourcing and label reading, you ensure that your kitchen is a safe haven for everyone. At BakeWithEase, we are here to support you every step of the way, providing resources, recipes, and inspiration to make nut-free baking easy and enjoyable.
Creating Delicious and Safe Treats for Everyone
The ultimate goal of mastering a nut-free baking flour guide is to create baked goods that are not only safe for those with allergies but also genuinely delicious for everyone. Nut-free doesn't mean flavor-free or texture-compromised. With the flours discussed, you can bake everything from flaky pie crusts and chewy cookies to tender cakes and rustic breads. Experiment with different blends and recipes to discover your favorites.
Sharing homemade treats is a wonderful way to connect with others. By baking nut-free, you can ensure that friends, family, and colleagues with nut allergies can safely participate in those moments. Imagine the joy of presenting a plate of freshly baked nut-free cookies at a gathering, knowing that everyone can indulge without worry. Your efforts in learning and practicing nut-free baking open up a world of possibilities for inclusive and joyful food experiences.
Further Exploration: Nut-Free Chocolate Cake Recipe on BakeWithEase
Ready to put your nut-free baking flour guide knowledge into practice? A fantastic next step is trying a reliable nut-free cake recipe. Chocolate cake is a perennial favorite, and mastering a nut-free version is incredibly rewarding.
- Explore our website, BakeWithEase.com, for a dedicated Nut-Free Chocolate Cake recipe.
- The recipe utilizes a blend of nut-free flours, often including sorghum or rice flour for structure and tapioca starch for moisture and texture.
- It provides step-by-step instructions tailored for working with alternative flours.
- Pay close attention to ingredient sourcing to ensure all components, including cocoa powder and chocolate, are certified nut-free.
Attempting this recipe will help solidify your understanding of how the flours discussed in this guide work together in a classic baked good. It's a delicious way to build confidence and continue your journey in mastering nut-free baking with BakeWithEase. Happy baking!
Frequently Asked Questions
What is the primary benefit of using nut-free flours in baking?
The primary benefit is catering to individuals with nut allergies or sensitivities, ensuring they can enjoy baked goods safely. It also broadens the range of dietary options available.
What are some examples of essential nut-free flours highlighted in the guide?
The guide likely covers flours like rice flour, oat flour, tapioca flour, sorghum flour, and coconut flour as essential nut-free options.
Can nut-free flours be substituted directly for wheat flour in recipes?
Not always. Nut-free flours often have different properties than wheat flour and may require adjustments to the recipe, such as adding binding agents or changing liquid ratios.
Are nut-free flours suitable for all types of baking, or are they better for specific items?
While versatile, certain nut-free flours excel in specific applications. For example, rice flour is great for crisp cookies, while oat flour adds a chewy texture to breads.
Where can I find the nut-free flours mentioned in the Beginner's Guide?
Most health food stores, specialty grocery stores, and online retailers offer a wide variety of nut-free flours. They are becoming increasingly common in mainstream supermarkets as well.
Final Reflection: Unlocking the Nut-Free Baking World
The demand for nut-free baking is not just a trend; it's a crucial accessibility issue impacting millions with allergies and dietary restrictions. This guide has highlighted five essential nut-free flours, empowering individuals to confidently explore a world of delicious, inclusive baking previously inaccessible to them. The ability to create safe and enjoyable treats for everyone is a powerful step towards a more equitable culinary landscape.
The journey into nut-free baking has been a personal one for many, revealing the creativity and resourcefulness required to adapt traditional recipes. The greatest discovery of all time is that a person can change his future by merely changing his attitude.
- Oprah Winfrey. This quote resonates deeply, as embracing nut-free alternatives requires a shift in perspective, leading to exciting new culinary discoveries and a deeper appreciation for the versatility of different flours. The impact extends beyond individual kitchens; it fosters a greater understanding and acceptance of dietary needs within our communities.
Now, it's your turn. Take this knowledge and experiment! Don't be afraid to try new combinations, adjust recipes to your preferences, and most importantly, share your creations with others. The world of nut-free baking is vast and waiting to be explored. Let your passion for baking shine, creating delicious and inclusive treats for everyone to enjoy. Embrace the challenge, and you'll discover the immense satisfaction of expanding your culinary horizons while contributing to a more welcoming and understanding food culture.
Unleash Your Inner Baker: Flour Power Awaits!
Thanks for taking the time to explore the wonderful world of nut-free flours! We hope you've discovered some new baking possibilities and feel inspired to create delicious, allergy-friendly treats. Now it's time to put your knowledge into practice!
- Bake your first nut-free masterpiece: Choose one of the flours highlighted in the article and try out a simple recipe. We’re confident you'll be amazed by the results!
- Share your baking journey: Show us your creations! Post a picture on social media using #BakeWithEaseNutFree and tag us – we’d love to see what you bake.
- Discover more nut-free recipes: Explore BakeWithEase.com for a wider selection of delicious, allergy-friendly recipes and baking tips. (Note: This would be the space for a link to relevant pages on bakewithease.com if external links were allowed).
What nut-free flour are you most excited to experiment with, and what delicious treat will you create first?