
PlantBased Pavlova: DairyFree EggWhite Desserts Explored

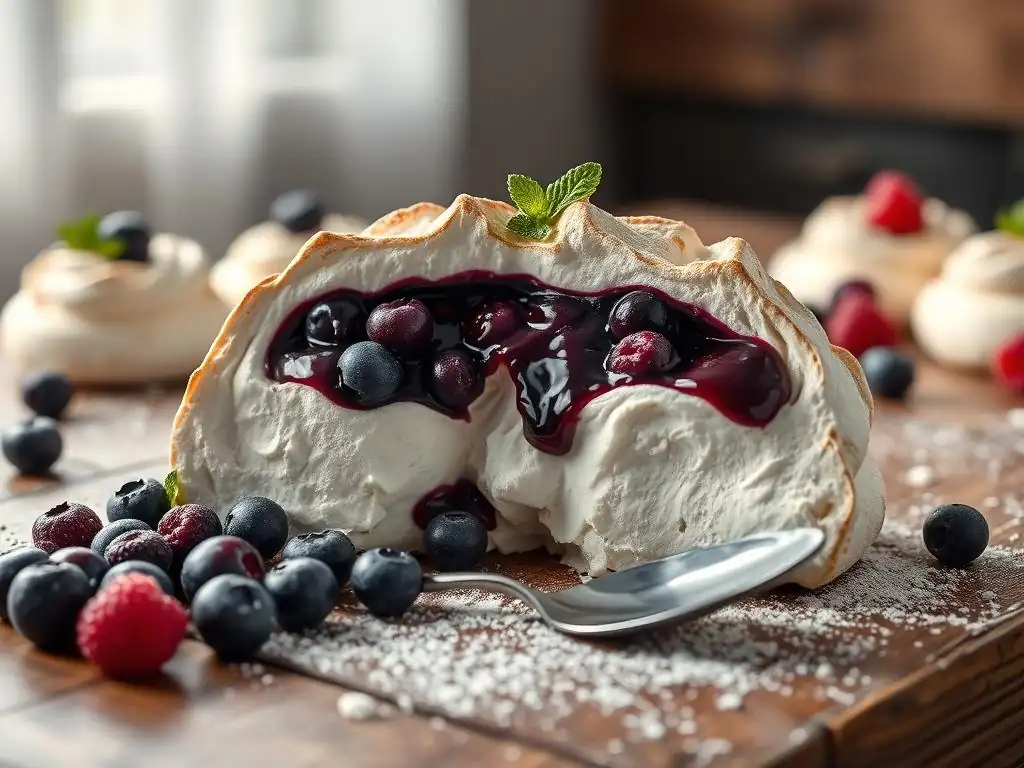
Welcome to BakeWithEase, your haven for delightful baking adventures! Ever dreamed of a flawless pavlova that's completely dairy-free and vegan? Uncover the secrets to our revolutionary dairyfree vegan pavlova recipe and discover how to craft this ethereal dessert without eggs or dairy. Intrigued? Let's dive in and redefine what's possible in the world of plant-based baking!
- Plant-Based Pavlova: Dairy-Free & Egg-Free Desserts Explored
- Introduction to Dairy-Free & Egg-Free Pavlova Baking
- Crafting the Perfect Dairy-Free & Egg-Free Pavlova: Recipe Essentials
- Step-by-Step Guide to a Flawless Dairy-Free & Egg-Free Pavlova Recipe
- Dairy-Free & Egg-Free Pavlova Topping Ideas & Variations
- Troubleshooting Your Dairy-Free & Egg-Free Pavlova
- Dairy-Free & Egg-Free Pavlova Recipe: The Complete Guide
- Storing Your Dairy-Free & Egg-Free Pavlova
- Conclusion: Enjoying Your Plant-Based Pavlova Creation
-
Frequently Asked Questions
- What makes this pavlova recipe "plant-based"?
- What is aquafaba, and why is it used in a dairy-free vegan pavlova?
- Can I substitute the aquafaba with something else?
- What kind of plant-based cream alternatives work best for topping this pavlova?
- Is this plant-based pavlova recipe as stable and long-lasting as a traditional pavlova?
- Final Reflection: A Sweet Revolution: Reimagining the Pavlova
- Unleash Your Inner Pastry Chef: Create the Perfect Dairy-Free Pavlova!
Plant-Based Pavlova: Dairy-Free & Egg-Free Desserts Explored
Introduction to Dairy-Free & Egg-Free Pavlova Baking
The Allure of Plant-Based Desserts: A Baking Enthusiast's Perspective
The world of baking is constantly evolving, embracing new techniques and ingredients to cater to diverse dietary needs and preferences. For many baking enthusiasts, exploring plant-based desserts offers a fascinating challenge and a rewarding experience. Moving beyond traditional ingredients like eggs and dairy opens up a realm of creativity, allowing us to reimagine classic treats using innovative plant-based alternatives. This journey into dairy-free and egg-free baking isn't just about restriction; it's about expansion, discovering new textures, flavors, and possibilities that can often surprise and delight.
Creating delectable desserts without animal products requires a deeper understanding of ingredient function and how to mimic the roles of eggs (binding, leavening, structure) and dairy (richness, moisture, tenderness). Successfully crafting a delicate, ethereal dessert like pavlova using only plant-based ingredients is a true testament to the ingenuity possible in the modern kitchen. It’s a process that teaches patience, precision, and the magic hidden within humble plant-based sources, proving that you don't need eggs or dairy to achieve stunning, light-as-air results.
Understanding Pavlova: A Classic Dessert, Reimagined for Plant-Based Diets
Pavlova, traditionally made from whipped egg whites and sugar, is a meringue-based dessert characterized by a crisp exterior and a soft, marshmallowy interior. It's a celebration of texture and sweetness, often served with whipped cream and fresh fruit. The challenge in creating a plant-based version lies in finding a substitute that can replicate the unique protein structure of egg whites, which allows them to whip into a stable foam and bake into this dual texture.
Reimagining this classic for a dairy-free and egg-free diet involves identifying plant-based ingredients that can perform the same structural function as egg whites. The goal is to achieve that signature crisp shell and tender, slightly chewy center without any animal products. This pursuit has led to exciting discoveries and techniques, making it entirely possible to enjoy a beautiful, dairy-free vegan pavlova recipe that stands proudly alongside its traditional counterpart, offering a delightful option for those with allergies, intolerances, or ethical preferences.
Crafting the Perfect Dairy-Free & Egg-Free Pavlova: Recipe Essentials
Key Ingredients for an Egg-Free Pavlova
Creating a successful egg-free pavlova hinges on selecting the right ingredients that can mimic the properties of egg whites and ensure stability during baking. The primary challenge is achieving a stable, voluminous meringue that will hold its shape and develop the desired texture. This involves careful consideration of the main foaming agent, the sweetener, and any additional stabilizers.
The core of a dairy-free vegan pavlova recipe relies on innovative plant-based substitutes for eggs. Unlike traditional meringues where the protein in egg whites traps air, plant-based versions utilize different mechanisms to create foam. Getting these ingredients right is the foundational step towards a light and airy result.
Aquafaba: The Egg White Substitute Star
Aquafaba, the liquid drained from canned chickpeas or other legumes, is the revolutionary ingredient that makes egg-free meringue possible. This viscous liquid contains proteins and starches that, when whipped vigorously, can emulsify, foam, and bind in a way remarkably similar to egg whites. Typically, the aquafaba from a standard 15-ounce can of chickpeas yields about 1/2 to 3/4 cup of liquid, which is often roughly equivalent to 2-3 egg whites in terms of whipping capacity.
To achieve the best results with aquafaba for a dairy-free vegan pavlova recipe, it's often recommended to use the liquid from unsalted chickpeas. Some bakers even reduce the aquafaba slightly over low heat to concentrate the proteins, leading to a more stable and voluminous foam, though this step isn't always necessary. The key is to start with chilled aquafaba, as cold liquids tend to whip up better and faster.
Sugar Selection: Achieving the Right Sweetness and Stability
Granulated sugar is the standard choice for pavlova as it dissolves well and helps stabilize the whipped foam, contributing to both the texture and the crispness of the baked meringue. The sugar should be added gradually once the aquafaba has started to foam, allowing it to dissolve completely into the mixture. This slow incorporation is crucial; adding sugar too quickly can deflate the foam.
For a typical dairy-free vegan pavlova recipe using about 1/2 cup of aquafaba, you might use anywhere from 3/4 cup to 1 cup of granulated sugar. The ratio of sugar to aquafaba is critical; too little sugar can result in a fragile meringue that doesn't hold its shape, while too much can make it overly sweet and potentially sticky. Ensure the sugar is fully dissolved before baking by rubbing a small amount of the mixture between your fingers – it should feel smooth, not gritty.
Cream of Tartar (Optional): Enhancing Aquafaba Volume
Cream of tartar, an acidic salt, is a common addition to traditional meringues and serves a similar purpose in an aquafaba-based pavlova. It helps to stabilize the foam by strengthening the protein structure (or, in the case of aquafaba, the compounds mimicking proteins) and increasing its volume. Adding just a small pinch, typically about 1/4 teaspoon per 1/2 cup of aquafaba, can significantly improve the whipping process and the stability of the final meringue.
While not strictly essential, cream of tartar can make the difference between a good egg-free pavlova and a great one. It helps the aquafaba reach stiff peaks faster and makes the foam more resilient, less likely to collapse during shaping or baking. This small addition contributes to a more reliable dairy-free vegan pavlova recipe outcome, resulting in a lighter, airier structure.
Stabilizers: Cornstarch, Vinegar, Lemon Juice
Beyond cream of tartar, other stabilizers play a vital role in ensuring the success of a dairy-free vegan pavlova. Cornstarch, for instance, is often whisked in at the very end of the whipping process. It absorbs moisture and helps create that desirable marshmallowy interior while also contributing to a crisp exterior shell. A typical amount might be one tablespoon per 1/2 cup of aquafaba.
Acids like white vinegar or lemon juice are also frequently used, similar to cream of tartar, to help stabilize the aquafaba foam and prevent it from weeping or collapsing. A small amount, usually 1/2 to 1 teaspoon, is added towards the end of the whipping process, often alongside the cornstarch. These stabilizers are key to achieving the signature pavlova texture, ensuring the meringue is both stable and has the correct balance of crispness and chewiness.
Essential Equipment for Dairy-Free & Egg-Free Pavlova Success
Having the right tools is crucial for achieving a perfect dairy-free vegan pavlova. The most important piece of equipment is a stand mixer with a whisk attachment. While it is possible to make aquafaba meringue with a hand mixer, it requires significant effort and time, as whipping aquafaba to stiff peaks can take longer than whipping egg whites – sometimes 10-15 minutes or even more, depending on the aquafaba consistency and the mixer's power.
Other essential items include clean, grease-free bowls (fat residues can prevent aquafaba from whipping), measuring cups and spoons for accurate ingredient proportions, parchment paper to prevent sticking, and a baking sheet. An oven thermometer is also highly recommended to ensure the oven is at the precise low temperature required for baking pavlova, which is critical for its texture and to prevent browning.
Step-by-Step Guide to a Flawless Dairy-Free & Egg-Free Pavlova Recipe
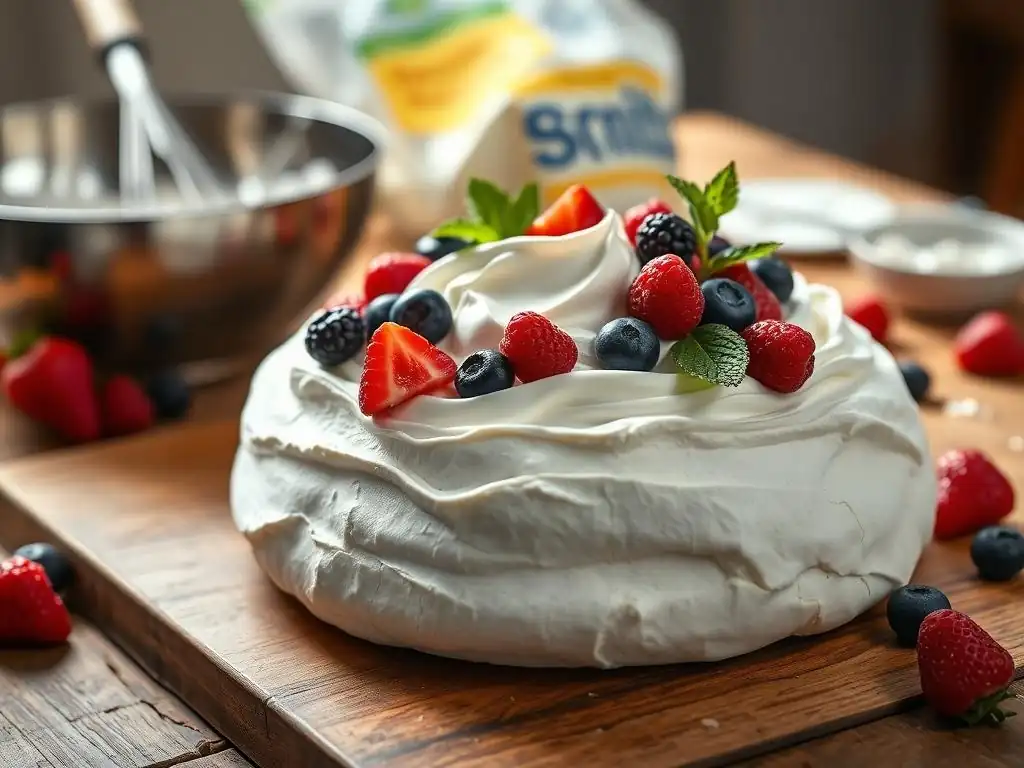
Preparing the Aquafaba: Achieving Optimal Whipping Consistency
The first step in crafting your dairy-free vegan pavlova is preparing the aquafaba. Start with chilled aquafaba straight from a can of unsalted chickpeas. Ensure the liquid is free of any chickpea solids. For potentially better results, you can gently reduce the aquafaba on the stovetop. Measure out your desired amount (e.g., 1/2 cup) and simmer it in a small saucepan over low heat until it has reduced by about 25-30%, which might take 5-10 minutes. This concentrates the proteins and can lead to a more stable meringue.
Allow the reduced aquafaba to cool completely, preferably chilling it again in the refrigerator for at least 30 minutes before whipping. This cooling step is often overlooked but can significantly impact the volume and stability of the whipped foam. Ensure your mixing bowl and whisk attachment are spotlessly clean and dry, as any residual grease or moisture can prevent the aquafaba from whipping up properly.
Whipping the Aquafaba: The Key to Pavlova Structure
Pour the chilled aquafaba into your clean stand mixer bowl fitted with the whisk attachment. Begin whipping on medium-high speed. Initially, the aquafaba will become frothy and bubbly, similar to soap suds. Continue whipping, and after a few minutes (typically 3-5 minutes), it will start to form soft peaks. This is the stage where adding a stabilizer like cream of tartar (if using) is beneficial – add it now and continue whipping.
Keep whipping on medium-high to high speed. This is the most time-consuming part of making a dairy-free vegan pavlova. It can take anywhere from 8 to 15 minutes, sometimes longer, for the aquafaba to reach stiff, glossy peaks. You'll know it's ready when the peaks stand up firmly on their own when you lift the whisk, and the mixture is thick, white, and shiny. It should resemble traditional meringue at the stiff peak stage.
Incorporating Sugar: The Gradual Sweetening Process
Once stiff peaks are achieved, begin adding the granulated sugar very slowly, about one tablespoon at a time, while the mixer is still running on medium-high speed. Wait about 30-60 seconds between each addition, allowing the sugar crystals time to dissolve into the aquafaba foam. This gradual process is essential; dumping the sugar in all at once can deflate the beautifully whipped aquafaba.
Continue adding sugar tablespoon by tablespoon until all of it is incorporated. After all the sugar is in, continue whipping for another 2-3 minutes on high speed. This final whipping helps to fully dissolve the sugar and create a smooth, glossy, and stable meringue. To check if the sugar is fully dissolved, take a small amount of the meringue between your thumb and forefinger and rub it together – it should feel completely smooth, without any grittiness. If it feels gritty, whip for another minute or two and test again.
Baking the Egg-Free Pavlova: Temperature and Timing Mastery
Preheat your oven to a very low temperature, typically between 200°F (90°C) and 225°F (100°C). Line a baking sheet with parchment paper. Spoon or pipe the aquafaba meringue onto the parchment paper, shaping it into a large disc or individual smaller discs. You can create a slight well in the center to hold toppings later. The low temperature is crucial for a dairy-free vegan pavlova; it allows the meringue to dry out and crisp up slowly without browning or becoming chewy.
Place the baking sheet in the preheated oven. The baking time will vary depending on the size of your pavlova and your oven, but a large pavlova might take 1.5 to 2.5 hours. Smaller individual meringues could take 60-90 minutes. The pavlova is done when it is firm to the touch on the outside and lifts easily off the parchment paper. It should look matte and dry, not shiny or sticky. Resist the urge to open the oven door frequently, as sudden temperature changes can cause cracking.
Cooling the Pavlova: Preventing Cracking and Collapsing
Once the baking time is complete, turn off the oven but leave the pavlova inside with the door slightly ajar. You can prop the door open with a wooden spoon. This slow cooling process is absolutely critical for preventing the pavlova from cracking or collapsing due to a sudden temperature shock. The residual heat in the oven allows the meringue to cool down gradually and finish drying out.
Allow the pavlova to cool completely in the oven for several hours, ideally overnight, before removing it. Do not rush this step. Taking it out too early while it's still warm can lead to significant cracking and loss of volume. A properly baked and cooled dairy-free vegan pavlova should be crisp on the outside and have a soft, slightly chewy interior when cut.
Dairy-Free & Egg-Free Pavlova Topping Ideas & Variations
Whipped Coconut Cream: A Classic Dairy-Free Topping
Whipped coconut cream is arguably the most popular and fitting dairy-free topping for a plant-based pavlova. To make it, chill a can of full-fat coconut milk or coconut cream in the refrigerator overnight. The solid cream will separate from the liquid. Scoop out the thick, solid cream into a bowl, leaving the liquid behind (save it for smoothies!). Whip the coconut cream with a hand mixer or stand mixer until it becomes light and fluffy, much like dairy whipped cream.
You can sweeten the whipped coconut cream with a tablespoon or two of powdered sugar or maple syrup and add a dash of vanilla extract for flavor. The richness and smooth texture of the coconut cream perfectly complement the light, crisp pavlova base, creating a delightful contrast that is essential to the pavlova experience. Ensure your coconut cream is very cold for best whipping results.
Vegan Fruit Curd: Adding a Tangy Twist
A vibrant vegan fruit curd offers a lovely tangy contrast to the sweet pavlova. Lemon curd is a classic, but lime, passion fruit, or even berry curds work beautifully. Vegan curds are typically made by combining fruit juice (like lemon juice), sugar, cornstarch or arrowroot starch as a thickener, a touch of vegan butter for richness, and sometimes a pinch of turmeric for color (in lemon curd). This mixture is heated gently, stirring constantly, until it thickens to a spoonable consistency.
The bright, zesty flavor of a vegan fruit curd cuts through the sweetness of the meringue and the richness of the coconut cream, adding another layer of complexity to your dairy-free vegan pavlova recipe creation. Allow the curd to cool completely before spooning it onto the pavlova just before serving.
Fresh Berries and Fruits: Seasonal Delights
No pavlova is complete without a generous topping of fresh fruit. Berries like strawberries, raspberries, blueberries, and blackberries are traditional choices, offering beautiful color and a burst of juicy freshness. Simply arrange a colorful medley of your favorite seasonal fruits over the whipped coconut cream.
Beyond berries, sliced kiwi, passion fruit pulp, mango cubes, or even caramelized peaches can make stunning and delicious toppings for your dairy-free vegan pavlova. The natural sweetness and slight acidity of the fruit balance the sweetness of the meringue and add essential moisture and texture. Choose ripe, flavorful fruit for the best results.
Chocolate Ganache (Vegan): A Decadent Indulgence
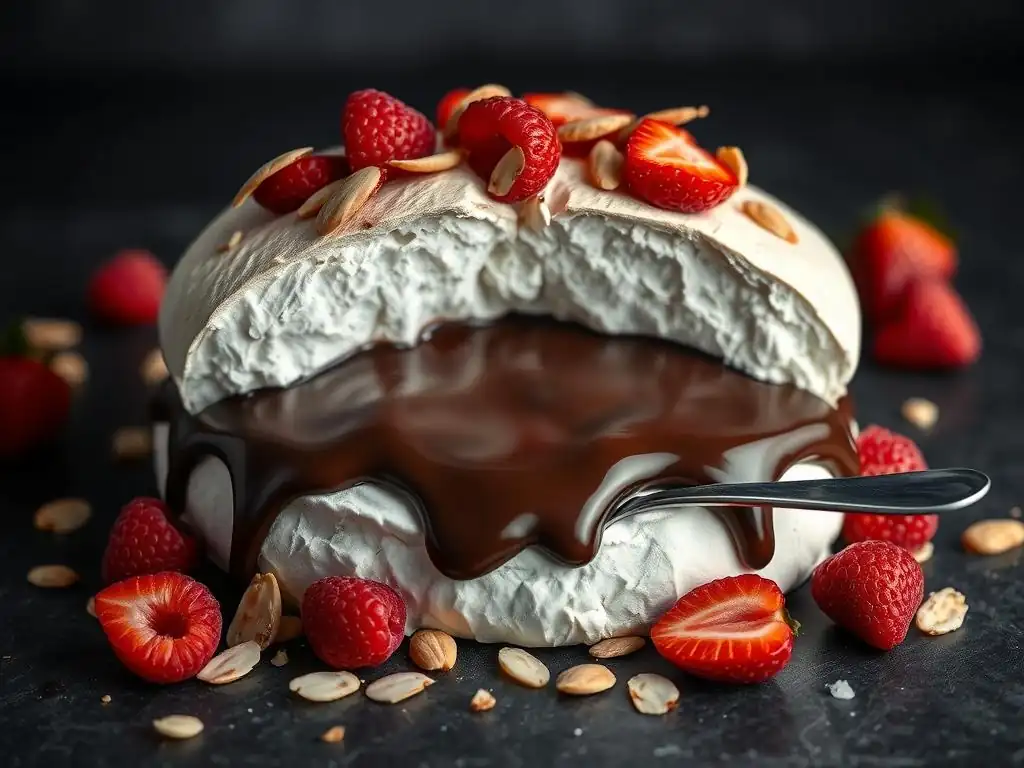
For chocolate lovers, a drizzle of vegan chocolate ganache can elevate a plant-based pavlova to a decadent treat. Vegan ganache is simple to make, typically requiring just two ingredients: vegan chocolate (chips or chopped bar) and hot plant-based cream (like full-fat coconut milk or a commercial vegan cream). Heat the cream until hot but not boiling, then pour it over the chocolate. Let it sit for a few minutes to melt the chocolate, then whisk until smooth and glossy.
Allow the ganache to cool slightly until it reaches a pourable consistency, then drizzle it over the pavlova and toppings. The rich, slightly bitter chocolate provides a luxurious counterpoint to the light meringue and sweet cream and fruit, making your dairy-free vegan pavlova recipe truly indulgent.
Topping Ideas: Vegan Caramel, Jams, Compotes
The possibilities for topping a dairy-free vegan pavlova are nearly endless. A swirl of homemade vegan caramel sauce adds a sticky, sweet depth of flavor. Vegan caramel can be made from sugar, water, vegan butter, and plant-based cream. Jams and fruit compotes also make excellent toppings, especially if you don't have fresh fruit readily available. A quick berry compote can be made by simmering berries with a little sugar and lemon juice until they break down and thicken slightly.
Other ideas include toasted nuts or seeds for crunch, a sprinkle of cocoa powder, edible flowers for decoration, or even crushed vegan cookies. Feel free to get creative and combine different textures and flavors to make your dairy-free vegan pavlova recipe truly unique and delicious.
Troubleshooting Your Dairy-Free & Egg-Free Pavlova
Common Pavlova Problems and Solutions
Baking a pavlova, whether traditional or plant-based, can sometimes present challenges. Understanding common issues and their solutions is key to mastering this delicate dessert. Don't be discouraged if your first attempt isn't perfect; each bake is a learning opportunity.
Addressing issues like cracking, collapsing, or stickiness requires reviewing your technique at each stage, from whipping the aquafaba to the final cooling process. Patience and precision are your best allies when perfecting a dairy-free vegan pavlova recipe.
Pavlova Cracking: Causes and Prevention
Cracking is one of the most common issues with pavlova. The primary cause is usually a sudden temperature change during or after baking. If the oven temperature is too high, the outside sets and hardens too quickly while the inside is still expanding, leading to fissures. Similarly, removing the pavlova from the oven too soon or exposing it to a draft while cooling can cause it to contract rapidly and crack.
To prevent cracking, ensure your oven temperature is accurate and consistently low (200-225°F / 90-100°C). Bake for the recommended time until the outside is firm. Most importantly, cool the pavlova completely inside the turned-off oven with the door ajar. Avoid opening the oven door during baking unless absolutely necessary. While minor cracks are often unavoidable and don't affect the taste, major cracks can be minimized with careful temperature management and slow cooling.
Pavlova Collapsing: Maintaining Volume and Structure
Collapsing often occurs if the aquafaba wasn't whipped to sufficiently stiff peaks, if the sugar wasn't fully dissolved, or if the meringue was exposed to too much moisture or humidity. Over-mixing after the sugar is added can also break down the foam structure.
Ensure you whip the aquafaba until very stiff, glossy peaks form that hold their shape firmly. Add the sugar slowly and whip until it is completely dissolved (check for grittiness). Make sure your kitchen isn't excessively humid when baking, if possible. Using stabilizers like cream of tartar and cornstarch in your dairy-free vegan pavlova recipe can also help create a more stable structure less prone to collapse. Finally, avoid under-baking, as a soft interior that hasn't dried out sufficiently is more likely to sink upon cooling.
Pavlova Stickiness: Achieving a Crisp Exterior
A sticky or chewy exterior instead of a crisp one usually indicates that the pavlova hasn't been baked or cooled for long enough, or that the oven temperature was too high, causing the sugar to caramelize on the outside before the interior had time to dry out. High humidity can also contribute to a sticky meringue.
To achieve a crisp exterior, bake the pavlova at the low temperature for the full recommended time (or even longer, if needed) until the outside is completely dry and firm. The slow, low bake dries out the meringue without browning it. Ensure the sugar is fully dissolved before baking.
Most importantly, allow the pavlova to cool completely inside the oven as per the cooling instructions. This allows the residual heat to continue drying the meringue. If the weather is very humid, it can be challenging to achieve a perfectly crisp shell, but the low and slow bake method is your best defense.
Tips for Success: Mastering the Art of Plant-Based Pavlova
- Use clean, grease-free equipment: This is paramount for successful whipping. Wash and dry your bowl and whisk thoroughly before starting.
- Chill the aquafaba: Cold aquafaba whips up better and faster.
- Whip sufficiently: Don't stop whipping until you have very stiff, glossy peaks. This can take longer than with egg whites.
- Add sugar slowly: Patience here pays off; ensure each addition is dissolved before adding more.
- Check for dissolved sugar: Rub a little meringue between your fingers – no grit means the sugar is ready.
- Use a low, accurate oven temperature: Use an oven thermometer to verify your oven's temperature setting.
- Cool slowly: Leaving the pavlova in the turned-off oven to cool is essential for preventing cracks and collapse.
- Assemble just before serving: Pavlova is best served immediately after topping to maintain its crispness. The moisture from toppings will soften the meringue over time.
- Humidity matters: Meringues are sensitive to humidity. Try to bake on a dry day if possible.
Dairy-Free & Egg-Free Pavlova Recipe: The Complete Guide
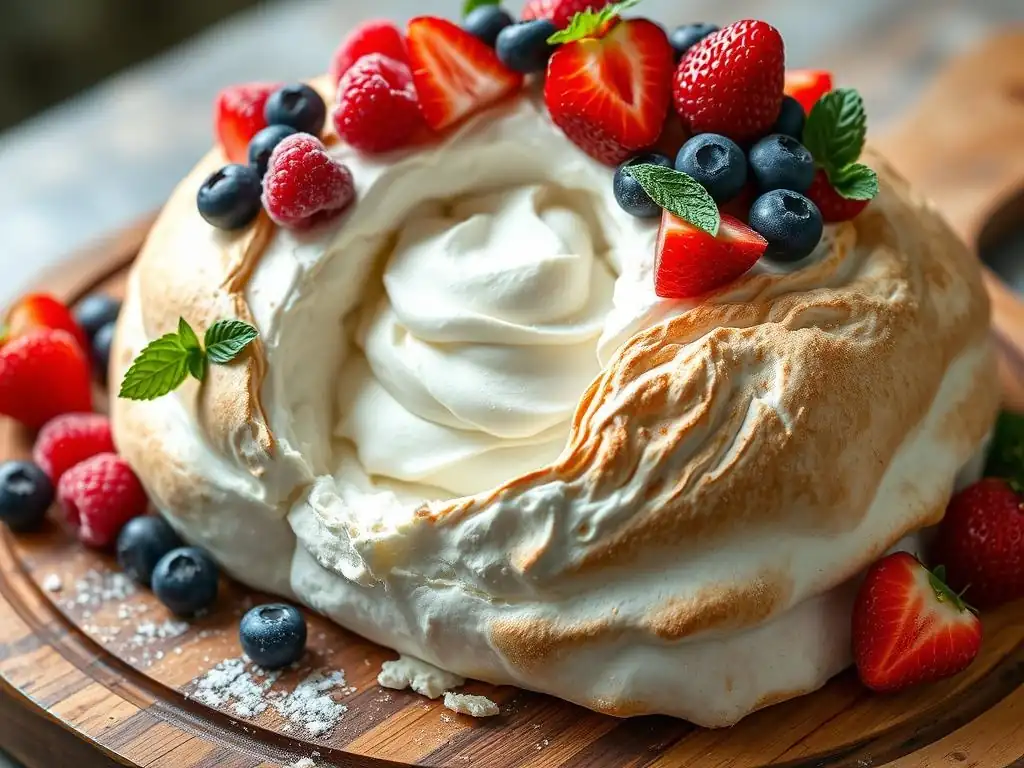
Ingredients List (Detailed)
- 1/2 cup (approx. 120ml) aquafaba (liquid from 1 standard 15-oz can of unsalted chickpeas, ideally reduced slightly and chilled)
- 1/4 teaspoon cream of tartar (optional, but recommended for stability)
- 3/4 cup to 1 cup (150g to 200g) superfine or caster sugar (granulated sugar works but takes longer to dissolve)
- 1 tablespoon cornstarch
- 1/2 teaspoon white vinegar or lemon juice
- 1/2 teaspoon vanilla extract (optional)
Step-by-Step Instructions (Comprehensive)
- Preheat your oven to 225°F (100°C). Line a baking sheet with parchment paper.
- Ensure your stand mixer bowl and whisk attachment are spotlessly clean and dry.
- Pour the chilled aquafaba into the mixer bowl. Begin whipping on medium-high speed until it becomes frothy, then starts to form soft peaks (approx. 3-5 minutes).
- If using, add the cream of tartar and continue whipping until the aquafaba holds medium peaks.
- Gradually add the sugar, one tablespoon at a time, allowing 30-60 seconds between additions for the sugar to dissolve. Continue whipping on medium-high speed.
- Once all the sugar is added, increase the speed to high and whip for another 2-3 minutes until the meringue is very thick, glossy, and holds stiff peaks. Rub a little between your fingers to ensure the sugar is fully dissolved (no grit).
- In a small bowl, whisk together the cornstarch and vinegar/lemon juice until smooth. Add this mixture and the vanilla extract (if using) to the meringue. Gently fold them in with a spatula or mix on the lowest speed for just 15-20 seconds, just until combined. Be careful not to deflate the meringue.
- Spoon or pipe the meringue onto the prepared baking sheet, shaping it into a large disc (approx. 8-10 inches in diameter) or several smaller individual discs. You can create a slight indentation in the center for toppings.
- Place the baking sheet in the preheated oven.
- Bake for 1.5 to 2.5 hours for a large pavlova, or 60-90 minutes for smaller ones, or until the outside is firm and dry to the touch and the pavlova lifts easily off the parchment. The exterior should be crisp.
- Once baked, turn off the oven. Prop the oven door open slightly with a wooden spoon and leave the pavlova inside to cool completely, ideally for several hours or overnight. Do not remove it until it is fully cooled.
Baking Time and Temperature (Precise)
- Oven Temperature: 200°F - 225°F (90°C - 100°C) - use an oven thermometer for accuracy.
- Baking Time:
- Large Pavlova (approx. 8-10 inches): 1.5 to 2.5 hours
- Individual Pavlovas (approx. 4-5 inches): 60 to 90 minutes
- Cooling Time: Several hours or overnight in the turned-off oven with the door ajar.
Storing Your Dairy-Free & Egg-Free Pavlova
Best Practices for Pavlova Storage
Proper storage is essential to maintain the delicate texture of your dairy-free vegan pavlova. The key is to protect it from moisture and humidity, which can quickly turn the crisp shell into a sticky mess. An undecorated, completely cooled pavlova base should be stored in an airtight container at room temperature. Avoid refrigeration, as the humid environment inside a refrigerator is the enemy of meringue.
Place the pavlova gently in a container large enough to hold it without crushing. If stacking, separate layers with parchment paper. Ensure the container is truly airtight. Stored correctly, an undecorated plant-based pavlova base can last for 2-3 days, retaining most of its crispness.
Maintaining Crispness and Preventing Sogging
To prevent your dairy-free vegan pavlova from becoming soggy, the most important rule is to only assemble and top the pavlova just before serving. Whipped cream, fruit, and other moist toppings will quickly start to soften the meringue base. Prepare all your toppings in advance and keep them chilled separately.
If you have leftover assembled pavlova, it will likely become soft within a few hours. While still edible, it won't have the signature crisp/soft texture contrast. For leftover undecorated bases, ensure they are returned to the airtight container immediately after serving to minimize exposure to air and humidity. If a stored base loses some crispness, you can sometimes try briefly reheating it in a very low oven (around 200°F / 90°C) for 10-15 minutes, then letting it cool completely again, though this isn't always guaranteed to fully restore the texture.
Conclusion: Enjoying Your Plant-Based Pavlova Creation
Crafting a dairy-free vegan pavlova recipe is a rewarding experience that showcases the incredible versatility of plant-based ingredients. From the magical transformation of aquafaba into a stable, glossy meringue to the final flourish of vibrant, dairy-free toppings, each step is a testament to the innovation in modern baking. This delightful dessert proves that dietary preferences or restrictions don't mean sacrificing elegance or deliciousness.
Whether you're an experienced baker or just starting your plant-based journey, attempting a dairy-free pavlova is a worthwhile endeavor. The result is a stunning, light-as-air dessert with a satisfying contrast of textures and flavors – a crisp shell, a soft, marshmallowy interior, rich whipped coconut cream, and bright, fresh fruit. Share your creation with friends and family, and enjoy the satisfaction of mastering this beautiful plant-based take on a beloved classic. Happy baking!
Frequently Asked Questions
What makes this pavlova recipe "plant-based"?
This recipe replaces traditional egg whites and dairy with plant-based alternatives, making it suitable for vegans and those with dairy intolerances. It typically uses aquafaba (chickpea brine) to mimic egg whites.
What is aquafaba, and why is it used in a dairy-free vegan pavlova?
Aquafaba is the liquid from canned chickpeas, which surprisingly whips up like egg whites. It provides the necessary structure and meringue-like texture for a vegan pavlova.
Can I substitute the aquafaba with something else?
While other substitutes exist, aquafaba is the most reliable for achieving the proper pavlova texture. Success with other options can vary significantly.
What kind of plant-based cream alternatives work best for topping this pavlova?
Coconut cream (the thick part from a chilled can) or cashew cream are popular choices for a dairy-free topping. Ensure they are whipped to a light and fluffy consistency before serving.
Is this plant-based pavlova recipe as stable and long-lasting as a traditional pavlova?
Plant-based pavlovas can be slightly more delicate than traditional ones. While they hold their shape well, it's best to consume them soon after assembly to prevent softening.
Final Reflection: A Sweet Revolution: Reimagining the Pavlova
The quest for delicious, dairy-free desserts is no longer a niche pursuit; it's a mainstream movement. The demand for plant-based alternatives reflects a growing awareness of ethical concerns, health considerations, and the sheer desire for delicious, inclusive recipes. This exploration of dairy-free and egg-free pavlovas demonstrates that indulgence and compassion can coexist beautifully.
This journey into the world of vegan pavlovas has been a personal revelation. It's shown me the incredible creativity and resourcefulness of plant-based cooking, proving that traditional recipes can be reimagined without sacrificing flavor or texture. The best things in life are unexpected.
This rings true for the surprising delights discovered while experimenting with aquafaba and other plant-based alternatives to create a truly magnificent pavlova.
Now, it's your turn to embrace the possibilities. Don't be afraid to experiment in your own kitchen, to adapt recipes, and to discover the joy of creating delicious and ethical desserts. The next time you crave a pavlova, remember the power of plant-based alternatives and the sweet satisfaction of a recipe that's both delicious and kind. Let's continue this culinary revolution, one dairy-free meringue at a time.
Unleash Your Inner Pastry Chef: Create the Perfect Dairy-Free Pavlova!
Thanks for joining us on this delicious journey into the world of dairy-free desserts! We hope you've discovered the amazing possibilities of creating light, airy, and utterly delightful pavlovas without any dairy. Ready to take your baking skills to the next level?
- Master the Egg White Whipping Technique: Practice makes perfect! Try whipping egg whites again, focusing on achieving those stiff, glossy peaks. You’ll be amazed at the difference.
- Share your Pavlova Triumphs: Snap a picture of your stunning creation and share it on social media using #BakeWithEaseDairyFree. Let's inspire others to embrace plant-based baking!
- Explore More Dairy-Free Recipes: Dive into our extensive recipe library and discover more innovative and delicious dairy-free treats. We've got plenty more where that came from!
So, what incredible dairy-free dessert will you create next? Let's hear your ideas in the comments!