
DairyFree Filled Donuts with Coconut Cream and Fruit Jam

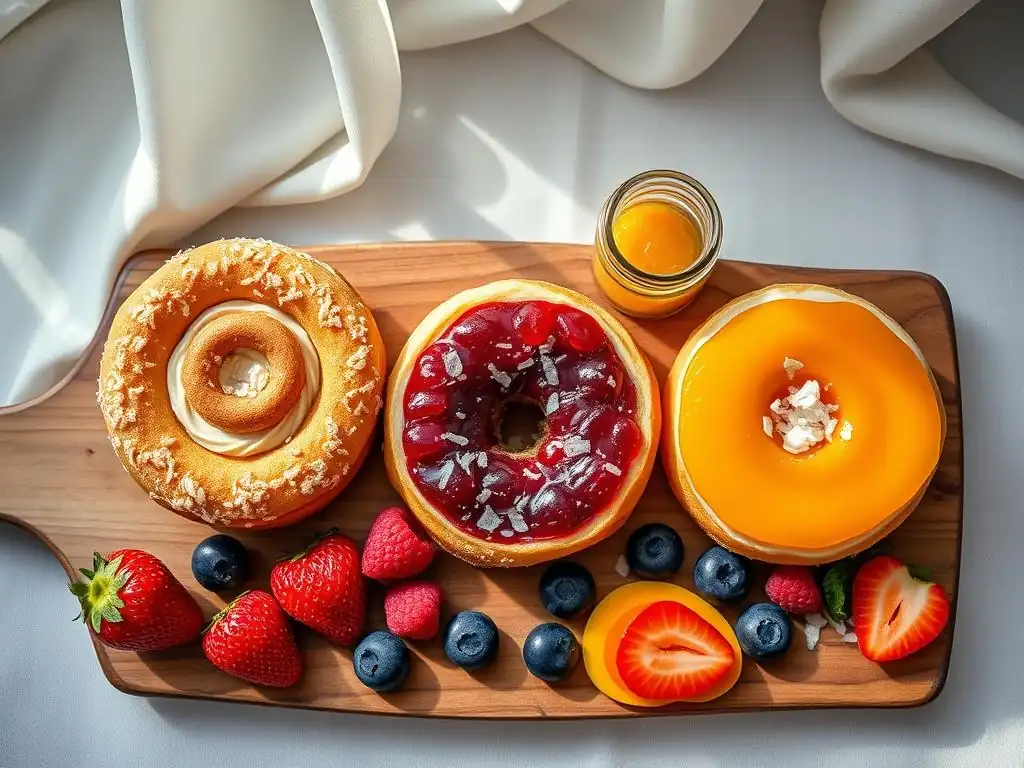
Welcome to BakeWithEase, your culinary haven for all things baking! Curious about creating delectable treats without dairy? Dive into our world where baking becomes an accessible joy, no matter your dietary needs. Get ready to discover our star recipe: a tantalizing Dairy-Free Coconut Donut Recipe that will redefine your expectations of allergen-friendly indulgence. But that's just the beginning... What other secrets will you unlock in the realm of easy, delicious, and dietary-inclusive baking?
- Introduction to Dairy-Free Baking: Delicious Coconut Cream Donuts
- Mastering the Dairy-Free Coconut Donut Dough
- Preparing the Coconut Cream Filling: A Dairy-Free Delight
- Creating the Flavorful Fruit Jam Filling: Dairy-Free and Delicious
- Assembling Your Dairy-Free Filled Donuts
- Tips and Tricks for Perfect Dairy-Free Donuts
- Enjoying Your Homemade Dairy-Free Treats: A BakeWithEase Creation
- Frequently Asked Questions
- Final Reflection: The Sweetness of Dairy-Free Delight
- Unleash Your Inner Baker: Make These Dairy-Free Donuts Today!
Introduction to Dairy-Free Baking: Delicious Coconut Cream Donuts
Embracing Dairy-Free Treats with BakeWithEase
Welcome to the wonderful world of dairy-free baking! At BakeWithEase, we believe that dietary restrictions shouldn't limit your enjoyment of delicious homemade treats. Baking without dairy opens up a vast array of possibilities, utilizing alternative ingredients like plant-based milks, vegan butters, and, our star ingredient for this recipe, rich coconut cream. Whether you're lactose intolerant, have a dairy allergy, or are simply exploring plant-based options, mastering dairy-free techniques allows you to create baked goods that are just as satisfying, if not more so, than their traditional counterparts.
Many common baking ingredients contain dairy, such as milk, butter, and certain types of sugar or chocolate. Learning to substitute these effectively is key. For instance, swapping dairy milk for almond, soy, or oat milk is a straightforward change, but understanding how different plant milks affect texture (e.g., coconut milk's richness) is crucial. Similarly, replacing butter with vegan butter sticks or coconut oil requires attention to fat content and melting points. Our goal at BakeWithEase is to guide you through these substitutions with confidence, ensuring your baking adventures are always successful and incredibly tasty.
Why Choose This Dairy-Free Coconut Donut Recipe?
This specific dairy-free coconut donut recipe stands out for several reasons, making it a perfect project for bakers looking to dive into dairy-free frying. Firstly, the combination of a light, airy donut dough with creamy coconut filling and vibrant fruit jam offers a delightful contrast in textures and flavors. Coconut cream, when whipped properly, provides a luxurious, dairy-free alternative to traditional pastry cream or whipped cream, offering a tropical hint that pairs beautifully with various fruits.
Furthermore, this recipe is designed with accessibility in mind, aiming to provide a straightforward guide to making dairy-free coconut donuts from scratch. Unlike some complex vegan recipes that require hard-to-find ingredients, this approach focuses on readily available items like canned full-fat coconut milk, common flours, and everyday fruits for the jam.
We break down each step, from mixing the dough to frying and filling, ensuring that even those new to dairy-free baking or deep-frying can achieve fantastic results right in their own kitchen. This isn't just a recipe; it's a pathway to discovering how simple and rewarding creating delicious dairy-free coconut donuts can be.
Mastering the Dairy-Free Coconut Donut Dough
Ingredients for Perfect Dairy-Free Donuts
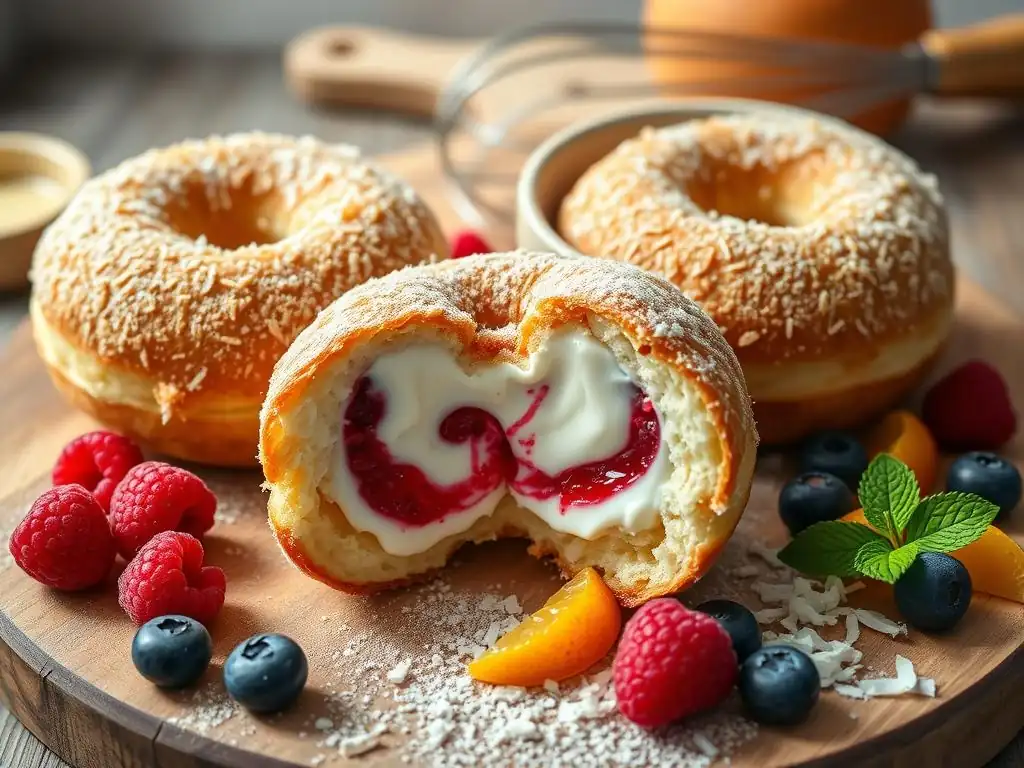
Creating a light and fluffy dairy-free donut dough requires careful selection of ingredients. The right balance of leavening, fat, and liquid is essential to achieve that classic airy texture. For this dairy-free coconut donut recipe, we focus on substitutes that perform similarly to their dairy counterparts while adding unique qualities.
We'll be using active dry yeast as our leavening agent, typically needing about 2.25 teaspoons for a batch of donuts yielding around 10-12 pieces. This amount is sufficient to provide a good rise, resulting in tender donuts. For fat, a good quality vegan butter or refined coconut oil works well, providing richness and helping to create a soft crumb structure.
You'll need about 1/4 cup of melted vegan butter or oil. Sugar is also crucial, not just for sweetness but to feed the yeast and promote browning during frying; around 1/4 cup of granulated sugar is usually adequate for the dough itself.
Dairy-Free Milk Options for Dough (Coconut Milk Focus)
Choosing the right dairy-free milk is paramount for this dairy-free coconut donut recipe. While almond, soy, or oat milk can technically be used, full-fat canned coconut milk is highly recommended for this specific recipe. The higher fat content in full-fat coconut milk (often containing around 15-20 grams of fat per 100ml, compared to 2-5 grams in most other plant milks) contributes significantly to the dough's richness and moisture, leading to a softer, more tender donut crumb.
When using coconut milk, ensure it's the full-fat variety from a can, not the carton beverage type, which is much thinner. You'll likely need about 3/4 to 1 cup of warm coconut milk to activate the yeast and bring the dough together. The warmth (around 105-115°F or 40-46°C) is critical for yeast activity. Using coconut milk not only replaces dairy effectively but also subtly complements the coconut cream filling planned for these dairy-free coconut donuts.
Flour Selection for Light and Airy Donuts
The type of flour you use greatly impacts the final texture of your dairy-free donuts. All-purpose flour is a common and reliable choice, offering a good balance of gluten for structure without making the donuts too dense. Look for an all-purpose flour with a protein content around 10-12%. This level of protein allows for sufficient gluten development to trap the gases produced by the yeast, resulting in a light and airy texture.
For an even lighter result, some bakers prefer using a mix of all-purpose and cake flour (which has a lower protein content, typically 6-8%). Using about 3 cups of all-purpose flour is a good starting point for a standard batch size. Sifting the flour before measuring can also help incorporate air and ensure accuracy. While gluten-free flour blends exist, they require significant recipe adjustments and often contain gums or starches, which would change the nature of this specific dairy-free coconut donut recipe significantly.
Sweeteners for Dairy-Free Baking
Sweeteners play a vital role in dairy-free baking, contributing not just sweetness but also moisture and browning. For the donut dough itself, granulated sugar is standard. About 1/4 cup is typically enough to feed the yeast and provide a subtle sweetness to the dough, which will be further enhanced by the fillings and optional glaze.
When choosing sugar, most granulated sugars are naturally vegan, but some are processed using bone char. If this is a concern, look for certified vegan sugars. Other sweeteners like maple syrup or agave are less ideal for the dough as they are liquids and can alter the dough's hydration balance, though they work well in glazes or fillings. For this dairy-free coconut donut recipe, sticking to granulated sugar for the dough ensures predictable results.
Step-by-Step Guide to Making Dairy-Free Donut Dough
Making a yeast-based dough requires patience and attention to detail, but it's a rewarding process. Follow these steps closely to achieve the perfect base for your dairy-free coconut donuts.
Start by activating your yeast. In a small bowl, combine the warm dairy-free milk (coconut milk, preferably, around 105-115°F), a pinch of the sugar, and the active dry yeast. Give it a gentle stir and let it sit for 5-10 minutes. You should see a foamy layer develop on top, which indicates the yeast is alive and active. If it doesn't foam, your milk might not have been warm enough, too hot, or the yeast may be expired, and you'll need to start this step over.
Mixing the Dry Ingredients
In a large mixing bowl, whisk together the flour (about 3 cups all-purpose), the remaining granulated sugar (around 1/4 cup), and about 1/2 teaspoon of salt. Salt is important for flavor and also helps control yeast activity, preventing the dough from rising too quickly. Make sure these dry ingredients are evenly combined before adding the wet components.
You can use a stand mixer with a dough hook attachment for ease, or mix by hand. If mixing by hand, ensure you have a sturdy bowl and a good wooden spoon or spatula. Creating a small well in the center of the dry ingredients makes it easier to incorporate the wet ingredients smoothly in the next step.
Incorporating Wet Ingredients for a Smooth Dough
Once your yeast is foamy, pour the activated yeast mixture into the well in your dry ingredients. Add the melted and slightly cooled vegan butter or coconut oil (about 1/4 cup). Begin mixing, either with the dough hook on low speed or by hand. The dough will initially look shaggy and wet.
Continue mixing and kneading. If using a stand mixer, knead for about 5-7 minutes on medium-low speed. If kneading by hand, this will take longer, roughly 8-10 minutes. You may need to add a tablespoon or two more flour if the dough is excessively sticky, but be careful not to add too much, as this can result in dry, tough donuts. The goal is a smooth, elastic dough that springs back slowly when gently poked. It should be slightly tacky but shouldn't stick stubbornly to your hands or the bowl.
First Rise: Achieving Optimal Dough Texture
The first rise, or bulk fermentation, is crucial for developing flavor and texture in your dairy-free coconut donut dough. Lightly grease a clean bowl with a little vegan butter or oil. Place the kneaded dough in the bowl, turning it to coat all sides. Cover the bowl tightly with plastic wrap or a clean kitchen towel.
Place the covered bowl in a warm, draft-free spot. An oven turned off with the light on is often a good option. Let the dough rise until it has doubled in size. This typically takes between 1 to 2 hours, depending on the warmth of your environment. In a room around 75°F (24°C), it might take closer to 1.5 hours. Properly risen dough will look puffy and a gentle poke will leave an indentation that slowly springs back halfway.
Shaping and Frying Your Dairy-Free Donuts
Once the dough has completed its first rise, it's ready to be shaped and prepared for frying. This stage requires a gentle touch to maintain the airiness achieved during the rise.
Turn the risen dough out onto a lightly floured surface. Punch it down gently to release some of the gas. Knead it briefly for about 30 seconds to redistribute the yeast and even out the temperature. You are now ready to roll and cut your shapes for these delightful dairy-free coconut donuts.
Rolling and Cutting the Donut Shapes
Roll the dough out to a thickness of about 1/2 inch (approximately 1.25 cm). This thickness is important; too thin and your donuts will be flat and dense; too thick and they might not cook through properly in the center. Use a donut cutter or two different-sized round cutters (a larger one for the outside and a smaller one for the hole, if making rings). For filled donuts, you'll just use one larger round cutter, typically around 3-3.5 inches (7.5-9 cm) in diameter.
Carefully place the cut donut shapes onto squares of parchment paper. This makes transferring them to the hot oil much easier and helps prevent them from deflating. Leave enough space between them for the second rise. Gather the scraps, gently knead them together, and let them rest for 5-10 minutes before rerolling and cutting more shapes. This rest allows the gluten to relax.
Frying Donuts to Golden Perfection: Temperature Control
Frying is arguably the most critical step for achieving perfectly cooked dairy-free donuts. Heat about 2-3 inches of vegetable oil (like canola or peanut oil) in a large, heavy-bottomed pot or Dutch oven to a temperature of 350-375°F (175-190°C). Maintaining a consistent oil temperature is key; too low and the donuts will absorb too much oil and be greasy; too high and they will burn on the outside before cooking through. A deep-fry thermometer is highly recommended.
Carefully slide the donuts into the hot oil using the parchment paper squares (the paper will peel off easily once the donut is in the oil). Don't overcrowd the pot; fry only 2-3 donuts at a time to avoid dropping the oil temperature significantly. Fry for about 1.5 to 2 minutes per side, or until golden brown and puffed up. Use a slotted spoon or spider strainer to flip them halfway through.
Cooling the Fried Donuts
Once the dairy-free donuts are golden brown on both sides, carefully lift them out of the hot oil using the slotted spoon or spider strainer. Hold them over the pot for a moment to allow excess oil to drip off. Transfer the fried donuts to a wire rack set over a baking sheet lined with paper towels. The paper towels will absorb any remaining grease.
Allow the donuts to cool completely before filling or glazing. Filling a hot donut can cause the filling to melt or the donut to become soggy. Cooling the donuts on a wire rack allows air to circulate around them, preventing the bottoms from getting soggy. This cooling period is essential for the structural integrity of your delicious dairy-free coconut donuts.
Preparing the Coconut Cream Filling: A Dairy-Free Delight
The coconut cream filling is a star component of this dairy-free coconut donut recipe, offering a rich, creamy texture and a subtle tropical flavor that complements the fried dough beautifully.
Making whipped coconut cream is a fantastic dairy-free alternative to traditional whipped cream or pastry cream. It's relatively simple but requires a bit of planning, primarily chilling the coconut milk properly. The fat content in full-fat canned coconut milk is what allows it to whip up into a light, airy cream, similar to dairy heavy cream.
Ingredients for Homemade Coconut Cream Filling
To make the luscious coconut cream filling for your dairy-free coconut donuts, you'll need just a few key ingredients. The most important is full-fat canned coconut milk. You'll typically need one or two standard 13.5-ounce cans. Ensure the cans have been refrigerated for at least 24 hours, preferably longer, without being shaken. This allows the solid cream to separate from the liquid coconut water.
You'll also need a sweetener. Powdered sugar (also known as confectioners' sugar) is ideal because it dissolves easily and helps stabilize the whipped cream. Start with about 1/4 to 1/2 cup of powdered sugar per can of coconut milk, adjusting to your desired sweetness. A pinch of salt can also help balance the sweetness.
Choosing the Right Coconut Cream
As mentioned, selecting the correct coconut milk is crucial for successful whipped coconut cream. Look for full-fat canned coconut milk. Brands with higher fat content (check the nutrition label; ideally over 15g of fat per 100g serving) will yield a firmer, more stable whipped cream. Avoid "light" coconut milk or the carton beverage types, as they do not contain enough fat to whip properly.
Refrigerating the cans for at least 24 hours is non-negotiable. This step is vital for the solid cream to separate and harden at the top of the can. When you open the can, you should see a thick, solid layer of cream at the top and the liquid coconut water at the bottom. You will scoop out only the solid cream for whipping.
Sweetening the Coconut Cream Filling
Powdered sugar is the preferred sweetener for whipped coconut cream because its fine texture helps it blend smoothly without leaving a gritty texture. It also contains a small amount of cornstarch, which acts as a stabilizer, helping the whipped cream hold its shape longer.
Start by adding a conservative amount of powdered sugar (e.g., 1/4 cup per can of cream) and whip. Taste and add more gradually until the desired sweetness is reached. You could also use other powdered sweeteners like erythritol or xylitol for a lower-sugar option, but their stabilizing properties might differ slightly. Liquid sweeteners like maple syrup are not recommended as they can make the cream too runny.
Adding Flavor Enhancers (Vanilla, Extracts)
Vanilla extract is a classic addition to whipped cream and works beautifully in dairy-free coconut cream. Add about 1 teaspoon of pure vanilla extract per can of coconut cream to enhance the flavor. Be sure to use pure extract, not imitation vanilla, for the best taste.
Other extracts can also be used to customize the flavor of your dairy-free coconut donuts. Almond extract pairs well with coconut, or a touch of rum extract could add a tropical twist. You could also whisk in a tablespoon of cocoa powder for a chocolate coconut cream filling. Add extracts after the cream has started to thicken, during the whipping process.
Whipping the Coconut Cream to Perfection
Whipping coconut cream requires a cold environment and patience, similar to whipping dairy cream. Ensure your bowl and whisk attachment (if using a stand mixer) or beaters (if using a hand mixer) are also chilled. Placing them in the freezer for 10-15 minutes beforehand helps significantly.
Open the chilled cans of coconut milk carefully without shaking. Scoop the solid coconut cream from the top into your chilled bowl. Reserve the liquid coconut water for smoothies or other uses. Begin whipping the solid cream on medium speed. It will initially look thick and clumpy.
Achieving the Ideal Consistency
Continue whipping the coconut cream, gradually increasing the speed to medium-high. As you whip, the cream will become smoother and lighter, incorporating air. This can take anywhere from 5 to 10 minutes, depending on the temperature and the fat content of the coconut milk.
Watch the cream carefully. It will go from thick and somewhat dense to light and fluffy. You're looking for medium to stiff peaks, similar to dairy whipped cream. When you lift the whisk, the peaks should hold their shape relatively well. Be careful not to over-whip, as coconut cream can sometimes become grainy or separate if beaten for too long.
Avoiding Common Coconut Cream Problems
One of the most common issues when making whipped coconut cream is it not whipping up properly. This is almost always due to insufficient chilling or using a low-fat variety of coconut milk. Ensure your cans are very cold and that you're using full-fat canned coconut milk with a high fat content.
Another issue can be graininess. This can happen if the cream isn't fully separated or if it's over-whipped. If it becomes slightly grainy, sometimes adding a tiny splash of the reserved liquid coconut water (about a teaspoon at a time) and whisking briefly can help smooth it out. Ensuring all your equipment is cold also helps prevent separation. Patience is key; whip until just the right consistency is reached for your dairy-free coconut donut recipe filling.
Creating the Flavorful Fruit Jam Filling: Dairy-Free and Delicious
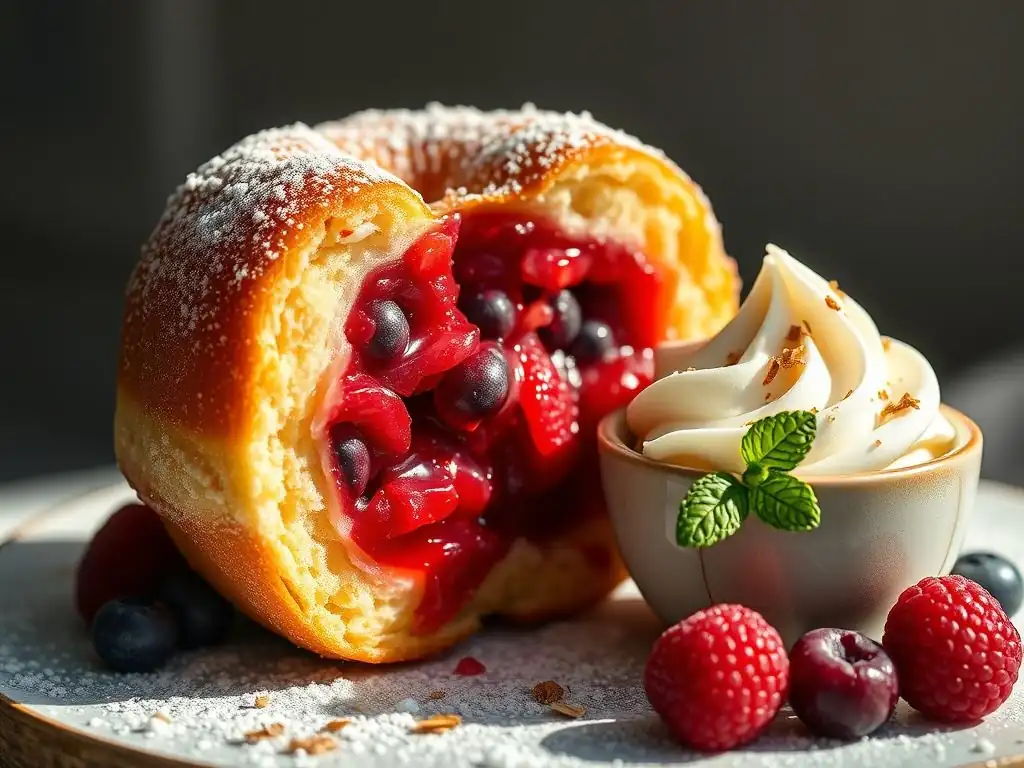
Adding a fruit jam filling alongside the coconut cream in these dairy-free coconut donuts provides a burst of bright, tangy flavor that beautifully contrasts the creamy sweetness. Making a simple, quick fruit jam at home is easy and allows you to control the ingredients.
Fruit jam is naturally dairy-free, making it a perfect complement to our dairy-free coconut donut recipe. The acidity of the fruit also helps cut through the richness of the fried dough and coconut cream.
Selecting Your Favorite Fruits for the Jam
Almost any fruit can be turned into a simple jam, but some work better than others for fillings. Fruits with natural pectin content, like apples, cranberries, and citrus peels, thicken more easily. Berries are also excellent choices as they break down readily and have lovely vibrant colors.
For a donut filling, you want a jam that isn't too runny. Fruits that are too watery might make the donut soggy. Choosing slightly less ripe fruit can sometimes help, as they often contain more pectin. Consider the flavor profile you want – something sweet and tangy like raspberry, or richer like blueberry.
Berry Jam Options: Strawberry, Raspberry, Blueberry
Berries are fantastic choices for a quick donut jam. They break down easily when heated and offer a wide range of flavors. Strawberry jam is a classic, offering sweetness with a slight tartness. Approximately 1 pound of fresh or frozen strawberries will yield about 1.5 cups of finished jam, enough for a batch of these dairy-free coconut donuts.
Raspberry jam provides a more intense tartness and a beautiful vibrant color. Blueberries create a richer, slightly sweeter jam with a deeper color. For a mixed berry jam, combine equal parts strawberries, raspberries, and blueberries. Roughly 2 cups of mixed berries will make about 1 cup of jam.
Stone Fruit Jam Options: Peach, Apricot, Plum
Stone fruits like peaches, apricots, and plums also make wonderful dairy-free donut fillings. They offer a different texture and flavor profile compared to berries, often with a smoother consistency once cooked down. Peaches yield a sweet, slightly floral jam. Apricots offer a pleasant tanginess. Plums can range from sweet to tart depending on the variety.
To make jam from stone fruits, you'll typically need to peel and pit them first. Roughly 1.5 pounds of pitted and chopped stone fruit will yield about 1.5 to 2 cups of jam. Cooking time might be slightly longer than for berries due to their firmer texture. These jams pair exceptionally well with the coconut flavor in the dairy-free coconut donut recipe.
Making a Quick and Easy Dairy-Free Fruit Jam
Making a small batch of fruit jam for your donuts is surprisingly simple and much quicker than traditional canning methods. You don't need special equipment, just a saucepan and a spoon.
Start with your chosen fruit. If using fresh fruit, wash and prepare it (hull strawberries, pit stone fruits, etc.). If using frozen fruit, you can often use it directly from the freezer. Combine the fruit in a medium saucepan.
Cooking the Fruit to Softness
Place the saucepan over medium heat. As the fruit heats, it will begin to release its juices and break down. Stir occasionally to prevent sticking. For berries, this process happens relatively quickly, perhaps 10-15 minutes. Stone fruits might take slightly longer, 15-20 minutes, to soften completely.
Once the fruit is soft and has started to break apart, you can use the back of your spoon or a potato masher to mash it to your desired consistency. Some prefer a chunkier jam with visible fruit pieces, while others like a smoother texture. Continue cooking, stirring frequently, until the mixture thickens.
Adding Sweeteners and Pectin (Optional)
Sweetness levels in jam are a matter of preference and also depend on the natural sweetness of your fruit. Start by adding about 1/4 to 1/2 cup of granulated sugar per 2 cups of fruit. Stir it in and continue cooking. The sugar helps the jam thicken and acts as a preservative. Taste and add more sugar if needed.
For a quicker, thicker jam without cooking for a long time, you can add a small amount of pectin. Powdered pectin (like Sure-Jell or Ball RealFruit Classic Pectin) requires specific ratios of sugar and fruit, usually listed on the package. A simpler alternative is to just rely on the fruit's natural pectin and cook it down until it reaches a jam-like consistency.
This might take 20-30 minutes or more of simmering after adding sugar, depending on the fruit. The jam is ready when it coats the back of a spoon and a drop placed on a cold plate wrinkles when pushed.
Achieving the Right Jam Consistency
Getting the jam to the right consistency is key for a good donut filling – not too runny, not too stiff. As the jam cooks and sugar is added, it will thicken. You can test the consistency by placing a small spoonful on a plate that has been chilled in the freezer for a few minutes. Let it cool for 30 seconds, then push it with your finger. If it wrinkles and doesn't run, it's likely ready.
Remember that the jam will thicken considerably more as it cools. If it seems a little too thin when hot, it might be perfect once cooled. If it's too thick, you can add a tablespoon of water or fruit juice and stir over low heat until incorporated. If it's too thin after cooling, you can gently simmer it again for a few more minutes. Store the finished jam in an airtight container in the refrigerator once cooled.
Assembling Your Dairy-Free Filled Donuts
Now for the fun part: filling and finishing your beautiful dairy-free coconut donuts! This is where the creamy coconut filling and vibrant fruit jam come together to create an explosion of flavor and texture.
Ensuring the donuts are completely cooled before filling is essential. Warm donuts can absorb the filling in an undesirable way or cause the whipped coconut cream to melt.
Filling the Donuts with Coconut Cream and Fruit Jam
There are a couple of ways to fill a donut, but for a generous amount of both coconut cream and jam, using a piping bag is the most effective method. You'll want two separate piping bags, one for each filling.
Using a sharp knife or a skewer, make a small hole in the side of each cooled dairy-free donut. Try to make the hole deep enough to reach the center cavity of the donut. This creates an opening for the fillings.
Using a Piping Bag for Precise Filling
Fit a piping bag with a plain round tip (a medium-sized tip, around 1/4 to 3/8 inch diameter, works well). Fill one bag with your prepared whipped coconut cream and the other with the fruit jam. Don't overfill the bags; it's easier to work with smaller amounts.
Insert the tip of the piping bag filled with coconut cream into the hole you made in the donut. Gently squeeze the bag, filling the donut until you feel it become slightly heavy or see the donut puff up slightly. Repeat with the fruit jam in the second piping bag, inserting the tip into the same hole or a slightly different spot nearby, and fill until you achieve the desired amount of jam.
Achieving the Perfect Filling Ratio
The perfect ratio of coconut cream to fruit jam in your dairy-free coconut donuts is a matter of personal preference. Some people prefer more creaminess, while others love a burst of tart jam. A good starting point is to aim for roughly equal amounts of each filling.
Alternatively, you could fill some donuts solely with coconut cream and others solely with fruit jam, offering a variety. As you fill, you'll get a feel for how much each donut can hold without bursting. A typical donut might hold 2-3 tablespoons total of filling.
Glazing Your Dairy-Free Coconut Donuts (Optional)
While the fillings themselves are delicious, adding a simple glaze can enhance the appearance and add another layer of sweetness to your dairy-free coconut donuts. A basic powdered sugar glaze is quick and easy to make dairy-free.
Glazing is best done after the donuts have been filled. This prevents the glaze from cracking as you insert the filling tip.
Dairy-Free Glaze Recipes
A simple dairy-free glaze can be made by whisking together about 1 cup of powdered sugar with 2-3 tablespoons of dairy-free milk (such as almond, soy, or the leftover coconut water from your canned coconut milk) and a splash of vanilla extract. Whisk until smooth and pourable.
For a thicker glaze, use less liquid. For a thinner, more transparent glaze, use more liquid. You can also add a touch of lemon juice for a tangy glaze or a tablespoon of melted vegan butter for a richer glaze. For a chocolate glaze, whisk in 2-3 tablespoons of cocoa powder.
Decorating Your Donuts
Once the glaze is ready, you can dip the tops of your filled dairy-free donuts into the glaze, letting the excess drip off before placing them back on the wire rack. Alternatively, you can drizzle the glaze over the tops using a spoon or a piping bag with a fine tip.
You can further decorate your dairy-free coconut donuts with sprinkles, toasted coconut flakes, or a sprinkle of chopped nuts while the glaze is still wet. This adds visual appeal and extra texture. Allow the glaze to set for 15-20 minutes before serving or storing.
Tips and Tricks for Perfect Dairy-Free Donuts
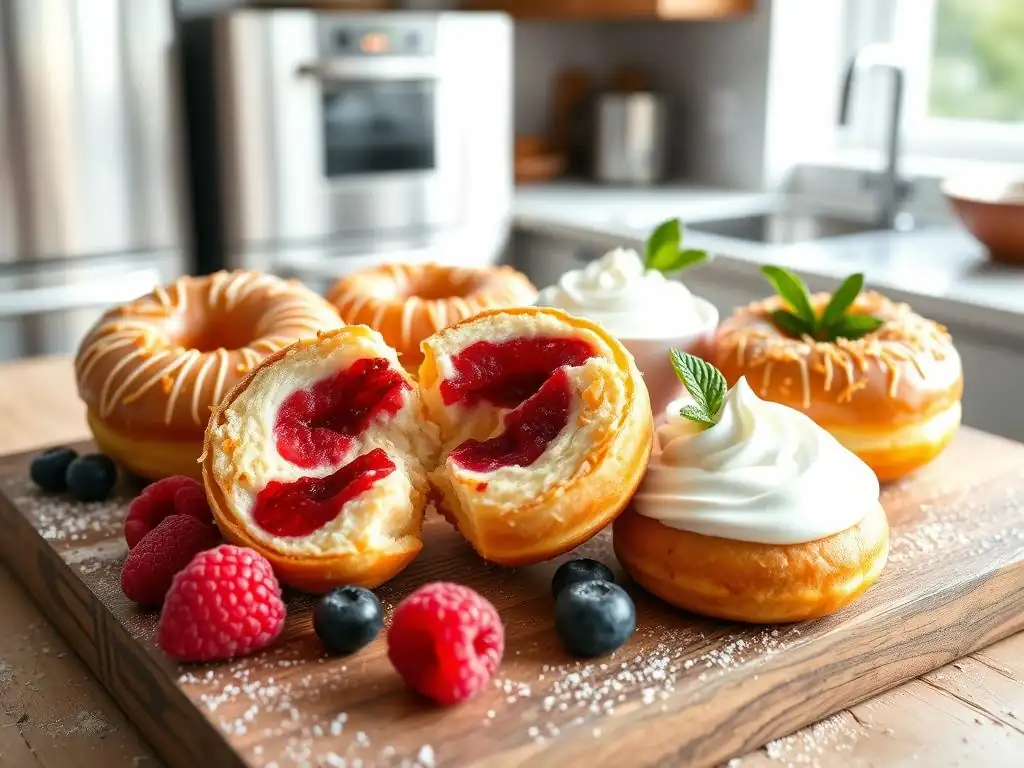
Making dairy-free donuts, especially fried ones, can have a few potential pitfalls. Knowing how to troubleshoot common issues can save you frustration and ensure your dairy-free coconut donut recipe turns out perfectly.
Even experienced bakers encounter problems occasionally. The key is understanding the dough and the frying process.
Troubleshooting Common Donut Problems
One common issue is donuts that are heavy or dense instead of light and airy. This can be caused by several factors, including inactive yeast, not letting the dough rise long enough (or rising in a cold environment), or overworking the dough during kneading or shaping, which develops too much tough gluten. Ensuring your yeast is active (the foaming test is crucial) and giving the dough adequate, warm rising time are key preventative measures.
Another problem is donuts that are greasy. This almost always means the oil temperature was too low during frying. The donut dough absorbs oil like a sponge if the temperature isn't hot enough to create an immediate crust. Using a thermometer and maintaining the oil temperature between 350-375°F (175-190°C) is vital.
Dough Too Sticky or Dry
If your dough is too sticky after mixing, it might need a little more flour. Add flour a tablespoon at a time, mixing until it's just slightly tacky but manageable. Too much flour will make the dough dry and the resulting donuts tough. Factors like humidity can affect how much flour is needed, so trust the feel of the dough.
If the dough is too dry and crumbly, you might need a little more liquid. Add dairy-free milk (like coconut milk) a teaspoon at a time while mixing until the dough comes together and is smooth and elastic. This usually happens early in the mixing process; if it's dry after kneading, it's harder to fix. Accurate measuring, especially of flour, is important here.
Donuts Not Rising Properly
If your donuts aren't rising well, either during the first rise or after shaping (the second rise, which happens while they rest on the parchment paper before frying), the most likely culprit is inactive yeast or a cold environment. Ensure your yeast is fresh and activated with warm (not hot) liquid.
Make sure your rising spot is warm and draft-free. If your kitchen is cool, use the oven-with-light-on method or place the covered bowl in a warm spot. Giving the donuts enough time for the second rise before frying is also crucial; they should look visibly puffed up.
Uneven Frying
Unevenly colored or cooked donuts usually result from inconsistent oil temperature or overcrowding the pot. If the oil is too hot in some spots and cooler in others, the donuts will cook unevenly. Using a heavy-bottomed pot helps distribute heat more evenly.
Frying too many donuts at once significantly drops the oil temperature, leading to greasy, unevenly cooked results. Fry in small batches, usually 2-3 at a time, depending on the size of your pot. This allows the oil temperature to recover quickly between batches. Flipping the donuts halfway through also ensures even browning on both sides.
Storing Your Dairy-Free Coconut Donuts
Fried and filled donuts are best enjoyed fresh, ideally the same day they are made. The texture is at its peak when the dough is still soft and the filling is fresh.
If you need to store them, place the cooled, filled dairy-free coconut donuts in a single layer in an airtight container. If stacking is necessary, place a layer of parchment paper between them to prevent sticking. Store them in the refrigerator due to the coconut cream and fruit jam fillings.
They will keep in the refrigerator for 1-2 days, but the texture of the dough will soften over time. Reheating is generally not recommended as it can make them greasy or dry out the dough.
Enjoying Your Homemade Dairy-Free Treats: A BakeWithEase Creation
You've done it! You've successfully made delicious dairy-free filled donuts with coconut cream and fruit jam. Take a moment to appreciate your baking achievement. This dairy-free coconut donut recipe proves that going dairy-free doesn't mean sacrificing flavor or indulgence.
These homemade treats are perfect for sharing with friends and family, whether they follow a dairy-free diet or not. The combination of the light donut, creamy coconut, and sweet-tart jam is universally appealing.
Serving Suggestions for Dairy-Free Donuts
Serve your freshly made dairy-free coconut donuts as a special breakfast treat, a dessert, or an afternoon snack. They pair wonderfully with a cup of coffee or tea (dairy-free, of course! ).
For an extra touch, you could offer a small bowl of extra fruit jam or a dollop of additional whipped coconut cream on the side for dipping. A sprinkle of fresh fruit or a mint leaf could also add a nice garnish. The vibrant fillings make them visually appealing on their own.
We love seeing your baking creations! Share photos of your beautiful dairy-free coconut donuts online and tag BakeWithEase. Let us know what fruit jam you chose and how your coconut cream whipped up. Your success can inspire others to try this dairy-free coconut donut recipe and explore the possibilities of dairy-free baking.
Making dairy-free coconut donuts from scratch is a skill to be proud of. It involves mastering yeast dough, understanding frying temperatures, and creating delicious dairy-free fillings. We hope this guide has empowered you to bake with ease and confidence, proving that delightful dairy-free treats are well within your reach. Happy baking!
Frequently Asked Questions
What makes this donut recipe dairy-free?
This recipe achieves a dairy-free status by using coconut cream as a substitute for traditional dairy ingredients like milk and butter. This ensures a delicious treat that caters to those with dairy sensitivities or allergies.
Can I use a different type of non-dairy milk instead of coconut cream?
While you can experiment with other non-dairy milks, the coconut cream is crucial for the donut's texture and richness. Other milks may result in a different final product.
Is it difficult to find the ingredients for this dairy-free donut recipe?
No, the ingredients are generally easy to find. Coconut cream, fruit jam, and other common baking staples are usually available in most grocery stores. You can also find them online.
How long does it take to make these dairy-free filled donuts?
The total time varies, but expect around 2-3 hours. This includes prep time, proofing, frying or baking, cooling, and filling, making it a weekend baking project.
Can I bake these donuts instead of frying them?
Yes, you can bake them! Baking will result in a slightly different texture compared to frying, but it's a healthier alternative. Adjust baking time accordingly, usually until golden brown.
Final Reflection: The Sweetness of Dairy-Free Delight
The demand for delicious, inclusive recipes continues to grow, and dairy-free baking is leading the charge. This simple yet satisfying dairy-free coconut donut recipe demonstrates that embracing dietary restrictions doesn't mean sacrificing flavor or enjoyment. The creamy coconut filling and vibrant fruit jam offer a delightful alternative that caters to a wider audience, proving that deliciousness knows no dietary boundaries.
Creating this recipe wasn't just about finding a delicious alternative; it was about exploring the potential of plant-based ingredients and celebrating the joy of baking without compromise. The best things in life are the simple things.
This rings true for this recipe – simple ingredients, simple process, yet a result that is anything but simple in its deliciousness. The positive feedback I've received from those with dairy sensitivities, and even those without, underscores the universal appeal of a well-crafted, flavorful treat.
Now, I invite you to try your hand at this recipe. Don't be afraid to experiment with different fruit jams and perhaps even explore other plant-based milks or cream alternatives. The beauty of baking lies in its adaptability and the joy of creating something delicious to share. Let this recipe be a springboard for your own culinary adventures, proving that even the smallest changes can lead to the most satisfying results. Embrace the sweetness, embrace the dairy-free delight!
Unleash Your Inner Baker: Make These Dairy-Free Donuts Today!
Thanks for joining us on this delicious dairy-free donut adventure! We hope you gained some sweet inspiration and maybe even a few new baking skills. Ready to put your newfound knowledge to the test?
- Bake a batch of these amazing donuts! The recipe is designed for success, even for beginner bakers.
- Share your creations! Tag us on social media – we’d love to see your beautiful, dairy-free donuts.
- Explore more dairy-free recipes on BakeWithEase.com – discover a world of delicious possibilities!
What unique fruit jam will you experiment with in your next batch of dairy-free donuts?