
8 Creative DairyFree Toppings for Pies and Cupcakes

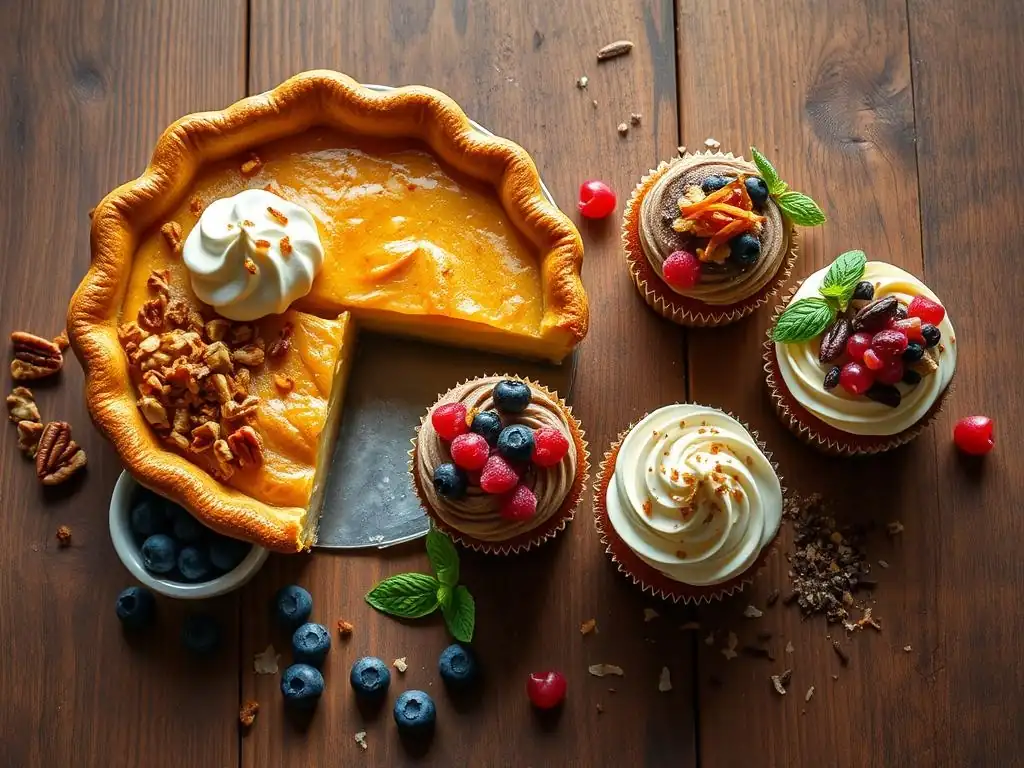
Welcome to BakeWithEase, your guide to effortless baking! Ever wondered how to achieve that perfect, creamy topping on your pies and cupcakes without the dairy? This week, we dive into the delicious world of Dairyfree pie cupcake toppings. Discover 8 creative and surprisingly simple ways to elevate your treats, proving that dietary restrictions don't have to limit your culinary creativity. Intrigued? Let's get baking!
- 8 Delicious Dairy-Free Toppings for Pies and Cupcakes
- Introduction to Dairy-Free Baking: Elevating Your Pies and Cupcakes
- Understanding Dairy-Free Topping Ingredients
-
8 Delicious and Creative Dairy-Free Pie and Cupcake Toppings
- 1. Coconut Whipped Cream: A Tropical Delight
- 2. Vegan Chocolate Ganache: Rich and Indulgent
- 3. Cashew Cream Frosting: Smooth and Creamy
- 4. Dairy-Free Buttercream: Classic with a Twist
- 5. Fruit Compote: Fresh and Flavorful
- 6. Dairy-Free Crumble Topping: Crunchy and Sweet
- 7. Maple Glaze: Simple and Sweet
- 8. Aquafaba Meringue: Light and Airy
- Tips and Tricks for Dairy-Free Topping Success
- Conclusion: Enjoying Delicious Dairy-Free Pie and Cupcake Toppings
-
Frequently Asked Questions
- How can I make a dairy-free whipped topping that's stable enough for decorating?
- What's a good dairy-free alternative to buttercream frosting for cupcakes?
- Can I use aquafaba to create a dairy-free meringue topping?
- Are there any readily available store-bought dairy-free whipped toppings that are recommended?
- What can I use instead of dairy-based chocolate ganache for a pie or cupcake topping?
- Final Reflection: Sweetening the Dairy-Free Delight
- Unleash Your Dairy-Free Baking Genius!
8 Delicious Dairy-Free Toppings for Pies and Cupcakes
Introduction to Dairy-Free Baking: Elevating Your Pies and Cupcakes
The Growing Popularity of Dairy-Free Options in Baking
The world of baking is constantly evolving, and one of the most significant shifts in recent years is the surge in popularity of dairy-free options. More and more people are seeking alternatives to traditional dairy ingredients, whether due to allergies, lactose intolerance, ethical choices, or simply a preference for plant-based foods. This growing demand has spurred innovation in the kitchen, leading to a wealth of delicious and accessible dairy-free recipes and ingredients. What was once a niche market is now mainstream, making it easier than ever to bake delightful treats that everyone can enjoy.
This increased interest means that finding high-quality dairy-free alternatives for staples like milk, butter, and cream is no longer a challenge. Supermarket shelves are stocked with various plant-based milks (almond, soy, oat, cashew), vegan butters, and dairy-free creams. This accessibility empowers home bakers to adapt their favorite recipes or explore entirely new ones, ensuring that dietary needs don't compromise on taste or texture. The focus is shifting from simply substituting ingredients to creating equally, if not more, delicious results.
Why Choose Dairy-Free Toppings?
Opting for dairy-free toppings for your pies and cupcakes isn't just about catering to dietary restrictions; it's also about exploring new flavors and textures that can elevate your baked goods. Traditional toppings like whipped cream or buttercream rely heavily on dairy, but the dairy-free alternatives available today offer incredible versatility. You can achieve everything from light, airy finishes to rich, decadent glazes and crunchy crumbles, all without a drop of dairy.
Choosing dairy-free pie cupcake toppings opens up a world of creative possibilities. Imagine a vibrant berry compote adding a burst of freshness, a smooth cashew cream offering nutty richness, or a crispy oat crumble providing delightful texture. These options not only make your desserts inclusive for guests with dairy sensitivities but also add unique dimensions of flavor that might surprise and delight even those without dietary restrictions. Plus, mastering these dairy-free techniques expands your baking repertoire significantly.
Understanding Dairy-Free Topping Ingredients
Common Dairy Substitutes for Baking
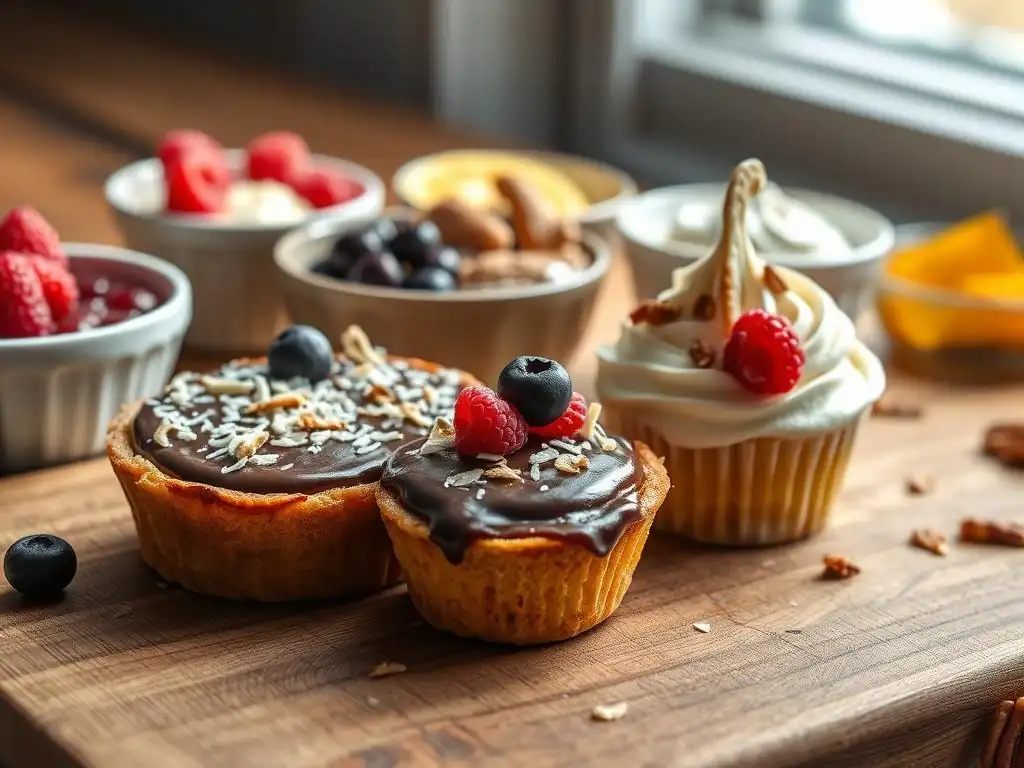
When venturing into dairy-free baking, understanding the common substitutes is key to achieving successful results, especially for dairy-free pie cupcake toppings. Plant-based milks like almond, soy, oat, and cashew milk are excellent replacements for dairy milk in glazes, batters, and creams. Each offers a slightly different flavor profile and fat content, which can subtly affect the final product. For instance, oat milk tends to be creamier than almond milk, making it suitable for richer toppings.
Vegan butter is another staple, formulated to mimic the texture and performance of dairy butter using vegetable oils (like palm, shea, or coconut oil) and emulsifiers. It's crucial for creating flaky pie crusts and smooth dairy-free buttercreams. Coconut cream, derived from the thick part of canned coconut milk, whips beautifully into a light, airy topping akin to whipped cream. Cashews, when soaked and blended, form a wonderfully creamy base for frostings and fillings, offering a neutral flavor that pairs well with many other ingredients.
Essential Ingredients for Dairy-Free Pie and Cupcake Toppings
Beyond the primary dairy substitutes, several other ingredients are essential for crafting delicious dairy-free pie cupcake toppings. Sweeteners are fundamental, including granulated sugar, powdered sugar, maple syrup, agave nectar, and coconut sugar. Powdered sugar is particularly important for frostings and glazes as it dissolves easily and creates a smooth consistency. Vanilla extract is a crucial flavor enhancer for almost all sweet toppings, adding warmth and depth.
Thickening agents like cornstarch, arrowroot powder, or tapioca starch are vital for compotes, glazes, and fillings to achieve the desired texture. A pinch of salt helps to balance sweetness and enhance other flavors. For chocolate toppings, ensure you use dairy-free chocolate chips or bars, checking the ingredients carefully as some dark chocolates can contain dairy. Flavorings like cocoa powder, extracts (almond, peppermint), citrus zest, and spices (cinnamon, nutmeg) allow you to customize your dairy-free toppings to perfectly complement your baked goods.
8 Delicious and Creative Dairy-Free Pie and Cupcake Toppings
1. Coconut Whipped Cream: A Tropical Delight
Coconut whipped cream is a favorite dairy-free alternative for its light texture and subtle tropical flavor. Made from chilled canned full-fat coconut milk, it whips up similarly to dairy cream, making it perfect for dolloping onto pies or piping onto cupcakes. Its natural richness provides a satisfying mouthfeel, while the hint of coconut adds an exotic touch that complements fruit-based desserts beautifully.
This versatile topping can be sweetened to your liking with powdered sugar and flavored with vanilla extract or other additions like lime zest or a splash of rum extract. The key to success lies in using full-fat coconut milk that has been thoroughly chilled, allowing the cream to separate from the liquid. This solid cream is then scooped out and whipped, creating a stable and airy topping that holds its shape relatively well, offering a delightful finish to any dessert.
Recipe for Dairy-Free Coconut Whipped Cream Topping
Ingredients:
- 1 can (13.5 oz or 400ml) full-fat coconut milk, chilled in the refrigerator overnight
- 1-2 tablespoons powdered sugar (or other sweetener to taste)
- 1/2 teaspoon vanilla extract

Instructions:
1. Chill the can of coconut milk in the refrigerator for at least 8 hours, preferably overnight. Do not shake the can.
2. Open the can carefully and scoop out the thick cream that has solidified at the top, leaving the liquid behind (save the liquid for smoothies or other uses).
3. Place the thick coconut cream in a chilled mixing bowl.
4. Using an electric mixer (handheld or stand mixer) with a whisk attachment, whip the coconut cream on high speed until it becomes light and fluffy, forming soft or medium peaks. This usually takes 3-5 minutes.
5. Add the powdered sugar and vanilla extract. Continue whipping for another 30 seconds to a minute until fully incorporated and the mixture is smooth.
6. Use immediately or store in an airtight container in the refrigerator for up to 2-3 days. It may firm up when chilled; re-whisk briefly before serving if needed.
Tips for Achieving the Perfect Coconut Whipped Cream Texture
Achieving the ideal texture for dairy-free coconut whipped cream requires attention to detail. Firstly, using full-fat coconut milk is non-negotiable; light versions won't yield enough cream to whip properly. Chilling the can for an extended period is also critical; this allows the solid cream to separate effectively from the liquid whey. Avoid shaking the can before opening it to maintain this separation.
When whipping, start with a chilled bowl and whisk attachment, which helps the cream aerate more effectively. If your kitchen is warm, placing the mixing bowl over an ice bath can also assist in keeping the cream cold and promoting stiffness. Don't over-whip, as this can cause the mixture to become grainy or separate. Whip just until soft to medium peaks form. If it seems too thick, you can whisk in a tiny amount of the reserved coconut liquid, a teaspoon at a time, until the desired consistency is reached.
2. Vegan Chocolate Ganache: Rich and Indulgent
Vegan chocolate ganache is a luxurious dairy-free topping that brings intense chocolate flavor and a silky smooth texture to pies and cupcakes. Traditionally made with chocolate and heavy cream, the dairy-free version substitutes plant-based cream or full-fat coconut milk (from the can, the liquid part is fine here, or use carton plant cream) for the dairy cream. This simple two-ingredient wonder is incredibly versatile, serving as a pourable glaze when warm or a thick, spreadable frosting when chilled.
The richness of vegan chocolate ganache makes it an ideal pairing for vanilla, coffee, or even fruit-flavored baked goods. It sets up beautifully, providing a glossy finish that looks as impressive as it tastes. By adjusting the ratio of chocolate to dairy-free cream, you can control the consistency, from a thin glaze perfect for drizzling over a tart to a firm ganache suitable for piping decorative swirls onto cupcakes.
How to Make a Decadent Dairy-Free Chocolate Ganache
Ingredients:
- 8 ounces (approx. 225g) dairy-free chocolate, finely chopped or in chip form
- 1 cup (approx. 240ml) dairy-free cream alternative (such as full-fat coconut milk/cream or store-bought plant-based culinary cream)

Instructions:
1. Place the chopped dairy-free chocolate in a heatproof bowl.
2. Heat the dairy-free cream alternative in a small saucepan over medium heat until it just begins to simmer around the edges. Do not boil vigorously.
3. Pour the hot cream over the chocolate in the bowl.
4. Let sit undisturbed for 5-7 minutes to allow the heat from the cream to melt the chocolate.
5. Gently whisk the mixture starting from the center and moving outwards until it is completely smooth and glossy. Ensure all chocolate pieces are melted and incorporated.
6. For a pourable glaze, use immediately while warm.
7. For a spreadable or pipeable frosting, let the ganache cool at room temperature for several hours, stirring occasionally, or refrigerate until it reaches the desired consistency. If it becomes too firm, microwave briefly (5-10 seconds) and stir until softened.
Using Dairy-Free Chocolate for the Best Ganache Flavor
The quality of the dairy-free chocolate you use is paramount to the flavor of your vegan ganache. Look for high-quality dairy-free chocolate chips or bars that you enjoy eating on their own, as their flavor will be the dominant note in the ganache. Many brands now offer explicitly labeled dairy-free options, from dark chocolate to "milk" chocolate alternatives made with oat or rice milk.
Ensure the chocolate is finely chopped or in chip form so it melts evenly when the hot cream is added. Read ingredient labels carefully to confirm there is no hidden dairy, especially in dark chocolate which is often assumed to be dairy-free but can sometimes contain milk derivatives. Using a chocolate with around 55-70% cocoa content often yields a rich, balanced flavor for ganache, but feel free to experiment with darker or lighter options depending on your preference and the dessert it will top.
3. Cashew Cream Frosting: Smooth and Creamy
Cashew cream frosting is a revelation in dairy-free baking, offering a wonderfully smooth, rich, and creamy texture that rivals traditional buttercream. Made from soaked and blended raw cashews, this frosting provides a relatively neutral base that can be flavored in countless ways. It's naturally thick and luscious, perfect for spreading generously over cupcakes or filling tarts and pies.
Unlike some other dairy-free options, cashew cream doesn't have a strong inherent flavor like coconut, making it incredibly versatile. It takes on the flavors you add beautifully, whether that's vanilla, lemon, chocolate, or even fruit purees. The key to its signature smoothness lies in properly soaking the cashews and blending them until absolutely no graininess remains, often requiring a high-powered blender.
Creating a Silky Smooth Cashew Cream Frosting
Ingredients:
- 1 cup (approx. 140g) raw cashews
- 1/2 cup (approx. 120ml) dairy-free milk (such as almond or soy)
- 1/4 cup (approx. 60ml) maple syrup or agave nectar (adjust to taste)
- 1 teaspoon vanilla extract
- Pinch of salt

Instructions:
1. Soak the raw cashews in hot water for at least 1 hour, or in cold water overnight. Drain and rinse thoroughly.
2. Combine the soaked cashews, dairy-free milk, maple syrup, vanilla extract, and salt in a blender.
3. Blend on high speed, scraping down the sides as needed, until the mixture is completely smooth and creamy. This may take several minutes, especially if not using a high-powered blender. Blend until absolutely no grit remains.
4. If the mixture is too thick to blend, add a tiny bit more dairy-free milk (1 tablespoon at a time) until it blends smoothly, but avoid adding too much liquid.
5. Taste and adjust sweetness if necessary.
6. Use immediately or store in an airtight container in the refrigerator for up to 3-4 days. It will firm up when chilled; let it sit at room temperature for 10-15 minutes or whisk briefly before using.
Flavor Variations for Cashew Cream Frosting
The neutral base of cashew cream makes it perfect for a wide array of flavor variations, allowing you to create unique dairy-free pie cupcake toppings. For a zesty twist, blend in the zest and juice of a lemon or lime. To make a chocolate version, add 2-3 tablespoons of unsweetened cocoa powder during blending and potentially a bit more sweetener to balance the bitterness.
Other delicious additions include espresso powder for a coffee-flavored frosting, ground cinnamon and nutmeg for a spiced version, or a couple of tablespoons of fruit puree (like raspberry or mango) for a fruity and vibrant topping. Extracts like almond, peppermint, or orange can also dramatically change the flavor profile. Always start with a small amount of any strong flavor addition and taste as you go, blending thoroughly to ensure even distribution.
4. Dairy-Free Buttercream: Classic with a Twist
Dairy-free buttercream is the go-to topping for many, mimicking the classic frosting's fluffy texture and sweet flavor using vegan butter instead of dairy butter. This is perhaps one of the most versatile dairy-free pie cupcake toppings, offering a familiar taste and texture that appeals to almost everyone. It's stable enough for piping intricate designs and smooth enough for spreading.
Creating a successful dairy-free buttercream relies heavily on using a good quality vegan butter alternative that has a similar consistency to dairy butter. Combining this with powdered sugar, a splash of dairy-free milk, and vanilla extract yields a frosting that is remarkably close to the traditional version. It's the perfect choice when you want that classic cupcake swirl or a smooth layer atop a pie.
Achieving a Fluffy Dairy-Free Buttercream
Ingredients:
- 1 cup (approx. 225g) vegan butter, softened but still cool
- 4 cups (approx. 480g) powdered sugar, sifted
- 2-4 tablespoons dairy-free milk (such as almond, soy, or oat)
- 1 teaspoon vanilla extract
- Pinch of salt (optional, helps balance sweetness)

Instructions:
1. In a large mixing bowl, beat the softened vegan butter with an electric mixer (handheld or stand mixer with paddle attachment) on medium-high speed until light and fluffy, about 2-3 minutes.
2. Gradually add the sifted powdered sugar, one cup at a time, mixing on low speed until combined before increasing speed to medium. Scrape down the sides of the bowl as needed.
3. Once all the sugar is incorporated, the mixture will be quite thick. Add the dairy-free milk, vanilla extract, and salt (if using).
4. Beat on medium-high speed for another 3-5 minutes, or until the frosting is light, fluffy, and smooth. Add a little more dairy-free milk if needed to reach desired consistency for spreading or piping.
5. Use immediately or store in an airtight container in the refrigerator for up to a week. Bring to room temperature and re-whip briefly before using if stored in the fridge.
Dairy-Free Buttercream Flavor Ideas
Dairy-free buttercream serves as an excellent canvas for various flavors, making it a highly adaptable dairy-free pie cupcake topping. Beyond the standard vanilla, consider adding cocoa powder for a chocolate version, melted and cooled dairy-free chocolate, or a few tablespoons of smooth nut butter like peanut or almond butter.
For a fruity twist, incorporate fruit zest (lemon, orange) or a small amount of fruit puree (like strawberry or raspberry), ensuring the puree isn't too watery. Coffee or espresso powder dissolved in a tiny bit of hot water adds a rich mocha flavor. Extracts such as almond, maple, or peppermint can also transform the buttercream. Always beat well after adding flavorings to ensure they are fully incorporated and the frosting remains smooth and fluffy.
5. Fruit Compote: Fresh and Flavorful
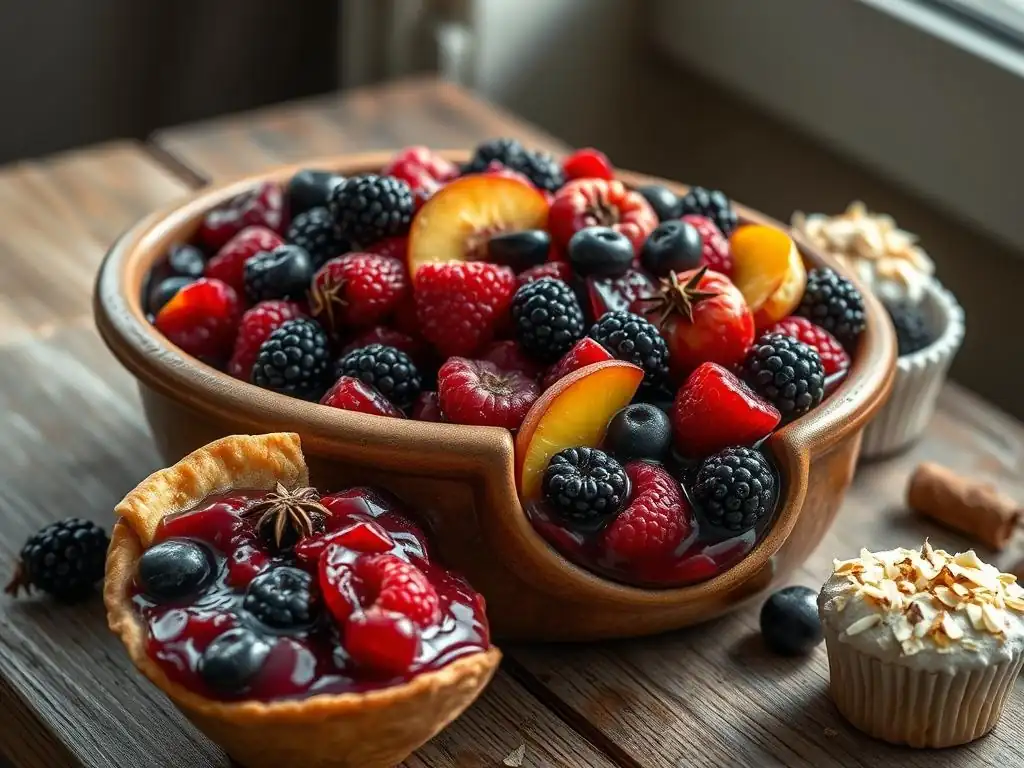
Fruit compote is a vibrant, naturally dairy-free topping that adds a burst of fresh fruit flavor and a lovely texture to pies and cupcakes. Essentially a simple sauce made by simmering fruit with sugar (and sometimes a touch of liquid and spice), compotes are quick to make and can be tailored to use seasonal fruits. They provide a refreshing contrast to richer baked goods and are naturally vegan and dairy-free.
Compotes can range from chunky, rustic sauces to smoother, more refined textures depending on how long you cook them and whether you choose to mash the fruit. They are fantastic spooned warm over a slice of pie or dolloped cold onto a frosted cupcake. The natural sweetness and slight tang of the fruit make them a wonderfully balanced dairy-free pie cupcake topping.
Making a Simple and Delicious Fruit Compote Topping
Ingredients:
- 2 cups (approx. 300g) fresh or frozen fruit (see suggestions below)
- 1/4 cup (approx. 50g) granulated sugar (adjust to sweetness of fruit)
- 1 tablespoon lemon juice (optional, brightens flavor)
- 1-2 tablespoons water or fruit juice (optional, if needed for simmering)
- Pinch of spice (like cinnamon or nutmeg, optional)

Instructions:
1. Combine the fruit, sugar, lemon juice (if using), and spice (if using) in a medium saucepan. If using fresh fruit that isn't very juicy, add 1-2 tablespoons of water or juice.
2. Heat the mixture over medium heat, stirring occasionally, until the sugar dissolves and the fruit begins to break down.
3. Bring the mixture to a gentle simmer and cook for 10-20 minutes, stirring frequently, until the fruit softens and the liquid thickens slightly. The cooking time will vary depending on the type of fruit and desired consistency. For a chunkier compote, cook for less time; for a smoother sauce, cook longer and gently mash some of the fruit.
4. Remove from heat and let cool. The compote will thicken further as it cools.
5. Taste and adjust sweetness if needed.
6. Store in an airtight container in the refrigerator for up to a week. Serve warm or cold.
Best Fruits for Dairy-Free Pie and Cupcake Compotes
A wide variety of fruits work wonderfully in dairy-free compotes, offering diverse flavors and colors for your dairy-free pie cupcake toppings. Berries like strawberries, blueberries, raspberries, and mixed berries are classic choices, yielding vibrant and slightly tart compotes. Stone fruits such as peaches, plums, cherries, and apricots become soft and sweet when cooked, creating rich sauces.
Apples and pears, especially firmer varieties, can be diced and simmered with warming spices like cinnamon and cloves for a comforting compote. Tropical fruits like mango or pineapple can also be used, though they may require less added sugar. Combining fruits, like apple and blackberry or peach and raspberry, can create complex and delicious flavor profiles. Using slightly overripe fruit is perfectly fine, as cooking softens them and enhances their sweetness.
6. Dairy-Free Crumble Topping: Crunchy and Sweet
A dairy-free crumble topping adds a delightful textural contrast and a sweet, buttery flavor to pies and cupcakes. Made from a mixture of flour, sugar, and dairy-free butter (or coconut oil), it's baked until golden and crunchy. This versatile topping can be sprinkled over muffin batter before baking, scattered over a fruit pie filling, or even crumbled over frosted cupcakes just before serving for an extra layer of texture and flavor.
The beauty of a dairy-free crumble lies in its simplicity and adaptability. The basic ratio is easy to remember, and you can customize it endlessly with different flours (like oat or almond flour), sugars (brown or coconut sugar for richness), and additions like nuts, seeds, or spices. It's a rustic yet satisfying dairy-free pie cupcake topping that provides a comforting, homemade feel.
Recipe for a Golden Brown Dairy-Free Crumble
Ingredients:
- 1 cup (approx. 120g) all-purpose flour (or a blend of flours)
- 1/2 cup (approx. 100g) granulated sugar or brown sugar
- 1/2 teaspoon ground cinnamon (optional)
- 1/4 teaspoon salt
- 1/2 cup (approx. 115g) cold dairy-free butter, cut into small cubes, or 1/2 cup solidified coconut oil

Instructions:
1. In a medium bowl, whisk together the flour, sugar, cinnamon (if using), and salt.
2. Cut in the cold dairy-free butter or coconut oil using a pastry blender, fork, or your fingertips until the mixture resembles coarse crumbs with some pea-sized pieces. Work quickly to keep the fat cold.
3. (Optional: For standalone crumble to sprinkle on frosted items) Spread the crumble mixture evenly on a baking sheet lined with parchment paper. Bake in a preheated oven at 350°F (175°C) for 15-20 minutes, or until golden brown and crunchy. Let cool completely before using.
4. (For baking on pies/muffins) Sprinkle the raw crumble mixture evenly over your pie filling or muffin batter before baking according to your recipe's instructions.
Adding Nuts and Spices to Enhance the Crumble Flavor
Elevating a dairy-free crumble topping is easy by incorporating nuts, seeds, and spices. Chopped nuts like pecans, walnuts, almonds, or hazelnuts add extra crunch and a toasted, nutty flavor. About 1/4 to 1/2 cup of chopped nuts per batch of crumble works well. Seeds such as rolled oats, sunflower seeds, or pumpkin seeds also contribute texture and nutrients.
Spices like cinnamon, nutmeg, ginger, or cardamon can significantly enhance the flavor, especially when paired with fruit fillings like apple or peach. Adding a pinch of ground cloves or allspice can bring warmth. For a hint of richness, you can swap some of the flour for almond flour or add a couple of tablespoons of shredded coconut. These additions not only boost flavor but also make the dairy-free crumble a more substantial and interesting dairy-free pie cupcake topping.
7. Maple Glaze: Simple and Sweet
A maple glaze is a wonderfully simple yet effective dairy-free topping that provides natural sweetness and a distinct flavor. Made primarily from maple syrup and powdered sugar, it's quick to whisk together and sets into a slightly firm, glossy coating. It's perfect for drizzling over bundt cakes, loaf cakes, or cupcakes, adding a touch of elegance and delicious maple flavor.
This glaze is naturally vegan and dairy-free, relying on the liquid element (maple syrup, sometimes with a splash of dairy-free milk or water) to achieve the right consistency. Its warm, caramel-like notes pair exceptionally well with flavors like vanilla, pecan, pumpkin, or apple. It's one of the easiest dairy-free pie cupcake toppings to whip up in a pinch.
How to Make a Perfect Maple Glaze
Ingredients:
- 1 cup (approx. 120g) powdered sugar, sifted
- 2-4 tablespoons pure maple syrup (use good quality for best flavor)
- 1/2 teaspoon vanilla extract (optional)
- Pinch of salt (optional)
- 1-2 teaspoons dairy-free milk or water (optional, for adjusting consistency)

Instructions:
1. In a medium bowl, whisk together the sifted powdered sugar, 2 tablespoons of maple syrup, vanilla extract (if using), and salt (if using).
2. The mixture will be thick. Add more maple syrup, one tablespoon at a time, whisking until a smooth, pourable consistency is achieved.
3. If the glaze is too thick even after adding enough maple syrup for flavor, whisk in 1-2 teaspoons of dairy-free milk or water until the desired drizzling or spreading consistency is reached.
4. If the glaze is too thin, whisk in a little more powdered sugar.
5. Use the glaze immediately as it will start to set as it sits. Drizzle or spread over cooled baked goods.
Tips for Achieving the Right Consistency of Maple Glaze
Getting the consistency of a maple glaze just right is key to its success as a dairy-free pie cupcake topping. The ratio of powdered sugar to maple syrup is the primary factor. Start with the lower amount of liquid and gradually add more until you reach your desired thickness. For a thick, opaque glaze that coats well, you'll use less liquid. For a thinner, more translucent drizzle, you'll need more.
Always sift your powdered sugar to prevent lumps, which can make the glaze grainy. Use pure maple syrup for the best flavor; imitation syrups won't provide the same depth. If the glaze becomes too thick while you're working with it, especially in a cool kitchen, you can gently warm it slightly over a double boiler or in the microwave for a few seconds (stirring well) to make it more fluid again. Conversely, if it's too thin, simply whisk in a little more sifted powdered sugar.
8. Aquafaba Meringue: Light and Airy
Aquafaba meringue is a fascinating and incredibly light dairy-free topping, perfect for pies (think lemon meringue pie!) or as airy swirls on cupcakes. Aquafaba is the liquid from canned chickpeas or white beans, and when whipped vigorously, it behaves remarkably like egg whites, creating a stable, foamy structure. This allows you to make dairy-free and egg-free meringues that can be baked until crisp or left soft.
While it might seem unusual, aquafaba has proven to be a fantastic vegan substitute for egg whites in many applications, including meringues. It can be sweetened and flavored just like traditional meringue, offering a guilt-free, ethereal topping that is surprisingly easy to make once you understand the technique. It's a truly creative dairy-free pie cupcake topping option.
Whipping Aquafaba into a Stable Meringue
Ingredients:
- 1/2 cup (approx. 120ml) aquafaba (liquid from a can of chickpeas, unsalted preferred)
- 1/4 teaspoon cream of tartar (optional, helps stabilize)
- 1/2 cup (approx. 100g) superfine or granulated sugar

Instructions:
1. Drain a can of chickpeas, reserving the liquid (aquafaba) into a clean, grease-free mixing bowl. A stand mixer with a whisk attachment works best, but a handheld electric mixer can also be used.
2. Add the cream of tartar (if using) to the aquafaba.
3. Begin whipping the aquafaba on medium-high speed. It will start to get foamy, then opaque and white, eventually forming soft peaks. This can take 5-10 minutes or longer.
4. Once soft peaks form, gradually add the sugar, one tablespoon at a time, while continuing to whip on high speed. Allow each addition of sugar to dissolve before adding the next.
5. Continue whipping until stiff, glossy peaks form and the sugar is completely dissolved (you can test this by rubbing a small amount between your fingers – it should feel smooth, not gritty). This can take another 5-10 minutes.
6. Use the meringue immediately for piping or spreading.
Baking and Decorating with Dairy-Free Aquafaba Meringue
Aquafaba meringue can be used in several ways as a dairy-free pie cupcake topping. For a classic baked meringue topping on a pie, spread or pipe the meringue over the filling and bake at a low temperature (around 250°F or 120°C) until dry and crisp, typically 60-90 minutes, or brown quickly with a kitchen torch for a soft-set meringue. Ensure the pie filling is fully cooked and cooled before adding the meringue.
For cupcakes, you can pipe swirls of raw aquafaba meringue onto cooled cupcakes and then brown them using a kitchen torch for a beautiful, toasted marshmallow effect. Alternatively, you can bake small meringue kisses or cookies on a baking sheet lined with parchment paper at a low temperature until dry, then use them as decorative elements on top of frosted cupcakes. As with egg white meringue, ensure all equipment is scrupulously clean and grease-free for successful whipping.
Tips and Tricks for Dairy-Free Topping Success
Choosing the Right Dairy-Free Alternatives
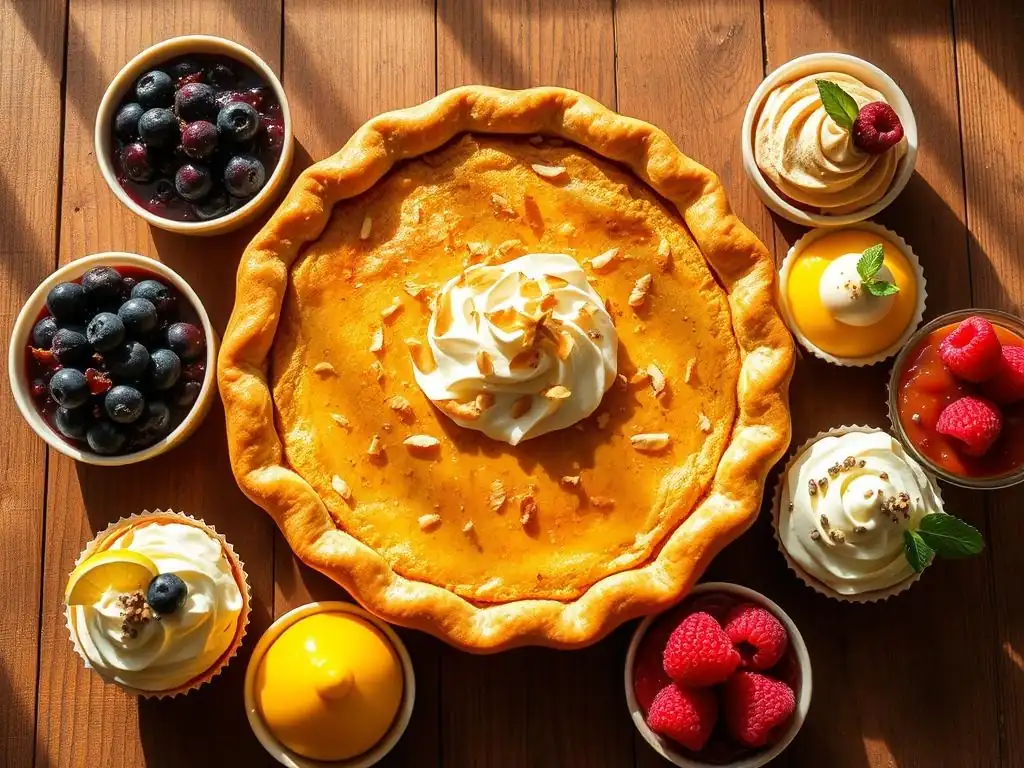
Selecting the appropriate dairy-free alternative is crucial for successful dairy-free pie cupcake toppings. Not all plant-based milks perform the same; for richness in glazes or creams, opt for higher-fat options like full-fat coconut milk (from a can) or a dedicated plant-based culinary cream. For lighter applications like thinning a glaze, any dairy-free milk will likely suffice.
Vegan butter varies significantly between brands in terms of fat content and emulsifiers used. Some are better for baking (like sticks designed for baking) while others are softer and better for spreading. For buttercream, a stick-style vegan butter that is firm when cold but softens nicely at room temperature is usually best. Experimenting with a few different brands might be necessary to find your favorite for specific dairy-free pie cupcake toppings.
Adjusting Recipes for Dairy-Free Baking
When adapting traditional recipes to be dairy-free, especially for toppings, be mindful of the differences in moisture and fat content of your substitutes. Dairy-free butters can sometimes contain more water than dairy butter, which might slightly affect texture. Plant-based milks have varying fat levels; using a low-fat milk instead of a full-fat cream will result in a much thinner glaze or sauce.
For frostings like buttercream, the amount of liquid needed (dairy-free milk) can vary depending on the vegan butter and humidity, so always add liquids gradually until the desired consistency is reached. When making ganache, the type of dairy-free chocolate and cream substitute will influence the ratio needed to achieve the right set. Be prepared for slight variations and be ready to make minor adjustments to liquid or thickening agents as you go.
Storing and Handling Dairy-Free Toppings
Proper storage is important for maintaining the quality and safety of your dairy-free pie cupcake toppings. Toppings made with plant-based creams or cashews, like coconut whipped cream or cashew cream frosting, should always be stored in an airtight container in the refrigerator. They are perishable and should be treated similarly to their dairy counterparts.
Glazes like maple glaze can typically be stored at room temperature for a day or two if made with stable ingredients, but refrigeration is safer for longer storage. Crumble toppings, once baked, should be stored in an airtight container at room temperature to maintain crispness. Aquafaba meringue, whether baked or raw (on a pie/cupcake), should generally be refrigerated due to its moisture content. Always check the texture after refrigeration; some toppings may need a brief whisking or time at room temperature to become usable again.
Conclusion: Enjoying Delicious Dairy-Free Pie and Cupcake Toppings
Embracing the World of Dairy-Free Baking
Embracing dairy-free baking, particularly when it comes to dairy-free pie cupcake toppings, opens up a world of exciting culinary possibilities. It's no longer about making do with limited options, but about exploring innovative ingredients and techniques that yield delicious results suitable for everyone. From the tropical lightness of coconut whipped cream to the rich indulgence of vegan ganache and the comforting crunch of a dairy-free crumble, there's a dairy-free topping to complement every pie and cupcake.
Mastering these eight creative dairy-free pie cupcake toppings not only expands your baking skills but also allows you to share delightful treats with friends and family who have dietary restrictions. It's a rewarding journey that proves baking can be inclusive, flavorful, and fun, regardless of dietary needs. So go ahead, experiment with these fantastic alternatives and discover your new favorite ways to finish off your delicious baked goods!
Frequently Asked Questions
How can I make a dairy-free whipped topping that's stable enough for decorating?
You can achieve a stable dairy-free whipped topping using chilled coconut cream. Be sure to only scoop out the solid part and whip it with powdered sugar and vanilla extract until light and fluffy.
What's a good dairy-free alternative to buttercream frosting for cupcakes?
A great option is a cashew-based buttercream. Soaked cashews blended with dairy-free milk, sweetener, and vanilla extract create a smooth and creamy frosting similar to traditional buttercream.
Can I use aquafaba to create a dairy-free meringue topping?
Yes, aquafaba (the liquid from canned chickpeas) can be whipped into a fluffy meringue alternative. It's crucial to use a stabilizer like cream of tartar to achieve the best results.
Are there any readily available store-bought dairy-free whipped toppings that are recommended?
Yes, several brands offer dairy-free whipped toppings made from ingredients like coconut or almond milk. Look for options that are specifically labeled as "dairy-free" and check the ingredient list for any allergens.
What can I use instead of dairy-based chocolate ganache for a pie or cupcake topping?
You can create a decadent dairy-free chocolate ganache using dairy-free chocolate chips and full-fat coconut milk. Heat the coconut milk and pour it over the chocolate, then stir until smooth for a rich, glossy topping.
Final Reflection: Sweetening the Dairy-Free Delight
The demand for delicious, dairy-free desserts is exploding, and this isn't just a fleeting trend; it's a reflection of a growing awareness of dietary needs and preferences. Finding creative and satisfying alternatives to traditional dairy-based toppings is key to making these treats truly enjoyable for everyone. This article explored eight unique and exciting options, proving that deliciousness doesn't require dairy.
The journey of discovering and crafting dairy-free alternatives has been a fascinating one, highlighting the ingenuity and resourcefulness of both bakers and consumers. It's a testament to our ability to adapt and innovate in the culinary world, pushing boundaries and expanding the possibilities of what we consider "dessert." The best things in life are unexpected,
and that certainly rings true when exploring the world of dairy-free baking. This shift towards inclusivity in food choices reflects a broader societal movement towards greater awareness and acceptance of diverse needs.
Now, it's your turn. Consider the recipes and ideas presented here, and let them inspire your own culinary creations. Don't be afraid to experiment, to substitute, and to discover your own signature dairy-free topping. The world of delicious, inclusive desserts awaits your unique touch. Embrace the challenge, and let your creativity flourish!
Unleash Your Dairy-Free Baking Genius!
Thanks for joining us on this delicious dairy-free adventure! We hope you’ve discovered some inspiring new ways to top your favorite treats. Ready to take your baking to the next level?
- Master your next dairy-free masterpiece: Try out one (or all!) of the eight creative toppings we shared – we’re confident you’ll find a new favorite. Detailed recipes and tips for each one are still waiting on the site!
- Share your creations: Tag us on social media with your dairy-free baking triumphs! Let's build a vibrant community of deliciousness.
- Explore more dairy-free delights: Discover even more exciting recipes and baking tips on our website; there are plenty more waiting to be explored.
What exciting dairy-free topping will you create next?