
Simple Way to Make a TwoTier Birthday Cake

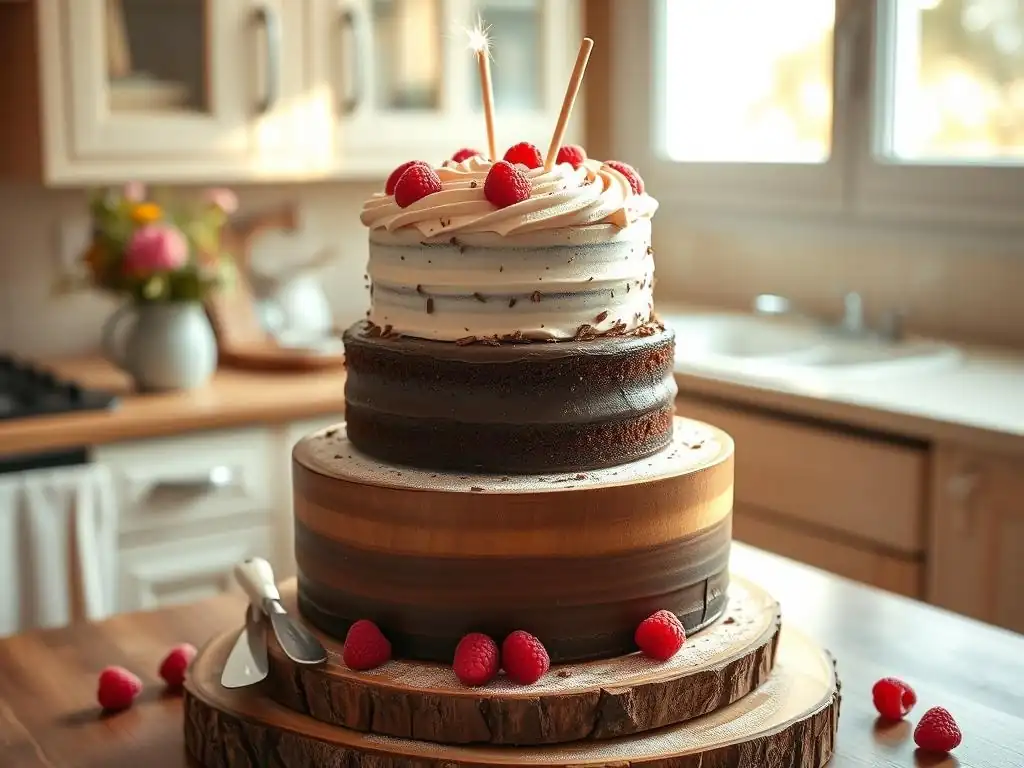
Welcome to BakeWithEase, your kitchen companion for unlocking baking brilliance! Ever dreamed of creating a show-stopping dessert without the stress? This week, we're demystifying the art of tiered cakes with our guide to an easy two-tier birthday cake. Prepare to impress with layers of deliciousness, crafted with simple steps and readily available ingredients. Ready to elevate your baking game? Let's get started!
- Classic Vanilla Two-Tier Birthday Cake: A Step-by-Step Guide from Sally's Baking Addiction
- Introduction: Baking a Show-Stopping Two-Tier Cake Made Easy
- Gathering Your Ingredients for the Perfect Two-Tier Cake
- Baking the Cake Layers: Two Different Sizes for Two Tiers
- Making the Frosting: Smooth and Creamy Perfection
- Assembling the Two-Tier Birthday Cake: A Layered Masterpiece
- Decorating Your Easy Two-Tier Birthday Cake: Simple Yet Stunning Ideas
- Tips and Tricks for a Successful Two-Tier Cake
- Enjoy Your Homemade Two-Tier Birthday Cake!
-
Frequently Asked Questions
- What makes this two-tier birthday cake "easy" to make?
- What skill level is required to bake this two-tier birthday cake?
- Can I customize the flavors or decorations of this two-tier birthday cake?
- What are some tips for ensuring the two cake tiers are stable and don't collapse?
- What if I don't have two cake pans of different sizes?
- Final Reflection: The Joy of a Perfectly Imperfect Two-Tier Cake
- Unleash Your Inner Cake Boss: Bake Your Masterpiece!
Classic Vanilla Two-Tier Birthday Cake: A Step-by-Step Guide from Sally's Baking Addiction
Introduction: Baking a Show-Stopping Two-Tier Cake Made Easy
Why Choose a Two-Tier Birthday Cake?
Choosing a two-tier birthday cake instantly elevates the celebration, transforming a simple dessert into a magnificent centerpiece. It adds a sense of occasion and grandeur that a single-layer cake simply can't match, making the birthday person feel extra special. The vertical design creates visual interest and provides ample space for creative decoration, allowing you to personalize the cake to fit any theme or personality.
Beyond the aesthetic appeal, a two-tier cake is also practical for larger gatherings. A standard 8-inch round cake typically serves 8-10 people, whereas a combination of an 8-inch bottom tier and a 6-inch top tier, as often used in simple two-tier designs, can comfortably serve 20-25 guests. This makes it an efficient and beautiful way to ensure everyone gets a slice of the celebration.
Sally's Baking Addiction's Simple Approach to Tiered Cakes
Sally's Baking Addiction is renowned for creating reliable, approachable recipes that yield consistently excellent results, and her method for tackling tiered cakes is no exception. Her approach focuses on using sturdy, stable cake and frosting recipes designed to hold up under the weight of multiple layers, making the process less intimidating for home bakers. By breaking down the steps into manageable parts – baking, frosting, and assembly – she demystifies what might seem like a complex task.
The core vanilla cake and vanilla buttercream recipes used in her easy twotier birthday cake guides are specifically formulated for structure and ease of handling. The cake recipe often uses methods that result in a tender yet robust crumb, while the buttercream is stable enough for both filling and frosting, providing the necessary support between tiers. This focus on foundational recipes that work makes creating a beautiful, stacked cake genuinely achievable for bakers of all skill levels.
Gathering Your Ingredients for the Perfect Two-Tier Cake
Cake Layers: Vanilla Cake Ingredients
To create the foundational layers for your easy twotier birthday cake, you will need standard baking ingredients. For a typical design using two 8-inch and two 6-inch cake rounds (to be split into four layers total), you'll generally require around 3-4 cups of all-purpose flour, 2-3 cups of granulated sugar, 1 cup of unsalted butter, 4-5 large eggs, 1.5-2 cups of buttermilk or milk mixed with a little vinegar, 1-2 teaspoons of vanilla extract, 2-3 teaspoons of baking powder, and about half a teaspoon of salt.
Ensuring your ingredients are at the correct temperature is crucial for the success of the cake batter. Butter and eggs should be at room temperature, which allows them to emulsify properly with the sugar, creating a smooth batter that bakes into a tender, even-crumbed cake. Using fresh baking powder is also important for proper leavening, helping your cake layers rise beautifully and evenly, which is key for a stable easy twotier birthday cake.
Frosting: Vanilla Buttercream Ingredients
For the classic vanilla buttercream that will hold your easy twotier birthday cake together and provide a delicious coating, you'll need a generous amount of ingredients. This typically includes 1-1.5 cups of unsalted butter (softened), 6-8 cups of confectioners' sugar (powdered sugar), 1-2 teaspoons of pure vanilla extract, 4-8 tablespoons of milk or heavy cream, and a pinch of salt to balance the sweetness. The quantities are estimated for both the crumb coat and final frosting layers on both tiers.
Using unsalted butter gives you control over the saltiness of the frosting, allowing you to add just a pinch to enhance the flavor without making it too savory. Sifting the powdered sugar can help prevent lumps, resulting in a smoother buttercream texture. The amount of liquid (milk or cream) can be adjusted to achieve the desired consistency – less liquid for a thicker frosting suitable for piping, and more for a softer, spreadable consistency.
Simple Syrup: For Moist and Delicious Cake Layers
Simple syrup is a baker's secret weapon for ensuring moist cake layers, particularly important for tiered cakes that might sit out for a while or are made ahead of time. It's incredibly easy to make, requiring just two ingredients: equal parts granulated sugar and water. A common ratio is 1 cup of sugar to 1 cup of water, heated gently until the sugar dissolves completely.
Once cooled, this syrup can be brushed onto the cut surfaces of the cake layers before frosting. The cake absorbs the liquid, adding moisture and preventing dryness. You can also infuse the simple syrup with flavorings like vanilla extract, a splash of liqueur, or citrus zest while it's warm to add an extra layer of taste to your easy twotier birthday cake.
Essential Tools: Cake Pans, Turntable, Spatulas, and More
Having the right tools makes the process of baking and assembling an easy twotier birthday cake significantly smoother. You will need two round cake pans in each size you plan to use (commonly 8-inch and 6-inch) to bake the layers efficiently. Parchment paper, cooking spray with flour, mixing bowls, an electric mixer (stand or hand), and wire cooling racks are also standard necessities for the baking phase.
For assembly and decoration, a cake turntable is invaluable for evenly frosting the cake. Offset spatulas in various sizes (small for filling, large for frosting sides) and a bench scraper help achieve smooth frosting finishes. A cake leveler or a long serrated knife is needed to flatten the tops of the cake layers. Dowels (plastic or wooden) and cake boards (one for the top tier) are essential for structural support.
Baking the Cake Layers: Two Different Sizes for Two Tiers
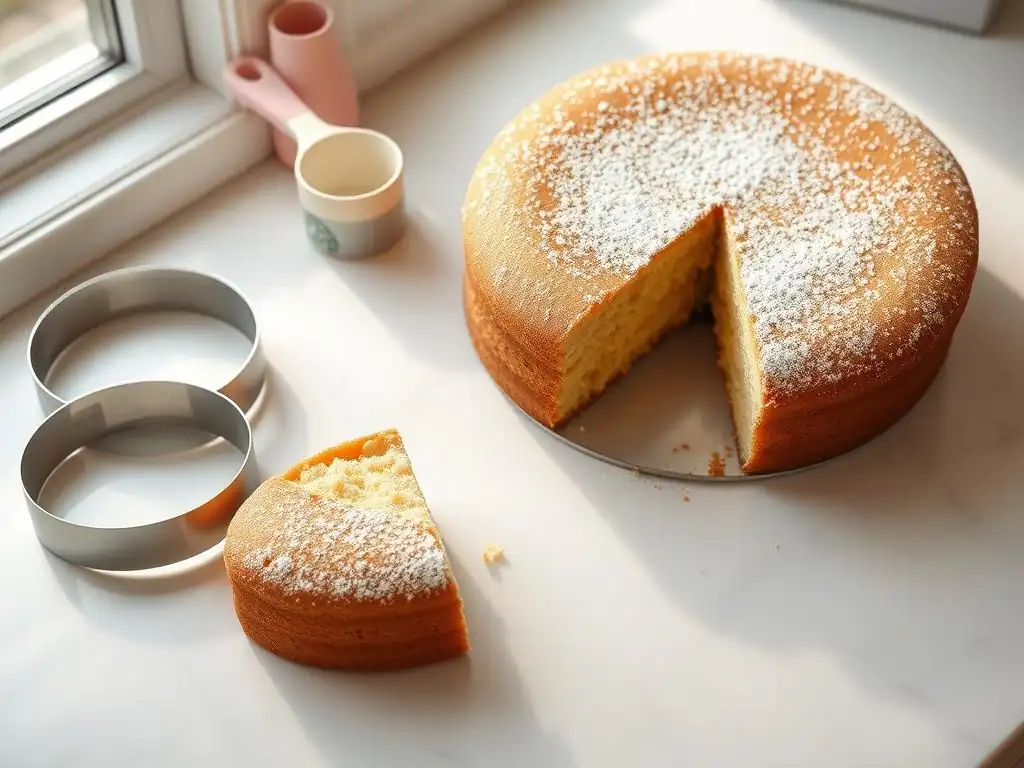
Preparing the Cake Pans: Ensuring Easy Release
Proper pan preparation is the first critical step to ensure your cake layers release cleanly, preventing frustrating breaks that can derail your easy twotier birthday cake project. Begin by generously greasing the insides of your cake pans with softened butter or baking spray containing flour. Pay special attention to the corners and sides.
Next, cut circles of parchment paper to fit snugly in the bottom of each pan. Place the parchment circles over the grease. This creates a non-stick barrier on the bottom, guaranteeing that your cake won't stick there. Finally, lightly flour the greased sides (shaking out any excess) or ensure your baking spray includes flour. This double layer of protection is key for perfect cake layers.
Mixing the Cake Batter: Step-by-Step Instructions
Most classic vanilla cake recipes for layered cakes follow the creaming method. Start by creaming the softened butter and sugar together on medium speed for 3-5 minutes until the mixture is light and fluffy. This incorporates air, which contributes to the cake's texture. Add eggs one at a time, beating well after each addition, followed by the vanilla extract.
In a separate bowl, whisk together the dry ingredients (flour, baking powder, salt). In another small bowl, combine the wet ingredients (buttermilk or milk mixture). Alternate adding the dry and wet ingredients to the creamed mixture, beginning and ending with the dry ingredients (e.g., add one-third of dry, mix, add half of wet, mix, add one-third of dry, mix, add remaining wet, mix, add remaining dry, mix).
Mix on low speed just until combined; overmixing develops gluten and can result in a tough cake. Divide the batter evenly among your prepared pans – using a kitchen scale can help ensure equal amounts for consistent layers for your easy twotier birthday cake.
Baking Time and Temperature: Achieving Perfectly Baked Cakes
For standard vanilla cake layers intended for stacking, a common oven temperature is 350°F (175°C). The baking time will vary depending on the size of your pans and your specific oven. Typically, 8-inch layers might bake for 30-35 minutes, while 6-inch layers could take 25-30 minutes.
Check for doneness by inserting a toothpick into the center of each cake. If it comes out clean or with just a few moist crumbs attached, the cake is ready. Avoid opening the oven door too early, especially in the first 20 minutes, as this can cause cakes to sink. Rotating the pans halfway through the baking time can help ensure even heat distribution and uniform browning, contributing to perfectly baked layers for your easy twotier birthday cake.
Cooling the Cakes: Preventing Cracking and Crumbling
Once the cakes are baked, proper cooling is essential to prevent cracking, crumbling, and sticking. Let the cakes cool in their pans on a wire rack for about 10-15 minutes. This allows the cake structure to set slightly as it cools, making it less fragile when you handle it.
After the initial cooling period in the pans, carefully invert the cakes onto a wire rack to cool completely. Remove the parchment paper from the bottom. Ensure the cakes are fully cooled to room temperature before attempting to level, fill, or frost them. Warm cakes are prone to breaking and will melt buttercream, making a smooth finish impossible for your easy twotier birthday cake. Patience during the cooling phase pays off!
Making the Frosting: Smooth and Creamy Perfection
Vanilla Buttercream Recipe and Instructions
Creating a smooth and stable vanilla buttercream is key to successfully frosting and assembling your easy twotier birthday cake. Begin by beating softened unsalted butter in a stand mixer with the paddle attachment (or using a hand mixer) on medium speed until it is very creamy and pale, about 3-5 minutes. This aerates the butter, contributing to the frosting's texture.
Gradually add the sifted confectioners' sugar, about 1 cup at a time, mixing on low speed until just combined before adding more. Scrape down the sides and bottom of the bowl frequently. Once all the sugar is incorporated, add the vanilla extract and 2 tablespoons of milk or cream. Beat on medium-high speed for another 3-5 minutes. Add more milk or cream, 1 tablespoon at a time, until the desired consistency is reached – it should be smooth, spreadable, and hold its shape.
Achieving the Right Consistency for Frosting and Decorating
The consistency of your buttercream is paramount for frosting a stacked cake. For the filling between layers and the initial crumb coat, a slightly softer, easily spreadable consistency is ideal. If your buttercream is too stiff after beating, add milk or cream, 1 teaspoon at a time, beating after each addition, until it loosens up.
For the final frosting layer and any decorative piping, the buttercream needs to be slightly firmer to hold its shape well. If it's too soft, you can beat in a tablespoon or two more sifted powdered sugar. The temperature of the buttercream also affects consistency; if it feels too soft, chill it in the refrigerator for 10-15 minutes, then beat it again before use. A properly consistent frosting makes achieving a smooth, professional look on your easy twotier birthday cake much simpler.
Flavor Variations: Enhancing Your Frosting with Extracts and More
While classic vanilla buttercream is delicious, you can easily customize the flavor to complement your easy twotier birthday cake. Substitute or add other extracts alongside the vanilla, such as almond, lemon, peppermint, or even a hint of coconut extract. Start with a small amount, like half a teaspoon, and add more to taste.
For a richer flavor, incorporate melted and cooled unsweetened or semi-sweet chocolate (ensure it's not warm!) for chocolate buttercream. You could also stir in finely ground espresso powder for a coffee flavor, or a tablespoon or two of fruit puree or zest (like raspberry or orange) for a fruity twist. Just be mindful that adding liquids or purees can thin the buttercream, so you might need to adjust with a little more powdered sugar to maintain the necessary stability for frosting a stacked cake.
Assembling the Two-Tier Birthday Cake: A Layered Masterpiece
Leveling the Cakes: Creating a Flat Surface for Stacking
Before you begin stacking and frosting, ensure all your cooled cake layers are perfectly flat. Use a long serrated knife or a dedicated cake leveler to carefully slice off the dome from the top of each cake layer. Aim to remove just enough to create a level surface.
Having flat, even layers is crucial for the stability and appearance of your easy twotier birthday cake. Uneven layers can cause the cake to lean or make it difficult to achieve smooth, straight sides when frosting. The removed cake tops, often called "scraps," are delicious and can be enjoyed as a snack or saved for other uses like cake pops.
Applying Simple Syrup: Adding Moisture and Flavor
Once your cake layers are leveled, it's time to add moisture using the cooled simple syrup. Place each cake layer cut-side up on a flat surface. Use a pastry brush to gently brush the simple syrup over the entire cut surface of each layer. Don't soak the cake, but ensure even coverage.
This step is particularly beneficial if you are making your cake layers in advance, as it helps them stay moist and tender over several days. It adds a subtle sweetness and can enhance the overall flavor profile of your easy twotier birthday cake, contributing to a more delicious final result.
Frosting the First Layer: Creating a Crumb Coat
Place the first leveled and syrup-brushed cake layer for your bottom tier onto a cake board or directly onto your serving plate or stand. Apply a generous dollop of buttercream to the center of the layer and spread it evenly over the top using an offset spatula. Place the second layer for the bottom tier on top and gently press to level. Now, apply a thin, even layer of buttercream all over the top and sides of this assembled bottom tier. This is the crumb coat.
The purpose of the crumb coat is to seal in any loose crumbs, preventing them from getting into your final, smooth layer of frosting. It doesn't need to be thick or perfectly smooth. Once the bottom tier is covered in a thin crumb coat, chill it in the refrigerator for at least 20-30 minutes, or until the frosting is firm to the touch. This chilling step is essential for achieving a clean final finish on your easy twotier birthday cake.
Stacking the Second Tier: Ensuring Stability and Alignment
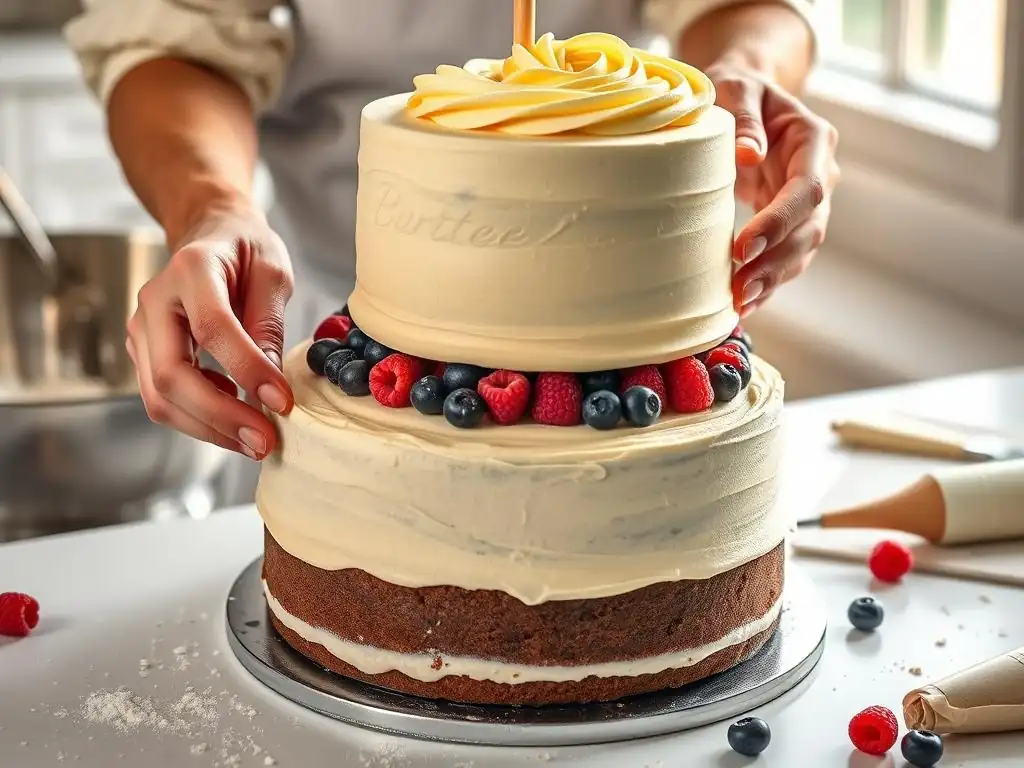
After the bottom tier has been crumb-coated and chilled until firm, it's time to add the crucial support structure. Insert several dowels (typically 3-5 for an 8-inch tier) into the bottom tier, pushing them down until they reach the cake board at the bottom. Cut the dowels so they are flush with the top surface of the crumb-coated bottom tier. Place the dowels in a pattern where the top tier's cake board will sit directly on them.
Place a small amount of frosting on the top of the bottom tier within the dowel placement area. Carefully lift the crumb-coated and chilled top tier (which should be on its own cake board cut to size) and center it on top of the bottom tier, aligning its cake board directly on the dowels. Gently press down to secure. Now you have a stable foundation for finishing your easy twotier birthday cake.
Decorating Your Easy Two-Tier Birthday Cake: Simple Yet Stunning Ideas
Crumb Coat: The Foundation for a Smooth Finish
As mentioned during assembly, the crumb coat is a vital step for achieving a polished look on your easy twotier birthday cake. After stacking and chilling the crumb-coated tiers, ensure the entire stacked cake (including the top tier) has a thin, even layer of frosting. This traps any stray crumbs and creates a smooth, sealed surface for the final frosting layer.
Apply the crumb coat using an offset spatula, spreading a thin layer over the top and sides of both tiers. Don't worry about making it perfect; the goal is just to cover the cake completely and smoothly enough to trap crumbs. Once the entire cake is coated, return it to the refrigerator to chill for another 20-30 minutes until the crumb coat is firm. This firm base is what allows you to apply the final frosting layer smoothly without pulling up crumbs.
Final Frosting Layer: Achieving a Professional Look
With the crumb coat firm, apply a more generous amount of buttercream for the final layer. Start by adding a good amount to the top of the cake and spreading it evenly. Then, apply frosting to the sides, using an offset spatula to spread it thick enough to completely cover the crumb coat.
For smooth sides, hold a bench scraper or a long, straight offset spatula against the side of the cake at a 90-degree angle to the turntable. While holding the scraper steady, rotate the turntable to smooth the frosting. For the top edge, use a small offset spatula to pull the excess frosting from the edge towards the center of the cake. Repeat these steps until you achieve your desired level of smoothness. Achieving a smooth finish on your easy twotier birthday cake takes practice, but focusing on even application and using a bench scraper helps immensely.
Simple Decoration Techniques: Sprinkles, Swirls, and a Drip Effect
You don't need complex techniques to create a stunning easy twotier birthday cake. Sprinkles are one of the easiest ways to add color and fun. You can press them into the sides of the frosted cake, sprinkle them over the top, or create a border. Another simple yet effective technique is piping swirls or rosettes. Use a piping bag fitted with a star tip to pipe decorative swirls around the base of each tier or along the top edge.
A popular and visually appealing decoration is a chocolate or ganache drip. Prepare a simple ganache (melted chocolate mixed with warm cream) or use melted candy melts. Let it cool slightly until it's thick enough to drizzle but still pourable. Spoon or pipe the mixture around the edge of the top tier, allowing it to naturally drip down the sides. This adds a professional-looking flourish to your easy twotier birthday cake with relatively little effort.
Adding the Finishing Touches: Candles, Toppers, and More
Once your easy twotier birthday cake is frosted and decorated, it's time for the finishing touches that make it truly special. Birthday candles are a must – place them carefully, perhaps just on the top tier. A cake topper, whether a custom design, a store-bought figurine, or even just a simple banner, adds height and instantly conveys the theme or celebrates the age.
Consider adding non-edible decorations like fresh flowers (ensure they are food-safe or protected), a ribbon tied around the base of each tier, or edible glitter for sparkle. These small additions can significantly enhance the overall look of your cake. Placing the finished cake on a decorative stand also elevates its presentation, completing your beautiful and easy twotier birthday cake.
Tips and Tricks for a Successful Two-Tier Cake
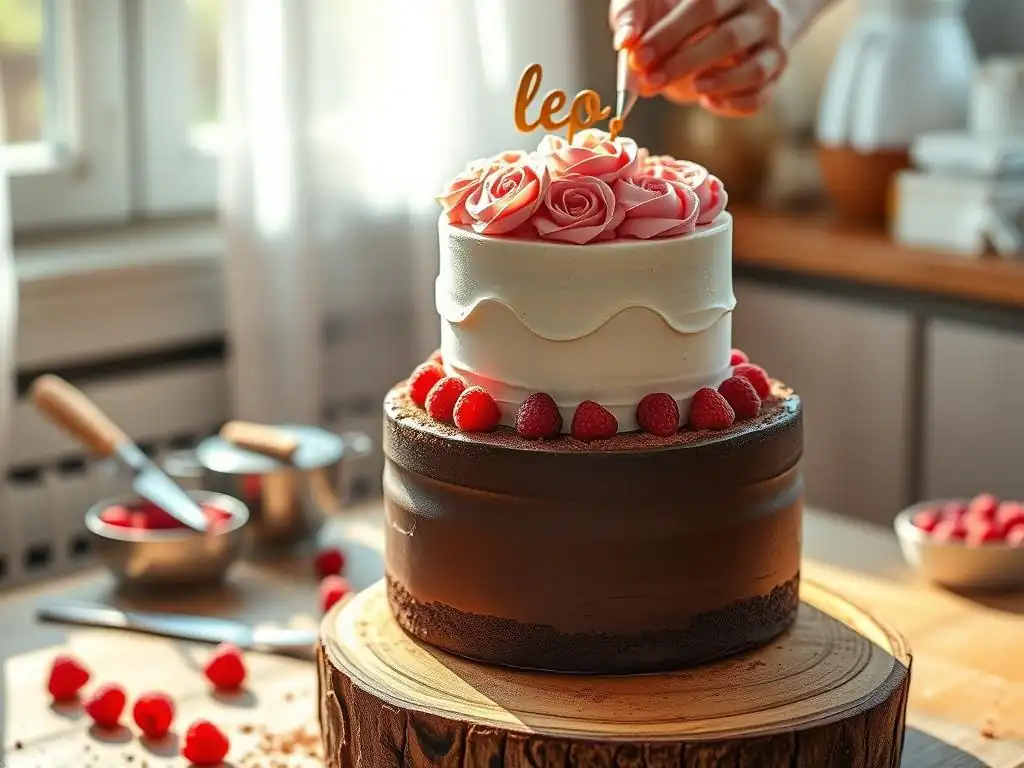
Preventing Cake Sagging: Using Dowels for Support
One of the most important steps to ensure your easy twotier birthday cake remains stable and doesn't sag is the proper use of internal supports, specifically dowels. Without dowels in the bottom tier, the weight of the upper tier will compress the lower cake, leading to a lopsided or collapsed cake.
For an 8-inch base tier supporting a 6-inch top tier, you will typically need 3 to 5 food-safe dowels (plastic or wooden). Insert the dowels into the bottom tier in a pattern that aligns with where the upper tier's cake board will sit. Push them all the way down to the bottom cake board. Use scissors or cutters to trim each dowel so it is exactly the height of the frosted bottom tier's surface. This ensures the upper tier's weight rests entirely on the dowels, not the cake itself.
Keeping Cakes Moist: Proper Storage Techniques
To ensure your easy twotier birthday cake layers stay moist, proper storage is key. Unfrosted cake layers can be baked ahead of time. Once completely cooled, wrap each layer tightly in plastic wrap, then in aluminum foil, and store at room temperature for 1-2 days, or freeze for up to 2 months. Thaw frozen layers overnight in the refrigerator before unwrapping to prevent condensation from making them sticky.
Once assembled and frosted, the cake should be stored in the refrigerator in an airtight cake carrier or loosely covered with plastic wrap if a carrier isn't large enough. Buttercream acts as a protective barrier against drying. For the best texture and flavor, allow the frosted cake to sit at room temperature for 30-60 minutes before serving (longer if it's a very large cake or a warm room).
Troubleshooting Common Baking Problems
Even when aiming for an easy twotier birthday cake, you might encounter common baking issues. If your cake layers dome excessively, your oven might be too hot (verify with an oven thermometer), or you might be overmixing. Ensure ingredients are at room temperature and consider using cake strips around the pans. If cakes stick, revisit your pan preparation – ensure you've greased, floured, and used parchment paper.
If your buttercream is too soft, it could be too warm; try chilling it briefly and re-beating. If it's too stiff, gradually add a teaspoon of milk or cream at a time. If your crumb coat isn't trapping all the crumbs, ensure you've chilled it sufficiently until it's firm before applying the final layer. Patience and minor adjustments can often resolve these issues.
Scaling the Recipe: Adjusting for Different Cake Pan Sizes
The provided recipe is likely calibrated for specific pan sizes like 8-inch and 6-inch rounds. If you wish to make an easy twotier birthday cake using different dimensions (e.g., 9-inch and 7-inch, or larger tiers), you will need to adjust the recipe yield. Online cake pan size conversion calculators can help estimate the amount of batter needed based on the volume of your pans compared to the original recipe's pans.
Remember that changing pan sizes will also affect baking times. Larger or deeper pans will require longer baking times. Always use the toothpick test to check for doneness, inserting it into the center of the deepest part of the cake layer. Be prepared to monitor your cakes closely when using different pan sizes than specified in the original recipe.
Enjoy Your Homemade Two-Tier Birthday Cake!
Serving and Storage Recommendations
Serving your beautiful easy twotier birthday cake requires a bit of care to keep slices neat. Use a long, sharp knife. Before each cut, dip the knife in hot water and wipe it clean and dry. This helps the knife glide through the frosting and cake without dragging or sticking.
Start by slicing the top tier first. Once the top tier is served, you can carefully remove the dowels from the bottom tier (use a clean fork or tool to locate and pull them out) before slicing the bottom tier. Store any leftover cake covered in the refrigerator. Buttercream-frosted cake can last 3-4 days refrigerated. For longer storage, slice individual portions, wrap them tightly in plastic wrap, and freeze for up to 2 months. Thaw slices in the refrigerator before bringing to room temperature to enjoy.
Celebrate with Sally's Baking Addiction
Following a reliable, step-by-step guide like the ones provided by Sally's Baking Addiction truly makes the process of creating an easy twotier birthday cake a fun and rewarding experience rather than a daunting task. Her clear instructions and dependable recipes empower home bakers to achieve impressive results.
So, gather your ingredients, follow the steps, and take pride in creating a stunning, homemade centerpiece for your next celebration. Baking a birthday cake from scratch is a special way to show you care, and mastering a two-tier design adds an extra layer of accomplishment to the joyous occasion. Celebrate your success and share your delicious creation!
Frequently Asked Questions
What makes this two-tier birthday cake "easy" to make?
The recipe focuses on simple techniques and easily accessible ingredients, avoiding complex steps often found in more advanced cake recipes. It prioritizes clarity and efficiency for a stress-free baking experience.
What skill level is required to bake this two-tier birthday cake?
This recipe is designed for bakers of all levels, including beginners. The step-by-step instructions and readily available ingredients make it accessible to those new to baking.
Can I customize the flavors or decorations of this two-tier birthday cake?
Absolutely! The recipe provides a foundation for customization. Feel free to experiment with different cake flavors, fillings, frostings, and decorations to personalize the cake to your liking.
What are some tips for ensuring the two cake tiers are stable and don't collapse?
Using cake dowels or supports between the tiers is crucial for stability. Ensure the frosting is firm and chilled before stacking, and transport the cake carefully.
What if I don't have two cake pans of different sizes?
You can use the same size pan for both tiers, but adjust the baking time accordingly and potentially reduce the batter amount for the top tier to achieve a smaller size. Alternatively, you can bake a single-layer cake and decorate it elaborately.
Final Reflection: The Joy of a Perfectly Imperfect Two-Tier Cake
Baking a two-tiered cake doesn't have to be a daunting task; it's an achievable feat of deliciousness, accessible to everyone with a little patience and the right guidance. This article aimed to demystify the process, proving that creating a stunning, celebratory cake is within reach, regardless of your baking experience. The simplicity of the steps outlined should empower even novice bakers to tackle this seemingly complex project.
The enduring appeal of homemade cakes, especially those crafted with love for special occasions, speaks volumes about our desire for connection and celebration. The act of baking itself is a meditative process, a chance to slow down and focus on creating something beautiful. And the sharing of that creation? That's where the true magic lies. A cake is a celebration of life, a symbol of joy and togetherness.
This sentiment perfectly captures the heart of what a homemade two-tiered cake represents – a tangible expression of care and affection.
Now, I invite you to consider your own baking journey. Perhaps this article has inspired you to try your hand at a two-tiered cake, or maybe it's ignited a desire to explore other baking adventures. Whatever your next culinary endeavor, remember that the process is as important as the result. Embrace the imperfections, celebrate the successes, and most importantly, enjoy the journey of creating something delicious and meaningful to share with those you cherish. Don't be afraid to get your hands messy – the sweetest memories are often made in the kitchen.
Unleash Your Inner Cake Boss: Bake Your Masterpiece!
Thanks for joining us on this delicious journey! We hope you've gained the confidence to tackle a stunning two-tiered cake. Now it's time to put your newfound skills to the test.
- Bake your dream cake: Gather your ingredients and follow your favorite recipe (or ours! ), creating the perfect two-tiered masterpiece. Don't forget to personalize it!
- Share your creation: Show us your baking prowess! Post a picture of your finished cake on social media using #BakeWithEaseTwoTier.
- Explore more amazing cake designs: Discover other inspiring recipes and tutorials on our website to continue your baking adventure!
What creative flavor combinations will you use for your next two-tiered baking adventure?