
BakeWithEase Vanilla Cake Troubleshooting Guide

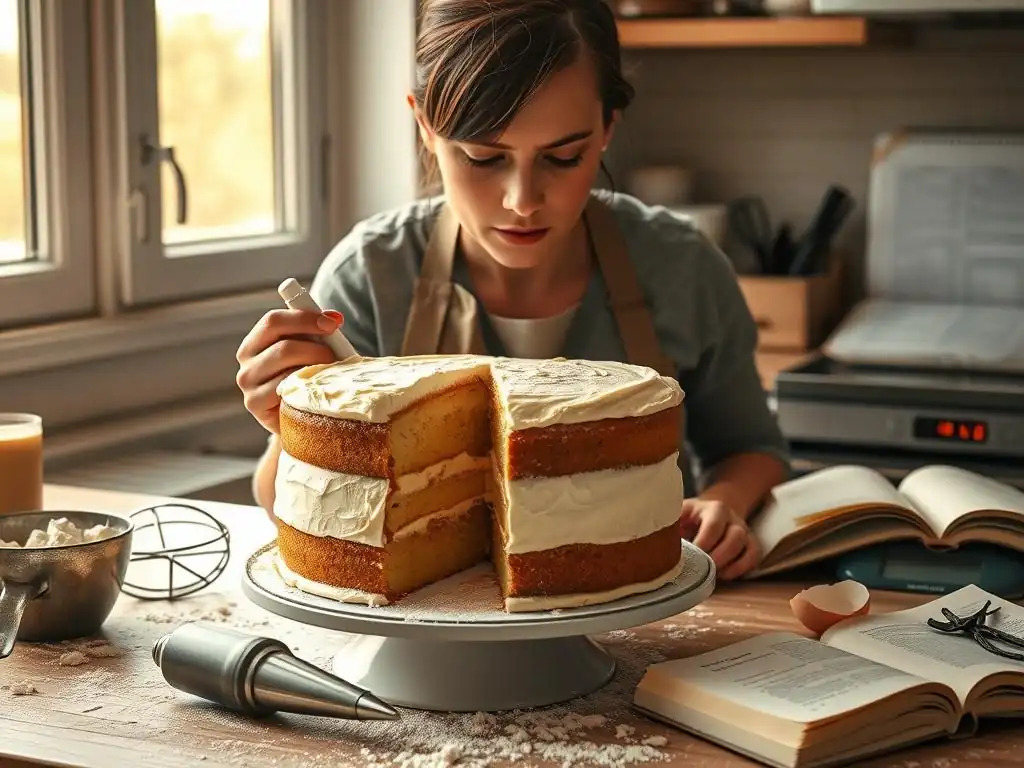
Welcome to BakeWithEase, your friendly guide to conquering the world of baking! Ever wondered why your vanilla cake isn't quite reaching its full potential? Perhaps it's too dry, too dense, or lacking that perfect vanilla punch. Dive in and discover our essential vanilla cake troubleshooting tips – secrets that will transform your baking from frustrating to fabulous. Ready to unlock the secrets to a flawlessly delicious vanilla cake? Let's get started!
- Introduction to Vanilla Cake Troubleshooting
- Problem: My Vanilla Cake is Dense and Heavy
- Problem: My Vanilla Cake is Dry
- Problem: My Vanilla Cake Sank in the Middle
- Problem: My Vanilla Cake is Crumbly
- Problem: My Vanilla Cake Has a Tough Crust
- Problem: My Vanilla Cake is Not Rising Properly
- Problem: My Vanilla Cake Tastes Bland
- General Vanilla Cake Baking Tips for Success
- Conclusion: Mastering Vanilla Cake Baking with BakeWithEase
- Frequently Asked Questions
- Final Reflection: The Sweet Science of Troubleshooting
- Unleash Your Inner Baker: Conquer Cake Challenges!
Introduction to Vanilla Cake Troubleshooting
Why Vanilla Cakes Sometimes Go Wrong: Common Baking Problems
Baking a perfect vanilla cake seems simple enough – flour, sugar, eggs, butter, vanilla, and a leavener. Yet, even with these basic ingredients, bakers of all levels can encounter frustrating issues. Perhaps your cake turned out dense and heavy, or maybe it was so dry it crumbled into dust.
Maybe it rose beautifully only to sink in the middle, or the crust became tough and chewy. These common problems are not signs of failure, but rather opportunities to learn and refine your technique. Understanding the science behind why these issues occur is the first step in mastering the art of vanilla cake baking.
Troubleshooting vanilla cake problems is a core part of becoming a confident baker. Each time a cake doesn't turn out exactly as planned, it provides valuable clues about what went wrong, whether it was ingredient measurement, mixing method, oven temperature, or even cooling technique. By identifying the specific issue and its root cause, you can prevent it from happening again. This guide offers practical vanilla cake troubleshooting tips to help you diagnose and fix common baking mishaps, transforming those frustrating moments into successful baking experiences.
Using This Vanilla Cake Troubleshooting Guide
This guide is designed to help you identify specific issues you might encounter when baking a vanilla cake and provide clear, actionable steps to resolve them. We've broken down common problems into sections, from dense texture to a bland taste. Start by finding the problem that best describes your situation. Under each problem, you'll find explanations of the likely causes, followed by detailed troubleshooting vanilla cake solutions and preventive measures.
Think of this guide as your baking detective manual. When your vanilla cake isn't quite right, refer to the relevant section to understand why it happened. For example, if your cake is dry, the guide will explain potential culprits like overmeasuring flour or overbaking, and then offer specific tips like using a kitchen scale for accuracy or checking for doneness earlier. By applying these vanilla cake troubleshooting tips, you'll gain a deeper understanding of the baking process and improve your results with every bake.
Problem: My Vanilla Cake is Dense and Heavy
Understanding Dense Vanilla Cake Causes
A dense vanilla cake lacks that desirable light, airy texture. One primary culprit is often inaccurate ingredient measurement, particularly flour. Too much flour adds excessive structure and weight, preventing a delicate crumb. For instance, scooping flour directly from the bag with a measuring cup can add up to 20-30% more flour than needed compared to spooning it in and leveling it off, leading to a significantly heavier batter.
Another major factor is overmixing the batter once the dry ingredients are added. This develops gluten, the protein network in flour, which is essential for bread but makes cakes tough and dense. Just a few extra seconds of mixing after the flour is incorporated can activate too much gluten.
Furthermore, insufficient leavening or expired leavening agents (like baking powder or baking soda) can fail to produce enough gas bubbles to lift the batter, resulting in a heavy texture. Using ingredients that are too cold, especially butter and eggs, can also hinder proper emulsification and air incorporation during the creaming stage, contributing to density. For example, butter should be at room temperature (around 68-70°F or 20-21°C) to cream correctly with sugar, trapping air pockets that are crucial for lift.
If your butter is too cold, creaming won't incorporate enough air, leading to a denser outcome. These are key areas to focus on when troubleshooting vanilla cake density issues.
Troubleshooting Dense Vanilla Cake: Solutions and Prevention
Measuring Ingredients Accurately for Light Vanilla Cake
Precise measurement is paramount for a tender, light vanilla cake. The most reliable method is using a kitchen scale to weigh ingredients, especially flour. A standard cup of all-purpose flour weighs approximately 120-130 grams. Using a scale ensures you add the exact amount specified in the recipe, avoiding the common error of over-compacting flour in volume measures. If you don't have a scale, use the spoon-and-level method: gently spoon flour into your dry measuring cup until it overflows, then level it off with a straight edge without tapping or packing the flour down.
Beyond flour, ensure other ingredients like sugar and liquids are measured accurately using the appropriate tools (dry measuring cups for sugar, liquid measuring cups for milk, oil, etc.). For fats like butter, recipes often specify "softened," "room temperature," or "melted." Follow these instructions precisely. Using butter that is too hard or too soft will affect how it creams with sugar, impacting the final texture. These careful measuring practices are fundamental vanilla cake troubleshooting tips for achieving a consistently light result.
Proper Mixing Techniques to Avoid Dense Cake
Mixing technique significantly impacts cake texture. The goal is to incorporate air and combine ingredients without developing excessive gluten. Start by creaming softened butter and sugar together until the mixture is light, fluffy, and pale yellow. This process can take 3-5 minutes with an electric mixer on medium speed and is crucial for building structure and incorporating air bubbles that help the cake rise. Add eggs one at a time, mixing well after each addition to ensure they are fully incorporated into the fat-sugar mixture, which prevents curdling and promotes a smooth batter.
Once you add the dry ingredients (flour, leavening, salt) and wet ingredients (milk, vanilla), mix just until they are combined. Overmixing at this stage activates gluten in the flour, leading to a tough, dense cake. Mix on low speed or even by hand with a spatula until no dry streaks remain. It's okay if there are a few small lumps; these will usually disappear during baking. Stop mixing as soon as the flour is incorporated. This "minimal mixing" approach after adding flour is one of the most critical vanilla cake troubleshooting tips for preventing density.
Oven Temperature's Impact on Cake Texture
An oven that is too cool can also contribute to a dense cake. If the temperature is too low, the cake won't rise quickly enough before the structure sets, resulting in a shorter, heavier crumb. Conversely, an oven that is too hot can cause the cake to set too quickly on the outside before the inside has a chance to fully rise, sometimes leading to a dense layer at the bottom or edges. Using an oven thermometer is highly recommended, as oven temperatures can vary by as much as 25-50°F (15-30°C) from the thermostat setting.
Preheating your oven properly is essential. Allow the oven to preheat for at least 15-20 minutes after it reaches the set temperature to ensure the heat is evenly distributed throughout the cavity. Place the cake pan in the center of the oven rack for optimal heat circulation. If your oven has hot spots, rotating the cake halfway through the baking time (gently and quickly) can help ensure even baking and prevent some areas from becoming dense while others overbake. Accurate temperature management is a key component of effective vanilla cake troubleshooting.
Problem: My Vanilla Cake is Dry
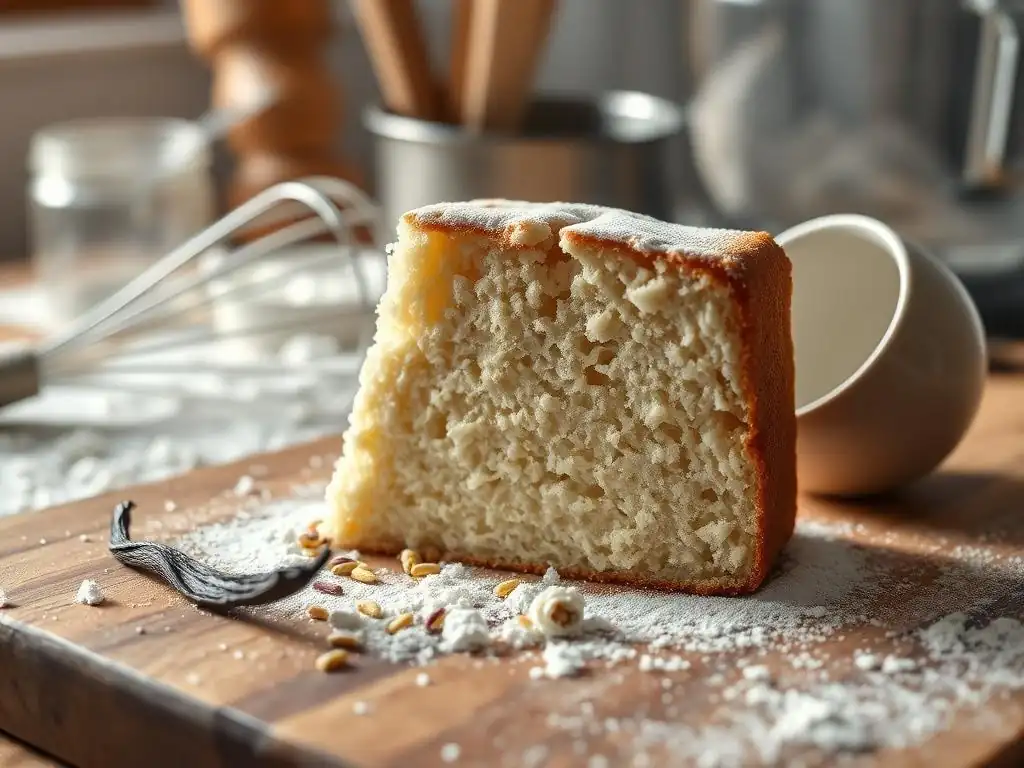
Identifying the Reasons for a Dry Vanilla Cake
A dry vanilla cake is often the result of too little moisture or too much heat exposure. Overmeasuring dry ingredients, particularly flour, is a common cause, as excess flour absorbs more liquid than the recipe intends, leaving the cake dry. Similarly, using too little fat (butter or oil) or liquid (milk, buttermilk) can significantly reduce the cake's moisture content. Fat contributes tenderness and moisture, while liquids hydrate the dry ingredients and help create steam during baking, which keeps the cake moist.
Overbaking is perhaps the most frequent reason for a dry cake. When a cake bakes for too long, moisture evaporates from the batter, leaving behind a dry, sometimes crumbly, texture. Even a few minutes past the ideal baking time can dry out a vanilla cake.
Baking at too high a temperature can also cause the cake to dry out quickly, as the moisture is driven off too rapidly. Poor storage after baking can also strip moisture from a cake, making it dry and stale prematurely. These factors are central to understanding why your vanilla cake might lack moisture when troubleshooting.
Troubleshooting Dry Vanilla Cake: Solutions and Prevention
Adding Moisture to Your Vanilla Cake Batter
To prevent dryness, ensure your batter has adequate moisture. Double-check ingredient measurements, particularly liquids and fats. Using fats like melted butter or oil can sometimes result in a more moist cake than creamed butter, depending on the recipe structure. Consider incorporating ingredients known for adding moisture, such as buttermilk (its acidity also tenderizes the crumb), sour cream, yogurt, or even a small amount of applesauce or mashed banana in variations of a basic recipe. For example, substituting half the milk with buttermilk in a standard recipe can add noticeable moisture and a finer crumb.
Ensure your eggs are at room temperature before mixing; they emulsify better with fats and liquids, leading to a smoother, more hydrated batter. Some recipes benefit from adding an extra egg yolk, which contributes fat and richness without adding much protein, resulting in a more tender and moist cake.
If a recipe consistently yields a dry cake, consider slightly increasing the liquid or fat by a tablespoon or two in your next attempt, or look for recipes specifically designed for maximum moisture, often using oil or a combination of butter and oil. Applying these vanilla cake troubleshooting tips can significantly improve texture.
Preventing Overbaking for a Moist Vanilla Cake
Preventing overbaking is crucial for a moist vanilla cake. Always start checking for doneness a few minutes before the recipe's suggested minimum baking time. Cake doneness is typically tested by inserting a toothpick or wooden skewer into the center; it should come out with a few moist crumbs attached, but no wet batter. If it comes out completely clean, the cake is likely already slightly overdone. The cake should also begin to pull away slightly from the sides of the pan and spring back gently when lightly pressed in the center.
Ensure your oven temperature is accurate using an oven thermometer. Baking at the correct temperature ensures the cake bakes through without drying out too quickly. If you notice the edges are browning too fast while the center is still raw, the oven might be too hot, or the heat is uneven. You can loosely tent the top of the cake with aluminum foil during the last portion of baking to prevent the top and edges from drying out or burning. These careful checks and adjustments are key vanilla cake troubleshooting tips for maintaining moisture.
Storing Your Vanilla Cake to Maintain Moisture
Proper storage is essential to keep your vanilla cake moist after baking. Once the cake has cooled completely on a wire rack (cooling in the pan for too long can create steam and make the bottom soggy, but cooling on a rack for too short a time means it's still releasing moisture), wrap it tightly in plastic wrap. Ensure there are no gaps where air can reach the cake, as air exposure is the primary cause of moisture loss. For extra protection, you can then place the plastic-wrapped cake in an airtight container or a resealable plastic bag.
Store the cake at room temperature unless it contains perishable fillings or frostings that require refrigeration. Refrigeration can actually dry out cakes faster than room temperature storage due to the circulating cold air. If you must refrigerate, make sure the cake is exceptionally well-wrapped. For longer storage, vanilla cakes freeze very well.
Wrap individual slices or the entire cake tightly in plastic wrap, then in aluminum foil, and place in a freezer-safe bag or container. Thaw at room temperature while still wrapped to allow moisture to redistribute. These storage methods are vital vanilla cake troubleshooting tips for keeping your cake delicious for days.
Problem: My Vanilla Cake Sank in the Middle
Why Vanilla Cakes Sink: Common Causes
A sunken vanilla cake is a frustrating sight after watching it rise beautifully in the oven. One of the most common culprits is opening the oven door too early during baking. The influx of cooler air can cause the cake's delicate structure, which hasn't fully set, to collapse. This is especially true during the first two-thirds of the baking time. Another frequent cause is using too much leavening agent (baking powder or baking soda). Excessive leavening produces too much gas too quickly, causing the cake to rise dramatically but then collapse as the structure can't support the rapid expansion.
Overmixing the batter after adding flour can also contribute to sinking. While undermixing can lead to tunnels, overmixing develops gluten, making the batter too strong and elastic. This developed gluten can sometimes prevent the cake from rising evenly, or it can cause the structure to become too tight, leading to cracking and sinking.
Furthermore, baking at too low a temperature, or an oven temperature that fluctuates significantly, can result in uneven baking where the outside sets before the inside, leading to collapse. Extreme temperature changes upon removing the cake from the oven can also sometimes cause a slight dip. These are key areas to examine when troubleshooting vanilla cake sinking issues.
Troubleshooting Sunken Vanilla Cake: Solutions and Prevention
Adjusting Oven Temperature for Even Baking
Ensuring an accurate and stable oven temperature is critical to prevent a sunken vanilla cake. Use an oven thermometer to verify your oven's temperature setting. If it runs cool, adjust the thermostat accordingly. Preheat the oven thoroughly for at least 15-20 minutes after it indicates it's reached the target temperature. This ensures the oven cavity is uniformly hot, which promotes even rising. Place the cake pan in the center of the oven rack, away from the walls, to allow heat to circulate freely around the pan.
Avoid placing multiple large items in the oven at once, as this can lower the overall temperature and disrupt airflow. If your oven has hot spots, you might gently rotate the cake halfway through the baking time, but do this quickly to minimize heat loss. Consistent heat allows the cake to rise and set gradually and evenly from the edges to the center, preventing the middle from collapsing. Monitoring and adjusting your oven temperature is a fundamental vanilla cake troubleshooting tip.
Avoiding Overmixing to Prevent Collapse
Careful mixing is essential to prevent a sunken vanilla cake. As discussed earlier, overmixing after adding the dry ingredients develops gluten, which can lead to structural issues like sinking. Mix the batter just until the dry ingredients are incorporated and no streaks of flour are visible. Use a low speed on your mixer or a spatula to gently fold in the final ingredients. It's better to have a few small lumps of flour than a perfectly smooth, overmixed batter.
The initial creaming of butter and sugar is the stage where vigorous mixing is needed to incorporate air. However, once the wet and dry ingredients are added alternately, the mixing should be minimal. Pay attention to the texture of the batter; it should be smooth but not overly elastic or "ropy." Understanding the purpose of each mixing stage and stopping at the right point is a crucial vanilla cake troubleshooting tip for achieving a stable structure.
Ensuring Proper Leavening for a Stable Cake
Using the correct amount and type of leavening agent (baking powder or baking soda, or both) as specified in the recipe is vital for a stable rise. Too much leavening will cause the cake to rise too quickly and dramatically, making it prone to collapse in the center as it cools. Ensure your leavening agents are fresh.
Baking powder can lose its potency over time; you can test its freshness by adding a teaspoon to a quarter cup of hot water – it should fizz vigorously. Baking soda can be tested by adding a quarter teaspoon to a tablespoon of vinegar – it should bubble immediately.
Expired leavening won't provide enough lift, resulting in a dense cake (another common problem). Using fresh, properly measured leavening ensures a steady, controlled rise that the cake's structure can support throughout the baking process. Also, ensure other ingredients like eggs and butter are at room temperature, as they contribute to the emulsification and structure that support the rise. These are key vanilla cake troubleshooting tips for a cake that rises and stays risen.
Problem: My Vanilla Cake is Crumbly
Understanding a Crumbly Vanilla Cake
A crumbly vanilla cake lacks cohesion; instead of slicing cleanly, it falls apart easily. One of the most common causes is too little moisture or fat in the batter. Fat, such as butter or oil, coats the flour particles, inhibiting gluten development and tenderizing the crumb. If there isn't enough fat, the gluten network becomes too strong and brittle, leading to crumbling. Similarly, insufficient liquid prevents the flour from hydrating properly, resulting in a dry, crumbly texture. For example, reducing the butter by just 25% in a standard recipe can significantly impact the cake's tenderness and increase crumbling.
Overbaking is another major culprit for a crumbly cake. As a cake bakes past its ideal time, moisture evaporates, leaving the structure dry and fragile. The heat continues to set the proteins and starches, making them rigid and prone to breaking apart.
Using the wrong type of flour can also contribute; flours with higher protein content (like bread flour, around 12-14% protein) develop more gluten than lower-protein flours (like cake flour, 7-8% protein), which is undesirable for a tender cake crumb. Overworking the dough, even slightly, can also activate too much gluten, making the cake tough and crumbly instead of soft and tender. These are important considerations when troubleshooting vanilla cake crumbling.
Troubleshooting Crumbly Vanilla Cake: Solutions and Prevention
Using the Right Flour for Cake Baking
The type of flour used significantly impacts cake texture. For a tender, less crumbly vanilla cake, cake flour is often preferred over all-purpose flour. Cake flour has a lower protein content (typically 7-8%) compared to all-purpose flour (10-12%). Less protein means less potential for gluten development, resulting in a softer, finer, and less crumbly crumb. If a recipe calls for cake flour, use it. If it calls for all-purpose flour, be extra careful not to overmix.
You can approximate cake flour by removing two tablespoons of all-purpose flour per cup and replacing them with two tablespoons of cornstarch, then sifting them together several times. This reduces the effective protein content. Always measure flour accurately, preferably by weight, as overmeasuring is a direct path to a dry, crumbly cake. Ensuring the correct flour type and measurement is a fundamental vanilla cake troubleshooting tip for crumbly texture.
Adding Fat for a Tender Crumb
Fat is a tenderizer in cakes; it shortens the gluten strands, creating a softer texture. Ensure your recipe has an adequate amount of fat (butter, oil, or a combination) and that you measure it accurately. Using ingredients at the correct temperature is also important; room temperature butter creams properly with sugar, incorporating air and distributing fat evenly throughout the batter, which is essential for preventing crumbling. If a recipe consistently yields a crumbly result, you might consider slightly increasing the fat content (e.g., by 10-15%) in future attempts, provided it doesn't throw off the liquid balance too much.
Using fats like oil can sometimes result in a moister, less crumbly cake than butter, as oil is 100% fat whereas butter is about 80-82% fat and 18-20% water. Some recipes benefit from a combination of butter (for flavor) and oil (for moisture). Ingredients like sour cream, yogurt, or buttermilk also add fat and acidity, which helps tenderize the crumb and reduce crumbling. These additions are valuable vanilla cake troubleshooting tips for improving texture.
Preventing Overbaking to Avoid Crumbling
Overbaking is a primary cause of dry and crumbly vanilla cakes because it removes too much moisture. Use the doneness tests mentioned earlier – a toothpick inserted into the center should come out with a few moist crumbs, not completely clean, and the cake should spring back gently when lightly pressed. Start checking for doneness at the earliest recommended time in the recipe.
Using an accurate oven thermometer ensures you are baking at the correct temperature, preventing the cake from drying out too quickly. If you see the edges browning too fast, consider reducing the oven temperature slightly or tenting the cake loosely with aluminum foil.
Cooling the cake properly is also important; while it needs to cool in the pan for a short time (usually 10-15 minutes) before inverting onto a rack, leaving it in the hot pan for too long can continue the cooking process and dry it out. Preventing overbaking is a critical vanilla cake troubleshooting tip for a moist, tender crumb.
Problem: My Vanilla Cake Has a Tough Crust
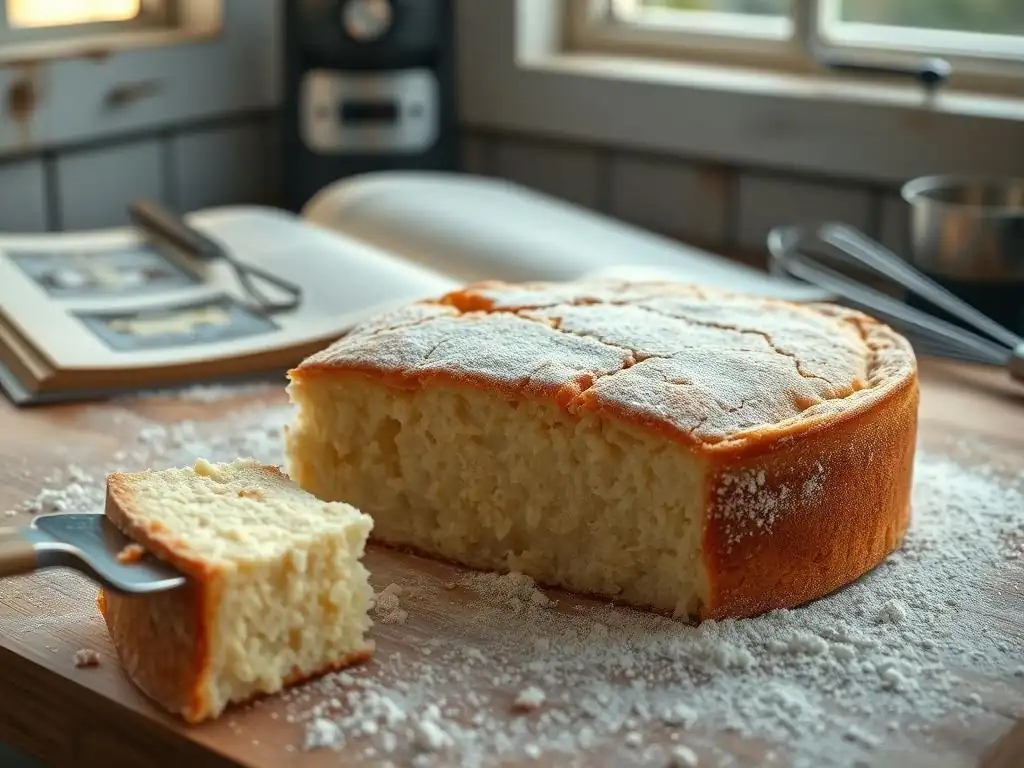
Identifying the Causes of a Tough Crust
A tough crust on your vanilla cake can detract from an otherwise perfect bake. One significant cause is baking at too high a temperature. Excessive heat causes the outside of the cake to set and brown too quickly before the inside is fully baked, leading to a thick, hard crust. Similarly, baking for too long, even at the correct temperature, can dry out the outer layer excessively, resulting in toughness. The sugar content in the batter caramelizes and hardens with prolonged heat exposure, contributing to a tougher crust.
Another factor can be insufficient fat or moisture in the batter, particularly near the surface. Fat and moisture keep the cake tender. If the recipe is lean or if moisture evaporates too rapidly from the surface during baking, the crust will become hard. Using the wrong type of pan (e.g., a dark metal pan that absorbs and radiates heat more intensely than a light-colored pan) or placing the cake too close to a heating element can also cause the crust to become tough and overly browned. Troubleshooting vanilla cake crust issues often involves managing heat and moisture.
Troubleshooting Tough Vanilla Cake Crust: Solutions and Prevention
Adjusting Baking Time and Temperature for a Softer Crust
To prevent a tough crust, ensure your oven temperature is accurate using an oven thermometer. If your oven runs hot, reduce the temperature slightly (e.g., by 10-15°F or 5-8°C) and potentially increase the baking time slightly, checking for doneness frequently. Baking at a slightly lower temperature for a longer time allows the cake to bake through more evenly, giving the crust more time to set without becoming overly hard.
Always start checking for doneness at the minimum time suggested in the recipe. Overbaking is a major cause of tough crusts. Use the toothpick or skewer test, looking for moist crumbs rather than a completely clean skewer. If the cake is browning too quickly on the top but the center is still raw, the temperature might be too high, or the rack position is incorrect. Adjusting the baking time and temperature is a key vanilla cake troubleshooting tip for a tender crust.
Covering the Cake During Baking
If you consistently get a tough crust, especially on the top, consider covering the cake loosely with aluminum foil partway through the baking process. Once the cake has risen and the top is set but not yet deeply golden brown (usually after about 20-30 minutes for a standard layer cake), loosely tent the pan with foil. This shields the top from direct heat, preventing it from drying out and hardening while allowing the inside to finish baking.
Ensure the foil is tented so it doesn't touch the cake's surface. This simple technique is particularly useful if your oven has strong top heat or if you are baking at a slightly higher altitude where things tend to dry out faster. Using a light-colored metal baking pan or even a glass pan can also help prevent the crust from becoming too dark or tough compared to dark, non-stick pans which absorb more heat. These are practical vanilla cake troubleshooting tips for crust texture.
Preventing Overbaking
As mentioned for dry and crumbly cakes, preventing overbaking is also crucial for avoiding a tough crust. The longer a cake bakes, the more moisture it loses, and the harder the outer layers become. Rely on visual cues and doneness tests (toothpick test, cake pulling away from the sides, springiness) rather than strictly following the recipe time, as ovens and pan materials vary.
If you are unsure, it's better to underbake slightly (a few moist crumbs on the skewer) than to overbake, which can result in a cake that is both dry inside and tough outside. Removing the cake from the oven at the first sign of doneness, and allowing it to cool properly, helps ensure the crust remains tender. These are essential vanilla cake troubleshooting tips for achieving the desired soft crust.
Problem: My Vanilla Cake is Not Rising Properly
Understanding the Reasons for Poor Rise
A vanilla cake that doesn't rise properly can be disappointing, resulting in a flat, dense layer instead of a fluffy cake. The most common cause is inactive or insufficient leavening. Baking powder and baking soda create gas bubbles (carbon dioxide) when they react with liquid and/or acid and heat. If your leavening agents are old or expired, they won't produce enough gas to lift the batter. For instance, baking powder typically has a shelf life of 6-12 months once opened.
Another reason for poor rise is an incorrect oven temperature. If the oven is too cool, the leavening reaction won't be activated effectively, and the cake's structure will set too slowly, preventing it from achieving full height. Conversely, if the oven is too hot, the crust can set prematurely, trapping the gases inside and preventing the cake from rising properly in the center, or sometimes causing it to dome excessively and then flatten.
Improper mixing techniques can also hinder rise; overmixing can develop too much gluten, creating a batter that's too stiff to rise easily, while undermixing might not distribute the leavening evenly. Cold ingredients can also affect leavening effectiveness. These factors are key when troubleshooting vanilla cake rising issues.
Troubleshooting Vanilla Cake Not Rising: Solutions and Prevention
Checking the Expiration Date of Leavening Agents
The first step when troubleshooting poor rise is to check the freshness of your baking powder and baking soda. Look at the expiration date on the package. Even if not expired, if the container has been open for a long time, the leavening agents may have lost potency. Store them in airtight containers in a cool, dry place.
To test baking powder: Place 1 teaspoon in 1/4 cup of hot water. It should bubble immediately and vigorously. If the reaction is weak or non-existent, the baking powder is likely expired. To test baking soda: Place 1/4 teaspoon in 1 tablespoon of vinegar or lemon juice. It should fizz immediately. If there's no reaction, replace it. Using fresh leavening is perhaps the most critical vanilla cake troubleshooting tip for ensuring a good rise.
Ensuring Proper Oven Temperature for Rising
Accurate oven temperature is vital for activating leavening agents and achieving a proper rise. Use an oven thermometer to confirm your oven is heating to the temperature set on the dial. Preheat your oven for at least 15-20 minutes after it reaches the target temperature to ensure the heat is stable and even throughout.
Baking at the correct temperature allows the leavening reaction to occur efficiently and the cake's structure to set at the right pace, supporting the rise. If your oven temperature is consistently off, you'll need to adjust your baking temperature accordingly. Baking in the center of the oven helps ensure even heat distribution, contributing to a uniform rise across the cake. Temperature management is a fundamental vanilla cake troubleshooting tip for achieving good height.
Avoiding Overmixing to Encourage Rise
While undermixing can leave pockets of flour, overmixing after the dry ingredients are added is a common cause of poor rise and dense texture. Overmixing develops gluten, creating a strong, elastic network that makes the batter too tough to expand easily from the gas produced by the leavening agents. Mix the batter just until the dry ingredients are combined and no streaks of flour remain.
Using room temperature ingredients also helps ensure proper emulsification and distribution of leavening agents and fats throughout the batter. Cold ingredients can make the batter stiff and less likely to rise evenly. Gentle handling of the batter after mixing, such as pouring it carefully into the pan rather than vigorously scraping, also helps preserve the air bubbles incorporated during the creaming and mixing stages, which contribute to the cake's lift. These mixing and handling tips are important vanilla cake troubleshooting tactics for a better rise.
Problem: My Vanilla Cake Tastes Bland
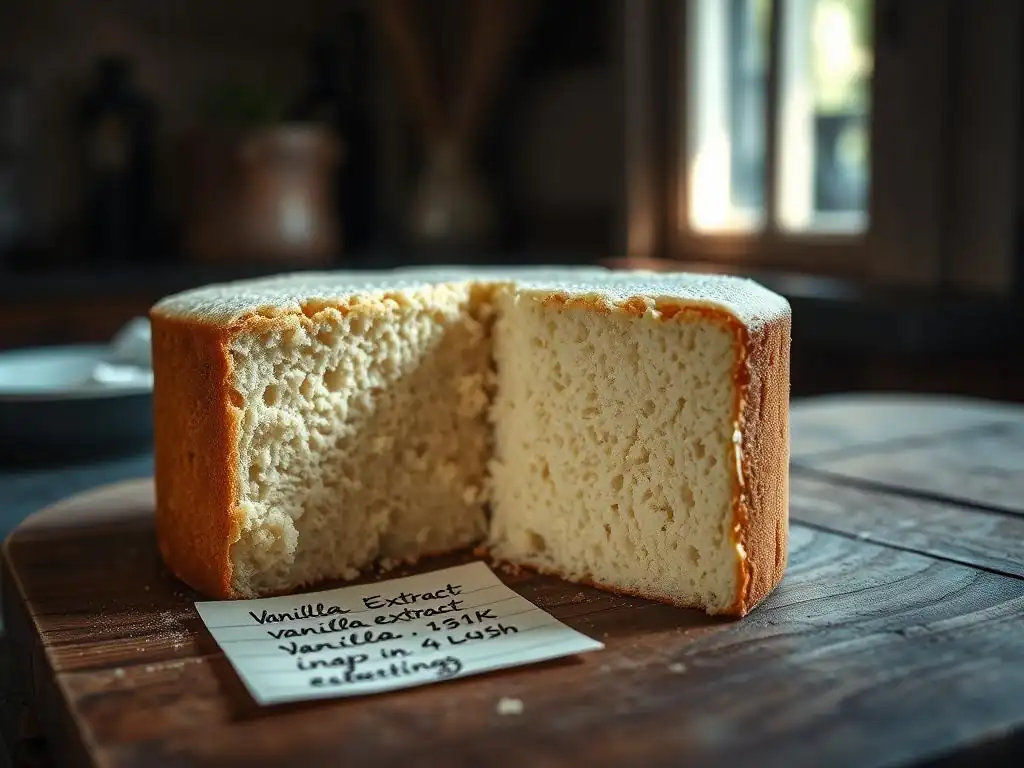
Identifying Reasons for a Bland Taste
A vanilla cake should have a delightful, distinct vanilla flavor. If yours tastes bland or merely sweet without that characteristic warmth, several factors could be at play. The most obvious reason is using insufficient vanilla extract. Recipes vary, but a standard layer cake often requires at least 1 to 2 teaspoons of good-quality vanilla extract to provide noticeable flavor. Using less than this amount can result in a weak vanilla presence.
The quality of the vanilla extract itself is paramount. Imitation vanilla extract, while more affordable, lacks the complex flavor compounds found in pure vanilla extract derived from vanilla beans. Using imitation vanilla can result in a less pronounced and sometimes slightly artificial taste.
Another factor is the balance of flavors in the cake; sometimes, a lack of salt can make a cake taste bland, as salt enhances the perception of sweetness and other flavors. Overpowering flavors from other ingredients (though less likely in a simple vanilla cake) could also mask the vanilla. These are key areas to consider when troubleshooting vanilla cake flavor issues.
Troubleshooting Bland Vanilla Cake: Solutions and Prevention
Enhancing Vanilla Flavor
To ensure your vanilla cake has a rich, prominent vanilla flavor, make sure you are adding enough vanilla extract as specified in the recipe. Don't be shy with the vanilla! For a standard cake recipe using 1.5-2 cups of flour, 1.5 to 2 teaspoons of vanilla extract is usually appropriate. You can even add a touch more if you desire a very strong vanilla presence, though adding excessively large amounts might affect the liquid balance slightly.
Consider adding vanilla in different forms. Some recipes benefit from using both vanilla extract and vanilla bean paste or seeds scraped from a vanilla bean. Vanilla bean paste provides those visible specks and a more intense, complex flavor profile than extract alone. Adding vanilla to the liquid ingredients before combining with dry ingredients can help distribute the flavor evenly throughout the batter. These are effective vanilla cake troubleshooting tips for boosting flavor.
Using High-Quality Vanilla Extract
The quality of your vanilla extract makes a significant difference in the final taste of your vanilla cake. Opt for pure vanilla extract made from real vanilla beans, rather than imitation vanilla extract. Pure vanilla extract contains hundreds of flavor compounds that contribute to a rich, nuanced vanilla flavor, while imitation vanilla is typically made from vanillin derived from lignin or other sources, offering a simpler, less complex taste.
Different types of pure vanilla extract (e.g., Madagascar Bourbon, Mexican, Tahitian) have slightly different flavor profiles. Madagascar Bourbon vanilla is the most common and offers a classic, sweet, creamy vanilla flavor that is excellent in baked goods. Experimenting with different types can also enhance your vanilla cake experience. Investing in a good quality pure vanilla extract is one of the best vanilla cake troubleshooting tips for achieving great flavor.
Balancing Flavors to Improve Taste
Sometimes, a cake tastes bland not just because of insufficient vanilla, but because the overall flavor profile is unbalanced. Salt is a critical ingredient in baking for enhancing sweetness and bringing out other flavors, including vanilla. Ensure you are adding the amount of salt specified in the recipe, using a fine-grained salt like table salt or fine sea salt for even distribution. Omitting salt entirely can make a cake taste flat and overly sweet.
Ensure other ingredients like sugar and butter are measured correctly. Too little sugar can result in a less flavorful cake, while too much can be cloying and potentially mask the vanilla flavor. High-quality butter also contributes richness and depth of flavor. By ensuring all ingredients are accurately measured and of good quality, you create a balanced foundation that allows the star flavor – vanilla – to shine through. These balancing acts are important vanilla cake troubleshooting tips for overall deliciousness.
General Vanilla Cake Baking Tips for Success
Ingredient Quality Matters
The quality of your ingredients directly impacts the quality and flavor of your vanilla cake. Using fresh, high-quality butter (preferably unsalted, so you can control the salt level), fresh eggs, and good pure vanilla extract will make a noticeable difference compared to using lower-quality or older ingredients. Flour should be stored properly and used within its shelf life.
Even staples like sugar can vary; fine-grained granulated sugar dissolves better and contributes to a finer crumb than coarser varieties. Ensure dairy ingredients like milk or buttermilk are fresh. While this guide focuses on troubleshooting vanilla cake problems, starting with the best possible ingredients is the first step in preventing many issues from occurring in the first place.
Accurate Measurements are Key
We've touched on this repeatedly throughout the troubleshooting sections because it is fundamental. Baking is often described as a science, and accurate measurement is like performing a scientific experiment correctly. Using a kitchen scale for dry ingredients like flour and sugar is the most precise method. For liquids, use clear liquid measuring cups at eye level.
Using the wrong size pan can also affect baking time and outcome; a pan that is too large will result in a thin, potentially dry cake, while one that is too small can overflow or result in a dense, underbaked center. Consistency in measurement is a vital vanilla cake troubleshooting tip that prevents a multitude of issues before they even arise.
Understanding Your Oven
Every oven is different. Using an oven thermometer is essential for knowing your oven's true temperature and identifying potential hot spots. Preheat your oven fully before putting the cake in. Avoid opening the oven door unnecessarily during baking, especially during the first 20-25 minutes for a standard layer cake, as this causes temperature fluctuations that can negatively impact rise and texture.
Knowing how your oven behaves – whether it runs hot or cool, has uneven heating – allows you to make necessary adjustments to temperature and baking time, significantly improving your baking success and providing valuable insight for vanilla cake troubleshooting.
Cooling Your Cake Properly
The cooling process is just as important as baking for the final texture and stability of your vanilla cake. Allow the cake to cool in the pan on a wire rack for the amount of time specified in the recipe (usually 10-15 minutes). This allows the cake's structure to set slightly before being handled. Cooling on a wire rack is crucial because it allows air to circulate around the entire pan, preventing the bottom from becoming soggy from trapped steam.
After the initial cooling in the pan, invert the cake onto the wire rack to cool completely. Cooling completely before frosting or storing prevents condensation, which can make the cake gummy or cause frosting to melt. For best results, some cakes are even better the day after baking, as the moisture and flavors settle. Proper cooling is an often-overlooked vanilla cake troubleshooting step that impacts final texture.
Conclusion: Mastering Vanilla Cake Baking with BakeWithEase
Baking a perfect vanilla cake is a rewarding experience, and encountering problems is a normal part of the learning process. By understanding the common issues and applying these vanilla cake troubleshooting tips, you can diagnose what went wrong and adjust your technique for future bakes. From preventing dense textures caused by overmixing to ensuring a moist crumb by avoiding overbaking, each tip brings you closer to baking success.
Remember that baking is also about practice and patience. Don't be discouraged by a less-than-perfect cake. Instead, use it as a learning opportunity, consult this guide for vanilla cake troubleshooting advice, and try again. With attention to detail in measuring, mixing, baking temperature, and cooling, you'll soon be baking consistently delicious vanilla cakes that are light, moist, and full of flavor.
Further Resources for Vanilla Cake Recipes and Techniques on BakeWithEase.com
Explore our collection of vanilla cake recipes on BakeWithEase.com, featuring step-by-step instructions designed for bakers of all levels. Find recipes ranging from simple one-layer cakes perfect for beginners to more elaborate layered creations.
- Browse our Vanilla Cake Recipes section for tried-and-true formulas.
- Check out our Baking Techniques articles for in-depth guides on creaming butter and sugar, measuring ingredients accurately, and understanding leavening agents.
- Visit the Tips and Tricks section for general baking advice that complements these vanilla cake troubleshooting tips.
- Discover variations like Buttermilk Vanilla Cake or Oil-Based Vanilla Cake for different textures and moisture levels, which can help address some common problems.
Frequently Asked Questions
How do I prevent my vanilla cake from being dry?
A dry vanilla cake is often caused by overbaking or using too much flour. Try reducing baking time or carefully measuring ingredients.
Why did my vanilla cake sink in the middle?
Sinking often indicates the cake was underbaked or there was too much liquid in the batter. Check the cake's internal temperature with a toothpick.
My vanilla cake is too dense. What went wrong?
A dense cake can result from overmixing the batter after adding flour, which develops too much gluten. Gently fold in the dry ingredients.
How can I achieve a moist and flavorful vanilla cake?
Using high-quality vanilla extract and adding sour cream or buttermilk can significantly enhance both moisture and flavor.
What if my vanilla cake sticks to the pan even after greasing?
Even with greasing, use parchment paper at the bottom of the pan. Make sure the pan is properly greased and floured before adding the batter.
Final Reflection: The Sweet Science of Troubleshooting
The seemingly simple vanilla cake holds a surprising amount of power; its delicate nature reveals the importance of precision and patience in baking, a lesson applicable far beyond the kitchen. A perfectly risen, moist, and flavorful vanilla cake is a testament to understanding the subtle interplay of ingredients and technique, and troubleshooting its common pitfalls offers valuable insights into the entire baking process. This understanding isn't just about cake; it's about problem-solving and the rewarding feeling of mastering a craft.
The enduring appeal of the vanilla cake lies in its versatility and the emotional connection it fosters. It's a cake that transcends generations, a comforting presence at celebrations and everyday moments alike. The challenges encountered while baking it – from fallen centers to dry crumb – are opportunities for growth and learning. The best way to find yourself is to lose yourself in the service of others,
while not directly about baking, speaks to the dedication and attention to detail required to perfect a vanilla cake, and indeed, to master any skill. This dedication, this attention to detail, is what makes the process so rewarding.
Now, consider your own baking journey. What challenges have you faced? What have you learned from those experiences? Don't be afraid to experiment, to embrace the imperfections, and to learn from your mistakes. The next time you encounter a baking challenge, remember the lessons learned here. Approach it with curiosity, patience, and a willingness to troubleshoot. The perfectly baked vanilla cake, and the satisfaction that comes with it, awaits.
Here's a Call to Action (CTA) for the BakeWithEase Vanilla Cake Troubleshooting Guide, following the provided instructions:
Unleash Your Inner Baker: Conquer Cake Challenges!
Thanks for taking the time to explore our Vanilla Cake Troubleshooting Guide! We hope you now feel more confident in tackling those tricky baking moments. Ready to put your newfound knowledge to the test?
- Bake your perfect vanilla cake today! Experiment with the tips and tricks you’ve learned and see the amazing results. Let your creativity shine!
- Share your baking triumphs (and even your flops!) with us on social media using #BakeWithEaseVanilla. We love seeing your creations!
- Challenge a friend to a baking showdown – vanilla cake edition! See who can create the most delicious (and visually appealing) cake.
Ready to transform your baking game? What delicious vanilla cake creation will you make first?