
Whipping Perfect Meringues and Cream: Unleash Your Stand Mixer's Power

Welcome to BakeWithEase, your culinary compass in the world of baking! Ever wondered how to achieve that flawlessly glossy, sky-high meringue? This time, we're diving deep into the secrets of your stand mixer with our guide: " Whipping Perfect Meringues and Cream: Unleash Your Stand Mixer's Power." Unlock the potential of your favorite baking tool and discover the professional-quality results you've always dreamed of. Ready to transform your meringue game? Let's get started!
- Why Use a Stand Mixer for Meringues and Cream?
- Understanding the Science Behind Meringues and Cream
- Perfect Meringue Recipe Stand Mixer: A Step-by-Step Guide
- Whipping Perfect Cream in Your Stand Mixer: A Creamy Dream
- Troubleshooting Common Meringue and Cream Problems
- Stand Mixer Meringue Recipe Variations: Explore New Flavors
- Beyond the Basics: Creative Uses for Perfect Meringues and Whipped Cream
- Maintaining Your Stand Mixer for Optimal Performance
- Conclusion: Unleash Your Stand Mixer's Potential for Baking Excellence
- Frequently Asked Questions
- Final Reflection: The Sweet Science of Stand Mixer Mastery
- Unlock Your Inner Pastry Chef!
Why Use a Stand Mixer for Meringues and Cream?
While hand mixers and even whisks can get the job done, the stand mixer truly shines when tackling delicate tasks like whipping egg whites into a glossy meringue or transforming heavy cream into billowy clouds. Its consistent power and stable base offer significant advantages that are hard to replicate manually, especially when aiming for professional-level results in your home baking. Using a stand mixer simplifies these often finicky processes, making them accessible and less intimidating for bakers of all levels.
The robust motor and specialized attachments of a stand mixer provide the continuous, high-speed motion necessary to incorporate air efficiently and create stable structures in both meringues and whipped cream. This is particularly important for achieving the correct volume and texture required for various recipes, from light-as-air meringue cookies to stable whipped cream toppings that hold their shape. Investing in understanding how your stand mixer handles these tasks is key to unlocking its full potential in your baking adventures.
Consistent Results: Achieving Perfect Peaks Every Time
One of the primary benefits of using a stand mixer for meringues and cream is the unparalleled consistency it provides. Manual whipping can lead to fatigue, inconsistent speed, and ultimately, uneven incorporation of air. A stand mixer, once set to the correct speed, maintains that velocity throughout the process, ensuring that the egg whites or cream are whipped uniformly. This reliability means you're much more likely to achieve those desirable stiff, glossy peaks for your perfect meringue recipe stand mixer, or perfectly soft, voluminous peaks for your whipped cream, batch after batch.
Consider the difference between hand-whipping egg whites for 10-15 minutes versus letting a stand mixer run for just 5-8 minutes. The stand mixer's consistent speed and powerful whisk attachment break down the protein bonds in the egg whites more efficiently and build a stable foam structure without tiring your arm. This consistency is crucial, especially when dealing with delicate recipes like a classic French meringue or a stable Swiss meringue, where the texture directly impacts the final product's success. This reliability is a major reason why a stand mixer is often recommended for ambitious baking projects.
Hands-Free Convenience: Multitask While Your Meringue Sets
The hands-free operation of a stand mixer is a game-changer in the kitchen. Whipping meringue or cream by hand requires constant attention and effort, tying you to the bowl for extended periods. With a stand mixer, you can simply attach the whisk, turn on the machine, and walk away (though keeping an eye on the progress is always wise!). This allows you to simultaneously work on other components of your recipe, preheat the oven, prepare your baking sheets, or clean up as you go.
Imagine you're making a Pavlova, which requires a significant amount of meringue. While your stand mixer is busy whipping the egg whites to stiff peaks for your perfect meringue recipe stand mixer, you can be preparing the fruit topping, making a pastry cream filling, or getting your baking station ready. This multitasking capability significantly streamlines the baking process, saving you time and effort, and making complex recipes feel much more manageable. It transforms potentially tedious tasks into passive ones, freeing you up for other essential steps.
Speed and Efficiency: Faster Whipping for Superior Texture
Stand mixers are significantly faster and more efficient at whipping than manual methods. Their powerful motors and optimized whisk attachments are designed to incorporate air rapidly and effectively. This speed is not just about saving time; it also contributes to a better final texture. Rapid whipping creates smaller, more uniform air bubbles within the mixture, leading to a smoother, more stable foam structure in both meringues and whipped cream.
For instance, whipping heavy cream by hand can take 5-10 minutes to reach soft peaks, potentially resulting in larger, less stable air pockets. A stand mixer can achieve the same stage in just 2-4 minutes, producing a finer, more stable whipped cream. Similarly, achieving stiff, glossy peaks for a perfect meringue recipe stand mixer might take 15-20 minutes of intense hand-whipping, while a stand mixer can often accomplish this in 7-10 minutes. This increased speed and efficiency not only accelerates your baking but also enhances the quality and stability of your whipped components.
Understanding the Science Behind Meringues and Cream
Delving into the basic science behind how meringues and whipped cream form helps demystify the process and allows you to troubleshoot more effectively. Both rely on incorporating air into a liquid matrix, but the components and mechanisms are quite different. Understanding these scientific principles will give you a deeper appreciation for why certain techniques work and why a stand mixer is so effective at facilitating these transformations.
At its core, baking is applied chemistry, and understanding the interactions between ingredients like egg whites, sugar, and cream is fascinating. When you apply mechanical energy (whipping) with the right conditions, you create stable foams that are essential for countless desserts. Knowing the 'why' behind each step in your perfect meringue recipe stand mixer or whipped cream preparation empowers you to adapt and succeed even when things don't go exactly as planned.
The Meringue Magic: Egg Whites and Sugar's Perfect Union
Meringue is essentially a stable foam created by whipping egg whites. Egg whites are about 90% water and 10% protein. When you whip them, the mechanical action denatures (unfolds) the proteins, particularly albumin. These unfolded proteins then rearrange themselves around the air bubbles being incorporated, forming a network that traps the air. This is the initial foam.
The magic happens when sugar is gradually added. Sugar plays multiple roles: it stabilizes the protein network by binding to the proteins, preventing them from collapsing. It also draws moisture from the protein walls, making the foam structure stronger and less prone to weeping. Furthermore, sugar creates that characteristic glossy sheen of a well-made meringue. The timing and method of adding sugar (slowly, once the egg whites have reached soft peaks) are critical for achieving a stable, shiny, and perfect meringue recipe stand mixer outcome.
Cream Chemistry: Fat Content and Whipping Volume
Whipped cream is a foam formed by incorporating air into heavy cream. Heavy cream is an emulsion of fat globules dispersed in a water phase. When you whip cream, the mechanical action disrupts the membranes surrounding the fat globules, causing them to clump together. These clumps of fat then surround and stabilize the air bubbles being introduced.
The fat content is paramount. Heavy cream, typically containing 30-36% milk fat, whips significantly better and holds its shape longer than lighter creams or milk because it has more fat globules available to form the stabilizing network around the air bubbles. Whipping temperature is also crucial; cold cream whips faster and holds its shape better because the fat globules are firmer and less likely to melt and collapse the foam structure. Understanding this fat-air interaction is key to achieving voluminous, stable whipped cream.
The Role of Temperature: Achieving Optimal Stability
Temperature plays a critical, albeit different, role in the success of both meringues and whipped cream. For meringues, room temperature egg whites whip to a larger volume faster than cold ones. This is because the proteins are more elastic and unfold more easily when warm, allowing them to form a more expansive network around the air bubbles. However, the stability of the final meringue foam is enhanced by the baking process, which dries out and sets the protein structure.
Conversely, cold temperatures are essential for whipping cream. Cold cream (ideally between 35°F and 40°F or 2°C and 4°C) whips much faster and yields a more stable foam. The fat globules in cold cream are harder and less likely to melt during the whipping process, which generates some heat. Cold equipment (bowl and whisk) further helps maintain this low temperature, facilitating quicker whipping and a more robust, stable whipped cream that holds its shape for serving or decorating.
Perfect Meringue Recipe Stand Mixer: A Step-by-Step Guide
Creating a perfect meringue recipe stand mixer is straightforward once you understand the key steps and have the right equipment. This guide focuses on the classic French meringue, which is the simplest to make and serves as a base for many desserts, including meringue cookies, pie toppings, and Pavlovas. Following these steps carefully will help you achieve light, airy, and stable meringues every time you use your stand mixer.
This recipe is designed for clarity and success, breaking down the process into manageable stages. Pay close attention to the visual cues for whipping stages and the specific instructions for adding sugar. Mastery of this basic perfect meringue recipe stand mixer will open the door to exploring more complex variations like Swiss or Italian meringue in the future.
Ingredients for Flawless Meringues
Getting the right ingredients in the correct proportions is the first step towards a perfect meringue recipe stand mixer. Quality and freshness matter, particularly with the egg whites.
Egg Whites, Granulated Sugar, Cream of Tartar, Vanilla Extract
You will need:
- Large Egg Whites: Approximately 4 large egg whites (about 120-140 grams), ideally at room temperature. Room temperature egg whites whip up with more volume.
- Granulated Sugar: 1 cup (about 200 grams). Fine granulated sugar dissolves easily, which is crucial for a smooth meringue.
- Cream of Tartar: 1/2 teaspoon. This acidic powder helps stabilize the egg white foam, making it stronger and less likely to collapse.
- Vanilla Extract: 1/2 teaspoon. Adds a touch of flavor, though optional depending on your desired outcome.
Equipment Checklist: Essential Tools for Meringue Success
Having the right tools prepped and ready ensures a smooth process when following your perfect meringue recipe stand mixer. Cleanliness is paramount, especially regarding the bowl.
Stand Mixer, Stainless Steel Bowl, Whisk Attachment, Measuring Cups
Ensure you have:
- Stand Mixer: Any model with sufficient power will work.
- Stainless Steel Bowl: The stand mixer bowl, preferably stainless steel or glass. Avoid plastic bowls, as they can retain grease residue.
- Whisk Attachment: The wire whisk attachment for your stand mixer.
- Measuring Cups and Spoons: For accurately measuring ingredients.
- Optional: A kitchen scale for precise egg white measurement (recommended for consistency).
Step 1: Preparing Your Stand Mixer and Ingredients
Preparation is key to meringue success. A tiny amount of fat can prevent egg whites from whipping properly, so ensure everything is spotless.
Ensuring a Clean Bowl for Maximum Volume
Before you start, thoroughly clean your stand mixer bowl and whisk attachment. Even a microscopic trace of grease (from fingers, previous baking, etc.) can prevent the egg whites from forming a stable foam. Wash them with hot, soapy water, rinse well, and then wipe them down with a paper towel dipped in a little white vinegar or lemon juice. This acidic wipe helps remove any residual grease and ensures optimal whipping volume for your perfect meringue recipe stand mixer.
Separating Eggs Perfectly: Avoiding Yolk Contamination
Separate your egg whites from the yolks very carefully. The yolk contains fat, and even a tiny drop can ruin your meringue. It's best to separate eggs one at a time into a small bowl first, then transfer the clean egg white to your stand mixer bowl. If any yolk gets into an egg white, discard that white and use a fresh one. Ensure your hands are clean and dry during this process. Using cold eggs for separation can make this step easier, though you'll then need to let the whites come to room temperature.
Step 2: The Whipping Process: Achieving Stiff Peaks
This is where the stand mixer does the heavy lifting. Patience and observation are crucial during the whipping stages.
Gradually Adding Sugar: The Key to Stability
Attach the clean bowl and whisk attachment to your stand mixer. Add the room temperature egg whites and the cream of tartar to the bowl. Begin whipping on medium speed (around 4-6 on a KitchenAid). Whip until the egg whites become foamy and opaque, like soap bubbles.
This usually takes 1-2 minutes. Once you reach this stage, increase the speed to medium-high (around 6-8) and begin adding the granulated sugar very slowly, about 1-2 tablespoons at a time, allowing each addition to dissolve before adding the next. This gradual addition, taking about 5-7 minutes, is vital for building a stable, glossy structure for your perfect meringue recipe stand mixer.
Continue whipping on medium-high speed after all the sugar is added. The mixture will transition from soft peaks (tips curl over) to medium peaks (tips hold slightly) and finally to stiff, glossy peaks. Add the vanilla extract during the last minute of whipping. The total whipping time after adding sugar can range from 5 to 10 minutes, depending on your mixer and the egg whites.
Identifying Stiff Peak Stage: Visual Cues
You know you've reached stiff peaks when the meringue is very thick, smooth, and glossy. When you lift the whisk attachment, the meringue should stand straight up without drooping. You can also test it by carefully tilting the bowl; the meringue should not slide or move. Another test is to rub a tiny bit of meringue between your fingers – it should feel smooth, not gritty, indicating the sugar has fully dissolved. This glossy, stable stage is exactly what you need for a perfect meringue recipe stand mixer that will hold its shape during baking.
If you are unsure, whip for another minute and test again. However, be careful not to over-whip, as this can cause the protein structure to break down, resulting in a grainy, less stable meringue. The visual cue of tall, rigid peaks is your best indicator.
Step 3: Baking and Cooling: Setting Your Meringue
Meringues aren't baked in the traditional sense; they are dried out at a low temperature. This process sets the protein structure and makes them crisp.
Baking Temperature and Time: 200°F (93°C) for 60-90 minutes
Preheat your oven to a very low temperature, typically 200°F (93°C). Line a baking sheet with parchment paper. Gently scoop or pipe your meringue onto the prepared sheet. Leave some space between meringues as they might expand slightly. Place the baking sheet in the preheated oven. The baking time depends on the size and thickness of your meringues. Small meringue kisses might take 60-75 minutes, while larger shapes or a Pavlova base could take 90 minutes or even longer. The meringue should feel firm and dry to the touch and lift easily off the parchment paper when done.
The goal is to dry the meringue out slowly without browning it too much. The low temperature ensures the sugar doesn't caramelize excessively, which would make the meringue chewy rather than crisp. After the initial baking time, you can turn off the oven and leave the meringues inside with the door slightly ajar to cool completely. This slow cooling process is as important as the baking itself for achieving a crisp, dry texture for your perfect meringue recipe stand mixer.
Cooling Techniques: Preventing Cracking and Shrinking
Proper cooling is essential to prevent your perfectly baked meringues from cracking or shrinking. Once the baking time is complete and the meringues are dry, turn off the oven. Leave the meringues inside the oven with the door propped open slightly (a wooden spoon works well) for at least 1-2 hours, or ideally, until the oven is completely cool. This gradual cooling prevents a sudden temperature shock, which can cause the delicate protein structure to contract rapidly and crack.
Avoid moving the meringues while they are still warm and fragile. Once completely cool, they should be crisp throughout. Store cooled meringues in an airtight container at room temperature. Humidity is the enemy of meringues, causing them to become sticky and chewy, so store them away from moisture. Following these cooling steps helps ensure your perfect meringue recipe stand mixer yields beautiful, intact results.
Whipping Perfect Cream in Your Stand Mixer: A Creamy Dream
Whipping cream in a stand mixer is incredibly fast and easy, but it requires attention to detail to avoid over-whipping. The goal is a light, airy, and stable cream that holds its shape. Just like with meringue, having the right temperature and clean equipment are crucial for success.
Using your stand mixer for whipped cream transforms a potentially messy and arm-tiring task into a quick and reliable process. Whether you need a soft dollop for a pie or stiff peaks for piping decorations, your stand mixer can deliver the perfect consistency every time, provided you follow a few simple guidelines.
Choosing the Right Cream: Fat Content Matters
For stable whipped cream that holds its shape, you need heavy cream or whipping cream. Look for a carton labeled "heavy cream" or "heavy whipping cream," which typically contains 36% or more milk fat. "Whipping cream" may have slightly less fat (around 30-35%) and might not hold its shape quite as well for extended periods or intricate piping, but it will still whip up nicely for immediate use.
Avoid using "light cream," "half-and-half," or milk, as they do not have enough fat content to form a stable foam. The higher fat content in heavy cream allows the fat globules to clump together effectively and trap air, creating that desirable fluffy volume and stable structure. Always start with cold cream, straight from the refrigerator, for best results.
Step 1: Chilling Your Bowl and Whisk Attachment
This step is crucial for successful whipped cream, especially in warmer kitchens. Cold cream whips better and faster, and cold equipment helps maintain that low temperature throughout the process. Place your stand mixer bowl and whisk attachment in the refrigerator or freezer for at least 15-20 minutes before you plan to whip the cream.
The cold metal or glass of the bowl helps to keep the cream chilled as it whips. This prevents the fat globules from warming up and potentially melting, which would hinder the formation of a stable foam. Starting with thoroughly chilled equipment gives you a head start and makes it easier to achieve stiff peaks quickly without risking over-whipping. This simple step makes a significant difference in the speed and outcome of your whipped cream.
Step 2: Whipping the Cream: Soft Peaks to Stiff Peaks
Attach the chilled bowl and whisk to your stand mixer. Pour the cold heavy cream into the bowl. Start whipping on medium speed (around 4-6). The cream will initially look foamy, then thicken. As it thickens, increase the speed slightly to medium-high (around 6-8). Keep a close eye on the cream as it progresses through the stages.
Whip until the cream reaches your desired consistency. Soft peaks occur when the cream forms peaks that curl over when the whisk is lifted. Medium peaks hold their shape better but the tips still curl slightly. Stiff peaks stand straight up when the whisk is lifted. This stage happens quickly in a stand mixer, often within 2-5 minutes depending on the quantity of cream and mixer power.
Avoiding Over-Whipped Cream: Recognizing the Signs
Over-whipping cream is a common mistake and happens very quickly in a stand mixer. Past the stiff peak stage, the fat globules continue to clump together, expelling the liquid (buttermilk). The texture will become grainy, then curdled, and eventually, you'll have butter and liquid.
Watch the cream constantly once it starts thickening. Stop whipping the moment it reaches stiff peaks. The surface will look smooth and glossy. If you see the cream starting to look grainy or slightly yellow, you've gone too far. It's better to under-whip slightly and finish by hand if needed than to over-whip and ruin the texture.
Step 3: Sweetening and Flavoring: Enhancing the Cream's Taste
Once the cream has reached the desired peak stage, you can add sugar and flavorings. It's best to add these at the end to avoid interfering with the whipping process.
Flavoring Ideas: Vanilla Extract, Cocoa Powder, Lemon Zest
For classic sweetened whipped cream, add powdered sugar (confectioners' sugar) and vanilla extract. Powdered sugar contains cornstarch, which helps stabilize the whipped cream slightly, though granulated sugar can also be used if whipped in slowly at the beginning. For about 1 cup of heavy cream, start with 1-2 tablespoons of powdered sugar and 1/2 teaspoon of vanilla extract. Gently fold or briefly whip them in on low speed until just combined.
Beyond vanilla, you can explore many flavoring options. Add a tablespoon of unsweetened cocoa powder for chocolate whipped cream, a teaspoon of lemon or orange zest for a bright citrus note, a splash of almond extract, or even a little dissolved instant coffee for a mocha flavor. Always add flavorings at the very end and mix gently to avoid deflating the cream.
Troubleshooting Common Meringue and Cream Problems
Even with a stand mixer, things can occasionally go wrong. Knowing how to identify and address common issues with meringues and whipped cream can save your dessert and your sanity. Most problems relate back to the basic science of foam formation – usually temperature, fat contamination, or whipping technique.
Don't get discouraged if your first attempt isn't perfect. Baking is a skill that improves with practice. Understanding these troubleshooting tips will make you a more confident baker, ready to tackle any perfect meringue recipe stand mixer or whipped cream challenge that comes your way.
Meringue Isn't Stiffening: Potential Causes and Solutions
If your egg whites are whipping but refuse to reach stiff peaks, several factors could be at play. This is a common frustration when attempting a perfect meringue recipe stand mixer.
Egg White Contamination, Humidity
The most common culprit is fat contamination. Even a tiny amount of egg yolk or grease residue on your bowl or whisk can prevent the proteins from forming a stable network. Solution: Ensure all equipment is scrupulously clean and free of any grease. Separate eggs carefully, ideally one by one in a separate bowl. Another factor is humidity. High humidity can prevent the sugar from dissolving properly and can cause the meringue to absorb moisture from the air, inhibiting stiffening.
Solution: Unfortunately, baking meringues on a rainy or very humid day is challenging. Choose a dry day if possible. Ensure your sugar is fresh and stored properly. If using older sugar, you might gently warm it before adding (not hot, just slightly warm) to help it dissolve faster. Using a stabilizer like cream of tartar is also crucial.
Cream Isn't Whipping: Addressing Common Issues
If your heavy cream is just splashing around in the bowl and not thickening, it's usually due to temperature or fat content issues.
Low Fat Content, Warm Cream
The primary reasons cream won't whip are insufficient fat content (you might have accidentally used light cream or half-and-half) or the cream is not cold enough. Solution: Always use heavy cream or heavy whipping cream with at least 36% fat for reliable results. Ensure the cream is straight from the coldest part of your refrigerator (ideally below 40°F/4°C).
Make sure your stand mixer bowl and whisk attachment were thoroughly chilled before you started. If the cream is warming up as you whip, stop, place the bowl and whisk back in the freezer for 10-15 minutes, and then resume whipping. Whipping speed also matters; start on medium and increase to medium-high as it thickens, but avoid low speeds which just churn.
Meringue Cracking During Baking: Prevention Tips
Cracking often occurs due to sudden temperature changes or too high a baking temperature. While some minor cracking is sometimes unavoidable, especially with large meringues, significant cracking can be prevented.
The primary cause is baking at too high a temperature or cooling too quickly. Solution: Ensure your oven temperature is accurate and set to a very low heat (200°F/93°C is standard). Avoid opening the oven door frequently while the meringues are baking. After baking, turn off the oven and leave the meringues inside with the door propped open to cool very gradually to room temperature. This slow cooling allows the structure to set gently without rapid contraction. Over-whipping the meringue can also sometimes contribute to cracking, so stop whipping as soon as stiff, glossy peaks are achieved.
Over-Whipped Cream: Salvaging Techniques
If you've accidentally whipped your cream past stiff peaks and it looks grainy or slightly curdled, don't despair entirely! It's difficult to return it to perfectly smooth whipped cream, but you can often salvage it for certain uses.
If it's just slightly grainy, you can sometimes whisk in a tablespoon or two of cold liquid heavy cream by hand. Gently whisk until the texture smooths out slightly. This might not restore it to perfectly pipeable cream, but it can make it suitable for topping a dessert where a slightly rustic texture is acceptable.
If it's fully separated into butter and buttermilk, you've essentially made butter! You can drain off the liquid (buttermilk) and use the resulting butter, although the yield will be small. The best "salvage" is to watch carefully and stop whipping the moment stiff peaks form, preventing over-whipping in the first place.
Stand Mixer Meringue Recipe Variations: Explore New Flavors
Once you've mastered the basic perfect meringue recipe stand mixer, you can explore different types of meringue and add various flavors to expand your baking repertoire. Each type of meringue has a slightly different texture and stability, making them suitable for various applications, from cookies to buttercreams.
Experimenting with these variations allows you to appreciate the subtle differences that changes in technique and temperature can make. Your stand mixer makes whipping these different types of meringues significantly easier than traditional manual methods, encouraging you to try new things.
Italian Meringue: A More Stable and Silky Option
Italian meringue is made by whipping egg whites while simultaneously pouring in a hot sugar syrup (heated to 240°F - 245°F or 115°C - 118°C). The hot syrup cooks the egg whites as they whip, creating a very stable, safe-to-eat meringue that is smooth and glossy. It is often used for frosting cakes (like a classic lemon meringue pie topping that is then torched) or as a base for stable buttercreams.
To make Italian meringue in your stand mixer, whip the egg whites to soft peaks while simultaneously heating the sugar and water to the correct temperature on the stovetop. Once the syrup reaches temperature, slowly and carefully pour it in a thin stream down the side of the stand mixer bowl while the mixer whips on medium-high speed. Continue whipping until the bowl is cool to the touch and the meringue is thick, glossy, and forms very stiff peaks. This method results in a remarkably stable meringue that holds its shape beautifully.
Swiss Meringue: A Smoother and Glossier Finish
Swiss meringue involves gently heating the egg whites and sugar together over a double boiler (or bain-marie) while whisking constantly until the sugar is dissolved and the mixture reaches about 130°F - 140°F (54°C - 60°C). This mixture is then transferred to the stand mixer and whipped until cool and stiff peaks form. The gentle heating partially cooks the egg whites and dissolves the sugar completely before whipping, resulting in a very smooth, stable, and glossy meringue.
This type of meringue is excellent for piping decorations, as a base for Swiss meringue buttercream (a popular, less sweet frosting), or simply baked into cookies. The pre-dissolved sugar gives it a particularly fine and silky texture compared to French meringue. Using your stand mixer to whip the heated mixture makes the process much easier than attempting it with a hand mixer.
French Meringue: The Simplest, Yet Most Delicate Version
French meringue, as detailed in the perfect meringue recipe stand mixer section above, is the simplest to make as it doesn't involve cooking the egg whites or sugar beforehand. It's made by simply whipping raw egg whites and gradually adding granulated sugar. While the easiest and quickest to prepare, it is also the least stable and should ideally be baked or used immediately.
French meringue is perfect for light, crisp meringue cookies, Pavlova bases that are baked until crisp outside and soft inside, or as a quick topping for pies that will be browned under a broiler. Because the egg whites are not cooked, it's advisable to use pasteurized egg whites if consuming it uncooked (e.g., in mousses). Its delicate nature means it's prone to weeping if exposed to humidity for too long.
Flavored Meringues: Adding Extracts, Zests, and More
Once you have your base meringue, you can easily add flavorings to create exciting variations. For French or Swiss meringue, add extracts (like almond, peppermint, or lemon) or finely grated citrus zest during the last minute of whipping, just after achieving stiff peaks. Be careful not to add too much liquid flavoring, as this can destabilize the meringue.
For Italian meringue, flavorings can often be added to the sugar syrup before heating, or extracts can be beaten in at the end. Consider adding a teaspoon of instant coffee powder dissolved in a tiny amount of water, a few drops of food coloring for vibrant meringue kisses, or folding in finely chopped nuts or chocolate chips after whipping (very gently!). Adding dry ingredients like cocoa powder or freeze-dried fruit powder can also work, but they should be folded in carefully to avoid deflating the foam.
Beyond the Basics: Creative Uses for Perfect Meringues and Whipped Cream
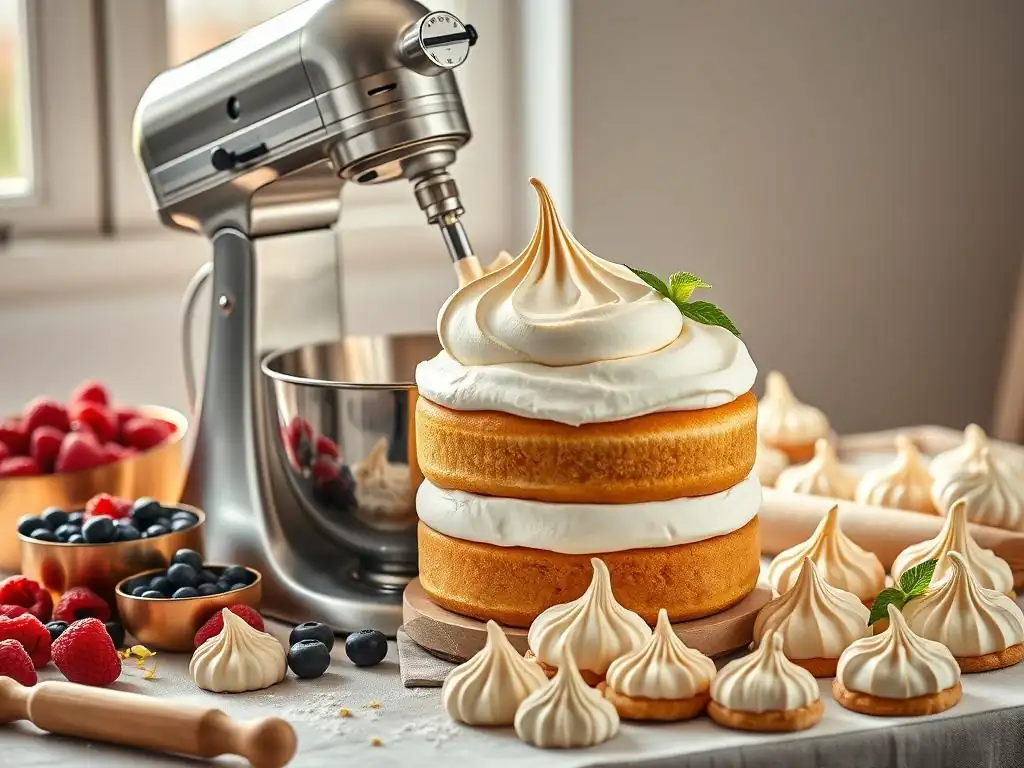
Mastering the perfect meringue recipe stand mixer and stable whipped cream opens up a world of dessert possibilities. These two components are incredibly versatile and can be used in countless ways to elevate your baking creations.
From simple toppings to elaborate centerpieces, knowing how to whip these to perfection with your stand mixer means you're always ready to add a touch of lightness and elegance to your desserts.
Meringue Kisses: A Classic Treat
One of the simplest and most delightful uses for French meringue is baking them into small, crisp "kisses." Simply pipe the stiff, glossy meringue onto a parchment-lined baking sheet using a piping bag fitted with a star or round tip. Bake them at a low temperature (around 200°F/93°C) until completely dry and crisp throughout, typically 60-90 minutes depending on size.
Meringue kisses are naturally low in fat and can be flavored or colored for festive occasions. They make a wonderful light snack or a pretty garnish for cakes and cupcakes. Stored in an airtight container, they stay crisp for several days, making them a great make-ahead component. Using a stand mixer ensures you have enough stable meringue to pipe dozens of these delicate treats efficiently.
Meringue Toppings: Elevating Pies and Desserts
A layer of fluffy meringue is the classic crowning glory for pies like Lemon Meringue Pie or Baked Alaska. Italian or Swiss meringue is often preferred for pie toppings because their cooked nature makes them more stable and safer to eat without additional baking. You can pipe swirls or simply spread the meringue over the cooled pie filling, ensuring it touches the crust all around to prevent shrinking.
The meringue topping is then typically browned using a kitchen torch for a beautiful caramelized finish or placed under a hot broiler for a minute or two (watch constantly!). The contrast between the sweet, airy meringue and the tart filling is a perfect combination. Using your stand mixer allows you to whip up a large batch of stable meringue quickly to generously cover your pie.
Whipped Cream Frosting: A Light and Airy Alternative
While traditional buttercreams are rich and dense, whipped cream makes a wonderfully light and airy frosting. Stabilized whipped cream (made with gelatin, cornstarch, or a commercial stabilizer) can be used to frost cakes and cupcakes. Even unstabilized whipped cream is perfect for filling layer cakes or topping trifles and parfaits just before serving.
A standard recipe often involves whipping cold heavy cream with powdered sugar and vanilla to stiff peaks. For added stability, you can dissolve a teaspoon of gelatin powder in a few tablespoons of cold water, let it bloom, then gently heat it until liquid before whisking it into the cream as it whips. This results in a whipped cream that holds its shape longer, making it suitable for frosting. Your stand mixer handles whipping large batches of cream for frosting with ease.
Pavlova: A Showstopping Meringue Dessert
Pavlova is a spectacular dessert consisting of a large baked meringue shell, typically crisp on the outside and slightly soft and marshmallowy in the center, topped with whipped cream and fresh fruit. It's a fantastic use of a perfect meringue recipe stand mixer. French meringue is commonly used, often with a little cornstarch and vinegar added (per ratio, e.g., 4 egg whites, 1 cup sugar, 1 tsp cornstarch, 1/2 tsp white vinegar) to help create that characteristic soft interior.
The meringue is shaped into a large circle or nest shape on a baking sheet and baked slowly at a low temperature until set and dry. Once cooled, the center is filled with generous amounts of freshly whipped cream (again, made easily in your stand mixer) and piled high with vibrant fresh berries or tropical fruits. It's a relatively simple dessert that looks incredibly impressive.
Maintaining Your Stand Mixer for Optimal Performance
Your stand mixer is an investment and a workhorse in your kitchen, especially if you frequently make meringues and whipped cream. Proper care and maintenance will ensure it continues to perform optimally for years to come, consistently delivering that perfect meringue recipe stand mixer result and fluffy whipped cream.
Taking a few minutes for cleaning and basic care after each use will prevent buildup and keep your attachments in good working order. This isn't just about cleanliness; it's about preserving the mechanics that provide the power and speed you rely on.
Cleaning Your Stand Mixer: Ensuring Longevity
After each use, especially after whipping sticky meringue or fatty cream, it's important to clean your stand mixer thoroughly. Unplug the mixer before cleaning. Wipe down the head and base unit with a damp cloth, avoiding getting water into the motor vents.
The bowl and whisk attachment should be washed immediately after use to prevent meringue or cream from drying and hardening, which makes them much harder to remove. Wash them in hot, soapy water. For stubborn meringue residue, a soak in hot water for a few minutes can help. Ensure the whisk attachment is completely dry before storing to prevent rust, particularly if it's not stainless steel.
Attachment Care: Protecting Your Whisks and Bowls
Different attachments require different care. Your whisk attachment, with its many wires, needs careful cleaning to ensure no residue is left behind. Use a small brush if necessary to get between the wires. Most stainless steel bowls and whisk attachments are dishwasher safe, but check your manufacturer's instructions to be sure. Plastic bowls and coated attachments may require hand washing.
Avoid using abrasive scrubbers on your bowl or attachments, as this can scratch the surfaces, potentially creating spots where grease or food particles can hide, which could negatively impact future meringues or whipped cream. Proper care of your attachments ensures they remain effective at incorporating air and providing the necessary mechanical action.
Regular Maintenance: Keeping Your Mixer Running Smoothly
Beyond daily cleaning, stand mixers benefit from occasional deeper maintenance. Check the attachment hub periodically for any buildup and clean it with a small brush if needed. Some mixers require lubrication of certain parts over time; consult your user manual for specific instructions for your model.
Ensure the head locking mechanism (if applicable) is clean and functioning smoothly. If you notice any unusual noises or performance issues, refer to your manual or contact the manufacturer's support. While stand mixers are built to be durable, a little proactive maintenance can prevent problems down the line and keep your mixer reliably whipping perfect meringues and cream whenever you need them.
Conclusion: Unleash Your Stand Mixer's Potential for Baking Excellence
Your stand mixer is a powerful ally in the kitchen, especially when it comes to mastering the delicate yet rewarding tasks of whipping perfect meringues and cream. By understanding the science behind these processes and leveraging the consistent power and efficiency of your mixer, you can achieve results that are often difficult to replicate by hand. From the basic perfect meringue recipe stand mixer to advanced variations and creative applications, your stand mixer makes these baking endeavors accessible and enjoyable.
Embrace the convenience and capability your stand mixer offers. Practice makes perfect, and with these guidelines and your trusty mixer by your side, you're well on your way to consistently whipping up light-as-air meringues and billowy, stable whipped cream for all your baking needs. So, get your bowl and whisk ready, and unleash the full potential of your stand mixer to elevate your baking to new heights!
Frequently Asked Questions
What makes a meringue "perfect"?
A perfect meringue is characterized by its stiff peaks, glossy appearance, and ability to hold its shape without weeping. Achieving this requires precise techniques and the right ingredients.
Why use a stand mixer for meringue?
Stand mixers offer consistent speed and power crucial for incorporating air into egg whites efficiently. This results in a stable and voluminous meringue that is difficult to achieve by hand.
What are the key ingredients for a successful meringue?
The essential ingredients are fresh egg whites, sugar (granulated or caster), and an acid such as cream of tartar or lemon juice. These components work together to stabilize the egg whites and create a strong structure.
Can I use any type of sugar in a meringue recipe?
While granulated sugar is common, caster sugar dissolves more easily, leading to a smoother meringue. However, adjusting whipping time may be necessary depending on the sugar type used.
What are some common mistakes to avoid when making meringue?
Avoid grease contamination in your bowl or utensils, as this prevents the egg whites from whipping properly. Also, ensure the egg whites are at room temperature for optimal volume.
Final Reflection: The Sweet Science of Stand Mixer Mastery
The pursuit of the perfect meringue, once a laborious task, is now within everyone's reach thanks to the power of the stand mixer. This seemingly simple confection reveals a deeper truth about the intersection of technology and culinary artistry, a truth that resonates far beyond the kitchen. Mastering the meringue, with its delicate balance of air and sugar, is a testament to precision and patience – qualities valuable in all aspects of life.
The journey to the perfect meringue, as detailed in this article, is more than just a recipe; it's a reflection of our evolving relationship with food and technology. The stand mixer, a seemingly simple appliance, has revolutionized baking, allowing us to achieve levels of consistency and precision previously unimaginable. This democratization of culinary skill empowers us all to create something beautiful and delicious. The best things in life are simple, but not easy.
This quote perfectly encapsulates the effort and reward inherent in crafting the perfect meringue, a microcosm of the larger human endeavor to create something meaningful.
Now, consider your own "meringue." What is that seemingly impossible task, that delicate balance you strive for in your own life? Perhaps it's a challenging project at work, a complex personal relationship, or even the pursuit of a long-held dream. Remember the lessons learned here: precision, patience, and the power of the right tools. Embrace the process, allow yourself to experiment, and don't be afraid to adjust your approach. With dedication and the right tools, you too can achieve your own perfect blend of air and substance, creating something truly remarkable.
Unlock Your Inner Pastry Chef!
Thanks for joining us on this delicious journey into the world of perfect meringues and cream! We hope you've gained valuable insights and newfound confidence in your baking abilities. Now it's time to put your knowledge to the test.
- Whip up a batch of your own meringue: Use the techniques you've learned today and experiment with different flavors! Don't be afraid to get creative!
- Share your meringue masterpiece: Post a picture of your creation on social media and tag us – we'd love to see your results! Use #BakeWithEaseMeringues.
- Try a new recipe using your perfectly whipped cream – explore a stunning pavlova or a decadent mousse!
What surprising flavor combinations will you try in your next meringue creation? Let us know in the comments below!