
Turn One Dough into Many: Simple Variations for SliceandBake Beginners


Welcome to BakeWithEase, where baking becomes an adventure! Ever dreamt of effortlessly creating a variety of delicious treats from a single dough? This is your starting point! Dive into our guide, " Turn One Dough into Many: Simple Variations for SliceandBake Beginners," and unlock the secrets to mastering slice and bake cookies. Discover how easy it is to transform one basic recipe into a delightful assortment of flavors. What will your first masterpiece be?
- Slice-and-Bake Cookies: Easy Variations for Beginners
- Baking Made Simple: Mastering Slice-and-Bake Cookies
- Why Slice-and-Bake Cookies are Great for New Bakers
- Basic Vanilla Slice-and-Bake Cookie Dough: The Starting Point
- Flavor Variations: Expanding Your Cookie Options
- Baking Your Cookies Perfectly
- Storing Your Cookies
- Troubleshooting Common Problems
- Recipe Inspiration: Get Creative!
-
Frequently Asked Questions
- How easy are slice-and-bake cookies for a complete beginner?
- What are the main advantages of using slice-and-bake cookie dough?
- Can I customize slice-and-bake cookie dough with different flavors?
- How long does slice-and-bake cookie dough typically last in the refrigerator or freezer?
- What are some common mistakes to avoid when making slice-and-bake cookies?
- Final Reflection: The Enduring Magic of a Simple Cookie
- Unleash Your Inner Baker: Expand Your Slice-and-Bake Skills!
Slice-and-bake cookies are a true revelation for anyone just starting their baking journey. Imagine having delicious, homemade cookies ready to go with minimal effort. This method simplifies the process by allowing you to prepare the dough ahead of time, shape it into logs, chill it, and then simply slice and bake whenever a cookie craving strikes. It eliminates much of the mess and fuss associated with traditional drop cookies or intricate cutouts, making it an ideal starting point for new bakers.
The beauty of mastering basic slice and bake cookies lies in their versatility. Once you have a solid foundation with a simple dough recipe, you can easily transform it into a variety of exciting flavors and textures. This article will guide you through creating a basic dough and then explore several straightforward variations, proving that you don't need complex techniques to bake impressive and tasty treats right from your own kitchen.
One of the biggest hurdles for beginner bakers can be getting consistent results. Slice-and-bake cookies solve this beautifully because the dough is formed into uniform logs before baking. This means that when you slice the chilled dough, each cookie will be roughly the same size and thickness, leading to more even baking across the batch. You won't end up with some cookies that are perfectly golden while others are still pale or, worse, burnt.
This pre-portioning also saves significant time during the actual baking process. Instead of scooping or rolling individual cookies, you simply grab your chilled dough log from the refrigerator or freezer, slice off the desired number of cookies, and place them directly onto the baking sheet. This streamlined approach reduces the overall time spent actively preparing cookies for the oven, making it much less daunting for someone new to baking.
Quick Baking for Busy People
Life can be hectic, and finding time for baking can feel impossible. Slice-and-bake cookies fit perfectly into busy schedules. Because the dough is prepared in advance, you can bake a small batch of cookies in as little as 15-20 minutes from freezer to plate. This is ideal for impromptu guests, a quick dessert after dinner, or simply satisfying a sudden craving without committing to a full baking session.
Imagine having a ready-to-bake dough log in your freezer. When you want a warm cookie, you preheat your oven (typically to 350°F or 175°C), slice off maybe 6-8 cookies, place them on a baking sheet, and they're usually done in 12-15 minutes. Compare this to mixing dough from scratch, which could take 20-30 minutes before baking even begins. The convenience of having easy slice and bake cookies ready means you can enjoy fresh baking whenever you have a few spare minutes.
Simple Recipes, Big Flavors
Slice-and-bake cookie recipes are generally quite straightforward, relying on common pantry staples like flour, sugar, butter, and eggs. The mixing process is often as simple as creaming butter and sugar, adding eggs and vanilla, and then mixing in the dry ingredients. There's no complex yeast activation or intricate dough handling required, making them very approachable for beginners.
Despite their simplicity, these cookies are anything but bland. A basic vanilla dough provides a wonderful canvas for a wide array of flavors. You can easily incorporate mix-ins like chocolate chips, nuts, or dried fruit directly into the dough before shaping the logs. With just a few simple additions, your basic slice and bake cookie dough can be transformed into multiple delicious variations, offering a lot of flavor payoff for minimal effort.
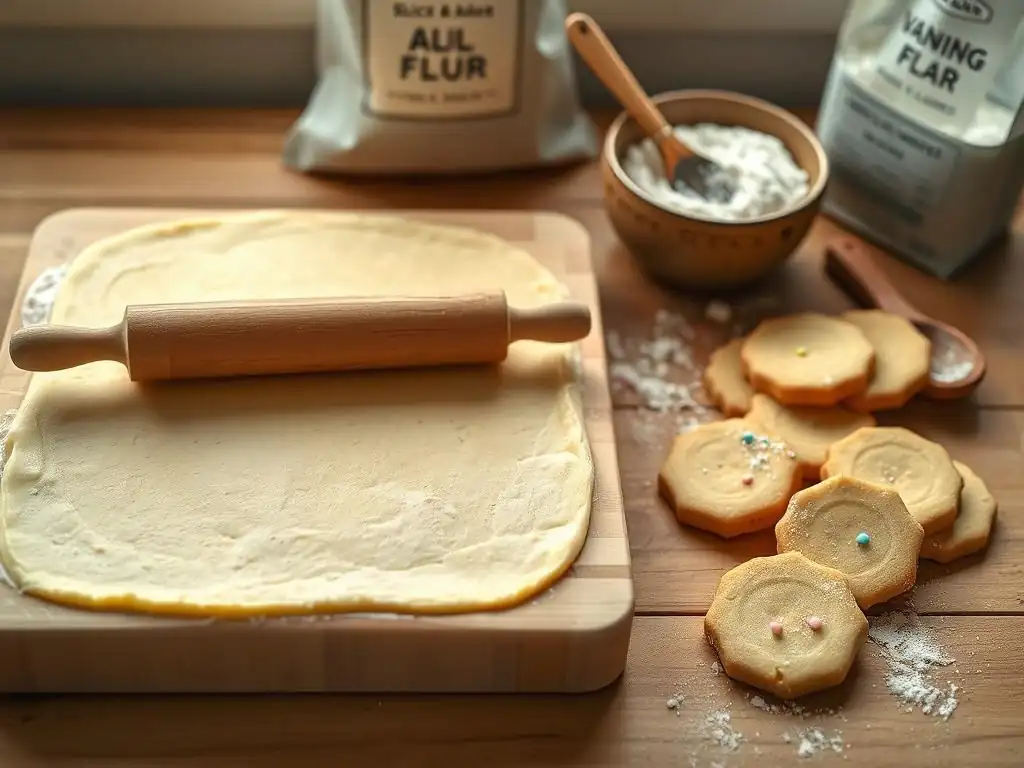
To make a foundational vanilla slice and bake cookie dough, you'll need just a handful of common ingredients. Typically, this includes about 1 cup (2 sticks or 226g) of unsalted butter, softened; around ¾ cup (150g) of granulated sugar; about ½ cup (100g) of packed light brown sugar; 2 large eggs; 1 teaspoon of vanilla extract; 2 ½ cups (315g) of all-purpose flour; 1 teaspoon of baking powder; and ½ teaspoon of salt. Using softened butter is crucial for proper creaming with the sugars, which helps incorporate air and contributes to the cookie's texture.
The combination of granulated and brown sugar adds both sweetness and a slight chewiness to the cookie. The eggs act as a binder, holding the dough together, while vanilla extract provides that classic, comforting flavor. Baking powder gives the cookies a little lift, preventing them from being too dense, and salt balances the sweetness. Having these basic ingredients on hand allows you to whip up a batch of versatile slice and bake cookie dough whenever you're ready to bake.
Dough Preparation: A Step-by-Step Guide
Preparing the basic vanilla slice and bake cookie dough follows a simple process. Start by creaming the softened butter and both sugars in a large bowl until the mixture is light and fluffy, which usually takes about 3-5 minutes with an electric mixer. This step is important for incorporating air into the dough. Next, beat in the eggs one at a time, mixing until fully combined after each addition, followed by the vanilla extract.
In a separate bowl, whisk together the flour, baking powder, and salt. Gradually add the dry ingredients to the wet ingredients, mixing on low speed or by hand until just combined. Be careful not to overmix, as this can result in tough cookies.
Once the dough comes together, divide it in half and shape each half into a log about 1 ½ to 2 inches in diameter. Wrap the logs tightly in plastic wrap and refrigerate for at least 2-3 hours, or until firm enough to slice. This chilling step is essential for easy slicing and prevents excessive spreading during baking.
Achieving the Right Dough Texture
The ideal texture for slice and bake cookie dough is firm but not dry or crumbly. It should hold its shape when rolled into a log and feel slightly pliable but not sticky. If your dough seems too dry after mixing, it might be because you added too much flour or didn't use enough butter or eggs. You can try adding a teaspoon or two of milk or a tiny bit more softened butter, mixing just until the dough comes together.
Conversely, if the dough is too sticky to handle and shape into logs, you might have added too little flour, or your butter wasn't properly softened (too melted). You can try adding a tablespoon or two more flour, mixing it gently until the dough is manageable. Remember, the chilling process will also firm up a slightly soft dough significantly. Aim for a consistency that allows you to roll a smooth log without it sticking excessively to your hands or the counter.
Chocolate Slice-and-Bake: Beyond Basic Chocolate
Transforming your basic dough into chocolate slice and bake cookies is incredibly easy and opens up a world of delicious possibilities. The simplest method is to add chocolate chips or chopped chocolate to the vanilla dough before shaping the logs. For a more intense chocolate flavor throughout the cookie itself, you can modify the dry ingredients slightly by replacing a small amount of the flour (say, ¼ cup) with unsweetened cocoa powder. This gives the cookie base a rich chocolate hue and taste.
When adding chocolate, aim for about ¾ to 1 cup of chips or chopped chocolate per batch of dough (from the basic recipe above). You can gently fold these in after the dry ingredients are just combined. Shaping this dough into logs and chilling allows the chocolate pieces to be evenly distributed throughout the cookies once sliced and baked. This simple addition creates classic chocolate chip slice and bake cookies that are always a crowd-pleaser.
Adding Walnuts and Pecans for Crunch
Introducing nuts like walnuts or pecans adds a wonderful textural contrast and nutty flavor to chocolate slice and bake cookies. After incorporating the chocolate chips or chopped chocolate into your dough, you can fold in about ½ to ¾ cup of chopped nuts. Lightly toasting the nuts beforehand can enhance their flavor even further, though it's not strictly necessary.
The combination of rich chocolate and crunchy nuts creates a more sophisticated cookie experience. The nuts provide a pleasant bite that complements the smooth texture of the cookie dough and the melted chocolate pockets. Ensure the nuts are chopped into relatively small pieces so they distribute evenly within the dough log and don't make slicing difficult.
Using Milk, Dark, and White Chocolate
Don't feel limited to just one type of chocolate! Using a mix of milk, dark, and white chocolate can add complexity and visual appeal to your slice and bake cookies. You could use a combination, like half dark chocolate chips and half milk chocolate chips, or even mix in some white chocolate chunks for sweet, creamy pockets.
Experimenting with different chocolate percentages in dark chocolate (from 60% cacao up to 80%+) will also impact the final flavor, offering varying degrees of bitterness and richness. Using chopped chocolate bars instead of chips often results in better melting and larger pools of chocolate in the baked cookie. A combination adds layers of flavor that elevate a simple slice and bake cookie.
Creating Double Chocolate Chunk Cookies
For serious chocolate lovers, double chocolate chunk slice and bake cookies are a must-try. This variation starts with a chocolate-flavored dough base (by adding cocoa powder as mentioned earlier) and then incorporates generous chunks of chocolate. Using chopped chocolate bars rather than chips works best here, as they create larger, more irregular pockets of melted chocolate.
Aim for about 1 cup of roughly chopped chocolate chunks (a mix of milk and dark is great) folded into the cocoa-infused dough. The resulting cookies will be intensely chocolatey throughout the dough itself, punctuated by molten pools of chocolate chunks after baking. This takes the chocolate slice and bake cookie concept to the next level of indulgence.
Sugar cookie dough is another excellent base for easy slice and bake cookies, offering a clean, sweet flavor profile that pairs well with many decorations and additions. A typical sugar cookie dough uses similar ingredients to vanilla dough but often omits the brown sugar and sometimes uses a bit more flour or less baking powder to create a slightly firmer cookie that holds shapes well.
Once your sugar cookie dough is mixed and formed into logs, it's incredibly adaptable. The simple, buttery flavor is perfect for adding bright citrus zests, extracts other than vanilla, or simply decorating the baked cookies. Chilling the sugar cookie dough logs is just as important as with vanilla dough to ensure clean slices and minimal spreading during baking.
Sprinkles and Icing for Fun Cookies
One of the most fun ways to decorate sugar slice and bake cookies is with sprinkles! Before chilling the dough logs, you can roll them in sprinkles to coat the outside. As the cookies are sliced and baked, the sprinkles adhere to the edges, creating colorful and festive cookies. Jimmies, nonpareils, or sanding sugar all work well for this technique.
Alternatively, after baking and cooling, the simple surface of a sugar cookie is perfect for icing. A simple glaze made from powdered sugar and milk or lemon juice can be drizzled or spread onto the cookies. For more decorative options, royal icing or buttercream can be used to create intricate designs. This makes sugar slice and bake cookies fantastic for holidays or parties.
Adding Lemon Zest for Brightness
Adding citrus zest is a simple yet impactful way to infuse sugar slice and bake cookies with bright, fresh flavor. Lemon zest is particularly popular, offering a sunny, slightly tangy note that cuts through the sweetness of the cookie. You can add the zest of one or two lemons to the wet ingredients along with the vanilla extract.
Ensure you use a microplane or zester to get only the colored part of the peel, avoiding the bitter white pith underneath. The fragrant oils in the zest will permeate the dough during chilling and baking, resulting in wonderfully aromatic and flavorful lemon sugar cookies. This small addition makes a big difference in the final taste.
Making Vanilla, Almond, or Lemon Sugar Cookies
Using extracts is another easy way to vary the flavor of your sugar slice and bake cookies. While vanilla extract is standard, substituting or adding other extracts can create distinct flavors. For almond sugar cookies, replace half or all of the vanilla extract with almond extract (start with ¼ to ½ teaspoon, as almond extract is potent).
To enhance lemon flavor beyond zest, you can add a few drops of lemon extract along with the zest. You could also use other extracts like orange, coconut, or even a hint of peppermint for seasonal variations. These simple substitutions in the extract quantity allow you to easily create a range of flavored sugar cookies from a single basic dough recipe.
Oatmeal slice and bake cookies offer a heartier texture and a comforting, wholesome flavor. The basic dough recipe is similar to vanilla cookies but incorporates rolled oats into the dry ingredients. Typically, you would replace about 1 cup of the flour with 1 ½ to 2 cups of old-fashioned rolled oats. Quick oats can also be used, but they will result in a less chewy texture.
The oats absorb moisture from the dough during chilling, contributing to the cookie's structure and characteristic chewiness. This makes oatmeal slice and bake cookies a great base for adding various mix-ins like dried fruits, nuts, or chocolate. The robust flavor of the oats stands up well to these additions, creating satisfying and flavorful cookies.
Adding Raisins and Dried Cranberries
A classic addition to oatmeal cookies is raisins, and for good reason! They add bursts of sweetness and chewiness that complement the texture of the oats perfectly. You can fold about 1 cup of raisins into the dough along with the oats. For a tangier twist, dried cranberries are an excellent substitute or addition, offering a bright counterpoint to the rich dough.
Mixing in dried fruits is best done at the end of the dough preparation, just until they are evenly distributed. The moisture in the dried fruit also helps keep the cookies soft. Other dried fruits like chopped apricots or cherries could also be used for different flavor profiles in your oatmeal slice and bake cookies.
Incorporating Cinnamon and Nutmeg
Spices are essential for that warm, comforting flavor associated with oatmeal cookies. Adding ground cinnamon and a pinch of nutmeg to the dry ingredients alongside the flour and oats elevates the flavor profile significantly. About 1 teaspoon of cinnamon and ¼ teaspoon of nutmeg is a good starting point for a standard batch of dough.
These spices blend wonderfully with the oats and any added dried fruits or nuts. They create that familiar, inviting aroma as the cookies bake. Adjust the amount of spice to your preference; some bakers like a more pronounced cinnamon flavor, while others prefer it more subtle.
Making Oatmeal Chocolate Chip Cookies
Combining the wholesome texture of oats with the beloved flavor of chocolate chips creates a popular variation: oatmeal chocolate chip slice and bake cookies. Simply add about ¾ to 1 cup of chocolate chips (milk, dark, or a mix) to the dough along with the rolled oats.
The chocolate melts into gooey pockets within the chewy oatmeal base, offering a delightful contrast in texture and flavor. This variation provides the satisfaction of a classic chocolate chip cookie but with the added substance and chewiness from the oats. It's a simple modification that yields a beloved cookie type using the easy slice and bake method.
Peanut butter slice and bake cookies are wonderfully rich, nutty, and satisfying. The dough typically includes creamy peanut butter mixed in with the butter and sugars. A common ratio uses about 1 cup of peanut butter for a standard batch of dough, along with the usual flour, sugar, eggs, etc. Using creamy peanut butter usually yields a smoother dough than crunchy, though crunchy can add texture.
The high fat content from the peanut butter makes this dough slightly softer than plain vanilla dough, so proper chilling is crucial for clean slicing. The distinct flavor of peanut butter is fantastic on its own, but it also pairs exceptionally well with chocolate, opening up several delicious variation possibilities for your easy slice and bake cookies.
Adding Chocolate Chips
Peanut butter and chocolate are a classic combination, and adding chocolate chips to peanut butter slice and bake cookies is a simple way to combine these flavors. Fold in about ¾ cup of chocolate chips (milk or dark work equally well) into the peanut butter dough after the dry ingredients are mixed in.
The chocolate chips provide sweet bursts that complement the savory, nutty flavor of the peanut butter. This variation is incredibly popular and easy to achieve by simply stirring in the chips before shaping the dough logs. It's a straightforward way to enhance the classic peanut butter cookie.
Making Peanut Butter Cup Cookies
To create a cookie reminiscent of peanut butter cups, you can incorporate chopped peanut butter cups into the dough. Roughly chop about 1 cup of miniature or regular-sized peanut butter cups and fold them into the peanut butter cookie dough.
As the cookies bake, the chocolate and peanut butter filling from the cups will melt into delicious pockets within the cookie. This variation offers an intense burst of peanut butter and chocolate flavor in every bite, taking the peanut butter slice and bake cookie to a decadent level.
Creating Peanut Butter Chocolate Swirl Cookies
For a visually appealing and delicious variation, you can create peanut butter chocolate swirl slice and bake cookies. This requires making two separate doughs: a batch of the basic peanut butter dough and a small batch of basic chocolate dough (using cocoa powder). Roll each dough into a flat rectangle.
Place the chocolate rectangle on top of the peanut butter rectangle and gently press them together. Carefully roll the layered dough into a log, creating a swirl pattern. Chill the log thoroughly before slicing and baking. This method takes a little more effort but results in stunning cookies with a beautiful swirl and combined flavor.
Slicing for Even Baking
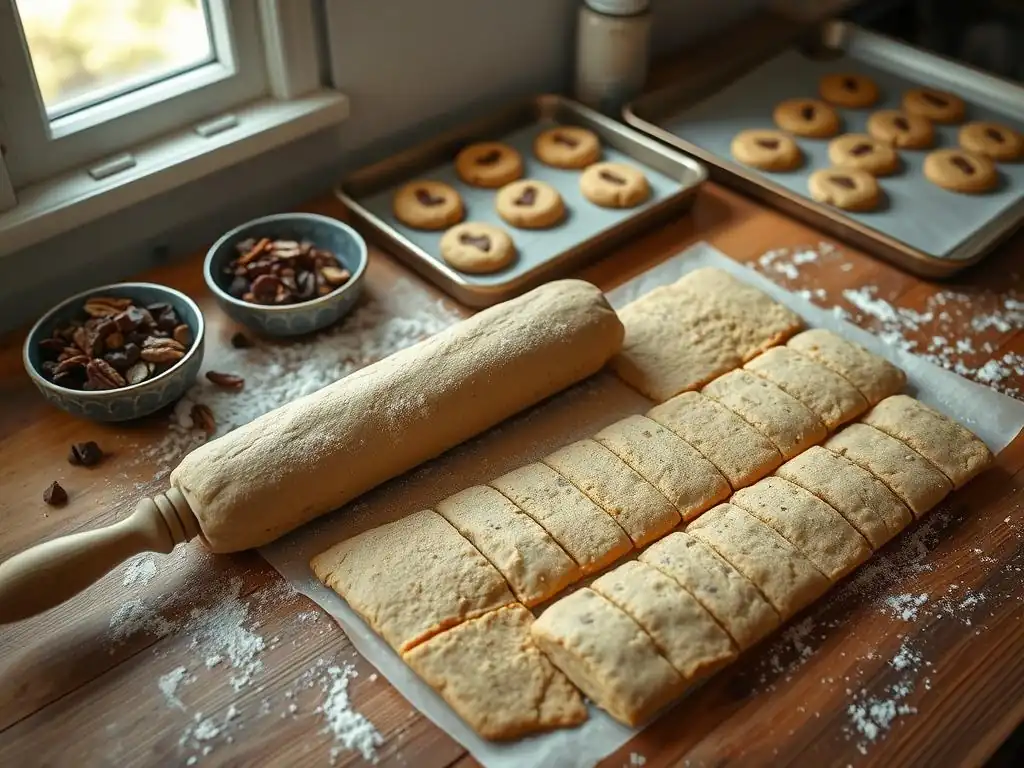
Slicing your chilled dough log correctly is key to achieving evenly baked slice and bake cookies. Use a sharp knife and cut the log into uniform slices, typically about ¼ to ½ inch thick. Thicker slices will result in chewier, slightly less spread cookies, while thinner slices will be crispier and spread more.
Holding the log firmly and using a decisive downward motion with the knife helps prevent the dough from squishing or cracking. If the dough is very firm from the freezer, let it sit at room temperature for just 5-10 minutes to make slicing easier. Place the sliced cookies onto your prepared baking sheet (lined with parchment paper is recommended) leaving about 2 inches of space between them to allow for spreading.
Baking Time and Temperature Guide
Most slice and bake cookies bake at a moderate oven temperature, typically 350°F (175°C). This temperature allows the cookies to bake through and develop color without burning the edges before the center is done. Baking time will vary depending on the thickness of your slices and your oven, but generally ranges from 10 to 14 minutes.
Start checking your cookies around the 10-minute mark. They are usually done when the edges are set and lightly golden brown, and the centers still look slightly soft. Overbaking will result in hard, dry cookies. For softer cookies, you might pull them out when the edges are just starting to turn golden.
Achieving Golden Brown Results
The desired level of "golden brown" varies depending on personal preference and the specific recipe, but for most slice and bake cookies, you're looking for the edges to have a noticeable change in color from pale dough to a light to medium golden hue. The center of the cookie should look set, not wet or raw, but might still appear slightly lighter than the edges.
If your cookies are browning too quickly on the edges while the centers are still pale, your oven might be too hot, or the cookies are too thin. If they aren't browning at all after the recommended time, your oven might be too cool, or the cookies are too thick. Using an oven thermometer can help verify your oven's actual temperature. Once baked, let the cookies cool on the baking sheet for a few minutes before transferring them to a wire rack to cool completely.
Proper storage is essential to keep your baked slice and bake cookies tasting their best. Once completely cooled, store cookies in an airtight container at room temperature. Layering them between sheets of parchment paper can prevent them from sticking together, especially if they have soft centers or melty additions like chocolate.
Most baked cookies will stay fresh for about 3-5 days stored this way. If you live in a humid climate, or for longer storage, you can refrigerate baked cookies for up to a week. For best texture, bring refrigerated cookies back to room temperature before serving.
Freezing Dough for Future Use
One of the biggest advantages of slice and bake cookies is the ability to freeze the dough logs for future baking. After shaping the dough into logs and wrapping them tightly in plastic wrap, place them in a freezer-safe bag or container. Frozen dough logs can be stored for up to 3-4 months.
When you're ready to bake, you can slice the log while it's still frozen (though letting it sit out for 5-10 minutes makes slicing easier) and bake the slices directly. Frozen slices may require an extra minute or two in the oven compared to chilled slices. This is a fantastic way to have homemade cookies ready anytime you want just a few fresh-baked treats.
Troubleshooting Common Problems

Dough Too Sticky or Dry?
If your slice and bake cookie dough is too sticky to handle and roll into logs, you likely have too much moisture or not enough dry ingredients. This can happen if your butter was too soft (almost melted) or if you didn't add enough flour. Try adding a tablespoon or two of flour at a time, mixing gently, until the dough is workable. Chilling the dough thoroughly will also help firm it up significantly.
Conversely, if the dough is too dry and crumbly, it might have too much flour or not enough fat/liquid. This can occur if your flour measurements were off or if you used too little butter or eggs. Add a teaspoon or two of milk or a tiny bit more softened butter, mixing just until the dough comes together and is no longer crumbly. Ensure you are scooping flour into your measuring cup and leveling it, rather than scooping directly from the bag, which compacts the flour.
Excessive spreading is a common issue with slice and bake cookies. The most frequent culprit is insufficient chilling time for the dough logs. Warm dough spreads much more readily in the oven. Ensure your dough logs are thoroughly chilled, preferably for at least 2-3 hours in the refrigerator or until very firm.
Other factors can contribute to spreading, such as using butter that was too soft or melted, the oven temperature being too low (causing the butter to melt slowly before the cookie structure sets), or the cookies being sliced too thinly. Make sure your butter is just softened, not melted, and verify your oven temperature with an oven thermometer. If all else fails, try adding a tablespoon or two more flour to the dough before shaping the logs.
If your slice and bake cookies are burning, especially on the bottom or edges, several factors could be at play. The most obvious is baking them for too long or at too high a temperature. Ensure you are following the recommended temperature (around 350°F or 175°C) and start checking for doneness at the lower end of the suggested time range (e.g., 10 minutes). Ovens can run hot, so an oven thermometer is a good investment.
Baking on dark-colored baking sheets can also cause bottoms to brown faster than the tops. Using parchment paper helps insulate the bottom and prevents sticking. If your cookies are burning on the edges but the centers are still raw, your oven might be too hot, or the cookies are too thin. Try reducing the temperature slightly or slicing the cookies a bit thicker.
Recipe Inspiration: Get Creative!
Slice-and-bake cookies are incredibly versatile! Once you're comfortable with the basic techniques and variations mentioned, feel free to experiment further. Try adding different extracts like maple or rum, incorporating spices like ginger or cardamom into the dough, or folding in other mix-ins like toffee bits, chopped dried figs, or even crushed pretzels for a sweet and salty twist. The possibilities are vast, limited only by your imagination.
Consider rolling the dough logs in different coatings before chilling, such as coarse sugar, finely chopped nuts, or even cocoa powder mixed with sugar. You can also create layered logs with different colored doughs (like adding food coloring or cocoa powder) for a marbled effect. Don't be afraid to play around with combinations of flavors and textures to discover your new favorite easy slice and bake cookie recipe.
We love seeing what our community bakes! Once you've whipped up a batch of your favorite slice and bake cookies or experimented with a new variation, consider sharing your results. Take a photo of your delicious cookies and tell us what flavors you made or any creative twists you added.
Sharing your baking successes not only inspires others but also helps build a community of enthusiastic bakers. Your experience, whether it's a perfectly baked batch or a lesson learned from a troubleshooting moment, can be incredibly valuable to fellow beginners. We encourage you to share your journey with slice and bake cookies!
Frequently Asked Questions
Slice-and-bake cookies are extremely easy for beginners. The dough is prepared, chilled, and then simply sliced and baked. This eliminates the need for complex shaping techniques and ensures consistent cookie sizes.
The main advantages are convenience and time-saving. You can make the dough ahead of time and bake only what you need, preserving the rest for later. This minimizes prep time when you crave fresh cookies.
Absolutely! The base dough can be easily customized with extracts, spices, chocolate chips, nuts, or dried fruit. This allows for endless flavor variations from a single batch of dough.
In the refrigerator, slice-and-bake dough typically lasts for 3-5 days. In the freezer, it can last for up to 2-3 months if properly wrapped to prevent freezer burn.
Avoid slicing the dough too thin, which can lead to overly crisp or burnt cookies. Also, ensure the dough is properly chilled for easy slicing and to prevent spreading too much during baking.
The humble slice-and-bake cookie, a cornerstone of baking simplicity, remains surprisingly relevant in our fast-paced world. Its ease of preparation offers a welcome respite from complex recipes, while its inherent versatility allows for endless creative exploration, making it a perfect activity for both seasoned bakers and enthusiastic beginners. The joy of transforming one simple dough into a multitude of delicious variations is a testament to the power of mindful baking.
The enduring appeal of the slice-and-bake method lies not just in its convenience, but in its ability to foster creativity and connection. It's a recipe that invites experimentation; a blank canvas upon which to paint flavors and textures. The simple act of slicing and baking becomes a meditative process, a moment of calm amidst the chaos. As Julia Child wisely said, People who love to eat are always the best people.
And what better way to share that love than with a batch of homemade cookies, easily crafted from a single, versatile dough?
Now, it's your turn. Consider the possibilities! Don't be afraid to experiment with different flavor combinations, add-ins, and shapes. Let the simple elegance of the slice-and-bake method inspire you to create your own unique cookie masterpieces. Share your creations, share your joy, and most importantly, share the deliciousness. The world needs more cookies, and you, dear reader, have the power to bake them.
Unleash Your Inner Baker: Expand Your Slice-and-Bake Skills!
Thanks for joining us on this delicious journey into the world of slice-and-bake! You've learned how easy it is to create amazing treats with minimal effort. Now, it's time to take your baking to the next level.
- Master a New Flavor: Try one of the variations we suggested, or get creative and experiment with your own unique twist! Think about adding different extracts, spices, or even mix-ins. What's your go-to flavor combination?
- Share the Dough-light: Post a picture of your creations on social media and tag us! We love seeing your baking successes.
- Explore Further: Dive deeper into our other slice-and-bake recipes on BakeWithEase.com to discover even more possibilities.
Ready to transform your kitchen into a slice-and-bake paradise? What exciting flavor adventure awaits you next?