
Easy Chocolate Charlotte Cake (Simplified)

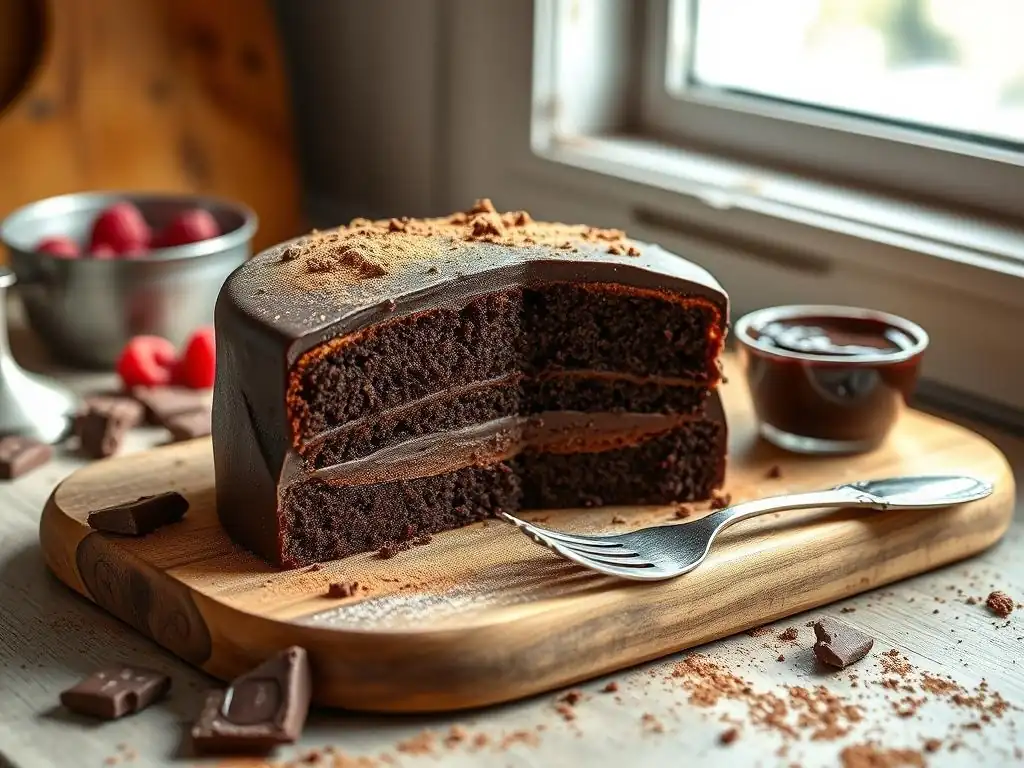
Welcome to BakeWithEase, your companion in the delightful world of baking! Ever dreamed of creating a show-stopping dessert without the fuss? Get ready to turn that dream into reality. Dive into our Easy Chocolate Charlotte Cake (Simplified) recipe – it's more achievable than you think. We'll guide you through each step, unveiling the secrets to a perfect, decadent treat. Curious how to make this impressive dessert using simple techniques? Let's get baking!
- Easy Chocolate Charlotte Cake (Simplified) - BakeWithEase
- Introduction to Easy Chocolate Charlotte Cake
- Easy Chocolate Charlotte Cake Recipe: Ingredients You'll Need
- Step-by-Step Guide: Making Your Simple Chocolate Charlotte Cake
- Tips and Tricks for the Best Chocolate Charlotte Cake
- Chocolate Charlotte Cake Variations: Explore Different Flavors
- Troubleshooting Common Chocolate Charlotte Cake Issues
- Enjoy Your Delicious and Easy Chocolate Charlotte Cake!
-
Frequently Asked Questions
- What makes this chocolate charlotte cake recipe easy?
- What are the key ingredients I'll need for this Easy Chocolate Charlotte Cake?
- Can I customize this Easy Chocolate Charlotte Cake recipe?
- How do I prevent the ladyfingers from becoming too soggy?
- What's the best way to store the Easy Chocolate Charlotte Cake?
- Final Reflection: The Enduring Allure of a Simple Chocolate Charlotte
- Unlock Your Inner Pastry Chef: Bake This Charlotte!
Easy Chocolate Charlotte Cake (Simplified) - BakeWithEase
Introduction to Easy Chocolate Charlotte Cake
What is a Chocolate Charlotte Cake? A Simplified Delight
A Chocolate Charlotte Cake is a classic French dessert known for its elegant appearance and luscious filling. Traditionally, it features a creamy filling, often Bavarian cream or mousse, encased in a delicate "collar" of ladyfinger biscuits.
These biscuits, sometimes called boudoir biscuits, are light and airy, providing a lovely contrast to the rich interior. The beauty of a Charlotte lies in its simplicity – minimal baking is required, often just for the filling if it's a cooked cream, or none at all if using a simple mousse, making it an accessible and rewarding project for bakers of all skill levels.
The visual appeal is a key characteristic of this dessert. The vertical arrangement of the ladyfingers around the perimeter, often tied with a ribbon, creates a stunning presentation that belies the relative ease of assembly. While traditional versions can involve complex techniques for the filling, this easy chocolate charlotte cake recipe focuses on a straightforward chocolate mousse, significantly simplifying the process without sacrificing flavor or elegance. It's a dessert that impresses guests yet requires minimal fuss, perfect for celebrations or a delightful weekend treat.
Why This Easy Chocolate Charlotte Cake Recipe is Perfect for Beginners
Many aspiring bakers are intimidated by multi-layered cakes or elaborate pastries, but this easy chocolate charlotte cake recipe provides a fantastic entry point into creating beautiful desserts. By utilizing store-bought ladyfingers, a significant step of the traditional recipe is skipped, eliminating the need for precise piping and baking of the biscuits themselves. The core technique then becomes mastering a simple chocolate mousse – a skill that transfers to countless other dessert applications like trifles, tarts, and parfaits.
Furthermore, the assembly process is quite forgiving. Arranging ladyfingers and layering mousse is less prone to issues like uneven cake layers or frosting mishaps. The chilling time is crucial but passive, allowing beginners to step away and let the refrigerator do the work of setting the mousse and softening the ladyfingers to a cake-like consistency. This simplified approach means you can achieve a professional-looking and incredibly delicious dessert with basic kitchen tools and minimal prior baking experience, making it a truly accessible easy chocolate charlotte cake recipe.
Easy Chocolate Charlotte Cake Recipe: Ingredients You'll Need
Ingredients for the Chocolate Mousse Filling
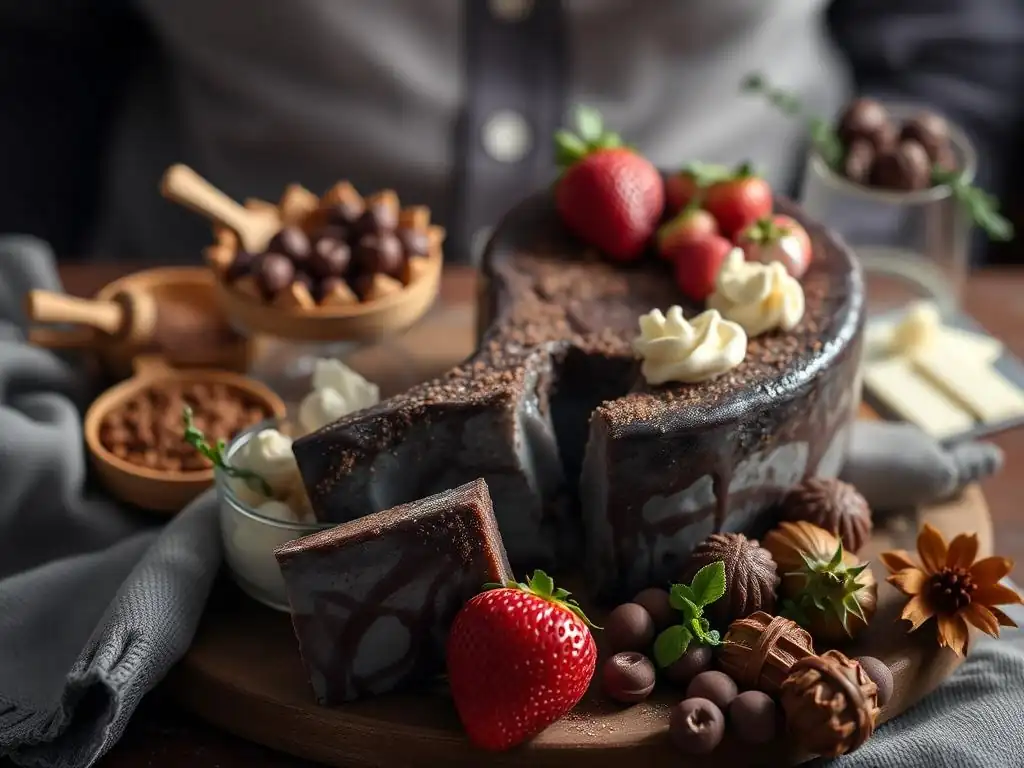
The heart of this easy chocolate charlotte cake recipe is its rich, yet surprisingly simple, chocolate mousse. You'll need high-quality chocolate, ideally one with a cocoa percentage around 60-70% for a good balance of flavor and smooth melting properties. The amount required will depend on your pan size, but typically ranges from [Insert Specific Grams/Ounces] of chopped chocolate or chocolate chips. Using a good quality chocolate, like a couverture with higher cocoa butter content, results in a smoother, more stable mousse compared to standard chocolate chips which contain stabilizers.
The other primary component is heavy whipping cream, which needs to be cold for optimal whipping. You'll need approximately [Insert Specific Milliliters/Cups] of heavy cream. When whipped to stiff peaks, the cream incorporates air, giving the mousse its light, airy texture that contrasts beautifully with the dense chocolate flavor. Some recipes might include sugar or vanilla extract for added sweetness or aroma, typically [Insert Specific Grams/Teaspoons]. Ensure your cream is very cold, ideally straight from the refrigerator, as this significantly aids in the whipping process and helps achieve stable peaks necessary for a well-set mousse.
Ingredients for the Ladyfinger Biscuits (Optional Shortcut)
For this easy chocolate charlotte cake recipe, using store-bought ladyfingers is the key shortcut that simplifies the process dramatically. You'll need enough to line the perimeter and create layers within the cake. A standard package usually contains around [Insert Approximate Number] ladyfingers, and you might need one or two packages depending on the size of your cake pan (a typical 8-inch springform pan might require roughly 30-40 biscuits). Look for firm ladyfingers, often labeled as "hard" or "savoiardi," rather than the soft, cake-like ones, as they hold their shape better when moistened slightly and provide the characteristic texture of a Charlotte.
If you prefer to make ladyfingers from scratch, you would typically need eggs, sugar, and flour. A basic recipe might call for separating [Insert Number] eggs, whipping the whites with [Insert Grams/Cups] of sugar to stiff peaks, whipping the yolks with more sugar, and then gently folding in [Insert Grams/Cups] of flour. These would be piped into finger shapes and baked at around [Insert Temperature] for [Insert Time] until lightly golden. While this adds complexity, it offers control over texture and freshness, but for an easy chocolate charlotte cake recipe, store-bought is recommended.
Additional Ingredients for Decoration (Optional)
Decorating your easy chocolate charlotte cake adds a final touch of elegance and can be as simple or elaborate as you like. A dusting of cocoa powder is a classic and effortless option, requiring just a few tablespoons of unsweetened cocoa. You can use a sieve to create an even layer over the top of the set mousse. Another popular decoration is whipped cream, piped around the edges or dolloped on top. This would require an additional [Insert Specific Milliliters/Cups] of heavy cream, potentially with a touch of sugar ( [Insert Grams/Teaspoons]) and vanilla ( [Insert Teaspoons]), whipped until stiff peaks form.
Fresh fruit is also a wonderful addition, especially berries like raspberries or strawberries, which pair beautifully with chocolate. A cup or two of fresh berries ( [Insert Specific Grams/Cups]) can be arranged artfully on top. For a more decadent finish, you could drizzle melted chocolate over the cake (requiring a small amount of chocolate, perhaps [Insert Grams/Ounces]) or sprinkle chocolate shavings. These optional elements allow you to customize the cake's appearance and flavor profile, making your easy chocolate charlotte cake truly your own.
Step-by-Step Guide: Making Your Simple Chocolate Charlotte Cake
Preparing the Chocolate Mousse Filling (Easy Method)
Creating the silky chocolate mousse for this easy chocolate charlotte cake recipe is a straightforward process involving melting chocolate and whipping cream. The first step is to gently melt your chosen chocolate. This can be done using a double boiler, where a heatproof bowl containing the chopped chocolate is set over a pot of simmering water, ensuring the bottom of the bowl doesn't touch the water.
Stir occasionally until the chocolate is completely smooth. Alternatively, you can microwave the chocolate in 30-second intervals, stirring between each, until melted. Be careful not to overheat it, as chocolate can seize or burn easily; aiming for a temperature around 105-115°F (40-46°C) is ideal for dark chocolate.
While the chocolate cools slightly (it should be warm, not hot, when combined with the cream), whip the cold heavy cream in a separate bowl. Using a stand mixer with a whisk attachment or a hand mixer, beat the cream on medium-high speed until stiff peaks form. This means that when you lift the whisk, the peaks of cream stand up straight and hold their shape firmly.
Overwhipping can result in a grainy texture, so watch it carefully as it approaches the stiff peak stage. Once whipped, gently fold a small amount of the whipped cream into the slightly cooled melted chocolate to lighten it, then carefully fold the chocolate mixture back into the remaining whipped cream until just combined, being careful not to deflate the airy structure of the whipped cream.
Melting the Chocolate for the Mousse
Melting the chocolate correctly is fundamental to achieving a smooth, glossy mousse. Using a double boiler is a classic method that provides gentle, even heat, minimizing the risk of scorching. Place about an inch or two of water in the bottom pot and bring it to a simmer, then place your bowl of chopped chocolate or chips over it. Stir the chocolate slowly with a spatula or spoon as it melts. Resist the urge to rush this process; slow melting ensures the cocoa solids and cocoa butter melt uniformly, resulting in a fluid, lump-free chocolate.
If using a microwave, use a microwave-safe bowl and heat on medium power. Heat for 30 seconds, stir thoroughly, then repeat. Chocolate retains its shape even when melted, so stirring is crucial to assess its consistency. Stop heating when there are still a few small lumps remaining, and continue stirring; the residual heat will finish the melting process. This method is faster but requires more vigilance to prevent burning. Regardless of the method, once melted, remove the chocolate from the heat and let it sit for a few minutes to cool slightly before proceeding.
Whipping the Cream for a Light and Airy Texture
Whipping heavy cream is the process that transforms liquid cream into a voluminous, stable foam, essential for the light texture of the mousse in your easy chocolate charlotte cake recipe. Start with very cold heavy cream, ideally straight from the refrigerator. The colder the cream, the faster and more stable it will whip. Use a clean, dry bowl and whisk attachment (any trace of fat or moisture can hinder whipping). Begin whipping on medium speed until the cream starts to thicken and become frothy, then increase the speed to medium-high.
Watch the cream closely as you whip. Soft peaks form first – when you lift the whisk, the cream peaks curl over. Continue whipping until stiff peaks form – the peaks stand straight up when the whisk is lifted. This stage is crucial for mousse stability. It typically takes anywhere from 3 to 7 minutes depending on the amount of cream, the mixer's power, and the temperature of the cream. Be careful not to overwhip, which results in curdled, buttery cream. Stop just as stiff peaks are achieved.
Combining Chocolate and Cream: The Perfect Mousse Consistency
Combining the melted chocolate and whipped cream requires a gentle touch to maintain the airy texture achieved during whipping. Once the melted chocolate has cooled slightly (it should still be liquid but not hot to the touch), take about a quarter of the whipped cream and fold it into the chocolate.
This step, often called "tempering" or "lightening," helps to bring the temperature and consistency of the chocolate closer to that of the whipped cream, making it easier to incorporate the rest without deflating the mixture. Use a spatula and a gentle folding motion – cutting through the center and scraping the sides of the bowl, then lifting and folding over.
Once the chocolate mixture is lightened, gently add it back into the bowl with the remaining whipped cream. Continue to fold carefully until no streaks of white cream or dark chocolate remain and the mixture is uniform in color. It's better to slightly under-mix than to over-mix and lose the precious air bubbles. The resulting mixture should be light, airy, and glossy – the perfect filling for your easy chocolate charlotte cake. Work relatively quickly at this stage as the chocolate mousse will begin to set as it cools.
Assembling the Easy Chocolate Charlotte Cake
Assembling this easy chocolate charlotte cake is like building a delicious, edible structure! The key is preparing your pan and ladyfingers before you start layering. A springform pan, typically 8-inch or 9-inch ( [Insert Diameter]), is ideal because its removable sides make unmolding effortless. Line the bottom of the pan with parchment paper for easy removal, and you might lightly grease the sides or use a thin layer of plastic wrap for extra insurance against sticking.
The assembly involves arranging the ladyfingers around the perimeter and on the bottom (optional, but creates a solid base) and then filling the cavity with the prepared chocolate mousse. Precision isn't paramount in this easy chocolate charlotte cake recipe; the mousse will fill any small gaps. The goal is to create a stable structure that holds the mousse while it sets in the refrigerator. This step is where the cake begins to take its iconic form.
Preparing the Ladyfingers (Store-Bought or Homemade)
If using store-bought ladyfingers for your easy chocolate charlotte cake, they may need a brief dip in a liquid to soften them slightly. Traditionally, this liquid is coffee or a coffee liqueur, but for a pure chocolate flavor, a simple sugar syrup or even milk can be used. Prepare your dipping liquid in a shallow dish. Quickly dip one side of each ladyfinger for just a second or two – you want them to soften slightly but not become soggy. This quick dip ensures they absorb just enough moisture to become cake-like after chilling without falling apart.
If you've opted to make homemade ladyfingers, ensure they are completely cooled before use. Homemade ones tend to be softer than the hard savoiardi biscuits and may not require dipping at all, or perhaps just a very quick brush with liquid on one side. Test one first to see how quickly it absorbs moisture. The goal is a tender biscuit that still provides structural integrity for the finished easy chocolate charlotte cake.
Lining the Cake Pan with Ladyfingers
Lining the springform pan is where your easy chocolate charlotte cake gets its signature "collar." Unlock the springform pan and place the parchment paper on the bottom, then clamp the sides shut over the paper. Arrange the dipped (or undipped, if soft) ladyfingers vertically around the inside edge of the pan, with the sugary side facing outwards for a more attractive finish. Stand them up snug against the side of the pan, ensuring they are close together with minimal gaps. You may need to trim the bottoms of the ladyfingers to fit the height of your pan, usually around [Insert Height] inches.
For the base of the cake, you can either leave the bottom clear (resulting in a mousse-only base once unmolded) or create a layer of ladyfingers on the bottom as well. If adding a base layer, arrange ladyfingers horizontally across the bottom of the pan, trimming them as needed to fit snugly. Some bakers prefer a single layer, while others create a double layer for a firmer base. A typical 8-inch pan might require [Insert Approximate Number] ladyfingers for the sides and [Insert Approximate Number] for the base layer.
Filling the Cake with Chocolate Mousse
Once your pan is lined with ladyfingers around the sides and potentially on the bottom, it's time to fill it with the prepared chocolate mousse. Gently spoon or pour the mousse into the center of the pan. Use a spatula to carefully spread the mousse evenly, working from the center outwards towards the ladyfinger collar. Be careful not to disturb the upright ladyfingers. Fill the pan about halfway if you plan to add a middle layer of ladyfingers, or fill it almost to the top if you are making a single-layer mousse cake.
The mousse should be spread smoothly to create a level surface. Tap the pan gently on the counter a couple of times to help settle the mousse and remove any large air pockets. The mousse mixture, while airy, should be thick enough to hold its shape once chilled. This filling step is crucial for the structure and taste of your easy chocolate charlotte cake, providing the creamy contrast to the biscuits.
Creating Layers of Ladyfingers and Mousse
For a multi-layered effect in your easy chocolate charlotte cake, you can add a layer of ladyfingers in the middle. After filling the pan halfway with chocolate mousse, arrange another layer of dipped ladyfingers horizontally over the mousse. You may need to break or trim the ladyfingers to fit the shape of the pan, creating a solid layer that covers the mousse. This middle layer adds another textural element and makes the cake feel more substantial.
Once the middle layer of ladyfingers is in place, pour or spoon the remaining chocolate mousse over the top. Spread this final layer of mousse evenly with a spatula, ensuring it fills the pan up to the top of the ladyfinger collar. Smooth the surface of the mousse so it's level. This layering technique creates beautiful defined sections when the cake is sliced, showcasing the structure of your easy chocolate charlotte cake.
Chilling and Setting the Chocolate Charlotte Cake
After assembly, the most critical step for your easy chocolate charlotte cake is allowing it sufficient time to chill and set. This process transforms the soft mousse into a firm, sliceable filling and allows the ladyfingers to absorb moisture from the mousse, softening them to a cake-like consistency. Place the assembled cake in the refrigerator, uncovered initially for the first hour to allow the surface to firm up slightly, then you can loosely cover it with plastic wrap to prevent it from absorbing refrigerator odors.
The minimum chilling time required is usually around 4 hours, but for the best results and a truly set mousse, it is highly recommended to chill the cake overnight, or for at least 8-12 hours. During this time, the gelatin (if used in the mousse recipe, though simpler versions often rely on chocolate and cream density) or the cocoa butter in the chocolate will solidify, firming up the mousse. Simultaneously, the moisture from the mousse will migrate into the ladyfingers, softening them beautifully. Patience during this stage is key to a successful easy chocolate charlotte cake.
The Importance of Chilling Time
Adequate chilling time is non-negotiable for a successful easy chocolate charlotte cake. The primary purpose is to allow the chocolate mousse filling to set completely. Chocolate mousse, especially one made primarily from whipped cream and melted chocolate, relies on the solidification of the cocoa butter in the chocolate and the stability of the whipped cream to hold its shape. Without sufficient chilling, the mousse will be too soft and the cake will collapse when the springform ring is removed and when sliced. Aim for a minimum of 4 hours, but 8+ hours is vastly superior.
Beyond setting the mousse, chilling allows the ladyfingers to soften. They absorb moisture from the mousse and the surrounding air, transforming from crisp biscuits into tender, cake-like layers. This creates the desired textural contrast between the soft filling and the yielding biscuit exterior. Rushing this process will leave you with crunchy, dry ladyfingers and a potentially unset mousse, undermining the entire structure and enjoyment of your easy chocolate charlotte cake. Plan ahead to give your cake ample time in the refrigerator.
Decorating Your Simplified Chocolate Charlotte Cake (Optional)
Once your easy chocolate charlotte cake is fully chilled and set, you can proceed with decoration before serving. Gently release the springform ring by running a thin knife around the edge if necessary, then unlock and lift the ring straight up. Carefully remove the parchment paper from the bottom if you lined it. The ladyfinger collar should stand firm, holding the mousse in place. Now it's time to add your personal touch, though the cake is quite elegant even undecorated.
Simple decorations are often the most effective for a Charlotte. A light dusting of unsweetened cocoa powder over the top is classic and requires minimal effort – just use a small sieve or fine-mesh strainer. Alternatively, you can pipe swirls or dollops of whipped cream around the top edge using a piping bag fitted with a star tip.
Fresh berries, particularly raspberries or strawberries, scattered across the top or arranged in a pattern, add a pop of color and freshness that complements the rich chocolate. For a touch of decadence, you might shave some chocolate curls over the surface. These simple additions elevate the visual appeal of your easy chocolate charlotte cake.
Simple Decoration Ideas for a Stunning Cake
- Cocoa Dusting: The easiest method. Place a few tablespoons of unsweetened cocoa powder in a fine-mesh sieve and gently tap it over the surface of the cake.
- Whipped Cream Swirls: Whip additional heavy cream (about
[Insert Specific Amount]) with a little sugar ([Insert Specific Amount]) and vanilla ([Insert Specific Amount]) until stiff peaks form. Transfer to a piping bag with a decorative tip and pipe swirls around the top perimeter or dollops in the center. - Fresh Berries: Arrange fresh raspberries, strawberries (halved or quartered), or a mix of berries on top of the mousse. The vibrant red of berries offers a beautiful contrast to the dark chocolate.
- Chocolate Shavings/Curls: Use a vegetable peeler or a sharp knife to shave curls from a block of chocolate directly onto the cake.
- Confectioners' Sugar: A simple dusting of powdered sugar can also add a delicate, elegant finish.
Each of these simple decoration ideas takes only a few minutes but significantly enhances the presentation of your easy chocolate charlotte cake, making it look like it came from a professional bakery. Choose one or combine a couple, like cocoa dusting with a few strategically placed berries.
Tips and Tricks for the Best Chocolate Charlotte Cake
Ensuring a Smooth and Creamy Chocolate Mousse
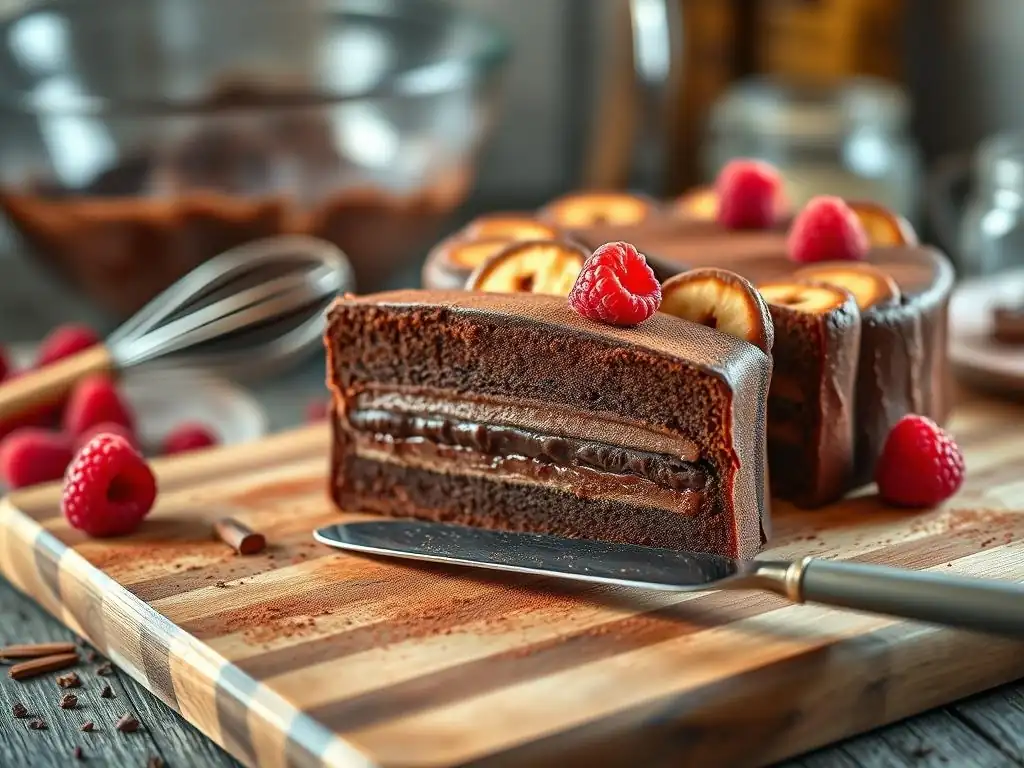
Achieving a smooth and creamy texture in your chocolate mousse is paramount for a delicious easy chocolate charlotte cake recipe. The quality of your chocolate is the first key factor; using a good baking chocolate (couverture) with sufficient cocoa butter will result in a smoother melt and a silkier mousse compared to compound chocolate or standard chocolate chips which might contain vegetable oils and stabilizers that affect texture. Aiming for a chocolate with 60-70% cocoa solids provides a good balance of flavor and texture.
Proper melting technique is also crucial. Avoid overheating the chocolate, which can cause it to seize or become grainy. Melting gently over a double boiler or in short intervals in the microwave while stirring frequently is essential.
Furthermore, ensure your melted chocolate is not too hot when you fold it into the whipped cream; it should be warm but not hot to the touch. Folding gently and thoroughly, but without overmixing, ensures the airy structure of the whipped cream is maintained while incorporating the chocolate fully, leading to that desirable smooth and creamy consistency in your easy chocolate charlotte cake.
Preventing Soggy Ladyfingers
One common pitfall when making a Charlotte is overly soggy ladyfingers, which can make the structure weak and the texture unpleasant. The key to preventing this in your easy chocolate charlotte cake recipe lies in the dipping process. If using hard savoiardi biscuits, dip only one side of the ladyfinger, and do so very quickly – literally just a second or two per biscuit. You want just enough liquid absorbed to initiate the softening process during chilling, not enough to saturate the biscuit immediately.
The type of liquid used for dipping can also influence sogginess. A thick sugar syrup or a slightly viscous liqueur will absorb slower than thin milk or coffee. Using a springform pan that fits the ladyfingers snugly helps them support each other, reducing the chance of collapse if they become slightly softer than intended. Also, ensure your mousse is properly made and will set well; a very wet mousse will contribute more moisture to the biscuits, increasing the risk of sogginess. With the right technique, your ladyfingers will transform into perfectly tender, cake-like layers after adequate chilling.
Serving and Storing Your Chocolate Charlotte Cake
Once your easy chocolate charlotte cake has chilled for the recommended time (preferably overnight), it's ready to be served! Carefully remove the springform ring just before presenting or slicing. If you used parchment paper on the bottom, slide the cake onto a serving plate. Use a sharp knife dipped in hot water and wiped dry for clean slices. Charlotte cake is best served cold, directly from the refrigerator.
To store leftover easy chocolate charlotte cake, cover it loosely with plastic wrap or place it in an airtight cake container. It will keep well in the refrigerator for 2-3 days. While the flavors might meld further, the texture can change slightly over time as the ladyfingers continue to soften. Freezing a Charlotte cake is generally not recommended as the texture of the mousse and ladyfingers can be compromised upon thawing, potentially becoming watery or grainy. Enjoy your delicious creation within a few days for the best texture and flavor.
Chocolate Charlotte Cake Variations: Explore Different Flavors
Adding Coffee or Liquor to the Chocolate Mousse
While a pure chocolate mousse is delightful, adding coffee or liquor can elevate the flavor profile of your easy chocolate charlotte cake, creating sophisticated variations. For a classic Tiramisu-like twist, dissolve [Insert Grams/Teaspoons] of instant espresso powder or strong brewed coffee ( [Insert Milliliters/Tablespoons]) into the melted chocolate or fold it into the mousse mixture. This introduces a subtle bitterness that enhances the richness of the chocolate.
Incorporating liquor adds depth and warmth. A tablespoon or two ( [Insert Milliliters/Tablespoons]) of coffee liqueur (like Kahlúa or Tia Maria), dark rum, or orange liqueur (like Grand Marnier) can be folded into the chocolate mousse. Be mindful of the amount, as too much liquid can affect the mousse's setting ability. These additions not only contribute distinct flavors but also lend a certain je ne sais quoi to your easy chocolate charlotte cake, making it perfect for adult palates.
Using Different Types of Chocolate
The type of chocolate you use fundamentally alters the flavor of your easy chocolate charlotte cake. While semi-sweet or dark chocolate (60-70% cocoa) is standard, experimenting with other types can yield exciting results. Using milk chocolate will produce a sweeter, creamier, and milder flavored mousse, appealing to those who prefer less intense chocolate. You might need slightly less sugar in the mousse if using milk chocolate, as it contains more sugar than dark chocolate.
Conversely, using a very dark chocolate, perhaps 75-85% cocoa solids, will result in a deeply intense, less sweet mousse with pronounced bitter notes. This is perfect for serious chocolate lovers. White chocolate can also be used, though it requires a different technique (often involving gelatin or egg yolks for stability as it contains no cocoa solids) and results in a very sweet, creamy, vanilla-forward mousse. Combining dark and milk chocolate ( [Insert Specific Ratio]) can offer a nuanced flavor that balances intensity and sweetness in your easy chocolate charlotte cake.
Fruit Additions for a Refreshing Twist
Introducing fruit into your easy chocolate charlotte cake provides a refreshing contrast to the richness of the chocolate mousse. Berries are a classic pairing. You can scatter fresh raspberries, strawberries, or blueberries ( [Insert Specific Amount]) within the layers of mousse as you assemble the cake, or simply arrange them generously on top as decoration. The slight tartness of the berries cuts through the sweetness of the chocolate beautifully.
Other fruits can also work, though some may need preparation. Slices of banana can be layered with chocolate and ladyfingers for a classic combination. Stewed or caramelized pears or apples ( [Insert Specific Amount]), cooled completely, can also be used, adding a spiced warmth that pairs well with chocolate. Ensure any fruit additions are not excessively juicy, as too much moisture can compromise the mousse's setting and make the ladyfingers soggy. Fruit adds a vibrant element that makes your easy chocolate charlotte cake even more delightful.
Troubleshooting Common Chocolate Charlotte Cake Issues
Mousse Not Setting Properly
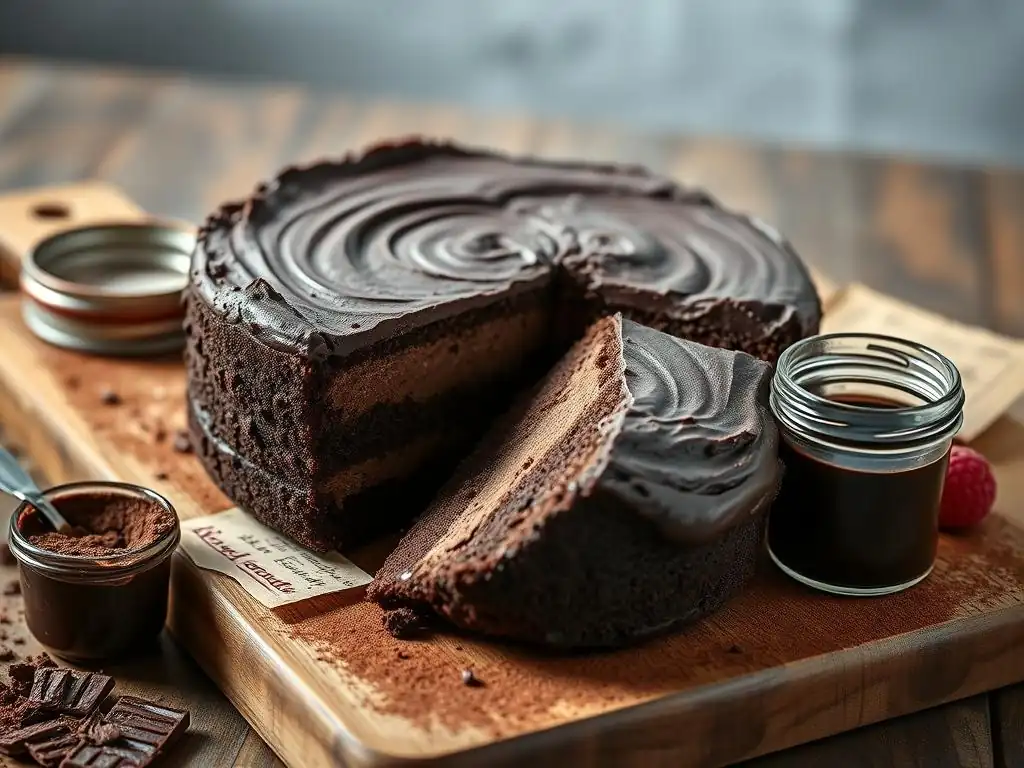
A common and frustrating issue with an easy chocolate charlotte cake recipe is the mousse failing to set firmly, resulting in a runny filling that collapses when the pan is opened. This is usually due to insufficient chilling time – the mousse needs ample time (minimum 4 hours, ideally 8-12) for the cocoa butter in the chocolate and the structure of the whipped cream to firm up in the cold. Ensure your refrigerator is set to the proper temperature, ideally around 38-40°F (3-4°C).
Another culprit can be improper mousse preparation. If the heavy cream wasn't whipped to stiff peaks, it won't provide enough structure. Also, if the melted chocolate was too hot when folded into the whipped cream, it could have melted the fat in the cream, causing it to deflate.
Finally, ensure you used enough chocolate relative to the amount of cream; the chocolate is key to setting. If your mousse is still too soft after sufficient chilling, unfortunately, it's difficult to rescue without re-melting and adding a stabilizer like gelatin, which complicates the "easy" aspect. Prevention through proper technique and chilling is key.
Ladyfingers Too Soggy
Soggy ladyfingers can ruin the texture of your easy chocolate charlotte cake, turning the elegant biscuit collar into a mushy mess. This almost always happens because the ladyfingers absorbed too much liquid during the dipping stage. The key is to dip them very quickly – just a fleeting moment on one side, especially if using a thin liquid like coffee or milk. Hard savoiardi biscuits require a quick dip, while softer homemade ones might not need any dipping at all.
The moisture from the mousse also contributes to softening over time. If your mousse is particularly wet or if the cake is left to chill for an excessive period (beyond 2-3 days), the ladyfingers can become overly saturated. Using a springform pan that provides good support around the sides helps contain the biscuits even if they become very soft. Practice with the dipping time on one or two biscuits first to gauge how quickly they absorb liquid before dipping the rest for your easy chocolate charlotte cake.
Cake Collapsing
A collapsing easy chocolate charlotte cake upon unmolding is often a direct consequence of the mousse not being fully set or the ladyfingers being too soft to provide adequate structural support. As mentioned in troubleshooting the mousse and ladyfingers, insufficient chilling time is the most frequent cause. The mousse must be firm enough to hold its shape when the external support of the springform ring is removed.
Ensure your springform pan is clamped tightly before assembly. When unmolding, do it gently and carefully. If the cake feels at all wobbly when you touch the top, it likely needs more chilling time. A well-chilled cake with properly set mousse and appropriately softened ladyfingers should stand tall and proud once the ring is removed. If a slight lean occurs, sometimes a ribbon tied snugly around the ladyfinger collar can offer a little extra support and also adds a lovely decorative touch to your easy chocolate charlotte cake.
Enjoy Your Delicious and Easy Chocolate Charlotte Cake!
You've successfully created a beautiful and delicious easy chocolate charlotte cake! This classic dessert, simplified for home bakers, offers a delightful combination of textures – the tender, cake-like ladyfingers contrasting with the smooth, rich chocolate mousse. It's a showstopper dessert that proves you don't need complex techniques to achieve impressive results. Whether you followed the basic recipe or experimented with variations like coffee or fruit, you've mastered a fundamental patisserie technique.
Take a moment to admire your creation before slicing. The elegant collar of biscuits and the smooth surface of the mousse are a testament to your baking efforts. Serve slices chilled, perhaps with a dollop of whipped cream or a few fresh berries. This easy chocolate charlotte cake recipe is perfect for any occasion, from a casual family dinner to a celebratory gathering. Enjoy every bite of this decadent yet surprisingly simple dessert.
We love seeing what our community bakes! If you've made this easy chocolate charlotte cake recipe (or any other recipe from BakeWithEase.com), we encourage you to share your success. Taking photos of your finished cake and sharing them is a great way to inspire other bakers and celebrate your achievement. You can mention any variations you tried or tips you discovered along the way.
Sharing your experience helps others who are attempting this easy chocolate charlotte cake recipe for the first time. Did you find a specific type of ladyfinger worked best? Did you add a unique decoration? Your insights are valuable! Baking is a journey, and sharing your progress, successes, and even challenges makes the experience richer for everyone. We can't wait to see your beautiful easy chocolate charlotte cake!
Frequently Asked Questions
What makes this chocolate charlotte cake recipe easy?
This recipe emphasizes simplified steps and readily available ingredients. It avoids complex techniques, making it accessible to beginner bakers.
What are the key ingredients I'll need for this Easy Chocolate Charlotte Cake?
You'll primarily need ladyfingers, chocolate (melting and cocoa powder), heavy cream, sugar, and coffee or liqueur for soaking. The focus is on easily sourced items.
Can I customize this Easy Chocolate Charlotte Cake recipe?
Absolutely! Feel free to experiment with different flavors of chocolate, add fruit fillings, or use various liqueurs for soaking. Personalization is encouraged.
How do I prevent the ladyfingers from becoming too soggy?
Briefly dip the ladyfingers in the coffee or liqueur. Avoid soaking them for too long to maintain a pleasant texture and prevent them from falling apart.
What's the best way to store the Easy Chocolate Charlotte Cake?
Store the cake in the refrigerator for up to three days. This helps maintain its shape and prevents the cream from spoiling. Proper refrigeration is crucial.
Final Reflection: The Enduring Allure of a Simple Chocolate Charlotte
The seemingly simple act of baking a chocolate charlotte cake transcends mere confectionery; it's a testament to the power of accessible elegance. This recipe, designed for ease and deliciousness, proves that creating something beautiful and impressive doesn't require hours of complex techniques or a pantry stocked with obscure ingredients. The joy lies in the process, the shared experience, and the ultimate satisfaction of a perfectly executed dessert.
The enduring appeal of the charlotte cake, in its various forms, speaks to our inherent desire for both comfort and sophistication. It's a dessert that can grace a casual weeknight gathering or a more formal celebration, adapting seamlessly to the occasion. The delicate balance of rich chocolate and airy sponge, the satisfying crunch of the ladyfingers, all contribute to a sensory experience that lingers long after the last bite. The best things in life are simple,
a sentiment perfectly embodied by this recipe's success.
Now, I invite you to consider the possibilities. Don't let the perceived complexity of a charlotte cake intimidate you. This recipe is your gateway to unlocking a world of baking creativity. Experiment with different fillings, frostings, and even the shape of your mold. Most importantly, embrace the joy of the process, share your creation with loved ones, and savor the sweet reward of your efforts. The perfect chocolate charlotte cake awaits – and it's easier to make than you think.
Unlock Your Inner Pastry Chef: Bake This Charlotte!
Thanks for taking the time to explore this simplified Chocolate Charlotte recipe! We hope you discovered a new favorite dessert that's surprisingly easy to master. Ready to get baking?
- Whipping up your own Charlotte: Grab your ingredients and let's get baking! This recipe is designed for success, even for beginner bakers. Follow the steps, and you'll be amazed at how effortlessly delicious it turns out.
- Share your creation: Snap a photo of your finished Chocolate Charlotte and share it on social media using #BakeWithEaseCharlotte – we'd love to see your masterpiece!
- Explore more easy desserts: Dive into our collection of simple yet impressive recipes on bakewithease.com – you might just find your next baking adventure!
What delicious twist will you add to your Chocolate Charlotte? Let us know in the comments below!