
Baking Stone vs. Dutch Oven: A SidebySide Comparison of Baked Goods.

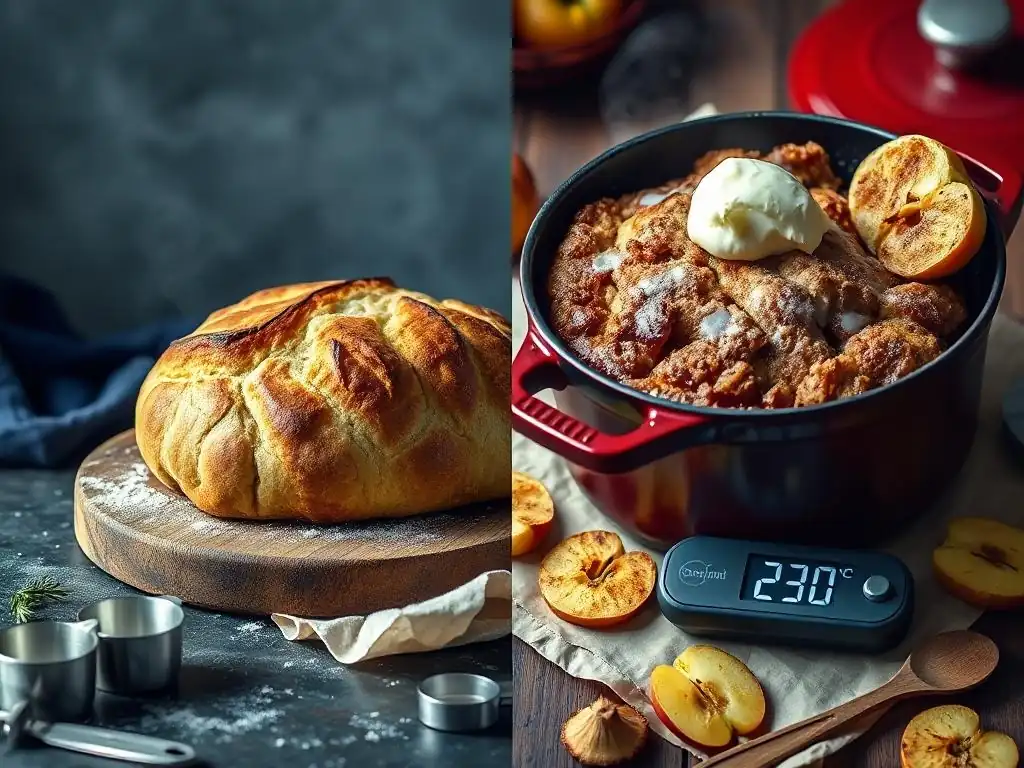
Welcome to BakeWithEase, your haven for all things baking! Ever wondered if your oven is really reaching the ideal Dutch oven baking temperature for that perfect crust? We explore that and more, as we dive headfirst into the ultimate showdown: Baking Stone vs. Dutch Oven. Which will reign supreme in achieving bakery-worthy results? Prepare to unlock the secrets to exceptional baked goods and discover the ideal equipment for your next masterpiece!
- Baking Stone vs. Dutch Oven: A Side-by-Side Comparison for Perfect Baked Goods
- Baking Stone: Mastering Crispy Crusts and Even Baking
- Dutch Oven: Achieving Optimal Baking with Temperature Control
- Baking Stone vs. Dutch Oven: A Detailed Comparison
- Understanding Dutch Oven Baking Temperature Guide
- Baking Stone Temperature Guide
- Conclusion: Choosing the Right Tool for Your Baking Adventure
-
Frequently Asked Questions
- What are the key differences between using a baking stone and a Dutch oven for baking?
- Can I use the same "Dutch oven baking temperature guide" for all types of bread?
- Is a Dutch oven necessary, or can I achieve similar results with a baking stone and other methods?
- What are the advantages of using a Dutch oven for baking versus a baking stone?
- How does the "Dutch oven baking temperature guide" impact the texture and appearance of the final baked product?
- Final Reflection: The Perfect Crust: Choosing Your Baking Vessel
- Unleash Your Inner Baker: Take the Next Step!
Baking Stone vs. Dutch Oven: A Side-by-Side Comparison for Perfect Baked Goods
BakeWithEase Presents: Baking Stone and Dutch Oven Showdown
Welcome to BakeWithEase, where we explore the tools that transform simple ingredients into culinary masterpieces. Today, we're diving deep into a classic baking debate: the baking stone versus the Dutch oven. Both are celebrated pieces of equipment in the home baker's arsenal, each promising to elevate your results, but they achieve this through different mechanisms and excel in different areas. Understanding the unique properties of each can significantly impact the outcome of your baked goods, from the crispness of a pizza crust to the rise and texture of your artisan bread.
Choosing the right tool isn't just about preference; it's about understanding how heat and moisture interact with your dough or batter within the oven environment. A baking stone provides direct, intense heat, while a Dutch oven creates a contained, steamy microclimate. This fundamental difference leads to distinct results. Whether you're aiming for a perfectly charred pizza base, a loaf of bread with a crackling crust, or a cake that's unbelievably moist, selecting the appropriate equipment is a crucial step in your baking journey.
Understanding the Impact of Baking Equipment on Your Results
The equipment you choose plays a pivotal role in how heat is transferred to your baked goods. Convection ovens circulate hot air, while standard ovens rely more on radiant heat from the elements and conduction from the surfaces the food sits on.
Baking stones and Dutch ovens introduce specific conductive and radiant heat properties, along with unique ways of managing moisture, which are critical for achieving desired textures and finishes. For instance, a baking stone absorbs and retains heat, acting like the floor of a professional pizza oven, providing a burst of intense heat to the bottom of your dough.
Conversely, a Dutch oven, especially when preheated, creates a sealed environment. The lid traps steam released by the dough as it bakes. This trapped steam keeps the surface of the dough moist during the crucial initial phase of baking, allowing for maximum oven spring before the crust begins to set.
This process is particularly vital for rustic loaves, contributing to a thinner, crispier crust compared to baking on an open sheet pan. The density and material of the equipment—whether ceramic, cordierite, or cast iron—also influence how quickly and evenly heat is absorbed and radiated, directly affecting bake times and crust development.
Baking Stone: Mastering Crispy Crusts and Even Baking
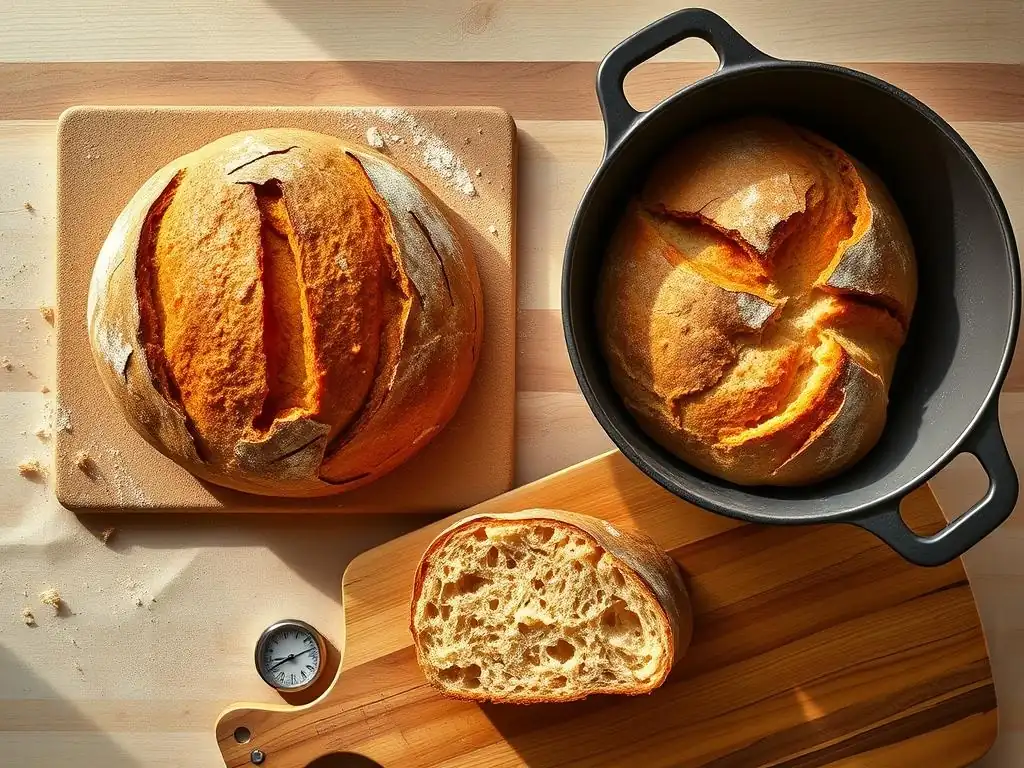
What is a Baking Stone? A Baker's Best Friend
A baking stone, often made from ceramic, cordierite, or even cast iron, is essentially a flat slab placed in your oven. Its primary function is to absorb and retain heat from the oven, creating a stable, high-temperature surface for baking. Think of it as bringing a bit of a brick oven's magic into your home kitchen. When dough is placed directly onto a preheated stone, it receives a powerful burst of heat from below, causing the bottom crust to set and crisp up rapidly.
The material composition of a baking stone dictates its performance. Cordierite stones, for example, are known for their thermal shock resistance, meaning they are less likely to crack when exposed to rapid temperature changes, such as placing cold dough onto a hot stone. Ceramic stones are also popular but can be more prone to cracking if not handled carefully. Regardless of the material, a good baking stone becomes incredibly hot and maintains that heat, providing consistent energy transfer throughout the baking process, which is essential for achieving evenly baked goods with desirable crust development.
Benefits of Using a Baking Stone for Baking
Achieving a Crispy Crust with a Baking Stone
One of the most significant advantages of using a baking stone is its ability to produce exceptionally crispy crusts, particularly on items like pizza and artisan bread. When dough is placed on a preheated stone, the intense, direct heat causes immediate and rapid evaporation of moisture from the bottom of the dough. This process, known as "oven spring" from below, helps the crust develop a light, airy interior structure while forming a firm, crispy exterior.
For example, a pizza baked directly on a stone at 500°F (260°C) will often achieve a crispier, more authentically charred bottom crust in about 8-12 minutes compared to baking on a standard metal pan, which might take longer and result in a softer, less developed crust. The stone mimics the effect of a professional pizza oven, where dough is placed directly on a hot surface, ensuring that desirable crispiness that's hard to replicate otherwise.
Even Heat Distribution for Consistent Results
Beyond just crispiness, a baking stone excels at providing even heat distribution. Once the stone is fully preheated – which can take 30 minutes to an hour depending on the oven temperature and stone thickness – it acts as a thermal mass. This means it radiates heat consistently across its surface, minimizing hot spots that can lead to uneven baking.
This stable heat transfer is crucial for achieving uniform results, whether you're baking a large loaf of bread or a tray of cookies. Instead of relying solely on the fluctuating air temperature within the oven, the stone provides a steady, consistent heat source from below. This helps ensure that items like cookies spread evenly and bake through at the same rate, or that the bottom of a bread loaf isn't undercooked while the top is perfectly browned.
Best Baked Goods for Baking Stones
Pizza Perfection: Baking Stones and Authentic Pizza
Using a baking stone is arguably the gold standard for achieving authentic, Neapolitan-style pizza at home. The stone's ability to get extremely hot and transfer intense heat directly to the dough mimics the floor of a traditional pizza oven. This results in a rapid bake time and a crust that is beautifully charred, crispy on the bottom, and slightly chewy inside.
To illustrate, a pizza baked on a stone preheated to 500°F (260°C) or even higher can cook in as little as 5-8 minutes, producing the characteristic leopard spotting on the crust's edge and a firm base that holds its shape. Compare this to a pizza baked on a standard baking sheet at a lower temperature, which might take 15-20 minutes and result in a softer, less developed crust without the desired crispness.
Artisan Bread: Creating Crusty Loaves at Home
Baking stones are excellent for baking artisan bread, particularly those with higher hydration levels that benefit from a strong heat source from below. While they don't trap steam like a Dutch oven, they are often used in conjunction with other methods to create steam in the oven (like placing a tray of water below the stone). The direct heat helps set the base and contribute to oven spring.
For a rustic boule, placing the dough directly on a preheated stone allows the bottom crust to begin developing immediately. While the top crust benefits from ambient oven heat and introduced steam (if used), the stone ensures the base is not dense or undercooked. This method helps achieve a loaf with a good rise and a satisfyingly crisp bottom crust, a hallmark of well-baked artisan bread.
Cookies: Evenly Baked and Delicious
While not the first thing people often associate with baking stones, they can significantly improve cookie baking. Placing your cookie sheet directly on a preheated baking stone helps regulate the temperature the cookies are exposed to from below. This prevents the bottom of the cookies from burning or becoming too dark before the rest of the cookie is baked through.
Using a stone helps create a more consistent baking environment, leading to cookies that are evenly golden brown on the bottom and cooked perfectly throughout. For example, instead of hot spots on a metal sheet causing some cookies to brown faster than others, the stone provides a uniform heat buffer. This results in batches of cookies where every single one is baked to delicious perfection, with consistent texture from edge to center.
Baking Stone Temperature Guide: Optimizing Your Oven
Optimizing your baking stone temperature is key to achieving the best results for different baked goods. The ideal temperature depends heavily on what you are baking. For pizza, you want the highest temperature your oven can safely reach, typically 450°F to 550°F (230°C to 290°C). For bread, temperatures usually range from 400°F to 475°F (200°C to 245°C), depending on the loaf size and desired crust. Cookies might require a stone preheated to align with a standard baking temperature of 350°F to 375°F (175°C to 190°C), with the cookie sheet placed on top.
It's crucial to give your baking stone ample time to preheat and absorb heat fully. Simply waiting for the oven's preheat indicator to turn off is often not enough. For high-temperature baking like pizza, preheating the stone at the target temperature for at least 45 minutes to an hour is recommended. For lower temperatures, 30-45 minutes might suffice. A well-preheated stone ensures maximum heat transfer upon contact, which is vital for achieving that immediate crust development and oven spring.
Tips for Using a Baking Stone: Getting the Most Out of Your Stone
To get the most out of your baking stone, always place it in a cold oven before preheating. Rapid temperature changes can cause some stone materials to crack. Position the stone on a rack in the middle or lower-middle of your oven, depending on what you're baking and where you want the most intense heat directed (lower for pizza, middle for bread or cookies).
Use a pizza peel dusted with cornmeal or semolina to easily slide dough onto the hot stone. This prevents sticking and allows for quick transfer, minimizing heat loss. Avoid placing cold or wet items directly onto a hot stone unless it's specifically designed for thermal shock. After baking, turn off the oven and let the stone cool completely inside the oven before attempting to remove or clean it. Never wash a hot stone with cold water; this is a sure way to cause it to crack. Scrape off any baked-on residue once cooled.
Dutch Oven: Achieving Optimal Baking with Temperature Control
What is a Dutch Oven? A Versatile Baking Tool
A Dutch oven is a heavy pot, typically made of cast iron (enameled or seasoned), with a tight-fitting lid. While often used on the stovetop for stews and braises, it is also an exceptional tool for baking, especially for bread. The key to its baking prowess lies in its ability to create a controlled, steamy environment inside the pot when the lid is on.
The heavy construction of a Dutch oven, particularly cast iron, means it retains and distributes heat incredibly well. When preheated in a hot oven, the walls and base become a powerful heat source. Placing dough inside and covering it traps the moisture released by the dough as it heats up, creating steam. This steam is crucial for keeping the surface of the dough pliable during the initial phase of baking, allowing it to expand fully and achieve excellent oven spring.
Benefits of Using a Dutch Oven for Baking
Moisture Retention: Baking Deliciously Moist Baked Goods
One of the primary benefits of using a Dutch oven for baking is its ability to retain moisture. When baking bread, the dough releases steam as it heats. In a standard oven, this steam quickly dissipates. However, in a lidded Dutch oven, the steam is trapped, creating a humid microclimate around the dough.
This trapped steam keeps the surface of the dough soft and moist for the first portion of the bake. This allows the dough to expand optimally during the "oven spring" phase without the crust setting too early. The result is a loaf with better volume and a thinner, crispier crust because the surface doesn't dry out and harden prematurely. This moisture retention is also beneficial for baking cakes or other items that require a moist interior.
Temperature Control: Dutch Oven Baking Temperature Guide
A key advantage of a Dutch oven is the stable and controlled temperature environment it provides. The heavy cast iron retains heat exceptionally well, radiating it evenly around the dough or batter inside. While the oven itself might have slight temperature fluctuations, the Dutch oven acts as a buffer, maintaining a more consistent temperature within its walls. Understanding the appropriate Dutch oven baking temperature guide for different items is critical for success.
For instance, when baking bread, you typically preheat the Dutch oven to a high temperature, often 450°F to 500°F (230°C to 260°C). This initial high heat, combined with the trapped steam, promotes maximum oven spring.
After the initial covered bake (perhaps 20-30 minutes), the lid is often removed, and the oven temperature might be slightly reduced (say, to 400°F or 425°F, 200°C or 220°C) for the remainder of the bake to allow the crust to brown and crisp up without burning. This two-stage temperature approach, guided by the Dutch oven baking temperature guide for your specific recipe, ensures both optimal rise and perfect crust development.
Creating a Crusty Exterior
Despite trapping moisture initially, a Dutch oven is excellent for creating a wonderfully crusty exterior on bread. The initial steaming phase allows the dough to expand fully. Once the lid is removed, the intense dry heat from the preheated pot and the oven hits the now-expanded loaf.
This sudden exposure to dry heat causes the moist surface of the loaf to rapidly dehydrate and caramelize, forming a deep golden-brown, crackling crust. The heavy cast iron radiates heat intensely, contributing significantly to the even browning and crisping of the crust during the final baking stage. This combination of initial steam and subsequent dry heat is what gives Dutch oven bread its signature thick, chewy, and ultimately crispy crust.
Best Baked Goods for Dutch Ovens
Bread Baking: The Ultimate Dutch Oven Bread Recipe
The Dutch oven is widely considered the ultimate tool for baking rustic, artisan-style bread at home, especially no-knead recipes. Its ability to trap steam mimics professional deck ovens that inject steam, resulting in superior oven spring and crust development. A typical Dutch oven bread recipe involves preheating the oven and the pot to a high temperature, around 450°F-475°F (230°C-245°C).
The dough is then carefully placed in the hot pot, the lid is secured, and it bakes covered for the first 20-30 minutes. This covered period allows the dough to expand fully in the steamy environment. After this, the lid is removed, and baking continues for another 15-25 minutes until the crust is deeply browned and crispy. This method consistently yields loaves with impressive height and a beautiful, crackly crust that's hard to achieve with other home baking methods.
Cakes: Moist and Tender Perfection
While less common than bread, a Dutch oven can also be used to bake incredibly moist cakes, especially those that benefit from gentle, even heat and moisture retention. Baking a cake in a covered Dutch oven essentially creates a mini-steam oven, which can prevent the cake from drying out around the edges before the center is cooked.
Recipes might call for placing the cake batter in a smaller baking pan that fits inside the Dutch oven, or sometimes directly into a well-greased and floured pot. Baking temperatures might be lower than for bread, perhaps 325°F to 350°F (160°C to 175°C), with varying bake times depending on the cake size and density. The even heat distribution from the cast iron helps ensure the cake bakes uniformly without hot spots.
Cobblers and Crisps: Rustic and Delicious
Dutch ovens are perfect for baking fruit cobblers, crisps, and crumbles, especially when aiming for a rustic, homey feel. The heavy pot retains heat wonderfully, ensuring the fruit filling bubbles and thickens evenly while the topping bakes to golden perfection.
Baking a cobbler in a Dutch oven often happens at temperatures around 375°F to 400°F (190°C to 200°C). The pot ensures the heat penetrates the fruit quickly, cooking it down, while the open top allows the crumble or biscuit topping to brown and crisp up nicely. This method is particularly great for baking outdoors over coals, but it works just as effectively in a conventional oven, yielding bubbling, delicious desserts with a beautifully baked topping.
Dutch Oven Baking Temperature Guide: Mastering the Heat
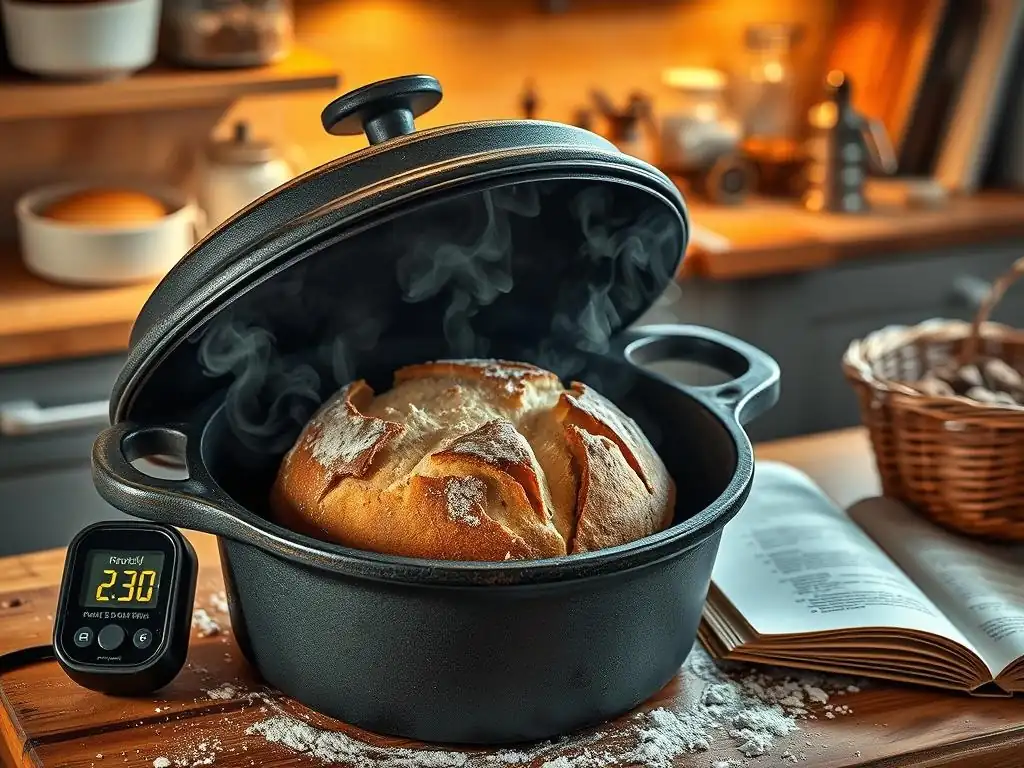
Mastering the heat with a Dutch oven involves understanding the specific temperature needs for different stages and recipes. For most artisan bread, the initial preheat temperature is high, typically 450°F to 500°F (230°C to 260°C). This high temperature, combined with the preheated pot, provides the necessary thermal energy for rapid oven spring and steam generation. The Dutch oven baking temperature guide for bread often recommends baking covered at this high temperature for the first phase.
For the second phase of bread baking, after the lid is removed, the Dutch oven baking temperature guide might suggest reducing the oven temperature slightly, perhaps to 400°F to 425°F (200°C to 220°C). This allows the crust to brown and crisp without burning, as the loaf is now fully exposed to the oven's dry heat.
For other items like cakes or cobblers, lower, more consistent temperatures, typically 325°F to 400°F (160°C to 200°C), are used throughout the bake, often with the lid on for part or all of the time depending on the desired outcome. Always refer to the specific recipe's Dutch oven baking temperature guide.
Tips for Using a Dutch Oven: Maximizing Its Potential
To maximize the potential of your Dutch oven for baking, always preheat it inside the oven at the target temperature for at least 30-60 minutes before adding your dough or batter. This ensures the heavy pot is fully saturated with heat, providing that crucial initial burst of energy. Use parchment paper to carefully lower delicate dough into the scorching hot pot to avoid burns and make removal easier.
Be extremely cautious when handling a hot Dutch oven; use heavy-duty oven mitts. When baking bread, remove the lid carefully, directing the burst of steam away from you. For cakes or other items baked with the lid on, check for doneness using a skewer inserted into the center. Allow the Dutch oven to cool down significantly before cleaning. For seasoned cast iron, avoid soap if possible; for enameled cast iron, standard dish soap is fine, but avoid abrasive scrubbers that can damage the finish.
Baking Stone vs. Dutch Oven: A Detailed Comparison
Heat Distribution: Comparing Baking Stone and Dutch Oven
Both baking stones and Dutch ovens are excellent at absorbing and distributing heat, but they do so differently. A baking stone, placed on an oven rack, primarily provides intense, direct heat from below through conduction and radiation. It acts as a stable, hot surface that the baked good sits directly on or is placed above (if using a sheet pan on the stone). This is ideal for crisping bases.
A Dutch oven, especially a heavy cast iron one, absorbs heat from all sides – bottom, top (via the lid), and walls – and radiates it inwards. When the lid is on, it creates a contained thermal mass where heat is distributed evenly within the pot. When the lid is off, it still provides strong radiant heat from the bottom and sides. This creates a more uniform baking environment around the entire item inside, contributing to even cooking and browning, particularly beneficial for the overall rise and crust development of bread.
Moisture Retention: Which Baking Method is Best?
When it comes to moisture retention during baking, the Dutch oven is the clear winner, especially for bread. The tight-fitting lid traps the steam released by the dough as it heats up, creating a humid environment within the pot. This trapped steam keeps the surface of the dough moist and pliable, allowing for maximum expansion during oven spring before the crust sets.
A baking stone, on the other hand, offers no inherent moisture retention. When baking on a stone in a standard oven, any steam released by the dough quickly dissipates into the oven cavity. To achieve a similar steamy environment when using a stone for bread, bakers often employ external methods like placing a tray of hot water or lava rocks below the stone, or spraying the oven walls, but this is often less effective and harder to control than the contained environment of a Dutch oven.
Crust Formation: Achieving the Perfect Texture
Both tools contribute significantly to crust formation but yield slightly different results. A baking stone, with its intense direct heat from below, is superb at creating a very crispy, often slightly charred bottom crust, particularly desirable for pizza. It helps set the base quickly and contributes to a light, airy crumb structure above the stone.
A Dutch oven, through its two-stage process (covered steam, then uncovered dry heat), excels at creating a thick, uniformly crispy, and often chewy crust all around the loaf. The initial steam allows the entire surface to remain soft and expand, while the subsequent direct heat from the pot and oven bakes and browns the crust evenly. For a thick, rustic bread crust, the Dutch oven method is generally preferred. For a thin, crispy pizza base, the baking stone is king.
Versatility: Which Baking Equipment Offers More Options?
In terms of overall versatility in the kitchen, a Dutch oven often has the edge. While excellent for baking bread, cakes, cobblers, and even roasting meats in the oven, it is also a fundamental piece of equipment for stovetop cooking – simmering stews, braising meats, frying, and boiling. Its utility extends far beyond baking.
A baking stone's primary function is centered around baking items that benefit from direct heat transfer to a hot surface, such as pizzas, flatbreads, artisan bread (often with supplementary steam), and potentially improving the bake of cookies or pastries on a sheet pan. While highly effective for these specific tasks, its use cases are more limited compared to the multi-functional nature of a Dutch oven.
Ease of Use: Baking Stone vs. Dutch Oven for Beginners
For beginners, both tools require careful handling due to high temperatures, but the Dutch oven method for bread is often considered slightly more forgiving in terms of achieving a good rise and crust without needing external steam methods. The contained environment of the Dutch oven simplifies the steam aspect of bread baking significantly.
However, placing dough into a scorching hot Dutch oven requires care, often using parchment paper and mitts to avoid burns. A baking stone is simpler in concept (just place it in the oven), but achieving a truly great artisan bread crust on a stone might require mastering separate steam techniques. For pizza, the stone is relatively straightforward – just slide the pizza on. Ultimately, ease of use depends on the specific application, but for consistently good bread results without extra steps for steam, the Dutch oven often feels more "easy" for beginners.
Understanding Dutch Oven Baking Temperature Guide
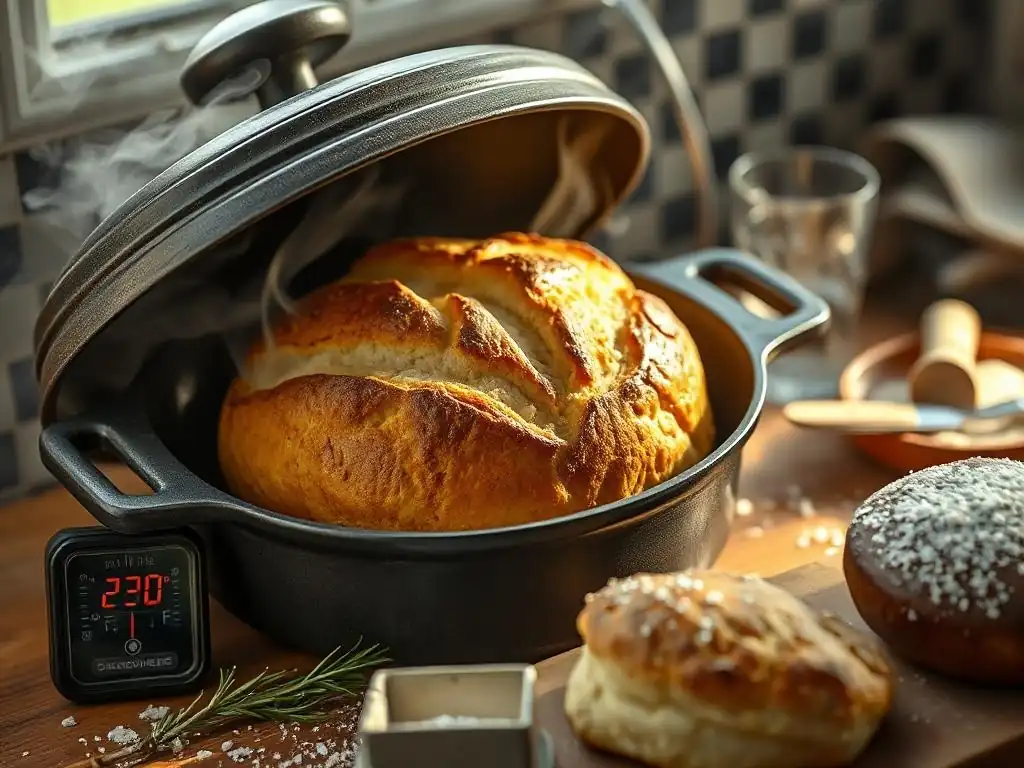
Dutch Oven Baking Temperature Guide: Temperature Charts and Recommendations
A typical Dutch oven baking temperature guide for bread starts with a high preheat. For a standard 1-2 pound loaf, preheat the oven and the empty Dutch oven to 450°F to 475°F (230°C to 245°C). This high temperature is crucial for achieving rapid oven spring. Bake covered at this temperature for 20-30 minutes.
After the covered bake, the Dutch oven baking temperature guide often recommends removing the lid and potentially reducing the oven temperature slightly to 400°F to 425°F (200°C to 220°C) for another 15-25 minutes, or until the crust is a deep golden brown and the internal temperature of the bread reaches around 200°F-210°F (93°C-99°C). For cakes baked in a Dutch oven, a lower, consistent temperature like 325°F to 350°F (160°C to 175°C) is more common, with baking times varying significantly based on size and recipe. Always consult your specific recipe's Dutch oven baking temperature guide.
Factors Affecting Dutch Oven Baking Temperature
Dough Hydration and Baking Time
The hydration level of your dough can influence the ideal Dutch oven baking temperature guide and baking time. Higher hydration doughs (like those above 75%) benefit greatly from the initial high heat and steam in the Dutch oven, allowing them maximum expansion before the crust sets. They might require a slightly longer covered bake time within the high-temperature range (e.g., 30 minutes at 450°F) to ensure sufficient structure develops before the lid is removed.
Lower hydration doughs might require less time covered. The total baking time will also vary based on the size and weight of the loaf. A larger loaf will need more time to bake through to the center than a smaller one, potentially requiring adjustments to both the covered and uncovered baking times within the recommended Dutch oven baking temperature guide ranges.
Adjusting Temperature for Different Recipes
The Dutch oven baking temperature guide needs to be adjusted based on the specific recipe you are following. While bread typically uses a high initial temperature, baking a cake or a casserole in a Dutch oven will require significantly lower temperatures, often in the 325°F to 375°F (160°C to 190°C) range, similar to standard baking temperatures for those items.
Furthermore, recipes might call for variations in the covered versus uncovered baking times, or even suggest baking uncovered for the entire duration for certain dishes. Always refer to the specific recipe's Dutch oven baking temperature guide and instructions for the best results. The heavy cast iron will still provide even heat distribution even at lower temperatures.
Preheating Your Dutch Oven
Proper preheating is perhaps the most critical factor in using a Dutch oven for baking, especially bread. The Dutch oven must be preheated with the oven to the target temperature for at least 30-60 minutes. This ensures the heavy pot is fully saturated with heat.
Skipping adequate preheating means the pot won't be hot enough to provide the necessary initial heat transfer for optimal oven spring and crust development. The Dutch oven baking temperature guide assumes you are placing your dough into a preheated pot that is as hot as the oven itself. Insufficient preheating can lead to a less impressive rise and a thicker, less desirable crust.
Baking Stone Temperature Guide
Baking Stone Temperature Guide: Temperature Charts and Recommendations
The ideal baking stone temperature guide varies significantly depending on what you're baking. For high-temperature items like pizza, preheat the stone at your oven's highest setting, typically 450°F to 550°F (230°C to 290°C), for 45-60 minutes. The stone needs this time to fully absorb and radiate heat.
For artisan bread, a baking stone temperature guide often suggests preheating the stone at 400°F to 475°F (200°C to 245°C) for 30-45 minutes. If you are using the stone for baking items on a sheet pan, like cookies or pastries, preheating the stone at the recipe's standard baking temperature (e.g., 350°F or 375°F / 175°C or 190°C) for 30-45 minutes is usually sufficient to create a stable heat platform.
Factors Affecting Baking Stone Temperature
Baking Time and Baking Stone Material
The required baking stone temperature guide and baking time are influenced by the material and thickness of your stone. Thicker stones, while taking longer to preheat, retain heat better and provide a more stable baking surface over time. Cordierite stones tend to heat up faster and be more durable at high temperatures than some ceramic alternatives.
The baking time for your specific item will dictate how long the stone needs to maintain its temperature. For a quick pizza bake (under 10 minutes), a very high preheat is essential. For a longer bread bake (30-40 minutes), the stone's ability to sustain heat is more important. Always ensure the stone is fully preheated for the duration specified in the baking stone temperature guide for your recipe.
Adjusting Temperature for Different Recipes
Just like with a Dutch oven, the baking stone temperature guide must be adjusted based on the recipe. A baking stone is primarily used at higher temperatures than a standard baking sheet to achieve specific crust characteristics. Pizza demands the highest heat, while bread requires high heat but often with attention to creating steam separately.
When using a stone simply to improve the evenness of baked goods on a sheet pan (like cookies), the stone temperature should match the recipe's standard oven temperature. Using a baking stone temperature guide ensures you are using the stone effectively for the intended purpose of the recipe, whether it's maximum crisping or just improved heat stability.
Preheating Your Baking Stone
Proper preheating is non-negotiable when using a baking stone. Placing dough or batter onto a stone that hasn't reached the target temperature means you won't get the desired effect of rapid heat transfer, which is the stone's main benefit. The baking stone temperature guide emphasizes preheating the stone with the oven for a significant amount of time after the oven indicates it has reached temperature.
For high-temperature baking (pizza, bread), this means preheating for 45-60 minutes at the target temperature. For lower temperatures, 30-45 minutes is usually sufficient. A well-preheated stone ensures that when your dough hits the surface, it receives that intense burst of heat needed for immediate oven spring and bottom crust development.
Conclusion: Choosing the Right Tool for Your Baking Adventure
Summarizing the Benefits of Baking Stones
Baking stones are champions of direct heat transfer, making them indispensable for achieving incredibly crispy bottom crusts. They act as a thermal mass, providing a stable, even heat source from below that minimizes hot spots and promotes uniform baking. They are particularly excellent for high-temperature items like pizza, delivering that authentic, slightly charred crust, and can significantly improve the bake of artisan bread (especially when combined with external steam) and even cookies on a sheet pan by regulating bottom heat.
Summarizing the Benefits of Dutch Ovens
Dutch ovens, with their heavy construction and tight-fitting lids, excel at creating a controlled, steamy environment crucial for achieving maximum oven spring and a thick, uniformly crispy crust on bread. They provide even heat distribution around the entire item being baked. The ability to manage moisture within the pot makes them ideal for moist cakes and rustic cobblers, in addition to being a top choice for artisan bread baking, often simplifying the steam-creation process compared to using a stone. Understanding the Dutch oven baking temperature guide is key to harnessing its power.
BakeWithEase Recommendation: Selecting the Best Baking Equipment for Your Baking Style
Choosing between a baking stone and a Dutch oven ultimately depends on what you bake most often and what results you prioritize. If your passion is creating perfect, crispy-bottomed pizzas and you frequently bake artisan bread but are comfortable creating steam separately, a baking stone is a fantastic investment.
If your focus is on achieving consistently well-risen artisan bread with a thick, crackling crust, or you enjoy baking moist cakes and rustic desserts in a single pot, a Dutch oven is likely the better choice. Many dedicated bakers find that having both tools in their kitchen allows them to tackle a wider range of recipes with optimal results, leveraging the specific strengths of each piece of equipment.
Frequently Asked Questions
What are the key differences between using a baking stone and a Dutch oven for baking?
A baking stone provides a direct heat source for a crispy crust, while a Dutch oven creates a steamy environment that traps moisture for a soft interior. The choice depends on the desired outcome of the baked good.
Can I use the same "Dutch oven baking temperature guide" for all types of bread?
While a general Dutch oven baking temperature guide exists, adjustments may be needed based on the type of bread. Consider factors like hydration level and desired crust color, and adjust accordingly.
Is a Dutch oven necessary, or can I achieve similar results with a baking stone and other methods?
A Dutch oven is not strictly necessary, but it creates a unique environment that's difficult to replicate perfectly. You can try creating steam in your oven with a baking stone, but the Dutch oven's enclosed space is unique.
What are the advantages of using a Dutch oven for baking versus a baking stone?
A Dutch oven offers superior heat retention and creates a steamy environment, leading to a softer crumb and a crispy crust. Baking stones are better for a crisp and even bake on flat items.
How does the "Dutch oven baking temperature guide" impact the texture and appearance of the final baked product?
Following a Dutch oven baking temperature guide ensures proper gluten development and crust formation. High temperatures create a darker, crisper crust, while lower temperatures result in a softer, less browned crust.
Final Reflection: The Perfect Crust: Choosing Your Baking Vessel
The quest for the perfect loaf, the crispiest crust, the most tender crumb—it's a pursuit shared by bakers worldwide. This exploration of baking stones versus Dutch ovens reveals that the "best" choice isn't a universal answer, but rather a nuanced decision based on desired outcome and baking style. Understanding the unique properties of each vessel unlocks a world of baking possibilities, far beyond simply achieving the right temperature.
The impact of these two seemingly simple baking tools extends far beyond the kitchen. They represent a connection to tradition, a celebration of craftsmanship, and a testament to the enduring power of simple ingredients transformed by heat. Baking is at once child's play and adult joy. And love, of course.
– Paul Hollywood. This quote perfectly encapsulates the emotional connection we forge with the process, a connection amplified by the choice of our baking vessel. The careful selection of a baking stone or Dutch oven becomes a personal statement, reflecting our individual baking philosophies and desired results.
So, as you stand before your flour-dusted countertop, ready to embark on your next baking adventure, consider the insights shared within this guide. Don't just bake; experiment. Try both a baking stone and a Dutch oven, noting the subtle differences in texture, color, and overall flavor. Discover which vessel best suits your style and the specific baked goods you crave. The journey of culinary exploration is a lifelong one, and the perfect crust, much like the perfect baking vessel, is a personal discovery waiting to be made.
Unleash Your Inner Baker: Take the Next Step!
Thanks for taking the time to explore the world of baking stones and Dutch ovens! We hope you now feel confident in choosing the perfect tool to elevate your baking game. Ready to put your new knowledge into practice?
- Bake something amazing! Try a recipe you've been putting off – perhaps that sourdough bread or flaky croissant – using your preferred baking method. This is your chance to experience the difference firsthand!
- Share your creations: Post a picture of your masterpiece on social media and tag us @BakeWithEase – we'd love to see what you bake!
- Explore more baking techniques: Dive deeper into our other articles to unlock even more baking secrets and expand your culinary horizons.
What delicious creation will you bake first? Let us know in the comments below!