
GlutenFree Baking Made Simple: Best Machines & Recipes

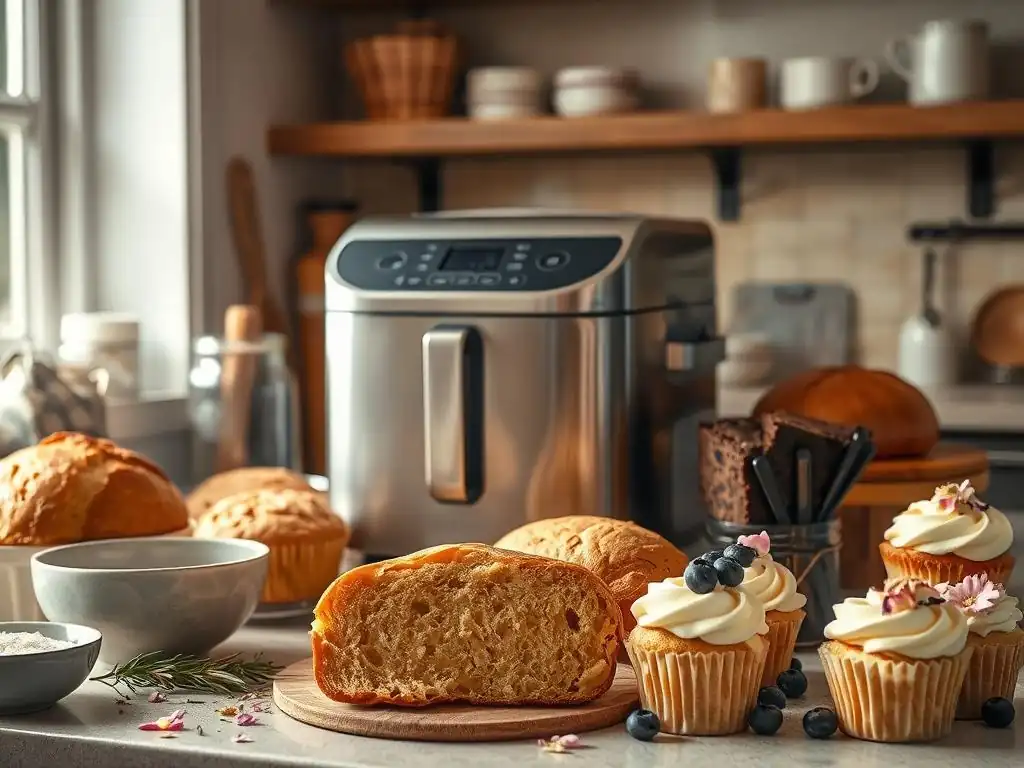
Welcome to BakeWithEase, where baking dreams become delicious realities! Are you ready to unlock the secrets to flawlessly gluten-free baking with the right machine and the most delectable recipes? We've got you covered. Discover how to create amazing treats, easier than you ever thought possible, and find out which machines are truly essential for success. Let's get baking!
- Introduction to Gluten-Free Baking with Machines
- Top Gluten-Free Bread Machines Reviewed
- Essential Gluten-Free Bread Machine Recipes
- Advanced Gluten-Free Baking Techniques for Bread Machines
- Maintaining Your Gluten-Free Baking Machine
- Conclusion: Mastering Gluten-Free Baking with the Right Machine and Recipes
-
Frequently Asked Questions
- What types of baking machines are best suited for gluten-free baking?
- Are there any specific considerations when adapting regular baking recipes for a gluten-free baking machine?
- What are some common challenges faced when using a baking machine for gluten-free recipes, and how can they be overcome?
- Where can I find reliable gluten-free baking machine recipes?
- What ingredients are essential to have on hand when starting to bake gluten-free recipes in a baking machine?
- Final Reflection: The Flour Power of Accessible Gluten-Free Baking
- Unleash Your Inner Gluten-Free Baker!
Introduction to Gluten-Free Baking with Machines
Baking gluten-free bread can sometimes feel like a daunting challenge, especially for newcomers. Unlike traditional wheat-based baking where gluten provides structure and elasticity, gluten-free flours require different techniques and combinations to achieve a similar texture and rise.
Many home bakers discover that getting that perfect, airy loaf without gluten takes practice, precision, and often, a bit of experimentation with various flour blends, binders like xanthan gum or psyllium husk, and hydration levels. This is where the convenience of a bread machine truly shines, offering a controlled environment and specialized cycles designed to simplify the process and increase your success rate with gluten-free baking machine recipes.
Bread machines automate many of the crucial steps in bread making, including precise temperature control during kneading and rising, and consistent baking times. For gluten-free doughs, which often have a wetter, batter-like consistency and require specific handling compared to traditional dough, this automation is a significant advantage. By eliminating the guesswork involved in manual kneading and proofing times, a bread machine can help you consistently produce delicious gluten-free loaves. Exploring gluten-free baking machine recipes becomes much more approachable when you have a reliable appliance doing the heavy lifting, allowing you to focus on ingredient quality and flavor profiles.
The Benefits of Using a Bread Machine for Gluten-Free Baking
Using a bread machine significantly simplifies the gluten-free baking process by automating the kneading, rising, and baking cycles. Gluten-free doughs are often very sticky and difficult to handle manually, requiring less kneading than traditional doughs. A bread machine handles this delicate process with minimal intervention, preventing over-kneading which can negatively impact texture. Many machines also offer specific gluten-free cycles that are shorter and designed for the unique properties of these doughs, such as longer resting periods and different temperature profiles during baking to ensure a thorough cook without drying out the loaf.
Beyond the automation of the baking process, bread machines offer convenience that is hard to beat for gluten-free baking machine recipes. You simply add the ingredients in the specified order, select the gluten-free setting, and wait for a freshly baked loaf. This saves significant time and effort compared to mixing, kneading, proofing, and baking in a conventional oven. For individuals with celiac disease or gluten sensitivity, having a dedicated appliance can also help minimize the risk of cross-contamination with gluten, ensuring a safer baking environment right in your own kitchen.
Key Ingredients for Gluten-Free Bread Machine Recipes
Successful gluten-free baking in a bread machine relies on a careful selection of flours and binders. Common gluten-free flour blends often combine starches like rice flour, tapioca starch, and potato starch with protein-rich flours such as sorghum flour, brown rice flour, or millet flour. These blends provide structure and texture that mimics wheat flour to some extent. Using a pre-mixed gluten-free bread flour blend specifically designed for bread machines can be a great starting point for many gluten-free baking machine recipes, as these blends are formulated for optimal performance in automated cycles.
In addition to flours, binders are crucial in gluten-free baking to replace the function of gluten. Xanthan gum or psyllium husk powder are commonly used to provide elasticity and structure, helping the dough hold together and rise.
Yeast, typically active dry yeast or instant yeast, is essential for leavening, producing the gas that makes the bread rise. Liquids like water or milk, fats such as oil or butter, a sweetener like sugar or honey (which feeds the yeast), and salt for flavor are also standard components in most gluten-free baking machine recipes, each playing a vital role in the final texture, taste, and appearance of your loaf.
Top Gluten-Free Bread Machines Reviewed
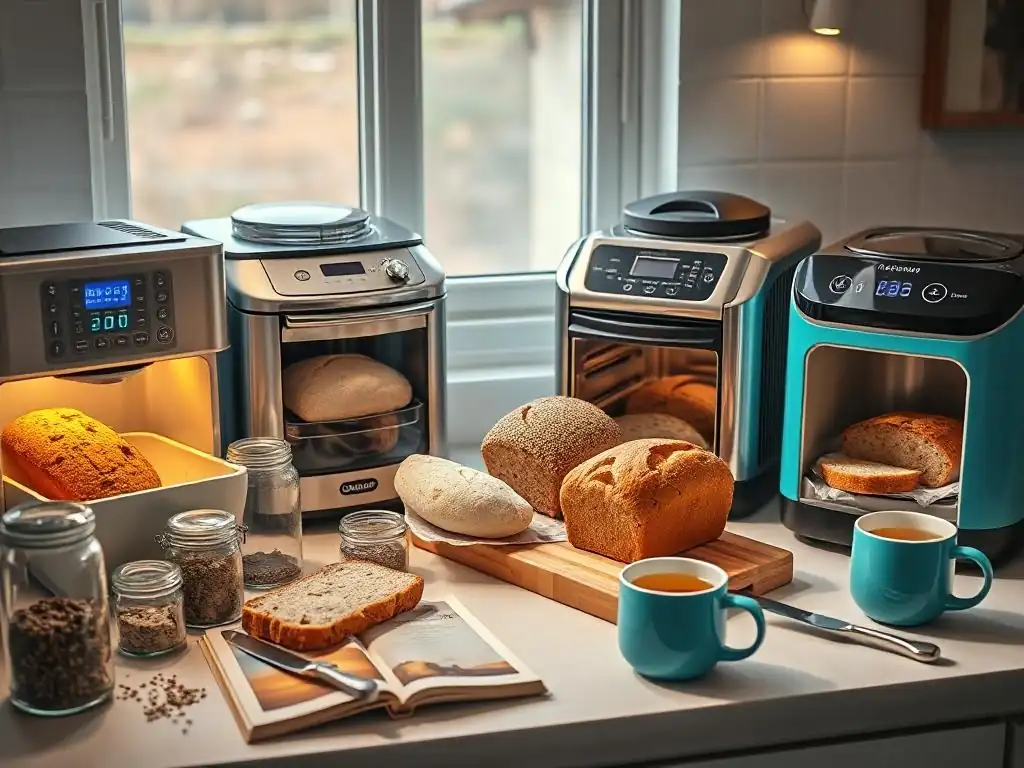
Choosing the right bread machine is key to consistent success with gluten-free baking machine recipes. While many machines offer a gluten-free setting, the quality and effectiveness of this program can vary significantly between models.
Factors to consider include the machine's loaf size capacity, the number and types of cycles (specifically the quality of the gluten-free cycle), delay timers, crust color options, and the overall durability and ease of use. Investing in a machine known for its strong gluten-free performance can dramatically improve your results compared to relying on a generic machine that may not handle the unique properties of gluten-free dough well.
When researching the best bread machine for your gluten-free baking needs, pay attention to user reviews and specifications regarding the gluten-free cycle duration and temperature profile. Some machines have longer mixing or resting periods specifically tailored for gluten-free batters. Others might offer different loaf size options suitable for smaller or larger gluten-free recipes. Consider your budget and how often you plan to bake. While premium machines often offer more features and potentially better results, there are also more affordable options that can still produce good gluten-free bread with the right recipes and techniques.
Comparing Bread Machine Features for Gluten-Free Baking
When evaluating bread machines for gluten-free baking, several features stand out as particularly important. A dedicated "Gluten-Free" cycle is paramount; ideally, this cycle should be optimized with specific timings for mixing, resting, and baking that differ from standard wheat bread cycles. Look for machines that offer multiple loaf sizes, often ranging from 1 lb to 2.5 lbs, allowing flexibility with different gluten-free baking machine recipes and household needs. Crust color options (light, medium, dark) are also useful, though the results can vary with gluten-free doughs.
Another beneficial feature is a fruit and nut dispenser, although for many gluten-free recipes with wetter doughs, it might be better to add inclusions manually during the mix cycle to ensure even distribution. A delay timer is standard on most machines and can be convenient, but be cautious using it with recipes containing perishable ingredients like milk or eggs, especially in warmer climates. The motor strength and paddle design can also influence how well the machine handles thicker gluten-free batters, though most gluten-free doughs are less demanding than dense whole wheat.
Breville Custom Loaf Bread Maker: A Detailed Review of Gluten-Free Capabilities
The Breville Custom Loaf Bread Maker, particularly models like the BBM800XL, is often cited for its advanced features and customization options, making it a strong contender for serious gluten-free baking. This machine boasts 13 automatic settings, including a dedicated "Gluten Free" cycle, and allows users to program their own custom cycles. This level of control is invaluable for tweaking gluten-free baking machine recipes to perfection, allowing adjustments to preheat, knead, rise, bake, and keep warm times and temperatures. The machine's collapsible paddle is also a unique feature designed to minimize the hole left in the bottom of the loaf.
User feedback and tests often show that the Breville BBM800XL performs well with gluten-free recipes, producing consistently good results. The custom programming feature allows bakers to experiment with different gluten-free flour blends and hydration levels, tailoring the machine's cycle to their specific recipe needs. For example, a recipe using a high proportion of rice flour might benefit from a slightly longer rise time, which can be easily programmed. While it represents a higher investment compared to basic models, its flexibility and performance make it a top choice for those committed to mastering gluten-free baking machine recipes.
Key Features of the Breville Bread Maker for Gluten-Free Baking
The Breville Custom Loaf offers several features specifically beneficial for gluten-free bakers. Its custom program function is perhaps the most significant, allowing precise control over each stage of the baking cycle. This means you aren't limited to the machine's default gluten-free setting but can adapt it based on the specific gluten-free baking machine recipes you are using and the results you desire. For instance, you can manually set a shorter kneading time followed by a longer rest period, which often works well for gluten-free doughs.
Other useful features include the automatic fruit and nut dispenser (though manual addition is often preferred for gluten-free batters), a large viewing window, and interior light to monitor progress without opening the lid, and multiple loaf size options (1 lb, 1.5 lb, 2 lb, 2.5 lb). The machine's sturdy build and powerful motor handle even slightly denser gluten-free doughs effectively. The collapsible paddle is a thoughtful design element, reducing the size of the paddle hole in the finished loaf, which is often a minor annoyance in bread machine baking.
Gluten-Free Bread Recipe Results with the Breville Bread Maker
When using well-formulated gluten-free baking machine recipes, the Breville Custom Loaf is capable of producing loaves with a good rise, tender crumb, and well-baked crust. Because gluten-free flours absorb liquids differently and lack the elastic network of gluten, achieving a light, airy texture can be challenging. However, the Breville's precise temperature control during the rise and bake cycles helps promote optimal yeast activity and ensures the loaf cooks through without becoming dense or gummy.
Many users report success baking a variety of gluten-free breads, from simple white blends to more complex multi-grain or seed loaves, using the Breville. While individual results can vary depending on the specific recipe, ingredients, and environmental factors (like altitude or humidity), the machine's ability to be customized allows bakers to fine-tune the process. For example, if a standard gluten-free cycle results in a loaf that is slightly under-baked in the center, a custom program can increase the baking time or temperature slightly to correct this, leading to more consistent and satisfying outcomes for your gluten-free baking machine recipes.
Zojirushi Home Bakery Virtuoso Plus: Gluten-Free Bread Making Champion?
The Zojirushi Home Bakery Virtuoso Plus (BB-PDC20) is widely regarded as a top-tier bread machine, particularly praised for its ability to produce large, horizontal loaves that resemble oven-baked bread. It features a dedicated "Gluten Free" course among its 15 programmed settings. This machine uses dual kneading blades, which some bakers find provides a more thorough mix, potentially beneficial for incorporating gluten-free flours and binders evenly into the batter. The horizontal pan design allows for a more traditionally shaped loaf compared to the tall, vertical loaves produced by many other machines.
While the Zojirushi Virtuoso Plus comes at a premium price point, its reputation for reliability and consistent results makes it a favorite among serious home bakers, including those focused on gluten-free baking machine recipes. The machine's cycles are precisely timed and temperature-controlled, contributing to predictable outcomes. Its large capacity (up to a 2 lb loaf) is also suitable for families or those who bake frequently. The ease of use, clear display, and included recipe booklet (which often includes specific gluten-free recipes) add to its appeal.
Zojirushi's Unique Settings for Gluten-Free Loaves
The Zojirushi Virtuoso Plus's "Gluten Free" course is specifically designed to handle the unique properties of gluten-free doughs. It typically involves a shorter kneading time, a longer resting period, and a different temperature profile during baking compared to standard cycles. The precise timing of this cycle is calibrated to allow gluten-free batters to develop structure and rise without the need for extensive kneading that would be detrimental. The machine's dual paddles ensure that even thick, sticky gluten-free batters are mixed thoroughly.
One key aspect of the Zojirushi's design is the heating element in the lid as well as the base. This helps ensure even baking throughout the loaf, reducing the chances of a dense or undercooked top, which can sometimes be an issue with gluten-free breads baked in machines that only heat from the bottom. This uniform heating contributes significantly to achieving a good crust color and texture on all sides of the loaf when following gluten-free baking machine recipes.
Achieving Optimal Texture with Zojirushi's Gluten-Free Program
Using the Zojirushi Virtuoso Plus's gluten-free program, many bakers achieve loaves with a surprisingly good texture for gluten-free bread – often a soft, tender crumb that isn't overly dense or crumbly. The machine's consistent temperature management during the rise cycle is crucial for activating yeast and promoting aeration in the batter. The baking cycle is designed to cook the loaf through evenly, which is essential for avoiding gumminess, a common problem with gluten-free baking.
Success with the Zojirushi, like any machine, also depends heavily on the gluten-free baking machine recipes used and the quality of ingredients. Using a well-balanced gluten-free flour blend and the correct amount of binder (like xanthan gum) is vital. The machine provides the optimal environment, but the recipe provides the foundational structure. Experimenting with slight variations in liquid content or ingredient temperature within the Zojirushi's gluten-free cycle can help fine-tune results for different recipes and achieve that desired light and airy texture.
Hamilton Beach Bread Maker: An Affordable Gluten-Free Baking Option
For bakers seeking a more budget-friendly entry point into gluten-free baking machine recipes, the Hamilton Beach Bread Maker, such as the 2 lb Digital model, is a popular choice. While it may not have the advanced customization of premium machines, it typically includes a dedicated "Gluten Free" cycle and offers standard features like multiple loaf sizes (often 1.5 lb and 2 lb) and crust color options. These machines provide a straightforward way to bake gluten-free bread at home without a significant financial investment.
Hamilton Beach machines are generally known for their ease of use and reliable basic functions. While the gluten-free cycle might be less sophisticated than those on higher-end models, they can still produce satisfactory results with the right gluten-free baking machine recipes. They are a great option for beginners or those who bake gluten-free bread occasionally and want the convenience of a machine without the bells and whistles of more expensive units. Learning the quirks of your specific Hamilton Beach model and adjusting recipes slightly can lead to consistent success.
Benefits of the Hamilton Beach Bread Maker for Budget-Conscious Bakers
The primary benefit of a Hamilton Beach bread maker for gluten-free baking is its affordability. This makes the convenience of using a bread machine for gluten-free baking accessible to a wider range of home bakers. Despite the lower price, these machines still offer the core functionality needed: mixing, rising, and baking cycles, including a specific gluten-free setting. This allows budget-conscious individuals to easily explore and use gluten-free baking machine recipes without manual effort.
Furthermore, Hamilton Beach machines are often compact and user-friendly, making them easy to store and operate. They typically come with a simple interface and clear instructions, which is helpful for beginners. While performance may vary compared to top-tier models, with practice and careful attention to ingredient measurements and order (which is crucial in gluten-free baking), bakers can achieve good results with their gluten-free baking machine recipes using a Hamilton Beach machine.
Gluten-Free Baking on a Budget: Tips and Tricks for the Hamilton Beach Bread Maker
Achieving success with gluten-free baking machine recipes in a budget-friendly machine like the Hamilton Beach often involves optimizing your ingredients and process. Since the machine's gluten-free cycle might be less forgiving than premium models, using a high-quality, reliable gluten-free bread flour blend specifically designed for bread machines can make a big difference. Ensure your yeast is fresh and active, as proper leavening is critical for gluten-free bread texture.
Pay close attention to the liquid temperature specified in your gluten-free baking machine recipes – usually around 105-115°F (40-46°C) is ideal for activating yeast. Adding ingredients in the order recommended by the machine's manual (often liquids first, then dry ingredients, with yeast last on top) helps ensure proper mixing. If you notice inconsistent results, try slightly adjusting the liquid amount (a tablespoon or two more or less) or using a bit more xanthan gum (e.g., 1/4 to 1/2 teaspoon extra per loaf) to improve structure, based on the specific recipe's initial outcome.
Essential Gluten-Free Bread Machine Recipes
Having a reliable bread machine is only half the battle; the other half is finding and using effective gluten-free baking machine recipes. Unlike traditional bread recipes that rely on gluten development, gluten-free recipes are formulated with specific flour blends, binders, and liquid ratios to create structure and lift. Starting with a basic recipe designed for bread machines is the best way to understand the process and get comfortable with the unique characteristics of gluten-free doughs in an automated environment.
Once you've mastered a basic loaf, you can begin experimenting with variations. Gluten-free baking machine recipes can range from simple sandwich loaves to sweeter breads, and even doughs intended for shaping and baking in a conventional oven. Always follow the recipe's instructions carefully, paying close attention to ingredient measurements and the order in which they are added to the bread machine pan, as this can significantly impact the final result. Using a kitchen scale for accurate measurement of flours is highly recommended for gluten-free baking.
Basic Gluten-Free Bread Machine Recipe: A Step-by-Step Guide
A simple, reliable gluten-free baking machine recipe is the foundation for successful gluten-free bread making at home. This type of recipe typically uses a common gluten-free flour blend and standard binders and leavening agents. The key is accurate measurement and following the sequence specified for your particular bread machine model. Most machines instruct adding liquids first, followed by dry ingredients, with the yeast placed last on top of the flour.
Here's a template for a basic recipe, suitable for a 1.5 or 2 lb machine with a gluten-free cycle. Note: Specific quantities will vary slightly based on your machine and flour blend.
Ingredients:
1 to 1.5 cups warm water or milk (approx. 105-115°F / 40-46°C)
1-2 large eggs (optional, adds richness and color)
2-3 tablespoons oil or melted butter
1-2 tablespoons sugar or honey
1 teaspoon salt
2.5 to 3 cups gluten-free bread flour blend (containing binders like xanthan gum, or add separately)
1-1.5 teaspoons xanthan gum (if not in flour blend)
1.5 to 2 teaspoons active dry yeast or instant yeast
Ingredients for a Perfect Gluten-Free Loaf
Selecting the right ingredients is crucial for a successful gluten-free baking machine recipe. Use a good quality gluten-free bread flour blend; blends formulated for bread machines often yield the best results. If your blend doesn't contain a binder, you must add xanthan gum or psyllium husk powder as specified in the recipe, typically around 1 teaspoon per cup of flour blend. This binder provides the necessary structure that gluten would normally provide.
Ensure your yeast is fresh. Stale yeast is a common culprit for dense, flat loaves. Test active dry yeast by dissolving it in a small amount of warm water with a pinch of sugar; it should foam within 5-10 minutes. For instant yeast, this test isn't necessary as it can be added directly to the dry ingredients, but ensure its expiration date hasn't passed. Use liquids at the correct temperature as specified in the recipe to properly activate the yeast.
Mixing and Baking Instructions for Bread Machines
Follow your bread machine's manual for the specific order of adding ingredients, but typically it's liquids first, then dry ingredients layered on top, with yeast placed last, often in a small well made in the flour. Avoid letting the salt or sugar directly touch the yeast initially, as they can inhibit its activity. Once all ingredients are in the pan, place the pan in the machine, close the lid, and select the "Gluten Free" cycle.
Start the machine. During the mixing cycle, you may need to use a rubber spatula to scrape down the sides of the pan to ensure all the dry ingredients are incorporated into the wet batter. Gluten-free dough is often more like a thick batter than a traditional dough ball.
Do this carefully while the machine is mixing, avoiding contact with the moving paddle. Once the cycle is complete, remove the bread pan using oven mitts and immediately turn the loaf out onto a wire rack to cool completely before slicing. Slicing warm gluten-free bread can result in a gummy texture.
Gluten-Free Sandwich Bread Recipe for Bread Machines
A good gluten-free sandwich bread requires a tender crumb and a crust that isn't too hard or thick, making it pleasant for slicing and eating. Many basic gluten-free baking machine recipes can be adapted for sandwich bread by adjusting the liquid-to-flour ratio slightly to create a slightly wetter dough, which often results in a softer texture. Adding ingredients like eggs, milk (instead of water), or a bit more oil can also contribute to a softer crumb and crust.
Consider using a blend that includes ingredients known for softness, such as sorghum flour or oat flour (ensure it's certified gluten-free oats). Some recipes specifically designed for sandwich bread might call for ingredients like psyllium husk powder in addition to or instead of xanthan gum, as psyllium can sometimes contribute to a softer, less crumbly texture. Following a recipe specifically labeled as "sandwich bread" is the easiest way to achieve the desired result for your gluten-free baking machine recipes.
Achieving a Soft Crust in Your Gluten-Free Sandwich Bread
Achieving a soft crust on gluten-free bread from a bread machine can be tricky, as the direct heat in the pan often creates a firmer crust. One method is to select the "Light" crust setting on your bread machine if available. Another tip is to brush the top of the baked loaf with melted butter or a little milk immediately after taking it out of the machine and before cooling. This adds moisture and helps soften the crust as the bread cools on the rack.
Allowing the bread to cool completely on a wire rack is also essential. Trapping steam by letting it cool in the pan or on a flat surface can make the bottom crust soggy while the top remains hard. For an extra soft crust, some bakers wrap the completely cooled loaf in plastic wrap before slicing and storing, which helps the moisture redistribute throughout the loaf, softening the crust over time.
Tips for Slicing Gluten-Free Bread Made in a Machine
Slicing gluten-free bread requires patience and the right tools. Because gluten-free bread lacks the elastic structure of wheat bread, it can be more prone to crumbling, especially if sliced while warm. Always ensure your gluten-free loaf is completely cool before attempting to slice it – ideally, let it cool for at least 1-2 hours, or even longer for larger loaves.
Using a sharp, serrated bread knife is highly recommended. A serrated blade cuts through the crust and crumb with less pressure, minimizing compression and crumbling. Use a gentle sawing motion rather than pressing straight down. For very soft or delicate loaves, an electric knife can provide even, clean slices with minimal effort. Store sliced gluten-free bread properly to maintain freshness, often in an airtight container or bag at room temperature for a day or two, or slice and freeze for longer storage.
Sweet Gluten-Free Bread Machine Recipe: Cinnamon Raisin Delight
Beyond savory loaves, gluten-free baking machine recipes can also include delicious sweet breads. A Cinnamon Raisin Gluten-Free Bread is a popular choice, perfect for breakfast or snacking. These recipes typically include sugar, eggs, butter, and additions like cinnamon, raisins, or other dried fruits. The base will still be a gluten-free flour blend with a binder, but the higher sugar and fat content can sometimes alter the texture slightly compared to a basic savory loaf.
When adding mix-ins like raisins to a sweet gluten-free bread machine recipe, consider the machine's dispenser if it has one. However, for wetter gluten-free batters, it's often best to add mix-ins manually during the final few minutes of the mixing cycle to ensure they are evenly distributed and don't sink to the bottom. Ensure raisins are plump by soaking them in warm water or juice for 10 minutes and draining before adding them to the dough.
Adding Flavors and Variations to Your Gluten-Free Sweet Bread
Sweet gluten-free baking machine recipes are excellent canvases for creativity. Once you have a reliable base recipe, you can easily introduce different flavors. Consider adding citrus zest (lemon, orange), vanilla extract, almond extract, or spices like nutmeg, cardamom, or ginger along with the cinnamon. Chocolate chips, dried cranberries, chopped nuts (ensure they are safe for any allergy concerns), or even shredded apple or zucchini can be added for variety.
Experiment with different sweeteners like brown sugar, maple syrup, or agave nectar, keeping in mind that liquid sweeteners will affect the overall hydration of the dough and may require slight adjustments to the flour or other liquids. For a richer bread, replace some or all of the water with milk or a non-dairy alternative, or increase the amount of butter or oil slightly. Always add extracts or zests with the wet ingredients.
Troubleshooting Common Gluten-Free Baking Issues in Bread Machines
Even with good gluten-free baking machine recipes, you might encounter issues. A common problem is a loaf that doesn't rise enough, resulting in a dense brick. This is often due to inactive yeast (check expiration date, use warm liquids, ensure proper storage), incorrect liquid temperature (too hot or too cold), or incorrect measurement of flour or binder. Too much flour or not enough liquid will result in a very stiff batter that won't rise well.
Another issue is a gummy texture, particularly in the center. This usually indicates the loaf didn't bake through completely. Ensure you are using the dedicated gluten-free cycle, which is typically longer and bakes at a lower temperature than standard cycles. If your machine allows, try increasing the baking time slightly or using a darker crust setting. Ensure the loaf is cooled completely before slicing, as slicing while warm can create a perception of gumminess due to steam.
Advanced Gluten-Free Baking Techniques for Bread Machines
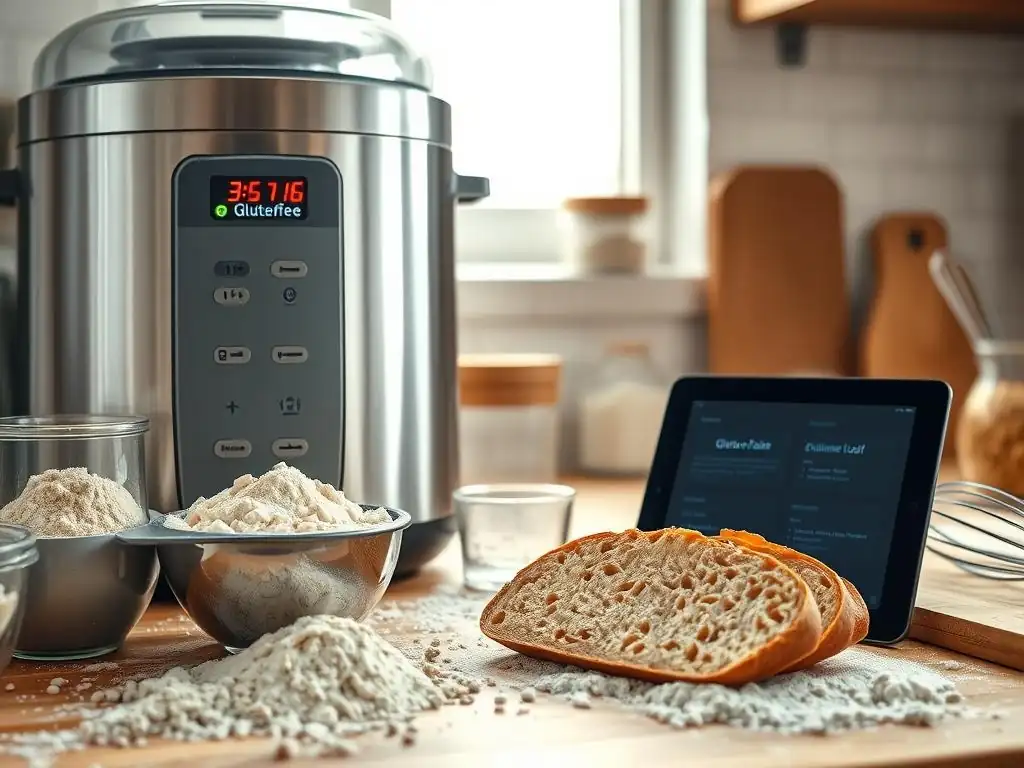
While bread machines are primarily known for baking a complete loaf from start to finish, they can also be used for specific stages of gluten-free baking. Many machines have a "Dough" cycle, which mixes and performs the first rise. This cycle is often suitable for gluten-free doughs, allowing you to use the machine's mixing and temperature-controlled proofing capabilities before shaping the dough manually and baking it in a conventional oven. This opens up possibilities beyond simple loaves.
Using the dough cycle is particularly useful for gluten-free baking machine recipes that require shaping, such as rolls, buns, pizza crusts, or even sweet doughs for cinnamon rolls. Gluten-free doughs can be stickier and harder to work with than wheat doughs, but using the machine for the initial mix and rise simplifies the process considerably. You'll still need to flour your surface and hands generously when handling gluten-free dough after the machine cycle.
Using Gluten-Free Bread Machine Dough for Other Recipes
The dough cycle on a bread machine is a fantastic tool for preparing gluten-free dough for various shaped baked goods. The machine mixes the ingredients thoroughly and provides a warm environment for the dough to rise, which is crucial for gluten-free recipes. Once the dough cycle is complete (usually after the first rise), the dough is ready to be turned out, shaped, and allowed a second rise before baking in a conventional oven.
This approach allows you to leverage the convenience of your bread machine for the messy and time-consuming initial steps while giving you the flexibility to bake items that aren't shaped like a standard bread machine loaf. Many gluten-free baking machine recipes can be adapted for the dough cycle by simply using the dough cycle duration specified by your machine instead of the full bake cycle. Be prepared for the gluten-free dough to be softer or stickier than traditional dough.
Gluten-Free Pizza Dough in a Bread Machine
Making gluten-free pizza dough in a bread machine is incredibly convenient. Most bread machines have a "Dough" cycle that is perfect for this task. Simply add your gluten-free pizza dough ingredients (typically a gluten-free flour blend, water, yeast, salt, a little sugar, and olive oil) to the machine according to your recipe's instructions and the machine's manual (usually liquids first, then dry, yeast last). Select the Dough cycle and let the machine do the work.
After the cycle finishes (usually around 1.5 to 2 hours, including mixing and rising), the dough will be ready to turn out. Gluten-free pizza dough is often quite soft and sticky. Lightly flour your hands and work surface with gluten-free flour or rice flour. Gently shape or press the dough into your desired pizza crust shape on a greased pizza pan or baking stone. Let it rest for 10-15 minutes before adding toppings and baking in a preheated oven (often at a high temperature, like 450-500°F or 230-260°C) until the crust is golden and toppings are cooked.
Gluten-Free Rolls and Buns from Bread Machine Dough
Using the dough cycle for gluten-free rolls or buns follows a similar process to pizza dough. Prepare your gluten-free roll or bun recipe ingredients and add them to the bread machine pan, selecting the Dough cycle. Once the cycle is complete, turn the dough out onto a lightly floured surface. Gluten-free dough for rolls is often easier to handle if it's slightly firmer than pizza dough, though it will still be softer than wheat dough.
Gently divide the dough and shape it into individual rolls or buns. Place them on a baking sheet lined with parchment paper. Allow the shaped rolls to rise in a warm place for their second rise, which might take 30-60 minutes, or until they appear visibly puffed (they won't double in size like wheat rolls). Bake them in a preheated oven (check your specific recipe for temperature and time, often around 375-400°F or 190-200°C for 15-25 minutes) until golden brown and baked through.
Troubleshooting Common Gluten-Free Bread Machine Problems
Encountering issues with gluten-free baking machine recipes is part of the learning curve. One frequent problem is a sunken top or collapsed loaf. This can happen if there's too much liquid in the recipe, too much yeast, or if the rise time on the gluten-free cycle is too long for your specific flour blend and environment. High altitude can also cause loaves to over-rise and collapse. Try slightly reducing the liquid or yeast in your recipe, or if your machine allows, try a shorter rise time.
Another issue is a dense, heavy loaf with poor rise. As mentioned earlier, this is often due to inactive yeast, insufficient liquid, or not enough binder (xanthan gum or psyllium husk). Ensure your ingredients are fresh and measured accurately. If using a pre-made blend, check if it contains a binder; if not, you must add it. Sometimes, simply switching to a different brand of gluten-free flour blend can improve results, as blends vary significantly in composition and performance.
Common Gluten-Free Bread Machine Issues & Solutions
| Issue | Possible Cause | Solution |
|---|---|---|
| Dense, little rise | Inactive yeast, too little liquid, not enough binder, cold ingredients | Check yeast freshness/temp, ensure liquids are warm, add binder if needed, use room temp ingredients. |
| Loaf sunk/collapsed | Too much liquid, too much yeast, over-rising, high altitude | Reduce liquid/yeast slightly (1-2 tbsp liquid, 1/4 tsp yeast), try shorter rise cycle if customizable. |
| Gummy texture | Underbaked, sliced while warm, too much liquid/starch | Ensure loaf is baked through (check internal temp ~200°F), cool completely before slicing, adjust liquid. |
| Crumbly texture | Not enough binder, too dry, wrong flour blend | Ensure enough xanthan gum/psyllium, increase liquid slightly, try a different flour blend. |
| Hard/thick crust | Too long bake time, high temp, no moisture added post-bake | Use light crust setting if available, brush warm loaf with butter/milk, cool completely on wire rack. |
Tips for Improving Gluten-Free Bread Texture and Rise
Improving the texture and rise of gluten-free bread from a bread machine often involves fine-tuning the recipe and process. Accurate measurement, especially of flours and binders, is paramount; using a kitchen scale is highly recommended. The temperature of your liquids is also critical for yeast activation – aim for 105-115°F (40-46°C). Ensure all cold ingredients (like eggs or milk) are brought to room temperature before adding them to the bread pan.
Consider adding a tablespoon or two of apple cider vinegar or lemon juice to your liquid ingredients. The acidity can help improve the texture and rise in some gluten-free baking machine recipes. Some bakers also find that using a combination of xanthan gum and psyllium husk powder yields a better texture than using just one. Finally, be patient; achieving the perfect gluten-free loaf may take a few tries and slight adjustments based on your specific machine, ingredients, and environment.
Maintaining Your Gluten-Free Baking Machine
Proper maintenance of your bread machine is essential to ensure its longevity and continued performance, especially when regularly used for gluten-free baking machine recipes. Gluten-free flours, particularly finer starches, can sometimes create more dust than wheat flour. While the machine is designed to handle this, regular cleaning prevents buildup that could potentially affect performance or hygiene.
Always refer to your machine's manual for specific cleaning instructions. Generally, cleaning involves wiping down the interior and exterior after each use and carefully cleaning the bread pan and kneading paddle. Avoiding harsh chemicals or abrasive materials is key to preserving the non-stick coating on the pan and paddle. Taking good care of your appliance ensures it remains a reliable tool for all your gluten-free baking machine recipes.
Cleaning and Caring for Your Bread Machine After Gluten-Free Baking
After baking a gluten-free loaf, allow the bread pan to cool slightly but clean it relatively soon to prevent residue from hardening. Most bread pans have a non-stick coating and should be washed by hand with warm, soapy water and a soft sponge or cloth. Avoid using metal utensils or abrasive scrubbers inside the pan, as these can damage the coating. Pay special attention to cleaning around the spindle where the kneading paddle attaches.
The kneading paddle should also be removed and cleaned immediately after baking. Sometimes, it can be stuck inside the loaf; use a plastic or wooden utensil to carefully dislodge it. Wash it with the pan. Wipe down the interior of the bread machine with a damp cloth, ensuring no flour dust or crumbs are left behind, especially around the heating element. Clean the exterior with a damp cloth as needed. Ensure all parts are completely dry before reassembling or storing the machine.
Extending the Lifespan of Your Gluten-Free Bread Machine
To extend the lifespan of your bread machine when using it for gluten-free baking machine recipes, consistent cleaning is paramount. Residue buildup can stress the motor or affect the heating element over time. Always follow the manufacturer's instructions regarding maximum loaf size and ingredient weight to avoid overloading the machine's motor. Gluten-free batters can sometimes be heavy, so stick to the recommended capacities.
Store the bread machine in a clean, dry place when not in use. Avoid storing anything heavy on top of it. Handle the bread pan and kneading paddle gently to preserve their non-stick coating and structural integrity. If your machine has a viewing window, clean it regularly to maintain visibility during the baking process. By treating your bread machine with care and performing routine cleaning, you can enjoy baking delicious gluten-free bread for years to come.
Conclusion: Mastering Gluten-Free Baking with the Right Machine and Recipes
Mastering gluten-free baking machine recipes is an achievable goal with the right tools and techniques. A bread machine, particularly one with a dedicated and effective gluten-free cycle, takes much of the guesswork and manual effort out of the process. By understanding the unique properties of gluten-free ingredients and following carefully formulated recipes, you can consistently produce delicious, well-textured loaves right in your kitchen.
Whether you choose a premium model like the Breville or Zojirushi, or a more budget-friendly option like Hamilton Beach, the key to success lies in accurate measurements, quality ingredients, and learning how your specific machine handles gluten-free dough. Don't be discouraged by initial imperfect results; gluten-free baking often involves some experimentation. With practice and a growing collection of reliable gluten-free baking machine recipes, you'll soon be enjoying fresh, homemade gluten-free bread that rivals loaves from a bakery. Happy baking!
Frequently Asked Questions
What types of baking machines are best suited for gluten-free baking?
The best machines for gluten-free baking often include bread machines with a gluten-free setting, stand mixers for delicate batters, and even air fryers for smaller baked goods. These machines help create the right consistency and even cooking needed for gluten-free recipes.
Are there any specific considerations when adapting regular baking recipes for a gluten-free baking machine?
Yes, you'll likely need to adjust liquid ratios and use a gluten-free flour blend specifically designed for baking machines. Experimentation is key as different flours and machines behave differently.
What are some common challenges faced when using a baking machine for gluten-free recipes, and how can they be overcome?
Common challenges include dense textures and uneven rising. To overcome these, ensure accurate measurements, use binding agents like xanthan gum, and experiment with different settings and timings.
Where can I find reliable gluten-free baking machine recipes?
Websites like BakeWithEase.com offer a wide variety of tried-and-tested gluten-free recipes designed for baking machines. Look for recipes that specify the machine type and flour blend.
What ingredients are essential to have on hand when starting to bake gluten-free recipes in a baking machine?
Essential ingredients include a high-quality gluten-free flour blend, xanthan gum or another binding agent, and a variety of gluten-free-friendly baking aids such as baking powder and baking soda.
Final Reflection: The Flour Power of Accessible Gluten-Free Baking
The rise of gluten-free baking isn't just a trend; it's a revolution in inclusivity and culinary creativity. More and more people are seeking delicious, convenient ways to enjoy baked goods without compromising their health or dietary needs, and the right tools can make all the difference. This demand has fueled innovation in both recipe development and appliance technology, making gluten-free baking more accessible than ever before.
This journey into the world of gluten-free baking machines and recipes has highlighted for me the profound impact technology can have on personal well-being. It's not just about avoiding gluten; it's about reclaiming the joy of baking and sharing those treats with loved ones. The ease and consistency provided by specialized machines empower individuals to confidently explore a culinary landscape previously perceived as challenging. The best way to find yourself is to lose yourself in the service of others.
– Mahatma Gandhi – while not directly about baking, this speaks to the joy of sharing the fruits of one's labor, a sentiment deeply connected to the act of baking and sharing gluten-free treats.
Now, it's your turn. Consider the possibilities unlocked by accessible gluten-free baking. Perhaps you'll explore a new recipe, invest in a helpful appliance, or simply share the joy of delicious, inclusive baking with friends and family. Embrace the freedom to create, experiment, and savor the sweet rewards of a world where everyone can enjoy a perfectly baked treat, regardless of dietary restrictions. Let the flour power flow!
Unleash Your Inner Gluten-Free Baker!
Thanks for joining us on this gluten-free baking journey! We hope you've discovered some delicious new possibilities and gained the confidence to create amazing, allergy-friendly treats. Ready to take the next step?
- Dive into our curated recipe collection: Find even more delectable gluten-free recipes specifically designed for your baking needs. We have everything from cakes and cookies to savory delights!
- Share your baking triumphs (or challenges!): Connect with our vibrant community on social media and inspire others with your creations – tag us @BakeWithEase!
- Try out a new baking technique: We’ve got amazing resources on our site to help you perfect your gluten-free baking skills. Explore the tips and tricks!
So, what delicious gluten-free masterpiece will you bake next?