
The Joy of Baking Sweet Rolls: An Intermediate Skill Worth Mastering


Welcome to BakeWithEase, your companion in the delightful world of baking!
Ready to unlock the secrets of soft, flavorful sweet rolls? While it might seem intimidating, our easy sweet roll recipe for beginners (and beyond!) will guide you through each step, transforming you into a confident baker. Discover the joy of creating these classic treats from scratch and prepare to impress friends and family with your newfound skills. Intrigued? Let's get baking!
- Introduction: Why Sweet Rolls are a Baker's Delight
- Mastering the Dough: The Foundation of Perfect Sweet Rolls
- Crafting the Filling: Sweet and Savory Variations
- Shaping and Baking: From Dough to Golden Perfection
- The Finishing Touch: Glazes and Frostings for Sweet Rolls
- Easy Sweet Roll Recipe for Beginners: A Simplified Approach
- Storing and Reheating: Preserving Sweet Roll Freshness
- Conclusion: Embrace the Sweet Roll Baking Adventure
-
Frequently Asked Questions
- What makes sweet rolls an intermediate baking skill?
- Can a complete beginner successfully bake sweet rolls using BakeWithEase recipes?
- What is the most common mistake beginners make when baking sweet rolls, and how can I avoid it?
- What kind of glaze is best for sweet rolls, and does BakeWithEase offer glaze recipes?
- How can I store leftover sweet rolls to keep them fresh?
- Final Reflection: The Sweetness of Mastery and the Promise of Shared Joy
- Unleash Your Inner Baker: Master the Art of Sweet Rolls!
Introduction: Why Sweet Rolls are a Baker's Delight
Level Up Your Baking: From Beginner to Sweet Roll Artisan
Moving beyond basic cookies and quick breads opens up a world of exciting possibilities in the kitchen. Baking sweet rolls, like classic cinnamon rolls or sticky buns, represents a fantastic step for those who have mastered foundational baking skills and are ready to tackle slightly more complex techniques involving yeast dough. This journey from beginner baker to sweet roll artisan is incredibly rewarding, culminating in warm, fragrant pastries that bring smiles to everyone's faces. It's a skill that builds confidence and introduces you to the nuances of dough development and fermentation, crucial for many advanced baking projects.
Embracing the challenge of sweet rolls means learning patience and precision. While a simple cookie recipe might take just 30-40 minutes from start to finish, a good sweet roll recipe often involves multiple stages, including mixing, kneading, rising, shaping, and baking, potentially spanning several hours. However, the hands-on process of working with dough, watching it transform, and finally pulling a tray of golden-brown rolls from the oven is immensely satisfying. It's a tangible representation of your growing baking prowess, proving that you can create bakery-quality treats right in your own home.
BakeWithEase Presents: Your Guide to Delectable Sweet Rolls
At BakeWithEase, we believe that every baking challenge is an opportunity to learn and grow. Our goal is to demystify techniques and provide clear, actionable guidance, making even seemingly complex recipes approachable. This guide is designed to walk you through the process of creating delectable sweet rolls, breaking down each step into manageable parts. We'll cover everything from understanding the magic of yeast to achieving that perfect golden-brown crust and gooey center.
Whether you're attempting your first batch of cinnamon rolls or looking to perfect your technique for a truly easy sweet roll recipe for beginners, this article will equip you with the knowledge and tips you need. We aim to build your confidence by explaining the 'why' behind the steps, not just the 'how.' By the end, you'll have a solid understanding of what makes a great sweet roll and the skills to bake them consistently, ready to adapt recipes and explore new flavor combinations.
The Allure of Homemade Sweet Rolls: A Baking Journey
There's something uniquely comforting and inviting about the aroma of sweet rolls baking in the oven. It evokes feelings of warmth, home, and celebration. While store-bought options are convenient, nothing compares to the taste and texture of a homemade sweet roll, fresh from the oven. The tender, fluffy dough combined with a rich, sweet filling and a decadent glaze is a sensory experience that's hard to beat.
Baking sweet rolls is more than just following a recipe; it's a journey that connects you to traditional baking methods and allows for personal creativity. It's an opportunity to slow down, engage your senses, and create something truly special for yourself and your loved ones. Mastering this skill means you can whip up a batch for a special breakfast, a comforting afternoon treat, or a thoughtful gift, sharing the joy of your homemade creations.
Mastering the Dough: The Foundation of Perfect Sweet Rolls
Understanding Yeast: The Key to Light and Fluffy Sweet Rolls
Yeast is a living microorganism, a type of fungus, that is essential for creating the light, airy texture characteristic of sweet rolls. When yeast is combined with warmth, moisture, and sugar (its food source), it undergoes fermentation, producing carbon dioxide gas and alcohol. The carbon dioxide gas gets trapped within the gluten structure of the dough, causing it to rise and expand.
Understanding how yeast works is fundamental to successful sweet roll baking. Active dry yeast, a common type, typically needs to be proofed in warm liquid (around 105-115°F or 40-46°C) before being added to the dry ingredients to ensure it's alive and active. Instant yeast, on the other hand, can often be mixed directly with the dry ingredients, offering a slightly simpler approach often preferred in an easy sweet roll recipe for beginners.
The temperature of the liquid used to activate yeast is critical. Water that is too cold won't activate the yeast effectively, leading to a slow or non-existent rise. Water that is too hot (above 130°F or 54°C) can kill the yeast, rendering it inactive and resulting in dense, heavy rolls. Sugar also plays a role; a small amount helps "feed" the yeast and kickstart fermentation, while too much sugar or salt can inhibit yeast activity. Learning to work with yeast is a core skill for any baker venturing into enriched doughs like those used for sweet rolls.
Choosing the Right Flour for Soft Sweet Rolls
The type of flour you choose significantly impacts the texture of your sweet rolls. All-purpose flour is a versatile choice that works well for most sweet roll recipes. It has a moderate protein content, typically around 10-12%, which allows for sufficient gluten development to give the dough structure and elasticity, while still resulting in a tender crumb. Using a flour with a higher protein content, like bread flour (12-14% protein), will produce a chewier roll, which might be desirable for some breads but less so for soft sweet rolls.
For the softest possible sweet rolls, some recipes, including many tailored as an easy sweet roll recipe for beginners, might incorporate a percentage of cake flour (6-8% protein) or pastry flour (8-10% protein), or even use techniques like the Tangzhong method (cooking a small portion of the flour with liquid) which helps the dough retain more moisture. Using a combination of all-purpose flour and a lower-protein flour, or employing methods that enhance moisture retention, helps create that desirable melt-in-your-mouth texture that is the hallmark of a truly great sweet roll.
The Importance of Kneading: Developing Gluten for Texture
Kneading is a crucial step in developing the gluten network within the dough. Gluten is formed when the proteins in flour, glutenin and gliadin, are hydrated and worked together. Kneading stretches and aligns these protein strands, creating an elastic network that can trap the carbon dioxide gas produced by the yeast. Proper gluten development is essential for creating a dough that is strong enough to rise significantly but also elastic enough to produce a tender, chewy crumb, characteristic of perfect sweet rolls.
You can knead dough by hand or using a stand mixer with a dough hook. Kneading by hand typically takes 10-15 minutes, requiring rhythmic pushing and folding of the dough. A stand mixer can accomplish the same task in 5-8 minutes on medium speed.
You'll know the dough is sufficiently kneaded when it becomes smooth, elastic, and pulls away cleanly from the sides of the bowl (in a mixer) or forms a smooth, pliable ball (by hand). A simple test is the "windowpane test": take a small piece of dough and gently stretch it. If you can stretch it thin enough to see light through it without it tearing, the gluten is well-developed.
First Rise: Creating Volume and Flavor
The first rise, also known as bulk fermentation, is a critical stage where the yeast works its magic, causing the dough to double in size and developing complex flavors. After kneading, the dough is typically placed in a lightly oiled bowl, covered, and left in a warm, draft-free place to rise. The optimal temperature for rising dough is usually between 75-85°F (24-30°C). At room temperature (around 70°F), this rise can take anywhere from 1 to 2 hours, or even longer depending on the recipe and ambient temperature.
During this rise, not only does the dough gain volume due to the production of carbon dioxide, but the yeast also produces alcohol and other compounds that contribute significantly to the flavor profile of the finished sweet rolls. A slow, cool rise (e.g., in the refrigerator overnight) can develop even deeper, more nuanced flavors, although it adds considerable time to the process. For an easy sweet roll recipe for beginners, a single, relatively quick rise at room temperature is often sufficient to achieve good results. The dough should approximately double in volume before moving on to the next step.
Crafting the Filling: Sweet and Savory Variations
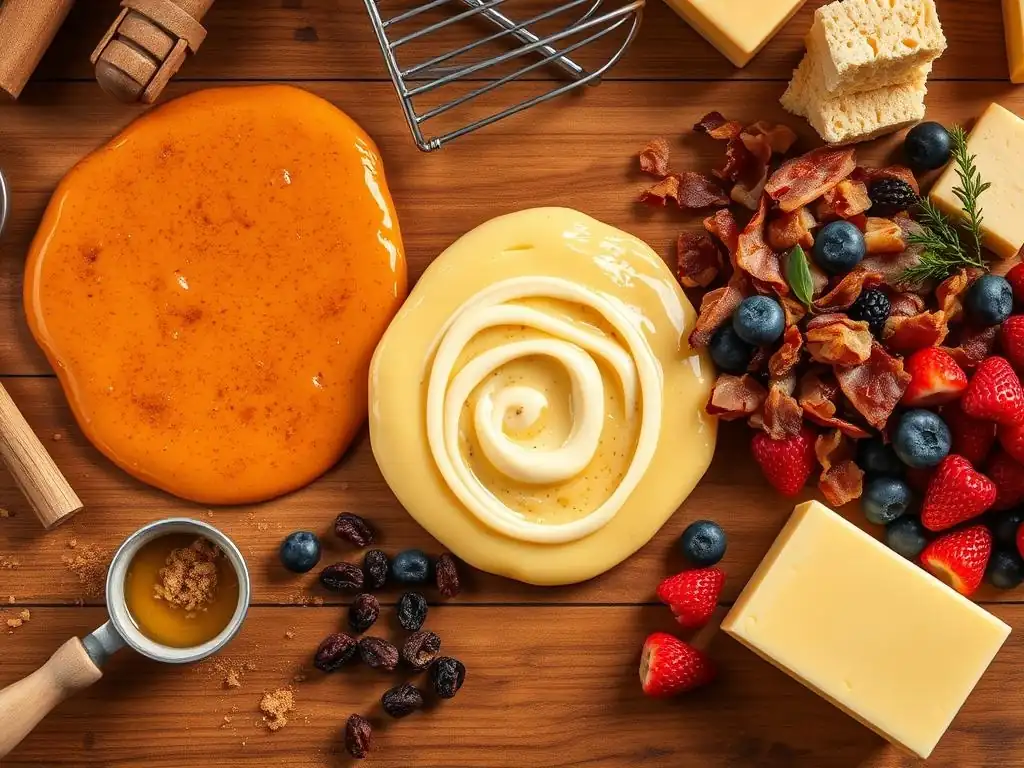
Classic Cinnamon Filling: The Heart of a Sweet Roll
The classic cinnamon filling is arguably the most beloved for sweet rolls, forming the basis of the iconic cinnamon roll. This filling typically consists of a simple mixture of granulated or brown sugar, ground cinnamon, and softened butter. The butter helps bind the sugar and cinnamon together and creates a gooey layer as it melts during baking.
The ratio of sugar to cinnamon can vary, but a common starting point is about 1 part cinnamon to 4-6 parts sugar by weight or volume. For example, 2 tablespoons of cinnamon mixed with 1/2 cup of packed brown sugar and 1/4 cup of softened butter makes enough filling for a standard batch of 12-15 rolls.
Using brown sugar adds moisture and a slight caramel note, enhancing the richness of the cinnamon. Ensuring the butter is properly softened (not melted) allows it to cream easily with the sugar and cinnamon, creating a spreadable paste that distributes evenly over the dough. This simple yet effective filling is what gives traditional sweet rolls their signature warmth, spice, and sweetness, making it a timeless favorite.
Beyond Cinnamon: Exploring Flavor Combinations
While cinnamon is a classic, the world of sweet roll fillings is vast and offers endless possibilities for creativity. Exploring different flavor combinations allows you to customize your sweet rolls to suit various tastes and occasions. Think beyond the traditional and consider fruits, nuts, chocolate, or even tangy elements like cream cheese within the filling itself. This is where you can truly make a recipe your own and surprise your taste buds.
Experimenting with fillings is a great way to elevate an easy sweet roll recipe for beginners. Once you understand the basic dough and rolling technique, you can swap out the classic cinnamon mixture for something new. Just ensure your filling isn't excessively wet, which can make the dough soggy, or too chunky, which can make rolling difficult.
Nutella Swirl: A Chocolate Lover's Dream
For those who adore chocolate and hazelnuts, a Nutella swirl filling is a decadent choice. Instead of a butter, sugar, and cinnamon mixture, you can simply spread a layer of softened Nutella over the rolled-out dough. A standard 13-ounce jar of Nutella is typically enough for a batch of 12-15 rolls, yielding a generous layer.
Sometimes, mixing the Nutella with a tablespoon or two of softened butter or a splash of milk can make it slightly more spreadable, especially if it's a bit stiff. The Nutella melts beautifully during baking, creating pockets of rich, gooey chocolate-hazelnut goodness within the soft dough. This variation is always a crowd-pleaser, offering a delightful twist on the classic sweet roll.
Apple Cinnamon: A Fall-Inspired Sweet Roll
Combining the warmth of cinnamon with the comforting flavor of apples creates a wonderful seasonal sweet roll. A typical apple filling involves finely diced apples (about 1-2 medium apples, peeled and cored), cooked briefly with a touch of butter, brown sugar, and cinnamon until slightly softened but still holding their shape. Adding a pinch of nutmeg or allspice can further enhance the autumnal flavors.
The cooked apple mixture is then spread over the dough before rolling. It's important not to add too much liquid from the apples, as this can make the dough wet. The apples soften further during baking, creating tender pockets of fruit within the roll, perfectly complemented by the cinnamon spice.
Cream Cheese Filling: A Tangy Twist
While cream cheese is often used as a frosting, incorporating it into the filling itself adds a delightful tanginess that balances the sweetness of the roll. A simple cream cheese filling can be made by creaming together softened cream cheese, a small amount of sugar (confectioners' or granulated), and perhaps a touch of vanilla extract. For a standard batch, using about 4-6 ounces of cream cheese with 1/4 cup of sugar works well.
This mixture is spread over the dough before rolling. The cream cheese softens and warms during baking, creating a creamy, slightly tangy layer. This type of filling pairs exceptionally well with fruit additions like berries or lemon zest, offering a brighter flavor profile compared to purely sugar-based fillings.
Preparing the Filling: Achieving the Perfect Consistency
Regardless of the flavor, achieving the right consistency for your sweet roll filling is key to easy assembly and a good final result. Most fillings should be spreadable but not liquid. If a filling is too wet, it can seep out during rising and baking, creating a mess and potentially making the bottom of the rolls soggy. If it's too dry or chunky, it can be difficult to spread evenly and might create gaps in the swirl.
For sugar-based fillings, ensuring the butter is properly softened is crucial for a smooth, spreadable paste. For fruit fillings, cooking down the fruit slightly helps remove excess moisture. Cream cheese fillings should be well-mixed and smooth. If a filling seems too stiff, adding a tiny amount of milk or softened butter can help. If it's too loose, chilling it briefly can firm it up. Taking a moment to ensure your filling is the right consistency will make the rolling and shaping process much smoother.
Shaping and Baking: From Dough to Golden Perfection
Rolling Out the Dough: Achieving Uniform Thickness
Once your dough has completed its first rise, it's time to roll it out. Gently punch down the dough to release the gas, then transfer it to a lightly floured surface. Use a rolling pin to shape the dough into a large rectangle. The exact dimensions will depend on your recipe and how many rolls you plan to make, but a common size for a batch of 12-15 rolls is approximately 12x18 inches or 14x20 inches.
The key is to achieve a uniform thickness across the entire rectangle, typically around 1/4 to 1/3 inch thick. Uneven thickness can lead to rolls that bake inconsistently – some might be underbaked in the center while others on the edge are dry. Take your time, using gentle, even pressure with the rolling pin. If the dough is resistant and springs back, cover it and let it rest for 5-10 minutes to allow the gluten to relax before continuing to roll.
The Art of the Swirl: Creating Beautiful Sweet Roll Shapes
Creating that iconic spiral swirl is one of the most satisfying parts of making sweet rolls. Once the dough is rolled out and the filling is spread evenly, you begin rolling the rectangle tightly from one long edge to the other. As you roll, try to keep the log uniform in thickness and tightness. Rolling too loosely will result in rolls that fall apart or have messy swirls, while rolling too tightly can make the dough tough.
Aim for a snug, even spiral. Use your hands to guide the dough and keep the edges straight as you roll. Once you reach the end, pinch the seam gently to seal it. This creates a long log ready for slicing. The visual appeal of the finished sweet roll is greatly enhanced by a well-defined, even swirl, a technique that improves with practice.
Slicing and Arranging: Preparing for the Second Rise
After rolling the dough into a log, it needs to be sliced into individual rolls. For consistent sizing, you can gently mark the log first to divide it into equal sections. Using a sharp knife, bench scraper, or even dental floss (unwaxed and unflavored) are common methods for slicing. Dental floss is particularly effective as it cuts cleanly without squishing the dough, helping to maintain the swirl shape. Simply slide the floss under the log, cross the ends over the top, and pull to slice.
Slice the log into pieces of your desired thickness, typically between 1 to 1.5 inches. Thicker slices yield larger, taller rolls, while thinner slices create more delicate ones. Arrange the sliced rolls in a prepared baking pan, usually lined with parchment paper and/or greased. Leave some space between the rolls (about 1/2 to 1 inch) as they will expand significantly during the second rise and baking. A standard 9x13 inch baking pan comfortably fits 12-15 rolls.
Second Rise: Achieving Maximum Fluffiness
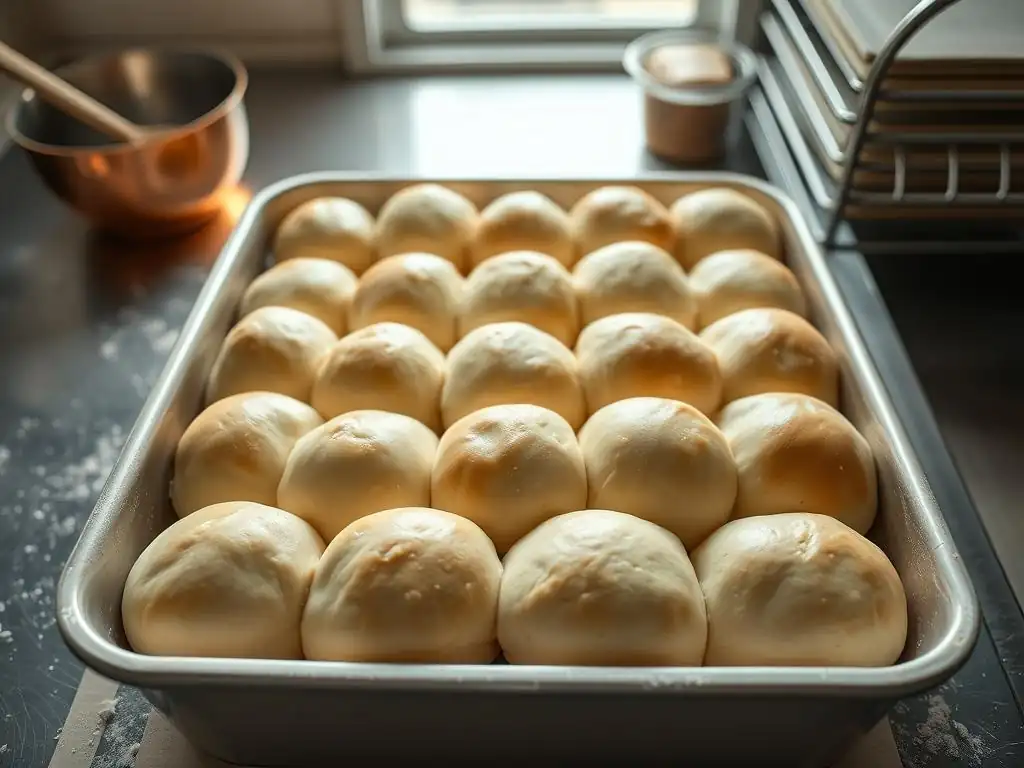
The second rise, or proofing, is crucial for achieving light and fluffy sweet rolls. After shaping and placing the rolls in the baking pan, they are covered and left to rise again in a warm place. During this rise, the yeast continues to produce gas, causing the individual rolls to expand and fill the pan, often touching each other. This process typically takes 30-60 minutes, depending on the temperature. The rolls should look noticeably puffier and almost doubled in size.
A properly proofed roll will yield a tender, airy texture after baking. If the rolls are under-proofed, they will be dense and might crack on top during baking. If they are over-proofed, they might collapse in the oven or have a slightly alcoholic smell. A good test for proofing is to gently press the side of a roll; if the indentation slowly springs back halfway, they are ready to bake.
Baking to Perfection: Temperature and Timing for Sweet Rolls
Baking sweet rolls requires the right temperature and timing to ensure they are cooked through, golden brown on top, and gooey in the center. Most sweet roll recipes call for baking at a moderate temperature, typically between 350°F and 375°F (175°C and 190°C). Baking at too high a temperature can cause the outside to brown too quickly before the inside is cooked, while too low a temperature might result in dry rolls.
The baking time for a standard batch of 12-15 rolls in a 9x13 pan is usually between 20 and 30 minutes. You'll know the rolls are done when they are golden brown across the top and the internal temperature reaches around 190-200°F (88-93°C) when measured with an instant-read thermometer in the center of a middle roll. If the tops are browning too quickly, you can tent the pan loosely with aluminum foil for the last 5-10 minutes of baking.
The Finishing Touch: Glazes and Frostings for Sweet Rolls
Simple Glaze: A Classic Sweet Roll Topping
A simple glaze is a quick and easy way to add sweetness and moisture to your baked sweet rolls. This classic topping typically consists of confectioners' sugar (also known as powdered sugar) mixed with a small amount of liquid, such as milk, water, or cream. The ratio is usually around 1 cup of confectioners' sugar to 1-2 tablespoons of liquid, whisked together until smooth and pourable.
You can customize the flavor by using orange juice, lemon juice, or even a splash of vanilla or almond extract instead of plain liquid. For best results, pour or drizzle the glaze over the warm (but not piping hot) rolls shortly after they come out of the oven. The warmth helps the glaze set slightly, creating a lovely, slightly firm but still sweet coating. This is a perfect finishing touch for an easy sweet roll recipe for beginners.
Cream Cheese Frosting: Rich and Tangy Perfection
Cream cheese frosting is a popular and decadent topping that adds a rich, tangy counterpoint to the sweetness of the rolls. A typical recipe involves beating softened cream cheese with softened butter until smooth, then gradually adding confectioners' sugar and a splash of vanilla extract. The ratio is often around 4-6 ounces of cream cheese to 1/4 cup of butter and 1-2 cups of confectioners' sugar, depending on desired thickness and sweetness.
For a thick, pipeable frosting, use less liquid and more sugar. For a softer, more spreadable or pourable frosting, add a tablespoon or two of milk or cream. This frosting is best applied when the rolls have cooled slightly, but are still warm, allowing it to melt just enough to spread beautifully over the tops and into the swirls. It's a luxurious addition that elevates any sweet roll.
Brown Butter Glaze: Adding Depth of Flavor
For a glaze with more complexity and depth of flavor, consider a brown butter glaze. Browning butter involves melting it and cooking it gently over medium heat until the milk solids separate and turn a rich brown color, emitting a nutty aroma. This process adds a wonderful toasted, caramel-like note that complements sweet rolls beautifully.
Once the butter is browned, remove it from the heat and let it cool slightly. Whisk in confectioners' sugar and enough milk or cream to reach a pourable consistency. The amount of sugar will vary depending on the amount of butter browned, but a ratio of about 1/4 cup browned butter to 1.5 - 2 cups confectioners' sugar is a common starting point. This glaze adds a sophisticated twist that goes especially well with cinnamon or pecan-filled rolls.
Adding Decorations: Elevating Your Sweet Roll Presentation
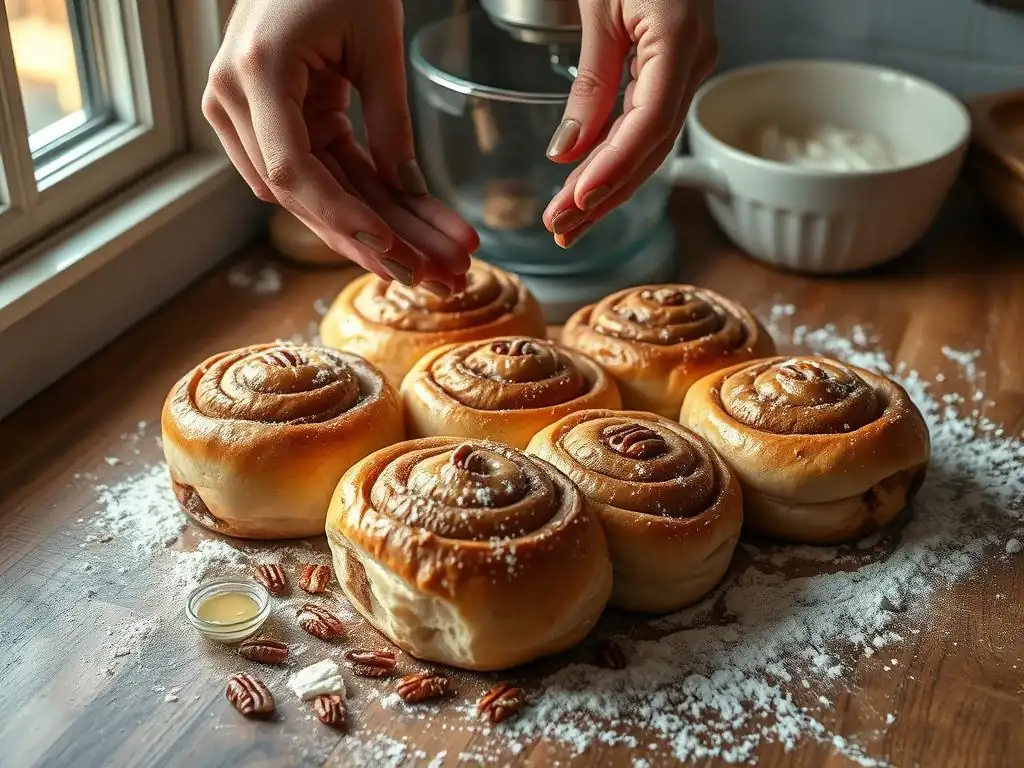
Once glazed or frosted, you can add simple decorations to enhance the visual appeal of your sweet rolls. A sprinkle of chopped nuts (like pecans or walnuts) adds texture and flavor, particularly if the filling contains nuts. A dusting of cinnamon or nutmeg can highlight the spice.
For a pop of color, consider adding fresh berries (like raspberries or blueberries) or a sprinkle of citrus zest (lemon or orange) on top of a cream cheese or simple glaze. Edible glitter or sprinkles can add a festive touch for special occasions. While not necessary for taste, these small additions make your homemade sweet rolls look even more inviting and professional, showcasing your growing skills.
Easy Sweet Roll Recipe for Beginners: A Simplified Approach
Modified Dough Recipe: Streamlining the Process
Creating an easy sweet roll recipe for beginners often involves modifying the dough process to be more forgiving and less time-intensive. One common simplification is using instant yeast, which eliminates the need for proofing the yeast in liquid beforehand – you can simply mix it directly with the dry ingredients. Another approach might involve a dough with slightly higher hydration (more liquid), making it softer and easier to handle, even with minimal kneading.
Some beginner-friendly recipes might also reduce the number of rises, perhaps opting for just one longer rise instead of a bulk fermentation followed by a shorter proofing period after shaping. Alternatively, a recipe might use melted butter instead of softened butter in the dough, which can simplify the mixing process. While these modifications might slightly alter the final texture compared to a traditional, multi-rise dough, they significantly lower the barrier to entry, allowing beginner bakers to achieve delicious results with less complexity.
Step-by-Step Instructions: A Beginner-Friendly Guide
An effective easy sweet roll recipe for beginners breaks down the process into clear, simple steps. Using visual cues and straightforward language helps build confidence.
- Prepare the Yeast: If using active dry yeast, dissolve 2 1/4 teaspoons in 1/2 cup warm milk (around 110°F) with a pinch of sugar. Let stand 5-10 minutes until foamy. If using instant yeast, skip this step and mix with dry ingredients.
- Mix Wet Ingredients: In a large bowl or stand mixer, whisk together 1 cup warm milk, 1/4 cup melted butter, 1/4 cup sugar, and 1 large egg.
- Combine Wet and Dry: If using active dry yeast, add the foamy yeast mixture. If using instant yeast, add 2 1/4 teaspoons instant yeast now. Gradually add about 3 to 3 1/2 cups all-purpose flour and 1/2 teaspoon salt, mixing until a shaggy dough forms.
- Knead: Turn dough onto a lightly floured surface and knead for about 5-7 minutes until smooth and elastic. Alternatively, use a stand mixer with a dough hook for 3-5 minutes on medium speed.
- First Rise (Simplified): Place dough in a lightly oiled bowl, cover, and let rise in a warm place for about 1 to 1.5 hours, or until doubled in size.
- Prepare Filling: Cream together 1/2 cup softened butter, 1/2 cup packed brown sugar, and 2 tablespoons ground cinnamon.
- Shape: Punch down dough. Roll into a 12x18 inch rectangle on a lightly floured surface. Spread filling evenly over dough.
- Roll and Slice: Roll dough tightly from the long edge into a log. Slice into 12-15 rolls, about 1.5 inches thick.
- Second Rise: Place rolls in a greased 9x13 inch baking pan. Cover and let rise for 30-45 minutes, or until puffy and nearly filling the pan.
- Bake: Preheat oven to 375°F (190°C). Bake for 20-25 minutes, or until golden brown and cooked through.
- Glaze: While rolls cool slightly, whisk together 1.5 cups confectioners' sugar with 2-3 tablespoons milk until smooth. Drizzle over warm rolls.
Troubleshooting Tips: Addressing Common Issues
Even with an easy sweet roll recipe for beginners, occasional challenges can arise. Knowing how to identify and address common issues is part of the learning process and prevents discouragement. Most problems relate back to yeast activity, dough hydration, or oven temperature.
- Dough Not Rising: This is often due to inactive yeast (liquid was too hot or cold, or yeast is old) or a cold environment. Ensure liquid temperature is correct (105-115°F for active dry), use fresh yeast, and find a warm spot for rising (like a slightly warm oven that's turned off, or near a sunny window).
- Dry Sweet Rolls: This can result from too much flour, insufficient liquid, or overbaking. Accurately measure flour (spoon into cup and level, don't scoop), ensure you add the correct amount of liquid, and use an oven thermometer to verify temperature. Baking just until golden and cooked through is key.
- Uneven Baking: Hot spots in the oven are a common culprit. Rotate the pan halfway through the baking time. Ensure rolls are spaced evenly in the pan. If edges are browning too fast, cover the pan loosely with foil.
Task List for Troubleshooting:

- [ ] Check yeast expiration date.
- [ ] Verify liquid temperature for yeast activation.
- [ ] Find a warm, draft-free spot for dough to rise.
- [ ] Measure flour accurately (using a scale is best!).
- [ ] Use an oven thermometer to check oven temperature.
- [ ] Rotate baking pan during baking.
Dough Not Rising: Solutions and Prevention
If your dough isn't rising, the first step is to assess the yeast. Did you proof it? Did it get foamy? If not, the yeast might be dead or the liquid temperature was wrong.
If using instant yeast, did you check its expiration date? Prevention involves using fresh yeast and ensuring your liquid temperature is within the recommended range (around 105-115°F for active dry). If the dough still isn't rising after an hour in a warm spot, you might need to start over with fresh yeast. Sometimes, simply moving the dough to a warmer location, like a proofer setting on your oven or a warm spot near a vent, can kickstart a slow rise.
Another reason for poor rising can be adding salt directly on top of the yeast before mixing, as salt can inhibit yeast activity. Always mix salt into the flour or add it after the yeast has been dispersed in the liquid. Ensure your rising environment is genuinely warm – below 70°F can significantly slow down fermentation. A simple test is to turn your oven on its lowest setting for a few minutes, then turn it off, and place the covered dough inside.
Dry Sweet Rolls: Hydration Adjustments
Dry sweet rolls are often a sign that the dough didn't have enough moisture. This could be due to inaccurate flour measurement (too much flour is a common mistake, especially scooping directly from the bag which compacts it) or simply a recipe with insufficient liquid for your flour type and environment. Flour absorbs moisture differently based on humidity and type. Prevention involves measuring flour accurately, preferably by weight (a cup of all-purpose flour is typically around 120-130 grams), and ensuring your liquid amounts are correct.
If your dough feels stiff and dry during kneading, you can gradually add an extra tablespoon or two of milk or water until it feels soft and pliable. Overbaking is another major cause of dryness; sweet rolls continue to cook slightly after being removed from the oven. Aim for just golden brown and check for an internal temperature of 190-200°F. If your baked rolls turn out dry, you can sometimes mitigate this by brushing them with a simple syrup or extra glaze while they are still warm.
Uneven Baking: Oven Management Techniques
Uneven baking, where some rolls are perfectly golden while others are pale or over-browned, is almost always due to hot spots in your oven. Ovens rarely heat completely uniformly. Prevention involves getting to know your oven's hot spots (you can test this by baking a tray of biscuits or cookies placed evenly across the sheet).
To manage uneven baking, rotate your baking pan 180 degrees halfway through the estimated baking time. This exposes all sides of the pan to different parts of the oven, promoting more even browning.
If the tops of the rolls are browning much faster than the bottoms or centers are cooking, loosely tenting the pan with aluminum foil for the latter part of the baking time can help shield the tops while allowing the rest of the rolls to catch up. Using a reliable oven thermometer is also crucial to ensure your oven is actually heating to the temperature you set.
Storing and Reheating: Preserving Sweet Roll Freshness
Proper Storage Techniques: Keeping Sweet Rolls Soft
Proper storage is key to keeping your homemade sweet rolls soft and fresh after they've cooled. Air is the enemy of freshness for baked goods like sweet rolls, causing them to dry out quickly. Once the rolls have cooled completely (or are just slightly warm, if frosted), store them in an airtight container at room temperature. A plastic container with a tight-fitting lid or a resealable plastic bag works well.
If the rolls are glazed or frosted, ensure the glaze/frosting has set before stacking them, or store them in a single layer if possible. Stored correctly at room temperature, sweet rolls are typically best enjoyed within 1-2 days. For longer storage, refrigeration is an option, but it can sometimes slightly alter the texture, making the dough a bit firmer. If refrigerating, still use an airtight container to prevent them from absorbing odors or drying out.
Reheating Methods: Restoring Warmth and Flavor
One of the joys of homemade sweet rolls is enjoying them warm, with a gooey center and soft dough. Luckily, reheating them is easy and effectively restores their fresh-baked goodness. The best method for reheating individual rolls is often the microwave. Place a single roll on a microwave-safe plate and heat on high for 15-30 seconds, or until warm and soft. Be careful not to overheat, as this can make them tough.
For reheating a few rolls or a whole pan, the oven is a great option. Preheat your oven to a low temperature, around 300-325°F (150-160°C). Place the rolls in an oven-safe dish, cover loosely with foil (this helps retain moisture), and heat for 10-15 minutes, or until warmed through. This method works well for both glazed and frosted rolls and brings back that lovely warm, soft texture.
Freezing Sweet Rolls: Long-Term Storage Options
Freezing is an excellent option if you want to store sweet rolls for longer periods, preserving their quality for up to 2-3 months. You can freeze sweet rolls baked and cooled, or even freeze the shaped rolls before their second rise (though the latter requires a specific thawing and proofing process).
To freeze baked rolls:
- Ensure they are completely cooled.
- If unfrosted, wrap each roll individually in plastic wrap, then place wrapped rolls in a freezer-safe bag or container.
- If frosted, it's best to freeze them on a baking sheet first until the frosting is firm, then wrap individually in plastic wrap, and store in a container. This prevents the frosting from sticking.
- Label with the date.
To reheat frozen baked rolls, you can either thaw them overnight in the refrigerator and then reheat using the oven or microwave method, or reheat them directly from frozen in a 300-325°F oven for 15-25 minutes, covered with foil.
Conclusion: Embrace the Sweet Roll Baking Adventure
The Satisfaction of Homemade Sweet Rolls
There's an unparalleled sense of accomplishment that comes from baking a batch of sweet rolls from scratch. From the initial mixing of ingredients and the patient waiting for the dough to rise, to the careful shaping and the final moments as they turn golden in the oven, each step contributes to the ultimate reward: warm, fragrant, and utterly delicious pastries.
The soft, tender dough, the sweet, gooey filling, and the luscious glaze combine to create a truly comforting treat that store-bought versions simply can't replicate. Sharing these homemade creations with family and friends adds another layer of joy, making the effort entirely worthwhile.
Mastering an easy sweet roll recipe for beginners is more than just learning a new skill; it's about creating moments of warmth and happiness in your home. The process is engaging, the aroma is inviting, and the final product is a testament to your growing abilities in the kitchen. It's a skill that keeps on giving, providing you with the ability to whip up a delightful treat whenever the craving strikes or a special occasion arises.
Continue Your Baking Journey with BakeWithEase
Baking sweet rolls is a fantastic milestone on your baking journey, building upon basic skills and introducing you to the wonderful world of yeast doughs and enriched pastries. At BakeWithEase, we are here to support you every step of the way, whether you're perfecting your sweet roll technique or ready to explore new challenges like sourdough bread, delicate croissants, or elaborate cakes. We offer a wealth of resources, from simple recipes and detailed guides to troubleshooting tips and inspiring ideas.
Think of this sweet roll adventure as just the beginning. The techniques you've learned – understanding yeast, working with dough, achieving the perfect bake – are transferable to countless other recipes. Continue to experiment with different fillings, glazes, and dough variations. Our website is filled with tutorials and recipes designed to help you expand your repertoire and tackle new baking projects with confidence. Keep baking, keep learning, and keep creating delicious things!
One of the most rewarding aspects of baking is sharing your creations. Bringing a tray of warm, homemade sweet rolls to a gathering or simply sharing them with your household spreads warmth and joy. But beyond that, sharing your baking journey can also inspire others. Don't hesitate to share photos of your sweet rolls – the perfectly swirled shapes, the golden crust, the melted glaze – on social media or with friends and family.
Talking about your experience, including any challenges you overcame (like troubleshooting a dough that didn't rise initially! ), can encourage other aspiring bakers, especially those looking for an easy sweet roll recipe for beginners, to give it a try. Your success can demonstrate that mastering these skills is achievable and rewarding. By sharing, you become part of a larger baking community, fostering a love for homemade goodness and inspiring others to embark on their own delicious baking adventures.
Frequently Asked Questions
What makes sweet rolls an intermediate baking skill?
Sweet rolls involve several steps, including making a yeast dough, shaping the rolls, and creating a glaze, requiring a bit more experience with baking techniques than simpler recipes. While not overly complex, mastering them requires some patience and attention to detail.
Can a complete beginner successfully bake sweet rolls using BakeWithEase recipes?
Yes! BakeWithEase provides step-by-step guides and easy-to-find ingredients, specifically designed to make the process manageable for beginners, even with an intermediate recipe like sweet rolls. We focus on breaking down complex techniques.
What is the most common mistake beginners make when baking sweet rolls, and how can I avoid it?
The most common mistake is not proofing the dough properly. Ensure the dough doubles in size in a warm place before shaping. This is crucial for light and fluffy rolls.
What kind of glaze is best for sweet rolls, and does BakeWithEase offer glaze recipes?
A simple powdered sugar glaze is a classic choice, but cream cheese frosting is also popular. BakeWithEase offers various glaze recipes to complement your sweet rolls, including both classic and more adventurous options.
How can I store leftover sweet rolls to keep them fresh?
Store leftover sweet rolls in an airtight container at room temperature for up to two days or in the refrigerator for up to a week. Reheat them slightly before serving to restore their softness.
The simple act of baking a perfect sweet roll transcends mere culinary skill; it's a testament to patience, precision, and the enduring power of shared joy. In a world increasingly dominated by instant gratification, taking the time to knead dough, let it rise, and carefully shape each roll offers a profound counterpoint – a mindful process yielding incredibly rewarding results. This isn't just about following an easy sweet roll recipe for beginners; it's about embracing the journey.
The aroma of warm, cinnamon-laced dough rising in the kitchen is a powerful sensory experience, one that evokes memories of childhood and family gatherings. It's a tradition that connects generations, a tangible expression of love and care. Baking is at once child's play and adult joy. And love, of course.
This quote perfectly captures the essence of what baking sweet rolls represents – a blend of simple pleasure and profound connection. The act of sharing these homemade treats, witnessing the smiles they bring, amplifies the joy tenfold, creating a ripple effect of positivity.
Now, I invite you to consider the possibilities. Don't just passively read this article; actively engage with it. Try your hand at an easy sweet roll recipe. Embrace the mess, the learning curve, and the occasional imperfection. The journey of mastering this seemingly simple skill is far more valuable than the final product. The true reward lies in the process itself, in the quiet moments of creation, and in the shared joy that follows. So, gather your ingredients, preheat your oven, and embark on your own sweet roll adventure. The taste of success, both literal and metaphorical, awaits.
Unleash Your Inner Baker: Master the Art of Sweet Rolls!
Thanks for joining us on this delicious journey into the world of sweet rolls! We hope you've gained valuable insights and inspiration to elevate your baking skills. Now it's time to put your newfound knowledge into action.
Here's what you can do next:
- Bake a batch of your favorite sweet roll recipe (or try a new one!). This is your chance to shine and experience the satisfaction of creating something truly delightful. Don't be afraid to experiment with flavors and fillings!
- Share your baking triumphs (and challenges!) on social media using #BakeWithEaseSweetRolls. Let's build a community of passionate bakers who love to share their creations.
- Try adapting a different bread recipe into a sweet roll format – challenge yourself to get creative!
Ready to share the joy of homemade sweet rolls with friends and family? What unique twist will you add to your next batch?