
Easy Tips for Handling Basic Pie Dough

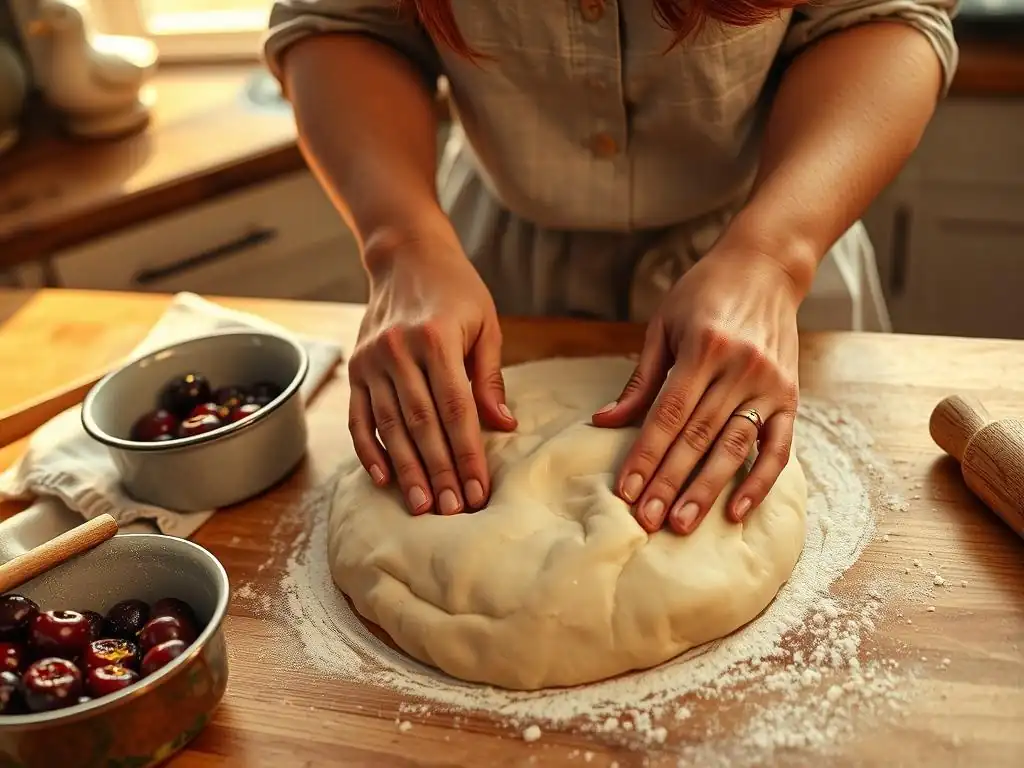
Welcome to BakeWithEase, your guide to unlocking the secrets of delicious, homemade baking! Ever wondered how to achieve that perfectly flaky, melt-in-your-mouth pie crust? This article dives deep into handling basic pie dough tips, and we're about to debunk the myths and share the essential techniques that will transform your pie-making experience. Ready to conquer the art of pie crust? Let's get started and uncover the secrets to baking success!
- Mastering Pie Dough: Techniques for Flaky Crusts
- Introduction to Pie Dough Handling
-
Essential Techniques for Handling Pie Dough
- Technique 1: Maintaining Cold Ingredients for Flakiness
- Technique 2: Precise Ingredient Measurement for Consistency
- Technique 3: Gentle Mixing to Avoid Overdevelopment
- Technique 4: Resting Dough for Gluten Relaxation and Reduced Shrinkage
- Technique 5: Rolling Dough for Even Thickness and Shape
- Technique 6: Transferring Dough to the Pie Plate Without Tearing
- Technique 7: Crimping Edges for Aesthetics and Functionality
- Troubleshooting Common Pie Dough Issues
- Storing Pie Dough for Later Use
- Advanced Pie Dough Techniques
- Conclusion: Achieving Pie Dough Mastery
- Frequently Asked Questions
- Final Reflection: Mastering the Humble Pie Dough
- Unleash Your Inner Pie Baker!
Mastering Pie Dough: Techniques for Flaky Crusts
Introduction to Pie Dough Handling
Why Proper Pie Dough Handling is Essential for Baking
Mastering the art of handling basic pie dough is arguably one of the most crucial steps in achieving a truly exceptional homemade pie. The way you interact with the dough from mixing to rolling significantly impacts its final texture and flakiness. Mishandling can result in a tough, dense crust rather than the delicate, flaky layers we all crave.
Understanding the science behind the ingredients and how they react to manipulation is key to unlocking the secrets of a perfect crust. It's not just about following a recipe; it's about developing a feel for the dough and knowing how to coax out its best qualities.
Proper handling prevents gluten overdevelopment, which is the primary culprit behind tough crusts. Flour contains proteins that, when hydrated and agitated, form gluten strands. While gluten is essential for structure in bread, too much development in pie dough creates a chewy, bread-like texture instead of a tender, melt-in-your-mouth flakiness.
Learning gentle techniques ensures these gluten strands remain short and tender, allowing the fat (like butter or shortening) to create steam pockets during baking, which separate the layers of dough into those coveted flakes. These easy tips for handling basic pie dough will set you on the path to pie success.
A Guide to Achieving Perfect Pie Crust
Embarking on the journey to perfect pie crust involves understanding a few fundamental principles and consistently applying gentle, deliberate techniques. It starts with selecting the right ingredients and ensuring they are at the correct temperature, particularly the fat and water. From there, the method of combining these ingredients, the minimal handling required, and the crucial resting period all play vital roles. Think of it less like kneading bread and more like carefully assembling delicate layers.
This guide provides essential tips for handling basic pie dough, breaking down the process into manageable steps. We'll cover everything from keeping ingredients cold to the best way to roll out and transfer your dough. By focusing on these techniques, you'll build confidence in your ability to create consistently flaky, tender pie crusts, transforming your baking results from good to truly outstanding. Let's dive into the core methods that professionals use to achieve pie perfection.
Essential Techniques for Handling Pie Dough
Technique 1: Maintaining Cold Ingredients for Flakiness
One of the golden rules in handling basic pie dough is keeping all your ingredients, especially the fat and water, as cold as possible. Cold butter or shortening is cut into the flour, creating small pockets of fat throughout the dough. As the pie bakes, these cold fat pieces melt, releasing steam. This steam pushes apart the layers of dough, resulting in those desirable flaky layers. Warm fat, on the other hand, melts and incorporates too fully into the flour before baking, leading to a more cookie-like or mealy texture rather than distinct flakes.
Using ice water is equally important. Cold water helps to keep the fat solid and also limits gluten development. Add just enough ice water to bring the dough together; typically, this is only a few tablespoons for a standard double-crust recipe, perhaps 6-8 tablespoons in total. Using too much water can also contribute to toughness by promoting more gluten formation. Aim for the minimum amount needed for the dough to just hold together when squeezed. These cold temperatures are fundamental tips for handling basic pie dough effectively.
The Role of Cold Butter in Tender Crusts
Cold butter is paramount for creating a tender and flaky pie crust. When cold butter is cut into the flour, it remains in small, distinct pieces. During baking, the water content in the butter turns to steam, creating air pockets within the dough. These pockets expand, separating the layers of dough and resulting in a light, flaky texture. If the butter is soft or warm, it blends too much with the flour, leading to a dense, less flaky crust.
For best results, use very cold butter, ideally cut into small cubes (like 1/2 inch or 1 cm) and even chilled in the freezer for 10-15 minutes before incorporating it into the flour. Some bakers even cube the butter and then toss it with a tablespoon of flour before chilling to help prevent clumping. The goal is to have visible pieces of butter throughout the dough mixture before adding any liquid – think pea-sized pieces, or even slightly larger if you prefer very large flakes.
Using Ice Water for Optimal Dough Texture
The liquid component of pie dough, typically water, should also be ice cold. This helps to keep the fat solid and prevents it from melting into the flour prematurely. Cold water also slows down the hydration of the flour proteins, which in turn minimizes gluten development. Remember, less gluten development equals a more tender crust.
To prepare ice water, simply fill a cup with ice and add cold water. Let it sit for a few minutes to get very cold. When adding it to the dough, remove the ice cubes and use only the water. Add the water gradually, a tablespoon at a time, sprinkling it over the flour-fat mixture. Use a fork or your fingers to gently incorporate the water until the dough just begins to come together. You should see moist clumps forming, but the dough shouldn't be uniformly wet or sticky.
Technique 2: Precise Ingredient Measurement for Consistency
Accuracy in measuring ingredients is vital for successful pie dough, ensuring the correct ratio of flour to fat to liquid. While some bakers can eyeball ingredients, especially with experience, precise measurement removes guesswork and leads to consistent results every time you're handling basic pie dough. Slight variations in the flour or liquid amount can drastically alter the dough's consistency, making it too sticky or too dry, both of which are problematic for handling and baking.
Using a kitchen scale provides the most accurate measurement for flour and fat. For instance, a common ratio by weight for flaky pie dough might be roughly 3 parts flour, 2 parts fat, and 1 part ice water. This translates, for example, to 250 grams of flour, 165 grams of cold butter, and about 80-100 grams (ml) of ice water, adjusted as needed. Relying on volume measurements (cups) can be inconsistent because flour compacts differently depending on how it's scooped.
Utilizing a Kitchen Scale for Accurate Ratios
A kitchen scale is the gold standard for measuring dry ingredients like flour and solid fats like butter or shortening when making pie dough. Measuring by weight ensures that you are using the exact amount specified in a recipe, leading to predictable outcomes. For example, a cup of all-purpose flour can weigh anywhere from 120 grams to 150 grams depending on how it's scooped and packed. This variation of up to 25% can significantly impact the dough's hydration and handling characteristics.
Using a scale eliminates this variability. Simply place your mixing bowl on the scale, zero it out (tare), and weigh your flour directly into the bowl. Repeat for the fat. This method guarantees the correct ratio, which is crucial for achieving the desired dough consistency and ultimately, a flaky crust. It's one of the most effective tips for handling basic pie dough with precision.
The Correct Method for Flour Measurement
If you don't have a kitchen scale, the most accurate way to measure flour by volume is using the "spoon and level" method. Do not scoop the flour directly from the bag with your measuring cup, as this compacts the flour, resulting in too much flour. Instead, use a spoon to lightly fluff the flour in its container, then gently spoon it into your dry measuring cup.
Once the cup is full, use a straight edge, like the back of a knife or a spatula, to level off the excess flour without packing it down. This method provides a more consistent volume measurement compared to scooping directly. While not as precise as weighing, it's significantly better than scooping and helps prevent adding too much flour, which can make your dough dry and difficult to handle.
Technique 3: Gentle Mixing to Avoid Overdevelopment
The way you mix pie dough is just as important as the ingredients you use. The goal is to bring the ingredients together just enough so that the dough forms a cohesive mass. Overmixing is a common mistake that leads to tough crusts. When flour is mixed with liquid, gluten begins to form. The more you mix or knead the dough, the more the gluten develops, creating a strong, elastic network suitable for bread but detrimental to the tenderness of pie crust.
For most pie dough recipes, you start by cutting the cold fat into the flour until you have pieces of fat ranging from pea-sized to lima bean-sized. Then, you add ice water a tablespoon at a time, using a fork or your fingers to gently incorporate it until the dough just barely comes together. Stop mixing as soon as the dough forms a shaggy mass that can be pressed together; it's okay if there are still some dry bits. This minimal handling ensures that the gluten development is kept to a minimum.
The Impact of Overmixing on Dough Toughness
Overmixing pie dough activates and develops the gluten proteins in the flour excessively. As these proteins form a strong, elastic network, the dough becomes increasingly tough and difficult to work with. When baked, this high-gluten dough will be chewy and bread-like rather than tender and flaky. You'll notice the dough resists rolling and snaps back frequently if it's been overmixed.
To avoid this, use a light touch. Whether using a pastry blender, a food processor (pulsing only! ), or your hands, the goal is to quickly combine the ingredients without kneading or vigorously stirring. Stop mixing when moist clumps form and the dough just starts to hold together when squeezed gently in your hand. It does not need to look perfectly smooth or uniform at this stage.
Proper Ingredient Incorporation Technique
Start by combining the flour, salt, and any sugar in a bowl. Cut in the cold, cubed fat using a pastry blender, forks, or your fingertips until the mixture resembles coarse meal with some larger, pea-sized pieces of fat remaining. This step is crucial for creating flakiness. Next, add the ice water one tablespoon at a time, sprinkling it over the flour-fat mixture.
Use a fork or your hands to lightly toss and mix the ingredients until the water is just incorporated. Continue adding water only until the dough is moist enough to hold together when gently squeezed. It's better to err on the side of slightly dry than too wet. The dough should look shaggy and not completely uniform. Gather the dough into a ball or disc, handle it minimally, and proceed to the resting step.
Technique 4: Resting Dough for Gluten Relaxation and Reduced Shrinkage
After mixing, pie dough needs to rest in the refrigerator. This step is non-negotiable for achieving a tender, easy-to-handle crust and is a key tip for handling basic pie dough successfully. The primary purpose of resting is to allow the gluten strands, which were partially developed during mixing, to relax. Relaxed gluten makes the dough less elastic and easier to roll out without snapping back excessively.
Resting also allows the liquids in the dough to hydrate the flour more evenly. This results in a more consistent dough texture. A typical resting period is at least 30 minutes, but chilling for 1-2 hours is often recommended. For make-ahead convenience, pie dough can often rest for up to 2-3 days in the refrigerator. This resting period significantly reduces shrinkage during baking.
Preventing Shrinkage Through Dough Resting
One of the most frustrating issues in pie baking is when the crust shrinks away from the edges of the pie plate during baking. This often happens because the gluten in the dough is still tense from mixing and rolling. As the dough heats up in the oven, these tense gluten strands contract, pulling the dough inwards.
Resting the dough in the refrigerator allows the gluten to relax and become more pliable. When you roll out relaxed dough, it is less likely to snap back and shrink. Chilling the dough also re-hardens the fat, which helps maintain the structure when rolling and transferring, further minimizing the risk of shrinkage during baking. A well-rested dough is your best defense against a shrunken crust.
Wrapping and Chilling Dough Effectively
Properly wrapping the dough before chilling is essential to prevent it from drying out and forming a crust on the surface. Divide the dough into the number of portions needed (typically one disc for a single crust, two discs for a double crust). Gently shape each portion into a flattened disc, about 1 inch thick. This shape will make it easier to roll out later.
Wrap each disc tightly in plastic wrap, ensuring there are no air pockets. Press down gently to seal the wrap around the dough. Place the wrapped discs in the refrigerator for the recommended resting time. If chilling for more than a few hours or overnight, you might place the wrapped discs inside a resealable bag or container for extra protection against drying or absorbing refrigerator odors.
Technique 5: Rolling Dough for Even Thickness and Shape
Rolling out pie dough is where your gentle handling techniques really come into play. The goal is to achieve an even thickness (usually around 1/8 inch or 3mm) across the entire sheet of dough, in a shape large enough to fit your pie plate with some overhang. Uneven thickness can lead to parts of the crust being undercooked or overcooked. Rolling requires patience and a light touch to avoid overworking the dough.
Always start with well-chilled, rested dough. If it's too hard to roll immediately, let it sit at room temperature for just a few minutes (no more than 5-10) until it's slightly pliable but still very cold. Use a lightly floured surface and rolling pin, but avoid using excessive flour, which can make the dough tough and dry. Rotate the dough frequently and flip it over occasionally to prevent sticking and ensure even rolling.
Techniques for Achieving Uniform Dough Thickness
Achieving uniform thickness is key for even baking. Start by pressing down on your chilled dough disc with your rolling pin to flatten it slightly. Begin rolling from the center outwards, rotating the dough frequently (about a quarter turn after every few rolls). This helps maintain a round or desired shape and prevents one side from becoming thicker than the other.
Apply gentle, even pressure as you roll. Avoid pressing down too hard, which can force the fat into the flour and make the dough tough. If you find the edges are cracking, you can gently pinch them together to smooth them out. Roll until the dough is about 1/8 inch thick, checking the thickness periodically by eye or using a ruler if you want to be precise. The dough should be large enough to drape into your pie plate with a 1-inch overhang.
Preventing Dough Sticking During Rolling
Sticking is a common frustration when handling basic pie dough. The best defense is starting with well-chilled dough and using a lightly floured surface and rolling pin. "Lightly floured" is key; too much flour will be incorporated into the dough, making it dry and tough. Sprinkle a small amount of flour on your work surface and rolling pin, and brush off any excess from the dough as you roll.
If the dough starts to stick, use a bench scraper or spatula to gently lift an edge and add a tiny bit more flour underneath. Rotating and flipping the dough frequently also helps prevent it from bonding to the surface. If your kitchen is warm, consider chilling the dough briefly again if it becomes too soft and sticky to handle. Some bakers prefer rolling dough between two sheets of parchment paper or on a pastry mat for easier cleanup and less sticking.
Technique 6: Transferring Dough to the Pie Plate Without Tearing
Once rolled, transferring the delicate dough into the pie plate can feel daunting, but there are simple techniques to make it easier and prevent tears. The goal is to move the dough intact while keeping it cold and relaxed. A common method involves gently folding the rolled dough for easier lifting.
Ensure your pie plate is ready – some bakers lightly butter or flour it, though often this isn't strictly necessary for a standard flaky crust. Carefully lift the folded dough and position it over the pie plate. Unfold it gently, letting it settle into the bottom and sides of the plate without stretching it. Press it lightly into the corners and up the sides, being careful not to stretch the dough, which can lead to shrinkage. These tips for handling basic pie dough during transfer are crucial.
Methods for Folding and Lifting Dough Intact
One popular method for transferring rolled dough is to gently roll the dough sheet around your rolling pin. Position the rolling pin at one edge of the dough, and lightly roll the dough onto it. Then, unroll the dough over your pie plate. This provides support and reduces the risk of tearing.
Alternatively, you can gently fold the dough in half, then in half again (into quarters). Carefully lift the folded dough and place the point in the center of your pie plate. Unfold the dough, first one way, then the other, letting it settle into the plate. Whichever method you choose, work quickly while the dough is still cold and pliable.
Repairing Tears and Cracks in the Dough
Don't despair if your dough tears or cracks during rolling or transferring; it's a common occurrence, especially when you're new to handling basic pie dough tips. Most tears can be easily repaired. Simply pinch the edges of the tear together using your fingers. If it's a larger gap, you can patch it with a small piece of dough trimmed from the edge overhang.
Lightly moisten the area around the tear with a tiny bit of water (a drop or two) to help the patch adhere. Gently press the patch over the tear and smooth the edges with your fingers or a small spatula. For cracks around the edges while rolling, you can often just pinch them together and continue rolling. These repairs are usually invisible after baking.
Technique 7: Crimping Edges for Aesthetics and Functionality
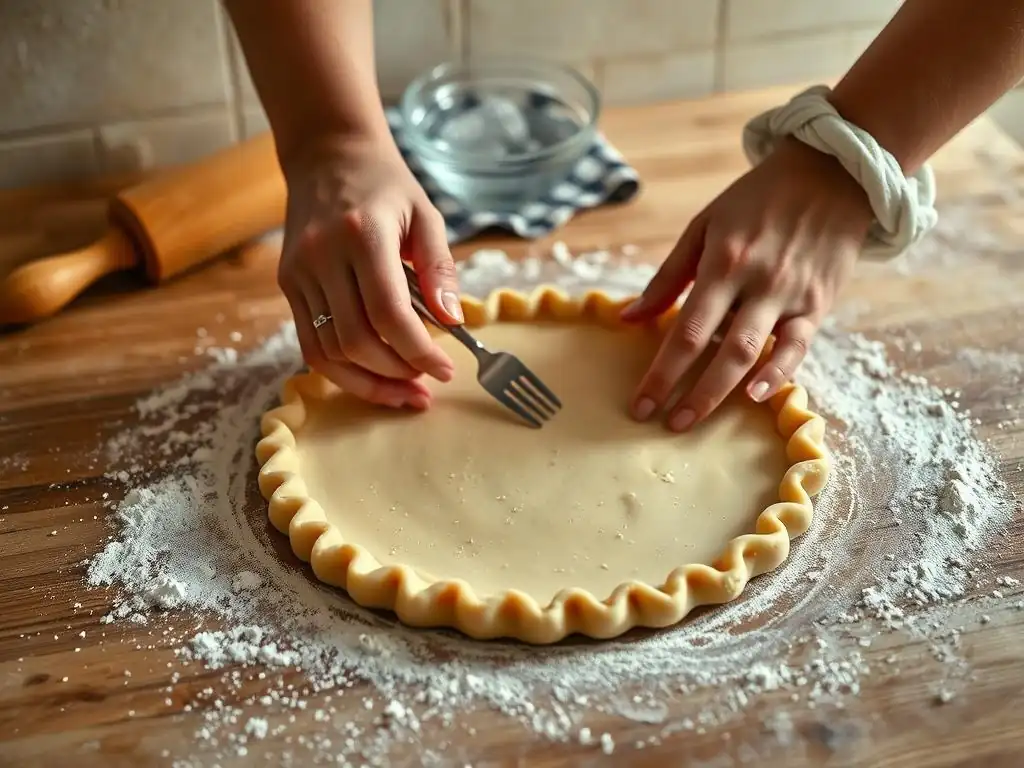
Crimping the edges of your pie crust serves both an aesthetic purpose, creating a beautiful finished look, and a functional one, sealing the top and bottom crusts together (for a double-crust pie) to prevent the filling from leaking out during baking. There are numerous ways to crimp edges, from simple fork marks to elaborate decorative patterns.
Before crimping, trim the excess dough, leaving about a 1-inch overhang around the edge of the pie plate. For a single crust, you can simply fold the edge under and crimp. For a double crust, lay the top crust over the filling, trim the excess, and then crimp the top and bottom edges together. Chilling the crimped edge for 15-20 minutes before baking helps it hold its shape.
Various Crimping Styles for Pie Crusts
- Fork Crimping: The simplest method. Press the tines of a fork perpendicular to the edge of the dough, all the way around the pie.
- Fluted Edge: Use your thumb and forefinger to pinch the edge of the dough, while simultaneously pushing the dough between them with the index finger of your other hand. Repeat around the circumference.
- Rope Edge: Pinch a section of the dough edge and twist it slightly towards you, creating a rope-like effect. Continue this motion around the entire edge.
- Decorative Cutouts: Use small cookie cutters to create shapes from the excess dough and place them decoratively on the edge before baking.
These methods offer different looks, but the core function is to create a sealed border. Experiment to find a style you enjoy and can execute neatly.
Sealing Edges to Prevent Filling Leaks
For double-crust pies, properly sealing the edges is crucial to keep the filling contained during baking, especially for juicy fruit pies. After laying the top crust over the filling and trimming the excess dough, you need to join the edges of the top and bottom crusts.
Align the edges of both crusts and press them together gently with your fingers. Then, proceed with your chosen crimping method. The crimping process itself helps to fuse the two layers of dough together, creating a seal. For extra security with very wet fillings, some bakers lightly brush the bottom crust edge with a little water or egg wash before laying the top crust over it, acting like glue. Ensuring a tight seal is a key tip for handling basic pie dough when dealing with fillings.
Troubleshooting Common Pie Dough Issues
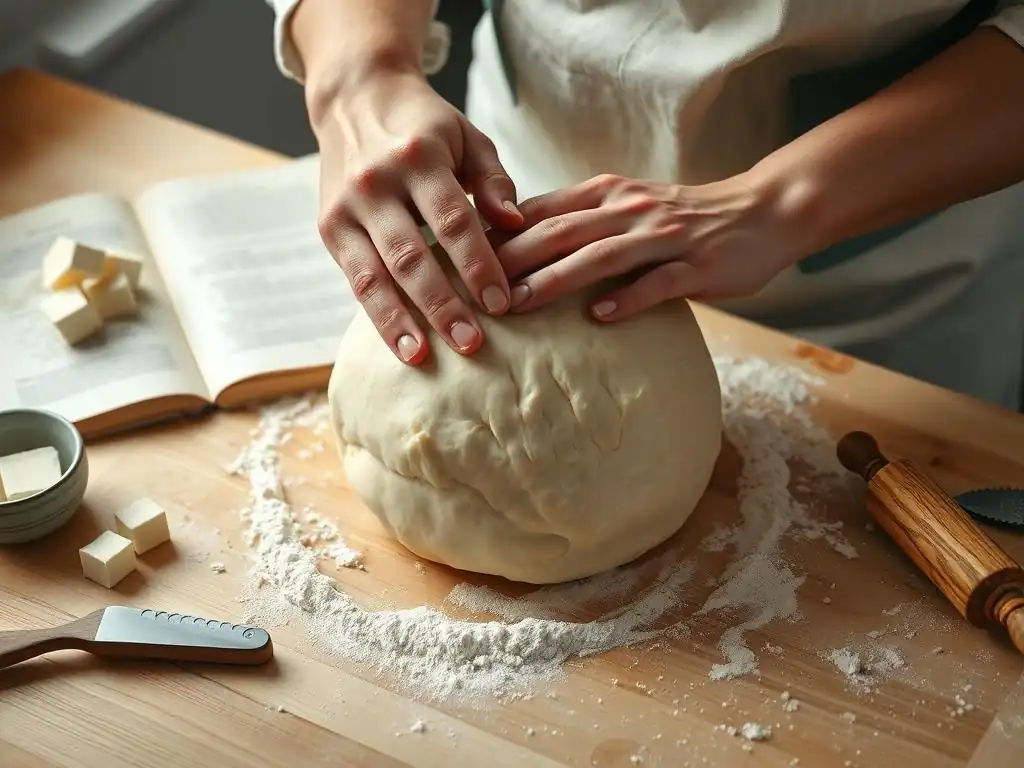
Handling basic pie dough can sometimes present challenges, but most problems have straightforward solutions. Understanding the common pitfalls and how to address them will improve your success rate and confidence. Two frequent issues are dough that is too sticky or too dry and crumbly. These often stem from incorrect ingredient measurement or temperature.
Another common problem is dough shrinkage during baking, which we touched on earlier. Addressing these issues involves understanding the dough's hydration and gluten structure. With practice and attention to these tips for handling basic pie dough, you'll learn to identify the signs of problematic dough and correct them before they ruin your pie.
Problem: Sticky Dough
Sticky dough is usually a sign of too much liquid or not enough flour. It can also occur if the dough is too warm. Sticky dough is difficult to roll and handle, often clinging to the work surface and rolling pin, and can lead to a tough crust because you might be tempted to add excessive flour during rolling.
If your dough feels excessively sticky right after mixing, it's best to add a tiny bit more flour (a tablespoon at a time) until it's manageable, then proceed to chill it thoroughly. If it becomes sticky during rolling, it's likely warming up; wrap it and chill it again for 15-20 minutes before attempting to roll it further.
Solution: Adjusting Hydration Levels in Sticky Dough
If your dough is sticky straight from the mixing bowl, you likely added too much water. The best way to fix this before chilling is to gently work in a tablespoon or two of additional flour until the dough is less sticky but still moist enough to hold together. Be careful not to overmix while adding the flour.
If the dough becomes sticky during rolling, it's usually due to warmth. Avoid adding large amounts of flour to your work surface, as this will alter the dough's hydration and can make the final crust tough. Instead, gather the dough, reshape it into a disc, wrap it tightly, and chill it in the refrigerator for 20-30 minutes until it's firm enough to roll again. A colder dough is less likely to stick.
Problem: Crumbly and Dry Dough
Dough that is too crumbly and dry is typically the result of too little liquid or too much flour. It won't come together easily, is difficult to roll without cracking excessively, and will likely result in a brittle, hard crust after baking. It indicates that the flour hasn't been sufficiently hydrated.
If your dough looks like dry crumbs and won't form a cohesive mass after adding the recommended liquid, you need to add a little more ice water. Do this very cautiously, adding perhaps a teaspoon at a time, sprinkling it over the driest parts and gently incorporating it until the dough just holds together when pressed.
Solution: Correcting Dry and Crumbly Dough
To fix dry and crumbly dough, you need to carefully add more liquid. Sprinkle a teaspoon of ice water over the driest parts of the dough mixture. Gently work it in with your hands or a fork, trying to bring the dry bits into the moist clumps. Continue adding ice water a teaspoon at a time, mixing gently after each addition, until the dough just barely comes together when squeezed.
Be patient and add the water gradually; it's easy to go from too dry to too wet. Stop as soon as the dough forms a shaggy mass that can be gathered into a ball. Once it's corrected, chill the dough as usual. While it might not be as perfect as dough mixed with the correct hydration initially, this technique can often salvage a dry batch.
Problem: Dough Shrinkage During Baking
As discussed earlier, shrinkage is often caused by insufficient resting time, which leaves the gluten tense. It can also happen if the dough was stretched excessively during rolling or transferring into the pie plate. Overworking the dough during mixing and rolling also contributes to this problem.
A key tip for handling basic pie dough to prevent shrinkage is adequate chilling before baking. After placing the dough in the pie plate and crimping the edges, chill the pie shell (or assembled pie) in the refrigerator for at least 30 minutes, or even the freezer for 15-20 minutes. This re-hardens the fat and relaxes the gluten further before it hits the hot oven.
Solution: Minimizing Shrinkage in Baked Pie Crusts
The most effective way to minimize shrinkage is to ensure the dough is properly rested and chilled before baking. Chill the dough discs for at least 30 minutes (preferably 1-2 hours) after mixing. When rolling, handle the dough gently and avoid stretching it. When placing it in the pie plate, ease it in without pulling.
After the dough is in the pie plate and crimped, chill the pie shell again for at least 30 minutes before filling and baking (for a single crust) or before baking (for a double crust). This final chill is crucial. Some bakers also recommend baking the pie on a preheated baking sheet in a hot oven (like 400°F or 200°C) as the initial blast of heat helps set the edges quickly before significant shrinkage can occur.
Storing Pie Dough for Later Use
One of the great advantages of making pie dough from scratch is that it can be made ahead of time and stored for later use. Proper storage ensures the dough remains fresh, pliable, and ready to roll when you are. This convenience makes tackling pie baking on a busy day much more manageable.
Whether you plan to use the dough in a few days or a few months, chilling or freezing are effective storage methods. Knowing how to store your dough correctly is an essential part of mastering pie dough handling tips, allowing you to bake delicious pies whenever the craving strikes.
Refrigerating Dough for Short-Term Storage
Pie dough can be safely stored in the refrigerator for short-term use, typically for 2 to 3 days. Ensure the dough is tightly wrapped in plastic wrap to prevent it from drying out or absorbing odors from the refrigerator. Shaping the dough into a flattened disc before wrapping makes it easier to store and quicker to soften slightly when you're ready to roll it out.
When ready to use refrigerated dough, take it out of the fridge about 10-20 minutes before rolling, depending on the warmth of your kitchen. It should be firm but slightly pliable, not rock hard. If it's still too cold and stiff, it will crack excessively when rolled. If it becomes too soft, pop it back in the fridge for a few minutes.
Freezing Dough for Extended Storage
For longer storage, freezing pie dough is an excellent option. Properly wrapped dough can be stored in the freezer for up to 3 to 4 months. Freezing allows you to prepare dough in advance, saving time when you need it for a special occasion or spontaneous baking project.
Wrap the flattened dough disc tightly in plastic wrap, then wrap it again in aluminum foil or place it in a freezer-safe bag. Label it with the date. To thaw frozen dough, transfer it to the refrigerator the day before you plan to use it. It will typically take about 24 hours to thaw completely. Avoid thawing at room temperature, as this can cause the fat to soften too much and compromise the texture. Once thawed, proceed as you would with refrigerated dough.
Advanced Pie Dough Techniques
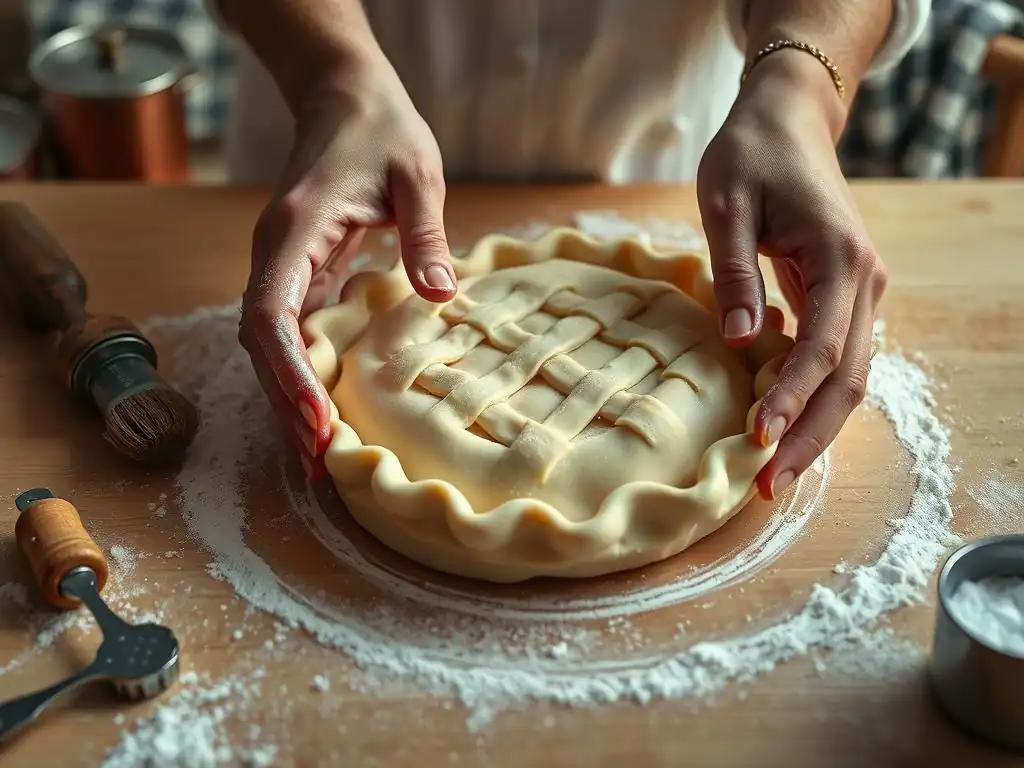
Once you've mastered the basics of handling basic pie dough, you might want to explore more advanced techniques to enhance your pies. These methods build upon the fundamental principles but add complexity or serve specific purposes, such as creating a sturdy base for wet fillings or adding decorative flair.
Two common advanced techniques are blind baking and creating lattice crusts. Blind baking is essential for pies with fillings that don't require baking, while lattice crusts offer both ventilation and a beautiful presentation. Exploring these techniques expands your pie-baking repertoire.
Blind Baking Crusts for Custard and Cream Pies
Blind baking (or par-baking) refers to baking a pie crust before adding the filling. This technique is necessary for pies with fillings that are not baked (like cream pies or puddings) or fillings that are very wet and would make the bottom crust soggy (like quiches or some custard pies). It ensures the bottom crust is fully cooked and crisp.
To blind bake, line your chilled pie shell with parchment paper or foil and fill it with pie weights, dried beans, or rice. This prevents the crust from puffing up or shrinking excessively. Bake at a relatively high temperature (e.g., 375-400°F or 190-200°C) for about 15-20 minutes, or until the edges are set. Remove the weights and paper/foil, then continue baking for another 10-15 minutes until the bottom is lightly golden and appears dry. For a fully baked crust, bake until uniformly golden brown.
Creating Lattice Crusts: A Detailed Guide
A lattice crust is a classic decorative top for double-crust pies, especially fruit pies. Besides being visually appealing, the openings in the lattice allow steam from the filling to escape during baking, preventing the crust from becoming soggy and ensuring the filling thickens properly. Creating a neat lattice requires careful cutting and weaving of dough strips.
Roll out the top crust dough into a circle slightly larger than your pie plate. Using a knife or pastry wheel, cut the dough into even strips (e.g., 1/2 inch or 1 cm wide). Place half of the strips parallel across the filled pie, spacing them evenly. Fold back alternate strips halfway. Place a strip perpendicular to the folded strips near the fold.
Unfold the folded strips over the perpendicular strip. Now, fold back the other alternate strips and lay another perpendicular strip. Continue this weave pattern until the pie is covered. Trim the ends and crimp them to the bottom crust edge. Chilling the cut strips briefly before weaving can make them easier to handle.
Conclusion: Achieving Pie Dough Mastery
Mastering pie dough may seem challenging at first, but by focusing on a few key principles and practicing gentle handling techniques, anyone can learn to create consistently flaky and delicious pie crusts. From keeping ingredients cold to resting the dough and handling it minimally, each step plays a vital role in the final outcome.
Remember that baking is a skill that improves with practice. Don't be discouraged by imperfect results initially. Every pie you make is a learning opportunity. Pay attention to how the dough feels at different stages and adjust your technique accordingly. These tips for handling basic pie dough provide a solid foundation for your baking adventures.
Summary of Key Pie Dough Handling Techniques
- Keep ingredients cold: Especially fat and water, to create steam pockets for flakiness.
- Measure precisely: Use a scale or spoon-and-level method for accurate flour and fat ratios.
- Mix gently: Stop mixing as soon as the dough comes together to prevent gluten overdevelopment.
- Rest and chill: Allow dough to rest for at least 30 minutes to relax gluten and prevent shrinkage.
- Roll evenly: Use a light touch and rotate the dough frequently to achieve uniform thickness.
- Transfer carefully: Use methods like rolling onto a pin or folding to move dough without tearing.
- Seal edges: Crimp effectively to prevent filling leaks and add visual appeal.
Begin Your Journey to Perfect Pie Baking.
You now have a comprehensive guide to handling basic pie dough, equipped with essential tips and techniques used by experienced bakers. The path to perfect pie crust is within your reach. Don't hesitate to try a recipe and put these tips into practice.
Start with a simple recipe and focus on mastering one or two techniques at a time. Pay attention to the temperature of your ingredients and the feel of the dough. With patience and practice, you'll soon be confidently handling basic pie dough and baking beautiful, flaky pies that will impress your family and friends. Happy baking!
Frequently Asked Questions
How can I prevent my pie dough from shrinking during baking?
Shrinkage is often due to gluten development and lack of chilling. Ensure you don't overwork the dough and chill it thoroughly before baking to relax the gluten.
What is the best way to keep my pie crust from getting soggy?
Blind baking the crust is key! Also, ensure your filling isn't too watery and consider using a starch thickener in the filling for better consistency.
Why does my pie dough sometimes crack when I roll it out?
This usually happens when the dough is too cold. Let the dough warm up slightly before rolling. Also, try adding a teaspoon of vinegar or vodka to your dough for a more pliable texture.
What is the ideal temperature for ingredients when making pie dough?
Using cold ingredients is crucial. Cold butter and water prevent gluten development, resulting in a flaky crust. Keep everything refrigerated until ready to use.
How can I achieve a flaky pie crust every time?
The secret to a flaky crust is cold butter and minimal mixing. The butter should be cut into small pieces and incorporated into the flour until it resembles coarse crumbs.
Final Reflection: Mastering the Humble Pie Dough
The seemingly simple act of handling pie dough is, in reality, a gateway to culinary creativity and a profound connection to tradition. A perfectly flaky crust isn't just about aesthetics; it's a testament to patience, precision, and understanding the fundamental properties of flour, fat, and water. This knowledge, once acquired, unlocks a world of possibilities, from classic apple pies to adventurous savory tarts.
The influence of pie dough extends far beyond the kitchen table; it's a thread woven into the fabric of countless cultural celebrations and family gatherings. The aroma of baking pie dough evokes powerful memories and emotions, connecting us to generations past. As Julia Child wisely said, Find something you're passionate about and keep tremendously interested in it.
For many, that passion is ignited by the simple act of creating a perfect pie crust, a testament to the enduring power of culinary tradition and the joy of creating something beautiful and delicious.
Now, consider your own relationship with pie dough. Have you been intimidated by its reputation for being finicky? I encourage you to revisit your approach, armed with the techniques discussed in this article. Don't be afraid to experiment, to embrace the occasional imperfection, and to find joy in the process. The next time you roll out that dough, remember the connection to history, the potential for creativity, and the satisfaction of creating something truly special. The perfect pie crust awaits – and so does the rewarding journey to get there.
Unleash Your Inner Pie Baker!
Thanks for taking the time to explore the wonderful world of pie dough! You've now got the confidence to tackle even the flakiest crusts. Ready to put your new skills to the test?
- Bake your dream pie: Use what you've learned to create your favorite pie recipe—or try a completely new one! This is your chance to shine.
- Share your baking journey: Tag us on social media (@BakeWithEase) with photos of your creations. We'd love to see your success!
- Experiment with fillings: Don't be afraid to try new and unique flavor combinations! What unexpected fillings will you create?
Ready to roll out that perfect pie crust? What's the first pie you're going to make?