
Simple PressIn Tart Shell

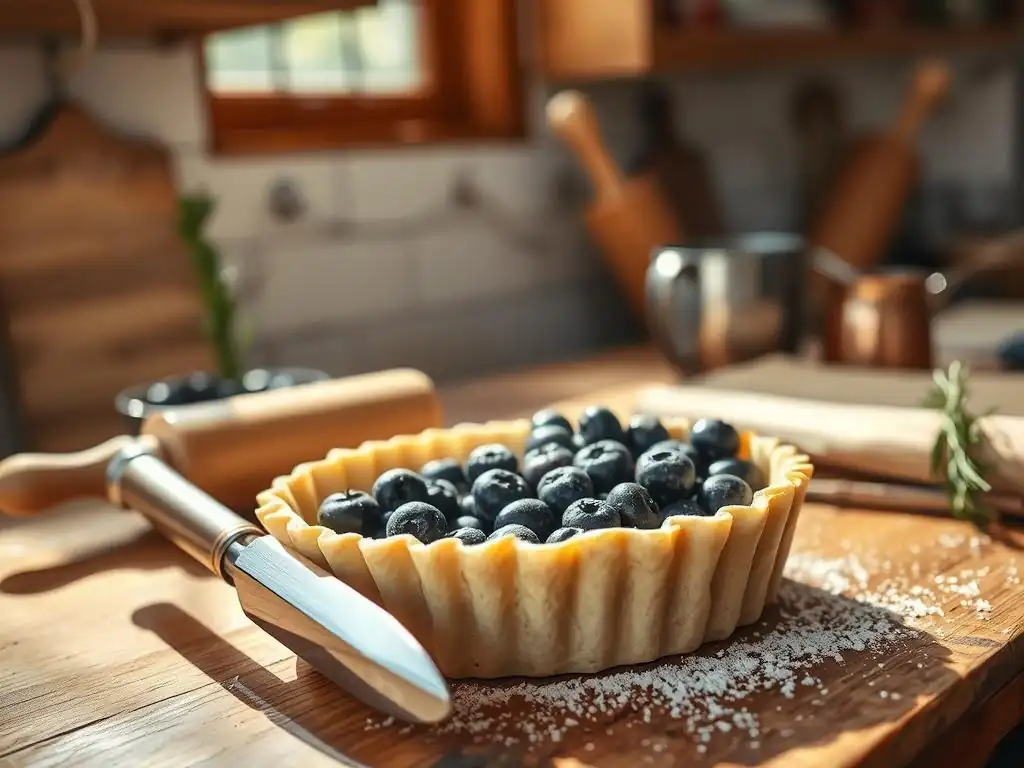
Welcome to BakeWithEase, your kitchen companion for unlocking the secrets of delicious baking! Ever dreamed of creating perfect tarts but felt intimidated by the crust? Discover the joy of easy press-in tart shells – a foolproof technique that will revolutionize your pastry game. Get ready to skip the rolling pin and dive into a world of simple ingredients and satisfying results. Curious how? Let's get started and you will be amazed by how easy it is!
- Simple Press-In Tart Shell: A Comprehensive Guide
- Introduction: Mastering Easy Press-In Tart Shells for Baking Success
- The Ultimate Guide to Making Easy Press-In Tart Shells
- Step-by-Step: Creating Your Press-In Tart Shell
- Baking Your Press-In Tart Shell to Golden Perfection
- Troubleshooting Common Press-In Tart Shell Problems
- Flavor Variations for Your Press-In Tart Shell
- Storing and Using Your Press-In Tart Shell
- Conclusion: Enjoying the Ease and Versatility of Press-In Tart Shells
-
Frequently Asked Questions
- What makes the "Simple Press-In Tart Shell" recipe from BakeWithEase different from other tart shell recipes?
- What are the key ingredients needed to make the "Simple Press-In Tart Shell"?
- Can I use different types of flour for the "Simple Press-In Tart Shell"?
- What kind of tart pan works best for the "Simple Press-In Tart Shell" recipe?
- How do I prevent the "Simple Press-In Tart Shell" from shrinking during baking?
- Final Reflection: The Enduring Allure of the Simple Press-In Tart Shell
- Unleash Your Inner Pastry Chef!
- Join the BakeWithEase Community!
- Master the Art of the Perfect Tart Shell!
Simple Press-In Tart Shell: A Comprehensive Guide
Introduction: Mastering Easy Press-In Tart Shells for Baking Success
Creating a delicious tart starts with a perfect crust. While traditional rolled pie crusts can seem daunting to beginners, the simple press-in tart shell offers a fantastic alternative. This method eliminates the need for rolling pins and intricate transfer techniques, making it accessible and less stressful for bakers of all levels. It's the ideal foundation for countless sweet and savory fillings, providing a crisp, buttery base that complements any flavor profile. Mastering this easy technique opens up a world of tart possibilities right in your own kitchen.
The beauty of an easy press-in tart shell lies in its forgiving nature. Unlike delicate rolled doughs that can crack or become tough if overworked, this method encourages direct interaction with the dough in the pan. You simply press the dough into shape, making it incredibly intuitive. This simplicity doesn't sacrifice quality; a well-made press-in crust is wonderfully tender and flavorful. Whether you're whipping up a quick fruit tart or a sophisticated quiche, knowing how to make this basic tart shell is a fundamental skill for any home baker.
Why Choose a Press-In Tart Crust? Simple Baking Solutions
Choosing an easy press-in tart crust simplifies the baking process significantly. One of the biggest hurdles for new bakers is handling traditional pastry dough, which requires careful temperature control and gentle handling to prevent toughness. A press-in dough is much more robust and forgiving. You don't need a perfectly floured surface or worry about the dough sticking to the rolling pin; everything happens directly in the tart pan. This reduces mess and minimizes the chances of overworking the dough, resulting in a consistently tender and crumbly texture.
Beyond the ease of handling, the press-in method is also incredibly fast. You can mix the dough and press it into the pan in under 15 minutes, making it perfect for spontaneous baking projects or when you're short on time. This speed doesn't compromise the quality of the final tart shell; it still bakes up golden brown and delicious.
For example, a standard rolled pie crust recipe might require 30-60 minutes of chilling time before rolling, while a press-in dough often only needs a brief chill once it's already in the pan, or sometimes no chill at all depending on the recipe. This efficiency makes easy press-in tart shells a go-to for busy bakers.
BakeWithEase: Your Partner in Effortless Tart Making
At BakeWithEase, our mission is to demystify baking and provide you with the tools and knowledge to create delicious treats with confidence. We understand that starting out can feel overwhelming, which is why we champion simple yet effective techniques like the easy press-in tart shell. Our recipes are designed with clarity and success in mind, breaking down each step into manageable actions. We believe that everyone can bake, and we're here to guide you from mixing bowl to perfect tart, ensuring your journey is enjoyable and rewarding.
We are committed to offering practical advice and reliable recipes that deliver consistent results. This guide to the easy press-in tart shell is a prime example of our approach. We focus on the fundamental principles, explain the 'why' behind each step, and offer troubleshooting tips to help you navigate any bumps along the way. Think of us as your friendly baking mentor, always ready to share a helpful tip or a simple solution. With BakeWithEase, mastering foundational skills like making a press-in tart crust becomes an achievable and satisfying goal.
The Ultimate Guide to Making Easy Press-In Tart Shells
Creating a simple press-in tart shell involves understanding the role of each ingredient and following a straightforward process. This section breaks down the components and steps, ensuring you have a clear roadmap to success. From selecting the right flour to the best way to press the dough into the pan, we cover everything you need to know to achieve a perfect, easy press-in tart crust every time. It's less about intricate technique and more about combining simple elements effectively.
The process is fundamentally different from traditional pastry, which relies heavily on developing gluten structure and maintaining cold temperatures throughout rolling. The press-in method minimizes gluten development, resulting in a tender, crumbly texture that is characteristic of many tart shells. This makes it much more forgiving for beginners who might accidentally overwork a traditional dough. By focusing on the interaction between fat and flour and the simple act of pressing, you can create a beautiful and functional base for your tart fillings.
Key Ingredients for a Perfect Press-In Tart Crust
The magic of an easy press-in tart shell lies in its minimal ingredient list and the way these few components interact. Success hinges on using the right type and proportion of flour, fat, sweetener, and liquid. Each ingredient plays a crucial role in achieving the desired texture – tender, crumbly, and structurally sound enough to hold a filling. Understanding these roles helps you make informed choices and troubleshoot if needed.
For instance, the type of flour impacts tenderness, while the state and type of fat dramatically affect flakiness or crumbliness. The sweetener adds flavor and aids in browning, and the liquid binds everything together. Getting these elements right is the foundation of a successful press-in tart crust. Let's delve into each one to understand their importance in creating your simple tart shell.
Flour Selection for Tender Tart Shells
The most common flour used for easy press-in tart shells is all-purpose flour. Its moderate protein content (typically around 10-12%) provides enough structure to hold the crust together without making it tough, especially when combined with the minimal handling required by the press-in method. Using a bleached all-purpose flour can sometimes result in a slightly more tender crust than unbleached, though the difference is often subtle. Some recipes might call for pastry flour (lower protein, around 8-9%) for an exceptionally tender crumb, but all-purpose is widely available and yields excellent results for a simple tart shell.
Avoid using high-protein flours like bread flour (12-14% protein) for your easy press-in tart shells. The higher gluten potential in bread flour, even with minimal handling, can lead to a tougher, chewier crust, which is not the desired texture for a delicate tart shell. Measuring flour accurately is also key; using the spoon-and-level method (gently spooning flour into the measuring cup and leveling off with a straight edge) prevents packing too much flour into the cup, which would also lead to a dry, tough dough.
Fat Matters: Choosing the Right Fat for Flavor and Texture
Fat is arguably the most critical ingredient in an easy press-in tart shell, determining both flavor and texture. Unsalted butter is the gold standard for its rich flavor and ability to create a tender, crumbly texture. When butter is incorporated into flour, it coats the flour particles, preventing excessive gluten development. As the butter melts during baking, it leaves behind small pockets, contributing to a slightly crumbly yet tender bite. Using cold butter, cut into small pieces, helps create these desirable pockets.
Other fats can be used, but they will yield different results. Shortening, for example, is 100% fat (compared to butter's approximately 80% fat and 18% water) and has a higher melting point. This can create a more tender and less crumbly crust, but it lacks the rich flavor of butter.
Some recipes might use a combination of butter and shortening. Oil can also be used in some press-in crust recipes, resulting in a very tender, almost cake-like crumb, but it won't have the same structure or classic tart shell flavor as butter-based versions. For a classic, delicious easy press-in tart shell, cold unsalted butter is usually the top choice.
Sweetness and Binding: Sugar and Liquid Choices
Granulated sugar is typically used in sweet easy press-in tart shells. It adds sweetness, contributes to the browning of the crust during baking, and helps create a tender texture by interfering with gluten development. The amount of sugar can vary, but it's usually enough to slightly sweeten the dough without making it overly sweet, allowing the filling to be the star. For savory press-in tart shells, sugar is often omitted or used in a very small amount (like a teaspoon) to aid browning without adding noticeable sweetness.
Liquid, usually cold water or milk, is the binder that brings the dry ingredients and fat together to form a cohesive dough for your easy press-in tart shell. It activates the small amount of gluten we want to form and helps hydrate the flour.
It's crucial to add just enough liquid to bring the dough together; too much will make the dough sticky and potentially tough, while too little will result in a dry, crumbly dough that is difficult to press into the pan. Adding the liquid gradually, often just a tablespoon or two at a time, and mixing until the dough just comes together is the best approach.
Essential Tools for Your Press-In Tart Shell
Having the right tools makes the process of creating your easy press-in tart shell even smoother. While you don't need a lot of specialized equipment, a few key items will ensure success. These tools help with accurate measurement, proper dough distribution, and achieving the desired shape and texture in the tart pan. Investing in these basic baking tools is worthwhile for any aspiring baker.
From the pan itself to the simple implements for pressing the dough, each tool plays a role in simplifying the process. You'll find that many of these are likely already in your kitchen, highlighting just how accessible making an easy press-in tart shell can be. Let's look at the essentials.
The Right Tart Pan: Size and Material
A tart pan with a removable bottom is highly recommended for making easy press-in tart shells. This design allows you to easily unmold the baked tart without damaging the delicate crust, making slicing and serving much simpler. Standard sizes for tart pans range from 8 inches to 11 inches in diameter. An 9-inch or 10-inch pan is a versatile choice for most tart recipes. The depth can vary, but a standard depth of around 1 inch is common.
Most tart pans are made from metal, which conducts heat efficiently for even baking and browning. Non-stick finishes are common and helpful for easy release, though a well-greased standard metal pan works perfectly fine for your easy press-in tart shell. Ceramic or glass tart dishes can also be used, but they may require longer baking times as they don't conduct heat as quickly as metal. For consistently crisp bottoms on your easy press-in tart shells, metal is generally preferred.
Measuring Cups and Spoons: Accurate Baking is Key
Accurate measurement is fundamental in baking, even for something as forgiving as an easy press-in tart shell. Using standard dry measuring cups for flour and sugar, and liquid measuring cups for water or milk, ensures you use the correct proportions specified in the recipe. Dry ingredients should be spooned into the cup and leveled, while liquid measurements are read at eye level.
Measuring spoons are essential for smaller quantities of ingredients like salt, sugar (if using a small amount in a savory crust), or extracts (like vanilla). Using precise measurements helps maintain the delicate balance between ingredients that gives the press-in tart crust its desirable texture and flavor. While baking is often seen as an art, successful baking relies heavily on the science of precise measurements.
Pressing Tools: Spatula or Fingers?
The beauty of an easy press-in tart shell is that the primary tool for shaping is often your own hands! Clean fingertips are excellent for pressing the dough evenly into the bottom and up the sides of the tart pan. The warmth of your fingers helps slightly soften the butter just enough to make the dough pliable and easy to work with, while still keeping it cool enough to maintain structure.
Alternatively, you can use a flat-bottomed measuring cup, the bottom of a glass, or a small offset spatula to help press and smooth the dough, especially in the bottom of the pan. Some bakers find using a tool helps achieve a more uniform thickness on the bottom. For the sides, fingers are usually the most effective tool for pressing the dough firmly into the fluted edges if your pan has them, ensuring a clean, defined edge on your finished easy press-in tart shell.
Step-by-Step: Creating Your Press-In Tart Shell
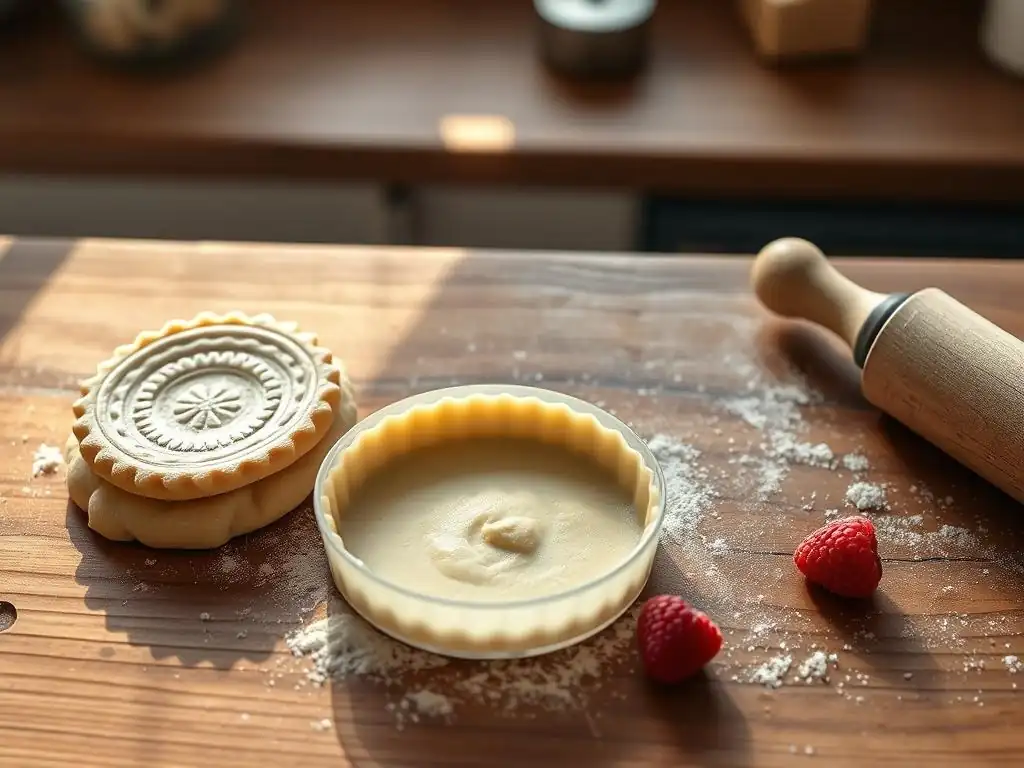
Now that you understand the ingredients and tools, let's walk through the simple process of creating your easy press-in tart shell. This method is straightforward and designed for minimal fuss, making it perfect for beginners. Following these steps will guide you from a bowl of ingredients to a perfectly formed crust ready for baking or filling.
The key throughout these steps is gentle handling and patience. While it's called "press-in," you're not trying to compact the dough into a brick. You're aiming to create a cohesive layer that adheres to the pan. Let's begin the journey to your perfect easy press-in tart crust.
Step 1: Combining Dry Ingredients for the Tart Dough
Start by whisking together the dry ingredients in a medium bowl. This typically includes the flour, sugar (if using), and salt. Whisking helps to aerate the flour slightly and ensures that the salt and sugar are evenly distributed throughout the mixture. This even distribution is important for flavor and texture; you don't want pockets of salt or sugar in your easy press-in tart shell.
Ensure you use the correct type and amount of flour as specified in your recipe. For a standard 9-inch tart pan, you might use around 1.5 to 2 cups of all-purpose flour. A pinch of salt enhances the flavor, even in a sweet crust, balancing the sweetness. This initial step is quick and simple, setting the stage for incorporating the fat.
Step 2: Incorporating Fat into the Flour Mixture
This step is where the magic of the easy press-in tart shell's texture begins. Add the cold, cut-up butter (or other fat) to the dry ingredients. The goal is to break down the fat into smaller pieces within the flour. You can use a pastry blender, a fork, or your fingertips for this. If using your fingers, work quickly to avoid melting the butter with the warmth of your hands.
Rub or cut the fat into the dry ingredients until the mixture resembles coarse meal or small peas. There should still be visible pieces of butter, ranging in size from tiny crumbs to small pea-sized bits. These pieces of fat are crucial; as they melt during baking, they create the tender, crumbly texture characteristic of a good press-in tart crust. Avoid overmixing at this stage; you don't want to create a uniform paste.
Step 3: Adding Liquid and Forming the Dough
Gradually add the cold liquid (usually water or milk) to the flour-fat mixture. Start with the minimum amount specified in the recipe, typically a tablespoon or two. Mix with a fork or your hands until the dough just begins to come together. The dough should be moist enough to hold together when squeezed, but not wet or sticky.
Continue adding liquid, a teaspoon at a time, mixing after each addition, until the dough forms large clumps and can be pressed together into a cohesive ball. Be careful not to add too much liquid. For a standard recipe using 1.5 cups of flour, you might only need 2-4 tablespoons of liquid in total. Over-hydrating the dough will lead to a tough crust. The dough for an easy press-in tart shell is often slightly less hydrated than traditional pie dough, which helps prevent shrinkage and makes it easier to press.
Step 4: Pressing the Dough into the Tart Pan
Once the dough is formed, transfer it directly into your tart pan. Break the dough into smaller pieces or crumble it into the pan. Now, using your fingertips, the bottom of a glass, or an offset spatula, begin pressing the dough evenly into the bottom of the pan. Work from the center outwards, ensuring the dough covers the entire base in an even layer.
After the bottom is covered, press the dough up the sides of the pan. Use your fingers to push the dough firmly and evenly against the sides, especially into the fluted edges if your pan has them. Aim for a consistent thickness throughout the bottom and sides, typically around 1/8 to 1/4 inch thick. This even thickness is important for uniform baking and preventing weak spots in your easy press-in tart shell.
Achieving an Even Crust: Tips and Tricks
Achieving an evenly thick crust is key to a successful easy press-in tart shell. Uneven spots can lead to some areas being underbaked (soggy) while others are overbaked (burnt). To ensure evenness, start by distributing the crumbled dough roughly evenly across the bottom and up the sides before you begin pressing firmly.
As you press, continuously check the thickness by feeling the dough. Use the edge of your finger or a tool to gauge the depth. For the sides, press the dough firmly against the pan edge to create a clean line at the top. If using a fluted pan, make sure the dough is pressed well into the indentations to define the shape. A small offset spatula can be useful for smoothing the bottom and creating a crisp corner where the bottom meets the sides of your easy press-in tart shell.
Dealing with Cracks and Tears
One of the benefits of an easy press-in tart shell is how forgiving it is when it comes to cracks or tears. If you notice a thin spot, crack, or tear while pressing the dough, simply pinch off a small piece of dough from a thicker area (like the top edge) or from any scraps, and press it into the damaged spot.
Use your fingertip or a small spatula to smooth the patched area, blending it seamlessly into the surrounding crust. Because this dough is meant to be pressed and doesn't rely on a delicate laminated structure like puff pastry, patching is incredibly effective and won't be noticeable in the final baked easy press-in tart shell. Don't stress about imperfections during the pressing stage; they are easily fixed.
Step 5: Preparing the Tart Shell for Baking
Once the dough is fully pressed into the pan and smoothed, a couple of final steps are necessary before baking to ensure the best possible outcome for your easy press-in tart shell. These steps help maintain the shape and prevent common issues like puffing or shrinking during baking. They are quick but important additions to the process.
These preparatory steps, pricking and chilling, contribute significantly to the stability and appearance of the finished crust. Skipping them might lead to a bubbly bottom or a shrunken shell, so take these few extra minutes for a superior result on your easy press-in tart shell.
Pricking the Crust: Preventing Bubbling
Pricking the bottom of the tart shell with a fork creates small holes, known as "docking" the crust. These holes act as vents, allowing steam to escape from underneath the dough during baking. If steam cannot escape, it can build up and cause the bottom of the crust to puff up unevenly, potentially creating a large bubble.
Use a fork to prick the entire bottom of the tart shell at intervals of about half an inch. Be careful not to pierce all the way through the dough if your filling is liquid, as this would allow it to leak out later. For blind baking (baking the crust before adding a filling), pricking is essential. For a press-in tart crust that will be filled and baked immediately, some recipes might skip this, but it's generally a good practice for preventing a bubbly bottom on your easy press-in tart shell.
Chilling the Crust: Maintaining Shape
Chilling the formed easy press-in tart shell before baking is a crucial step, especially when blind baking. Chilling allows the fat (butter) to firm up again. When the cold dough hits the hot oven, the butter melts slowly, creating steam that contributes to tenderness. More importantly, chilling helps the crust hold its shape during baking, preventing the sides from slumping down the pan.
Place the pan with the pressed-in dough in the refrigerator for at least 30 minutes, or in the freezer for 15-20 minutes. You can also chill it for several hours or even overnight if needed. This chilling period sets the dough structure. For an easy press-in tart shell that will be filled and baked immediately, a shorter chill might suffice, but a solid chill always improves the final texture and shape.
Baking Your Press-In Tart Shell to Golden Perfection
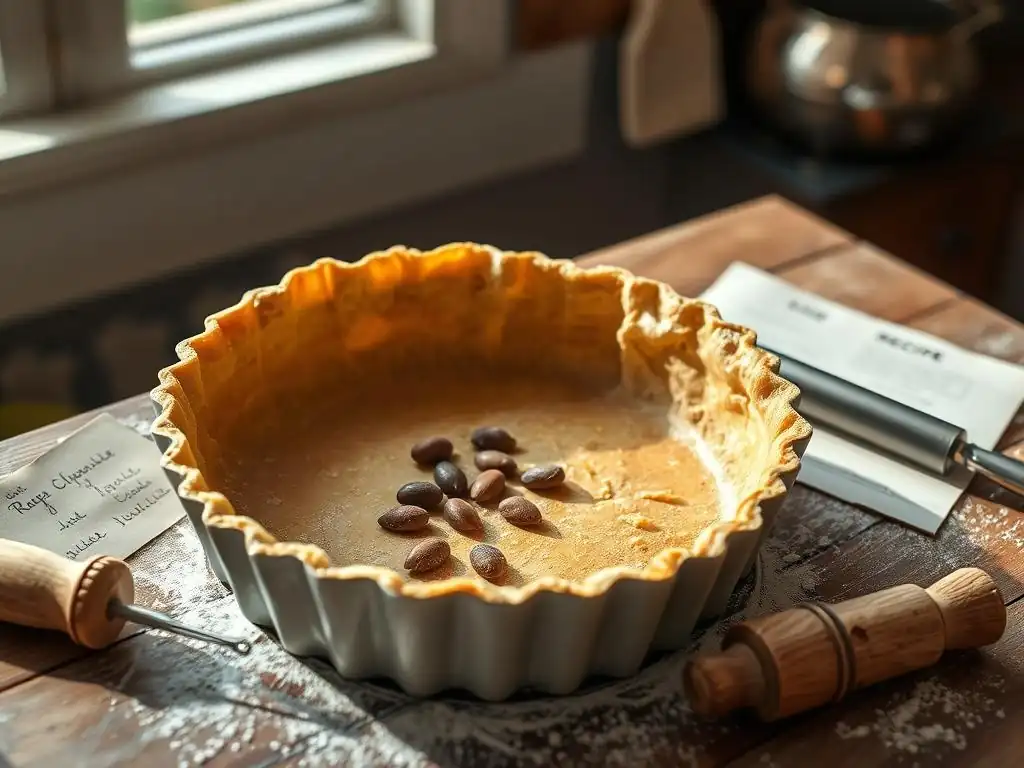
Baking the easy press-in tart shell is where the texture transforms from raw dough to a crisp, golden base. The baking process depends on whether you are blind baking the crust (baking it partially or fully before adding a filling) or if you are filling it immediately and baking the tart all at once. Blind baking is often preferred, especially for wet fillings or tarts that won't be baked again, ensuring a crisp bottom.
Understanding the nuances of baking time, temperature, and how to tell when your easy press-in tart shell is perfectly done will guarantee a successful outcome. Let's explore the techniques for achieving that desirable golden hue and tender-crisp texture.
Blind Baking: The Secret to a Crisp Crust
Blind baking involves baking the tart shell before adding the filling. This is particularly important for tarts with fillings that don't require much baking (like pastry cream or fresh fruit) or very wet fillings (like quiche), which could make an unbaked crust soggy. Blind baking gives the crust a head start, ensuring it's fully cooked and crisp on the bottom.
There are two levels of blind baking: partial and full. Partial blind baking bakes the crust until it's set but not browned, ready for a filling that will be baked later. Full blind baking bakes the crust until it is fully cooked and golden brown, suitable for fillings that don't require further baking. For most easy press-in tart shells used with cooked fillings, partial blind baking is common. For no-bake fillings, full blind baking is necessary.
Using Pie Weights or Beans
To prevent the bottom of the easy press-in tart shell from puffing up and the sides from slumping during blind baking, you need to weigh down the crust. After chilling the pricked crust, line it with parchment paper or aluminum foil, pressing it gently against the bottom and up the sides. Then, fill the lined crust with pie weights, dried beans, or uncooked rice. Ensure the weights are distributed evenly, reaching up the sides to support them.
Bake the crust with the weights for the initial part of the blind bake (e.g., 15-20 minutes at 375°F or 190°C). This sets the structure. After this initial bake, carefully remove the weights and the parchment/foil. Return the tart shell to the oven to continue baking until it reaches the desired level of doneness (partial or full bake). This two-stage process with weights helps ensure a perfectly shaped and flat bottom on your easy press-in tart shell.
Baking Time and Temperature: Avoiding Soggy Bottoms
Typical baking temperatures for blind baking an easy press-in tart shell range from 350°F to 400°F (175°C to 200°C). A common approach is to start at a higher temperature (like 375-400°F) with weights for the initial bake to set the crust quickly, then reduce the temperature slightly (to 350-375°F) after removing the weights to allow the crust to finish baking and brown evenly without burning.
Baking time varies depending on the oven, the pan size, and whether you're doing a partial or full bake. For a partial bake (with weights for 15-20 mins, then removed and baked for another 5-10 mins), the total time might be around 20-30 minutes. For a full bake (with weights, then removed and baked until deeply golden, potentially another 15-25 mins), the total time could be 30-45 minutes. A visual check is always the best indicator of doneness for your easy press-in tart shell.
Checking for Doneness: Achieving the Perfect Color
The best way to determine if your easy press-in tart shell is done is by its color. For a partial bake, the crust should look dry and set, opaque rather than translucent, with the edges just beginning to turn golden. It should not look wet or doughy anywhere.
For a full bake, the crust should be evenly golden brown across the entire bottom and sides. The edges might be slightly darker brown. A fully baked easy press-in tart shell will look crisp and dry. If you're unsure, you can gently lift the edge of the pan with a spatula (if not a removable bottom) to peek underneath. A pale, underbaked crust is the primary cause of a soggy bottom once a filling is added, so err on the side of baking it long enough to achieve a good color.
Troubleshooting Common Press-In Tart Shell Problems
Even with a simple method like the easy press-in tart shell, sometimes things don't go perfectly. Understanding common issues and how to fix or prevent them will save you frustration and help you achieve consistent success. Most problems with press-in crusts relate to texture or shape.
Fortunately, because this dough is so forgiving, many issues are easily rectified during or even after baking. Don't be discouraged if your first easy press-in tart shell isn't absolutely perfect; baking is a learning process. Here are solutions to the most frequent challenges.
Soggy Crust Solutions
A soggy bottom is perhaps the most common and disappointing issue with tarts. The primary cause is an underbaked crust that absorbs moisture from the filling. Prevention is key:
- Blind Bake: Always blind bake your easy press-in tart shell, especially for wet fillings.
- Full Bake for Wet Fillings: For very wet fillings like quiche, consider fully blind baking the crust until it's golden brown.
- Proper Temperature and Time: Ensure your oven is accurately calibrated and bake the crust at the recommended temperature for long enough to achieve a golden color on the bottom.
- Seal the Crust: For some recipes, brushing the partially blind-baked crust with a thin layer of egg white and baking for another minute or two can create a seal that helps prevent moisture absorption.
- Cool Completely: Let the baked easy press-in tart shell cool completely on a wire rack before adding the filling. Adding filling to a warm crust creates steam that can make it soggy.
If you already have a slightly soggy bottom after baking the filled tart, sometimes you can mitigate it by placing the tart back in a hot oven (around 375°F / 190°C) for a few minutes, or even placing it on a preheated baking sheet or pizza stone, which helps conduct heat to the bottom of the pan.
Shrinking Crust Prevention
Shrinking occurs when the dough pulls away from the sides of the pan during baking. This can happen if the dough is overworked (developing too much gluten), not chilled sufficiently before baking, or pressed too loosely into the pan.
To prevent shrinking in your easy press-in tart shell:
- Don't Overmix: Combine the dough ingredients until they just come together.
- Chill Thoroughly: Always chill the pressed-in crust in the refrigerator for at least 30 minutes (or freezer for 15-20 minutes) before blind baking. This sets the fat and helps the structure hold.
- Press Firmly: Ensure the dough is pressed firmly and evenly into the bottom and sides of the pan, especially along the rim.
- Use Weights: When blind baking, use enough pie weights or beans to fill the crust up the sides, providing support as the crust sets.
If your crust has slightly shrunk after blind baking, you can sometimes gently press the edges back up the sides of the pan while it's still warm and pliable, though this is a temporary fix. Proper preparation is the best defense against shrinkage in your easy press-in tart shell.
Cracked Crust Repair
Cracks can appear in the easy press-in tart shell during or after baking, sometimes from handling or uneven cooling. As mentioned before, repairing cracks before baking is simple by patching with extra dough. If cracks appear after baking, especially if you need the crust to hold a liquid filling without leaks, you can often repair them.
For baked cracks, you can use a paste made from a little flour and water, or even a tiny bit of melted butter mixed with flour, to fill the gap. Gently press the paste into the crack with your finger or a small spatula. If the tart is already filled, and you notice a leak, sometimes a quick fix can be to melt a little chocolate or white chocolate and brush it over the inside of the crust where the leak is occurring, letting it set to create a seal.
For minor cosmetic cracks on the edge, you can sometimes just leave them as they are. The forgiving nature of the easy press-in tart shell makes repairs quite straightforward.
Flavor Variations for Your Press-In Tart Shell

One of the joys of mastering the basic easy press-in tart shell is its versatility. The simple base recipe can be easily adapted to complement a wide range of sweet and savory fillings by incorporating different flavors directly into the dough. Experimenting with additions allows you to customize your tart from the crust up.
These variations are simple to execute, often just requiring the addition of an ingredient or two during the dry ingredient stage. They transform the basic press-in tart crust into something uniquely suited for your specific tart creation, adding another layer of flavor complexity.
Sweet Tart Dough Variations
A basic sweet easy press-in tart shell recipe typically includes flour, butter, sugar, and sometimes an egg yolk or milk. This simple base is perfect for adding complementary sweet flavors.
Adding Citrus Zest
Incorporating finely grated citrus zest (lemon, orange, or lime) adds a bright, aromatic note that pairs wonderfully with fruit fillings, creams, or chocolate. Add 1-2 teaspoons of zest to the dry ingredients in Step 1. The oils in the zest infuse the dough, providing a subtle but distinct flavor lift to your easy press-in tart shell.
Infusing with Vanilla Extract
A touch of vanilla extract deepens the classic sweet flavor of the crust. Add 1/2 to 1 teaspoon of pure vanilla extract along with the liquid in Step 3. Ensure you use pure extract for the best flavor; imitation vanilla won't provide the same depth. This simple addition enhances the overall richness of a sweet easy press-in tart crust.
- Other Sweet Variations:
- Add 1-2 tablespoons of finely ground nuts (almonds, pecans) to the dry ingredients for a nutty flavor and slightly different texture.
- Replace some of the sugar with brown sugar for a hint of caramel flavor.
- Add a pinch of ground cinnamon or other warm spices to the dry ingredients for spiced tarts.
Savory Tart Dough Options
While the basic easy press-in tart shell can be made without sugar for savory applications, incorporating herbs or cheese takes it to the next level, creating a flavorful base for quiches, vegetable tarts, or meat pies.
Incorporating Herbs
Dried or fresh herbs can be added to the dry ingredients to infuse the easy press-in tart shell with savory flavor. Try 1-2 teaspoons of dried herbs like thyme, rosemary, or oregano, or double the amount if using fresh, finely chopped herbs. They pair well with vegetable or cheese fillings. Add them in Step 1 with the flour and salt.
Adding Cheese
Finely grated hard cheese, like Parmesan or aged cheddar, can be added to the dry ingredients for a cheesy, savory crust. Add 1/4 to 1/2 cup of grated cheese in Step 1. The cheese melts slightly during baking, creating a flavorful and slightly richer easy press-in tart shell that is perfect for quiches or savory vegetable tarts.
- Other Savory Variations:
- Add a pinch of black pepper or a dash of cayenne for a subtle kick.
- Substitute some of the butter with bacon fat for a smoky flavor (use cold bacon fat).
- Mix in 1/4 cup of finely chopped olives or sun-dried tomatoes (pat them dry first) for Mediterranean-inspired tarts.
Storing and Using Your Press-In Tart Shell
Once your easy press-in tart shell is baked to perfection, knowing how to properly cool, store, and fill it ensures that your final tart is as delicious as possible. Proper handling at this stage maintains the crisp texture you worked to achieve.
Whether you plan to fill it immediately or save it for later, these steps will help you maximize the quality and longevity of your homemade press-in tart crust.
Cooling and Storing Baked Tart Shells
After baking, remove the easy press-in tart shell from the oven and place the pan on a wire rack to cool completely. Allowing it to cool in the pan for 10-15 minutes before attempting to remove the outer ring of the tart pan (if using a removable bottom) helps the crust set and prevents breakage.
Once the ring is removed, let the tart shell cool completely on the wire rack before handling further or adding any filling. Adding filling to a warm crust can make it soggy. A fully cooled, baked easy press-in tart shell can be stored at room temperature for 1-2 days, loosely covered, or refrigerated for up to 3-4 days. For longer storage, wrap the cooled shell tightly in plastic wrap and then foil, and freeze for up to 1-2 months. Thaw at room temperature before filling.
Filling Ideas for Your Homemade Tart Shell
The beauty of an easy press-in tart shell is that it's a blank canvas for countless fillings. Once your crust is ready, the possibilities are nearly endless, ranging from simple fruit arrangements to rich custards and hearty savory mixtures.
Consider the texture and moisture level of your filling when choosing whether to partial or full blind bake your easy press-in tart shell. A fully baked crust is essential for no-bake fillings or those with high moisture content.
Sweet Filling Suggestions
- Fresh Fruit Tart: Fill a fully baked easy press-in tart shell with pastry cream or diplomat cream and top with an arrangement of fresh berries, sliced kiwi, or peaches, often glazed with apricot jam.
- Chocolate Ganache Tart: Pour rich chocolate ganache into a fully baked crust and chill until set.
- Lemon Tart: A classic, tangy lemon curd baked in a partially blind-baked press-in tart shell until set.
- Pecan Pie: A sweet, gooey pecan filling baked in a partially blind-baked crust.
- Fruit Crumble Tart: Fill a partially blind-baked crust with fruit (like apples or berries) and top with a streusel or crumble topping before baking until the fruit is tender and the topping is golden.
Savory Filling Suggestions
- Quiche Lorraine: A classic savory custard filling with bacon and cheese, baked in a partially blind-baked easy press-in tart shell until set and golden brown.
- Spinach and Feta Tart: A filling of sautéed spinach, crumbled feta cheese, and eggs baked in a partially blind-baked crust.
- Roasted Vegetable Tart: Fill a partially blind-baked crust with roasted vegetables (like bell peppers, zucchini, and onions) and a savory custard or cheese mixture.
- Tomato and Mozzarella Tart: Sliced tomatoes and fresh mozzarella baked on a layer of pesto or cheese in a partially blind-baked easy press-in tart shell.
- Caramelized Onion and Goat Cheese Tart: Sweet caramelized onions and tangy goat cheese baked in a savory press-in crust.
Conclusion: Enjoying the Ease and Versatility of Press-In Tart Shells
Mastering the easy press-in tart shell is a rewarding step in your baking journey. This simple technique eliminates the complexities of traditional pastry rolling while still yielding a delicious, tender, and versatile crust. It’s a perfect foundation for both sweet and savory creations, proving that beautiful, homemade tarts are well within reach for every baker, regardless of experience level. The ease of preparation means you can whip up a tart base whenever inspiration strikes, turning everyday ingredients into impressive desserts or appetizers.
The forgiving nature of the press-in method, combined with the minimal tools required, makes it an ideal starting point for beginners. With a few basic ingredients and a tart pan, you can create a reliable crust every time. From troubleshooting tips to flavor variations, this guide provides you with the knowledge to confidently tackle any tart recipe that calls for this type of shell. Embrace the simplicity and enjoy the delightful results of your easy press-in tart shells.
BakeWithEase: Encouraging Confident Baking
At BakeWithEase, we believe that baking should be a source of joy and creativity, not intimidation. Our goal is to empower you with simple, reliable methods and clear instructions, helping you build confidence in the kitchen. The easy press-in tart shell is a prime example of how straightforward techniques can lead to wonderful outcomes. We are dedicated to providing resources that make baking accessible and fun for everyone.
We hope this comprehensive guide to the easy press-in tart shell has inspired you to give it a try. Remember, every baking attempt is a learning experience. Don't be afraid to experiment with flavors or fillings. With BakeWithEase by your side, you have the support and information you need to bake with confidence and create delicious memories.
Your Go-To Recipe for Easy Tart Crusts
Consider this guide your definitive resource for making perfect easy press-in tart shells. Whether you're preparing a classic fruit tart for a special occasion or a quick quiche for brunch, this reliable method ensures a delicious and sturdy base every time. Save this guide, practice the steps, and soon you'll be pressing tart shells with effortless skill. It's a fundamental technique that will serve you well in countless baking adventures. Enjoy the process and the delicious results of your homemade easy press-in tart crusts!
Frequently Asked Questions
What makes the "Simple Press-In Tart Shell" recipe from BakeWithEase different from other tart shell recipes?
This recipe focuses on simplicity and ease, eliminating the need for rolling dough. It relies on pressing the dough directly into the tart pan.
What are the key ingredients needed to make the "Simple Press-In Tart Shell"?
The recipe likely uses basic ingredients like flour, butter, sugar, and sometimes an egg. Specifics can be found on BakeWithEase.com.
Can I use different types of flour for the "Simple Press-In Tart Shell"?
While all-purpose flour is typical, you may experiment with different flours like pastry flour for a more tender crust. Check BakeWithEase.com for suggested substitutions.
What kind of tart pan works best for the "Simple Press-In Tart Shell" recipe?
A tart pan with a removable bottom is highly recommended for easy removal of the baked shell. The recipe might specify a particular size as well.
How do I prevent the "Simple Press-In Tart Shell" from shrinking during baking?
Docking the dough (poking holes with a fork) and using pie weights can help minimize shrinkage. Chilling the dough before baking is also important.
Final Reflection: The Enduring Allure of the Simple Press-In Tart Shell
The ease and elegance of the press-in tart shell transcends mere convenience; it's a gateway to boundless culinary creativity. From rustic fruit tarts to sophisticated savory creations, this humble foundation unlocks a world of flavor and presentation possibilities, making it a cornerstone of both novice and experienced bakers' repertoires. Its simplicity belies its versatility, a testament to the power of fundamental techniques.
The press-in tart shell's enduring appeal lies not just in its practicality, but in its ability to elevate even the simplest ingredients. It's a blank canvas, inviting experimentation and personalization. The satisfying thunk as the dough settles into the pan, the promise of golden-brown perfection – these are sensory experiences that connect us to the joy of baking. The best things in life are simple,
a sentiment perfectly embodied by this unassuming yet impactful pastry element.
Consider the possibilities: the buttery aroma filling your kitchen, the pride in crafting something beautiful and delicious from scratch. You, too, can unlock this culinary magic. Don't be intimidated by the seemingly simple act of pressing dough into a pan; embrace the process, experiment with flavors, and share the joy of your creations with those you love. The perfect press-in tart shell awaits your touch.
Here are a few options for a Call to Action (CTA) based on the provided information, targeting readers of a "Simple PressIn Tart Shell" article on BakeWithEase.com:
Option 1 (Focus on Baking):
Unleash Your Inner Pastry Chef!
Thanks for taking the time to explore our simple press-in tart shell recipe! You've now unlocked the key to effortlessly elegant desserts. Ready to put your new skills to the test?
- Bake your dream tart: Use this recipe as a base and experiment with your favorite fillings! Think creamy custards, vibrant fruit compotes, or even savory combinations.
- Share your creations: Post a picture of your masterpiece on social media and tag us @BakeWithEase – we’d love to see it!
- Explore more easy baking recipes on our website to further enhance your skills.
What delicious filling will you choose for your first press-in tart?
Option 2 (Focus on Community):
Join the BakeWithEase Community!
We appreciate you reading about our simple press-in tart shell recipe – now you can easily create impressive desserts! Let's connect and share our baking journeys.
- Make this tart and share your experience: Tell us in the comments about your baking adventure – what worked well, and what could be improved?
- Share your baking tips: Have any secret ingredients or techniques for a perfect tart shell? Let's learn from each other!
- Browse our other recipes to expand your baking repertoire and discover new favorites!
What unique twist will you add to this classic tart shell?
Option 3 (Focus on Skill Development):
Master the Art of the Perfect Tart Shell!
Thanks for reading – you've just leveled up your baking game with our simple press-in tart recipe! Ready to become a true baking pro?
- Practice makes perfect: Try making this tart several times, experimenting with different flours and chilling times to perfect your technique.
- Learn more advanced tart techniques: Visit our website for more detailed tutorials on making various tart shells.
- Share your baking journey with fellow enthusiasts!
What's your next baking challenge after mastering this tart shell?
Remember to choose the option that best aligns with the overall tone and style of your BakeWithEase website.