
Easy Lattice Top Tutorial for Beginners

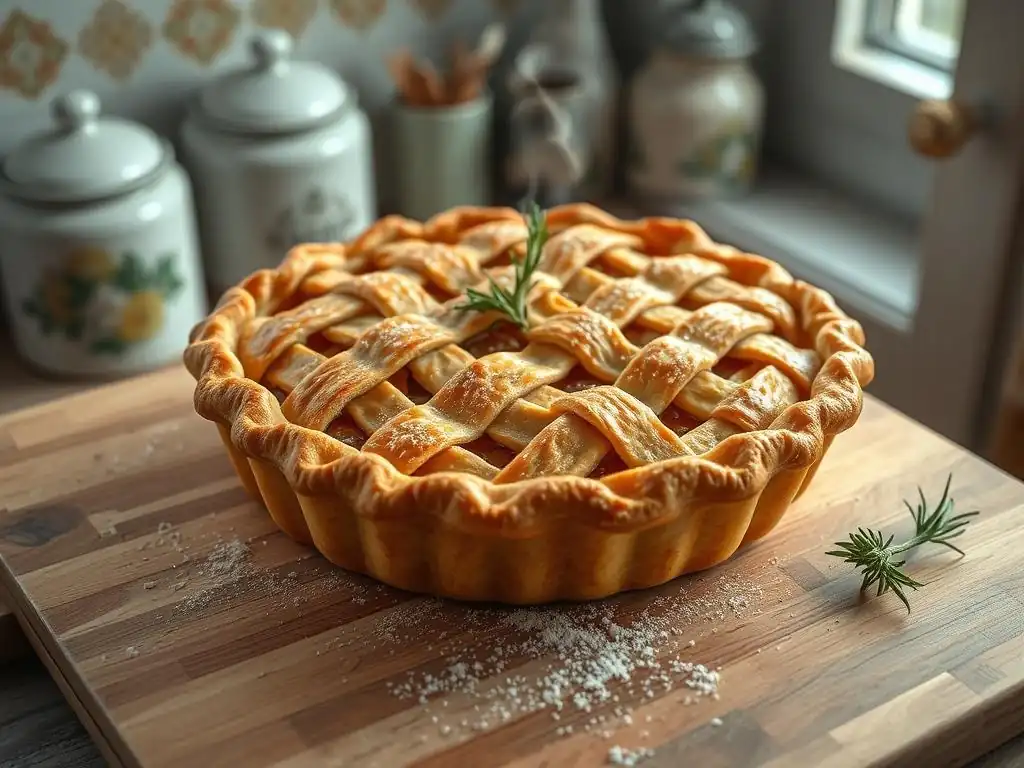
Welcome to BakeWithEase, your companion on the journey to baking brilliance! Ever dreamed of creating a picture-perfect pie? Our latest guide dives into the secrets of crafting an easy lattice top pie, even if you're just starting out. Intrigued? Discover step-by-step instructions and simple techniques that will transform you into a pastry pro. Let's get baking!
- Apple Pie with a Simple Lattice Top: A Beginner's Guide
- Introduction: Creating a Classic Apple Pie with an Easy Lattice Crust
- Essential Tools and Ingredients
- Step-by-Step Guide: Building Your Lattice Pie
- Baking Your Apple Pie to Perfection
- Troubleshooting Common Pie Problems
- Variations and Customization
- Serving and Storing Your Apple Pie
- Conclusion: Enjoy Your Homemade Apple Lattice Pie!
-
Frequently Asked Questions
- How difficult is it to create a lattice top pie crust, especially for someone new to baking?
- What kind of dough is best for making an easy lattice top pie?
- What kind of filling can I use for an easy lattice top pie?
- How do I prevent my lattice top from becoming soggy?
- What are some tips for making my lattice top pie look professional?
- Final Reflection: Weaving Together Simplicity and Skill in Pie Baking
- Unleash Your Baking Creativity Today!
Apple Pie with a Simple Lattice Top: A Beginner's Guide
Introduction: Creating a Classic Apple Pie with an Easy Lattice Crust
Why a Lattice Top is a Great Choice for Apple Pie
Creating an easy lattice top pie offers several advantages, making it a fantastic choice for both novice and experienced bakers alike. Aesthetically, it provides that quintessential, rustic look that everyone associates with homemade pie, offering a beautiful contrast between the golden crust and the bubbling fruit filling underneath. It elevates a simple fruit pie into a visually stunning dessert that's sure to impress.
Beyond just looks, the lattice design serves a practical purpose. The gaps between the dough strips allow steam to escape from the filling as the pie bakes. This venting is crucial; without it, steam can build up, causing the crust to become soggy or even burst open. By letting the steam out, you ensure your apple filling thickens properly and your bottom crust stays wonderfully flaky, contributing to the overall success of your easy lattice top pie.
This Guide to Baking a Perfect Apple Lattice Pie
This comprehensive guide will walk you through the process of baking a delicious apple pie featuring a beautiful and easy lattice top pie crust, perfect for beginners. We'll cover everything from the necessary tools and ingredients to step-by-step instructions for assembling and baking your pie to perfection. Our goal is to demystify the lattice technique, showing you that it's achievable and rewarding, even if you've never attempted it before.
We'll provide clear instructions for each stage, ensuring you understand the 'why' behind each step, not just the 'how'. By the end of this tutorial, you'll have the confidence and skills to create a classic apple pie with a stunning lattice crust that tastes as good as it looks. Get ready to bake an easy lattice top pie that will become a staple in your baking repertoire.
Essential Tools and Ingredients
Baking Essentials: Rolling Pin, Pastry Cutter, Pie Dish
Having the right tools is fundamental to successful pie making, especially when tackling an easy lattice top pie. A sturdy rolling pin is indispensable for rolling out your pie dough evenly to the desired thickness, typically about 1/8 inch. Whether you prefer a tapered French-style pin or one with handles, ensure it's comfortable to use and large enough for your dough.
A pastry cutter or bench scraper is incredibly helpful for dividing dough and is essential for cutting the uniform strips needed for your lattice. While a knife can work, a pastry cutter ensures clean, straight lines, which makes weaving your easy lattice top much simpler and neater. You'll also need a 9-inch pie dish, preferably ceramic or glass, as these materials conduct heat well and help ensure an evenly baked bottom crust.
All-Butter Pie Dough Recipe
For a truly flaky and flavorful easy lattice top pie, an all-butter pie dough is the gold standard. You'll need about 2 ½ cups of all-purpose flour, 1 teaspoon of salt, 1 cup (2 sticks) of unsalted butter cut into cubes and kept very cold, and about ½ to ¾ cup of ice water. The key to flakiness is keeping the butter cold and working it into the flour just until it resembles coarse meal with some pea-sized pieces remaining.
This recipe yields enough dough for a double-crust pie, meaning you'll have plenty for both the bottom crust and the strips for your easy lattice top. After mixing, the dough should be divided in half, shaped into discs, wrapped, and chilled for at least an hour. This chilling period is non-negotiable; it allows the gluten to relax and the butter to firm up, making the dough much easier to roll and handle for the lattice work.
Filling Choices: Spiced Apple Filling
The heart of your easy lattice top pie is, of course, the filling. A classic spiced apple filling requires about 6-8 medium apples, peeled, cored, and sliced about ¼ inch thick.
A mix of apple varieties, like Granny Smith for tartness and Fuji or Honeycrisp for sweetness and texture, works wonderfully. You'll need about ¾ cup to 1 cup of granulated sugar (adjust to the sweetness of your apples), 2 tablespoons of all-purpose flour or cornstarch as a thickener, 1 teaspoon of ground cinnamon, ¼ teaspoon of ground nutmeg, a pinch of allspice, 1 tablespoon of lemon juice, and 2 tablespoons of unsalted butter cut into small pieces.
Combine the sliced apples with the sugar, flour or cornstarch, spices, and lemon juice in a large bowl, tossing gently to coat the apples evenly. The flour or cornstarch is vital for absorbing the apple juices and preventing a watery filling that could make your bottom crust soggy, even with a perfectly vented easy lattice top. Let the mixture sit for about 15-20 minutes while you prepare your dough; this allows the apples to release some juice, which will then be thickened during baking.
Step-by-Step Guide: Building Your Lattice Pie
Step 1: Preparing the Pie Dough
Begin by taking one disc of chilled pie dough from the refrigerator. On a lightly floured surface, roll the dough out from the center outwards, rotating it frequently to ensure an even thickness and prevent sticking. Aim for a circle about 12 inches in diameter, roughly 1/8 inch thick. This will be your bottom crust.
Carefully transfer the rolled dough into your 9-inch pie dish, gently pressing it into the bottom and up the sides. Trim any excess dough, leaving about a 1-inch overhang around the rim. Place the pie dish with the bottom crust back into the refrigerator while you prepare the lattice dough. Keeping the crust cold helps maintain its shape and flakiness as you work on the easy lattice top.
Now, retrieve the second disc of dough for your lattice. This dough also needs to be rolled out to about 1/8 inch thickness. Aim for a rectangular or square shape as much as possible, as this will make cutting uniform strips easier for your easy lattice top pie. Once rolled, you can transfer this dough to a baking sheet lined with parchment paper and chill it briefly again if it has become too soft. This firming up is crucial for clean cuts and easy handling of the strips.
Step 2: Cutting Dough Strips for the Lattice
Once your second piece of dough is rolled and slightly chilled, it's time to cut the strips for your easy lattice top. Using a pastry cutter or a sharp knife and a ruler, cut the dough into even strips. For a classic look, aim for strips that are about ¾ inch to 1 inch wide. The number of strips you need will depend on the size of your pie dish and the desired spacing of your lattice, but typically you'll need between 10 to 14 strips.
Carefully lift the cut strips and arrange them on the parchment-lined baking sheet. If the dough is still very cold, the strips should be easy to handle without stretching or breaking. If they feel soft, pop the baking sheet back into the refrigerator for another 5-10 minutes. Uniform strip width is key to a visually appealing and easy lattice top pie, so take your time during this step.
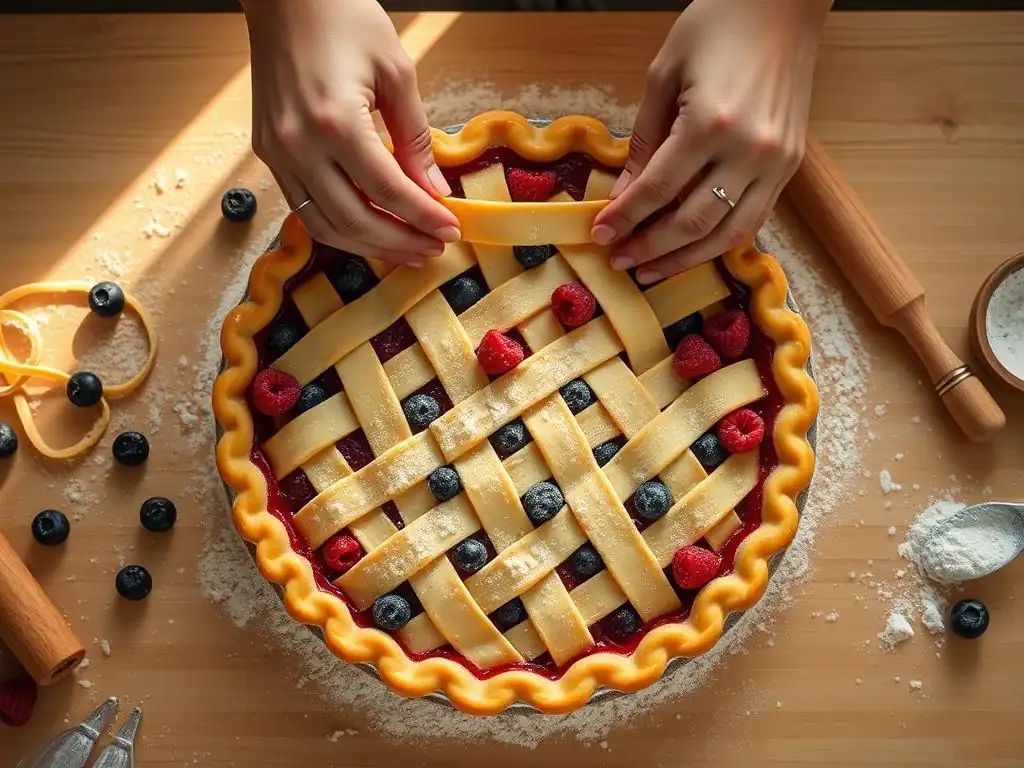
Step 3: Weaving the Lattice Top
Retrieve your chilled pie dish with the bottom crust and the prepared apple filling. Pour the apple filling into the bottom crust, spreading it evenly. Now, take half of your cut dough strips and lay them parallel across the top of the pie, leaving space between them. Start with a strip in the center, then add strips to either side. These are your base strips for the easy lattice top.
To begin weaving, take the center strip that runs perpendicular to your base strips. Lift every other parallel strip (e.g., 1st, 3rd, 5th) and fold them back towards the center. Lay the perpendicular strip down in the center. Unfold the lifted strips back over the perpendicular strip.
Now, take the next perpendicular strip and lift the alternate parallel strips (e.g., 2nd, 4th, 6th) and fold them back. Lay the second perpendicular strip down and unfold the lifted strips. Repeat this process, working outwards from the center, alternating which parallel strips you lift with each new perpendicular strip, until your easy lattice top is complete.
Step 4: Securing the Lattice and Crimping the Edges
Once all your strips are woven into the easy lattice top, you'll have excess dough strips hanging over the edge of the pie dish, along with the original bottom crust overhang. Trim the lattice strips so they are roughly the same length as the bottom crust overhang. Now, you need to secure the lattice strips to the bottom crust.
Fold the bottom crust overhang up and over the ends of the lattice strips, pressing them together gently to seal. This creates a neat edge and secures the lattice. Finally, crimp the edges of the pie crust to seal the deal and add a decorative touch. You can use your fingers to create a fluted edge or press a fork around the rim. Ensure the seal is tight to prevent the filling from bubbling out during baking. This step is crucial for a sturdy and beautiful easy lattice top pie.
Step 5: Egg Wash and Sugar for a Golden Finish
For that beautiful, glossy, golden-brown finish on your easy lattice top pie, an egg wash is recommended. Whisk together one large egg with about 1 tablespoon of milk or water in a small bowl. Using a pastry brush, gently brush the egg wash over the entire lattice crust, including the crimped edges. Be careful not to let the wash pool in the gaps.
Immediately after applying the egg wash, sprinkle the top of the pie liberally with granulated sugar or coarse sugar, like turbinado. The sugar not only adds a lovely sparkle but also provides a delightful crunch and helps the crust brown evenly. This final touch enhances the visual appeal of your easy lattice top, making it look professionally baked and irresistible.
- [ ] Chill your dough thoroughly before rolling and cutting.
- [ ] Cut strips of uniform width for easier weaving.
- [ ] Chill cut strips briefly if they become soft.
- [ ] Alternate lifting strips when weaving the lattice.
- [ ] Securely crimp the edges to prevent leaks.
- [ ] Apply egg wash and sugar just before baking.
Baking Your Apple Pie to Perfection
Oven Temperature and Baking Time: 375°F (190°C) for 45-55 Minutes
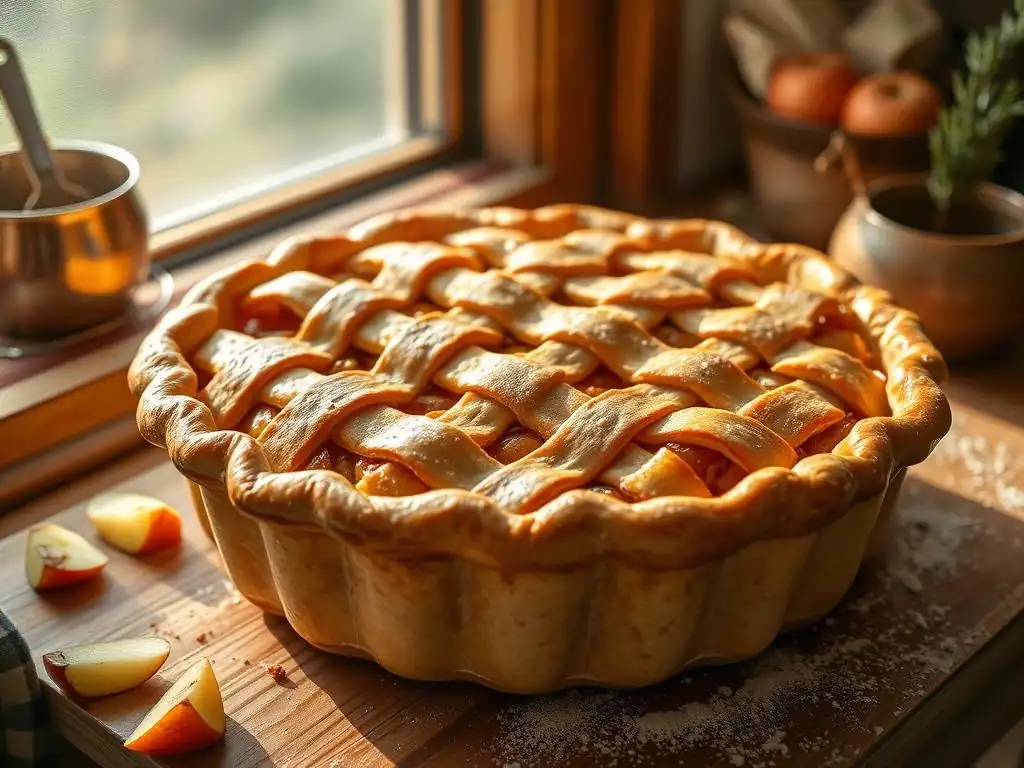
Baking your easy lattice top pie at the correct temperature is key to achieving a perfectly cooked crust and a bubbling, tender filling. Preheat your oven to 375°F (190°C). This moderate temperature allows the crust to brown gradually and become flaky while giving the apples ample time to soften and the filling to thicken. Place the pie on a baking sheet to catch any potential drips from the filling.
The typical baking time for a 9-inch apple pie with an easy lattice top is between 45 and 55 minutes. However, baking times can vary depending on your oven and the type of apples used. You'll know the pie is getting close to being done when you see the crust turning a lovely golden brown and hear the filling bubbling actively through the lattice openings.
Monitoring the Pie: Checking for Doneness
Monitoring your easy lattice top pie as it bakes is crucial for success. After about 30-35 minutes, start checking the pie periodically. Look for the color of the crust; it should be golden brown, not pale or dark brown. Also, observe the filling bubbling. The bubbles should look thick and syrupy, not watery, especially towards the center of the pie.
A reliable way to check if the apples are tender is to gently insert a paring knife through one of the lattice openings into the filling. If the knife goes in easily with little resistance, the apples are likely cooked through. Continue baking until both the crust color and filling consistency indicate doneness. Don't be afraid to bake it for the full 55 minutes if needed to ensure the bottom crust is also fully cooked and not soggy.
Achieving a Golden-Brown Lattice: Using a Pie Shield
Sometimes, the edges of your easy lattice top pie or the lattice strips themselves might start to brown too quickly before the rest of the pie is finished baking. To prevent the crust from burning, you can use a pie shield or create one from aluminum foil. A pie shield is a ring that covers the edges of the crust, protecting them from excessive heat.
If you don't have a store-bought pie shield, you can easily make one by folding a large sheet of aluminum foil into quarters, cutting out the center to form a ring, and placing it over the pie's edges. Place the shield on the pie about halfway through the baking time, or whenever you notice the edges are sufficiently golden. This simple trick ensures your entire easy lattice top browns evenly and beautifully without scorching.
Troubleshooting Common Pie Problems
Dough Too Sticky? Add More Flour
One common issue when working with pie dough, especially for an easy lattice top, is stickiness. If your dough feels too sticky after chilling, making it difficult to roll or cut, it likely has too much moisture or hasn't been chilled long enough. The solution is simple: add a little more flour to your work surface, your rolling pin, and even gently knead a tiny amount into the dough itself.
Add the flour gradually, a tablespoon at a time, until the dough is manageable and no longer excessively sticky. Avoid adding too much flour, as this can result in a tough crust. Just enough to make it easy to work with is perfect for creating a delicate and easy lattice top pie. Ensuring your hands and tools are also lightly floured helps prevent sticking as you roll and cut.
Lattice Cracking? Handle Dough Gently
Cracking can occur when you're cutting or transferring the strips for your easy lattice top, especially if the dough is too cold, too dry, or you're handling it too roughly. Pie dough is delicate because it contains large pieces of cold butter, which create flakiness but also make it fragile when cold.
If a strip cracks while you're cutting it, you can often press the edges back together gently. If it cracks while transferring or weaving, you can try to mend it on the pie or simply replace the strip with a new one. To minimize cracking, ensure your dough is adequately hydrated (not too dry), handle the strips carefully without stretching them, and allow the rolled dough to sit at room temperature for just a minute or two if it's excessively stiff from chilling before you begin cutting the strips for your easy lattice top.
Uneven Baking? Rotate the Pie
Sometimes, ovens have hot spots, leading to uneven baking where one side of your easy lattice top pie browns faster than the other. If you notice this happening, don't worry! The fix is easy: simply rotate the pie dish halfway through the baking time.
After about 20-30 minutes in the oven, open the oven door and carefully turn the pie dish 180 degrees. This ensures that all sides of the pie are exposed to the same amount of heat, promoting even browning of the crust and consistent cooking of the filling. Rotating the pie is a simple yet effective technique for achieving a uniformly golden and perfectly baked easy lattice top pie.
Variations and Customization
Adding Flavor to the Dough: Cinnamon or Nutmeg
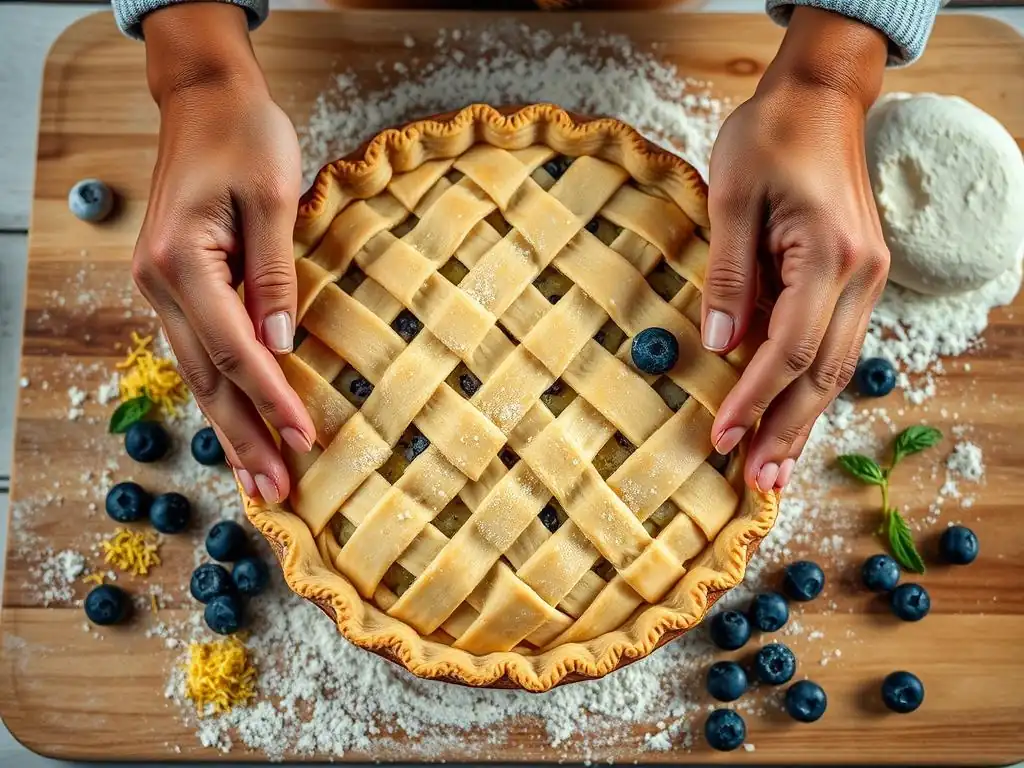
While a classic all-butter crust is wonderful on its own, you can add extra layers of flavor to complement your apple filling and enhance your easy lattice top pie. Before adding the cold butter, whisk a teaspoon of ground cinnamon or a half teaspoon of ground nutmeg into the dry flour mixture.
These spices infuse the crust with a subtle warmth that pairs beautifully with the spiced apple filling. The aroma as the pie bakes will be incredible! This small addition doesn't affect the texture or workability of the dough, making it an effortless way to customize your easy lattice top pie.
Creative Crimping Techniques
The edge of your easy lattice top pie is another area where you can add a personal touch. While a simple fork crimp or finger fluting is traditional and lovely, there are many other techniques you can try to make your pie unique. You can use the back of a spoon to create scallops, or even use cookie cutters to make decorative shapes from excess dough to place around the edge.
For a more intricate look, you can twist two thin strips of dough together to create a braided edge or use a pastry wheel to create a wavy edge. Experiment with different methods to find your favorite way to finish the border of your easy lattice top, adding another element of visual appeal to your homemade creation.
Serving and Storing Your Apple Pie
Cooling and Slicing
Patience is perhaps the hardest part after baking your easy lattice top pie! It is absolutely crucial to let the pie cool completely on a wire rack before slicing and serving, which can take anywhere from 2 to 4 hours. While it's tempting to cut into a warm pie, the filling needs this time to set properly. If you slice it too soon, the filling will likely be runny.
As the pie cools, the starches in the filling continue to absorb moisture and thicken, resulting in clean slices and a satisfying texture. Slicing into a perfectly set, cooled easy lattice top pie allows you to appreciate the crisp, flaky crust and the well-structured, flavorful apple filling.
Storing Leftovers: Refrigerate Properly
If you happen to have any leftovers of your delicious easy lattice top pie (a rare occurrence in most households! ), it's important to store them properly to maintain freshness. Cover the pie tightly with plastic wrap or aluminum foil, or transfer slices to an airtight container.
Apple pie, especially one with a fruit filling, is best stored in the refrigerator. It will keep well for 3-4 days. While some people enjoy cold pie, you can gently reheat slices in the oven at a low temperature (around 300°F or 150°C) for about 10-15 minutes to crisp up the crust again. Proper storage ensures you can enjoy your homemade easy lattice top pie for days to come.
Conclusion: Enjoy Your Homemade Apple Lattice Pie!
Congratulations! You've successfully baked a beautiful and delicious easy lattice top pie. From preparing the flaky, buttery crust to weaving the classic lattice pattern and perfecting the bake, you've mastered a fundamental pie-making technique. This guide was designed to make the process approachable for beginners, proving that creating a stunning pie is well within your reach.
Whether you're sharing it with family and friends or savoring a slice all to yourself, take pride in your accomplishment. The effort put into creating an easy lattice top pie from scratch is truly rewarding, resulting in a dessert that tastes infinitely better than anything store-bought. Keep practicing, try different fillings, and soon you'll be making lattice-top pies with ease and confidence! Enjoy every last crumb of your homemade creation.
Frequently Asked Questions
How difficult is it to create a lattice top pie crust, especially for someone new to baking?
Creating an easy lattice top pie is surprisingly simple with the right guidance. BakeWithEase.com provides step-by-step tutorials designed specifically for beginners. The goal is to make it less intimidating.
What kind of dough is best for making an easy lattice top pie?
While you can use various pie doughs, a classic shortcrust pastry is generally recommended for its ease of handling. BakeWithEase.com offers a simple recipe perfect for lattice tops.
What kind of filling can I use for an easy lattice top pie?
You can use any pie filling you like! Apple, berry, cherry, and pumpkin are all popular options. The lattice top works well with fillings that bake evenly and don't overflow too much.
How do I prevent my lattice top from becoming soggy?
To prevent sogginess, ensure your filling isn't too watery and blind bake the bottom crust slightly before adding the filling and lattice. Also, consider using a thicker dough for the bottom crust.
What are some tips for making my lattice top pie look professional?
For a professional look, use a ruler to cut even strips of dough and crimp the edges nicely. Brush the lattice with an egg wash for a golden brown finish.
Final Reflection: Weaving Together Simplicity and Skill in Pie Baking
The art of creating a beautiful and delicious lattice top pie remains surprisingly relevant today, offering a delightful blend of tradition and personal expression. In a world of fast food and pre-made desserts, taking the time to craft something beautiful and from scratch provides a profound sense of accomplishment and connection to culinary heritage. The intricate detail of the lattice, while seemingly simple, speaks volumes about patience, precision, and the joy of creating something truly special.
The enduring appeal of the lattice top pie lies not just in its visual elegance, but in its ability to symbolize the care and effort put into creating something meaningful. It's a testament to the power of simple ingredients transformed into something extraordinary. As the renowned chef Julia Child once said, Find something you're passionate about and keep tremendously interested in it.
For many, that passion is found in the kitchen, and the lattice top pie serves as a perfect embodiment of that dedication. The process itself, from carefully rolling the dough to meticulously weaving the lattice, becomes a meditative practice, a moment of mindful creation in a busy world.
Now, it's your turn. Don't be intimidated by the seemingly complex design of the lattice top. This tutorial has shown you that with a little patience and practice, anyone can master this classic technique. So, gather your ingredients, roll out your dough, and embark on your own pie-baking adventure. Let the process be as much a source of joy and self-discovery as the delicious final product. The beauty of the lattice top pie lies not just in the finished result, but in the journey of creation itself. Embrace the challenge, and savor the sweet reward.
Unleash Your Baking Creativity Today!
Thank you for joining us on this delicious journey through the world of lattice tops! You've learned some fantastic techniques that will elevate your baking skills and impress your friends and family. Now, it’s time to put that knowledge into action!
Here’s how you can dive into the exciting world of baking right away:
- Start by baking your first lattice-topped pastry using your newfound skills! Choose a filling that excites you, and let your creativity shine.
- Share your beautiful creations on social media using the hashtag #BakeWithEase to inspire others in the community and connect with fellow baking enthusiasts.
- Experiment with unique fillings or even try a savory twist on the classic lattice top— the possibilities are endless!
What creative combination will you try first in your kitchen? Let's spark some tasty conversations in the comments below!