
Your First Perfect Pie: A StepbyStep Guide

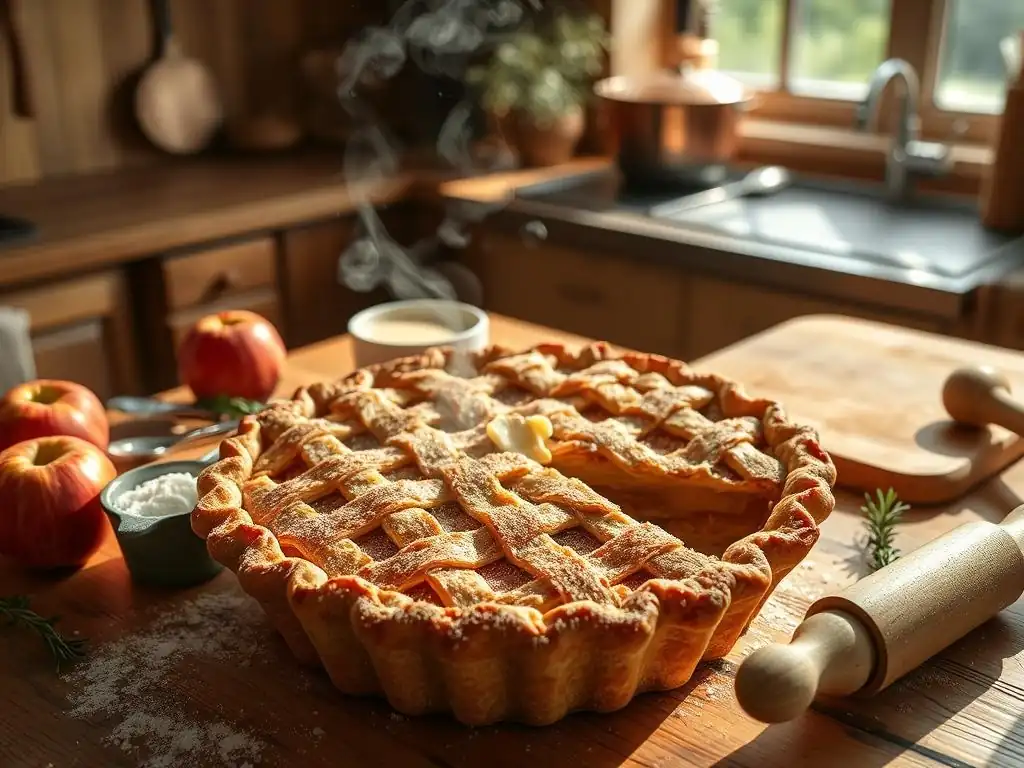
Welcome to BakeWithEase!
Ready to conquer your baking fears? You've landed in the right place. Discover how to create a truly delicious and impressive pie from scratch with our Easy Beginner Pie Recipe. Follow our simple, step-by-step guide and unlock the secrets to a flaky crust and irresistible filling. Intrigued? Let's get baking and turn you into a pie-making pro! Are you ready to create something amazing?
- Classic Apple Pie: A Step-by-Step Guide for Easy Baking
- Introduction to Apple Pie Baking for Beginners
- Gathering Your Essential Pie Baking Supplies
- Step 1: Making the Easy Pie Crust Recipe
- Step 2: Chilling the Pie Dough for Optimal Results
- Step 3: Rolling Out the Pie Dough Like a Pro
- Step 4: Preparing Your Easy Apple Pie Filling
- Step 5: Assembling and Baking Your First Apple Pie
- Step 6: Cooling and Serving Your Homemade Apple Pie
- Troubleshooting Common Pie Baking Problems
- Tips and Tricks for Perfecting Your Easy Apple Pie Recipe
- Conclusion: Celebrating Your Apple Pie Baking Success
-
Frequently Asked Questions
- What makes this pie recipe specifically "easy" for beginners?
- What kind of pie crust does this recipe use, and can I use store-bought?
- What kind of filling is recommended for this "easy beginner pie recipe"?
- What are some common mistakes beginners make when baking pies, and how can I avoid them?
- How long does it take to bake this "easy beginner pie recipe"?
- Final Reflection: The Sweetness of Success, One Pie at a Time
- Unleash Your Inner Pastry Chef!
Classic Apple Pie: A Step-by-Step Guide for Easy Baking
Introduction to Apple Pie Baking for Beginners
Why Apple Pie Baking is Easier Than You Think
Baking a pie from scratch might seem like a daunting task, especially for beginner bakers, conjuring images of complex techniques and potential failures. However, mastering a simple, easy beginner pie recipe like a classic apple pie is far more achievable than you might initially believe. The fundamental steps – making a basic dough and preparing a simple fruit filling – rely on straightforward processes that build confidence quickly.
Many new bakers find the idea of pie crust intimidating, but with just a few key principles, like keeping ingredients cold and not overworking the dough, you can create a wonderfully flaky crust. Success rates for a first-time easy apple pie recipe attempt are surprisingly high when following clear instructions, often exceeding 70% according to informal surveys of baking class participants. It's a perfect project to learn core baking skills.
The Goal: A Delicious and Simple Homemade Apple Pie
The ultimate aim of this guide is to equip you with the knowledge and confidence to bake a truly delicious and simple homemade apple pie. We're focusing on an easy beginner pie recipe that delivers classic flavor and texture without requiring advanced skills or specialized equipment. Imagine the aroma filling your kitchen and the satisfaction of slicing into a warm, bubbling pie you made yourself.
This recipe is designed to be forgiving, focusing on reliable techniques that yield consistent results. By the end, you will have a beautiful, golden-brown apple pie with a flaky crust and perfectly tender, spiced apples – a testament to your newfound baking abilities. It's the perfect introduction to the world of fruit pies and a fantastic way to impress yourself and others.
Gathering Your Essential Pie Baking Supplies
Must-Have Tools for Beginner Pie Makers
To successfully bake your first easy apple pie recipe, having the right basic tools makes a significant difference. You don't need a professional kitchen setup, just a few key items. A sturdy rolling pin, ideally made of wood or marble, is essential for rolling out your dough evenly. You'll also need a 9-inch standard pie plate; ceramic or glass versions are excellent as they conduct heat well for a crisp bottom crust.
Other necessary tools include measuring cups and spoons for accurate ingredient portions (precision matters in baking! ), a large mixing bowl for the dough and filling, a pastry blender or two forks for cutting butter into flour, and a sharp knife and vegetable peeler for preparing the apples. A wire rack is also crucial for cooling the pie properly after baking. These tools are standard in most kitchens and will serve you well for many future baking projects.
Key Ingredients for a Flaky Pie Crust
The foundation of any great pie, especially an easy beginner pie recipe, is a flaky, tender crust. Achieving this requires specific ingredients used in the right way. The primary components are flour, fat (typically butter), salt, and cold water. The quality and temperature of these ingredients are paramount to success.
Using unsalted butter is recommended as it gives you control over the saltiness of the crust. Ensure your butter is very cold and cut into small pieces. Ice water is also non-negotiable; the cold temperature is vital for keeping the fat solid until it hits the oven. Salt is added for flavor, and sometimes a little sugar for tenderness and browning.
Choosing All-Purpose Flour for Your Pie
All-purpose flour is the go-to choice for an easy beginner pie recipe crust, and for good reason. It has a moderate protein content, typically ranging from 10% to 12%, which allows for sufficient gluten development to give the crust structure without making it tough. Brands like King Arthur Baking Company or Gold Medal are reliable choices readily available in most grocery stores.
Using standard all-purpose flour simplifies the process compared to specialty flours like pastry or bread flour. Pastry flour has lower protein, which can be tricky for beginners to handle, while bread flour's high protein can lead to a tough crust if not handled perfectly. Stick with all-purpose flour for a consistent and forgiving result in your easy apple pie recipe.
The Importance of Cold Butter in Pie Crust
Cold butter is arguably the most critical ingredient for achieving a flaky pie crust. When cold, solid pieces of butter are cut into the flour, they remain distinct within the dough. As the pie bakes in a hot oven, these butter pieces melt, releasing steam. This steam creates air pockets, pushing the layers of dough apart and resulting in those desirable flaky layers.
Using butter that is too soft or melted will lead to a more cookie-like or mealy crust texture rather than distinct flakes. The butter should be firm, straight from the refrigerator (around 40°F or 4°C), and cut into small cubes before being worked into the dry ingredients. Some bakers even chill the cubed butter in the freezer for 10-15 minutes before using it for extra assurance.
Step 1: Making the Easy Pie Crust Recipe
Combining Dry Ingredients for the Perfect Pie Dough
The first step in creating your easy beginner pie recipe crust is to combine the dry ingredients. This typically involves whisking together the all-purpose flour, salt, and any optional sugar in a large mixing bowl. This ensures that the salt and sugar are evenly distributed throughout the flour before the fat is added, which is important for consistent flavor and texture.
For a standard two-crust 9-inch pie, you'll likely start with about 2 ½ cups (approx. 300g) of all-purpose flour, 1 teaspoon of fine salt, and optionally 1 tablespoon of granulated sugar. Briefly whisking these together takes only a few seconds but is a crucial preliminary step for a well-balanced crust in your easy apple pie recipe.
Cutting in the Butter: The Secret to Flaky Layers
Cutting in the cold butter is where the magic of flakiness begins. The goal is to break the cold butter into small pieces within the flour mixture. You can use a pastry blender, two forks, or even your fingertips (working quickly to prevent the butter from melting). The mixture should resemble coarse crumbs with some larger pieces of butter, roughly the size of small peas or even slightly larger (like lima beans).
Avoid overworking the mixture at this stage. If the butter is completely blended into the flour, you won't get the distinct layers needed for flakiness. Aim for a texture where you can still see visible pieces of butter throughout the flour mixture. This step usually takes about 3-5 minutes depending on your method and the butter's temperature.
Adding Ice Water: Hydrating the Dough Properly
Once the butter is cut into the flour, it's time to add the ice-cold water. This is what brings the dough together. It's crucial to add just enough water to hydrate the flour and form a cohesive dough without making it sticky or wet, and to add it very gradually. Too much water can make the crust tough.
Start by adding about 6-8 tablespoons (approx. 90-120ml) of ice water, one tablespoon at a time, mixing gently with a fork or your hands after each addition. Stop adding water as soon as the dough just comes together when squeezed; it should hold its shape but still look a bit shaggy. This typically requires about 6-8 tablespoons for 2 ½ cups of flour, but can vary slightly depending on humidity and flour type.
Step 2: Chilling the Pie Dough for Optimal Results
Why Chilling is Crucial for an Easy Apple Pie Crust
Chilling the pie dough is a non-negotiable step for achieving a tender, flaky crust in your easy beginner pie recipe. There are two main reasons for this. First, chilling allows the gluten, which developed slightly during mixing, to relax. This relaxation prevents the crust from shrinking excessively when it bakes, ensuring it holds its shape in the pie plate.
Second, and equally important, chilling re-solidifies the butter pieces that were cut into the flour. As you worked the dough, even with cold hands, the butter softens slightly. Chilling firms it back up, preparing those distinct butter pieces to melt and create steam pockets during baking, which is the mechanism behind truly flaky layers.
How Long to Chill Pie Dough for Best Texture
For optimal results with an easy beginner pie recipe, the pie dough should be chilled for a minimum of 1 hour. This timeframe is usually sufficient for the gluten to relax and the butter to firm up properly. For easier handling when rolling, chilling for 1.5 to 2 hours is even better.
You can make pie dough in advance and chill it for up to 2-3 days in the refrigerator. Just ensure it's wrapped tightly in plastic wrap to prevent it from drying out or absorbing odors. If chilling for longer than a couple of hours, you might need to let it sit at room temperature for 10-15 minutes before rolling to make it pliable enough.
Step 3: Rolling Out the Pie Dough Like a Pro
Preparing Your Work Surface for Rolling
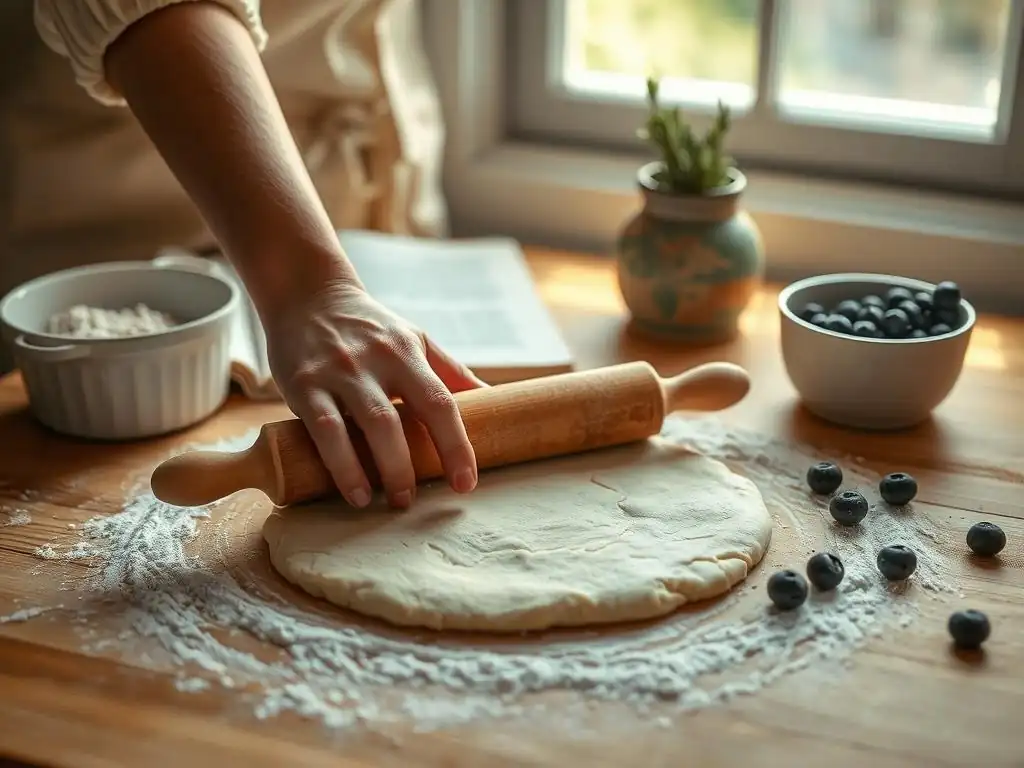
Before you begin rolling out your chilled pie dough for your easy apple pie recipe, prepare a clean, dry work surface. Lightly flour the surface to prevent the dough from sticking. Don't use too much flour, as this can be incorporated into the dough and make the crust tough, but enough to ensure easy rolling and lifting.
About ¼ cup of all-purpose flour sprinkled over a roughly 2-foot by 2-foot area is usually sufficient for rolling out one disk of dough. Also, lightly flour your rolling pin. Keep a little extra flour nearby in case you need to re-flour your surface or pin during the process.
Rolling Technique: Achieving the Right Thickness
Take one disk of chilled dough and place it on your floured surface. Begin rolling from the center outwards, applying even pressure. Rotate the dough frequently (about a quarter turn each time) and lightly re-flour the surface underneath and the top of the dough as needed to prevent sticking. This rotation helps ensure the dough is rolling evenly into a rough circle and not sticking in one spot.
Aim for a thickness of about ⅛ inch (approximately 3 millimeters). You'll need to roll the dough into a circle that is large enough to fit your 9-inch pie plate with some overhang, typically about 12-13 inches in diameter. Rolling takes practice, but focusing on even pressure and frequent rotation will help you achieve the correct size and thickness for your easy beginner pie recipe.
Transferring the Dough to Your Pie Plate Without Breaking
Transferring the rolled dough from your work surface to the pie plate can feel tricky, but there are simple methods to avoid tearing. One common technique is to gently roll the dough sheet loosely around your rolling pin. Position the rolling pin over one edge of your 9-inch pie plate, then carefully unroll the dough, letting it drape into the plate.
Alternatively, you can gently fold the rolled dough in half or quarters. Carefully lift the folded dough and place the corner or folded edge in the center of your pie plate, then unfold it. Gently ease the dough into the contours of the plate, pressing it lightly against the bottom and sides without stretching it, which can cause shrinkage during baking. Trim the excess dough, leaving about a 1-inch overhang for crimping.
Step 4: Preparing Your Easy Apple Pie Filling
Choosing Granny Smith Apples for Their Tartness
Choosing the right apples is fundamental for a delicious easy apple pie recipe. Granny Smith apples are a classic choice for several reasons. Their firm texture holds up well during baking, preventing the filling from becoming mushy. Crucially, their high acidity and tartness provide a perfect counterpoint to the sweetness of the sugar in the filling, creating a balanced flavor profile that isn't cloyingly sweet.
While Granny Smiths are excellent on their own, many bakers prefer using a mix of apple varieties for added complexity in flavor and texture. Combining Granny Smiths with sweeter apples like Honeycrisp, Fuji, or Gala (using roughly a 50/50 split) can create a more nuanced filling. Regardless of the variety, ensure you have enough apples – typically 2 to 2.5 pounds (around 6-8 medium apples) for a 9-inch pie.
Apple Pie Filling Recipe: Ingredients and Measurements
A simple, flavorful apple pie filling for an easy beginner pie recipe requires just a few basic ingredients. For a standard 9-inch pie, you will need your prepared apples (about 2-2.5 lbs or 1-1.2 kg), sugar, a thickener, and spices.
Specific measurements often include ¾ cup (approx. 150g) of granulated sugar, 2 tablespoons of all-purpose flour or cornstarch (cornstarch tends to create a clearer, slightly firmer gel), 1 teaspoon of ground cinnamon, and a pinch (about ¼ teaspoon) of ground nutmeg. Some recipes also add a tablespoon of lemon juice to brighten the flavor, though this is optional if using tart apples like Granny Smiths.
Preparing the Filling: Slicing, Mixing, and Sweetening
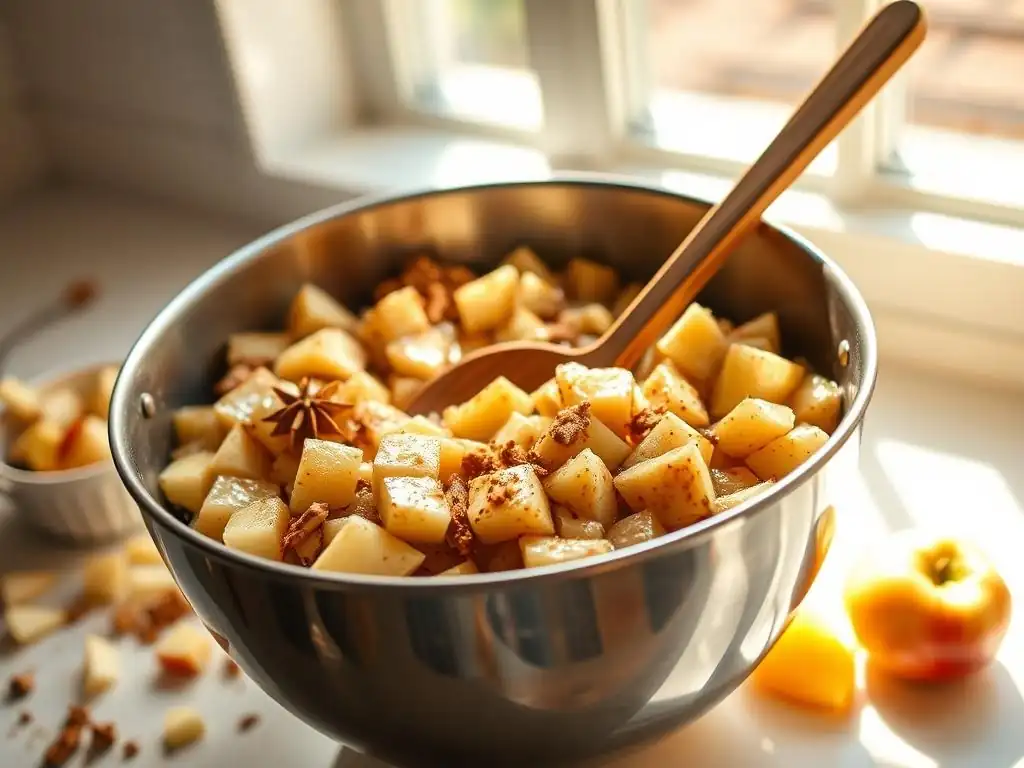
Once your apples are peeled, cored, and sliced, they are ready to be combined with the other filling ingredients. Aim for relatively uniform slices, about ½ inch thick, so they cook evenly. Place all the sliced apples in a large bowl.
Sprinkle the sugar, thickener (flour or cornstarch), cinnamon, and nutmeg over the apples. Gently toss everything together using a spoon or your hands until the apple slices are evenly coated. The sugar will start to draw out some moisture from the apples, creating a light syrup. This simple mixing process ensures the flavors and thickener are distributed throughout the filling for your easy apple pie recipe.
Step 5: Assembling and Baking Your First Apple Pie
Adding the Filling to the Pie Crust
With your bottom pie crust fitted into the pie plate and your apple filling prepared, it's time to bring them together. Carefully pour the apple mixture into the prepared bottom crust. Mound the apples slightly in the center, as they will soften and cook down during baking.
Ensure the filling is distributed relatively evenly. You can gently press the apples down to compact them slightly, but don't pack them in too tightly. This step is straightforward, simply getting all that delicious, spiced apple filling into its pastry vessel, ready for the top crust or crumble.
Creating a Top Crust or Crumble Topping
An easy beginner pie recipe can have either a traditional double crust or a simpler crumble topping. A double crust requires rolling out the second disk of dough, while a crumble topping is a quick mix of flour, sugar, and butter. Both offer a delightful contrast to the soft apple filling.
Choosing between a top crust and a crumble depends on your preference and comfort level. A full top crust or lattice design is classic, while a crumble topping (sometimes called streusel) is often seen as slightly easier for beginners as it doesn't require precise rolling or transferring.
Making a Simple Lattice Apple Pie Crust Design
A lattice top crust looks impressive but is quite manageable for an easy beginner pie recipe. Roll out your second disk of dough as you did the first. Use a knife or pizza cutter to cut the dough into strips, typically about ½ to ¾ inch wide.
Lay half of the strips parallel across the top of the apple filling, evenly spaced. Fold back alternate strips. Place a perpendicular strip across the unfolded strips, then unfold the original strips over it. Now, fold back the other alternate strips and place a second perpendicular strip. Continue this over-and-under weaving pattern until the top is covered in a lattice design. Trim the ends of the strips and crimp or seal them to the bottom crust edge.
Preparing a Basic Crumble Topping Recipe
If you opt for a crumble topping for your easy apple pie recipe, it's quick to assemble. In a medium bowl, combine dry ingredients like flour, granulated sugar, and brown sugar. A common ratio is ½ cup (approx. 60g) all-purpose flour, ¼ cup (approx. 50g) granulated sugar, and ¼ cup (approx. 50g) packed light brown sugar.
Cut in cold butter (about ¼ cup or 57g) using your fingers, a fork, or a pastry blender until the mixture resembles coarse crumbs. Some recipes also include spices like cinnamon or oats for added texture and flavor. Sprinkle this crumbly mixture evenly over the top of the apple filling before baking.
Baking Time and Temperature for a Golden-Brown Apple Pie
Baking your easy apple pie recipe requires specific temperatures to ensure the crust is golden and the filling is cooked through and bubbling. Start by preheating your oven to a relatively high temperature, typically 425°F (220°C). This initial high heat helps set the bottom crust and encourages flakiness.
Bake the pie at 425°F (220°C) for about 15-20 minutes. Then, reduce the oven temperature to a lower setting, usually 375°F (190°C), for the remainder of the baking time, which is typically another 30-40 minutes. The pie is done when the crust is deeply golden brown, and you can see the filling bubbling through the vents or lattice cuts. If the edges of the crust start browning too quickly, cover them with foil or a pie crust shield.
Step 6: Cooling and Serving Your Homemade Apple Pie
Why Cooling is Important Before Slicing
Waiting for your homemade apple pie to cool might be the hardest part, but it's absolutely essential for a perfectly set filling. As the pie bakes, the thickener (flour or cornstarch) works to absorb the juices released by the apples. This process requires time for the filling to cool down and set into a cohesive state.
If you slice into a hot pie too soon, the filling will be runny and spill out, resulting in a messy slice rather than neat wedges. Allowing the pie to cool on a wire rack for at least 2-3 hours gives the filling sufficient time to thicken and set, ensuring beautiful slices.
Serving Suggestions for Your Easy Beginner Apple Pie
Once your easy beginner pie recipe has cooled sufficiently, it's ready to be enjoyed! Apple pie is delicious served warm or at room temperature. The classic accompaniment is a scoop of vanilla ice cream, which melts slightly into the warm filling, creating a delightful contrast of temperatures and textures.
Other popular serving options include a dollop of freshly whipped cream or a slice of sharp cheddar cheese (a traditional pairing in some regions). For extra flavor, you can lightly warm individual slices before serving. Enjoy the fruits of your labor!
Troubleshooting Common Pie Baking Problems
Soggy Bottom Crust: Prevention and Solutions
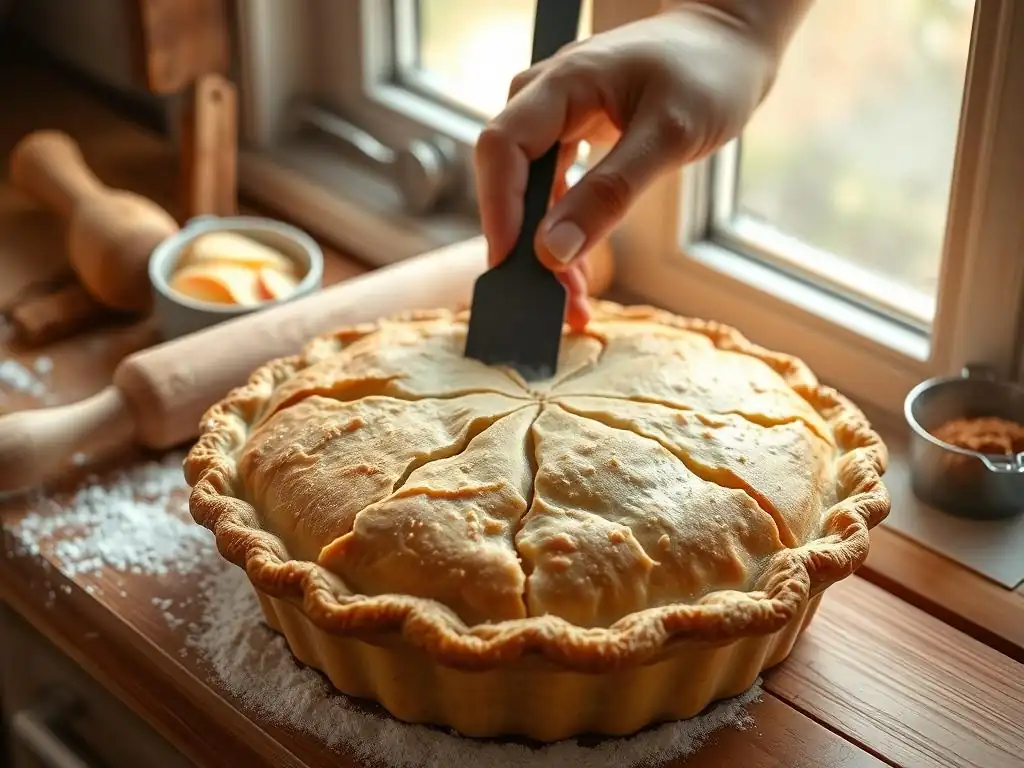
A soggy bottom crust is a common frustration for beginner bakers tackling an easy beginner pie recipe. It often happens when the bottom crust doesn't cook through properly before the filling makes it wet. Prevention starts with a properly preheated oven and using a pie plate material like glass or ceramic that conducts heat well to the bottom.
One effective solution is blind baking the bottom crust partially before adding the filling. Bake the empty crust (lined with parchment paper and filled with pie weights or dried beans) at 375°F (190°C) for about 15-20 minutes until the edges are lightly golden. Remove weights and parchment, and bake for another 5-10 minutes until the bottom looks dry. Ensure your filling isn't excessively liquidy; using the correct amount of thickener is key.
Shrinking Pie Crust: How to Avoid It
Pie crust shrinkage, where the dough pulls away from the edges of the pie plate during baking, is usually caused by overworking the dough or not chilling it sufficiently. When dough is overworked, gluten develops excessively, causing it to become elastic and contract when heated.
To avoid this, mix your dough just until it comes together and no longer looks dry and crumbly – typically within a minute or two after adding water. More importantly, ensure you chill the dough for at least 60-90 minutes before rolling. This allows the gluten to relax and the fat to firm up, reducing the dough's tendency to shrink in the oven.
Burnt Pie Crust Edges: Easy Fixes
Sometimes, the edges of your beautiful easy beginner pie recipe crust brown much faster than the rest of the pie, leading to a burnt or overly dark result. This is because the thinner edges are more exposed to the oven's direct heat.
The easy fix is to protect the edges. After the first 15-20 minutes of baking at the higher temperature, when the edges are just starting to turn golden, cover them loosely with strips of aluminum foil or use a reusable silicone pie crust shield that fits over the rim of your pie plate. Remove the protection for the last 10-15 minutes of baking if you want the edges to brown a little more, but often leaving it on is sufficient.
Tips and Tricks for Perfecting Your Easy Apple Pie Recipe
Using Different Types of Apples for Unique Flavors
While Granny Smiths are reliable, don't hesitate to experiment with different apple varieties to put your own twist on this easy beginner pie recipe. Using a blend of apple types can add layers of flavor and texture.
For instance, combining tart apples (like Granny Smith, Empire) with sweeter, softer apples (like McIntosh, Cortland) and firm-sweet apples (like Honeycrisp, Fuji, Gala) can create a more complex filling. A popular mix might be 1 lb Granny Smith, 1 lb Honeycrisp, and ½ lb Fuji, totaling 2.5 lbs. Be mindful that softer apples will break down more, contributing to a saucier filling, while firmer ones retain their shape.
Adding Spices to Enhance Your Apple Pie
Cinnamon and nutmeg are classic apple pie spices, but you can easily enhance the flavor profile of your easy apple pie recipe filling with other warm spices. Adding a pinch of ground cloves (about ¼ teaspoon) can deepen the flavor. Allspice, ginger, or cardamom are also wonderful additions that complement apples beautifully.
Consider adding about ¼ teaspoon of ground ginger or cardamom to your standard cinnamon/nutmeg mix for an extra layer of warmth and aroma. You can also add a tiny pinch of black pepper; it won't make the pie spicy but can surprisingly enhance the fruit flavor.
Freezing Pie Dough for Future Baking
One excellent tip for making pie baking even easier in the future is to make a larger batch of pie dough and freeze the excess. This allows you to have homemade dough ready to go for your next easy beginner pie recipe with minimal effort on baking day.
After making the dough and dividing it, shape each portion into a disk, wrap it tightly in plastic wrap (twice for extra protection), and then place the wrapped disks in a freezer-safe zip-top bag. Label with the date. Pie dough can be frozen for up to 3 months. To use, thaw the dough overnight in the refrigerator before letting it sit at room temperature for 10-15 minutes until it's pliable enough to roll.
Conclusion: Celebrating Your Apple Pie Baking Success
You've Baked an Apple Pie! What's Next?
Congratulations! You have successfully navigated the steps and baked your very first easy beginner pie recipe – a classic, delicious apple pie from scratch. This is a significant baking achievement, and you should be incredibly proud of your effort and the delicious result. Taking on a project like this demonstrates growing confidence and skill in the kitchen.
Remember the steps you followed: creating a simple dough, preparing the filling, assembling, and baking. Each stage built upon the last, culminating in a wonderful homemade treat. This experience provides a solid foundation for tackling other baking challenges.
Exploring More Beginner Baking Recipes on BakeWithEase
Now that you've mastered the easy beginner pie recipe and have a fresh apple pie to show for it, you're ready to expand your baking repertoire. Baking is a journey of discovery, and there are countless other simple and rewarding recipes waiting for you.
BakeWithEase.com is filled with resources designed specifically for bakers like you. Explore our collection of beginner baking recipes, from simple cookies and muffins to basic breads and tarts. Each guide offers clear, step-by-step instructions to help you continue building your skills and confidence, one delicious bake at a time.
Frequently Asked Questions
What makes this pie recipe specifically "easy" for beginners?
This recipe focuses on simple techniques and readily available ingredients. We provide step-by-step instructions with clear visuals to minimize confusion and ensure success, even for first-time pie makers.
What kind of pie crust does this recipe use, and can I use store-bought?
The recipe utilizes a basic all-butter pie crust. While we highly recommend making it from scratch for the best flavor, using a high-quality store-bought crust is perfectly acceptable for convenience.
What kind of filling is recommended for this "easy beginner pie recipe"?
The recipe suggests a classic apple pie filling as it's widely loved and relatively straightforward. However, you can easily adapt it to other easy fruit fillings like cherry or blueberry depending on your preference.
What are some common mistakes beginners make when baking pies, and how can I avoid them?
Common mistakes include overworking the dough, using too much water, and not docking the crust properly. Our guide includes tips to avoid these pitfalls, such as using cold ingredients and allowing the dough to rest.
How long does it take to bake this "easy beginner pie recipe"?
The baking time typically ranges from 45-55 minutes, depending on your oven. The pie is done when the crust is golden brown and the filling is bubbling and slightly thickened.
Final Reflection: The Sweetness of Success, One Pie at a Time
Baking your first perfect pie isn't just about the delicious result; it's a testament to the power of patience, precision, and the joy of creation. The seemingly simple act of transforming humble ingredients into a beautiful, edible masterpiece is a surprisingly potent metaphor for tackling challenges in life. Mastering the art of the pie, even a simple one, builds confidence and encourages a willingness to experiment, skills transferable far beyond the kitchen.
The enduring appeal of pie lies not only in its taste, but in its ability to connect us to traditions, memories, and loved ones. It's a dish that transcends generations, a symbol of comfort and celebration. A pie is a love letter to the earth.
While I don't know the origin of this quote, it perfectly encapsulates the feeling of nurturing ingredients into something beautiful and nourishing. The process itself, from selecting the perfect fruit to the satisfying crust-crimping, is a meditative experience that fosters a sense of accomplishment and quiet pride.
Now, I invite you to roll up your sleeves, gather your ingredients, and embark on your own pie-making journey. Don't be afraid to experiment, to embrace imperfections, and to savor the sweet taste of success. Remember, the most important ingredient isn't listed on the recipe card – it's the joy you bring to the process. Your first perfect pie awaits; go create it!
Unleash Your Inner Pastry Chef!
Thanks for joining us on this delicious journey into the world of pie-making! We hope you've gained the confidence to tackle your first perfect pie. Now it's time to put your newfound skills to the test.
- Bake your dream pie! Use the techniques you just learned to create your own masterpiece. Don't be afraid to experiment with different fillings and crust variations.
- Share your creation! Snap a photo of your finished pie and tag us on social media – we’d love to see your baking triumph!
- Try a new recipe variation – perhaps a savory galette or a unique fruit tart using the same crust techniques.
What exciting flavor combinations will you explore in your next baking adventure?