
Beginner's Guide to Pie Weights & Blind Baking

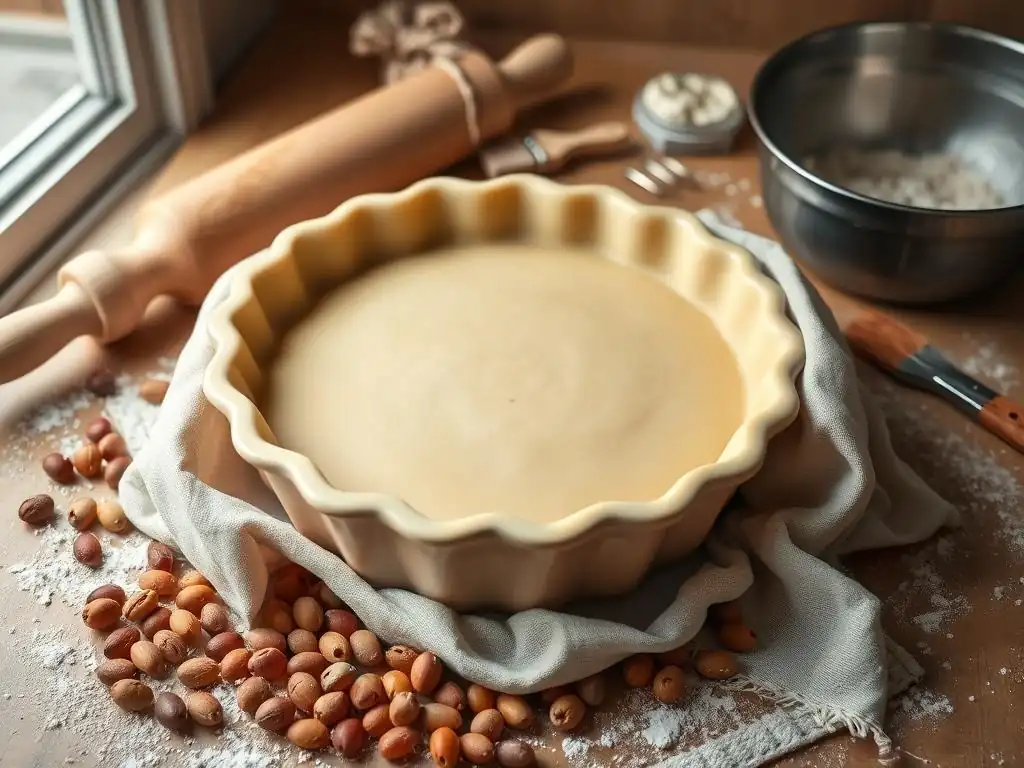
Welcome to BakeWithEase, your trusted companion in the delightful world of baking! Ever wondered how to achieve that perfectly crisp pie crust without any dreaded shrinkage? This week, we're diving deep into the essential technique of blind baking and uncovering the secrets behind effective pie weights blind baking tips. Get ready to say goodbye to soggy bottoms and hello to pie perfection! Intrigued? Read on to master this crucial skill and elevate your baking game.
- What is Blind Baking and Why is it Necessary?
- Pie Weights Explained: Your Guide to Perfectly Baked Pie Crusts
- Essential Tools for Blind Baking: Beyond Pie Weights
-
Step-by-Step Guide to Blind Baking with Pie Weights
- Step 1: Preparing Your Pie Dough
- Step 2: Docking the Pie Crust: Preventing Bubbling
- Step 3: Lining the Pie Crust with Parchment Paper or Foil
- Step 4: Adding Pie Weights Evenly
- Step 5: Blind Baking: Time and Temperature Guide for Different Crusts
- Step 6: Removing the Pie Weights and Parchment
- Step 7: Optional: Egg Wash for a Golden Crust
- Step 8: Cooling the Blind Baked Pie Crust
- Troubleshooting Common Blind Baking Problems
- Tips and Tricks for Perfect Pie Crusts Every Time
- Storing Blind Baked Pie Crusts: Keeping Them Fresh
- Recipes That Benefit From Blind Baking
-
Frequently Asked Questions
- What are pie weights and why are they used in blind baking?
- What can I use as pie weights if I don't have commercial ones?
- How long should I blind bake a pie crust with pie weights?
- What does "docking" the pie crust mean, and is it necessary when using pie weights?
- Can I reuse the pie weights after blind baking?
- Final Reflection: The Humble Pie Weight: A Foundation for Baking Success
- Unlock Perfectly Golden Pie Crusts: Your Baking Adventure Starts Now!
What is Blind Baking and Why is it Necessary?
Understanding the Purpose of Blind Baking: Preventing Soggy Pie Crusts
Have you ever cut into a beautiful pie only to find a disappointing, gummy layer of uncooked dough at the bottom? This common baking woe is often called a "soggy bottom," and it happens when a wet filling is added to an uncooked pie crust, and the crust doesn't have enough time or direct heat to bake through properly before the filling sets.
Think of juicy fruit pies, creamy quiches, or rich custard pies – these fillings introduce a lot of moisture to the equation. Without a crucial first step called blind baking, that moisture can steam the bottom crust instead of allowing it to crisp up and become flaky.
Blind baking is essentially pre-baking your pie crust before adding the filling. This process gives the dough a head start, creating a sturdy, partially or fully cooked foundation that can stand up to moist fillings. For pies with very short baking times for the filling (like many no-bake cream pies or fresh fruit tarts), a fully blind-baked crust is essential because the crust won't cook further once the filling is added.
For pies with longer baking times but wet fillings (like pumpkin or pecan pie), a partially blind-baked crust ensures the bottom is firm before the filling goes in, preventing that dreaded soggy result. Mastering the art of blind baking is a key step in achieving bakery-quality pies right in your own kitchen.
When to Blind Bake: Recipes That Require Pre-Baked Crusts
Knowing when to blind bake is just as important as knowing how. Generally, recipes that call for fillings that are either very wet, require minimal or no baking time, or are added cold benefit most from a blind-baked crust. Custard pies, such as pumpkin pie, pecan pie, or quiche, are prime examples.
Their liquid-heavy fillings would almost certainly lead to a soggy bottom if poured into a raw shell. Similarly, fruit tarts where fresh, uncooked fruit is arranged over a pastry cream often require a fully baked, sturdy crust that can support the weight and moisture of the fruit without becoming soft.
Beyond custards and tarts, many cream pies (like chocolate cream or banana cream) and chilled pies use fillings that don't require oven time. In these cases, the crust must be fully baked and cooled before the filling is added. Even some traditional fruit pies with particularly juicy fruits like berries might call for a partial blind bake to give the bottom crust extra protection against sogginess. Always check your specific recipe instructions, but as a rule of thumb, if the filling is wet or requires little to no oven time, prepare to blind bake!
Pie Weights Explained: Your Guide to Perfectly Baked Pie Crusts
What are Pie Weights? Different Types for Blind Baking
When you blind bake a pie crust, especially if you're aiming for a partially or fully baked shell, the dough needs support to prevent it from shrinking down the sides of the dish or puffing up in the center like a balloon. This is where pie weights come in. Pie weights are small, heavy objects placed inside the raw, lined pie crust during the initial baking phase.
Their purpose is twofold: they weigh down the bottom of the crust, preventing it from bubbling, and they press against the sides, helping the crust maintain its shape and height as it bakes. Using pie weights is a fundamental step in achieving a uniformly baked and beautifully shaped crust through blind baking.
There are several types of pie weights available, each with its own characteristics. Dedicated pie weights are typically made from ceramic or metal. However, many home bakers successfully use common pantry items as effective alternatives. The key is to use enough weight to fill the crust adequately and distribute it evenly. Whether you opt for commercially made weights or a DIY solution, having something to weigh down your crust is crucial for successful blind baking.
Ceramic Pie Weights: Advantages and Disadvantages
Ceramic pie weights are one of the most popular choices for blind baking. They are small, smooth, and typically made from porous ceramic material. A standard amount for a 9-inch pie shell is usually around 1 to 2 pounds (about 450-900 grams) of weights.
These weights are designed to absorb and distribute heat evenly, which can help promote even baking across the bottom of the crust. They are reusable and relatively easy to clean, although their porous nature means they can sometimes absorb oils or odors if not cleaned thoroughly. You can often find a 1-pound container of ceramic weights for around $10 to $15.
One potential disadvantage of ceramic weights is that they can be fragile and may break if dropped. Also, because they are individual pieces, they require a liner (like parchment paper or foil) to prevent them from sticking to the dough or falling through any cracks.
While they are effective at weighing down the crust, some bakers find they don't conform as tightly to the corners and edges of the pie dish compared to other options, which could potentially lead to slight shrinkage if not carefully arranged. Despite these minor points, ceramic pie weights remain a reliable tool for achieving excellent blind baking results.
Metal Pie Weights: Advantages and Disadvantages
Metal pie weights, often made from stainless steel or aluminum, are another durable option for blind baking. They are typically sold as small metal beads or chains. Like ceramic weights, they serve to weigh down the crust and prevent shrinkage.
Metal is an excellent conductor of heat, which can potentially help the bottom crust bake more quickly and evenly. They are very durable, easy to clean, and won't break if dropped. A set of metal weights or a chain might cost slightly more than ceramic ones, perhaps in the range of $15 to $25 for a comparable amount of weight.
A potential drawback of metal weights, especially if using individual beads, is the need for a robust liner to prevent them from sticking to the crust if any fat renders out during baking. Metal chains are designed to fit the shape of the pie dish more easily, but they can still be a bit fiddly to arrange perfectly.
While their heat conductivity is generally an advantage for achieving a crisp bottom, care must be taken to ensure the crust edges, which receive more direct heat, don't overbake before the center is done. Nevertheless, metal pie weights are a long-lasting and effective tool for your blind baking needs.
DIY Pie Weights: Rice, Beans, and Other Alternatives
If you don't have dedicated pie weights on hand, you likely have effective alternatives in your pantry. Dried beans (like kidney, navy, or even lentils) and uncooked rice are commonly used as DIY pie weights. You'll need a significant amount – often 1 to 2 pounds or more for a standard 9-inch pie – to adequately fill the lined crust. These materials are inexpensive or free if you already have them. They conform well to the shape of the pie dish, ensuring the weights press against the bottom and sides evenly.
The primary disadvantage of using dried beans or rice is that they are typically not edible after being used as pie weights because they become hard and can develop an off-flavor from the baking process. They can also leave a starchy residue on your liner or even the crust if the liner isn't perfect. While effective at providing weight, they may not conduct and distribute heat quite as efficiently as ceramic or metal weights. Despite these points, they are an excellent, accessible option for achieving successful blind baking without a special purchase.
Essential Tools for Blind Baking: Beyond Pie Weights
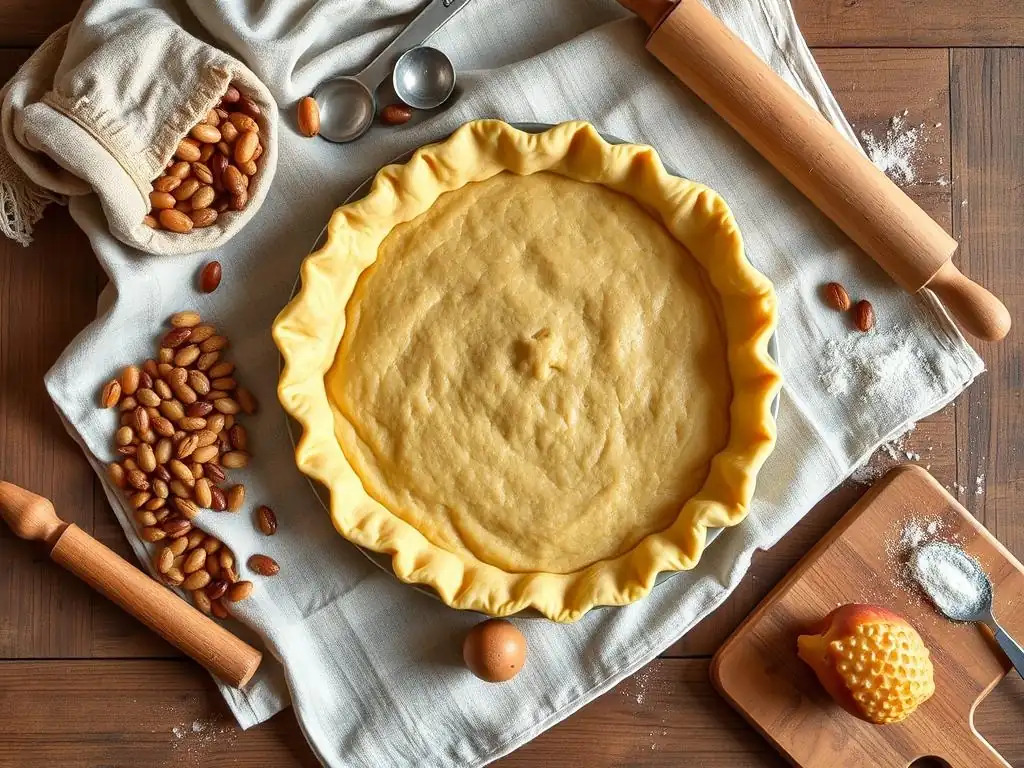
Parchment Paper or Foil: Protecting Your Pie Crust
While pie weights are key for blind baking, they need a partner to work effectively: a liner. Parchment paper or aluminum foil are the standard choices for this role. The liner is placed directly into the raw pie crust shell before the weights are added. Its primary function is to create a barrier between the weights and the delicate dough. This prevents the weights from sticking to the crust, especially if the dough contains a lot of butter or fat that might render out during baking.
Using a liner also makes removing the pie weights incredibly easy. Once the initial blind baking step with weights is complete, you simply gather the edges of the parchment or foil and lift the weights out in one go, minimizing disturbance to the partially baked crust. Parchment paper is often preferred because of its non-stick properties, requiring no greasing.
Aluminum foil works well too, but it's best to use heavy-duty foil and press it gently into the contours of the crust to ensure good contact with the weights. Either way, a proper liner is indispensable for a clean and efficient blind baking process using pie weights blind baking tips.
Pie Dish: Choosing the Right Size and Material
The pie dish itself plays a role in the blind baking process. Standard pie dishes are typically 9 or 10 inches in diameter. Ensuring your rolled-out dough is large enough to fit the dish with plenty of overhang for crimping is the first step. The material of your pie dish can also influence baking times and how evenly the crust bakes.
Glass pie dishes are great because you can visually check the bottom crust's color, but they can heat up slowly. Ceramic dishes also distribute heat well and are often quite attractive. Metal pie pans, particularly aluminum, heat up quickly and can promote a very crisp bottom crust, though they can sometimes lead to edges browning faster.
Regardless of the material, make sure your pie dish is clean and at room temperature before lining it with dough. For blind baking, using a dish with sloped sides is helpful as it allows the dough to settle nicely and the weights to press against the sides effectively. Having the right size dish ensures your crust-to-filling ratio is correct and that you have enough surface area for your pie weights blind baking tips to work their magic.
Fork: For Docking Your Pie Crust
A simple kitchen fork is an essential tool for blind baking. Before adding your liner and pie weights, you'll need to "dock" the pie crust. Docking involves pricking the bottom and sometimes the sides of the raw dough with the tines of a fork. This creates small holes in the crust. As the pie bakes, steam is generated within the dough, especially from the melting fat and moisture. If this steam has nowhere to escape, it can cause large bubbles or air pockets to form, lifting the crust away from the dish or creating an uneven surface.
Pricking the dough with a fork allows this steam to vent during the initial baking phase. You don't need to go overboard, but aim for consistent pricks across the bottom, perhaps every 1/2 to 1 inch (about 1-2.5 cm). For the sides, a few pricks are usually sufficient. Proper docking, along with the pressure from the pie weights, is crucial for preventing the crust from puffing up and ensuring it maintains a flat, even bottom that's ready to receive your filling.
Step-by-Step Guide to Blind Baking with Pie Weights
Step 1: Preparing Your Pie Dough
The foundation of a great blind-baked crust is well-made, properly chilled dough. Whether you're using a homemade recipe or store-bought dough, ensure it is cold and rested. After rolling out your dough to a size that comfortably fits your pie dish with about an inch or two of overhang, gently transfer it to the dish. Press the dough lightly into the bottom and up the sides, making sure it sits snugly against the dish's contours.
Trim any excess dough, leaving enough for your desired edge (crimping, fluting, etc.). Once the dough is in the dish, it's crucial to chill it thoroughly again. Place the lined pie dish in the refrigerator for at least 30-60 minutes, or even the freezer for 15-20 minutes, until the dough is firm. This chilling step is vital for preventing shrinkage during baking, a key part of successful pie weights blind baking tips.
Step 2: Docking the Pie Crust: Preventing Bubbling
Once your chilled pie dough is firmly settled in the dish, it's time to dock it. Using a standard kitchen fork, gently prick the bottom surface of the dough all over. Aim for pricks that go through the dough but aren't so large they create gaping holes. A spacing of roughly every inch (about 2.5 cm) across the bottom is usually sufficient. You can also prick the sides a few times, particularly if they are very thick.
The purpose of docking is to create vents for steam to escape as the crust bakes. Without these small holes, steam can build up under the crust, causing large, unsightly bubbles to form. While the pie weights will help keep the crust down, docking provides that extra insurance against puffing and ensures a flat, even surface at the bottom, perfect for holding your delicious filling. This simple step is a fundamental part of the blind baking process.
Step 3: Lining the Pie Crust with Parchment Paper or Foil
With your chilled and docked pie crust ready, the next step is to line it before adding the weights. Take a piece of parchment paper or heavy-duty aluminum foil that is large enough to generously cover the inside of the pie crust and extend up and over the edges. Gently press the paper or foil into the contours of the raw dough, making sure it fits snugly against the bottom and sides. You can crinkle the paper/foil slightly first to make it more pliable and easier to fit into the curves of the dish.
The liner serves as a protective barrier between the dough and your pie weights. It prevents the weights from sticking to the crust and makes them incredibly easy to remove later. Ensure the liner extends well beyond the edge of the pie dish; these overhangs will act as handles for lifting the weights out. Using a good quality liner is a simple but effective technique within your pie weights blind baking tips repertoire.
Step 4: Adding Pie Weights Evenly
Now it's time to add the pie weights! Pour your chosen weights – ceramic, metal, or DIY (like dried beans or rice) – into the lined pie crust. Fill the crust right up to the top edge. It might seem like a lot, but having enough weight is crucial for supporting the sides of the crust and keeping the bottom flat. For a standard 9-inch pie, this usually means using between 1 and 2 pounds (450-900 grams) of weights, depending on their density.
Distribute the weights evenly across the entire bottom surface and push them gently against the sides of the dish. The goal is to provide uniform pressure that prevents the crust from shrinking down the sides or bubbling up in the center as it bakes. Ensure the weights are spread out and not just piled in the middle. Proper and even distribution of pie weights is a key element of successful blind baking techniques.
Step 5: Blind Baking: Time and Temperature Guide for Different Crusts
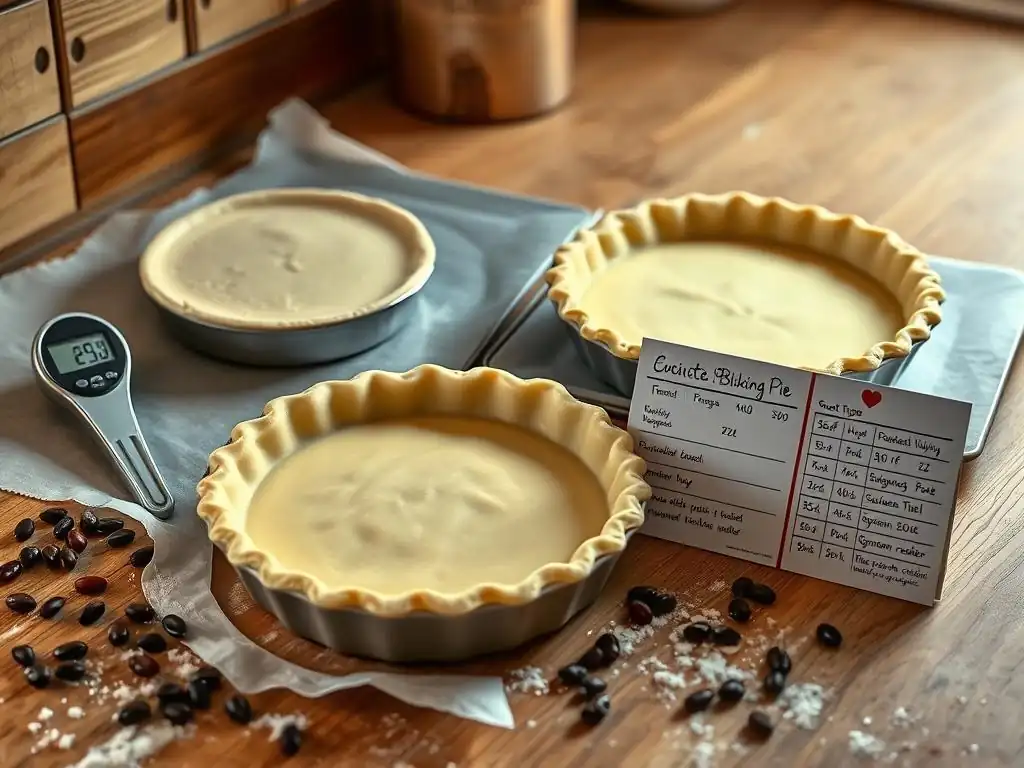
Preheat your oven to the temperature specified in your recipe, which is commonly between 375°F and 400°F (190°C and 200°C) for blind baking. Place the pie dish with the lined, weighted crust on a baking sheet (this makes it easier to handle and catches any potential drips). Bake for the initial stage with the weights. The timing here depends on whether you need a partial or full blind bake.
For a partial blind bake (where the pie will be filled and baked again), you typically bake with weights for about 15-20 minutes, until the edges are set and just beginning to look dry. For a full blind bake (where the crust needs to be fully cooked before filling), you'll bake with weights for the initial 15-20 minutes, then remove the weights and liner and bake for an additional 10-15 minutes or until the crust is golden brown and cooked through. Always adjust times based on your oven and the specific recipe you are following.
Blind Baking a Single Crust Pie
Blind baking is most commonly performed on single crust pies, which are designed to be filled after the crust is baked. This includes pies like quiches, custard pies (pumpkin, pecan), and tarts. For a partial blind bake, which is typical for pies that will be baked again with the filling (like pumpkin or quiche), bake the crust with the pie weights and liner for about 15-20 minutes at 375°F-400°F (190°C-200°C).
The crust edges should look set and opaque, not raw or wet. You'll then remove the weights and liner and proceed as the recipe instructs, often adding the filling and baking again.
For a full blind bake, necessary for pies with no-bake fillings (like cream pies or fresh fruit tarts), you follow the partial bake step (15-20 mins with weights), then carefully remove the weights and liner. Return the crust to the oven and bake for another 10-15 minutes, or until the bottom and sides are golden brown and look fully cooked.
Some recipes might even call for a slightly lower temperature (e.g., 350°F or 175°C) for this second stage to prevent the edges from burning while the bottom finishes. This two-stage process ensures the crust is sturdy and completely baked before adding a cold or unbaked filling, a vital part of effective pie weights blind baking tips.
Blind Baking a Double Crust Pie
Blind baking is less common for traditional double crust pies where a full top crust is added and baked along with the filling (like apple or cherry pie). In these cases, the long baking time required for the filling is usually sufficient to cook the bottom crust, provided the filling isn't excessively wet and the oven temperature is correct.
However, there are instances in double crust pies where blind baking the bottom crust is beneficial. This is usually done when the filling is particularly juicy (like a very wet berry pie) or when using a lattice top or cutouts, which expose the filling more.
If blind baking the bottom crust for a double crust pie, it's almost always a partial blind bake. You would line the bottom crust, add weights, and bake for the initial 15-20 minutes as described for a single crust partial bake. Then, remove the weights and liner, add your filling, and top with the second crust (lattice, full top, etc.) before baking the entire pie until the filling is cooked and the top crust is golden brown. This gives the bottom crust a head start and helps prevent sogginess, even with a second baking phase.
Step 6: Removing the Pie Weights and Parchment
Once the initial blind baking time with weights is complete (typically 15-20 minutes), carefully remove the pie dish from the oven and place it on a heatproof surface. Using the overhang of the parchment paper or foil as handles, gently lift the liner with the pie weights out of the hot crust. Do this slowly and steadily to avoid cracking the delicate, partially baked shell.
Be cautious, as the weights and liner will be very hot. Set them aside to cool completely before handling or storing the weights. At this point, your crust should be set and opaque on the bottom and sides.
If you are doing a partial blind bake, the crust is now ready for the filling and a second bake. If you are doing a full blind bake, the crust needs to go back into the oven without the weights to finish browning and crisping up. This step is critical for moving from the weighted phase to the final baking phase in your pie weights blind baking tips.
Step 7: Optional: Egg Wash for a Golden Crust
For blind-baked crusts that will be filled and not baked again (full blind bake), or sometimes for partial blind bakes just before adding the filling, applying a thin egg wash can enhance the appearance and texture. An egg wash is typically made by whisking a whole egg with a tablespoon or two of milk or water.
With a pastry brush, lightly brush the exposed, partially baked crust with the egg wash after removing the weights and liner but before the final baking step (if doing a full blind bake). The egg wash helps the crust achieve a beautiful golden-brown color and can add a subtle sheen. It can also help seal the surface of the crust, providing an extra layer of protection against moisture from the filling, further preventing a soggy bottom. This is a useful technique to add to your pie weights blind baking tips for aesthetic and functional benefits.
Step 8: Cooling the Blind Baked Pie Crust
After your pie crust has finished its blind baking journey – whether partially or fully baked – it needs time to cool properly. Carefully transfer the hot pie dish to a wire cooling rack. Allowing the crust to cool on a rack promotes air circulation around the dish, which helps prevent condensation from forming and keeps the bottom crust crisp.
If you're doing a partial blind bake, you might only need to let it cool for 5-10 minutes before adding the filling and returning it to the oven. If you've done a full blind bake for a no-bake filling, the crust must cool completely before you add the filling. Adding a wet or creamy filling to a warm crust can cause it to become soggy very quickly.
Allow the fully blind-baked crust to cool for at least 30-60 minutes, or until it is entirely at room temperature. Patience during the cooling step is just as important as the baking itself for a perfect blind baked crust.
Troubleshooting Common Blind Baking Problems
Soggy Bottom Crust: Causes and Solutions
The soggy bottom is the nemesis of pie makers, often the very reason we turn to blind baking in the first place. This problem occurs when the bottom crust doesn't cook through properly before the filling's moisture makes it gummy and unappetizing.
Common causes include not blind baking at all when the recipe needed it, not baking with enough pie weights to keep the bottom flat and in contact with the dish, or removing the weights too early in a full blind bake, leaving the bottom undercooked. Using a filling that is too hot or adding filling to a crust that hasn't cooled completely can also re-introduce moisture and lead to sogginess.
To combat this, ensure you are using sufficient pie weights (1-2 pounds for a 9-inch pie is a good estimate) and that they are distributed evenly, pressing against the sides and bottom. Bake with weights for the recommended time (15-20 minutes is standard) and for a full blind bake, don't skip the second baking phase without weights to crisp up the bottom.
If your filling is particularly wet, consider brushing the partially baked crust with a thin layer of egg wash or melted chocolate (for sweet pies) after removing the weights; this creates a barrier. Always cool your crust completely before adding cold or no-bake fillings.
Shrinking Pie Crust: How to Prevent It
Shrinking pie crust, where the edges pull away from the sides of the dish, is another frustrating issue in blind baking. This often happens when the gluten in the dough is too developed or not relaxed, causing it to contract when heated. Overworking the dough during mixing or rolling is a primary culprit. Insufficient chilling time, both after making the dough and after lining the pie dish, also contributes significantly to shrinkage. Dough that isn't cold and firm when it goes into the oven is more likely to slump.
Prevention starts with handling your dough gently; mix only until just combined and avoid excessive kneading. Ensure your dough chills adequately in the refrigerator for at least an hour (or even overnight) before rolling. After lining the pie dish, always chill it again for at least 30-60 minutes before baking. When adding pie weights, make sure they fill the crust completely, extending right up to the edges and pressing gently against the sides. This physical support from the pie weights blind baking tips helps hold the dough in place as it bakes.
Uneven Baking: Tips for a Uniformly Cooked Crust
Sometimes, despite your best efforts, a blind-baked crust might be more browned on one side than the other, or the bottom might be paler in the center compared to the edges. Uneven oven temperature is a common cause; many ovens have hot spots. Incorrect placement of the pie dish in the oven (e.g., too close to an element) can also lead to uneven heat distribution. If using pie weights, uneven distribution can mean some areas of the bottom crust receive less direct heat or support.
To promote uniform baking, ensure your oven is accurately calibrated (an oven thermometer can help). Always preheat your oven thoroughly. Place the pie dish on a baking sheet in the center of the oven rack. If you notice one side browning faster, rotate the pie dish halfway through the baking time. When adding pie weights, take a moment to ensure they are spread evenly across the entire bottom surface and pushed gently against the sides, providing consistent pressure and heat transfer. Following these steps helps ensure your blind baked crust is golden and perfectly cooked from edge to center.
Burnt Edges: Protecting Your Pie Crust
The edges of a pie crust are thinner and more exposed to direct heat than the bottom, making them prone to browning too quickly, sometimes even burning before the rest of the crust or filling is done. This is a common issue, especially during the second stage of a full blind bake when the weights are removed.
Fortunately, this is easily prevented. Once the edges of your blind-baking crust start to look golden brown (which might be halfway through the weighted bake or during the unwieghted bake), cover them. You can use a dedicated pie crust shield, which is a ring-shaped guard that fits over the edges of the pie dish.
Alternatively, you can create a makeshift shield by tearing off strips of aluminum foil about 1-2 inches wide and gently crimping them around the edges of the pie crust. This protects the edges from direct heat while allowing the rest of the crust (or filling) to continue baking. Use these protection methods proactively once the edges reach your desired color.
Tips and Tricks for Perfect Pie Crusts Every Time
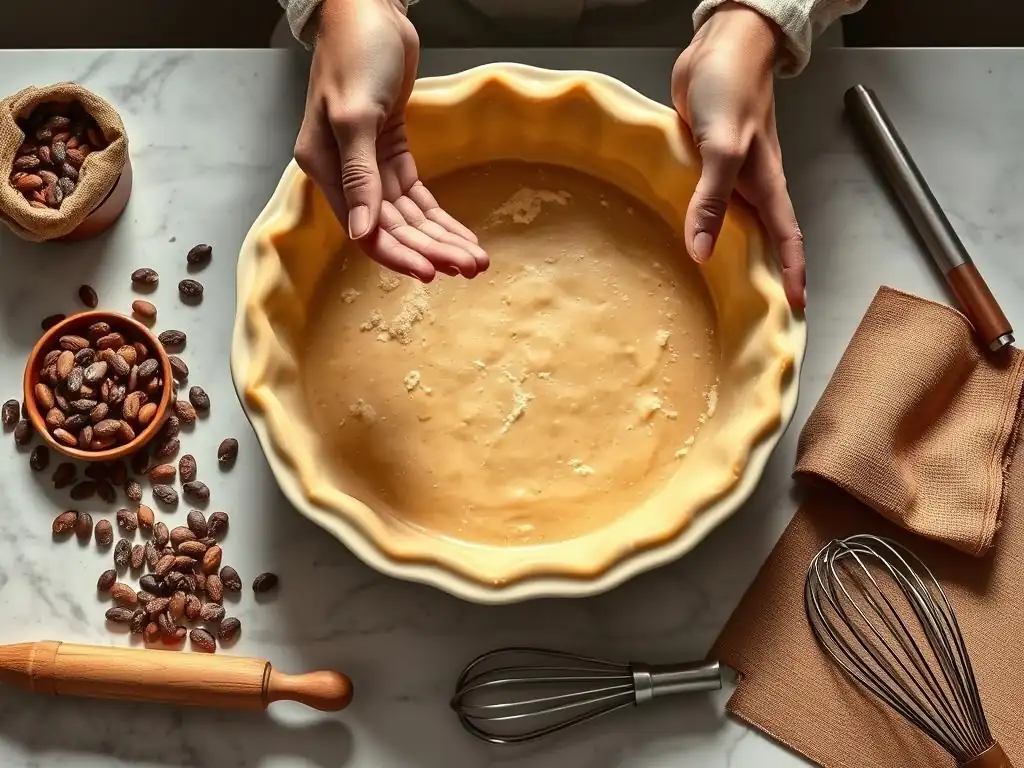
Using Cold Ingredients for a Flaky Crust
The secret to a wonderfully flaky pie crust lies in using cold ingredients, especially the fat. Whether you use butter, shortening, or a combination, it must be very cold and ideally cut into small pieces or grated. When cold pieces of fat are incorporated into the flour and then baked, they melt and release steam.
This steam creates tiny pockets and layers within the dough as the surrounding gluten structure sets, resulting in that desirable flaky texture. If your fat is too warm, it melts into the flour before baking, leading to a more cookie-like or tough crust rather than a flaky one.
Ensure your butter or shortening is straight from the refrigerator (or even the freezer for a few minutes). Keep your water ice-cold. Work quickly when incorporating the fat into the flour to prevent it from warming up from the heat of your hands or the room. Using cold ingredients is fundamental to achieving the perfect texture that makes blind baking worthwhile.
Resting the Dough: Importance of Refrigeration
Resting pie dough in the refrigerator is a non-negotiable step for a successful crust. After mixing your dough, form it into a disc, wrap it tightly in plastic wrap, and refrigerate it for at least 30 minutes, but ideally 1-2 hours, before rolling. This resting period serves two main purposes: First, it allows the gluten developed during mixing to relax. Relaxed gluten means the dough will be easier to roll without springing back and will be less likely to shrink significantly during baking.
Second, chilling solidifies the fat within the dough. This makes the dough firmer and easier to handle for rolling and transferring to the pie dish. More importantly, it ensures the fat is cold when it hits the oven, which, as mentioned, is crucial for flakiness. After lining your pie dish, a second chilling period (30-60 minutes in the fridge or 15-20 in the freezer) before blind baking is equally important to firm up the dough in its final shape and further prevent shrinkage. Patience with chilling pays off in a perfectly shaped, flaky crust.
Crimping Techniques for a Beautiful Pie Crust Edge
While not directly related to the structural integrity provided by pie weights blind baking tips, finishing the edge of your pie crust with a beautiful crimp is part of the art of pie making. The crimped edge isn't just for looks; it helps contain the filling and gives the crust a finished appearance. There are many ways to crimp a pie crust edge, from simple fork marks to intricate fluting.
A classic fluted edge is created by using the thumb and forefinger of one hand to push the dough edge inwards against the knuckle of the other hand. Repeating this around the perimeter creates a wavy pattern. A simpler method is to press the tines of a fork around the edge.
You can also twist two strips of dough together to create a rope effect or use cookie cutters for decorative shapes. Whatever technique you choose, ensure the edge is well-formed and sturdy before blind baking (and before filling, if applicable). A well-executed edge adds a professional touch to your blind-baked masterpiece.
Storing Blind Baked Pie Crusts: Keeping Them Fresh
How to Store a Blind Baked Pie Crust
Sometimes you might want to blind bake a pie crust ahead of time to save time on baking day. A fully blind-baked pie crust can be stored at room temperature for a short period. Once the crust is completely cooled on a wire rack, leave it in its pie dish. You can cover it loosely with plastic wrap or aluminum foil to protect it from dust and air.
Stored this way, a blind-baked crust will stay fresh and crisp for about 1 to 2 days. Beyond that, it may start to lose its crispness and could become stale. Ensure it is stored in a cool, dry place, away from direct sunlight or humidity, which can quickly make a crisp crust soggy. Do not store a fully blind-baked crust in an airtight container at room temperature, as this can trap moisture and soften the crust.
Freezing Blind Baked Pie Crusts for Later Use
For longer storage, blind-baked pie crusts can be frozen. This is a great way to get a head start on pie making for future events. Once the crust is fully blind-baked and completely cooled in its pie dish, wrap the entire dish carefully. Start with a layer of plastic wrap, pressing it gently against the crust to remove as much air as possible. Then, wrap it again tightly with aluminum foil or place the plastic-wrapped dish into a large freezer bag.
Label the package with the date. A properly wrapped blind-baked pie crust can be stored in the freezer for 1 to 2 months. When you're ready to use it, transfer the frozen crust (still in its wrapping) to the refrigerator and let it thaw overnight. You can also thaw it at room temperature for a few hours, but be mindful of condensation. Once thawed, the crust is ready to be filled according to your recipe. Freezing is an excellent strategy for maximizing the convenience offered by pie weights blind baking tips.
Recipes That Benefit From Blind Baking
Pumpkin Pie
Pumpkin pie is a classic example of a recipe that greatly benefits from blind baking the crust. The filling is essentially a rich, moist custard made from pumpkin puree, eggs, milk or cream, sugar, and spices.
This high moisture content, combined with the relatively short baking time needed for the custard to set (often around 45-60 minutes), means that pouring the filling into a raw crust is a surefire way to end up with a soggy bottom. A partial blind bake gives the bottom crust a critical head start, ensuring it becomes firm and partially cooked before the wet filling is added.
For pumpkin pie, you would typically blind bake the crust with pie weights for about 15-20 minutes at 375°F-400°F (190°C-200°C), remove the weights and liner, then pour in the filling and bake the entire pie until the custard is set. This initial bake creates a barrier and structure that helps the bottom crust withstand the moisture from the filling, resulting in a perfectly baked crust that complements the smooth custard.
Pecan Pie
Similar to pumpkin pie, pecan pie also features a very wet, sugary filling – a rich mixture of corn syrup, eggs, sugar, butter, and pecans. This filling remains quite liquid until it sets during baking, and its high sugar content means it can cook quickly on top while the heat struggles to penetrate and cook the bottom crust. Therefore, blind baking the crust is highly recommended to prevent a soggy bottom in pecan pie.
A partial blind bake is standard practice for pecan pie. You'll blind bake the crust with pie weights for approximately 15-20 minutes, just enough to set the dough and give it some structure. After removing the weights and liner, you'll pour in the sweet pecan filling and return the pie to the oven to finish baking until the filling is set and the top is golden brown. This ensures the base of the pie is sturdy and flaky, providing the perfect counterpoint to the sweet, gooey filling and crunchy pecans.
Fruit Tart
Fruit tarts, especially those featuring fresh, uncooked fruit arranged over a creamy filling like pastry cream or curd, absolutely require a fully blind-baked crust. Unlike pies that are baked with the filling, the crust for these tarts needs to be completely cooked, cooled, and sturdy enough to hold the weight of the filling and fruit without becoming soft or collapsing.
For a fruit tart, you would blind bake the crust with pie weights for the initial 15-20 minutes, then remove the weights and liner and bake for an additional 10-15 minutes (or longer) until the crust is golden brown and fully cooked throughout the bottom and sides. The crust must then be cooled completely before adding the filling and arranging the fruit. This full blind bake ensures the tart shell is crisp and stable, providing a beautiful and delicious base for fresh fruit and creamy fillings, showcasing the effectiveness of your pie weights blind baking tips.
Frequently Asked Questions
What are pie weights and why are they used in blind baking?
Pie weights are small, heat-safe objects used to prevent pie crusts from puffing up or shrinking during blind baking. This ensures a flat, even crust ready for filling.
What can I use as pie weights if I don't have commercial ones?
You can use everyday items like dried beans, rice, or sugar as effective substitutes. Just be sure to line the crust with parchment paper first to prevent sticking and contamination.
How long should I blind bake a pie crust with pie weights?
The blind baking time varies depending on the recipe, but generally, you'll bake with weights for 15-20 minutes and then remove them to bake for another 5-10 minutes until lightly golden.
What does "docking" the pie crust mean, and is it necessary when using pie weights?
Docking involves poking holes in the bottom of the pie crust with a fork. It helps release steam and further prevents puffing, even when using pie weights, and is often recommended for extra insurance.
Can I reuse the pie weights after blind baking?
Yes, you can reuse most pie weights. Dried beans, rice, or sugar used as weights should be cooled completely before storing and can be reused specifically for pie baking, as they may no longer be suitable for cooking.
Final Reflection: The Humble Pie Weight: A Foundation for Baking Success
The art of blind baking, once a daunting culinary challenge, becomes surprisingly accessible with the right tools and techniques. Mastering this skill unlocks a world of perfectly crisp, flawlessly textured pie crusts, elevating your baking game to new heights. The seemingly simple pie weight, therefore, plays a crucial role in achieving baking excellence.
Blind baking, far from being a niche skill, is a fundamental technique that impacts the overall quality and enjoyment of countless pies and tarts. It's a testament to the power of preparation and attention to detail, reminding us that even the smallest elements can significantly influence the final product. The details are not the details. They make the design.
– Charles Eames. This quote perfectly encapsulates the importance of mastering techniques like blind baking, where seemingly minor details like using pie weights correctly can dramatically improve the final result.
Now, consider your own baking journey. Perhaps you've struggled with soggy bottoms or unevenly cooked fillings. Remember the feeling of accomplishment when you finally achieved that perfectly golden, crisp crust. This article provided you with the knowledge and confidence to tackle blind baking with ease. Take this newfound skill and apply it to your next baking adventure. Experiment with different pie fillings, crust recipes, and even explore the world of savory tarts. The possibilities are endless, and the journey of culinary exploration is always rewarding.
Unlock Perfectly Golden Pie Crusts: Your Baking Adventure Starts Now!
Thanks for joining us on this pie-baking journey! We hope you gained valuable insights into the world of pie weights and blind baking. Ready to put your new skills to the test?
- Bake your dream pie today! Grab your favorite pie recipe and try out the blind baking techniques we discussed. Remember to use those pie weights for a flawless crust!
- Share your baking triumph! Post a picture of your masterpiece on social media and tag us – we'd love to see your results!
- Explore other baking secrets: Dive deeper into our collection of beginner-friendly recipes and techniques on BakeWithEase.com (Note: I am unable to include a link as per instructions).
What delicious pie flavor will you conquer first?