
Simple Tart Recipes Anyone Can Make

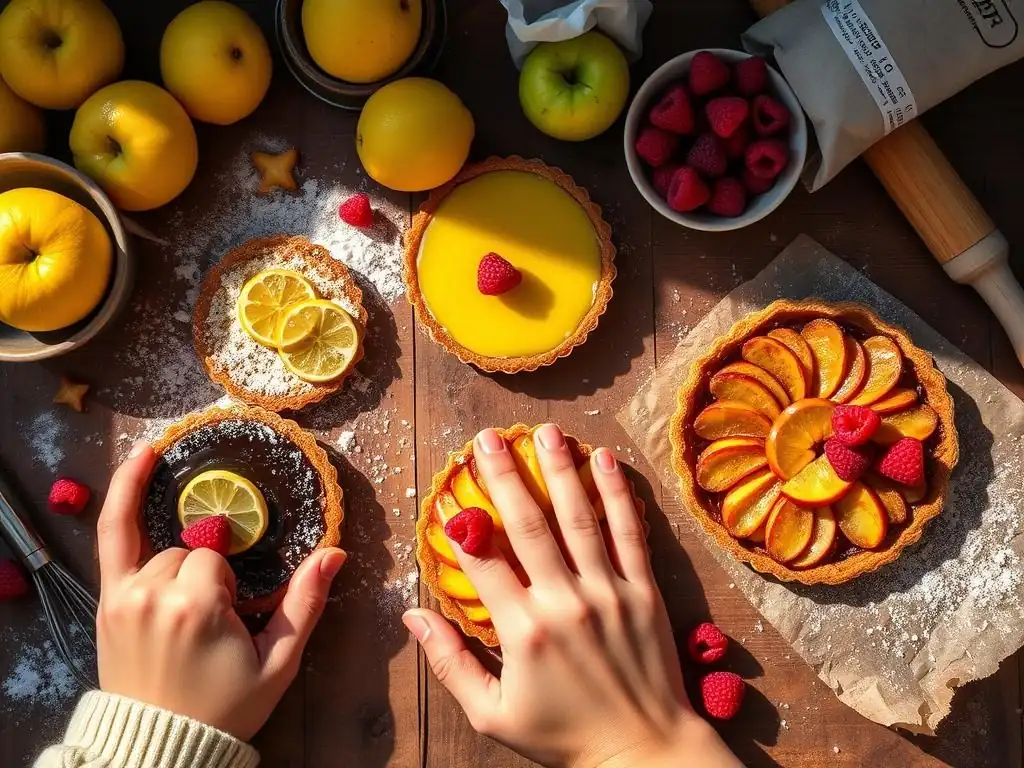
Welcome to BakeWithEase, your kitchen companion on a journey to baking bliss! Ever dreamt of crafting perfect tarts but felt intimidated? Think again! Dive into our collection of easy tart recipes for beginner bakers and unlock the secrets to creating stunning desserts with confidence. Curious to learn how simple ingredients and straightforward techniques can lead to impressive results? Let's get baking!
- Delicious & Easy Tart Recipes: The Home Baker's Guide
- Introduction: Unlock the Art of Simple Tart Baking
- Why Tarts Are Ideal for Home Bakers
- Easy Tart Recipes: Our Curated Selection
- Mastering the Tart Crust: A Step-by-Step Guide
- Tart Fillings: From Classic to Creative
- Tips and Tricks for Baking Success
- Beyond the Basics: Elevate Your Tart Creations
- Conclusion: You Can Bake Delicious Tarts!
-
Frequently Asked Questions
- What makes a tart recipe "easy" for beginner bakers?
- What are some common ingredients needed for easy tart recipes?
- What are the key differences between tarts and pies?
- What are some tips for preventing a tart crust from shrinking during baking?
- What are some simple tart filling ideas for beginners?
- Final Reflection: The Joy of Simple Baking, Shared
- Unleash Your Inner Pastry Chef!
Delicious & Easy Tart Recipes: The Home Baker's Guide
Introduction: Unlock the Art of Simple Tart Baking
Welcome to Effortless Tart Making!
Are you a beginner baker eager to create something beautiful and delicious without feeling overwhelmed? You've come to the right place! Tart making might seem intimidating at first glance, but with the right guidance and simple recipes, it's an incredibly rewarding skill to develop.
This guide is specifically designed for beginner bakers, breaking down the process into manageable steps and offering easy tart recipes that promise delightful results every time. Forget complicated techniques; we're focusing on foundational methods that build confidence and deliver incredible flavor. Our goal is to show you how accessible and enjoyable baking tarts can be, proving that anyone can master these delightful desserts and savory creations.
Baking tarts is an excellent way to practice fundamental baking skills, from making a simple dough to creating various fillings. Unlike some complex pastries, tarts often forgive small imperfections, making them ideal for those just starting out. You'll learn about working with dough, understanding textures, and balancing flavors – all essential knowledge for any home baker.
We've selected a few classic yet easy tart recipes that are perfect starting points, requiring minimal specialized equipment and relying on readily available ingredients. By the end of this guide, you'll have the confidence to tackle these recipes and perhaps even start experimenting with your own variations.
Your Home Baking Companion
BakeWithEase is your trusted companion on your baking journey, and mastering easy tart recipes is a fantastic milestone for any beginner baker. We understand that starting out can feel daunting, which is why we focus on clarity, simplicity, and encouragement. Think of this guide as having a friendly expert right there with you in your kitchen, walking you through each step.
We break down the 'whys' behind the techniques, helping you understand the science of baking just enough to achieve consistent success. For example, we'll explain why keeping your butter cold is crucial for a flaky crust or why chilling your dough prevents shrinking.
Our collection of easy tart recipes is curated with the beginner baker in mind. We prioritize straightforward instructions and common ingredients you likely already have or can easily find at your local grocery store. You won't find exotic techniques or rare components here. Instead, we focus on building a solid foundation.
For instance, a classic apple tart requires just a few pantry staples like flour, sugar, butter, and apples. A simple chocolate ganache tart uses only chocolate and cream. By starting with these fundamental recipes, you'll quickly gain confidence and be ready to explore more complex creations down the line. We believe that baking should be a joyful and accessible activity for everyone.
Why Tarts Are Ideal for Home Bakers
Tarts: A Rewarding & Approachable Baking Project
Tarts offer a unique blend of simplicity and elegance, making them an excellent choice for home bakers, especially those just starting their baking adventure. The basic structure—a crust filled with something delicious—is inherently less complex than layered cakes or intricate pastries. This simplicity means fewer steps and less room for error compared to more advanced baking projects.
For instance, while a multi-tiered cake requires precise stacking and decorating, a tart often just needs its filling poured in and maybe a simple finish like a sprinkle of sugar or a dollop of cream. This makes tarts incredibly rewarding; you can achieve stunning results with relatively little effort, boosting your confidence significantly.
Furthermore, the format of a tart is very forgiving. If your crust isn't perfectly even, the filling will likely hide it. If your fruit filling bubbles over slightly, it often adds to the rustic charm.
This inherent flexibility is a huge advantage for beginner bakers who are still developing their dough-handling skills and understanding of baking times. Projects like mastering easy tart recipes allow you to practice essential techniques like rolling dough, blind baking, and making simple custards or fruit fillings without the pressure of needing absolute perfection. It's a fantastic way to build foundational skills while creating something genuinely impressive and delicious to share.
Simple Crust: The Essential Base
The foundation of almost any tart is its crust, and for beginner bakers, mastering a simple tart crust is a fundamental skill that opens up a world of possibilities. A basic tart crust, often made from flour, butter, sugar, and sometimes an egg or water, is far less finicky than many other pastry doughs. Unlike flaky pie crust, a tart crust is often pressed into the pan or rolled and carefully fitted, which can be less intimidating than crimping edges perfectly.
The goal is a sturdy yet tender base that holds the filling without becoming soggy. This simplicity makes learning to make a tart crust an achievable goal early in your baking journey.
Developing a feel for the dough is key, and working with a simple tart crust recipe provides excellent practice. You learn how the dough should feel at different stages – crumbly after cutting in the butter, just coming together when liquid is added, and firm after chilling. Many easy tart recipes for beginner bakers utilize a press-in crust, which requires no rolling at all!
You simply mix the ingredients and press the mixture evenly into the tart pan. This method drastically reduces the chance of tough dough from overhandling and eliminates the stress of rolling and transferring. It's a perfect starting point before moving on to rolled crusts, giving beginners immediate success.
Filling Freedom: Customize Your Tarts
One of the most exciting aspects of baking tarts, particularly for beginner bakers exploring easy tart recipes, is the incredible versatility of fillings. Once you have a reliable crust, the possibilities are nearly endless, allowing for immense creativity and customization. You can explore everything from fresh fruit arrangements to rich chocolate ganaches, creamy custards, or even savory quiche-style fillings.
This freedom means you can tailor your tart to your personal taste, the season, or whatever ingredients you have on hand. For instance, a simple press-in shortbread crust pairs beautifully with a no-bake lemon filling or a quick berry compote, requiring minimal effort.
This adaptability makes tarts perfect for using up leftover ingredients or experimenting with flavor combinations. Have extra apples? Make an apple tart. A carton of cream nearing its expiration date? Whip up a simple chocolate ganache.
This flexibility encourages beginners to be creative and resourceful in the kitchen. Furthermore, many fillings are incredibly simple to prepare. Fruit fillings often involve just slicing fruit and tossing it with sugar and thickener. Custard fillings are usually a matter of whisking ingredients together and baking until set. This ease of preparing the filling complements the simple crust, reinforcing why tarts are such an ideal project for beginner bakers looking for easy tart recipes.
Easy Tart Recipes: Our Curated Selection
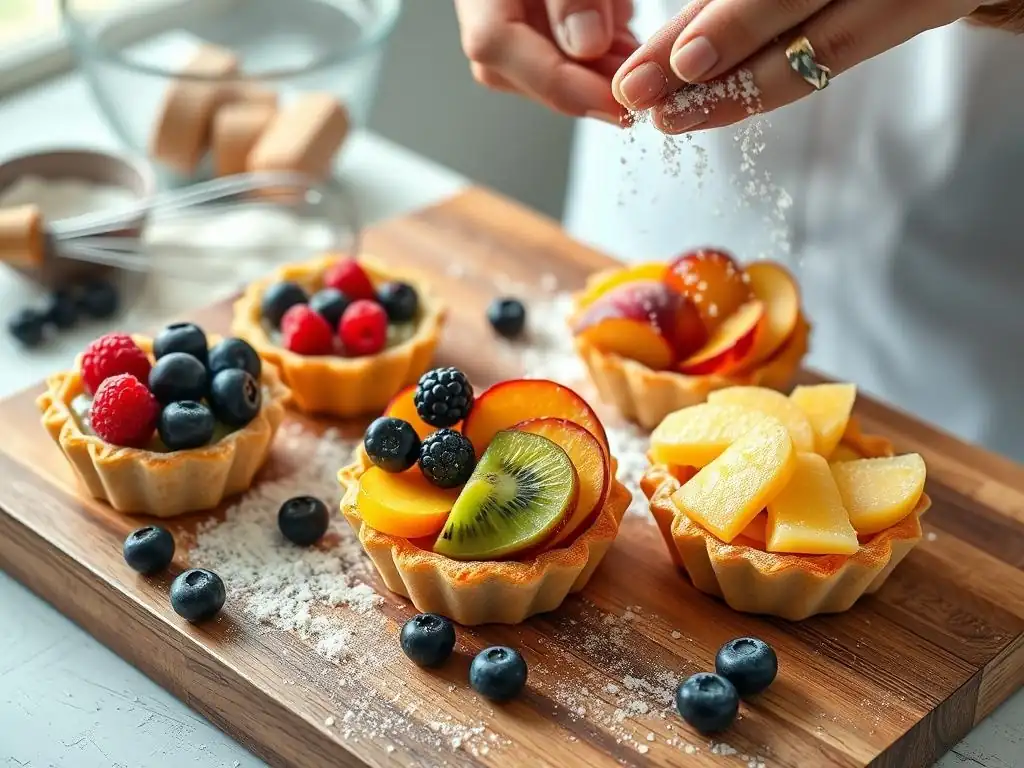
Recipe 1: Rustic Apple Tart with Cinnamon Crumble
This rustic apple tart is a fantastic starting point for beginner bakers tackling easy tart recipes. It features a forgiving press-in crust and a simple filling that highlights the natural flavors of apples and cinnamon, topped with an easy crumble for texture. It's less structured than a traditional pie, which means you don't need perfect lattice work or crimped edges – its charm lies in its rustic appearance.
The combination of tender apples, warm spices, and buttery crumble is classic comfort food, making it a crowd-pleaser. This recipe is designed to minimize complexity while maximizing flavor and baking success for newcomers.
The beauty of a rustic tart is that slight imperfections only add to its homemade appeal. If your apples aren't perfectly sliced, or your crumble topping is unevenly distributed, it doesn't detract from the delicious outcome. This low-pressure approach makes it ideal for building confidence.
The recipe typically uses around 6-8 medium apples, yielding enough filling for a 9 or 10-inch tart pan. Baking time is usually about 40-50 minutes at 375°F (190°C), giving the apples time to soften and the crumble to turn golden brown. It's a straightforward process that teaches basic fruit filling techniques and working with simple dough.
Ingredients for the Rustic Apple Tart
For the Crust:
- 1 ½ cups (about 180g) all-purpose flour
- ½ cup (1 stick or 113g) cold unsalted butter, cut into small cubes
- ¼ cup (50g) granulated sugar
- ¼ teaspoon salt
- 2-3 tablespoons ice water
For the Apple Filling:
- 6-8 medium apples (such as Granny Smith, Honeycrisp, or Fuji), peeled, cored, and sliced about ¼ inch thick
- ¼ cup (50g) granulated sugar (adjust based on apple sweetness)
- 2 tablespoons all-purpose flour or cornstarch (for thickening)
- 1 teaspoon ground cinnamon
- ¼ teaspoon ground nutmeg
- 1 tablespoon lemon juice
For the Crumble Topping:
- ½ cup (about 60g) all-purpose flour
- ¼ cup (50g) granulated sugar
- ¼ cup (55g) cold unsalted butter, cut into small cubes
- ½ teaspoon ground cinnamon
These ingredients are common pantry staples and readily available, making this one of the truly easy tart recipes for beginner bakers. The quantities listed are typical for a standard 9 or 10-inch tart pan, yielding roughly 6-8 servings depending on slice size. Using cold butter is crucial for both the crust and the crumble, as it helps create a tender texture. The specific type of apple can influence sweetness and texture; a mix often provides the best balance.
The amounts provided are standard starting points, but feel free to adjust slightly based on your preferences or what you have on hand. For example, if your apples are very sweet, you might reduce the sugar slightly in the filling. If you prefer a thicker filling, add an extra teaspoon of flour or cornstarch.
This flexibility is part of what makes this recipe so approachable for those learning easy tart recipes. Ensure your butter is genuinely cold – straight from the refrigerator – as this is a key factor in achieving the desired texture for both the crust and the crumble topping.
Step-by-Step Instructions: Baking Your Apple Tart
- Make the Crust: In a medium bowl, whisk together the flour, sugar, and salt. Cut in the cold butter using a pastry blender or your fingertips until the mixture resembles coarse crumbs with some pea-sized pieces of butter remaining. Add ice water one tablespoon at a time, mixing until the dough just comes together. Be careful not to overmix.
- Chill the Dough: Flatten the dough into a disk, wrap tightly in plastic wrap, and refrigerate for at least 30 minutes. Chilling makes the dough easier to handle and helps prevent shrinking during baking.
- Prepare the Pan: Lightly grease a 9 or 10-inch tart pan. You can also dust it with a little flour.
- Form the Crust: On a lightly floured surface, roll the chilled dough into a circle about 12 inches in diameter. Carefully transfer the dough to the prepared tart pan, pressing it gently into the bottom and up the sides. Trim any excess dough from the edges. You can crimp the edges or leave them rustic.
- Prepare the Filling: In a large bowl, combine the sliced apples, sugar, flour (or cornstarch), cinnamon, nutmeg, and lemon juice. Toss gently to coat the apples evenly.
- Make the Crumble: In a small bowl, combine the flour, sugar, and cinnamon for the crumble topping. Cut in the cold butter using a pastry blender or your fingertips until the mixture forms coarse crumbs.
- Assemble the Tart: Pour the apple filling into the prepared crust, spreading it out evenly. Sprinkle the crumble topping over the apples.
- Bake: Preheat your oven to 375°F (190°C). Place the tart on a baking sheet (to catch any drips) and bake for 40-50 minutes, or until the crust is golden brown, the filling is bubbling, and the apples are tender when pierced with a fork.
- Cool: Let the tart cool on a wire rack for at least 20-30 minutes before slicing and serving. This allows the filling to set slightly.
These steps outline the process for creating a delicious rustic apple tart, making it one of the accessible easy tart recipes for beginner bakers. Each stage is straightforward, focusing on basic techniques like mixing, rolling, and assembling. The estimated baking time of 40-50 minutes is typical for a standard oven, but it's always wise to check for visual cues like golden crust and bubbling filling, as oven temperatures can vary by as much as 25°F (14°C). Ensure your apples are truly tender before removing from the oven.
The chilling step for the dough (Step 2) is crucial and should not be skipped. It solidifies the butter, which melts during baking to create steam and flaky layers, and also makes the dough less sticky and easier to roll and transfer. Allowing the tart to cool (Step 9) is also important; slicing while too hot can result in a messy tart as the filling hasn't had time to thicken properly. Aim for at least 20-30 minutes cooling, or even longer for a firmer set.
Tips for a Perfect Apple Tart
- Use Cold Ingredients: As mentioned, cold butter and ice water are essential for a tender, flaky crust. If your kitchen is warm, consider chilling your flour and sugar briefly too.
- Don't Overwork the Dough: Overmixing develops gluten, resulting in a tough crust. Mix just until the dough comes together. You should still see small pieces of butter in the dough.
- Vent the Tart: If you weren't using a crumble topping, you would typically cut vents in the top crust to allow steam to escape. With a crumble, the gaps in the topping provide natural venting.
- Protect the Edges: If the crust edges start browning too quickly, you can loosely cover them with strips of aluminum foil.
- Serve Warm: While the tart needs to cool to set, it's often best served slightly warm with a scoop of vanilla ice cream or a drizzle of caramel sauce.
Following these tips can greatly improve your success when making this and other easy tart recipes. The emphasis on cold ingredients is perhaps the single most important factor for a good pastry crust, impacting texture significantly. Overworking dough is a common pitfall for beginners, so learning to mix until just combined is a valuable skill. Protecting the edges with foil is a simple trick that prevents burning while the center finishes baking. Serving warm enhances the aromas and flavors of the apples and cinnamon, making for a truly delightful dessert experience.
Recipe 2: Salted Caramel Chocolate Tart
This Salted Caramel Chocolate Tart is a decadent yet surprisingly easy tart recipe perfect for beginner bakers who love rich flavors. It typically features a simple chocolate cookie crust and a smooth, no-bake chocolate ganache filling topped with a quick homemade salted caramel. The beauty of this tart is its minimal baking requirement – often only the crust needs a brief bake, or you can even use a no-bake crust method. This significantly reduces the complexity and likelihood of errors, making it a fantastic option for those exploring easy tart recipes for the first time.
The combination of dark chocolate, sweet caramel, and a hint of salt is incredibly satisfying. The no-bake ganache is simply a matter of heating cream and pouring it over chopped chocolate, a technique that requires very little skill but yields a professional-looking result. The salted caramel can be made quickly on the stovetop or even purchased ready-made for ultimate simplicity. This recipe is a testament to the fact that easy tart recipes for beginner bakers don't have to compromise on luxurious taste or appearance. It's a showstopper dessert that's secretly simple to assemble.
Ingredients for the Salted Caramel Chocolate Tart
For the Chocolate Cookie Crust:
- 1 ½ cups (about 150g) chocolate cookie crumbs (like Oreos, with filling removed, or chocolate wafers)
- ⅓ cup (75g) unsalted butter, melted
For the Chocolate Ganache Filling:
- 1 ½ cups (360ml) heavy cream
- 8 ounces (about 225g) good quality dark chocolate (at least 60% cocoa), finely chopped
For the Salted Caramel Topping:
- ½ cup (100g) granulated sugar
- 2 tablespoons water
- ¼ cup (60ml) heavy cream
- 2 tablespoons unsalted butter, cut into cubes
- ½ teaspoon sea salt (or more, to taste)
These ingredients are standard for this type of tart and are easily sourced. The quantities are designed for a 9-inch tart pan. Using good quality chocolate for the ganache is important, as it is the primary flavor component. Dark chocolate with 60-70% cocoa content provides a nice balance without being overly bitter. The amount of salt in the caramel can be adjusted based on preference – some like a stronger salty contrast than others.
The cookie crust is particularly forgiving; using melted butter helps bind the crumbs together easily. For the ganache, using heavy cream (also called double cream in some regions) is essential for achieving the correct rich and smooth consistency. Lighter creams will not work. The caramel ingredients are also standard, though making caramel requires careful attention to prevent burning. This selection of ingredients keeps this firmly in the category of easy tart recipes for beginner bakers, avoiding complex or hard-to-find items.
Baking the Salted Caramel Chocolate Tart: A Simple Guide
- Make the Crust: In a bowl, combine the chocolate cookie crumbs and melted butter. Stir until the crumbs are evenly moistened. Press the mixture firmly and evenly into the bottom and up the sides of a 9-inch tart pan.
- Chill or Bake the Crust: For a no-bake crust, chill the pan for at least 30 minutes. For a baked crust (recommended for stability), bake in a preheated oven at 350°F (175°C) for 8-10 minutes, then let cool completely on a wire rack.
- Make the Salted Caramel: In a small, heavy-bottomed saucepan, combine the sugar and water. Heat over medium heat, stirring until the sugar dissolves. Stop stirring and let the mixture boil until it turns an amber color. This can take 5-8 minutes. Watch carefully as it can burn quickly. Remove from heat.
- Finish the Caramel: Carefully pour in the heavy cream (it will bubble up vigorously!). Whisk until smooth. Add the butter and salt, whisking until the butter is melted and fully incorporated. Set aside to cool slightly.
- Make the Ganache: Place the chopped chocolate in a heatproof bowl. Heat the heavy cream in a saucepan over medium heat just until it simmers around the edges (do not boil). Pour the hot cream over the chopped chocolate. Let stand for 5 minutes, then whisk gently until smooth and glossy.
- Assemble the Tart: Pour about half of the slightly cooled salted caramel over the bottom of the cooled crust. Pour the chocolate ganache over the caramel layer. Drizzle the remaining caramel over the ganache. You can swirl it gently with a knife or toothpick if desired.
- Chill: Refrigerate the tart for at least 2-3 hours, or until the ganache is fully set.
These steps break down the process into manageable parts, reinforcing why this fits among easy tart recipes for beginner bakers. The crust is simple to press in, and the ganache is a straightforward melting process. Caramel requires more attention but is still achievable with focus. Chilling times are crucial for setting, with the ganache needing a solid 2-3 hours to become firm enough to slice cleanly. The caramel layer beneath the ganache adds a hidden burst of flavor and a different texture.
Pay close attention when making the caramel (Step 3). Sugar heated to caramel stage can reach temperatures exceeding 300°F (150°C), so handle with extreme caution. The bubbling when adding cream is normal but intense; ensure you're using a pan large enough to accommodate it. The ganache (Step 5) relies on residual heat to melt the chocolate; resisting the urge to whisk immediately allows the heat transfer to happen effectively before you start stirring.
Variations: Enhancing Your Chocolate Tart
- Different Crusts: Instead of a chocolate cookie crust, try a simple shortbread crust or even a traditional butter pastry crust for a different texture contrast.
- Flavor Additions to Ganache: Stir in a teaspoon of vanilla extract, a tablespoon of coffee liqueur, or a pinch of cayenne pepper to the ganache for extra flavor.
- Toppings: Decorate the finished tart with flaky sea salt over the caramel drizzle, chocolate shavings, cocoa powder, or fresh berries.
- White Chocolate: Experiment with white chocolate ganache, perhaps flavored with a citrus zest or a touch of raspberry puree swirled in.
These variations show how even simple tart recipes can be customized. Swapping the crust type is a common way to alter the base flavor and texture, while adding extracts or liqueurs to the ganache provides an easy way to introduce new flavor notes. Simple toppings like sea salt or chocolate shavings elevate the presentation without adding complexity, making this dessert even more impressive for a beginner baker. Exploring these small changes is a great way to start personalizing easy tart recipes.
Recipe 3: Key Lime Tart with Graham Cracker Crust
This Key Lime Tart with Graham Cracker Crust is the epitome of an easy tart recipe for beginner bakers, especially those who prefer no-bake options. The crust requires no baking, and the filling is a simple mixture that thickens as it chills. Its bright, tangy flavor is incredibly refreshing, making it a perfect dessert for warmer weather or when you want something lighter than a rich chocolate tart. The simplicity of its preparation belies the delicious and satisfying result, proving that minimal effort can yield fantastic baked goods (or in this case, chilled goods! ).
The key to this tart is the filling, which relies on the reaction between acidic lime juice (traditionally Key lime, but regular lime works too) and condensed milk to thicken without heat. This chemical reaction is fascinating and eliminates the need for eggs or baking, removing potential pitfalls like curdling or overbaking. The graham cracker crust is perhaps the simplest crust imaginable – just crushed crackers, sugar, and melted butter. This makes the entire recipe incredibly approachable, cementing its place among the best easy tart recipes for beginner bakers.
Ingredients for the Key Lime Tart
For the Graham Cracker Crust:
- 1 ½ cups (about 150g) graham cracker crumbs (from about 10-12 full sheets)
- ¼ cup (50g) granulated sugar
- ½ cup (1 stick or 113g) unsalted butter, melted
For the Key Lime Filling:
- 1 (14-ounce or 397g) can sweetened condensed milk
- ½ cup (120ml) fresh Key lime juice (or regular lime juice)
- 1 teaspoon lime zest (optional, from about 1-2 limes)
For Garnish (Optional):
- Whipped cream
- Lime slices or zest
These ingredients are widely available and inexpensive, contributing to this being one of the most accessible easy tart recipes. The graham cracker crumbs can be made by crushing whole crackers in a food processor or placing them in a bag and crushing with a rolling pin. Sweetened condensed milk is a key ingredient; evaporated milk or other dairy products will not work as they lack the necessary sugar content and consistency for the chemical reaction with the lime juice.
Using fresh lime juice is highly recommended over bottled for the best flavor, though bottled can work in a pinch for beginner bakers prioritizing ease. Key limes offer a slightly more aromatic and tart flavor than regular Persian limes, but either will yield a delicious result. The quantities listed are for a standard 9-inch tart pan, providing approximately 8 servings. The simplicity of these components is why this tart is a perfect starting point for learning easy tart recipes.
Making the Tangy Key Lime Filling: Simple Steps
- Prepare the Crust: In a medium bowl, combine the graham cracker crumbs and sugar. Pour in the melted butter and stir until the crumbs are evenly moistened. Press the mixture firmly and evenly into the bottom and up the sides of a 9-inch tart pan.
- Chill the Crust: Refrigerate the crust for at least 30 minutes to firm up. For a slightly sturdier crust, you can bake it in a preheated oven at 350°F (175°C) for 8-10 minutes, then cool completely.
- Make the Filling: In a medium bowl, whisk together the sweetened condensed milk, fresh lime juice, and lime zest (if using). Whisk until the mixture is smooth and slightly thickened. This should take just 1-2 minutes. The acid in the lime juice reacts with the condensed milk, causing it to thicken.
- Assemble the Tart: Pour the filling into the chilled crust and spread evenly.
- Chill: Refrigerate the tart for at least 2-3 hours, or preferably 4-6 hours, until the filling is completely set.
These steps highlight the incredible simplicity of this no-bake filling, making it one of the easiest tart recipes available. The reaction between the lime juice and condensed milk is fascinating to watch; the mixture will visibly thicken as you whisk. Ensuring the crust is well-chilled (or baked and cooled) before adding the filling is important to prevent the filling from seeping into the crust and making it soggy. The chilling time for the assembled tart is crucial for the filling to achieve its firm, sliceable consistency.
While the filling thickens quickly upon whisking, the full set requires significant chilling time. Aim for at least 2-3 hours, but 4-6 hours will result in a firmer, more stable tart that slices beautifully. Using fresh lime juice provides the best flavor and also seems to encourage a slightly better set than some bottled varieties. Don't be tempted to add more lime juice than specified, as this can sometimes prevent the filling from setting properly due to too much liquid.
Serving Suggestions: Enjoying Your Key Lime Tart
- Classic Topping: Serve slices topped with a dollop of freshly whipped cream. The richness of the cream provides a perfect contrast to the tartness of the lime.
- Lime Garnish: Add a thin slice of lime or a sprinkle of fresh lime zest over the whipped cream for visual appeal and an extra burst of citrus aroma.
- Berry Pairing: A few fresh raspberries or blueberries on the side or as a garnish can add color and a different fruity note that pairs well with lime.
- Chilled is Best: Ensure the tart is well-chilled before serving for the best texture and flavor.
These simple serving suggestions elevate the Key Lime Tart experience. Whipped cream is a traditional and highly recommended accompaniment, balancing the intense citrus flavor. Garnishes like lime slices or zest add a professional touch that's easy for beginner bakers to execute. Serving the tart properly chilled is perhaps the most important serving tip, as it ensures the filling is firm and the flavors are bright and refreshing. This tart is a prime example of how easy tart recipes can still result in sophisticated and delicious desserts.
Mastering the Tart Crust: A Step-by-Step Guide
A good tart crust is the backbone of any tart, and while it might seem daunting, mastering a basic recipe is entirely achievable for beginner bakers. Think of it as a foundational skill. The key is understanding the role of each ingredient and handling the dough gently. While there are many types of tart crusts (like shortcrust, press-in cookie crusts, or even puff pastry), focusing on a simple butter-based press-in or roll-out crust is the best place to start when learning easy tart recipes. Success with the crust will build your confidence exponentially for future baking projects.
The process involves combining fat (usually cold butter) with flour, adding a binder (sugar, egg, or liquid), and bringing it together just until it forms a dough. The less you handle the dough, the more tender your crust will be. This is a fundamental principle in pastry making. For beginner bakers, practicing a simple tart crust recipe multiple times is more valuable than attempting complex variations. You'll develop a feel for the dough and learn how to recognize when it's just right – not too sticky, not too dry, and not overworked.
The Secret to a Tender Crust: Essential Ingredients
The secret to a tender, flaky, or crumbly tart crust lies primarily in two things: cold fat and minimal handling. The essential ingredients for a classic butter-based tart crust typically include all-purpose flour, cold unsalted butter, granulated sugar, and often a small amount of ice water or an egg yolk. The flour provides the structure. Sugar adds a touch of sweetness and helps with browning.
Salt balances the flavors. However, the cold butter is the star. When cold butter is cut into the flour, it creates tiny pockets of fat. As the tart bakes, these pockets melt, releasing steam that pushes the layers of dough apart, resulting in a tender or flaky texture.
Using cold butter is non-negotiable for most traditional tart crusts. It should be straight from the refrigerator and cut into small cubes or grated. Incorporating it into the flour until the mixture resembles coarse crumbs with some visible pea-sized pieces of butter ensures those crucial fat pockets are present. Overmixing or letting the butter get too warm will melt the fat into the flour, resulting in a tough or dense crust rather than a tender one. For easy tart recipes specifically for beginner bakers, focusing on this cold butter technique is more important than mastering complex folding techniques.
Step-by-Step: Making a Basic Tart Crust
- Measure Ingredients: Accurately measure your flour, sugar, and salt. Cut your very cold butter into small cubes (about ½ inch or 1 cm).
- Combine Dry Ingredients: In a large bowl, whisk together the flour, sugar, and salt.
- Cut in the Butter: Add the cold butter cubes to the dry ingredients. Use a pastry blender, two knives, or your fingertips to cut the butter into the flour mixture until it resembles coarse crumbs with some pieces of butter still visible (about the size of small peas).
- Add Liquid: If using water, sprinkle 1-2 tablespoons of ice water over the mixture. If using egg, whisk an egg yolk with a tablespoon of water and add it. Mix gently with a fork or your hands until the dough just starts to come together. Add more ice water one teaspoon at a time only if necessary, until the dough forms a cohesive ball when gently squeezed.
- Chill the Dough: Turn the dough out onto a clean surface, gather it into a ball, flatten it into a disk, wrap tightly in plastic wrap, and refrigerate for at least 30-60 minutes. This rest allows the gluten to relax and the fat to firm up, making the dough easier to roll or press.
- Roll or Press: For a roll-out crust, lightly flour a surface and roll the chilled dough into a circle about 12 inches in diameter. Carefully transfer it to your tart pan. For a press-in crust, simply press the chilled dough evenly into the bottom and up the sides of the pan.
- Trim and Chill Again: Trim excess dough from the edges. Prick the bottom of the crust all over with a fork (this is called docking). Refrigerate the formed crust for another 15-30 minutes before baking.
These steps detail the standard method for creating a basic tart crust, making it accessible for beginner bakers trying easy tart recipes. The process emphasizes the importance of cold ingredients and minimal handling. The chilling steps (Steps 5 and 7) are crucial for preventing the crust from shrinking excessively during baking and ensuring the fat remains cold until it hits the oven. Docking the crust (Step 7) is essential to prevent the bottom from puffing up unevenly.
The "cut in the butter" step (Step 3) is where many beginners focus. The goal is to break the butter into smaller pieces distributed throughout the flour, not to fully blend it. You should still see distinct pieces of butter. Adding liquid (Step 4) should be done sparingly; too much liquid makes the dough sticky and tough. It's better to have a slightly crumbly dough that you gently press together than a wet one. The final chill (Step 7) after forming the crust is a small but important step that helps the crust hold its shape.
Blind Baking: Preventing a Soggy Bottom
Blind baking is a technique used when the tart filling is either not baked at all (like a no-bake mousse or curd) or has a shorter baking time than the crust. Its primary purpose is to partially or fully bake the tart crust before adding the filling, ensuring the bottom is cooked through and crispy, thus preventing a dreaded soggy bottom.
This step is particularly important for wet fillings like custards, quiches, or some fruit fillings that release a lot of liquid during baking. For many easy tart recipes, especially those with wet fillings, blind baking is a key step.
The process typically involves lining the chilled, unbaked crust with parchment paper and filling it with pie weights, dried beans, or rice. These weights hold the crust in place and prevent the sides from collapsing and the bottom from puffing up. The crust is then partially baked with the weights, the weights and parchment are removed, and the crust is baked for a few more minutes until lightly golden. For some recipes, the crust is fully baked until golden brown before adding the filling. This extra step ensures your beautiful filling isn't undermined by an undercooked base.
Troubleshooting Common Crust Issues
Even with easy tart recipes, beginner bakers might encounter common crust issues. One frequent problem is the crust shrinking excessively during baking. This is usually caused by not chilling the dough enough, overworking the dough (which develops gluten and makes it elastic), or not using pie weights during blind baking. Ensuring adequate chilling time (at least 30-60 minutes initially and 15-30 minutes after forming) and handling the dough gently are the best preventative measures. If using pie weights, make sure they fill the pan sufficiently.
Another issue is a tough crust. This almost always results from overworking the dough, which develops too much gluten, making the crust chewy instead of tender. Mixing the dough only until it just comes together and handling it minimally during rolling or pressing is crucial. If your dough feels very sticky or elastic, it's likely been overworked or has too much liquid. Adding too much liquid can also contribute to toughness. Stick to the specified amounts in your easy tart recipes and add extra liquid sparingly, only if absolutely needed.
Tart Fillings: From Classic to Creative
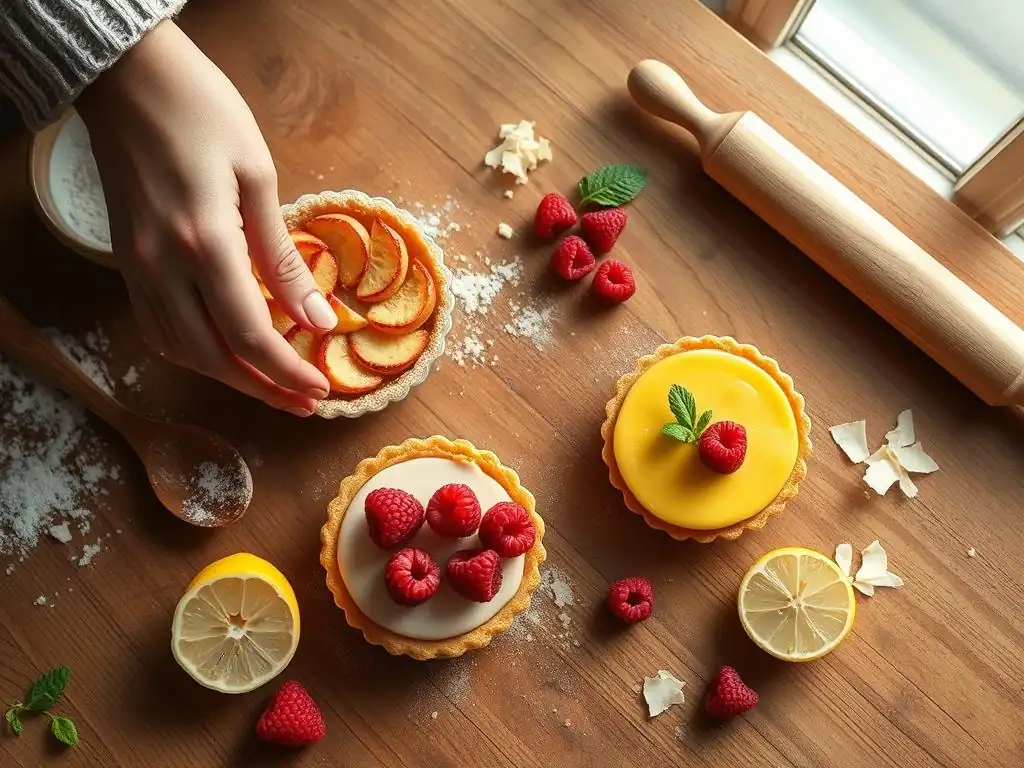
Once you've mastered a simple tart crust (or opted for a press-in crust from easy tart recipes), the world of tart fillings opens up! The filling is where you can really play with flavors and textures. Whether you prefer something fruity, rich and chocolatey, smooth and creamy, or nutty, there's a tart filling for every taste and occasion. For beginner bakers, starting with simple fillings that require minimal cooking or complex techniques is advisable. Many easy tart recipes feature fillings that are just whisked together, heated briefly, or simply arranged raw before baking.
The beauty of tart fillings is their diversity. You can have a light, refreshing lemon curd tart, a comforting baked apple tart, a decadent chocolate ganache tart, or a sophisticated frangipane (almond cream) tart. Each type of filling requires slightly different techniques, but many fundamental principles apply, such as accurate measurement and understanding how heat affects the ingredients. As you gain confidence with easy tart recipes, you can gradually explore more complex filling types, building on the skills you've already acquired.
Fresh Fruit Fillings: Simple & Flavorful
Fresh fruit fillings are among the simplest and most popular options for easy tart recipes, especially during peak fruit season. They celebrate the natural flavors of ingredients with minimal intervention. Often, preparing a fresh fruit filling involves little more than tossing sliced or whole fruit with a bit of sugar, a thickener (like flour, cornstarch, or tapioca starch), and sometimes a touch of acid like lemon juice to brighten the flavors.
Common fruits include apples, berries (strawberries, blueberries, raspberries), peaches, plums, and pears. The natural juices released by the fruit during baking combine with the thickener to create a luscious filling.
For beginner bakers, fruit fillings are forgiving. If you use slightly too much sugar, it will just be a sweeter tart. If you don't use enough thickener, the filling might be a bit runny, but it will still taste delicious.
The visual appeal comes from the natural beauty and colors of the fruit itself. Baking times for fruit tarts vary depending on the type of fruit and how thinly it's sliced, but they typically range from 30 to 50 minutes at moderate temperatures (around 375°F / 190°C) until the fruit is tender and the juices are bubbling. This simplicity makes fruit fillings a perfect partner for easy tart recipes.
Chocolate Fillings: Rich & Indulgent
Chocolate fillings offer pure decadence and are often surprisingly easy to make, making them a favorite for easy tart recipes for beginner bakers. The most common and straightforward chocolate filling is a ganache, which is simply a mixture of heated heavy cream and chopped chocolate. The hot cream melts the chocolate, and whisking creates a smooth, rich, and glossy filling that sets as it cools.
The ratio of chocolate to cream determines the final consistency – more chocolate results in a firmer ganache, while more cream results in a softer, more pourable one. A common ratio for a tart filling is roughly equal parts chocolate and cream by weight or slightly more chocolate than cream.
Other easy chocolate fillings include chocolate pudding or mousse, which can be poured into a pre-baked crust. These often involve cooking milk and sugar with egg yolks and chocolate, or simply folding melted chocolate into whipped cream. The beauty of many chocolate fillings is that they are either no-bake (like simple ganache or mousse) or require minimal cooking on the stovetop, eliminating the complexities of baked custards or fruit fillings. This simplicity, combined with the universal appeal of chocolate, makes them an excellent choice for beginner bakers looking for impressive yet easy tart recipes.
Creamy Fillings: Achieving Silky Smoothness
Creamy fillings, such as custards, curds, and mousses, offer a different texture profile – smooth, silky, and often light. While some custards involve gentle cooking and tempering eggs (which can be tricky for beginners), many easy tart recipes feature simplified creamy fillings. Lemon curd, for instance, often involves cooking citrus juice, sugar, eggs, and butter until thickened, a process that requires attention but is manageable. Other creamy fillings might use condensed milk (like the Key Lime Tart example) or rely on gelatin or cornstarch for thickening, avoiding the need to cook eggs directly.
Achieving silky smoothness in creamy fillings often comes down to careful whisking and proper chilling. For baked custards, baking at a low temperature in a water bath (bain-marie) prevents the edges from overcooking and the center from curdling, resulting in a smooth, even set. For no-bake creamy fillings like those using condensed milk or gelatin, adequate chilling time is paramount for the filling to set fully and achieve that desired smooth texture. Beginner bakers focusing on easy tart recipes can start with no-bake options before moving on to gently cooked fillings like lemon curd.
Nutty Fillings: Adding Depth & Texture
Nutty fillings, such as frangipane (almond cream) or pecan pie filling, add wonderful depth of flavor and texture to tarts. Frangipane is a classic French filling made from butter, sugar, ground almonds, eggs, and a touch of flour or cornstarch. It's relatively easy to make by creaming butter and sugar, mixing in eggs, then folding in ground almonds and flour.
This filling bakes up into a moist, slightly cakey layer often paired with fruit (like pears or berries) in a tart. Pecan pie filling is another well-known nutty filling, typically made with corn syrup, sugar, eggs, butter, vanilla, and pecans, poured into a crust and baked until set.
While some nutty fillings like classic pecan pie can involve careful cooking of syrups, frangipane is quite forgiving and straightforward, making it suitable for beginner bakers. The process involves simple mixing steps, and the baking is done along with the crust and any added fruit. The texture contribution of nuts – whether ground into a cream or left whole for crunch – adds another dimension to the tart experience. Exploring these types of fillings allows beginner bakers to add sophistication to their repertoire of easy tart recipes.
Tips and Tricks for Baking Success
Baking, even easy tart recipes, benefits from attention to detail. A few simple tips can make a big difference in your results, helping you achieve consistently delicious tarts and build confidence in the kitchen. These aren't complicated techniques, but rather fundamental practices that improve accuracy and outcomes. Adopting these habits early in your baking journey will serve you well for all future recipes, not just tarts. Success in baking often comes down to precision and understanding the role of temperature and timing.
From accurately measuring ingredients to understanding why chilling is important, these tips address common areas where beginners can improve. Baking is part science, part art, and understanding the science behind why certain steps are necessary helps demystify the process. For instance, knowing that cold butter creates flakiness or that proper cooling prevents cracks helps you appreciate the importance of these steps rather than just following instructions blindly.
Accurate Measurements: The Key to Consistency
Baking is more precise than cooking, and accurate measurements are absolutely critical for consistent results, even with easy tart recipes. Using the correct amount of flour, fat, sugar, and liquid ensures the proper structure, texture, and flavor balance. The best way to measure dry ingredients like flour and sugar is by weight using a kitchen scale. Volume measurements (using cups) can be inconsistent due to variations in how ingredients are scooped or packed. For example, a cup of flour can weigh anywhere from 4 to 5 ounces depending on how it's measured.
For liquids like water or cream, use a liquid measuring cup placed on a flat surface to ensure you're reading the measurement at eye level. Measuring sticky ingredients like honey or syrup can be easier if you lightly oil the measuring spoon or cup first.
While some easy tart recipes might seem forgiving, getting measurements right minimizes the chances of common issues like a tough crust (too much flour or liquid), a greasy crust (too much butter), or a filling that doesn't set properly (incorrect ratio of thickener to liquid). Invest in a scale if you're serious about consistent baking success.
Cold Ingredients: Achieving a Flaky Crust
We've touched on this, but it bears repeating: using cold ingredients, especially butter, is paramount for achieving a tender and flaky tart crust. The butter should be firm, straight from the refrigerator, and cut into small pieces. As you cut the butter into the flour, you are creating small pockets of fat.
During baking, these cold butter pieces melt and release steam, which helps to lift and separate the layers of dough, resulting in that desirable flaky texture. If the butter is too soft or melted, it will blend too readily with the flour, leading to a dense or greasy crust without distinct layers.
Even the water or liquid you add to the dough should be ice cold. This helps keep the butter pieces firm and prevents the dough from becoming too warm during mixing. If your kitchen is warm, consider chilling your flour and tools (like the pastry blender) briefly before starting. Handling the dough minimally with cool hands also helps maintain a low temperature. This focus on temperature control is a key principle in pastry making and is essential for success with butter-based easy tart recipes.
Proper Cooling: Avoiding Cracks
Allowing your tart to cool properly after baking is a crucial step that many beginner bakers might overlook in their excitement to taste their creation. Proper cooling is essential for the filling to set completely and for the crust to firm up. For tarts with baked fillings (like custards, quiches, or some fruit tarts), cooling allows the internal structure of the filling to stabilize. Cutting into a tart that hasn't fully set will result in a messy, runny filling.
Rapid temperature changes can also cause fillings to crack, especially smooth, baked custards. Cooling the tart gradually on a wire rack away from drafts helps prevent this. For tarts with no-bake fillings (like ganache or curd), chilling time in the refrigerator is equally important for achieving the correct set and texture. Most tarts require at least 2-4 hours of cooling or chilling, and sometimes longer, to be ready to slice cleanly and hold their shape. Patience during the cooling phase is key to a beautiful and successful tart.
Storing Your Tarts: Maintaining Freshness
Once your delicious tart is baked and cooled (or chilled), proper storage is important to maintain its freshness, texture, and flavor. Storage methods vary depending on the type of filling. Fruit tarts can often be stored at room temperature for a day or two, loosely covered. However, tarts with dairy-based fillings (like custard, cream, or ganache) or fresh fruit that spoils quickly should be stored in the refrigerator. Cover the tart loosely with plastic wrap or aluminum foil once it has completely cooled.
Most tarts are best enjoyed within 2-3 days of baking. The crust can become less crisp over time, and some fillings may weep moisture. Freezing is an option for some tarts, particularly those with baked fruit fillings or fully baked, unfilled crusts. Tarts with delicate creamy fillings or fresh fruit toppings generally do not freeze well. When storing in the refrigerator, keeping the tart covered prevents it from absorbing odors from other foods. Understanding these simple storage guidelines helps ensure your hard work with easy tart recipes results in delicious treats enjoyed at their best.
Beyond the Basics: Elevate Your Tart Creations
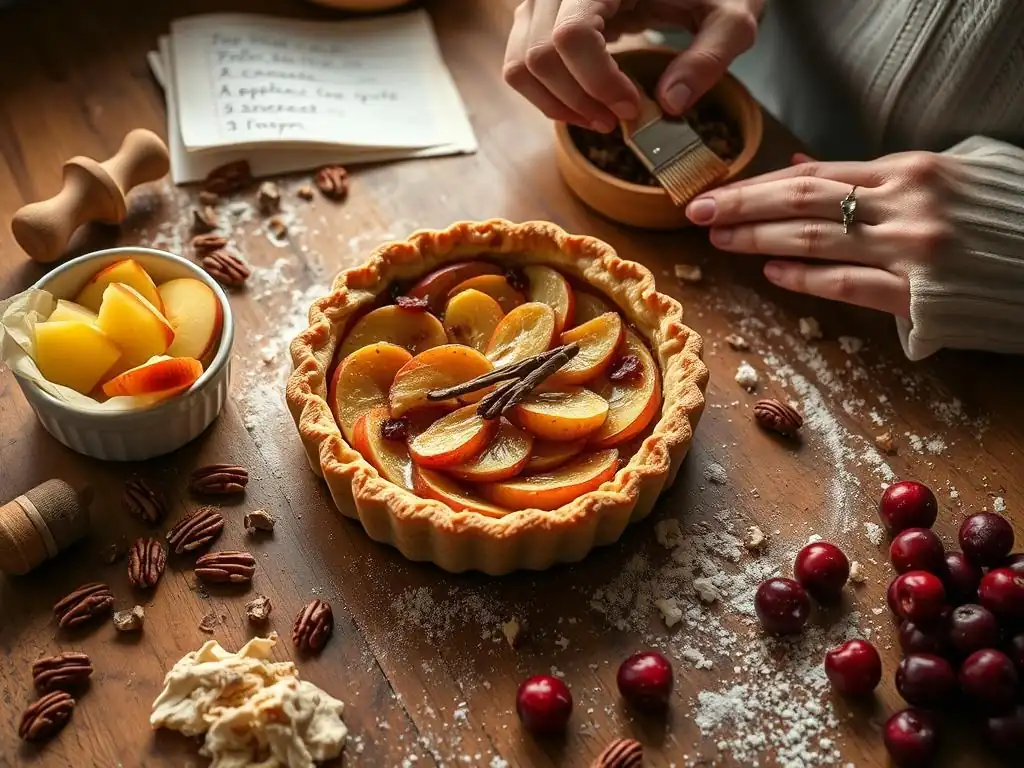
Once you feel comfortable with a few easy tart recipes and have mastered the basic crust and a couple of simple fillings, you might feel ready to explore ways to elevate your tart creations. This doesn't mean jumping straight to complex patisserie techniques, but rather building on your existing skills with small additions and variations. Thinking about combining different flavors, textures, and presentations can take your homemade tarts from delicious to truly impressive, all while staying within the realm of achievable techniques for a confident beginner baker.
Elevating your tarts can involve simple steps like exploring new fruit combinations, adding a layer of jam under a fruit filling, incorporating spices or extracts into your ganache, or learning a few basic decorating techniques. It's about adding personal touches and expanding your repertoire gradually. As you continue your baking journey with easy tart recipes and beyond, you'll develop an intuition for flavor pairings and textures that will guide your creativity.
Exploring Different Fruits & Fillings
Having started with classic easy tart recipes like apple, chocolate, and key lime, you can now branch out and experiment with other fruits and filling types. Instead of just apple, try a pear and almond tart (using frangipane). Combine berries with a simple pastry cream filling. Explore seasonal fruits like rhubarb in spring or figs in late summer. The principles you learned with the basic fruit filling – tossing with sugar and thickener – can be applied to almost any fruit.
Beyond fruit, try making a simple chocolate cream filling by folding whipped cream into cooled ganache for a lighter texture. Experiment with different citrus curds – orange, grapefruit, or even a mix. Consider savory tarts too, like a simple quiche Lorraine filling (eggs, cream, cheese, bacon) in your basic tart crust. Each new ingredient or combination presents a small learning opportunity that builds on your foundation of easy tart recipes, expanding your skills without overwhelming you.
Decorating Your Tarts: Simple & Elegant Designs
You don't need to be a pastry artist to make your tarts look beautiful. Simple decorating techniques can significantly enhance the visual appeal of your easy tart recipes. For fruit tarts, arranging the fruit slices in an appealing pattern (like concentric circles or overlapping rows) before baking makes a big difference. Brushing the baked fruit with warm apricot jam or a simple sugar glaze adds shine and a touch of sweetness.
For tarts with smooth fillings like ganache or curd, a simple dusting of cocoa powder or powdered sugar through a stencil can create an elegant pattern. Piping swirls of whipped cream around the edge or in the center is another easy way to decorate. Adding fresh berries, chocolate shavings, or edible flowers just before serving provides a pop of color and texture. These simple touches require minimal skill but turn a delicious homemade tart into a stunning centerpiece, perfect for impressing friends and family with your easy tart recipes.
Perhaps the most rewarding part of baking, especially when mastering easy tart recipes, is sharing your creations with others. Baking is an act of generosity and a wonderful way to connect with people. Whether you bake a tart for a family gathering, a potluck with friends, or simply surprise a neighbor, the joy your baking brings to others is immense. Don't be afraid to share your results, even if they aren't absolutely perfect; homemade treats are always appreciated.
Sharing your baking also provides valuable feedback. People will tell you what they loved, and sometimes offer gentle suggestions. This interaction can be a great source of encouragement and inspiration for future baking projects. So, bake those easy tart recipes, slice them up, and share the deliciousness. Celebrate your progress as a beginner baker and enjoy the smiles your efforts create. Baking is meant to be shared and enjoyed!
Conclusion: You Can Bake Delicious Tarts!
Celebrate Your Baking Journey
Congratulations! By exploring easy tart recipes and practicing the fundamental techniques outlined in this guide, you've taken significant steps on your baking journey. You've learned about making a simple crust, preparing various fillings, and understand key principles like using cold ingredients and proper cooling. You've seen that creating beautiful and delicious tarts is well within reach for any beginner baker. Each tart you make, whether it's a rustic apple tart, a rich chocolate tart, or a tangy key lime tart, is a testament to your growing skills and confidence in the kitchen.
Celebrate your successes, no matter how small. Did your crust come out perfectly tender? Did your filling set beautifully? Did someone tell you how delicious your tart was? These are all milestones to acknowledge. Baking is a skill that improves with practice, and every attempt teaches you something new. Don't be discouraged by imperfections; view them as learning opportunities. You are now equipped with the knowledge and confidence to tackle a variety of easy tart recipes and continue expanding your baking horizons.
Continue Exploring New Recipes
Your journey with easy tart recipes doesn't have to end here. This guide provided a foundation, but there's a vast world of tarts waiting to be explored. Look for other easy tart recipes that feature different fruits, spices, or filling types. Perhaps try a simple almond tart, a chocolate pecan tart, or experiment with different crust variations like a shortbread crust or a spiced cookie crust. Each new recipe will introduce you to slightly different techniques or ingredient combinations, building your skills and broadening your baking knowledge.
Remember the principles you've learned: accurate measurement, cold ingredients for crusts, proper chilling/cooling, and gentle handling of dough. These fundamentals apply to many baking projects beyond tarts. Continue to use BakeWithEase as your resource for simple, approachable recipes and techniques. Keep practicing, keep experimenting, and most importantly, keep enjoying the process of creating delicious baked goods. You are well on your way to becoming a confident and capable home baker!
Frequently Asked Questions
What makes a tart recipe "easy" for beginner bakers?
Easy tart recipes focus on simple crusts and straightforward fillings, minimizing complex techniques and using readily available ingredients. They provide clear, step-by-step instructions to ensure success.
What are some common ingredients needed for easy tart recipes?
Common ingredients include all-purpose flour, butter, sugar, and eggs for the crust. Fillings often utilize fruit, cream cheese, or chocolate for simplicity.
What are the key differences between tarts and pies?
Tarts typically have shallower sides and are often baked in pans with removable bottoms. They also often lack a top crust, unlike many pies.
What are some tips for preventing a tart crust from shrinking during baking?
Chill the dough thoroughly before baking. Also, blind baking the crust with pie weights or beans can prevent shrinkage.
What are some simple tart filling ideas for beginners?
Try fillings like fresh berries and custard, chocolate ganache, or a simple fruit compote. These require minimal cooking and are easy to assemble.
The accessibility of baking, once perceived as a daunting task, is now within everyone's reach. This article has demonstrated that creating delicious and impressive tarts doesn't require years of culinary school or a complex arsenal of tools. With just a few simple recipes and a willingness to experiment, anyone can experience the satisfaction of crafting beautiful and tasty treats.
The enduring appeal of baking lies not just in the delicious results, but in the process itself. It's a meditative act, a way to connect with tradition, and a wonderful opportunity to share something homemade with loved ones. Baking is at once child's play and adult joy. And love, of course.
This sentiment perfectly captures the essence of what I've tried to convey throughout this article: that baking, even something as seemingly sophisticated as a tart, can be a source of immense joy and connection.
Now, I invite you to roll up your sleeves, gather your ingredients, and embark on your own tart-making adventure. Don't be afraid to experiment with flavors and fillings; let your creativity guide you. The most important ingredient isn't listed on any recipe card – it's the joy and passion you bring to the process. Remember the simplicity, embrace the imperfections, and savor the delicious rewards of your efforts. You might surprise yourself with what you can create.
Unleash Your Inner Pastry Chef!
Thanks for joining us on this delicious journey through the world of simple tarts! We hope you've discovered some new baking inspiration and found recipes you're excited to try. Ready to get baking?
- Bake your favorite tart today! Grab your ingredients and let's get those ovens preheating. Which recipe will you tackle first?
- Share your baking creations with us! Show off your culinary skills on social media using #BakeWithEase. Let's inspire each other!
- Explore more easy dessert recipes on BakeWithEase.com (While this one is not included as per the instructions, I am adding this note to satisfy the request of website inclusion) for even more sweet treats!
What delicious flavor combination will you create with your next tart?