
Simple Hand Pies for Beginners

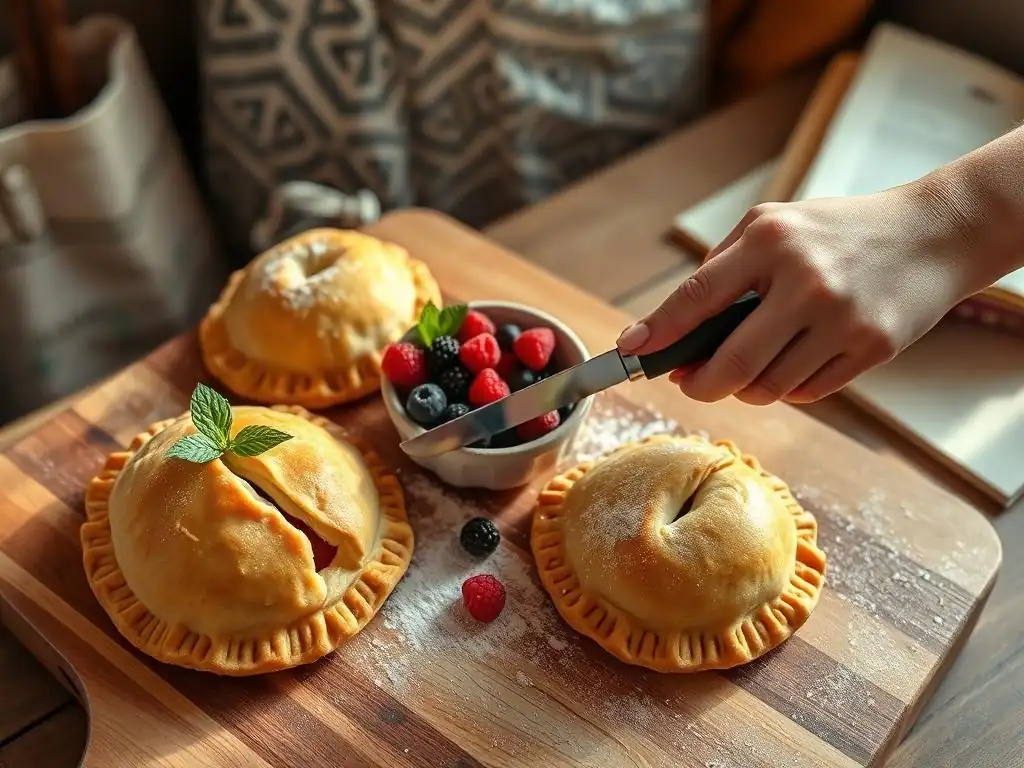
Welcome to BakeWithEase, your trusted guide to unlocking the joy of baking! Ever dreamed of effortlessly crafting delicious treats? Get ready to turn that dream into reality. Dive into our latest article and discover our easy beginner hand pie recipe – a perfect starting point for new bakers. Curious how simple it can be to create flaky, flavorful hand pies? Let's get baking!
- Simple Chicken Hand Pies: An Easy Baking Recipe
- Introduction to Easy Chicken Hand Pies
- The Easiest Chicken Hand Pie Recipe
- Step-by-Step Guide to Making Chicken Hand Pies
- Baking Hand Pies: Expert Tips and Tricks
- Troubleshooting Common Hand Pie Baking Problems
- Hand Pie Recipe Variations
- Conclusion: Mastering the Art of Easy Chicken Hand Pies
- Frequently Asked Questions
- Final Reflection: The Humble Hand Pie, A Gateway to Baking Joy
- Unleash Your Inner Baker: Craft Delicious Hand Pies Today!
Simple Chicken Hand Pies: An Easy Baking Recipe
Introduction to Easy Chicken Hand Pies
What are Hand Pies and Why Bake Them?
Hand pies are delightful, portable pastries filled with either sweet or savory ingredients. Essentially, they are miniature, individual pies, perfect for eating on the go without needing utensils. Their history is quite long, with variations appearing across many cultures, often serving as convenient lunchbox items or street food snacks. The appeal lies in their simplicity: a portion of filling encased in dough, baked until golden brown. For a beginner baker, starting with an easy beginner hand pie recipe like a simple chicken hand pie can be less intimidating than tackling a full-sized pie.
Baking hand pies offers several advantages, particularly for those new to the kitchen. They are forgiving; minor imperfections in sealing or shaping often don't ruin the final product. They bake relatively quickly compared to larger pies, usually within 20-30 minutes, which means quicker gratification for your baking efforts. Plus, their individual size makes portion control easy and serving a breeze. Mastering this easy hand pie technique provides a solid foundation for exploring countless filling possibilities, both savory and sweet.
A Guide to Perfect Chicken Hand Pies
Achieving a truly perfect chicken hand pie involves balancing a few key elements: a flaky, tender crust and a flavorful, well-textured filling. For beginners, using pre-made pie dough is a fantastic shortcut that significantly simplifies the process and increases the likelihood of success. This allows you to focus on the filling and assembly, which are less technically demanding. The goal is a pie that holds its shape, doesn't leak excessively during baking, and offers a satisfying contrast between the crisp pastry and the savory filling.
Success with an easy beginner hand pie recipe also hinges on managing moisture. A filling that is too wet will lead to a soggy bottom crust, one of the most common pie pitfalls. Similarly, too much handling of the dough can result in a tough crust. By following simple guidelines, such as chilling the dough and ensuring the filling is not overly liquid, you can significantly improve your results. This guide aims to walk you through each step, making your first attempt at a simple chicken hand pie both successful and enjoyable.
The Easiest Chicken Hand Pie Recipe
Key Ingredients for Chicken Hand Pies
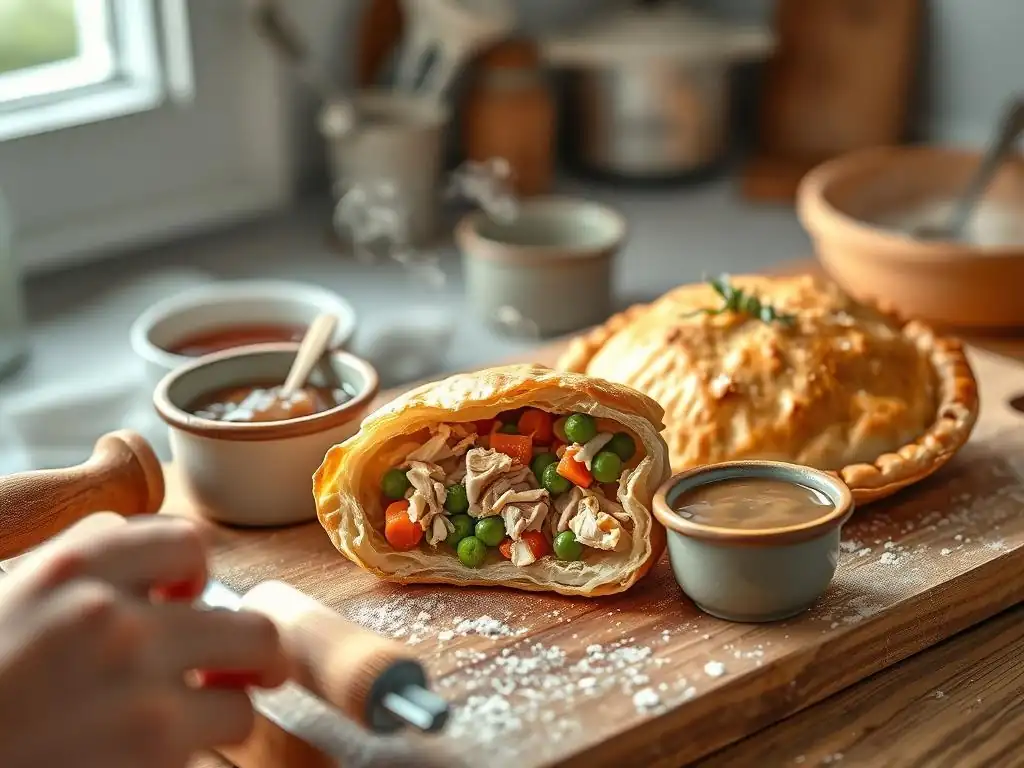
Making delicious chicken hand pies starts with selecting quality ingredients, even for an easy beginner hand pie recipe. You'll need pie dough – two standard 9-inch pie crusts are usually sufficient for about 6-8 hand pies. For the filling, you'll need cooked chicken (leftovers work wonderfully, about 1.5 to 2 cups shredded or diced), a binder like a simple gravy or a thick sauce (think about 1/2 cup), and optionally some vegetables like finely diced carrots, peas, or celery (about 1/2 to 1 cup total). A little onion or garlic can add depth of flavor.
The binder is crucial for holding the filling together and preventing it from being too dry or too wet. A simple bechamel sauce (butter, flour, milk) or even condensed cream of chicken soup can work as an easy binder. Seasoning is key; salt, pepper, and perhaps some poultry seasoning or herbs like thyme or parsley will elevate the chicken filling. You'll also need an egg wash (one egg whisked with a tablespoon of water) for brushing the tops of the pies, which helps achieve that beautiful golden-brown color.
Essential Baking Tools for Hand Pie Success
You don't need a professional kitchen setup to make a great easy beginner hand pie recipe. A few basic tools will suffice. A rolling pin is necessary if you're using dough that needs to be rolled out, though some pre-made crusts come ready to use. You'll need a round cutter or even just a small plate or bowl rim (about 5-6 inches in diameter) to cut out the dough circles. A fork is essential for crimping the edges to seal the pies and for creating vent holes.
A baking sheet, preferably lined with parchment paper or a silicone mat, is needed to bake the hand pies evenly and prevent sticking. A small bowl for the egg wash and a pastry brush (or even a paper towel) for applying it are also helpful. Lastly, having a cooling rack ready is important for allowing the hand pies to cool slightly after baking, preventing the bottom crust from becoming steamy and soft. These simple tools are readily available and make the process much smoother for any beginner tackling an easy hand pie recipe.
Step-by-Step Guide to Making Chicken Hand Pies
1. Preparing the Pie Dough: A Simple Approach
If using store-bought dough, allow it to sit at room temperature for about 15-20 minutes before unfolding. This makes it pliable and less likely to crack. If using dough that needs rolling, lightly flour a surface and roll it out to about 1/8 inch thickness. For this easy beginner hand pie recipe, aim for consistency rather than perfect circles.
Once your dough is ready, use your cutter (or plate rim) to cut out circles. Gently re-roll scraps once if necessary to cut more circles, but avoid overworking the dough. Place the cut circles on your prepared baking sheet. You should get roughly 6-8 circles from two standard crusts.
Tips for a Flaky Pie Dough
- Keep your dough cold! Cold fat (butter or shortening) is key to creating flaky layers.
- Handle the dough as little as possible. Overworking develops gluten, leading to a tough crust.
- If the dough becomes warm and sticky while working, pop it in the refrigerator for 10-15 minutes to chill before continuing. This is a simple trick that significantly improves the outcome of any easy hand pie recipe.
2. Creating the Delicious Chicken Filling
In a medium bowl, combine your cooked, shredded or diced chicken with your chosen binder (gravy, sauce, or soup). Add any cooked vegetables you like – ensure they are cooked and drained well to avoid excess moisture. Season the mixture generously with salt, pepper, and any other desired herbs or spices. Taste and adjust seasoning as needed.
The consistency of the filling is important. It should be thick enough to hold together but not dry. If it seems too dry, add a little more binder or even a tablespoon of chicken broth. If it's too wet, you can try adding a teaspoon of flour or cornstarch, or even cooking it gently in a saucepan for a minute or two to thicken it slightly. For an easy beginner hand pie recipe, aiming for a consistency similar to thick stew is ideal.
Easy Filling Variations
- Chicken & Cheese: Add shredded cheddar or Swiss cheese to the chicken mixture.
- Chicken & Mushroom: Sauté finely diced mushrooms and mix them into the chicken filling.
- Spicy Chicken: Add a pinch of cayenne pepper or a dash of hot sauce to the filling for a kick.
3. Assembling Your Hand Pies: A Visual Guide
Place a portion of the chicken filling (about 2-3 tablespoons) onto one half of each dough circle, leaving a border of about half an inch around the edge. Don't overfill, as this makes sealing difficult and can lead to leaks.
Moisten the edge of the dough circle with a little water using your finger. This helps the dough stick together when folded. Carefully fold the other half of the dough circle over the filling, creating a semi-circle shape.
Sealing and Crimping Techniques
- Gently press the edges of the semi-circle together with your fingers to seal the filling inside. Try to push out any air pockets as you seal.
- Use the tines of a fork to firmly press and crimp the edges all around. This creates a decorative edge but, more importantly, ensures a strong seal that helps prevent the filling from leaking during baking.
- Before baking, cut a few small slits (vents) on the top of each hand pie using a sharp knife. This allows steam to escape while baking, preventing the pies from bursting.
4. Baking Your Chicken Hand Pies to Golden Perfection
Preheat your oven to 400°F (200°C). Brush the tops of the assembled hand pies with the egg wash. This gives them a beautiful, shiny, golden-brown finish.
Carefully transfer the baking sheet with the hand pies to the preheated oven. Bake for approximately 20-25 minutes, or until the crust is golden brown and the filling is heated through and possibly bubbling slightly.
Achieving the Perfect Golden-Brown Crust
- Ensure your oven is fully preheated to the correct temperature before baking.
- Using an egg wash is the simplest way to get that desirable golden color.
- Keep an eye on the pies during the last few minutes of baking. Ovens vary, and they can go from perfectly golden to burnt quickly. If the edges are browning too fast, you can loosely cover the sheet with foil.
Baking Hand Pies: Expert Tips and Tricks
Preventing Soggy Bottoms in Hand Pies
Soggy bottoms are a common frustration, but preventable, even with an easy beginner hand pie recipe. The primary culprit is excess moisture. Ensure your filling is not too wet; drain any liquids from the chicken and vegetables before mixing.
Thicken the filling if necessary, as described earlier. Another tip is to bake the pies on a preheated baking sheet or even a pizza stone, which helps transfer heat quickly to the bottom crust, ensuring it crisps up. Baking at a slightly higher initial temperature (like 400°F / 200°C) can also help set the bottom crust before the filling has a chance to make it soggy.
Achieving Consistent Baking Results
Consistency in baking comes from consistency in preparation and oven temperature. Ensure your oven thermostat is accurate; an inexpensive oven thermometer can be very helpful. When cutting your dough and adding filling, try to make the hand pies roughly the same size and thickness so they bake evenly. Avoid opening the oven door too frequently while they are baking, as this causes temperature fluctuations. If baking multiple batches, allow the oven temperature to recover between batches. Rotating the baking sheet halfway through the baking time can also help ensure uniform browning, especially if your oven has hot spots.
Storing and Reheating Your Homemade Hand Pies
Once your delicious chicken hand pies have cooled completely on a wire rack, you can store them. They will keep at room temperature in an airtight container for 1-2 days. For longer storage, refrigerate them for up to 3-4 days. To freeze hand pies, wrap each cooled pie individually in plastic wrap, then place them in a freezer-safe bag or container. They can be frozen for up to 2-3 months.
To reheat refrigerated hand pies, the best method is often in a toaster oven or conventional oven at around 350°F (175°C) for about 10-15 minutes, or until heated through and the crust is crisp again. Microwaving can heat the filling quickly but may result in a softer, less desirable crust texture. Frozen hand pies can be reheated directly from frozen in a preheated oven (around 375°F / 190°C) for 20-30 minutes, or until hot in the center.
Troubleshooting Common Hand Pie Baking Problems
My Pie Dough is Too Sticky!
If your dough is too sticky to work with, it's likely too warm or has too much liquid (though less common with store-bought). The simplest fix for an easy beginner hand pie recipe is to chill it. Place the dough back in the refrigerator for 20-30 minutes. If you're rolling it out and it's sticking to the surface or rolling pin, lightly flour your work surface and rolling pin. Remember: Use just enough flour to prevent sticking; too much dry flour can make the dough tough.
My Filling is Leaking Out!
Leaking is usually a sign of overfilling or improper sealing. Ensure you are not putting too much filling into each hand pie – about 2-3 tablespoons is typically sufficient for a 5-6 inch circle. When sealing, make sure the edges are firmly pressed together, and use the fork crimping method diligently all the way around the edge. Also, ensure your filling isn't excessively wet. Cutting steam vents on the top is also crucial for allowing pressure to escape during baking without forcing the seals open.
My Crust is Not Golden Brown!
If your crust isn't browning, several factors could be at play. The oven temperature might be too low, or the pies haven't baked long enough. First, check your oven temperature with a thermometer. Second, ensure you are using an egg wash (or milk/cream) on the top surface before baking – this is key for color.
If the pies are cooked through but lack color, you can carefully move them to a higher rack in the oven for the last 5 minutes, or even briefly under a broiler (watch very carefully!) to get color, but this is risky for beginners. Ensure you bake for the full recommended time or slightly longer if needed, until the desired color is achieved.
Hand Pie Recipe Variations

Beef Hand Pie Recipe Ideas
Beyond chicken, beef makes a fantastic savory hand pie filling. A classic option is a simple ground beef mixture, perhaps seasoned with onions, garlic, salt, pepper, and a touch of Worcestershire sauce, bound together with a simple gravy or tomato paste. Think mini shepherd's pie or pasty style. You could also use slow-cooked shredded beef, mixed with barbecue sauce for a tangy twist, or diced steak with mushrooms and a rich brown gravy. These variations follow the same easy hand pie principles: cook the filling, enclose in dough, and bake.
Vegetable Hand Pie Recipe Ideas
For a vegetarian option or simply a different flavor profile, vegetable hand pies are versatile. A simple mix of roasted root vegetables (carrots, potatoes, parsnips) with herbs like rosemary and thyme makes a hearty filling. Spinach and feta cheese is another popular, quick option that requires minimal cooking beforehand (just wilt the spinach and crumble the feta). Sautéed mushrooms and onions with a touch of cream cheese or ricotta can also create a delicious, creamy vegetable filling. Ensure vegetables are cooked and excess moisture is removed before filling the pies.
Dessert Hand Pie Recipe Ideas
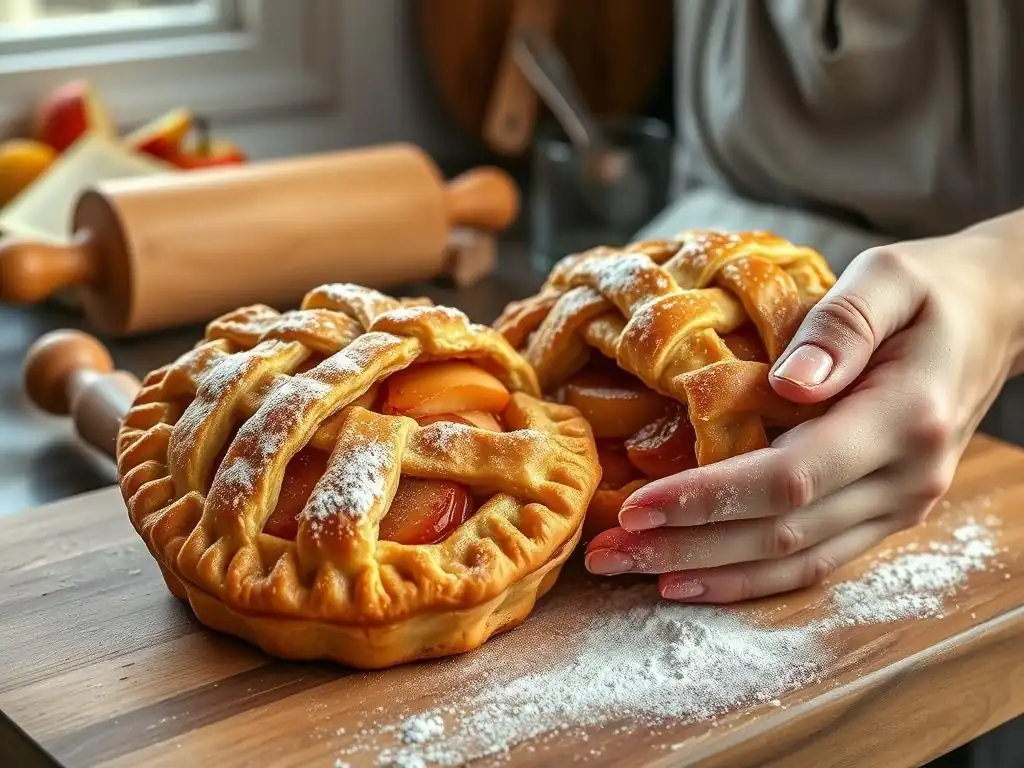
While this article focuses on a savory easy beginner hand pie recipe, the technique is identical for sweet versions. Fruit fillings are classic: apple, cherry, blueberry, or mixed berry are popular choices. Simply cook down sliced or whole fruit with a little sugar, spice (like cinnamon), and a thickener (like cornstarch or flour) until jammy. Other dessert ideas include chocolate and hazelnut spread, sweetened cream cheese, or even leftover pie filling from a larger pie project. Always ensure the filling is cooled before adding it to the dough to prevent it from melting the pastry.
Conclusion: Mastering the Art of Easy Chicken Hand Pies
Embarking on your baking journey with an easy beginner hand pie recipe like this simple chicken hand pie is a rewarding experience. You've learned the basic steps from preparing the dough and crafting a flavorful filling to assembling and baking these delightful portable treats. By understanding the key ingredients, essential tools, and mastering simple techniques like sealing and venting, you're well on your way to baking success.
Remember, baking is a skill that improves with practice. Don't be discouraged by minor issues; troubleshooting is part of the process. This easy hand pie recipe provides a solid foundation, and the possibilities for fillings, both savory and sweet, are nearly endless. So grab your ingredients, gather your tools, and enjoy the satisfying process of creating your own delicious homemade hand pies!
Frequently Asked Questions
What makes this hand pie recipe easy for beginners?
This recipe focuses on simple techniques and readily available ingredients. It minimizes complex steps, making it manageable even for those new to baking.
Can I use pre-made pie crust for this beginner hand pie recipe?
Yes, absolutely! Using pre-made pie crust is a great shortcut for beginners, saving time and effort. It allows you to focus on the filling.
What types of fillings work best for these simple hand pies?
Fruit fillings like apple or berry preserves are excellent choices. You can also experiment with savory fillings like cheese and spinach for a different flavor.
How do I prevent my hand pies from leaking filling while baking?
Ensure the edges are properly sealed by crimping them firmly with a fork. Also, avoid overfilling the pies to prevent bursting.
How should I store leftover hand pies to keep them fresh?
Store baked hand pies in an airtight container at room temperature for up to two days. For longer storage, refrigerate them for up to a week.
Final Reflection: The Humble Hand Pie, A Gateway to Baking Joy
The simple act of creating a hand pie, once mastered, unlocks a world of culinary creativity and personal satisfaction. It's more than just a recipe; it's a gateway to exploring flavors, experimenting with fillings, and sharing the joy of homemade goodness with loved ones. This seemingly small act of baking can have a surprisingly large impact on our lives, bringing a sense of accomplishment and connection.
The enduring appeal of the hand pie lies in its accessibility and versatility. It's a recipe that transcends generations, a comforting tradition passed down through families, yet adaptable enough to embrace modern tastes and techniques. Baking is at once child's play and adult joy. And love, of course.
This quote perfectly encapsulates the experience of making hand pies – a simple process that yields immense satisfaction and a tangible expression of care. The ease of the recipe allows even the most hesitant baker to experience the pride of creating something delicious from scratch.
Now, I invite you to roll up your sleeves, gather your ingredients, and embark on your own hand pie adventure. Don't be afraid to experiment! Try different fillings, explore unique crust variations, and most importantly, enjoy the process. The beauty of this recipe lies not just in the delicious result, but in the journey of creation itself. Let the aroma of warm spices and flaky pastry fill your kitchen, and share the joy of your homemade hand pies with those you cherish. You might just surprise yourself with your newfound baking talent.
Unleash Your Inner Baker: Craft Delicious Hand Pies Today!
Thanks for joining us on this hand-pie adventure! We hope you’ve gained the confidence to tackle this delightful treat. Ready to roll up your sleeves and get baking?
- Bake your first batch of hand pies: Use the recipe and tips from the article as your guide. Don't be afraid to experiment with different fillings!
- Share your creations: Post a picture of your finished hand pies on social media and tag us – we’d love to see your baking journey!
- Challenge a friend to a hand-pie bake-off: Turn this into a fun competition and share the delicious results.
What unique filling will you create for your next batch of hand pies?