
Fresh Yeast Fermentation: Techniques for Optimal Results

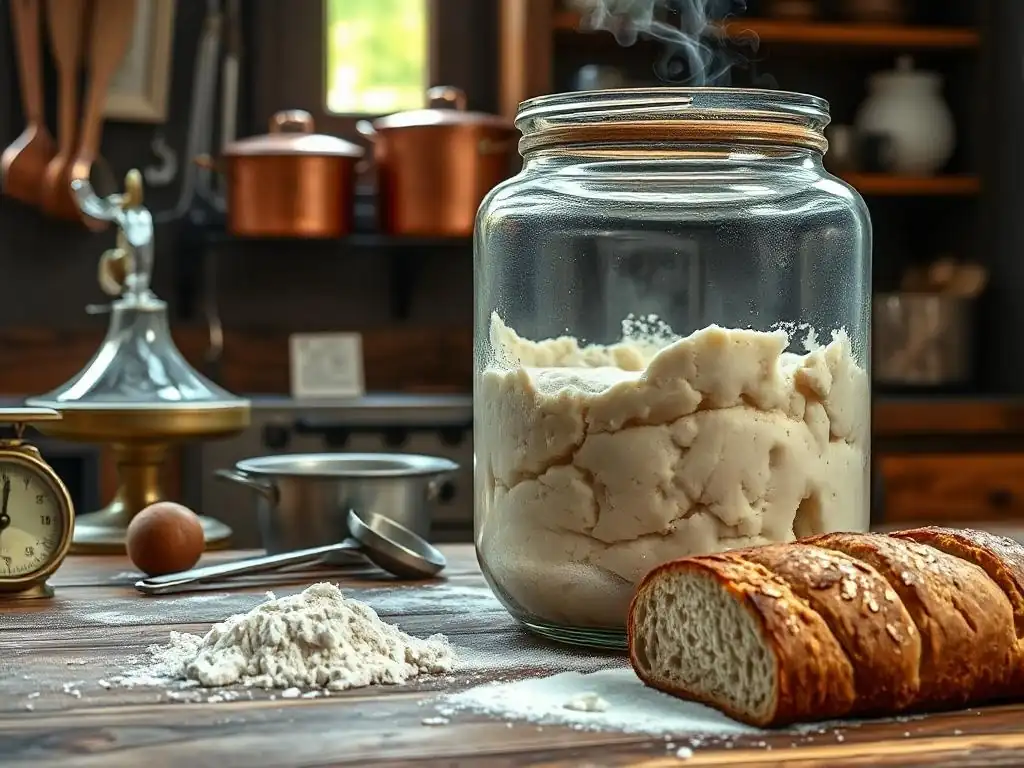
Welcome to BakeWithEase, where we unlock the secrets to perfect baking! Ever wondered how to achieve that perfect rise and incredible flavor in your baked goods? This week, we're diving deep into yeast fermentation timing control. Discover the techniques that will transform your baking, ensuring optimal results every time. Curious about achieving the perfect proof? Read on to master the art of fermentation!
- Mastering Yeast Fermentation for Baking Excellence
- Understanding Yeast and its Role in Baking
- Yeast Fermentation: Achieving Optimal Results
- Techniques for Effective Yeast Fermentation Timing
- Troubleshooting Common Yeast Fermentation Issues
- Yeast Fermentation: Recipes and Applications
- Advanced Techniques for Yeast Fermentation
- Conclusion: Elevating Your Baking with Precise Yeast Fermentation
-
Frequently Asked Questions
- What is yeast fermentation and why is timing so important in baking?
- How can I tell if my yeast is active and ready to use in a recipe?
- What factors can affect the timing of yeast fermentation?
- What are some common signs of over-fermentation in dough?
- How can I control the timing of yeast fermentation to achieve the best results?
- Final Reflection: Mastering the Art of Yeast Fermentation Timing
- Unleash Your Inner Baker: Master Yeast Fermentation!
Mastering Yeast Fermentation for Baking Excellence
Yeast fermentation is a magical process in baking, transforming simple dough into airy, flavorful creations. It's the heart of many beloved baked goods, from rustic loaves to fluffy pizza crusts. Understanding and controlling yeast fermentation timing is crucial for consistent and delicious results in your kitchen. This guide will take you through the essentials, helping you achieve perfect dough development every time.
Whether you're a beginner just starting your baking journey or looking to refine your techniques, mastering the nuances of yeast activity will significantly elevate your bakes. We'll explore the science behind how yeast works, the factors that influence its pace, and practical techniques for managing fermentation time effectively. Get ready to unlock the secrets to achieving optimal dough structure, texture, and flavor through precise yeast fermentation timing control.
Your Deep Dive into Yeast Fermentation
Embarking on a deep dive into yeast fermentation reveals the fascinating biological processes that make bread rise. Yeast, a living organism, consumes sugars in the dough and produces carbon dioxide gas and alcohol. This gas gets trapped by the gluten network in the dough, causing it to expand – the rise we see. The alcohol and other byproducts contribute significantly to the complex flavors and aromas that develop during fermentation.
Controlling the speed and extent of this process is key to successful baking. Too little fermentation, and your dough will be dense and lack flavor. Too much, and it can collapse, becoming gummy or sour. Learning how to manage yeast fermentation timing allows you to dictate the dough's development, ensuring it reaches its peak potential before baking. This control is fundamental whether you're working with a quick 1-hour rise or a slow 24-hour cold ferment.
Understanding Yeast and its Role in Baking
What is Yeast and Why Use It?
Yeast is a single-celled microorganism, specifically a type of fungus, vital to the leavening process in many baked goods. Its primary function in baking is to convert fermentable sugars present in flour (like glucose and fructose, derived from the breakdown of starch) into carbon dioxide gas and ethanol through a process called anaerobic respiration, or fermentation. The carbon dioxide gas is trapped within the elastic gluten network of the dough, causing it to expand and rise.
Beyond leavening, yeast plays a critical role in developing the flavor and aroma of baked goods. As it ferments, yeast produces various byproducts, including organic acids, esters, and aldehydes, which contribute to the complex, desirable characteristics of fermented dough. Without yeast, many classic breads, rolls, and pastries would be flat, dense, and lacking the rich taste we associate with them. Using yeast allows bakers to achieve light, airy textures and deep, nuanced flavors.
Yeast Types: A Comparative Overview
The baking aisle offers a few different types of yeast, each with slightly different characteristics and best uses. Active Dry Yeast is perhaps the most common. It consists of dehydrated yeast granules that need to be proofed in warm liquid (typically around 105-115°F or 40-46°C) before being added to dry ingredients. This rehydrates the yeast and ensures it's alive and active, indicated by frothing or bubbling. Active dry yeast is reliable but generally ferments a bit slower than instant yeast.
Instant Dry Yeast is a more finely ground, porous form of dry yeast that doesn't require proofing. It can be mixed directly into dry ingredients, saving a step. Instant yeast is highly active and reliable, often leading to faster fermentation times compared to active dry yeast. Fresh Yeast (also known as cake yeast) is a moist, perishable block of active yeast cells.
It's very potent and provides a lovely flavor, but it has a short shelf life and must be stored in the refrigerator. It's typically crumbled and dissolved in liquid before use. While the target keyword mentions fresh yeast, understanding all types helps in controlling yeast fermentation timing regardless of the specific yeast used.
Storing Yeast Properly for Maximum Potency
Proper storage is essential for maintaining yeast's viability and ensuring consistent yeast fermentation timing. Dry yeast (active and instant) is sensitive to moisture, air, and heat. Once opened, packages should be stored in an airtight container in a cool, dry place, such as the refrigerator or freezer. When stored in the freezer, dry yeast can remain potent for several months, often well past its "best by" date. Before use, allow frozen yeast to come to room temperature for about 30-60 minutes.
Fresh yeast is highly perishable and must be stored in the refrigerator. It typically comes wrapped in paper or foil; keep it in its original packaging within an airtight container to prevent it from drying out or absorbing odors. Fresh yeast has a much shorter shelf life, usually only a couple of weeks. Signs of spoilage include hardening, darkening, or mold growth. Using fresh yeast at its peak potency ensures reliable and predictable yeast fermentation timing control.
Yeast Fermentation: Achieving Optimal Results
The Science Behind Yeast Fermentation
At its core, yeast fermentation in dough is an anaerobic process where yeast enzymes break down simple sugars. Flour contains complex carbohydrates (starches), which are first broken down into simpler sugars (like glucose and maltose) by enzymes naturally present in the flour (amylases) or added to the dough. Yeast then consumes these simple sugars, primarily glucose and fructose, to produce energy for its own growth and reproduction.
The key outputs of this metabolic process in the absence of oxygen are carbon dioxide (CO2) and ethanol. The CO2 gas is what causes the dough to rise. Ethanol contributes to flavor and evaporates during baking. Other metabolic byproducts, like organic acids (lactic and acetic acid), alcohols other than ethanol, and esters, are also produced in smaller quantities. These compounds are vital for developing the complex aroma and flavor profile of fermented dough, significantly impacting the final taste of your baked goods. The rate of these reactions directly impacts yeast fermentation timing.
Factors Affecting Yeast Fermentation Timing
Several variables significantly influence the rate at which yeast ferments, and managing these is key to effective yeast fermentation timing control. Temperature is perhaps the most critical factor; yeast activity increases with warmth within a certain range. The amount of yeast used also directly impacts speed – more yeast means faster fermentation, while less yeast slows it down. The availability of food (sugars) and nutrients in the dough is another factor; doughs with added sugar or enriched flour may ferment more quickly initially.
Hydration level also plays a role, as yeast needs moisture to activate and move through the dough. Salt, while essential for flavor and gluten structure, inhibits yeast activity; too much salt can significantly slow down or even stop fermentation. The presence of other ingredients like fats or dairy can also influence the process. Understanding how these factors interact allows bakers to adjust their approach and achieve the desired yeast fermentation time for their specific recipe.
Temperature's Impact on Yeast Activity
Temperature is a dominant force in controlling yeast fermentation timing. Yeast is most active within a temperature range of approximately 75°F to 95°F (24°C to 35°C). Within this range, warmer temperatures accelerate yeast activity, leading to a faster rise. For instance, dough left to rise at 80°F (27°C) might double in volume in about 1-1.5 hours, whereas the same dough at 70°F (21°C) could take 2-3 hours or more.
Temperatures below this range slow down yeast activity considerably. Refrigeration (typically 35-40°F or 2-4°C) dramatically slows fermentation, allowing for long, slow rises that develop complex flavors. Temperatures above 140°F (60°C) will kill yeast cells, stopping fermentation entirely. Maintaining a consistent dough temperature is vital for predictable yeast fermentation timing control. Using lukewarm water (around 100°F or 38°C) when mixing can help jumpstart activity, while cooler liquids will slow it down.
Sugar and Nutrient Availability for Yeast
Yeast relies on fermentable sugars for energy to produce CO2 and alcohol. Flour contains starch, which is broken down into simpler sugars by enzymes. Doughs made with flours high in amylase activity or those with added sugars will provide more readily available food for the yeast, potentially speeding up the initial phase of fermentation. Simple sugars like glucose, fructose, and sucrose are quickly consumed by yeast.
However, the impact of sugar isn't linear. While a small amount of sugar (say, 1-2% of flour weight) can boost yeast activity, high concentrations of sugar (above 10% or so) can actually slow fermentation. This is because sugar is hygroscopic (it attracts water), and high sugar levels can draw water away from the yeast cells through osmosis, inhibiting their activity. Therefore, recipes with significant amounts of sugar (like brioche or sweet rolls) often require more yeast or longer fermentation times to achieve the desired rise, highlighting the interplay of ingredients in yeast fermentation timing control.
The Role of Hydration in Yeast Fermentation
Hydration, the ratio of water to flour in dough, significantly impacts yeast activity and yeast fermentation timing. Yeast requires moisture to become active and to move through the dough to access sugars. In very low-hydration doughs (like bagels or some crackers), yeast activity might be slower because there is less free water available for the yeast.
Conversely, higher hydration doughs (like ciabatta or focaccia, often 70% hydration or more) tend to ferment more quickly. The increased water content allows yeast cells to disperse more easily and access nutrients throughout the dough. The softer, more extensible gluten structure in high-hydration doughs also makes it easier for the CO2 gas produced by fermentation to expand the dough volume. Proper hydration is therefore not just about texture but also about facilitating efficient yeast fermentation.
Techniques for Effective Yeast Fermentation Timing
Direct Method: Fermenting in One Step
The direct method is the most straightforward approach to yeast fermentation, involving mixing all ingredients, including the yeast, into a single dough and allowing it to ferment in one or two rises before shaping and baking. This technique is popular for many everyday bread recipes and is ideal for bakers wanting a relatively quick turnaround time. Yeast fermentation timing control in the direct method primarily involves adjusting the amount of yeast, the dough temperature, and the fermentation environment temperature.
Typically, a direct method dough will undergo a bulk fermentation (first rise) until it has approximately doubled in volume, followed by shaping, and then a final proof (second rise) before baking. The total time for these rises can range from as little as 1-2 hours with warmer temperatures and higher yeast quantities to 3-4 hours or more in cooler conditions with less yeast. It's a method where vigilance and observation of the dough's progress are key to hitting the right yeast fermentation time.
Calculating Yeast Quantity for Direct Fermentation
Calculating the correct yeast quantity is a critical aspect of yeast fermentation timing control in the direct method. As a general guideline for active dry yeast, a common starting point is around 1.5% to 2% of the flour weight for a standard recipe fermented at room temperature (around 70-75°F or 21-24°C). So, for 500 grams of flour, you might use 7.5 to 10 grams of active dry yeast.
If using instant dry yeast, which is more potent, you can typically use about 75-80% of the amount of active dry yeast (e.g., 6-8 grams for 500g flour). For fresh yeast, you would use about 3 times the weight of active dry yeast (e.g., 22.5-30 grams for 500g flour). These are starting points; you can adjust the yeast amount up to speed up fermentation (e.g., 2.5% or 3% for a faster rise) or down to slow it (e.g., 1% or less for a slightly longer, flavor-building rise), helping you fine-tune your yeast fermentation timing.
Monitoring Fermentation Progress: Visual Cues and Tests
Monitoring the dough is essential for controlling yeast fermentation timing, as rise times are estimates and can vary. Visual cues include watching the dough increase in volume. For a typical first rise (bulk fermentation), you're often looking for the dough to roughly double in size. The surface should look puffy and perhaps have some visible air bubbles.
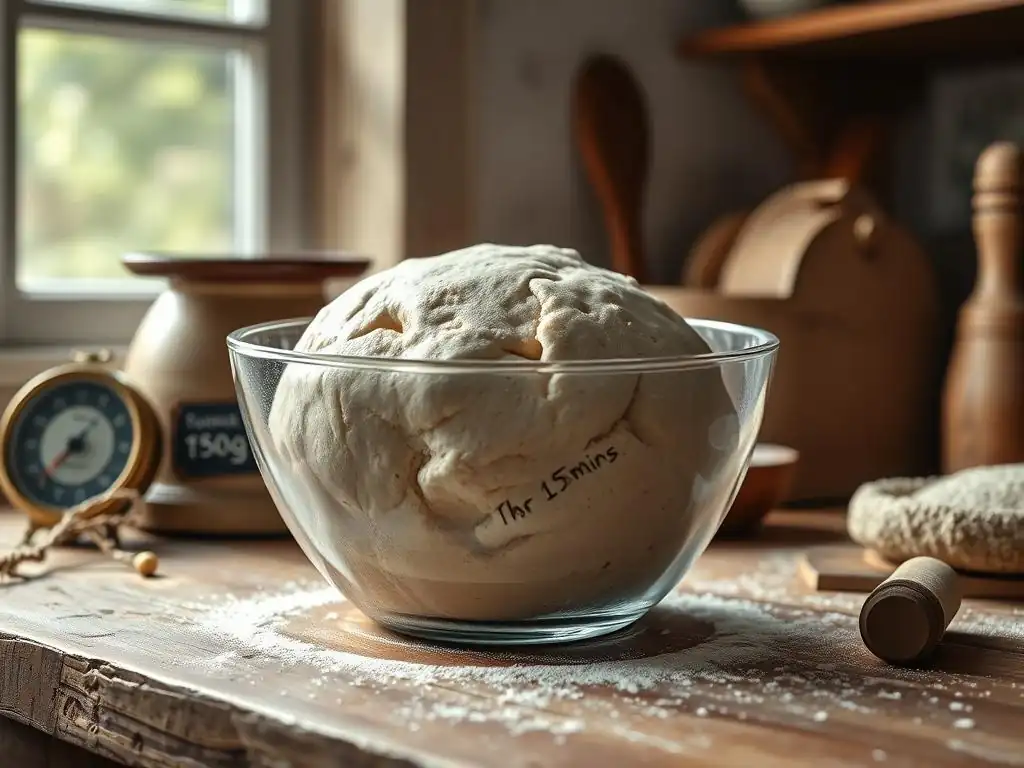
A common test for readiness during the first rise is the "poke test." Gently press a floured finger about half an inch into the dough. If the indentation springs back immediately, the dough needs more time. If it springs back slowly, leaving a small indentation, it's likely ready for shaping. For the final proof, the indentation should spring back very slowly or not at all, indicating the dough is fully proofed and ready to bake. Over-proofed dough will collapse easily when poked. Learning to read these cues is vital for achieving accurate yeast fermentation timing.
Prefermentation: Enhancing Flavor and Texture
Prefermentation involves preparing a portion of the dough ingredients (typically flour, water, and yeast) and allowing this mixture to ferment for a period before adding the remaining ingredients to make the final dough. This technique, used in methods like poolish, biga, or levain (sourdough starter), is a powerful tool for yeast fermentation timing control and significantly enhances flavor and texture. By giving the yeast a head start in a smaller, often wetter environment, preferments develop more complex organic acids and compounds.
Using a preferment leads to a more flavorful loaf because the longer, slower fermentation of a portion of the flour allows enzymes to break down starches more thoroughly, providing more food for the yeast over time and creating a wider range of aromatic compounds. It also contributes to a stronger gluten structure and better oven spring. While it adds an extra step and extends the overall process, the improved quality of the final bake makes prefermentation a worthwhile technique for achieving superior results and sophisticated yeast fermentation timing.
Preparing the Preferment: Ingredients and Ratios
The specific ingredients and ratios for a preferment vary depending on the type. A poolish is typically a liquid preferment made with equal weights of flour and water (100% hydration) plus a small amount of yeast. For example, you might mix 100g flour, 100g water, and a pinch (say, 0.1-0.5% of flour weight in yeast) for a poolish. It's often fermented at room temperature for 8-12 hours, or in the refrigerator for 18-24 hours.
A biga is a stiffer preferment, usually made with a lower hydration, typically 50-65% water to flour, and a smaller amount of yeast than a poolish. A common biga might use 100g flour, 50g water, and a tiny amount of yeast (perhaps 0.05-0.1% of flour weight). Biga is often fermented for a longer period, such as 12-16 hours at cool room temperature or up to 48 hours in the refrigerator. These different ratios and yeast quantities are specifically designed to manage the yeast fermentation timing of the preferment itself.
Preferment Fermentation Timing: Achieving Peak Activity
Achieving peak activity in your preferment is crucial for its effectiveness. The ideal yeast fermentation timing for a preferment is when it is mature – meaning the yeast has reached its maximum activity level for that specific mixture and conditions. For a poolish, maturity is typically indicated by a bubbly, frothy surface and a slightly domed top that may just be starting to recede in the center. It should smell pleasantly yeasty and slightly acidic. This often takes 8-12 hours at average room temperature (around 70°F/21°C).
A biga, being stiffer, won't show as dramatic a rise or bubbling. Maturity for a biga is usually indicated by a significant increase in volume (perhaps doubling) and a domed top. The smell will be pleasantly fermented. This process takes longer due to the lower hydration and often cooler fermentation temperatures, perhaps 12-16 hours. Using the preferment when it's mature ensures you're incorporating highly active yeast and well-developed flavors into your final dough, optimizing overall yeast fermentation timing and results.
Incorporating the Preferment into the Final Dough
Once the preferment has reached peak maturity, it's ready to be incorporated into the final dough. This is typically done by adding the preferment to the mixing bowl along with the remaining flour, water, salt, and any other ingredients specified in the recipe. The preferment should be broken up or dissolved in the liquid component before adding the dry ingredients, ensuring it is evenly distributed throughout the dough.
Because the preferment contributes active yeast and already-developed gluten and flavor compounds, the fermentation time for the final dough is often shorter than in a direct method. The amount of yeast needed in the final dough is also usually reduced. The preferment essentially gives the fermentation process a significant head start, allowing for faster subsequent rises while still providing the flavor benefits of a longer fermentation, showcasing effective yeast fermentation timing control through method selection.
Long Fermentation: Developing Complex Flavors
Long fermentation, often involving refrigeration (cold fermentation), is a technique specifically employed to maximize flavor development in dough. By significantly slowing down yeast activity and extending the fermentation period, typically from 12 hours up to 72 hours or even longer, enzymes have more time to break down starches and proteins. This enzymatic activity, combined with the slow work of the yeast and other microorganisms (especially in sourdough or preferments), produces a rich array of organic acids, alcohols, and esters.
The result of a long fermentation is a dough with a more complex, nuanced flavor profile, often with pleasant tangy or nutty notes depending on the flour and duration. Cold fermentation also strengthens the gluten network, making the dough easier to handle and contributing to a better crust and crumb structure in the final bake. While requiring patience, this method is a powerful way to use yeast fermentation timing to achieve depth of flavor and superior texture.
Crafting a Long Fermentation Dough: Hydration and Yeast Ratios
Crafting a dough for long fermentation requires careful consideration of hydration and yeast ratios to manage the extended yeast fermentation timing. Because the fermentation period is much longer, the amount of yeast used is significantly reduced compared to direct methods. For a 24-hour cold ferment, you might use as little as 0.1% to 0.5% active dry yeast relative to flour weight (e.g., 0.5g to 2.5g yeast for 500g flour). Using too much yeast would cause the dough to over-ferment before the desired time has elapsed.
Hydration levels for long fermentation doughs are often moderate to high (65-80% or more). The higher hydration helps facilitate enzymatic activity and allows for better gas expansion over the long period. The dough is typically mixed, given a short rest (autolyse) or initial room temperature bulk fermentation (perhaps 1-2 hours with a couple of folds), and then transferred to the refrigerator for the extended cold fermentation. This initial room temperature phase helps kickstart fermentation before the cold slows it down, aiding in yeast fermentation timing control.
Long Fermentation Timing: Signs of Readiness
Determining readiness in long-fermented dough requires looking for different signs than a quick room-temperature rise. Dough undergoing cold fermentation will increase in volume, but often not necessarily double or triple like a warm rise. A typical sign for a cold-fermented dough (say, after 24-48 hours) is an increase in volume of about 50-75%. The surface should appear well-aerated with many visible bubbles, and the dough should feel lighter.
The smell is also a key indicator; it should have a pleasant, complex aroma, perhaps slightly acidic or yogurty, depending on the fermentation duration and presence of preferments or sourdough. The poke test can still be useful, though cold dough will spring back more slowly than warm dough. The dough should feel strong and elastic but also relaxed and extensible. Checking the dough periodically (every 8-12 hours after the initial 12 hours) helps monitor its progress and ensures you bake it at the optimal point of yeast fermentation timing.
Utilizing Long Fermentation in Your Dough for Enhanced Results
Incorporating long fermentation into your baking routine can dramatically improve the quality of your bread. The extended period allows for the breakdown of starches and proteins, leading to a more digestible and nutritious loaf. The development of organic acids contributes to a stronger gluten network, which results in better structure, a more open crumb (the interior texture with air pockets), and enhanced oven spring (the final rapid expansion in the oven).
Furthermore, the complex flavors developed during the long, slow fermentation process add depth and character that simply cannot be achieved with quick methods. This technique is particularly beneficial for lean doughs like artisan bread, baguettes, and pizza dough, where flavor and texture are paramount. Mastering the yeast fermentation timing control in long ferments allows you to bake loaves with professional-quality taste and structure right in your home kitchen.
Troubleshooting Common Yeast Fermentation Issues

Slow Fermentation: Identifying and Addressing the Causes
Slow fermentation can be frustrating, but understanding the common causes helps you troubleshoot. The most frequent culprit is temperature – if your kitchen or ingredients are too cold, yeast activity will be sluggish. Ensure your water or milk is lukewarm (around 100°F/38°C) when activating dry yeast or mixing the dough. Placing the dough in a warmer spot, like a proofing box, a turned-off oven with the light on, or near a sunny window, can help speed things up.
Other causes include using inactive or old yeast (always check the expiration date and proof dry yeast if unsure), insufficient yeast quantity for the recipe and conditions, or the presence of inhibitory ingredients like too much salt or sugar added directly on top of the yeast. Kneading also impacts fermentation; underdeveloped gluten can restrict gas expansion, making the rise appear slow.
If your dough is rising slowly, try giving it more time in a warmer environment, or gently incorporating a small amount of activated yeast mixed with a little warm water and flour. Effective yeast fermentation timing control means being able to adjust when things aren't going as planned.
Over-Fermentation: Recognizing the Signs and Salvaging the Dough
Over-fermentation, or over-proofing, occurs when dough ferments for too long, leading to the gluten structure weakening and potentially collapsing. Signs include the dough expanding rapidly and then starting to deflate or spread out rather than holding its shape. The surface may look very bubbly or even slightly wrinkled. The smell can become strongly alcoholic or excessively sour, particularly with longer ferments.
If you catch over-fermentation early, you might be able to salvage the dough. Gently punch it down, reshape it, and give it a much shorter final proof. The resulting bread may still be slightly less voluminous or have a denser crumb than intended. If the dough has completely collapsed and become very sticky and difficult to handle, it may be best used for flatbreads, pizza crusts rolled thin, or even discarded. Avoiding over-fermentation requires diligent monitoring and understanding the optimal yeast fermentation timing for your specific dough and conditions.
Uneven Fermentation: Achieving Consistency in Dough Development
Uneven fermentation can lead to parts of the dough rising more than others, resulting in inconsistent texture in the final bake. One common cause is uneven dough temperature; parts of the dough exposed to warmer or cooler spots will ferment at different rates. Ensuring the dough is in a consistently warm environment during fermentation helps.
Another factor is incomplete mixing or kneading, which can result in yeast, salt, or other ingredients not being evenly distributed. Salt clumps, for instance, can inhibit yeast activity in localized areas. Proper kneading develops a uniform gluten network, allowing gas to be trapped evenly throughout the dough. Performing stretch and folds during bulk fermentation is an excellent way to redistribute yeast and gases, equalize temperature, and strengthen the gluten, promoting more consistent yeast fermentation timing and development throughout the dough mass.
Yeast Fermentation: Recipes and Applications
Simple Bread Recipe: Fermentation Schedule
Here is a basic direct method recipe demonstrating a typical yeast fermentation timing schedule.
Ingredients:
- 500g All-Purpose Flour
- 10g Salt
- 7g Instant Dry Yeast (approx. 1.4% of flour weight)
- 320g Lukewarm Water (approx. 64% hydration)
Instructions:
- In a large bowl, whisk together flour, salt, and instant yeast.
- Add lukewarm water and mix with a spoon or by hand until a shaggy dough forms.
- Turn dough onto a lightly floured surface and knead for 8-10 minutes until smooth and elastic.
- Place dough in a lightly oiled bowl, cover, and let rise (Bulk Fermentation).
Detailed Steps and Fermentation Schedule
- Step 1: Mixing and Kneading: (approx. 15-20 minutes) - Combine ingredients, knead until dough is smooth and elastic. Dough temperature should ideally be around 75-80°F (24-27°C) after kneading.
- Step 2: Bulk Fermentation (approx. 1.5 - 2.5 hours at 75°F/24°C) - Place dough in oiled bowl, cover. Let rise until roughly doubled in size. This is where active yeast fermentation timing is most visible. The poke test should show slow recoil.
- [ ] Mix ingredients
- [ ] Knead dough
- [ ] Place in oiled bowl
- [ ] Cover bowl
- [ ] Let rise until doubled
- Step 3: Shaping: (approx. 10-15 minutes) - Gently turn dough onto a lightly floured surface, shape into a loaf or rolls. Avoid degassing completely.
- Step 4: Final Proof (approx. 45-75 minutes at 75°F/24°C) - Place shaped dough in a proofing basket or on a baking sheet, cover loosely. Let rise until significantly increased in size and feels light. The poke test should show minimal or no recoil. This final rise completes the yeast fermentation timing before baking.
- [ ] Shape dough
- [ ] Place for final proof
- [ ] Cover dough
- [ ] Let rise until proofed
- Step 5: Baking: - Bake according to recipe instructions (e.g., 425°F/220°C for 25-35 minutes).
Note: These times are estimates. Adjust based on your room temperature and dough's visual cues.
Pizza Dough Recipe: Fermentation Schedule
This recipe uses a slightly longer fermentation for better flavor, demonstrating how yeast fermentation timing can be adjusted.
Ingredients:
- 500g Bread Flour (or All-Purpose)
- 10g Salt
- 3g Instant Dry Yeast (approx. 0.6% of flour weight - lower for longer ferment)
- 325g Lukewarm Water (approx. 65% hydration)
- 1 tbsp Olive Oil (optional, for dough elasticity)
Instructions:
- In a large bowl, whisk together flour, salt, and instant yeast.
- Add lukewarm water (and olive oil if using) and mix until a shaggy dough forms.
- Turn dough onto a lightly floured surface and knead for 5-7 minutes until mostly smooth.
- Place dough in a lightly oiled container, cover tightly, and refrigerate for a long, slow fermentation.
Detailed Steps and Fermentation Schedule
- Step 1: Mixing and Kneading: (approx. 15 minutes) - Combine ingredients, knead briefly. Dough may still be slightly shaggy.
- Step 2: Initial Room Temp Rest (Optional but helpful): (approx. 30-60 minutes at room temperature) - Allows yeast to start activity before the cold. This short period impacts overall yeast fermentation timing.
- Step 3: Cold Fermentation (approx. 24 - 72 hours in refrigerator at 38-40°F/3-4°C) - Dough will rise slowly, developing flavor. Volume may increase by 50-75%.
- [ ] Mix ingredients
- [ ] Knead briefly
- [ ] (Optional) Rest at room temp
- [ ] Place in oiled container
- [ ] Cover tightly
- [ ] Refrigerate for 24-72 hours
- Step 4: Bringing to Temperature & Shaping: (approx. 1-2 hours at room temperature) - Remove dough from fridge 1-2 hours before shaping to relax and warm slightly. Gently divide and shape into balls.
- Step 5: Final Proof (Optional/Short) (approx. 30-60 minutes at room temperature) - Allow dough balls to relax and puff slightly before shaping into pizza rounds. This final, short rise concludes the primary yeast fermentation timing for pizza.
- [ ] Remove from fridge
- [ ] Let rest/warm up
- [ ] Divide and shape balls
- [ ] (Optional) Final short proof
- Step 6: Shaping Pizza & Baking: - Gently stretch or press dough into rounds. Top and bake at a high temperature (450-550°F/230-290°C).
Note: The long cold ferment is key here for flavor and structure. Adjust time based on desired flavor development and dough strength.
Advanced Techniques for Yeast Fermentation
Retarding Fermentation: Slowing Down the Process for Flavor Development
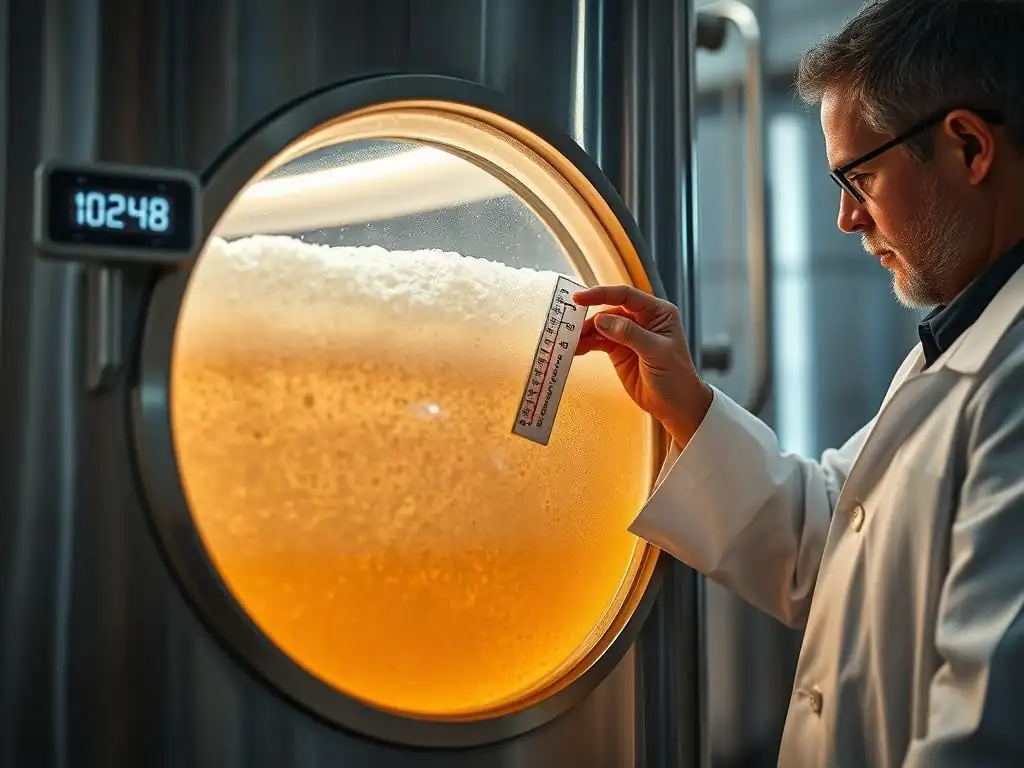
Retarding fermentation is the practice of deliberately slowing down yeast activity, most commonly by using refrigeration. This technique is a cornerstone of advanced yeast fermentation timing control and is employed to extend the fermentation period, allowing for greater development of complex flavors and aromas. By moving the dough to a cooler environment, typically 35-40°F (2-4°C), the yeast's metabolic rate is significantly reduced.
This slower pace gives enzymes more time to break down starches into sugars and proteins into amino acids, providing more food for the yeast and other microbes (like lactic acid bacteria, especially in sourdough or preferments) over a longer duration. The resulting accumulation of organic acids and other compounds contributes to a richer, more nuanced flavor profile than achievable with a quick room-temperature rise. Retarding also strengthens the gluten network, improving dough handling and the final bread's structure and crust. It's an essential technique for bakers aiming for artisan-quality results by precisely manipulating yeast fermentation timing.
Bulk Fermentation: Maximizing Flavor and Dough Strength
Bulk fermentation, also known as the first rise, refers to the initial period of fermentation after mixing and kneading the dough, before it is divided and shaped. This stage is crucial for developing both flavor and dough structure. During bulk fermentation, the yeast is most active, producing the majority of the gas that will leaven the bread. Simultaneously, enzymatic activity is breaking down components of the flour, and the gluten network is developing and relaxing.
Managing the yeast fermentation timing during the bulk rise is key. Allowing sufficient time for the dough to increase significantly in volume (often doubling or nearly doubling) indicates that enough gas has been produced. Performing stretch and folds during this phase helps strengthen the gluten, redistribute yeast and nutrients, and equalize dough temperature, leading to a more even and successful final bake. The duration of bulk fermentation is influenced by yeast quantity, temperature, and hydration, and mastering its timing is fundamental to overall yeast fermentation timing control.
Cold Fermentation: Achieving Unique Textures
Cold fermentation, as discussed earlier, is a specific form of retarding fermentation where dough is placed in a refrigerator for an extended period. Beyond flavor development, this technique significantly impacts the texture of the final product. The slower fermentation rate and colder temperature result in a dough that is easier to handle after refrigeration – it's less sticky and more extensible, making shaping easier, especially for high-hydration doughs.
The long, slow rise in the cold also allows the gluten structure to relax and align more effectively. When the cold-fermented dough is eventually baked, the cold temperature hitting the hot oven causes a more rapid and vigorous expansion of gases within the dough (oven spring). This often results in a more open, irregular crumb structure with larger, desirable air pockets, particularly in artisan-style breads. The unique texture achieved through precise cold yeast fermentation timing makes it a favored technique for many bakers.
Conclusion: Elevating Your Baking with Precise Yeast Fermentation
Mastering yeast fermentation timing is arguably one of the most impactful skills a baker can develop. It moves baking from simply following a recipe to truly understanding and controlling the biological heart of the process. By paying attention to the type and amount of yeast, managing dough temperature, understanding the role of hydration and other ingredients, and learning to read the signs of fermentation, you gain the power to influence not just whether your dough rises, but how it rises and the resulting flavor and texture.
Whether you choose the quick direct method, incorporate a flavor-boosting preferment, or embrace the depth of a long cold ferment, your ability to control yeast fermentation timing directly correlates with the quality of your baked goods. Experiment with these techniques, observe your dough closely, and make adjustments based on what you see and feel. With practice, you'll consistently achieve optimal results, transforming simple ingredients into delicious, beautifully textured breads and pastries. Your journey to becoming a more confident and skilled baker is deeply intertwined with understanding and commanding the magic of yeast.
Frequently Asked Questions
What is yeast fermentation and why is timing so important in baking?
Yeast fermentation is the process where yeast consumes sugars and produces carbon dioxide and alcohol, which is essential for leavening dough. Timing is crucial because under- or over-fermentation affects the texture and flavor of the final baked product.
How can I tell if my yeast is active and ready to use in a recipe?
A simple test is to mix yeast with warm water and a bit of sugar. If the mixture foams or bubbles significantly within 5-10 minutes, the yeast is actively fermenting and ready to use.
What factors can affect the timing of yeast fermentation?
Several factors influence fermentation, including temperature, the amount of yeast used, and the sugar content of the dough. Warmer temperatures generally speed up fermentation, while colder temperatures slow it down.
What are some common signs of over-fermentation in dough?
Over-fermented dough will often have a sour or alcoholic smell, a collapsed or overly sticky texture, and might even be difficult to handle. It may also result in a dense, unpleasant final product.
How can I control the timing of yeast fermentation to achieve the best results?
You can control timing by adjusting the temperature of the environment, modifying the amount of yeast used, and closely monitoring the dough's rise. Using a bulk fermentation container with volume markings can also aid in visual assessment.
Final Reflection: Mastering the Art of Yeast Fermentation Timing
Precise control over yeast fermentation timing is not merely a technical detail; it's the cornerstone of consistent, high-quality results in baking and brewing. The techniques explored in this article—from temperature management to nutrient supplementation—are crucial for anyone seeking to elevate their craft. Ignoring these subtleties can lead to unpredictable outcomes, impacting everything from bread texture to beer flavor profiles.
The journey of understanding yeast fermentation is a fascinating exploration of biological processes and their impact on our culinary traditions. It's a journey that continues to evolve, with new research constantly refining our understanding. The more I learn, the more I realize how much I don't know,
a sentiment perfectly encapsulates the ongoing quest for perfection in this field. This continuous learning, driven by both scientific advancements and the passionate pursuit of culinary excellence, ensures that the art of fermentation remains vibrant and dynamic.
Now, consider your own baking or brewing endeavors. What adjustments can you make to your current processes based on the insights shared here? I encourage you to experiment, to meticulously track your results, and to embrace the subtle nuances of yeast fermentation. By mastering this fundamental process, you'll not only improve the quality of your creations but also deepen your appreciation for the intricate dance between science and artistry that lies at the heart of fermentation.
Unleash Your Inner Baker: Master Yeast Fermentation!
Thanks for diving deep into the world of yeast fermentation! We hope you've gained valuable insights into achieving perfectly risen dough. Ready to put your newfound knowledge into practice?
- Bake your best loaf yet! Try out one of the techniques discussed today and share your results (we'd love to see your creations! ).
- Experiment with different flours and hydration levels to see how they impact fermentation. Keep notes to refine your technique!
- Challenge a friend to a sourdough bread-off using what you've learned!
What unique ingredient will you experiment with to elevate your next yeast-based creation?