
Easy Swirls: Simple Frosting Decoration for Beginners

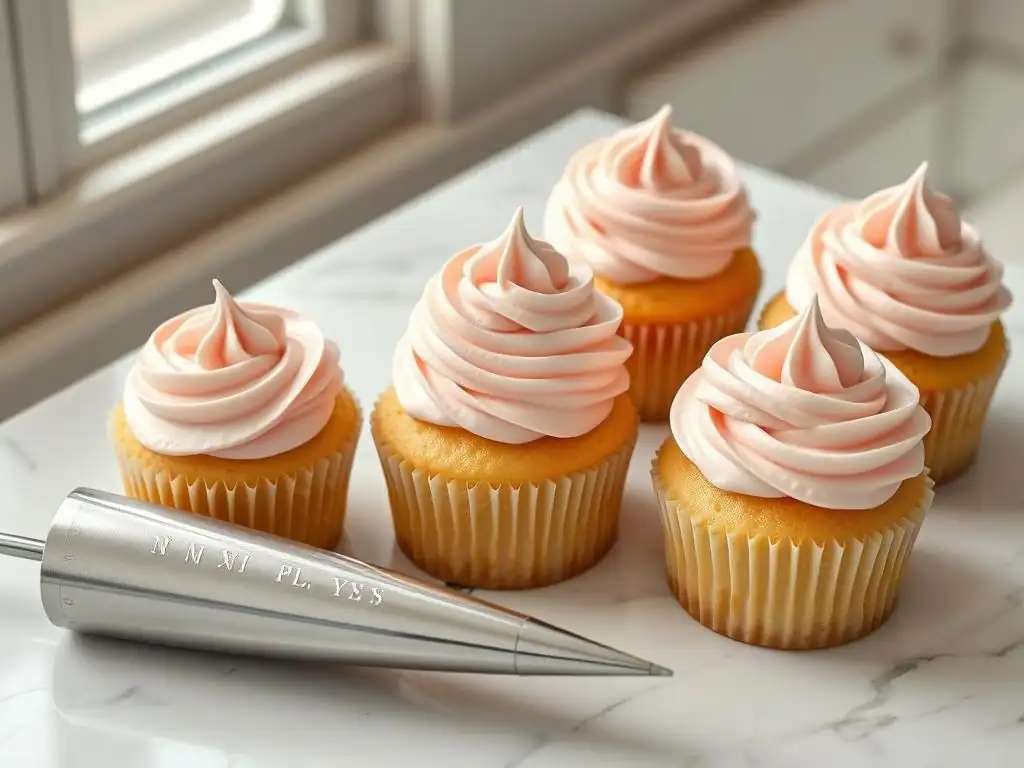
Welcome to BakeWithEase, your baking sanctuary! Ever dreamt of effortlessly creating those elegant swirls you see on professional pastries? Get ready to transform your desserts! This week, we're diving into the secrets of easy swirl frosting decorating – a technique so simple, even a complete beginner can achieve stunning results. Unlock the artistry of pastry decoration and prepare to impress; the delicious details await!
- BakeWithEase Presents: Mastering Easy Swirl Frosting
- Introduction to Swirl Frosting Techniques for Cakes
- Essential Tools and Ingredients for Perfect Swirls
- Step-by-Step Guide to Easy Swirl Frosting Decoration
- Troubleshooting Common Swirl Frosting Problems
- Tips and Tricks for Stunning Swirl Frosting
- Easy Swirl Frosting Design Ideas and Inspiration
- Conclusion: You've Mastered Easy Swirl Frosting!
-
Frequently Asked Questions
- How can I achieve a smooth frosting base before adding swirls?
- What's the best frosting consistency for creating swirls?
- What piping tip is best for easy swirl frosting decorating?
- How do I prevent air bubbles from ruining my frosting swirls?
- What are some creative variations on the classic swirl frosting technique?
- Final Reflection: Mastering the Art of the Easy Swirl
- Unleash Your Inner Pastry Artist!
BakeWithEase Presents: Mastering Easy Swirl Frosting
Welcome to BakeWithEase, where we believe that beautiful cakes and pastries are within everyone's reach! Learning to decorate your baked goods can seem daunting, but with the right techniques, even beginners can create stunning results. One of the most popular and achievable decoration methods is the simple swirl frosting. It's versatile, forgiving, and instantly elevates the look of cakes, cupcakes, and more.
This guide is designed specifically for those new to the world of cake decorating. We'll break down the process into simple, manageable steps, covering everything from choosing the right frosting to mastering the basic piping motion. Our goal is to empower you with the knowledge and confidence to tackle easy swirl frosting decorating and impress your friends and family with your creations.
Introduction to Swirl Frosting Techniques for Cakes
Swirl frosting is a classic decorating technique that involves piping frosting onto a cake or cupcake in a circular or upward motion, creating a decorative peak or pattern. It's a fundamental skill in baking that allows for a wide range of looks, from rustic charm to elegant sophistication. Unlike intricate piping designs that require advanced dexterity, basic swirls are incredibly simple to learn and execute, making them perfect for beginners.
Mastering easy swirl frosting decorating opens up a world of possibilities for personalizing your baked treats. Whether you're topping a simple sheet cake or adding flair to a batch of cupcakes, a well-executed swirl adds texture, height, and visual interest. It's a technique that looks impressive but requires minimal practice to achieve a beautiful, consistent result.
Why Choose Swirl Frosting? Simplicity and Elegance
Swirl frosting is a favorite among both novice and experienced bakers primarily because of its perfect balance of simplicity and elegance. For beginners, the basic technique is incredibly easy to grasp – essentially involving squeezing a piping bag while moving it in a controlled pattern. This low barrier to entry means you can achieve professional-looking results much faster than attempting more complex piping work or smooth frosting finishes that require significant practice.
Beyond its ease, the swirl offers remarkable visual appeal. A cake or cupcake topped with uniform, fluffy swirls has an inherent charm and celebratory feel. It adds volume and dimension that a simple spread of frosting cannot match. Think of a classic birthday cake or a display of cupcakes at a bake sale – chances are, many will feature the inviting look of a simple, yet elegant, swirl. It's a technique that consistently delivers a delightful aesthetic with minimal effort, making easy swirl frosting decorating a go-to for many home bakers.
What You'll Learn in This Easy Swirl Frosting Guide
In this comprehensive guide, you will gain practical knowledge and step-by-step instructions to confidently create beautiful frosting swirls. We will start by identifying the ideal types of frosting and the essential tools required, ensuring you have the right foundation before you even begin piping. Understanding your materials is crucial for successful easy swirl frosting decorating.
Moving beyond the basics, we will walk you through the entire process, from preparing your cake surface to filling and handling a piping bag correctly. You'll learn the fundamental techniques for creating classic swirls, along with tips for maintaining consistency. We'll also touch upon simple variations to add complexity and visual interest as you gain confidence. By the end of this guide, you'll possess the skills to tackle easy swirl frosting decorating for various occasions and baked goods.
Essential Tools and Ingredients for Perfect Swirls
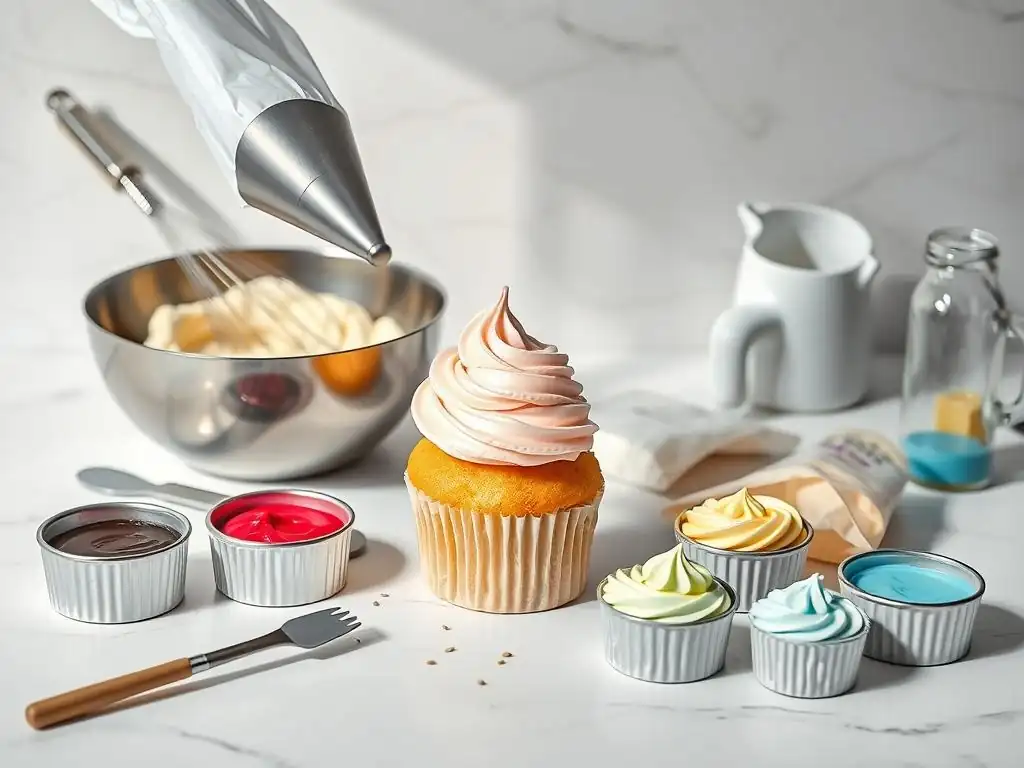
Achieving beautiful frosting swirls isn't just about technique; it also relies heavily on having the right tools and ingredients prepared. While you don't need a professional kitchen setup, a few key items will make the process significantly easier and yield much better results. Using the correct consistency of frosting and the appropriate piping equipment is fundamental to successful easy swirl frosting decorating.
Gathering your supplies before you begin helps streamline the decorating process and prevents last-minute scrambling. From selecting the right frosting to choosing the perfect piping tip, each element plays a role in how your swirls turn out. Investing in a few basic, quality tools will make all the difference in your easy swirl frosting decorating journey.
The Best Frosting for Swirls: Consistency is Key
The type and consistency of your frosting are paramount for creating well-defined, stable swirls. American buttercream is perhaps the most popular choice for easy swirl frosting decorating due to its firm yet pipeable texture and ability to hold peaks well. A standard American buttercream recipe typically involves creaming about 1 cup of softened butter with 3-4 cups of powdered sugar and a few tablespoons of milk or cream, plus flavorings. This high sugar content contributes to its stability.
Other suitable options include cream cheese frosting (ensure it's chilled slightly for firmness) and Swiss or Italian meringue buttercreams. Meringue-based buttercreams, while smoother and less sweet than American buttercream, are incredibly stable and create beautiful, silky swirls. Regardless of the type, the frosting should be smooth, lump-free, and thick enough to hold its shape when piped, but not so stiff that it's difficult to squeeze from the bag. If it's too soft, the swirls will collapse; if too stiff, they will look jagged and be hard to pipe.
Must-Have Tools for Easy Swirl Frosting Decorating
To effectively execute easy swirl frosting decorating, a few specific tools are indispensable. These items are readily available at most craft stores or online retailers and are a worthwhile investment for any aspiring baker looking to decorate cakes or cupcakes. Having the right equipment ensures a smoother process and more professional outcome for your swirls.
The core tools include piping bags, piping tips, and often, a turntable for cakes and an offset spatula for preparation. While you can try improvising, using these dedicated tools simplifies the technique considerably. They are designed to make applying frosting neatly and consistently much easier, which is key to mastering easy swirl frosting decorating.
Piping Bags: Choosing the Right Size and Material
Piping bags are essential for directing the frosting precisely onto your cake or cupcake. They come in various sizes, typically measured in inches or by the volume they hold. For general easy swirl frosting decorating on cakes or cupcakes, bags ranging from 12 to 16 inches are most common and comfortable to handle, allowing you to hold a good amount of frosting without being overly bulky.
Material options include disposable plastic bags, reusable silicone or nylon bags, and traditional canvas bags. Disposable bags are convenient for easy cleanup, especially when working with different colors or flavors. Reusable bags are more eco-friendly and durable but require thorough washing. For beginners practicing easy swirl frosting decorating, disposable bags offer simplicity and hygiene.
Piping Tips: The Best Tips for Swirl Designs
Piping tips, also called decorating tips or nozzles, attach to the end of the piping bag and shape the frosting as it's squeezed out. For easy swirl frosting decorating, star tips are the most popular choice as they naturally create the ridges seen in classic swirls and rosettes. Open star tips (like the Wilton 1M or Ateco 826) produce defined ridges and are perfect for classic swirls.
Closed star tips (like the Wilton 2D or Ateco 846) have petals that curl inward, creating swirls with more distinct, ruffled edges. French star tips (like the Ateco 869) have deep grooves for sharply defined, angular swirls. For general easy swirl frosting decorating, starting with a large open star tip like the 1M is highly recommended as it's versatile and forgiving.
Turntable: Creating Smooth and Even Swirls
While not strictly mandatory for cupcakes, a cake turntable is incredibly helpful when decorating cakes with swirls. A turntable allows you to smoothly rotate the cake as you pipe, enabling you to create continuous, even swirls around the sides or a neat pattern on top without having to awkwardly move yourself or the cake. This free movement significantly improves the consistency and appearance of your easy swirl frosting decorating.
Manual turntables are widely available and work well; simply spin the top platform as you pipe. Some advanced turntables have ball bearings for extra smooth rotation or even tilting capabilities. Even a basic plastic turntable, costing around $15-$25, will make a noticeable difference in achieving professional-looking swirls on your cakes.
Offset Spatula: For Perfecting the Finish
An offset spatula, with its angled blade, is invaluable for preparing your cake surface before piping swirls. It's used to apply and smooth crumb coats and final layers of frosting. A smooth base layer provides a clean canvas for your easy swirl frosting decorating and helps the piped swirls adhere properly.
Offset spatulas come in various sizes; a small (4-6 inch blade) or medium (8-10 inch blade) size is versatile for most home baking tasks. The offset handle keeps your knuckles from dragging in the frosting while you work. While not used for the piping motion itself, using an offset spatula for foundational frosting work ensures your cake is perfectly prepped, making your subsequent easy swirl frosting decorating much more successful.
Step-by-Step Guide to Easy Swirl Frosting Decoration
Now that you have your tools and frosting ready, it's time to get piping! This section will walk you through the process of creating beautiful frosting swirls on your cake or cupcakes, from preparing your canvas to executing the basic piping motion. Follow these steps for successful easy swirl frosting decorating.
Breaking down the process makes it less intimidating and helps you focus on each individual action. Remember, practice makes perfect, but these fundamental steps will get you started on the right path to mastering easy swirl frosting decorating.
Step 1: Preparing Your Cake for Frosting
Before you even think about piping swirls, your cake needs proper preparation. This involves ensuring the layers are level and applying a foundational layer of frosting known as a crumb coat. This initial step is crucial for a clean and professional final look in your easy swirl frosting decorating.
Taking the time to properly prepare your cake base prevents crumbs from mixing into your final frosting layers and provides a smooth surface for piping. Skipping this step can result in a messy appearance, detracting from your beautiful swirls.
Leveling Your Cake Layers for a Professional Finish
Most baked cake layers will have a slight dome on top. For a stable, even cake, it's important to level these layers. Use a serrated knife or a specialized cake leveler to carefully slice off the domed top, creating a flat surface. This ensures your cake layers stack neatly without tilting and provides a level top surface for your final swirls.
Aim to remove just enough to create a flat plane. For instance, if your cake has a dome rising about 1/2 inch above the pan edge, you might need to trim off that much. Leveling creates a foundation where your easy swirl frosting decorating will look much more polished and even across the surface.
Applying a Crumb Coat for a Smooth Surface
A crumb coat is a thin layer of frosting applied to the cake's surface, designed to trap any loose crumbs. Apply a thin, even layer of frosting using your offset spatula, covering the top and sides completely. Don't worry about making it perfectly smooth – its main job is to seal in crumbs.
Once applied, chill the cake in the refrigerator for about 15-30 minutes until the crumb coat is firm to the touch. This chilling sets the frosting and locks the crumbs in place, providing a clean, smooth canvas for your final, thicker layer of frosting or direct easy swirl frosting decorating on top.
Step 2: Filling the Piping Bag with Frosting
Correctly filling a piping bag prevents mess and makes piping much easier. An overfilled or improperly filled bag can be difficult to control and lead to frustrating leaks. Learning this simple technique is key to smooth easy swirl frosting decorating.
Taking a moment to fill your bag neatly saves time and frustration during the actual piping process. It ensures the frosting flows consistently and you have good control over the bag.
How to Properly Load a Piping Bag Without Making a Mess
To fill a piping bag neatly, first insert your piping tip into the narrow end (if using a coupler, attach that first). Then, fold down the top few inches of the bag over your hand, creating a cuff. This cuff helps keep the opening wide and stable while you spoon the frosting in.
Using a spoon or spatula, fill the bag about two-thirds full. Do not overfill, as this makes the bag hard to twist and squeeze. Unfold the cuff, then gather the top of the bag and twist it closed, pushing the frosting down towards the tip. This creates pressure for piping. Holding the twisted end provides control for easy swirl frosting decorating.
Choosing the Right Amount of Frosting for Your Cake
The amount of frosting needed depends on the size of your cake or the number of cupcakes, and how much coverage you desire. For a basic 8-inch two-layer cake with swirls on top, you might need approximately 3-4 cups of prepared frosting. For a dozen cupcakes, you'll likely need about 2-3 cups to pipe generous swirls.
It's better to have a little extra frosting than not enough. You can always store leftover frosting. Filling the bag two-thirds full allows for sufficient frosting for continuous piping without needing constant refills, which is helpful for maintaining consistency in your easy swirl frosting decorating pattern.
Step 3: Mastering the Basic Swirl Technique
This is where the magic happens! The basic swirl technique is straightforward but requires a little practice to get a feel for the pressure and motion. Once you understand the fundamentals, you'll be well on your way to easy swirl frosting decorating success.
Practice on a piece of parchment paper first if you're nervous. You can scrape the frosting off and reuse it. The key is consistent pressure and a steady hand.
Creating Simple Rosette Swirls
Rosette swirls are a classic and easy design, perfect for cupcakes or as a pattern on a cake top. Using a star tip (like the 1M), hold the bag perpendicular to the surface, with the tip just above the cake. Start in the center and apply steady pressure, moving the bag in a tight spiral outwards, overlapping slightly as you go.
Once you reach the desired size, stop squeezing and pull the bag away cleanly. The frosting will form a beautiful, textured rosette shape. For easy swirl frosting decorating on a cake top, you can pipe multiple rosettes side-by-side to cover the surface.
Piping Vertical Swirls for a Modern Look
Vertical swirls are often used on the sides of a cake for a contemporary textured finish. Using a large star tip, hold the bag perpendicular to the side of the cake, starting at the bottom edge. Apply steady pressure and pipe a straight line upwards to the top edge, creating a ridge of frosting.
Repeat this process side-by-side around the entire cake, overlapping the edges of each vertical line slightly to create a continuous textured surface. A turntable is particularly helpful for this style of easy swirl frosting decorating, allowing you to rotate the cake smoothly as you pipe each vertical stripe.
Achieving Consistent Swirls: Practice Makes Perfect
Consistency in size, shape, and height is what makes a cake covered in swirls look professional. The key to this consistency in easy swirl frosting decorating lies in maintaining steady pressure on the piping bag and a consistent speed in your movement. If your swirls are uneven, it's likely due to variations in how hard you're squeezing or how fast you're moving the bag.
Try piping several swirls on a piece of parchment paper, focusing on applying the same pressure and speed each time. Observe how changes affect the size and definition of the swirl. This practice helps build the muscle memory needed for uniform easy swirl frosting decorating on your actual cake or cupcakes.
Step 4: Advanced Swirl Variations and Patterns
Once you're comfortable with the basic techniques, you can explore simple variations to add more visual interest to your easy swirl frosting decorating. These techniques build upon the fundamentals and introduce color and texture in exciting ways.
These variations are still quite approachable for beginners but offer a chance to experiment and personalize your decorations further. They demonstrate the versatility of easy swirl frosting decorating.
Two-Toned Swirls: Adding Color and Dimension
Creating two-toned swirls adds a beautiful depth and visual appeal. There are a couple of ways to achieve this effect for easy swirl frosting decorating. One method is to prepare two different colors of frosting. Lay a piece of plastic wrap flat and spread a stripe of one color frosting down one side, and a stripe of the second color alongside it.
Roll the plastic wrap into a log, twisting the ends. Cut one twisted end off and insert the log, cut end first, into your piping bag fitted with a star tip. As you pipe, the two colors will emerge side-by-side, creating a striking striped swirl. Another method is to simply place dollops of two colors alternately into the piping bag.
Ombre Swirls: Creating a Gradient Effect
Ombre swirls transition gradually from one color to another, or from white to a deeper shade. This technique for easy swirl frosting decorating requires preparing frosting in gradually increasing shades of a color. For example, you might have plain white, a very pale blue, a medium blue, and a slightly darker blue.
Start by filling the bottom of your piping bag with the darkest shade, then layer the lighter shades on top in order, ending with the lightest or white at the top. As you pipe, the colors will blend together, creating a beautiful gradient effect in your swirls. This works particularly well for vertical swirls on the side of a cake.
Combining Different Swirl Techniques for Unique Designs
Don't feel limited to just one type of swirl on your cake. Combining techniques can lead to unique and dynamic designs. For instance, you could cover the sides of a cake with vertical swirls and then pipe a border of rosettes around the top edge. Or, pipe individual rosettes on cupcakes using a two-toned technique for added flair.
Mixing different sized star tips can also create interesting textures. A large 1M tip for the main swirl and a smaller 21 tip for miniature accent swirls or borders can add detail. Experimenting with combinations enhances your easy swirl frosting decorating skills and creativity.
Troubleshooting Common Swirl Frosting Problems
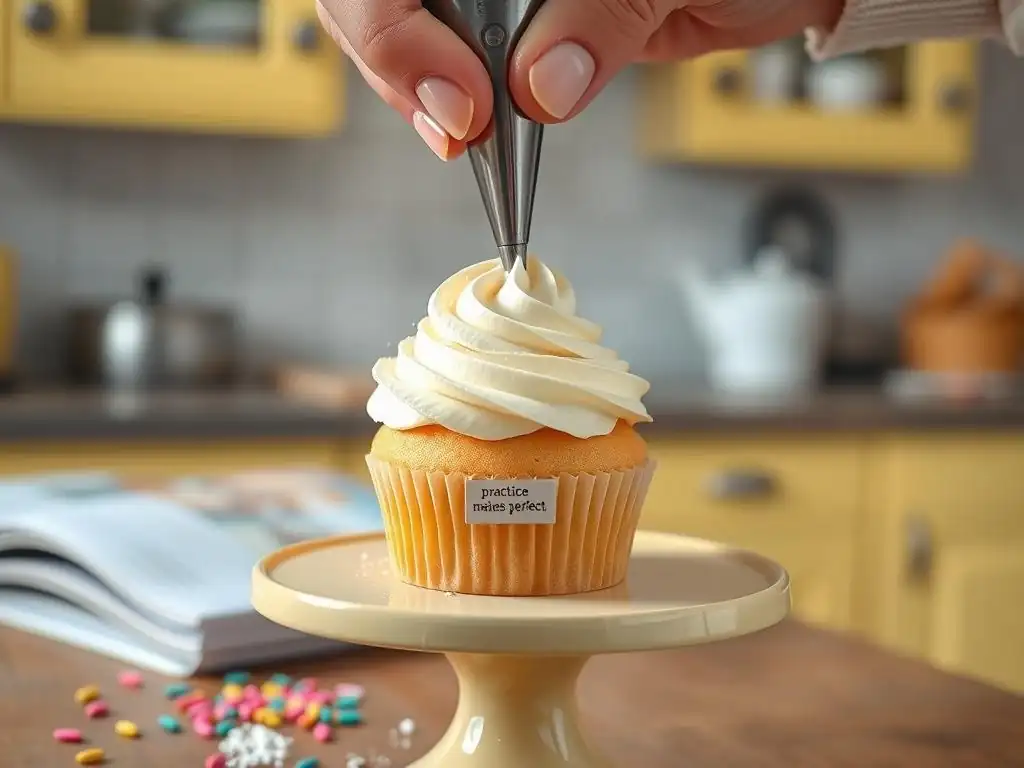
Even with careful preparation, you might encounter a few hiccups when learning easy swirl frosting decorating. Don't get discouraged! Most common problems have simple solutions. Identifying the issue is the first step to fixing it.
Being prepared for potential issues helps you handle them calmly and continue with your decorating. Troubleshooting is a normal part of mastering any new baking skill, including easy swirl frosting decorating.
Dealing with Air Bubbles in Your Frosting
Air bubbles in your frosting can cause unsightly gaps or bursts in your piped swirls. They often occur when mixing the frosting or when loading the piping bag. To minimize air bubbles, stir your frosting gently with a spatula after mixing to push out trapped air before putting it in the bag.
When filling the bag, press the frosting down towards the tip to eliminate air pockets. If you encounter a bubble while piping, stop squeezing briefly, twist the bag tighter to increase pressure, and often the bubble will pass through. You can also poke the bubble with a toothpick before continuing your easy swirl frosting decorating.
Preventing Frosting from Melting or Becoming Too Soft
Frosting that is too soft or begins to melt will not hold its shape, resulting in collapsed or messy swirls. This is often caused by warm hands holding the bag for too long, a warm kitchen environment, or the frosting itself being too warm.
If your frosting is softening, twist the piping bag tightly and place it in the refrigerator for 10-15 minutes to firm up. Work in a cool environment if possible. Consider using a sturdier frosting type like Swiss meringue buttercream if you have consistently warm hands or a warm kitchen. For easy swirl frosting decorating, keeping the frosting at the right temperature is critical.
Fixing Uneven or Messy Swirls
Uneven height, size, or spacing in your swirls usually stems from inconsistent pressure or speed while piping. Messy swirls might also be a sign that your frosting consistency is slightly off (too soft) or your piping tip is clogged (though less common with large star tips).
If you notice unevenness, pause, take a breath, and consciously focus on maintaining steady pressure and a consistent movement speed for the next swirl. If a swirl is particularly bad on a cake, you can gently scrape it off with an offset spatula and re-pipe it (ensure no crumbs get mixed in). For cupcakes, you can often just scrape the entire top off and try again. Practice on parchment paper helps improve consistency for easy swirl frosting decorating.
Tips and Tricks for Stunning Swirl Frosting
Beyond the basic technique and troubleshooting, a few extra tips can help elevate your easy swirl frosting decorating from good to truly stunning. These small details can make a big difference in the final presentation.
Incorporating these simple tricks can add that extra touch of polish and personality to your piped creations, making your easy swirl frosting decorating stand out.
Using Food Coloring to Enhance Your Swirls
Adding food coloring is a simple way to make your swirls pop. For vibrant colors, use gel food coloring rather than liquid, as it provides concentrated color without adding excess moisture that can thin the frosting. Add color gradually, mixing thoroughly until you achieve the desired shade.
For easy swirl frosting decorating, consider using colors that complement the cake flavor or the occasion. Pastel colors are lovely for spring or baby showers, while bold, vibrant colors are perfect for birthdays. Remember that colors can deepen slightly as they sit, so you might aim for a shade slightly lighter than your final goal.
Adding Sprinkles and Other Decorations to Your Swirls
Once your swirls are piped, they are the perfect canvas for additional decorations. Sprinkles are a classic choice – apply them immediately after piping while the frosting is still soft so they adhere. Jimmies, nonpareils, edible glitter, or shaped sprinkles can add texture and sparkle.
Other options include placing a cherry or berry on top of each cupcake swirl, adding chocolate shavings, edible flowers, or small candy decorations. These additions instantly enhance the visual appeal of your easy swirl frosting decorating and make your treats even more festive.
Achieving a Professional Look with Minimal Effort
The beauty of easy swirl frosting decorating is that it inherently looks polished with minimal effort once you master the basic technique. To maximize the professional appearance: ensure your crumb coat is smooth and chilled, use a consistent frosting texture, choose an appropriately sized piping tip for your cake/cupcakes, and focus on steady pressure and speed.
Little details like wiping the piping tip clean between swirls (especially if using a closed star tip where frosting can accumulate) can also help maintain sharp definition. Paying attention to these small steps elevates your easy swirl frosting decorating results significantly.
Easy Swirl Frosting Design Ideas and Inspiration
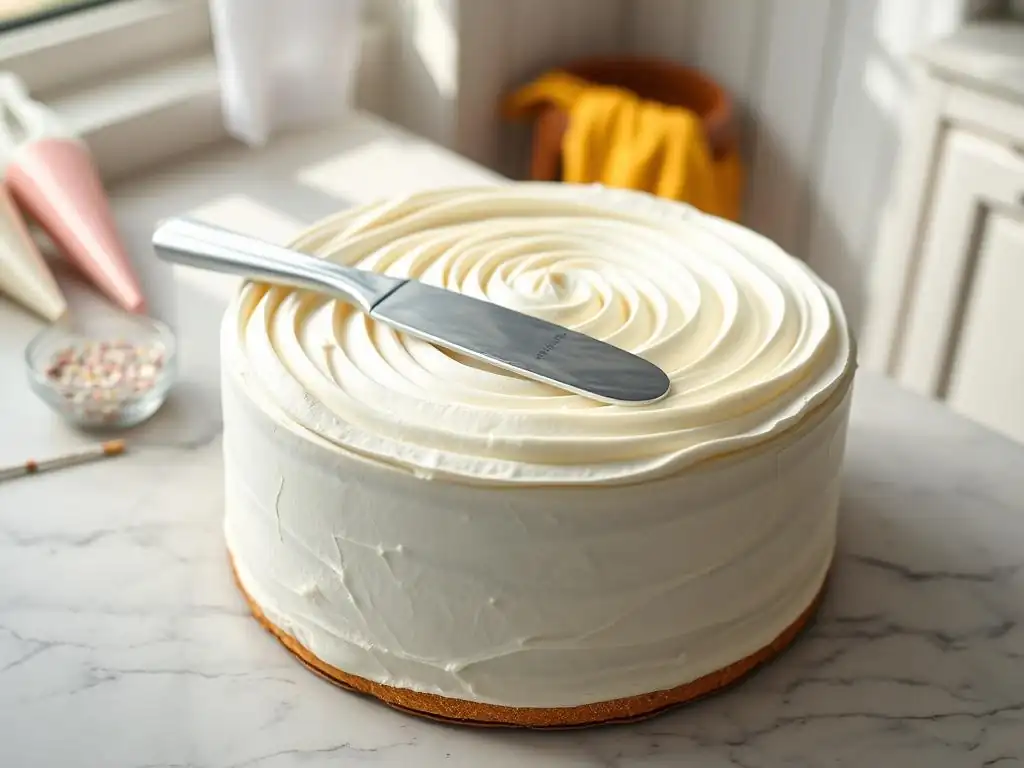
Swirl frosting is incredibly versatile and can be adapted for many different occasions and types of baked goods. Here are a few ideas to inspire your next easy swirl frosting decorating project.
Seeing how this technique can be applied in different contexts helps unlock its potential and gives you creative starting points for your own baking.
Swirl Frosting for Birthday Cakes
For a birthday cake, easy swirl frosting decorating is a fantastic choice. You can cover the entire top of a round cake with rosettes piped side-by-side, creating a full, textured surface. Use bright, celebratory colors like vibrant blues, pinks, or rainbow hues.
Alternatively, pipe vertical swirls around the sides and a simple border of shells or stars (using the same star tip) around the top edge. Add sprinkles generously over the swirls for extra festivity. A classic 1M tip rosette cake is a universally loved birthday design using simple easy swirl frosting decorating.
Swirl Frosting for Wedding Cakes
While professional wedding cakes often feature complex designs, a smaller, informal wedding cake or even wedding cupcakes can beautifully utilize easy swirl frosting decorating. White or ivory frosting with a large open star tip creates elegant, textured swirls that look sophisticated.
Consider an ombre effect transitioning from pure white to a blush pink or soft gold for a romantic touch. Minimalist vertical swirls on the sides can also look very chic. Pair with fresh flowers placed amongst the swirls for a stunning, yet achievable, wedding cake decoration.
Swirl Frosting for Cupcakes
Cupcakes are perhaps the most common canvas for easy swirl frosting decorating. A single, generous swirl on top of each cupcake is classic. Use a large star tip (like 1M or 2D) and pipe from the outside edge inwards, or from the center outwards, depending on the tip and desired look.
Experiment with different tip shapes on the same batch for variety. Two-toned or ombre frosting works wonderfully on cupcakes. Finish with a sprinkle of sanding sugar or a single candy pearl on top of each swirl for a perfect party treat using simple easy swirl frosting decorating.
Conclusion: You've Mastered Easy Swirl Frosting!
Congratulations! By following this guide, you've learned the essential steps, tools, and techniques for easy swirl frosting decorating. From preparing your cake and choosing the right frosting to mastering the basic piping motion and troubleshooting common issues, you now have the knowledge to create beautiful, swirled frosting finishes on your baked goods.
Remember that practice is key, but the easy swirl is designed to be forgiving and fun. Don't strive for absolute perfection on your first try; focus on getting comfortable with the piping bag and understanding how pressure and movement affect the outcome. With a little practice, easy swirl frosting decorating will become a go-to technique in your baking repertoire.
Celebrate Your Baking Success with BakeWithEase!
We hope this guide has empowered you to try easy swirl frosting decorating and discover the joy of decorating your own cakes and cupcakes. Share your creations with friends and family and celebrate your baking achievements! The simple elegance of a well-piped swirl is always a crowd-pleaser.
Continue exploring the world of baking and decorating with BakeWithEase. We offer many more resources, tips, and simple recipes to help you grow your skills and confidence in the kitchen. Keep practicing your easy swirl frosting decorating, experiment with colors and variations, and most importantly, have fun baking!
Frequently Asked Questions
How can I achieve a smooth frosting base before adding swirls?
A smooth base is crucial. Ensure your cake is completely cool and use a crumb coat of frosting first. Chill the crumb-coated cake before applying the final, thicker layer for easy swirl application.
What's the best frosting consistency for creating swirls?
The ideal consistency is soft but holds its shape. It should be pipable without being too runny. If it's too stiff, add a tiny bit of milk; too runny, add powdered sugar.
What piping tip is best for easy swirl frosting decorating?
A large round tip or a star tip are excellent choices for beginners. They create clear, defined swirls with minimal effort. Experiment with different sizes for varied effects.
How do I prevent air bubbles from ruining my frosting swirls?
Before piping, gently tap your filled piping bag on the counter to release any trapped air. Also, avoid overfilling the bag, which can contribute to air bubble formation.
What are some creative variations on the classic swirl frosting technique?
Try using multiple colors of frosting in the same bag for a rainbow swirl effect. You can also add sprinkles or edible glitter to enhance the look and add visual interest.
Final Reflection: Mastering the Art of the Easy Swirl
The simple elegance of a perfectly swirled frosting rose is surprisingly accessible, and this accessibility is more important than ever in a world craving homemade comfort and creative expression. Learning to decorate cakes and cupcakes doesn't have to be intimidating; mastering the easy swirl opens a world of possibilities for bakers of all skill levels. This technique empowers anyone to elevate their baking game with minimal effort and maximum impact.
The joy of creating something beautiful with your own hands is profoundly satisfying, and the easy swirl frosting technique perfectly embodies this sentiment. It's a testament to the power of simple techniques to yield impressive results. This accessible skill fosters a sense of accomplishment and encourages further exploration in the world of cake decorating. As the renowned pastry chef, Pierre Hermé, once said, Baking is a form of love. When you bake for someone, you're giving them a piece of your heart.
The easy swirl, in its simplicity, allows us to share that piece of our heart more readily.
Now, it's your turn. Don't be afraid to experiment! Grab your piping bag, choose your favorite frosting, and try creating your own easy swirls. Let this newfound skill be a springboard to further creativity in the kitchen. Embrace the imperfections, celebrate the successes, and most importantly, enjoy the process of transforming a simple cake into a delightful masterpiece. The world awaits your beautifully swirled creations!
Unleash Your Inner Pastry Artist!
Thanks for joining us on this sweet journey into the world of frosting decorations! We hope you now feel confident enough to create beautiful cakes, even with simple techniques. Ready to take your baking skills to the next level?
- Master the swirl: Practice your newly acquired swirling skills on cupcakes or cookies – you’ll be amazed at how quickly you improve!
- Share your creations: Show off your beautiful frostings on social media using #BakeWithEaseSwirls – let's inspire each other!
- Explore variations: Experiment with different piping tips and frosting colors to create unique designs.
What amazing swirl creations will you dream up next?