
Reviving Stale GlutenFree Bread: Simple Tricks

Welcome to BakeWithEase, your trusted guide to the delightful world of baking! Ever wondered if you could breathe new life into that stale loaf of GlutenFree bread? Our latest article unveils simple, yet effective, tricks to revive your bread and enjoy its fresh-baked goodness once more. Discover the secrets to transforming yesterday's disappointment into today's delicious treat. Intrigued? Let's get baking!
- Reviving Stale Gluten-Free Bread: Simple Tricks for BakeWithEase.com
- Introduction: Breathe New Life into Your Gluten-Free Loaf
- Simple Methods to Revive Stale Gluten-Free Bread
- Gluten-Free Bread Revive Recipe Variations and Hacks
- Preventing Gluten-Free Bread from Going Stale Too Quickly
- Conclusion: Enjoying Your Revived Gluten-Free Bread
-
Frequently Asked Questions
- What causes gluten-free bread to go stale so quickly?
- Can I revive any type of gluten-free bread using these techniques?
- What's the best method for reviving a whole loaf of stale gluten-free bread?
- How can I prevent my gluten-free bread from going stale in the first place?
- Does reviving gluten-free bread affect its nutritional value?
- Final Reflection: The Enduring Appeal of Fresh Gluten-Free Bread
- Unleash Your Inner Baker: Freshen Up Your Gluten-Free Loaf!
Reviving Stale Gluten-Free Bread: Simple Tricks for BakeWithEase.com
Introduction: Breathe New Life into Your Gluten-Free Loaf
The Challenge of Gluten-Free Bread: Staling and Texture Issues
Baking gluten-free bread can be incredibly rewarding, yielding delicious loaves free from wheat. However, one common challenge many bakers face is the tendency for gluten-free bread to go stale rather quickly and develop a tough or crumbly texture. Unlike traditional wheat bread, which relies on the elastic gluten network to maintain structure and moisture, gluten-free loaves use a variety of flours and binders that behave differently.
This often results in a loaf that, while delightful when fresh, can become hard or dry within a day or two. Understanding this inherent characteristic is the first step in mastering gluten-free baking and learning how to combat staleness.
The texture issues in gluten-free bread aren't just about dryness; they can also manifest as excessive crumbliness or a hard, dense crumb. This is often due to the specific starches and gums used in the recipe, which lack the cohesive properties of gluten.
For instance, a recipe heavy in rice flour might yield a drier crumb, while one with ample tapioca starch could become gummy. Achieving the perfect balance of ingredients is crucial for initial texture, but even the best gluten-free loaves are susceptible to the passage of time, making techniques for reviving stale gluten-free bread essential knowledge for any home baker.
Why Gluten-Free Bread Goes Stale Faster
The primary culprit behind bread staling, whether gluten-free or not, is the retrogradation of starches. This is a process where the gelatinized starches in the bread crumb recrystallize and squeeze out water molecules over time. In gluten-free bread, which often contains a higher proportion of starches compared to protein, this retrogradation can happen more rapidly or result in a more pronounced hardening effect. The absence of the gluten network, which helps trap moisture and provides structural support, also contributes to faster moisture loss from the crumb.
Furthermore, the specific types of flours and starches used in gluten-free baking play a significant role. Starches like tapioca, potato, and corn starch are common, and their retrogradation rates can differ. For example, some studies suggest that starches high in amylopectin content may stale more slowly than those high in amylose, but overall, the lack of gluten's structure means there's less resistance to this natural drying and hardening process. Without that springy protein matrix, the bread crumb simply becomes rigid and less palatable more quickly than its wheat-based counterparts.
BakeWithEase.com Tip: Understanding Gluten-Free Bread Ingredients
At BakeWithEase.com, we believe that understanding your ingredients is key to successful gluten-free baking. The blend of flours and starches you use dramatically impacts the final texture and how well your bread retains moisture. Common gluten-free flour blends often include a mix of brown rice flour, white rice flour, sorghum flour, millet flour, tapioca starch, potato starch, and corn starch. Each contributes different properties: rice flours provide structure, starches offer softness and chewiness, and flours like sorghum or millet add flavor and nutrition.
Beyond flours and starches, binders are critical in gluten-free bread. Ingredients like xanthan gum, guar gum, or psyllium husk powder mimic some of the functions of gluten by providing structure and helping to retain moisture.
For instance, adding just 10-15 grams of psyllium husk powder to a typical loaf recipe (around 400-500g flour) can significantly improve the crumb's elasticity and moisture retention, potentially extending its fresh life by a day or two compared to using only gums. Familiarizing yourself with how these components interact will not only help you bake better bread initially but also understand why a specific glutenfree bread revive recipe might work best for your particular loaf.
Simple Methods to Revive Stale Gluten-Free Bread
Method 1: Rehydrating with Water and Oven Baking - The Classic Revival
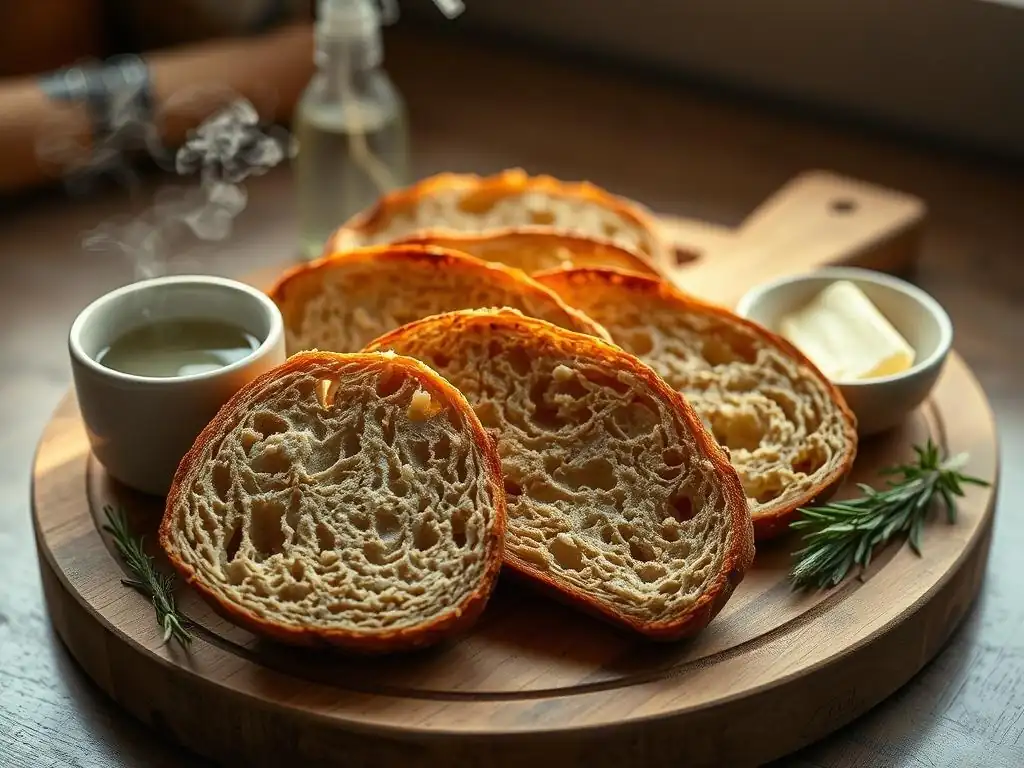
The oven baking method is a simple and effective way to bring a stale gluten-free loaf back to life, making it soft and edible again. This technique works by reintroducing moisture to the dry crumb and then gently heating the bread to soften the starches that have hardened during staling. It's a classic approach that can significantly improve the texture of a loaf that has become hard or dry, turning it from something potentially destined for the bin into a perfectly enjoyable slice.
This method is particularly good for whole loaves or large pieces of bread that have lost their initial softness but aren't completely rock hard. The gentle heat allows the moisture to penetrate the bread's core, softening the crumb without drying out the crust further, provided you follow the steps correctly. It's a forgiving glutenfree bread revive recipe that requires minimal equipment – just your oven and some aluminum foil.
Step 1: Lightly Moisten the Gluten-Free Bread
Begin by holding your stale gluten-free loaf or large piece of bread under cool running water for just a few seconds. The goal is to lightly dampen the crust, not soak the bread through. Alternatively, you can use a pastry brush to lightly brush water over the entire surface of the crust. Ensure the water covers the surface evenly. For a half loaf, focus on the cut surface as well as the crust. Avoid using warm or hot water, as this can make the bread gummy.
A quick dip or brush should be sufficient. For a standard-sized loaf (approximately 1.5 lbs or 680g), a 5-10 second dip under a gentle stream of water is usually enough. If using a brush, ensure the entire crust has a visible layer of moisture, but no standing water. This initial step is crucial for providing the moisture that the oven heat will then drive into the crumb, initiating the glutenfree bread revive recipe process.
Step 2: Wrap in Foil for Even Heating
Once the bread is lightly moistened, wrap it completely and tightly in aluminum foil. Make sure there are no gaps or holes in the foil wrap. This creates a steamy environment around the bread as it heats in the oven, helping the moisture penetrate the crumb and preventing the crust from becoming excessively hard or burnt. The foil acts like a mini-steamer bag, trapping the re-introduced moisture right where it's needed.
Wrapping tightly ensures that the steam generated from the water you added stays contained within the foil packet. This uniform distribution of heat and moisture is key to softening the entire loaf evenly. A double layer of foil can provide extra security against tears and ensure maximum steam retention, which is vital for a successful glutenfree bread revive recipe using this method.
Step 3: Oven Baking to Restore Softness
Preheat your oven to a moderate temperature, typically around 300-350°F (150-175°C). Place the foil-wrapped bread directly on the oven rack or on a baking sheet. Bake for 10 to 20 minutes, depending on the size and thickness of the bread. Smaller loaves or thick slices might need closer to 10-12 minutes, while a full loaf could require the full 20 minutes or slightly longer. You'll know it's done when the bread feels soft and pliable when gently squeezed through the foil.
After baking, carefully remove the bread from the oven and unwrap it immediately. Be cautious of the steam escaping from the foil. The crust might feel slightly soft right out of the foil, but it should firm up slightly as it cools for a minute or two. The interior crumb should be noticeably softer and less dry than before baking. This simple application of heat and steam provides an effective glutenfree bread revive recipe for many stale loaves.
Pro Tip: Adjusting Baking Time Based on Bread Size
The baking time is perhaps the most critical variable in this glutenfree bread revive recipe. A small baguette or half loaf will revive much faster than a large boule or sandwich loaf. Start with the minimum suggested time (e.g., 10-12 minutes for smaller items) and check for softness. If it still feels hard or dense through the foil, return it to the oven for additional 3-5 minute increments. Overheating can dry the bread out again, so it's better to check frequently.
Consider the density of the bread as well. A very dense, heavy gluten-free loaf might require a longer baking time to allow the heat and moisture to penetrate fully compared to a lighter, airier loaf. A good rule of thumb is to start checking around 10 minutes for most standard-sized loaves and add time as needed, ensuring the bread feels uniformly soft when pressed gently.
Method 2: Steaming for a Soft and Moist Gluten-Free Bread
Steaming is another excellent technique for reviving stale gluten-free bread, specifically targeting softness and moisture. This method directly introduces steam to the bread's surface and interior, effectively rehydrating the crumb and improving its texture. It's a gentle process that can yield a wonderfully soft result, often making the bread feel almost fresh again.
This technique is particularly useful for smaller pieces, rolls, or slices, though it can also be adapted for larger sections. The direct application of steam is very efficient at softening the hardened starches within the bread crumb. It's a quick glutenfree bread revive recipe, often taking less time than oven methods, and is ideal for those who have a steamer setup or even just a pot and a colander.
Using a Steamer Basket or Colander
To steam your stale gluten-free bread, you'll need a pot with a lid and a steamer basket or a metal colander that fits snugly inside the pot above the waterline. Add about an inch or two of water to the pot and bring it to a boil over medium-high heat. Once the water is boiling, reduce the heat to a simmer. Place your bread (whole, half, or slices) into the steamer basket or colander, ensuring it is not submerged in the water.
If you don't have a dedicated steamer, a metal colander placed over a pot of simmering water with a tight-fitting lid works perfectly. The key is to ensure the bread is elevated above the water level so it's exposed only to the steam. This simple setup allows you to implement this effective glutenfree bread revive recipe with common kitchen tools.
Adding Aromatics to the Steaming Water [Optional: Herbs, Spices]
For an extra layer of flavor, you can add aromatics to the steaming water. A few sprigs of rosemary, thyme, or bay leaves can infuse a savory note into the bread. For a slightly sweeter touch, consider adding a cinnamon stick or a few star anise pods to the water. Ensure the aromatics are fully submerged. This step is entirely optional but can add a subtle, pleasant aroma and flavor to your revived gluten-free bread.
Using aromatics is a creative twist on the basic glutenfree bread revive recipe. For instance, steaming a savory loaf with rosemary can enhance its flavor profile beautifully, while steaming a slightly sweet loaf with cinnamon can make it perfect for breakfast. Just a small handful of herbs or spices is usually sufficient to impart a noticeable fragrance.
Steaming Time for Optimal Texture
Once the water is simmering and the bread is in the steamer basket or colander, cover the pot tightly with a lid. Steam the bread for approximately 5 to 10 minutes. The exact time will depend on the size and thickness of the bread pieces. Smaller slices or rolls might only need 5-7 minutes, while a larger piece might require up to 10 minutes. You are looking for the bread to feel soft and pliable when gently squeezed.
Check the bread around the 5-minute mark. If it's still quite hard, continue steaming. Avoid over-steaming, as this can make the bread soggy. Once softened, carefully remove the bread from the steamer and let it sit for a minute or two before serving. The crust might be soft initially but can be lightly toasted afterward if you prefer a crisper exterior. This steaming duration is key to a successful glutenfree bread revive recipe using this method.
Method 3: Toasting Stale Gluten-Free Bread for a Crispy Treat
Sometimes, the best way to handle stale gluten-free bread isn't to make it soft again, but to embrace its dryness and turn it into something crispy and delicious. Toasting is the simplest way to do this, transforming hard slices into perfect bases for toppings or enjoyable snacks on their own. While it doesn't technically "revive" the bread in the sense of making it soft, it certainly revives its usability and deliciousness.
This method is ideal for slices that are too dry or thin to benefit much from rehydration methods. It prevents waste and creates a whole new texture experience. Toasting stale gluten-free bread is a fundamental "glutenfree bread revive recipe" in its own right, shifting its purpose from a soft loaf to a crunchy base.
Slicing the Bread for Even Toasting
If you have a whole or half loaf, the first step for successful toasting is to slice the stale gluten-free bread evenly. Aim for slices that are about 1/2 inch thick, or slightly thicker if you prefer a chewier toast. Even thickness is crucial for ensuring that all slices toast at the same rate, preventing some from burning while others remain soft in the middle. Use a sharp serrated knife for the cleanest cuts on stale bread.
Cutting consistent slices (e.g., within 1/8 inch variation) ensures uniform results, whether you're using an oven or a toaster. Stale bread can sometimes be crumbly, so a gentle hand and a sharp knife are essential. Preparing the bread this way sets the stage for a perfectly crispy outcome from this simple glutenfree bread revive recipe technique.
Toasting Techniques: Oven vs. Toaster
You have two main options for toasting stale gluten-free bread: using a toaster or using your oven. A standard toaster is convenient for one or two slices at a time. Simply place the slices in the slots and toast to your desired level of crispness. Watch carefully, as gluten-free bread can sometimes toast faster than wheat bread.
For larger batches or if you want more control over the crispness, the oven method is excellent. Preheat your oven to around 350-375°F (175-190°C). Place the slices in a single layer on a baking sheet. Bake for 8-15 minutes, flipping halfway through, until they are golden brown and crispy. The exact time will depend on your oven and the thickness of the slices. Both methods provide a simple glutenfree bread revive recipe by transforming texture.
Serving Suggestions for Toasted Gluten-Free Bread [Toppings, Dips]
Toasted stale gluten-free bread is incredibly versatile. Serve it simply with butter or jam for a classic breakfast. Top it with avocado and a sprinkle of salt and pepper for a popular snack. It also makes a fantastic base for bruschetta – rub a garlic clove over the warm toast, drizzle with olive oil, and top with chopped tomatoes and basil.
Consider using toasted slices for open-faced sandwiches or alongside soups and salads for dipping. The crispy texture holds up well to moisture. You can even cut the toasted slices into smaller pieces to use as "crackers" with cheese and dips. This transformation highlights how a simple glutenfree bread revive recipe can lead to many delicious possibilities.
When your gluten-free bread is past the point of revival for slicing, or you simply have a few leftover pieces, turning it into croutons or breadcrumbs is a fantastic way to prevent waste and create useful ingredients for other dishes. This is a staple glutenfree bread revive recipe that gives stale bread a second life with a completely new purpose.
Homemade gluten-free croutons and breadcrumbs are often fresher and more flavorful than store-bought versions, and they allow you to control the ingredients and seasonings. This method is perfect for loaves that have become very dry or crumbly, as the goal is to dry them out completely and then season and bake or process them.
Cutting the Bread into Crouton-Sized Pieces
To make croutons, cut the stale gluten-free bread into bite-sized cubes, roughly 1/2 to 3/4 inch square. Even sizing is important for uniform drying and toasting. Spread the cubes in a single layer on a baking sheet. At this stage, you can let them sit out at room temperature for a few hours or overnight to dry out further, which helps achieve a crispier crouton, or you can proceed directly to seasoning and baking if the bread is already quite dry.
Using a serrated knife helps create cleaner cuts, minimizing crumbling. Aim for consistency in size so they toast evenly. This preparation is the first step in transforming stale bread into a versatile ingredient using this glutenfree bread revive recipe approach.
Seasoning and Baking for Flavorful Croutons
Once the bread cubes are cut (and optionally air-dried), drizzle them generously with olive oil or melted butter. Toss to coat evenly. Then, add your desired seasonings. Classic options include garlic powder, onion powder, dried herbs like oregano, basil, thyme, or Italian seasoning, salt, and black pepper. You can also add paprika, chili powder, or nutritional yeast for different flavors. Toss again to distribute the seasonings.
Spread the seasoned cubes back onto the baking sheet in a single layer. Bake in a preheated oven at a low to moderate temperature, around 300-325°F (150-160°C), for 15-25 minutes, stirring halfway through. Bake until the croutons are golden brown and crispy all the way through. The exact time will depend on the dryness of your bread and your oven. This baking step is key to achieving the perfect texture for this glutenfree bread revive recipe.
Processing Bread into Gluten-Free Breadcrumbs
To make gluten-free breadcrumbs, you can use either fresh or dried stale bread. For dried breadcrumbs, you can simply break the completely dry bread into pieces. For softer crumbs, you can use bread that is just stale. Place the bread pieces in a food processor and pulse until coarse or fine crumbs form, depending on your preference. Avoid over-processing, which can turn the crumbs into a paste.
If using bread that isn't completely dry, you can lightly toast the crumbs on a baking sheet in a low oven (around 250°F / 120°C) for 10-15 minutes after processing to dry them out further and ensure they store well. This simple processing step is the core of creating gluten-free breadcrumbs from your stale loaf, a practical glutenfree bread revive recipe.
Storing Homemade Gluten-Free Breadcrumbs
Once your gluten-free croutons or breadcrumbs are completely cool, store them in an airtight container at room temperature. Properly dried croutons and breadcrumbs can last for several weeks. Ensure they are fully cooled before sealing the container; otherwise, trapped moisture can lead to mold. For longer storage, you can keep them in the refrigerator for a couple of months or freeze them for up to six months.
Labeling the container with the date is a good practice to keep track of freshness. Homemade breadcrumbs are excellent for coating chicken or fish, topping casseroles, or as a binder in meatballs or meatloaf. This final step completes the transformation of stale bread into a useful pantry staple via this glutenfree bread revive recipe.
Gluten-Free Bread Revive Recipe Variations and Hacks

Beyond simply restoring texture, stale gluten-free bread can be the star ingredient in entirely new dishes. These methods don't just revive the bread; they transform it into something new and delicious. Thinking creatively about how to use stale bread is part of a smart, waste-conscious kitchen strategy.
These next few ideas are popular ways to utilize bread that is too hard for slicing or has been sitting around for a few days. They leverage the dryness of the bread to absorb liquids and flavors, resulting in comforting and flavorful meals or desserts. Each offers a unique "glutenfree bread revive recipe" in the sense that it gives the bread a completely different, enjoyable purpose.
Gluten-Free Bread Pudding: A Delicious Way to Use Stale Bread
Gluten-free bread pudding is a classic comfort food that is perfect for using up stale bread. The dry bread cubes readily soak up a rich custard mixture made from milk (dairy or non-dairy), eggs, sugar, and flavorings like vanilla, cinnamon, or nutmeg. The staleness of the bread is actually an advantage here, as fresh bread can result in a soggy pudding.
To make it, cut or tear your stale gluten-free bread into chunks (about 1 inch). For a standard 8x8 inch baking dish, you might use about 6-8 cups of bread cubes. Whisk together the custard (e.g., 2 cups milk, 3 large eggs, 1/2 cup sugar, 1 tsp vanilla, 1/2 tsp cinnamon).
Pour the custard over the bread cubes in the baking dish and let it sit for at least 20-30 minutes (or even longer, up to overnight in the fridge) to allow the bread to fully absorb the liquid. Bake at around 350°F (175°C) for 40-50 minutes, or until set and golden brown on top. This is a truly decadent glutenfree bread revive recipe!
Gluten-Free French Toast: A Sweet and Savory Revival Option
Stale gluten-free bread is also ideal for making French toast. Similar to bread pudding, the slightly dry texture of stale bread allows it to absorb the egg and milk mixture without falling apart. This results in a beautifully soft interior and a potential for a golden, slightly crispy exterior when cooked.
Slice your stale gluten-free bread about 1/2 to 3/4 inch thick. Whisk together a simple batter (e.g., 2 large eggs, 1/4 cup milk, 1/2 tsp cinnamon, pinch of salt). Dip each slice of bread into the mixture, letting it soak for just a few seconds on each side – gluten-free bread can absorb quickly, so don't over-soak unless your bread is extremely dry.
Cook the soaked slices on a buttered griddle or non-stick pan over medium heat for 3-4 minutes per side, until golden brown and cooked through. Serve with your favorite toppings like syrup, fruit, or whipped cream. This quick glutenfree bread revive recipe is perfect for breakfast or brunch.
Reviving Gluten-Free Bagels: A Specific Technique
Stale gluten-free bagels can become particularly hard and dense. While they can be sliced and toasted, a specific steaming method often works best to bring back some of their chewiness. Unlike sliced bread, a whole bagel benefits from intense, even steam exposure.
Bring about an inch of water to a boil in a pot. Place a steamer basket or a metal colander over the pot. Place the stale gluten-free bagel(s) in the basket, ensuring they are above the water. Cover the pot and steam for 3-5 minutes. This direct steam helps rehydrate the dense crumb of the bagel. After steaming, you can then slice and lightly toast the bagel if desired for a combination of soft interior and slightly crisp surface. This tailored glutenfree bread revive recipe addresses the unique texture of bagels.
Preventing Gluten-Free Bread from Going Stale Too Quickly
While having a glutenfree bread revive recipe arsenal is great, preventing your bread from going stale in the first place is even better! Proper storage is the most effective way to maintain the freshness and texture of your homemade or store-bought gluten-free bread for as long as possible.
Understanding the factors that contribute to staling allows you to take proactive steps. It's not just about where you put the bread, but also how you package it and considering its intended use. Implementing good storage habits can significantly extend the enjoyment of your gluten-free loaves.
Proper Storage Techniques for Gluten-Free Bread
The enemy of fresh bread is air exposure, which leads to moisture loss and accelerates starch retrogradation. Storing gluten-free bread correctly is crucial. Avoid leaving it out on the counter unwrapped or just in its original paper bag for extended periods, especially in dry environments.
The best place to store gluten-free bread for short-term use (1-2 days) is in an airtight container or a resealable plastic bag at room temperature. For longer storage, the freezer is your best friend. Unlike wheat bread which can develop "freezer burn" or texture issues more easily, gluten-free bread generally freezes and thaws very well, preserving its texture much better than refrigeration.
Airtight Containers and Freezing
For maximum freshness retention beyond a day or two, wrap your cooled gluten-free bread tightly in plastic wrap, then either place it in a resealable plastic bag or an airtight container. This double layer helps prevent air from reaching the bread. For freezing, follow the same wrapping procedure. Place the well-wrapped bread directly into the freezer.
Freezing halts the staling process almost completely. Frozen gluten-free bread can maintain its quality for up to 3-6 months. When you're ready to use it, you can either thaw it at room temperature (still wrapped) or proceed directly to one of the revival methods like oven baking (Method 1) or toasting (Method 3), depending on whether you want soft or crispy results. This is a key preventative "glutenfree bread revive recipe" strategy.
Slicing and Freezing for Individual Portions
A highly recommended strategy for storing gluten-free bread, especially if you don't eat a whole loaf quickly, is to slice it before freezing. Once the bread is completely cooled, slice it to your desired thickness. Stack the slices with a small piece of parchment paper between each slice to prevent them from sticking together. Wrap the stack tightly in plastic wrap, then place it in a resealable freezer bag or airtight container.
Freezing bread in pre-sliced portions allows you to take out just the number of slices you need at a time, without having to thaw the entire loaf. You can then toast slices directly from frozen or let them thaw for a short time to use in other recipes. This method is incredibly convenient and ensures you always have fresh-tasting gluten-free bread available, effectively preventing the need for a glutenfree bread revive recipe on a whole loaf.
Choosing High-Quality Gluten-Free Bread Ingredients
The initial quality of your gluten-free bread also impacts how well it keeps. Recipes that are properly balanced and use high-quality ingredients tend to have better texture and moisture retention from the start. This includes using fresh flours, appropriate binders, and ensuring correct hydration levels.
A well-formulated gluten-free bread recipe considers the unique properties of each flour and starch used. For instance, recipes that rely heavily on just one type of starch might stale faster or develop a less desirable texture over time compared to blends that incorporate a variety of flours (like sorghum, millet, or oat) and effective binders (like psyllium husk or a balanced gum blend). Starting with a good recipe is the first step in minimizing future staleness.
The Importance of Hydration in Gluten-Free Bread Recipes
Proper hydration is absolutely critical in gluten-free baking, perhaps even more so than in wheat baking. Gluten-free flours and starches absorb water differently, and ensuring enough liquid is incorporated into the dough is key to achieving a soft, moist crumb that resists drying out quickly. Many successful gluten-free bread recipes have very high hydration percentages, sometimes exceeding 90% or even 100% (meaning the weight of water is equal to or greater than the weight of flour).
A dough that is too dry from the start will inevitably yield a loaf that is dense and stales rapidly. Ensuring your recipe calls for adequate liquid and that you measure accurately is vital. For example, a recipe using a blend of rice flours and starches might require 400g of liquid for 400g of flour blend (100% hydration) to achieve optimal softness and moisture retention, compared to a wheat bread that might use 60-70% hydration. High hydration contributes significantly to the initial quality and longevity before needing a glutenfree bread revive recipe.
Flour Blends and Their Impact on Shelf Life
The specific combination of gluten-free flours and starches in a blend affects the bread's structure, texture, and how quickly it stales. Blends that incorporate whole-grain gluten-free flours (like brown rice, sorghum, millet, teff) alongside starches often result in bread with better nutritional profiles and potentially slower staling rates than blends relying solely on white rice flour and starches.
The type and amount of binder used are also critical. Psyllium husk, for instance, is known for its excellent water-binding capacity, which directly contributes to a moister crumb and extended shelf life compared to using only gums like xanthan or guar gum, although gums are still important for structure. Experimenting with different flour blends and binder ratios in your baking can help you discover recipes that produce loaves that stay fresh longer, reducing the frequency with which you'll need a glutenfree bread revive recipe.
Conclusion: Enjoying Your Revived Gluten-Free Bread
Don't let stale gluten-free bread go to waste! As we've explored, there are several simple and effective methods to revive its texture or transform it into something new and delicious. Whether you choose to rehydrate a whole loaf in the oven, steam slices for softness, toast them for crispness, or repurpose the bread entirely into croutons, breadcrumbs, pudding, or French toast, you have plenty of options to extend its life.
By understanding why gluten-free bread stales faster and employing proper storage techniques from the moment your bread cools, you can minimize waste and maximize enjoyment. Freezing sliced bread is perhaps the most practical preventative measure for many home bakers.
BakeWithEase.com: Mastering Gluten-Free Baking Techniques
At BakeWithEase.com, our goal is to empower you with the knowledge and techniques to bake delicious gluten-free goods with confidence. From understanding the role of ingredients to mastering storage and revival methods, we provide the resources you need. We believe that gluten-free baking should be accessible and enjoyable, resulting in bread that you're proud to share and eat.
Exploring different flour blends, perfecting hydration levels, and learning tricks like this glutenfree bread revive recipe collection are all part of the journey. We encourage you to experiment in your kitchen and find what works best for you and the types of gluten-free bread you love to bake or buy.
A Final Word on Gluten-Free Bread Revival
Reviving stale gluten-free bread isn't just about saving money or preventing waste; it's about appreciating the food you've created (or purchased) and making the most of it. With a few simple techniques, you can bring a forgotten loaf back to life or give it a delicious second act. So next time you find yourself with a less-than-fresh gluten-free loaf, remember these tricks and turn that potential waste into a tasty treat. Happy baking and reviving!
Frequently Asked Questions
What causes gluten-free bread to go stale so quickly?
Gluten-free bread often stales faster due to the absence of gluten, which provides structure and elasticity. Without gluten, the starch molecules crystallize more rapidly, leading to a dry and crumbly texture.
Can I revive any type of gluten-free bread using these techniques?
While these tricks can help, success depends on the initial quality and ingredients of the bread. Bread made with high-quality gluten-free flours and binders (like xanthan gum) typically revives better than those with cheaper ingredients.
What's the best method for reviving a whole loaf of stale gluten-free bread?
The oven method is generally best for a whole loaf. Wrapping the loaf in foil with a little water and baking at a low temperature helps to rehydrate the bread without making it soggy.
How can I prevent my gluten-free bread from going stale in the first place?
Proper storage is key! Store gluten-free bread in an airtight container or bag at room temperature. Freezing slices individually is also a great way to preserve freshness and prevent staling.
Does reviving gluten-free bread affect its nutritional value?
Reviving stale bread primarily affects its texture, not its nutritional content. The nutrients remain largely unchanged during the rehydration process. You still get the same vitamins and minerals that were originally in the bread.
Final Reflection: The Enduring Appeal of Fresh Gluten-Free Bread
The quest for perfectly soft, flavorful gluten-free bread is a journey many undertake, and the struggle against staleness is a common pitfall. This article has explored simple, effective methods to revive even the most stubbornly dry gluten-free loaf, proving that a second chance at deliciousness is entirely possible. The techniques presented aren't just about rescuing a loaf; they're about minimizing food waste and maximizing enjoyment.
The impact of readily available, yet often disappointing, gluten-free bread on the lives of those following a gluten-free diet cannot be understated. It's more than just a dietary restriction; it's about finding joy and normalcy in everyday meals. The frustration of a stale loaf can be significant, impacting not only the taste experience but also the overall feeling of satisfaction and well-being. Food is symbolic of love when words are inadequate.
– Alan D. Wolfelt. This sentiment rings true, especially when considering the emotional connection many have with bread, a staple food across cultures. Reviving stale bread, therefore, becomes a small act of self-care and a testament to resourcefulness.
Now, consider your own kitchen. Think about that slightly hardened gluten-free loaf sitting on your counter. Don't let it go to waste! Experiment with the techniques outlined in this article. Embrace the opportunity to transform a seemingly lost cause into a delicious addition to your next meal. Remember, the journey towards perfect gluten-free bread is ongoing, and even the smallest victories, like reviving a stale loaf, contribute to a more satisfying and enjoyable experience. Let's celebrate the simple act of reclaiming deliciousness, one slice at a time.
Unleash Your Inner Baker: Freshen Up Your Gluten-Free Loaf!
Thanks for taking the time to explore our tips on reviving stale gluten-free bread! We hope you now feel empowered to tackle those slightly-less-than-perfect loaves. Ready to put your newfound knowledge into practice?
- Master the Art of Re-Crisping: Try our recommended methods – from the oven to the toaster oven – to restore that satisfying crunch to your gluten-free bread. This is your key to enjoying every last slice!
- Share Your Success (or Challenges!): We'd love to hear your experiences! Share your re-crisping triumphs (or even your baking mishaps) in the comments below. Let's build a supportive gluten-free baking community!
- Experiment with New Recipes: Inspired to try a new gluten-free bread recipe? Explore our recipe section for some amazing options that will keep your bread basket delightfully full.
Now, tell us: What's your favorite method for bringing stale gluten-free bread back to life?