
Beginner's Guide to Classic Buttermilk Scones

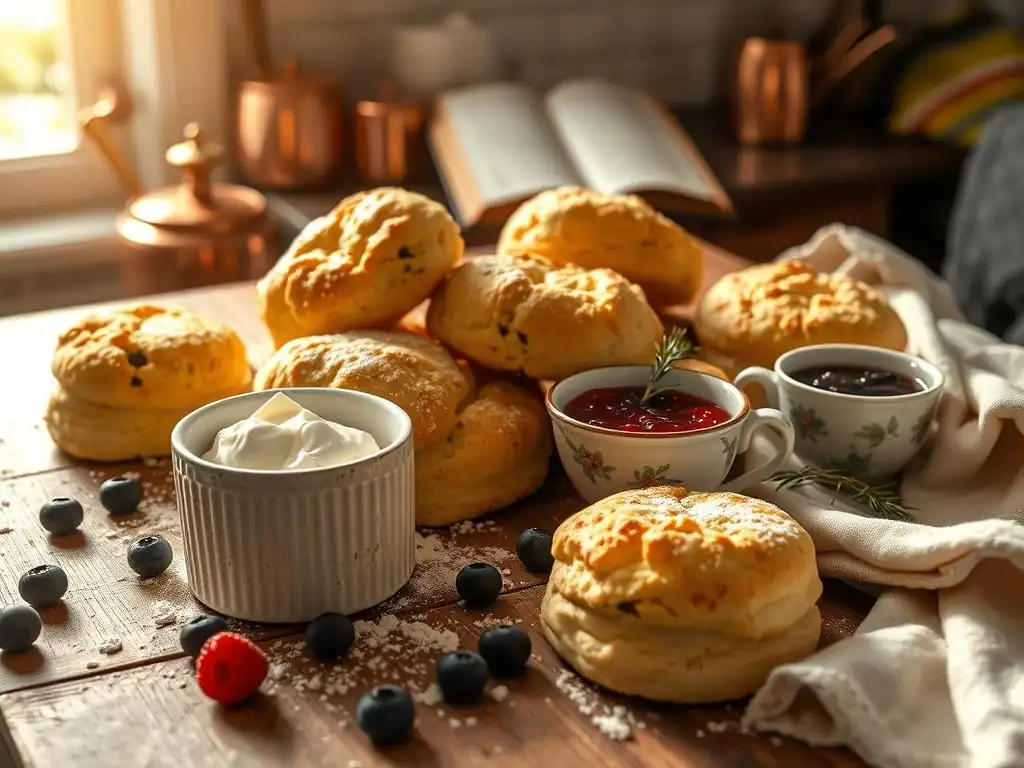
Welcome to BakeWithEase, your haven for unlocking baking brilliance! Ever dreamt of perfectly golden, effortlessly delicious scones? Our Easy Buttermilk Scones Recipe is your starting point. But what makes these scones so special, and how can you achieve that coveted light and fluffy texture even on your first attempt? Let's uncover the secrets together, transforming you from a baking beginner to a scone sensation!
- BakeWithEase: Mastering Easy Buttermilk Scones
- Why This Easy Buttermilk Scones Recipe Is Perfect for Beginners
- Essential Ingredients for Buttermilk Scones
- Step-by-Step Guide to Baking Buttermilk Scones
- Tips and Tricks for Baking the Best Buttermilk Scones
- Serving Suggestions for Your Homemade Buttermilk Scones
- Troubleshooting Common Buttermilk Scone Baking Issues
- Variations on the Classic Buttermilk Scone Recipe
- Enjoy Your Easy Homemade Buttermilk Scones!
-
Frequently Asked Questions
- What makes this buttermilk scones recipe "easy" for beginners?
- Can I substitute buttermilk with something else in this scones recipe?
- What's the secret to achieving light and fluffy scones?
- How long can I store leftover buttermilk scones?
- What are some variations I can make to this classic buttermilk scones recipe?
- Final Reflection: The Enduring Charm of a Simple Scone
- Unleash Your Inner Baker: Make Perfect Scones Today!
BakeWithEase: Mastering Easy Buttermilk Scones
Welcome to BakeWithEase, your friendly guide to conquering the kitchen! We believe baking should be fun and accessible to everyone, regardless of skill level. That's why we're starting with a true classic that's surprisingly simple: the buttermilk scone. This guide is designed to walk you through each step, making your first batch of scones a delightful success. Forget complicated techniques; we're focusing on an easy buttermilk scones recipe that yields tender, delicious results every time.
Whether you dream of a flaky pastry alongside your morning coffee or a warm snack for afternoon tea, mastering buttermilk scones is a fantastic step in your baking journey. This recipe uses common pantry staples and straightforward methods, proving that you don't need fancy equipment or years of experience to bake something truly wonderful. Let's get started on creating these delightful treats together!
Why This Easy Buttermilk Scones Recipe Is Perfect for Beginners
Baking can sometimes feel intimidating, with precise measurements and seemingly complex steps. However, the beauty of an easy buttermilk scones recipe lies in its forgiving nature and fundamental techniques. It teaches you essential skills like cutting in butter, handling dough gently, and understanding ingredient functions, all within a relatively short timeframe. Unlike some elaborate pastries, scones come together quickly, offering a rewarding baking experience without hours of waiting.
This particular easy buttermilk scones recipe simplifies the process even further by focusing on clear instructions and minimal handling. We'll guide you through techniques that prevent common pitfalls like tough dough or flat scones. Think of this recipe as a delicious baking bootcamp – you'll learn crucial lessons about texture and leavening that apply to many other baked goods, setting a solid foundation for your future culinary adventures.
Simple Scone Recipe for New Bakers
This recipe is designed with simplicity in mind, making it ideal for those just starting out. We break down each step into manageable actions, from measuring ingredients accurately to the final bake. The process primarily involves mixing dry ingredients, incorporating cold butter, adding wet ingredients, and shaping – no complex folding or proofing required. It’s a straightforward approach that builds confidence.
Furthermore, the ingredient list for this easy buttermilk scones recipe is short and uses items commonly found in most kitchens. You won't need to hunt for obscure ingredients. The techniques involved, such as using fingertips or a pastry blender to cut in butter, are fundamental baking skills that are easy to learn and practice with this recipe. It’s a perfect entry point into the world of quick breads and pastries.
Buttermilk Scones: A Great Starting Point
Buttermilk scones offer a fantastic introduction to baking because they are relatively quick to make and the results are often visible and rewarding very quickly. The texture you achieve – light, tender, and slightly crumbly – is directly related to how well you follow key steps like keeping ingredients cold and not overmixing. This provides immediate feedback on your technique.
Compared to yeast breads which require proofing time and understanding of fermentation, or complex cakes needing precise layering and frosting, scones provide a simpler, faster gratification. Mastering this easy buttermilk scones recipe gives beginners a tangible success that encourages them to try more challenging bakes in the future. It’s a stepping stone to more advanced recipes on BakeWithEase.
Essential Ingredients for Buttermilk Scones
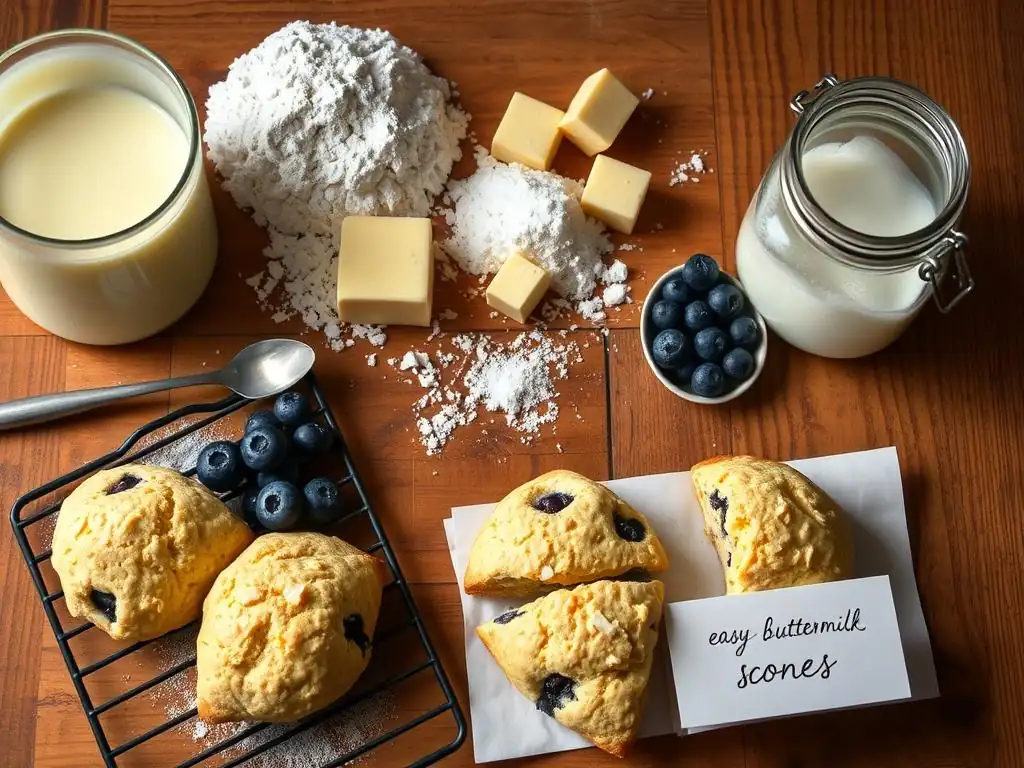
Creating light and tender buttermilk scones relies on a few key ingredients working together in harmony. While the recipe is simple, understanding the role each component plays is crucial for consistent results. We'll delve into the essentials you'll need, from the foundation of flour to the magic of buttermilk.
Having your ingredients measured out and ready before you begin, often referred to as "mise en place," is a great habit for any baker, especially beginners tackling their first easy buttermilk scones recipe. This prevents last-minute scrambling and ensures you haven't forgotten anything vital. Let's look closer at what makes these scones special.
High-Quality Flour for Light and Fluffy Scones
The type of flour you use significantly impacts the texture of your scones. For classic tender scones, a good quality all-purpose flour is typically recommended. It has a moderate protein content (around 10-12%), which provides enough structure without making the scones tough. Using cake flour (lower protein, ~8%) might result in scones that are too delicate, while bread flour (higher protein, ~13-14%) can lead to a chewier texture.
When measuring flour for your easy buttermilk scones recipe, it's best to use the "spoon and level" method. Gently spoon the flour into your measuring cup until it overflows, then level it off with a straight edge like a knife. Scooping directly from the bag can compact the flour, leading to too much flour by weight and potentially dry scones. For instance, a properly measured cup of all-purpose flour weighs around 120-130 grams, while a scooped cup could weigh 150 grams or more.
The Role of Cold Butter in Scone Baking
Cold butter is perhaps the most critical ingredient for achieving that desirable flaky, tender scone texture. As the scones bake, the small pieces of cold butter melt, creating steam pockets within the dough. This steam pushes the layers of dough apart, resulting in a light and airy interior. If the butter is too warm, it will incorporate too smoothly into the flour, yielding a cake-like or dense scone instead of a flaky one.
For this easy buttermilk scones recipe, ensure your butter is straight from the refrigerator. Many bakers even recommend freezing the butter for 10-15 minutes before using it. You'll need to cut the butter into small pieces, about the size of peas or even smaller, and work it into the dry ingredients quickly. This minimizes the time the butter has to warm up from the heat of your hands.
Buttermilk: The Secret to Moist and Tender Scones
Buttermilk is a star ingredient in this easy buttermilk scones recipe, contributing significantly to both moisture and tenderness. Its acidity reacts with the baking powder, enhancing the leavening and promoting a lighter rise. The acid also helps to break down gluten development in the flour, which results in a more tender crumb compared to using regular milk.
Real cultured buttermilk, which is slightly thicker than regular milk and has a tangy flavor, is ideal. If you don't have buttermilk, you can make a reasonable substitute by adding one tablespoon of white vinegar or lemon juice to one cup of regular milk and letting it sit for 5-10 minutes until it curdles slightly. While this substitute works, using actual buttermilk will generally give you the best results for this easy buttermilk scones recipe.
Baking Powder: Ensuring a Good Rise for Your Scones
Baking powder is the primary leavening agent in this easy buttermilk scones recipe. It's a chemical leavener that creates carbon dioxide gas when mixed with liquid and when heated. This gas gets trapped in the dough, causing the scones to rise and become light and airy during baking. Using the correct amount is crucial; too little will result in flat, dense scones, while too much can leave a metallic aftertaste.
It's important to ensure your baking powder is fresh. Over time, baking powder loses its potency. To test if your baking powder is still active, place a teaspoon in a small bowl and pour about a quarter cup of hot water over it. If it fizzes vigorously, it's still good to use. For this easy buttermilk scones recipe, we rely on the double-acting nature of most commercial baking powders, which provides a lift both when mixed and when heated in the oven.
Adding Lemon Zest and Vanilla Extract
While flour, butter, buttermilk, and baking powder form the essential base, ingredients like lemon zest and vanilla extract elevate the flavor profile of this easy buttermilk scones recipe. Lemon zest adds a bright, fresh note that complements the richness of the butter and the tang of the buttermilk. Be sure to zest only the yellow part of the lemon, avoiding the bitter white pith underneath.
Vanilla extract adds a classic warmth and sweetness that enhances the overall taste. Use pure vanilla extract for the best flavor. These additions are mixed into the wet ingredients or added with the dry ingredients, depending on the specific recipe structure. They are simple additions but make a significant difference in turning a basic scone into a truly delicious one.
Step-by-Step Guide to Baking Buttermilk Scones
Baking this easy buttermilk scones recipe is a straightforward process when you follow the steps methodically. Breaking it down makes it approachable for beginners and helps ensure success. We'll guide you from mixing the dry ingredients to pulling perfectly baked scones from the oven.
Remember to have all your ingredients measured and your equipment ready before you begin. This includes your mixing bowls, measuring cups and spoons, a pastry blender or fork (or even your hands), a baking sheet lined with parchment paper, and your oven preheated. Following these steps will lead you to delicious homemade scones.
Step 1: Preparing the Dry Ingredients for Buttermilk Scones
Begin by combining the dry ingredients in a large mixing bowl. This typically includes the flour, baking powder, sugar (if using), and salt. Whisk these ingredients together thoroughly. Whisking helps to distribute the leavening agent (baking powder) and salt evenly throughout the flour, which is essential for a consistent rise and flavor in your easy buttermilk scones recipe.
Ensuring the dry ingredients are well-mixed prevents pockets of salt or baking powder and ensures that the leavening will work uniformly throughout the dough. Some recipes also suggest sifting the dry ingredients, which can help incorporate air and further distribute the leavening, contributing to a lighter texture. For this easy buttermilk scones recipe, a good whisking is usually sufficient.
Step 2: Cutting in the Cold Butter for Perfect Scone Texture
This is a crucial step for achieving that signature flaky texture. Add the cold butter pieces to the bowl with the dry ingredients. Using a pastry blender, two forks, or your fingertips, work the butter into the flour mixture until it resembles coarse crumbs, with some pieces of butter still visible, ranging in size from peas to small beans. The goal is to coat the butter pieces with flour while keeping them cold and distinct.
If using your hands, work quickly to minimize the heat transfer from your body to the butter. Some bakers even chill their hands under cold water beforehand! The visible pieces of butter are what create those desirable steam pockets during baking. Getting this step right is key to a successful easy buttermilk scones recipe. Avoid overworking the mixture into a smooth paste.
Step 3: Adding Buttermilk and Forming the Scone Dough
Once the butter is cut in, make a well in the center of the dry ingredients. Pour in the cold buttermilk (and any other liquid extracts like vanilla). Use a fork or a rubber spatula to gently mix the wet ingredients into the dry ingredients until just combined. The dough will look shaggy and a bit messy, and there might still be some dry spots.
Do not overmix at this stage! Overmixing develops the gluten in the flour, which will result in tough, hockey-puck-like scones instead of tender ones. For this easy buttermilk scones recipe, the less you handle the dough, the better. Just bring it together until no dry flour remains visible.
Step 4: Shaping and Cutting the Buttermilk Scones
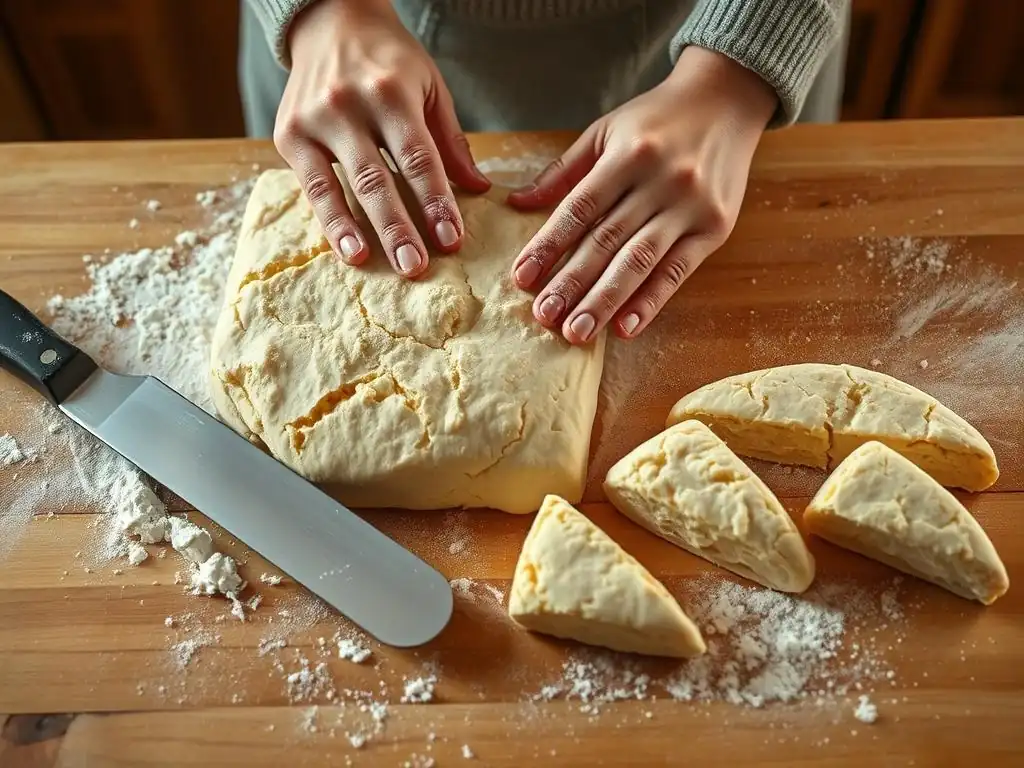
Turn the shaggy dough out onto a lightly floured surface. Gently bring the dough together with your hands a few times, just enough to form a cohesive mass. Avoid kneading. Pat the dough into a circle or rectangle about 1 to 1.5 inches thick. A thicker dough yields taller scones.
Using a sharp knife, bench scraper, or biscuit cutter, cut the dough into your desired shapes (wedges from a circle, squares, or rounds). For cleanly cut edges (which help with rise), press straight down without twisting the cutter. For this easy buttermilk scones recipe, cutting into 8 wedges from a 7-8 inch circle is a common and easy method. Place the cut scones onto your prepared baking sheet, leaving a little space between them.
Step 5: Baking the Scones to Golden Perfection
Preheat your oven to the temperature specified in the recipe, typically around 400°F (200°C). A hot oven helps the scones rise quickly and develop a lovely golden crust. Before baking, you can brush the tops of the scones with a little extra buttermilk or an egg wash for a richer color and shine.
Bake the scones for the recommended time, usually between 12 and 20 minutes, depending on their size and thickness. They are ready when they have risen, are golden brown on top and bottom, and a toothpick inserted into the center comes out clean. Baking this easy buttermilk scones recipe to the correct internal temperature ensures they are cooked through without being dry.
Tips and Tricks for Baking the Best Buttermilk Scones
Achieving perfect scones consistently involves more than just following the steps; a few key tips can elevate your results. These pointers focus on temperature, handling, and achieving the ideal finish, making your easy buttermilk scones recipe even more successful. Incorporating these simple techniques can make a significant difference in the final texture and appearance of your scones.
From keeping ingredients chilled to knowing when to stop mixing, these tips address common areas where beginners might encounter issues. Pay close attention to these details, and you'll be well on your way to baking bakery-quality scones in your own kitchen.
Keeping Your Ingredients Cold for Optimal Results
We've mentioned it before, but it bears repeating: keeping your butter and buttermilk very cold is paramount for a flaky texture. Warm butter melts into the flour before baking, preventing the creation of steam pockets needed for lift. Cold buttermilk helps keep the butter cold and controls gluten development.
Consider chilling your dry ingredients briefly after cutting in the butter if your kitchen is warm. Some bakers even chill the cut scones on the baking sheet for 10-15 minutes in the refrigerator before baking. This extra step ensures the butter is firm when it hits the hot oven, maximizing the potential for a great rise in your easy buttermilk scones recipe.
Avoiding Overmixing the Scone Dough
Overmixing is one of the most common mistakes beginners make when baking scones. It develops the gluten in the flour, leading to tough, heavy scones. Once you add the liquid, mix the dough just until the dry ingredients are incorporated. It's okay if there are still a few dry patches or if the dough looks shaggy.
When shaping, handle the dough as little as possible. Pat it gently into shape rather than kneading. The less you work the dough for this easy buttermilk scones recipe, the more tender your scones will be. A slightly rustic look is preferable to a perfectly smooth, tough scone.
Achieving a Golden Brown Crust on Your Buttermilk Scones
A beautiful golden brown crust adds to the appeal and texture of your scones. This color indicates that the Maillard reaction has occurred, developing complex flavors on the surface. Brushing the tops of the scones with a liquid before baking helps achieve this.
A simple brush of buttermilk or milk works well, promoting browning. For a richer, shinier crust, an egg wash (one egg beaten with a tablespoon of milk or water) is an excellent choice. For this easy buttermilk scones recipe, brushing the tops just before they go into the hot oven will help them brown nicely and evenly.
Storing Buttermilk Scones for Freshness
Scones are best enjoyed fresh from the oven, ideally within a few hours of baking. However, if you have leftovers from your easy buttermilk scones recipe, proper storage can help maintain their quality for a little longer. Once completely cooled, store them in an airtight container at room temperature.
They will typically stay relatively fresh for 1-2 days. To refresh slightly stale scones, you can warm them gently in a low oven (around 300°F or 150°C) for a few minutes. Avoid storing them in the refrigerator, as this can dry them out more quickly. For longer storage, baked scones can be frozen for up to 1-2 months; thaw at room temperature and warm before serving.
Serving Suggestions for Your Homemade Buttermilk Scones
Once your easy buttermilk scones recipe yields a beautiful batch of warm, fragrant scones, the fun continues with serving! Scones are incredibly versatile and pair well with a variety of toppings, both sweet and savory. The classic pairings are hard to beat, but don't hesitate to experiment and find your own favorites.
Whether you're hosting a tea party, enjoying a leisurely breakfast, or simply need a comforting snack, these homemade buttermilk scones provide the perfect base. Here are a few popular and delicious ways to enjoy them.
Classic Pairings: Clotted Cream and Jam
The quintessential way to serve buttermilk scones, particularly in British tradition, is with clotted cream and jam. Clotted cream is a thick, rich cream with a high-fat content, offering a luxurious counterpoint to the scone's texture. Strawberry jam is the classic choice, but any good quality fruit jam or preserve works beautifully.
The debate rages on whether the cream or the jam goes first! In Cornwall, it's traditionally jam then cream, while in Devon, it's cream then jam. Either way, a generous dollop of each transforms your simple easy buttermilk scones recipe into an indulgent treat fit for royalty.
Savory Options: Cheese and Chives
While often thought of as sweet, buttermilk scones also lend themselves wonderfully to savory applications. Adding shredded cheese (like cheddar or parmesan) and chopped fresh chives or other herbs to the dough before baking creates delicious savory scones perfect for serving with soup or as a side dish.
These savory variations on the easy buttermilk scones recipe are fantastic on their own or split and served with butter. Consider adding a sprinkle of flaky sea salt on top before baking for extra flavor and texture. They offer a delightful alternative to the sweet versions.
Simple Glaze Recipes for Scones
If you prefer a touch of sweetness but want something simpler than jam and cream, a simple glaze is a great option. A basic powdered sugar glaze is easy to make: whisk together powdered sugar with a little milk, cream, or lemon juice until you reach a pourable consistency.
For this easy buttermilk scones recipe, you can add a hint of vanilla extract to a simple milk glaze or lemon zest to a lemon juice glaze to complement the scone's flavor. Drizzle the glaze over the cooled scones. This adds sweetness and a lovely finish without overpowering the scone itself.
Troubleshooting Common Buttermilk Scone Baking Issues
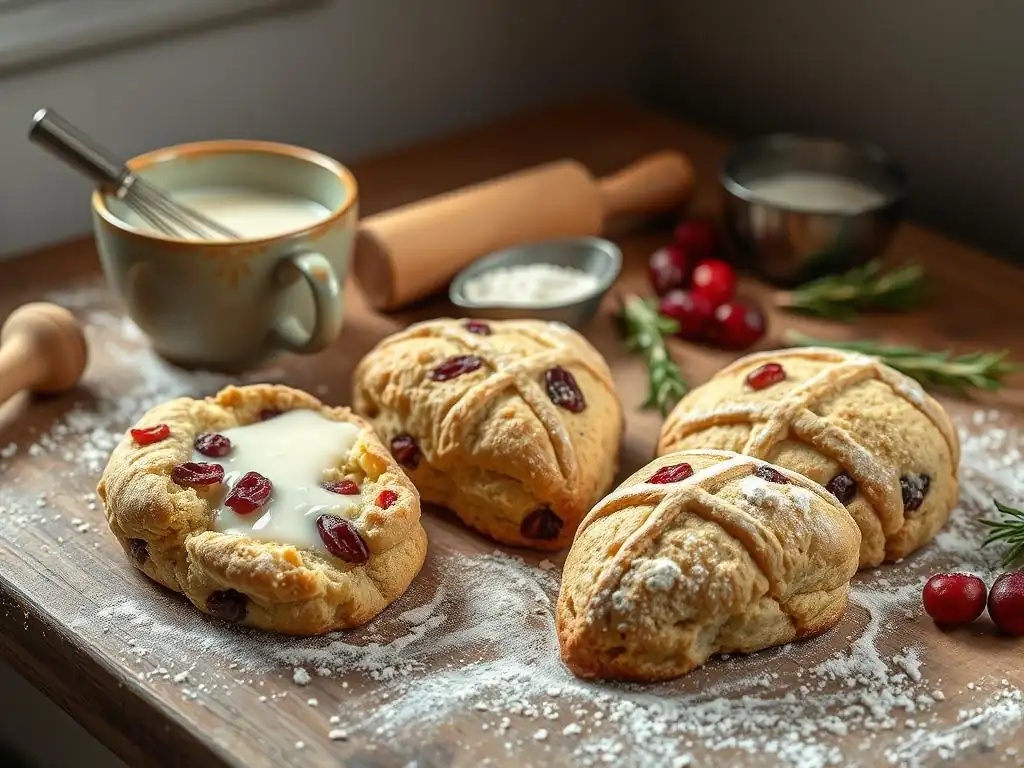
Even with an easy buttermilk scones recipe, beginners (and even experienced bakers!) can sometimes encounter issues. Don't be discouraged if your first batch isn't perfect. Baking is a skill that improves with practice. Understanding common problems and their causes will help you identify what went wrong and improve for next time.
Here are some frequent issues bakers face when making scones and how to troubleshoot them. Learning from these experiences is part of the fun and growth in your baking journey.
Scones Not Rising Properly? Here's Why
If your scones came out flat or dense, several factors could be at play. The most common culprits are inactive baking powder, butter that wasn't cold enough, or overworking the dough. As mentioned earlier, test your baking powder's freshness. If it doesn't fizz in hot water, it needs replacing.
If your butter melted too much before baking, it couldn't create the steam needed for lift. Ensure your butter is cold and you work quickly when cutting it in. Finally, overmixing develops gluten, which creates a tough structure that resists rising. For this easy buttermilk scones recipe, gentle handling is key to a good rise.
Dry and Crumbly Scones: How to Avoid Them
Scones that are too dry and crumbly often result from adding too much flour or not enough liquid (buttermilk). Remember to measure your flour correctly using the spoon and level method – scooping directly from the bag can add significantly more flour.
Ensure you're using the amount of buttermilk specified in the easy buttermilk scones recipe. The dough should be shaggy but should just come together when gently pressed. If it feels excessively dry and won't hold its shape at all, you might need to add a tiny bit more liquid, but do so cautiously, adding only a teaspoon at a time.
Unevenly Baked Scones: Solutions and Tips
If some of your scones are perfect while others are under or overdone, the issue is likely related to oven temperature or hot spots. Ovens can vary significantly, and even within the same oven, some areas might be hotter than others.
Using an oven thermometer is a great way to check if your oven is actually at the temperature you set. Rotating your baking sheet halfway through the baking time can also help ensure all the scones bake evenly. For this easy buttermilk scones recipe, consistent heat is important for a uniform rise and color.
Variations on the Classic Buttermilk Scone Recipe
Once you've mastered the basic easy buttermilk scones recipe, you can start exploring delicious variations! Adding different ingredients allows you to customize your scones and cater to different tastes or occasions. The possibilities are nearly endless, from sweet additions like fruit or chocolate to savory mix-ins.
Experimenting with flavors is a fun part of baking. These variations use the same fundamental technique as the classic recipe but introduce new textures and tastes.
Adding Fruit: Blueberry Buttermilk Scones
One of the most popular variations is adding fruit, and blueberries are a fantastic choice. Gently fold about 1/2 to 3/4 cup of fresh or frozen blueberries into the dough after the buttermilk has been added and the dough is just coming together. Be careful not to overmix, as this can crush the blueberries and turn the dough purple.
Baking blueberry variations of this easy buttermilk scones recipe might require a minute or two longer in the oven due to the moisture from the fruit. Ensure they are golden brown and set in the center. Other fruits like cranberries (fresh or dried), chopped apples, or raspberries also work well.
Chocolate Chip Buttermilk Scones: A Sweet Treat
For those with a sweet tooth, adding chocolate chips is a simple and delightful variation. Stir in about 1/2 to 3/4 cup of chocolate chips (mini or regular, dark, milk, or white) along with the dry ingredients or just before adding the buttermilk.
The chocolate chips will melt slightly during baking, creating pockets of gooey chocolate within the tender scone. This sweet twist on the easy buttermilk scones recipe is perfect for dessert or a rich snack. Consider adding a sprinkle of sugar on top before baking for extra crunch.
Savory Buttermilk Scones with Herbs and Cheese
As mentioned in the serving suggestions, turning your scones savory is easy and rewarding. Add about 1/2 cup of shredded cheese (like sharp cheddar, Gruyère, or parmesan) and 2-3 tablespoons of chopped fresh herbs (such as chives, rosemary, or thyme) to the dry ingredients before cutting in the butter.
These savory scones are excellent served warm with butter or alongside a meal. You can experiment with different cheese and herb combinations in this easy buttermilk scones recipe variation. Adding a pinch of black pepper or a dash of cayenne can also give them a little kick.
Enjoy Your Easy Homemade Buttermilk Scones!
Congratulations! You've successfully baked a batch of delicious, tender buttermilk scones using an easy buttermilk scones recipe. There's nothing quite like the aroma of freshly baked goods filling your kitchen. Take a moment to appreciate your accomplishment and enjoy the fruits of your labor.
Whether you enjoy them warm with butter, adorned with classic clotted cream and jam, or savor a savory variation, these homemade scones are a testament to how simple ingredients and straightforward techniques can create something truly special. Keep practicing, keep exploring new recipes on BakeWithEase, and most importantly, keep baking with ease!
Frequently Asked Questions
What makes this buttermilk scones recipe "easy" for beginners?
This recipe focuses on simple techniques and uses easily accessible ingredients. It also includes step-by-step instructions to guide beginners through the process.
Can I substitute buttermilk with something else in this scones recipe?
While buttermilk is ideal for its tangy flavor and tenderizing effect, you can substitute it with a mixture of milk and lemon juice or vinegar. However, this may slightly alter the texture and taste of the scones.
What's the secret to achieving light and fluffy scones?
The key is to avoid overmixing the dough. Overmixing develops gluten, resulting in tough, dense scones. Handle the dough gently and only mix until just combined for a light and airy texture.
How long can I store leftover buttermilk scones?
Buttermilk scones are best enjoyed fresh. However, you can store them in an airtight container at room temperature for up to 2 days. You can also reheat them in the oven for a few minutes to restore their warmth and texture.
What are some variations I can make to this classic buttermilk scones recipe?
You can add fruits like blueberries or cranberries, chocolate chips, or even savory ingredients like cheese and herbs. Experiment with different flavor combinations to create your own unique scone variations.
Final Reflection: The Enduring Charm of a Simple Scone
The humble buttermilk scone, a seemingly simple baked good, holds a surprising power to connect us to tradition while simultaneously offering a canvas for personal creativity. From the comforting aroma of baking to the satisfying crumble of a perfectly executed bite, the scone transcends its basic ingredients to become a symbol of warmth and shared experience. This enduring appeal is why, even in our fast-paced modern world, the desire for an easy, delicious scone recipe remains strong.
The journey of mastering the buttermilk scone, as detailed in this guide, is more than just following a recipe; it's about understanding the delicate balance of ingredients and the subtle nuances that elevate a good scone to a truly great one. This process mirrors life itself, where seemingly small details can have a profound impact on the final outcome. As the culinary writer M.F.K. Fisher once wisely noted, First we eat, then we do everything else.
The simple act of baking, and sharing these scones, becomes a powerful act of connection and nourishment, both physically and emotionally.
Now, I invite you to step away from the screen, gather your ingredients, and embark on your own scone-baking adventure. Don't be afraid to experiment, to adjust the recipe to your own tastes, and to savor the process as much as the final product. Remember the joy of creating something delicious with your own hands, and the satisfaction of sharing that creation with those you love. The perfect scone awaits – and so does the rewarding experience of making it.
Unleash Your Inner Baker: Make Perfect Scones Today!
Thanks for joining us on this baking adventure! We hope you now feel confident and excited to tackle those classic buttermilk scones. You've gained valuable knowledge – now it's time to put it to the test!
- Bake a batch of scones today! Use the recipe and tips from the article to create your own delicious scones. Experiment with different additions – maybe some chocolate chips or dried cranberries?
- Share your baking success (or even your baking mishaps!) with us on social media! Use #BakeWithEaseScones and tag us so we can see your creations.
- Explore other recipes on BakeWithEase.com – we've got tons of delicious treats waiting for you!
Ready to transform your kitchen into a scone-making paradise? What unique twist will you add to your first batch?