
Achieve RazorSharp Edges on Your Decorated Cookies

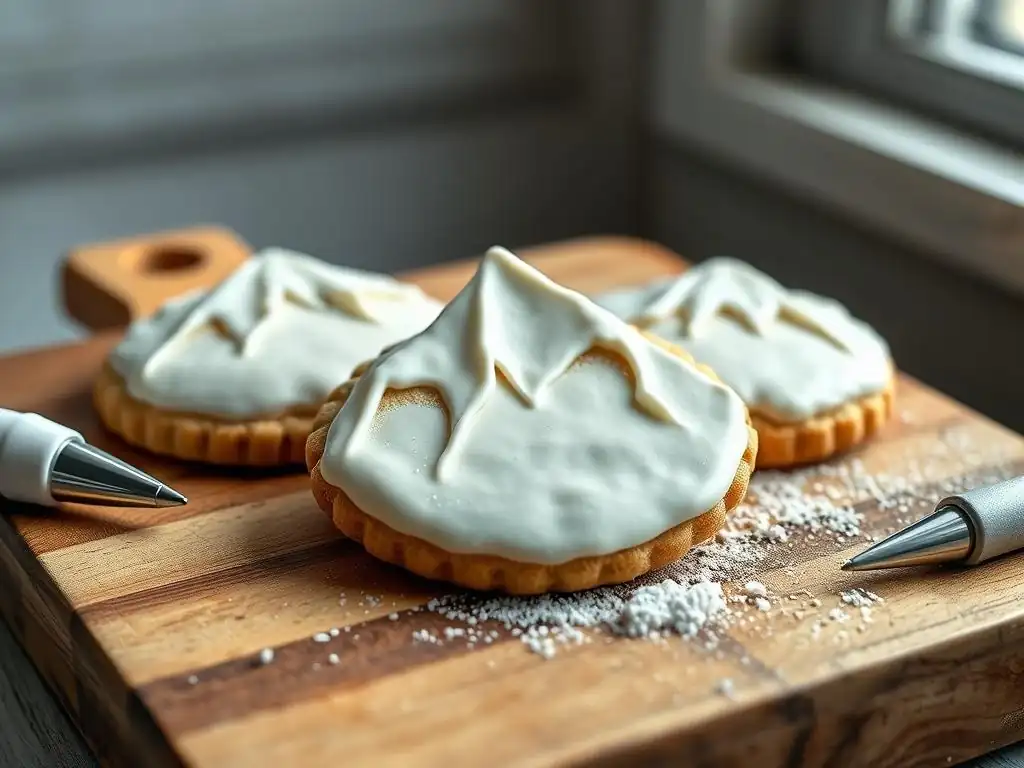
Welcome to BakeWithEase, your trusted companion in the delightful world of baking! Ever dreamed of creating cookies that aren't just delicious, but also visually stunning? In this article, we'll unveil the secrets to achieving that coveted razorsharp cookie edge frosting, transforming your treats into edible works of art. Get ready to elevate your cookie decorating game – the journey to flawless frosting starts now!
- Introduction: Mastering Razor Sharp Frosting Edges for Professional-Looking Cookies
- Understanding the Fundamentals of Cookie Edge Definition
- Step-by-Step Guide to Razor Sharp Royal Icing Cookie Edges
- Advanced Techniques for Perfecting Cookie Edge Definition
- Troubleshooting Common Issues with Cookie Edge Frosting
- Maintaining RazorSharp Edges: Storage and Handling Tips
- Beyond the Basics: Exploring Creative Edge Designs
- Conclusion: Your Journey to RazorSharp Cookie Edge Mastery
-
Frequently Asked Questions
- How can I achieve razor-sharp edges when frosting cookies?
- What type of icing works best for achieving razor-sharp cookie edges?
- What tools are helpful for creating razor-sharp cookie edge frosting?
- How important is the consistency of the icing for razor-sharp edges?
- How long should I wait for the icing to dry before handling cookies with razor-sharp edges?
- Final Reflection: The Art and Precision of the Razor-Sharp Cookie Edge
- Unleash Your Inner Cookie Artist!
Achieving razor-sharp edges on your decorated cookies is often the hallmark of a truly professional finish. It's the detail that elevates a simple iced cookie into a miniature work of art, catching the eye and demonstrating precision and skill.
While it might seem daunting at first, mastering the technique for creating defined, crisp edges with royal icing is absolutely within reach for any home baker. This guide from BakeWithEase will walk you through the essential steps, tools, and tips needed to transform your cookie decorating from good to absolutely stunning, focusing specifically on perfecting that coveted razorsharp cookie edge frosting.
The journey to perfect edges involves understanding the interplay between your cookie surface, your royal icing consistency, and your decorating tools. It's a process that requires patience and practice, but the results are incredibly rewarding. Whether you're aiming for geometric precision on modern designs or simply want clean lines on classic shapes, learning how to control your icing and refine your edges is a fundamental skill. Let's dive into the core principles and practical steps that will help you achieve those impeccable, razorsharp cookie edge frosting lines every time.
The foundation of any beautifully decorated cookie is the cookie itself. For achieving razorsharp cookie edge frosting, a smooth, flat cookie surface is paramount. Bumps, cracks, or uneven textures on the cookie can make it incredibly difficult to create a clean, straight line with your icing. Imagine trying to draw a perfect line on a bumpy road – it's nearly impossible! Similarly, any imperfections on the cookie surface will translate directly to imperfections in your icing outline and flood, making those desired crisp edges hard to achieve.
To ensure a smooth surface, start with a reliable cookie recipe that holds its shape well during baking. Chill your dough thoroughly before rolling and cutting – this helps prevent spreading and maintains sharp cookie edges straight out of the oven. Roll your dough to an even thickness, typically about 3/8 inch (approximately 1 cm), and use a smooth rolling pin.
After cutting, you can gently smooth the edges of the raw dough with your finger if needed. Baking on a flat baking sheet lined with parchment paper or a silicone mat also contributes to an even bake and a smooth top surface, setting the stage for perfect razorsharp cookie edge frosting application.
Choosing the Right Royal Icing Consistency for Edge Definition
The consistency of your royal icing is arguably the most critical factor in achieving razorsharp cookie edge frosting. Icing that is too thin will spread uncontrollably, resulting in wavy, undefined edges and potentially bleeding colors. Icing that is too thick will be difficult to pipe smoothly, leading to jagged lines and potential cracking once dry. The ideal consistency for outlining is often referred to as "piping consistency" or "medium consistency."
This consistency should hold a defined line when piped but still be fluid enough to flow smoothly from the tip without breaking. A common test is the "peak test" or "ribbon test." When you lift your spoon or spatula from the icing, it should fall back into the bowl in a ribbon that holds its shape briefly before slowly melting back into the bulk of the icing.
For outlining, you want this ribbon to disappear into the icing surface within approximately 15-20 seconds. This allows for a clean, steady flow that creates a sharp, defined line, essential for building that razorsharp cookie edge frosting foundation.
Having the right tools makes a significant difference in your ability to create precise, razorsharp cookie edge frosting. While skill is developed over time, the proper equipment can simplify the process and improve your results immediately. The most fundamental tools include piping bags (either disposable or reusable), piping tips, and a scribe tool or toothpick. For outlining, small round tips are typically used, such as a PME 1.5, Wilton #1 or #2, or equivalent. These small openings allow for fine, controlled lines.
A scribe tool is indispensable for achieving truly razorsharp cookie edge frosting. This sharp-tipped tool, often resembling a needle or awl on a handle, is used to manipulate the icing after it's applied. It allows you to push the icing precisely to the edge of the cookie, clean up wobbly lines, pop air bubbles, and draw the icing into sharp corners. Other useful tools include couplers (if you want to change tips easily) and potentially a small offset spatula for smoothing larger flooded areas, although the scribe tool is the primary instrument for edge definition.
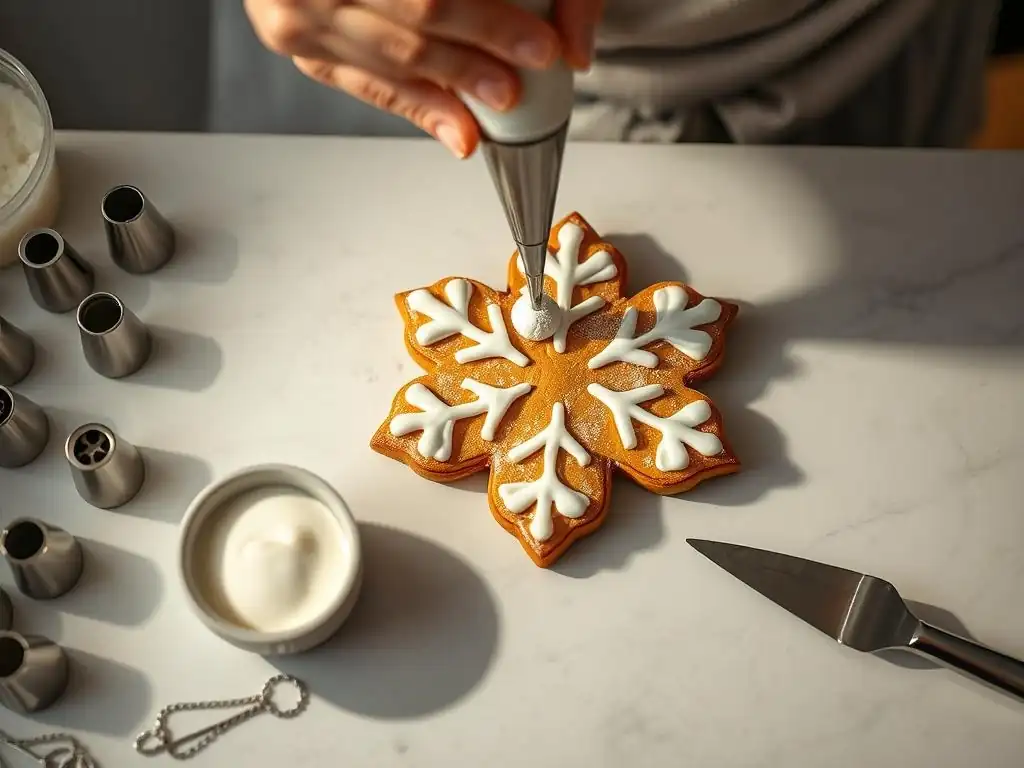
Step 1: Preparing Your Royal Icing for Edge Perfection
Achieving the Ideal Royal Icing Consistency: The 15-Second Rule
As mentioned earlier, consistency is king for razorsharp cookie edge frosting. For outlining, we are aiming for a consistency that allows the icing to flow smoothly from the piping bag but holds a distinct line. The "15-second rule" is a widely used method to check this. To perform this test, take a spoonful of your royal icing and drizzle it back into the bowl in a stream. Watch how long it takes for the ribbon of icing to disappear back into the surface.
For outlining and achieving sharp edges, aim for an icing where this ribbon disappears in about 15-20 seconds. If it disappears faster (say, in 5-10 seconds), your icing is too thin – add more powdered sugar or meringue powder mix. If it takes longer (30+ seconds), it's too thick – add more water, a tiny drop at a time, mixing thoroughly between additions. Getting this right is crucial; it ensures your outline is strong enough to contain the flood icing but smooth enough to create a clean, razorsharp cookie edge frosting line.
Coloring Your Royal Icing for Crisp Edge Designs
When coloring your royal icing, especially for outlines that will define razorsharp cookie edge frosting, it's best to use gel food coloring. Liquid food coloring can add too much moisture, thinning your icing and potentially compromising the desired consistency. Gel colors are highly concentrated, allowing you to achieve vibrant hues with just a small amount, thus minimizing the impact on your icing's texture.
Add your gel coloring sparingly, mixing it in completely before deciding if you need more. Remember that colors can deepen slightly as the icing dries. For dark colors, you might need to let the colored icing sit for an hour or two for the color to fully develop. Ensure the color is mixed in thoroughly and evenly; streaks of unmixed color will be visible and detract from the clean look of your razorsharp cookie edge frosting.
Piping Techniques for a Flawless Royal Icing Outline
Piping the outline is the first physical step in creating razorsharp cookie edge frosting. Hold your piping bag comfortably, gripping it towards the back with gentle, even pressure. Keep the tip slightly elevated above the cookie surface, allowing the icing to fall onto the cookie rather than dragging the tip directly on the surface. This technique, sometimes called "floating" or "dragging" the line, helps create a smoother, more consistent line.
Start piping at a point you can easily hide (like the back of the cookie) and work your way around. Maintain consistent pressure on the bag and a steady speed as you move along the cookie's edge. When you come to the end of your line, stop squeezing the bag and gently lift the tip away.
For corners, pipe up to the corner, pause briefly while maintaining pressure to allow a small amount of icing to gather, then turn the cookie or change direction and continue piping. Practice on parchment paper first to get a feel for the pressure and movement needed for a smooth, unbroken line that will form the basis of your razorsharp cookie edge frosting.
Avoiding Air Bubbles in Your Outlining Icing
Air bubbles are the enemy of smooth, razorsharp cookie edge frosting. They can cause your outline to break, create gaps, or leave unsightly holes. Air bubbles are often introduced during the mixing process or when filling your piping bags. To minimize them, mix your royal icing on a low speed if using a stand mixer; high speeds whip in too much air.
After mixing and coloring, let your icing sit covered with plastic wrap pressed directly onto the surface for 10-15 minutes before transferring it to piping bags. This resting period allows many small bubbles to rise to the surface. When filling your piping bag, push the icing down gently towards the tip to eliminate air pockets.
If you spot bubbles while piping, you can often coax them out by gently squeezing the bag or using your scribe tool to pop them before the icing sets. Taking these steps significantly improves your chances of achieving a flawless outline for your razorsharp cookie edge frosting.
Achieving a Smooth and Even Flood
Once your outline has set for about 20-30 minutes (it should be dry to the touch but still slightly soft underneath), it's time to flood the interior of your cookie. For flooding, you'll typically use a slightly thinner consistency of royal icing, often called "flood consistency" or "10-second icing." This icing should flow easily and self-level to create a smooth, uniform surface within the outline.
Start by piping a line of flood icing around the interior edge of your outline. Then, fill the center area, applying enough icing to cover the surface without overfilling. Use your scribe tool or a toothpick to gently guide the icing into all the corners and edges, ensuring complete coverage. Work relatively quickly, as the icing will start to set. The goal is a smooth, dome-like surface that reaches right up to your outline, creating a seamless transition that will help define your razorsharp cookie edge frosting.
Popping Air Bubbles for a Perfect Finish
Even with careful preparation, air bubbles can appear in your flooded area. These bubbles, if left untouched, will dry as noticeable imperfections on the surface of your cookie, detracting from the smooth finish needed for sharp edges. It's crucial to address these bubbles immediately after flooding while the icing is still wet.
Using your scribe tool or a toothpick, gently touch each air bubble to pop it. You can then use the tip of the tool to gently coax the surrounding icing to fill the void left by the bubble. Scan the entire flooded surface carefully under a good light to ensure you haven't missed any. This quick step is essential for achieving a flawless, smooth surface that will showcase your razorsharp cookie edge frosting beautifully once dried.
Step 4: The Key to Razorsharp Edges: The Scribe Tool Technique
Using a Scribe Tool to Define and Refine Your Edges
This is where the magic happens for truly razorsharp cookie edge frosting. While the outline sets the boundary, the scribe tool is your precision instrument for perfecting that line. After you've flooded the cookie and while the flood icing is still wet (but the outline is set), use the tip of your scribe tool to gently push the wet flood icing right up against the inside of the set outline.
Start at one point and work your way around the entire perimeter. Use small, controlled movements, guiding the flood icing to meet the outline seamlessly. This action eliminates any small gaps between the outline and the flood and helps to create a crisp, defined transition. For corners, use the scribe tool to gently pull the icing into a sharp point, carefully pushing it into the very angle of the corner. This meticulous process is vital for achieving those clean, angular razorsharp cookie edge frosting details.
Correcting Imperfections for a Professional Look
The scribe tool isn't just for pushing icing; it's also your best friend for correcting any minor imperfections that might appear during the outlining and flooding process. If your outline has a slight wobble, you can sometimes gently nudge it straighter with the scribe tool while it's still wet. If you have a tiny overflow of flood icing onto an area it shouldn't be, you can carefully wick it away with the tip of the scribe tool or a clean brush before it dries.
For areas where the flood didn't quite meet the outline, use the scribe tool to gently pull the flood icing towards the outline. If you notice a small divot or uneven spot in the flood before it sets, you can use the tool to gently spread the surrounding icing to fill it. This stage is your opportunity to refine every detail, ensuring your razorsharp cookie edge frosting is as clean and professional as possible before drying.
Proper Drying Techniques to Prevent Cracking
Proper drying is crucial for the structural integrity and appearance of your razorsharp cookie edge frosting. Royal icing dries through evaporation, and it needs ample time and the right conditions to harden completely without cracking. Once you've finished decorating and refining your edges, place your cookies on a flat surface, such as a baking sheet or cooling rack, in an area with good air circulation.
Avoid moving the cookies extensively while they are wet. Allow them to dry undisturbed for at least 6-8 hours, or preferably overnight (12-24 hours) for complete hardening. Placing them under a gentle fan can help speed up the drying process and promote a harder, shinier finish, which contributes to the stability of your razorsharp cookie edge frosting. Ensure the drying environment is not too humid, as high humidity significantly slows drying and can lead to a softer, less stable icing.
Avoiding Common Drying Mistakes
Several common mistakes can compromise your beautifully crafted razorsharp cookie edge frosting during the drying process. One of the most frequent is impatience – not allowing the icing enough time to dry fully. If you stack or package cookies before the icing is completely hard, you risk smudging, cracking, or damaging those sharp edges.
Another mistake is drying in a humid environment. As mentioned, humidity prevents proper hardening. If you live in a humid climate, consider using a dehydrator on a very low setting (around 100-120°F or 38-50°C) for the first hour or two to help the surface crust form quickly.
Avoid drying in direct sunlight, which can cause colors to fade or bleed. Also, don't cover the cookies too early; they need airflow to dry properly. Ensure your cookies are fully dry – the icing should feel hard and not yield to gentle pressure – before handling or storing them, protecting your razorsharp cookie edge frosting.

The Wet-on-Wet Technique for Intricate Edge Designs
While not directly creating a physical sharp edge, the wet-on-wet technique can be used within your outlined area to create intricate patterns that enhance the overall look and provide visual depth right up to your razorsharp cookie edge frosting. This technique involves applying wet royal icing onto a base layer of wet flood icing. Because both layers are wet, the applied icing sinks slightly into the base layer, creating a smooth, seamless design without raised lines.
For example, you could flood a cookie with white icing, and immediately pipe lines or dots of a contrasting color onto the wet white flood near the outline. Using a scribe tool, you can then drag through these wet lines or dots to create swirls, marbling, or feathering effects that extend to the very edge defined by your initial outline. This adds complex visual interest while maintaining the flat surface necessary for showcasing the sharpness of your initial razorsharp cookie edge frosting.
Beyond flat icing, you can add texture right at or near your razorsharp cookie edge frosting to create visual interest. This can be done by using different icing consistencies or applying decorative elements. For example, after your outline has set but before flooding, you could pipe a second, thicker line of icing just inside the outline using a small star tip (like a Wilton #13) to create a tiny, textured border.
Alternatively, you could use a brush to create a textured effect on the flood icing near the edge while it's still wet. Another method is to apply sprinkles, sanding sugar, or edible glitter along the wet outline or just inside the flood area near the edge before the icing dries. These textures contrast with the smooth flood and highlight the clean line of your razorsharp cookie edge frosting. Just be careful not to obscure the sharpness of the edge itself if that's your primary goal.
Using Stencils for Precise Edge Detailing
Stencils aren't just for the center of the cookie; they can be used to apply precise patterns or textures right up to or along your razorsharp cookie edge frosting. Once your base flood layer is completely dry, place a stencil over the cookie, aligning it with the edge. You can then apply a thin layer of royal icing (often slightly thicker than flood consistency) over the stencil using a small offset spatula or scraper.
Carefully lift the stencil straight up to reveal a crisp pattern applied directly onto the dry icing surface. This allows you to add very fine, repetitive details like geometric lines, dots, or lace patterns that follow the curve or shape of your razorsharp cookie edge frosting. Stenciling requires a completely dry base layer (usually 12-24 hours) to prevent damage when the stencil is lifted. This technique is excellent for adding consistent, professional-looking details right up to the defined edge.
Preventing Royal Icing Bleeding
Color bleeding is a frustrating issue that can ruin your meticulously crafted razorsharp cookie edge frosting. It occurs when moisture causes colors to migrate into adjacent icing areas, blurring your clean lines. The primary culprits are excessive moisture in the icing or cookie, high humidity during drying, or using too much dark food coloring.
To prevent bleeding, ensure your icing consistency is correct – avoid making it too thin. Use gel or powder food colors instead of liquid. If using dark colors, use a quality brand known for stability and consider letting the colored icing sit for a few hours after mixing for the color to deepen naturally, reducing the amount of color needed.
Ensure your cookies are completely cool before decorating. Most importantly, dry your cookies properly in a low-humidity environment. A fan or dehydrator can help create a crust quickly, locking colors in and protecting your razorsharp cookie edge frosting from moisture issues.
Fixing Uneven or Wavy Edges
Even with careful piping, you might end up with a slightly uneven or wavy outline, which compromises the razorsharp cookie edge frosting. If you catch this immediately after piping the outline, you can often gently nudge the line straighter with your scribe tool before it sets. Work quickly and gently to avoid damaging the line.
If the outline has already crusted over or dried, fixing it becomes much harder without redoing it. However, sometimes you can mitigate minor wobbles when you flood the cookie. Use your scribe tool to push the wet flood icing firmly up against the inside of the wavy outline, trying to create a visually straighter line with the flood itself. For small imperfections, you can sometimes add a decorative element like a row of dots or a piped border along the edge once the flood is dry to disguise the unevenness and enhance the razorsharp cookie edge frosting effect.
Addressing Cracking in Your Royal Icing
Cracking in royal icing, especially along the edges, can occur during drying or after. This often happens if the icing is too thick, dries too quickly on the surface while the underneath is still wet, or if the cookie is flexed after the icing has hardened. Using an icing that is too thick for flooding is a common cause; it doesn't self-level well and is prone to stress cracks.
Ensure your icing consistency is appropriate for flooding (around 10-second consistency). When drying, aim for consistent, gentle airflow rather than intense heat or drafts that might crust the surface too rapidly. Drying under a fan is helpful.
Avoid moving or stacking cookies before they are completely dry, which can take 12-24 hours. If a crack does appear, you can sometimes carefully fill it with a small amount of fresh, slightly thinner icing using a fine tip or scribe tool, then allow it to dry again. Addressing the underlying cause, like consistency or drying environment, is key to preventing future cracks in your razorsharp cookie edge frosting.
Maintaining RazorSharp Edges: Storage and Handling Tips

Once your beautiful cookies with their razorsharp cookie edge frosting are completely dry (this is crucial! ), proper storage is essential to keep them looking their best. Royal icing, when fully hardened, is relatively durable, but sharp edges can still be chipped or broken if not handled carefully. Store decorated cookies in a single layer in an airtight container at room temperature.
Avoid stacking cookies directly on top of each other unless you use a layer of parchment paper or tissue paper between them. Even with paper, excessive stacking can still cause pressure that might damage delicate razorsharp cookie edge frosting or decorations. Keep the container away from direct sunlight or heat sources, which can affect colors and icing stability. Stored correctly, royal-iced cookies can maintain their appearance for several weeks, though they are best enjoyed within 1-2 weeks for freshness.
Handling Techniques to Avoid Damage
Handling decorated cookies requires a gentle touch, especially when dealing with intricate designs and razorsharp cookie edge frosting. Always pick up cookies by their sides or from underneath, avoiding touching the top surface of the icing directly, particularly the delicate edges. If you need to move a batch of cookies, use a spatula or a thin, flat tool to carefully lift them from the drying surface.
When packaging cookies for gifts or sale, wrap each cookie individually in cellophane bags or place them in small boxes or compartments to prevent them from shifting and bumping into each other. For stacking layers in a box, always use sturdy dividers like cardboard rounds or foam core between layers. Educating recipients on how to handle the cookies gently is also helpful! Taking these precautions ensures that the razorsharp cookie edge frosting you worked so hard to achieve arrives at its destination intact and looking perfect.
Beyond the Basics: Exploring Creative Edge Designs
Creating Geometric Edge Patterns
Once you've mastered the basic razorsharp cookie edge frosting technique, you can start exploring more complex designs that utilize and highlight these crisp lines. Geometric patterns are a natural fit for sharp edges. Consider dividing your cookie surface into geometric sections using your outline icing, creating triangles, squares, or diamond shapes that meet at sharp points along the edge.
You can then flood these individual sections with different colors, or leave some sections unflooded for contrast. Using a ruler or a straight edge as a guide (not touching the wet icing!) while piping your outline can help achieve perfectly straight lines for these geometric patterns, further emphasizing the razorsharp cookie edge frosting effect. Experiment with checkerboards, stripes that meet at the edge, or concentric shapes that follow the cookie's perimeter.
Incorporating Metallic Accents for a Luxurious Look
Metallic accents can add a touch of elegance and sophistication to your cookies, and they pair beautifully with razorsharp cookie edge frosting. Once your royal icing is completely dry, you can apply edible gold, silver, or other metallic paints or dusts. Metallic paints, made by mixing edible metallic dust with a clear alcohol-based extract (like vodka or lemon extract), can be brushed directly onto the dry royal icing edge.
Use a fine brush and a steady hand to carefully paint along the very edge of your cookie, highlighting the sharpness of the razorsharp cookie edge frosting. For a softer metallic look, you can dry-brush edible dust onto specific areas near the edge. Be sure to use products specifically labeled as "edible" for consumption. The contrast between the smooth, matte or satin royal icing and the reflective metallic finish truly makes the sharp edges stand out.
Experimenting with Different Icing Colors and Textures
Varying the colors and textures used for your outline and flood can create striking effects that draw attention to your razorsharp cookie edge frosting. A classic look is a contrasting outline color – a dark color outline on a light flood, or vice versa, makes the edge pop. For a subtle effect, use an outline color that is only slightly darker or lighter than your flood color.
Beyond color, consider texture. While the flood is typically smooth, you can add texture to the outline or a border just inside the outline, as mentioned earlier. Piping small beads (dots) closely together along the outline, or using a shell border technique, adds a raised, textured element right at the edge. These textures, combined with the smooth, defined line of the razorsharp cookie edge frosting, add layers of visual and tactile interest to your decorated cookies.
Achieving razorsharp cookie edge frosting is a skill that develops with practice, patience, and attention to detail. By focusing on the fundamentals – starting with a smooth cookie, mastering the right icing consistency, and utilizing your tools effectively – you lay the groundwork for success. Following a step-by-step process, from precise outlining and smooth flooding to the crucial refinement with a scribe tool and proper drying, brings those crisp lines within reach.
Remember that setbacks like bleeding or cracking are part of the learning process; understanding their causes helps you prevent them in the future. As you gain confidence, explore advanced techniques like wet-on-wet designs or adding texture and metallic accents to further enhance your razorsharp cookie edge frosting. With dedication and the guidance provided here on BakeWithEase, you'll soon be consistently creating cookies with edges so sharp, they look professionally finished, ready to impress everyone who sees (and eats!) them. Happy decorating!
Frequently Asked Questions
The key is using a stiff consistency royal icing and a precise technique. Pipe a border around the edge of the cookie first, then flood the center. Let it dry completely.
Royal icing is the preferred choice. It dries hard and smooth, allowing for clean, defined edges. Adjust the consistency for piping and flooding.
A piping bag fitted with a fine tip is essential. Also, consider using a scribe tool or toothpick to guide the icing and pop any air bubbles.
How important is the consistency of the icing for razor-sharp edges?
Consistency is crucial! You need separate consistencies for outlining and flooding. The outline icing should be thicker to hold its shape.
Allow at least 6-8 hours or preferably overnight for the icing to dry completely. This ensures the edges are firm and won't smudge.
The pursuit of the perfect razor-sharp edge on a decorated cookie is more than just aesthetics; it's a testament to skill, patience, and the unwavering dedication to detail that elevates baking from a hobby to an art form. This meticulous attention to detail, explored throughout this article, isn't just about pleasing the eye; it's about showcasing the baker's mastery and creating a truly unforgettable treat. In a world increasingly focused on instant gratification, the time and effort invested in achieving this level of precision speaks volumes about the value of craftsmanship.
The quest for the razor-sharp edge reflects a broader cultural shift towards appreciating handcrafted goods and the artistry behind seemingly simple creations. We live in a time where mass-produced items are readily available, yet there's a growing appreciation for the unique character and quality found in handmade items. This resonates deeply with me, as I've witnessed firsthand the joy and satisfaction derived from mastering a technique, and the pride that comes with presenting a beautifully crafted cookie. The details are not the details. They make the design.
- Charles Eames. This quote perfectly encapsulates the importance of focusing on the seemingly small aspects, like the cookie edge, to achieve a truly exceptional result.
Now, it's your turn. Consider the techniques and tips discussed in this article, and apply them to your own baking journey. Don't be afraid to experiment, to push your boundaries, and to strive for that perfect, razor-sharp edge. Each cookie you decorate is an opportunity to learn, grow, and express your creativity. Embrace the challenge, celebrate the process, and savor the sweet reward of a perfectly executed design. The razor-sharp edge is not just a visual achievement; it's a symbol of your dedication and passion for the art of baking.
Thanks for taking the time to elevate your cookie decorating game! You've learned valuable techniques to achieve those perfectly crisp edges – now it's time to put them into practice.
Here's how to keep the momentum going:
- Master the royal icing consistency: Experiment with different ratios of meringue powder and water to find your perfect flood consistency. This is crucial for achieving those flawless edges!
- Share your creations: Show off your stunning, razor-sharp cookies on social media! Use #BakeWithEase to connect with our community.
- Try a new design: Challenge yourself to decorate a cookie with a more intricate design using your newfound skills. What amazing designs will you create next?
Ready to transform your cookies from good to absolutely breathtaking?