
Add Sparkle and Structure with Isomalt Accents on Cookies

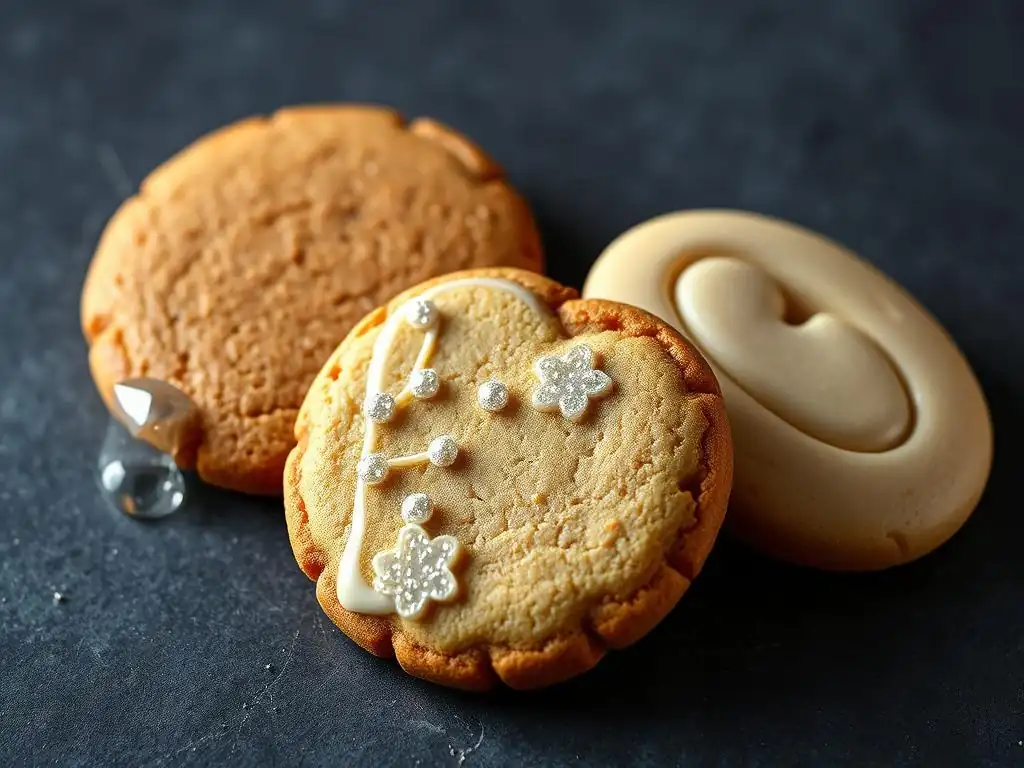
Welcome to BakeWithEase, where baking becomes a joy! Ever wondered how to create those stunning, glassy decorations you see on professional cookies? This week, we're diving into the mesmerizing world of isomalt cookie decorating techniques. Learn how to add breathtaking sparkle and structural artistry to your creations with our step-by-step guide. Are you ready to transform your cookies from delicious to dazzling? Let's get started!
Embarking on the journey of advanced cookie decorating opens up a world of possibilities beyond royal icing. One captivating medium that adds incredible visual appeal and dimension is isomalt. This sugar substitute allows bakers to create stunning, transparent, and structural elements that can transform simple cookies into edible works of art. Mastering isomalt cookie decorating techniques can set your creations apart, adding that touch of magic that delights both the eyes and the taste buds.
- Introduction to Isomalt Cookie Decorating Techniques
- Understanding Isomalt: A Baker's Guide
- Essential Tools and Materials for Isomalt Cookie Art
- Step-by-Step Guide: Creating Isomalt Cookie Decorations
- Isomalt Cookie Decorating Ideas and Inspiration
- Troubleshooting Common Isomalt Decorating Problems
- Storing Isomalt Cookies for Optimal Freshness
- Conclusion: Mastering Isomalt Cookie Decoration Techniques
-
Frequently Asked Questions
- What is Isomalt and why is it used in cookie decorating?
- How do I safely melt Isomalt for cookie decorating?
- What are some basic Isomalt cookie decorating techniques described on BakeWithEase?
- What are some common mistakes to avoid when working with Isomalt?
- Where can I find simple Isomalt cookie decorating recipes and guides on BakeWithEase.com?
- Final Reflection: The Enduring Allure of Isomalt in Cookie Decorating
- Unleash Your Inner Sugar Artist: Master Isomalt Accents!
Stepping into the realm of isomalt for cookie art means embracing a material that behaves differently from traditional sugar work, offering unique advantages for decorative purposes. These techniques require careful handling and a bit of practice, but the results—like dazzling edible gems or delicate structural pieces—are truly rewarding and elevate the sophistication of your baked goods. It's a skill that allows for creativity limited only by imagination.
Isomalt provides an unparalleled way to add brilliance and depth to your cookie designs. Unlike opaque icings, its transparency allows light to pass through, creating a stained-glass effect or the look of precious stones. Imagine a simple sugar cookie adorned with a sparkling, clear isomalt "window" or a vibrant, jewel-toned isomalt "gem" nestled within a royal icing frame. This level of detail and visual interest is difficult to achieve with other edible mediums.
Furthermore, isomalt hardens into a very stable, glass-like structure, making it ideal for creating three-dimensional elements that stand off the cookie surface. Think of delicate isomalt butterfly wings that appear ready to take flight, or intricate isomalt cages that enclose a design. These structural capabilities, combined with its clarity and ability to take on vibrant colors, make isomalt a powerful tool for elevating your cookie decorating techniques to an advanced level.
The primary reasons bakers choose isomalt for cookie decorations are its unique properties: clarity, stability, and resistance to crystallization compared to regular sugar. While cooked sugar can become cloudy or sticky relatively quickly, isomalt maintains its glassy appearance and holds up well in various conditions (though humidity is still a factor). This makes it perfect for elements that need to look pristine and last for display or gifting.
Another significant advantage is isomalt's lower hygroscopicity, meaning it absorbs less moisture from the air than cooked sugar. This is crucial for cookie decorations, as absorbed moisture can cause stickiness and dullness. While not completely immune to humidity, isomalt offers better resilience. Its neutral taste also ensures it doesn't overpower the flavor of your delicious cookies, allowing the baked treat to remain the star while the isomalt provides the visual spectacle.
Understanding Isomalt: A Baker's Guide
Before diving into specific isomalt cookie decorating techniques, it's essential to understand what isomalt is and how it differs from the sugar you typically use in your baking. Knowing its composition and behavior is key to working with it successfully and safely.
What is Isomalt and How is it Used in Baking?
Isomalt is a sugar substitute derived from sucrose. It's a disaccharide alcohol and is typically produced through a two-stage process involving enzymatic rearrangement of sucrose followed by hydrogenation. Chemically, it's a mixture of two disaccharide alcohols: alpha-D-glucopyranosyl-1,6-mannitol and alpha-D-glucopyranosyl-1,6-sorbitol. This unique structure gives it properties distinct from sucrose.
In baking and confectionery, isomalt is primarily used for creating decorative elements like pulled sugar, blown sugar, cast sugar, and importantly, rigid structures for cakes and cookies. Its high melting point and resistance to crystallization make it ideal for techniques that require heating sugar to high temperatures and shaping it. For cookie decorating, it's melted down and then poured or shaped to create transparent or colored accents.
The differences between isomalt and regular sugar (sucrose) are critical when using them for decorative purposes on cookies. Sucrose, when heated to the hard crack stage (around 300-310°F or 149-154°C), can be used for pulled or blown sugar, but it crystallizes easily, becoming opaque and grainy. It also caramelizes at high temperatures, developing a golden or amber color which might not be desired for clear decorations.
Isomalt, on the other hand, melts at a slightly higher temperature (around 320-340°F or 160-171°C) but remains clear and doesn't brown or caramelize readily. Its chemical structure makes it much more resistant to crystallization, allowing for smoother, clearer finishes. This resistance to crystallization and lack of browning are key reasons why isomalt is preferred for creating transparent effects like glass-like windows, gems, or delicate structures in isomalt cookie decorating techniques.
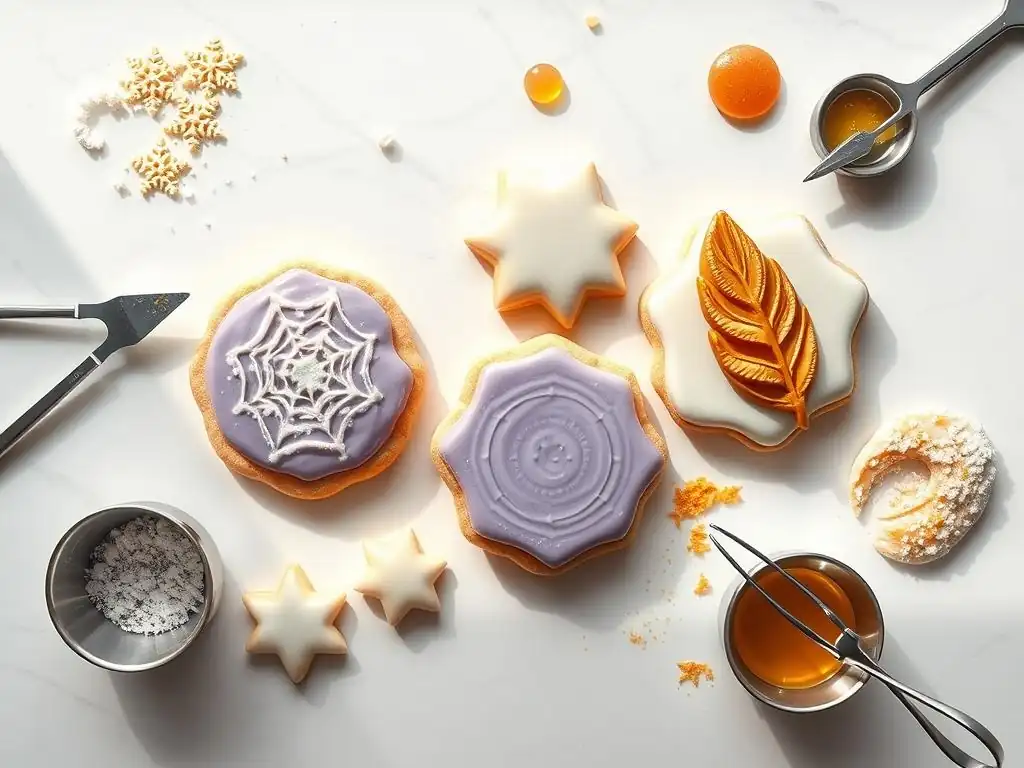
Working with molten isomalt requires specific tools and careful preparation to ensure both successful results and safety. Having the right equipment on hand makes the process smoother and allows for greater control over your isomalt cookie decorating techniques.
Must-Have Equipment for Working with Isomalt
Working with hot isomalt necessitates heat-resistant tools. A heavy-bottomed saucepan is crucial for even heating and preventing scorching. A candy thermometer is non-negotiable to accurately monitor the temperature as isomalt needs to reach a specific range (typically 320-340°F or 160-171°C) for proper working consistency. Silicone mats or parchment paper laid over a heat-resistant surface (like a granite countertop or a thick cutting board) are essential for pouring and cooling isomalt, as it won't stick to these surfaces.
Other useful tools include heat-resistant gloves (silicone or multiple layers of cotton), stainless steel or silicone spatulas for stirring and handling, and possibly a heat lamp to keep small amounts of isomalt pliable if you're doing detailed pulling or shaping. For precise application on cookies, squeeze bottles or piping bags with fine tips are invaluable for pouring the melted isomalt into specific areas or molds. Having everything ready before you start melting is key.
Isomalt is commonly available in two forms: granules or pre-cooked nibs/sticks. Both work for isomalt cookie decorating techniques, but they have slight differences in ease of use. Granulated isomalt needs to be melted with a small amount of distilled water (often about 10-15% water to isomalt by weight) to help it dissolve and prevent scorching initially. This requires careful simmering to evaporate the water before reaching the working temperature.
Pre-cooked isomalt nibs or sticks are often preferred by decorators because they can be melted directly in a saucepan or microwave-safe container without adding water. This simplifies the process and reduces the risk of incorporating too much moisture, which can cause stickiness later. While slightly more expensive per pound than granules, the convenience and reduced preparation steps often make nibs or sticks the preferred choice for smaller cookie projects or for those new to isomalt work.
Safety Precautions When Handling Molten Isomalt
Safety is paramount when working with isomalt, as it reaches extremely high temperatures. Molten isomalt can cause severe burns (third-degree burns can occur within seconds of contact with 300°F+ liquid). Always wear heat-resistant gloves when handling hot isomalt or tools that have come into contact with it. Work on a stable, heat-resistant surface away from pets and children.
Keep a bowl of ice water nearby as a first-aid measure in case of accidental contact – do not try to wipe hot isomalt off your skin, as this will spread the burn. Instead, immediately plunge the affected area into ice water and seek medical attention. Never leave melting isomalt unattended. Use caution and move slowly and deliberately when pouring or shaping the hot liquid to minimize the risk of spills. These precautions are non-negotiable for safe isomalt cookie decorating techniques.
Let's walk through the general process of preparing and using isomalt for your cookie creations. While specific designs will vary, the fundamental steps for handling and shaping isomalt are consistent across many isomalt cookie decorating techniques.
Preparing Isomalt for Melting: A Crucial First Step
The preparation step depends on the form of isomalt you are using. If using granulated isomalt, measure the desired amount (start small for practice, perhaps 100-200 grams) and place it in a clean, heavy-bottomed saucepan. Add the recommended amount of distilled water (using tap water can introduce impurities that cause crystallization, about 10-15% by weight of isomalt). Swirl the pan gently to distribute the water, but avoid stirring aggressively at this stage to prevent sugar crystals from forming on the sides of the pan.
If using pre-cooked isomalt nibs or sticks, simply place the desired amount directly into your clean, dry, heavy-bottomed saucepan or a microwave-safe container designed for candy making. No water is needed for this type. Ensure your work surface is prepped with silicone mats or parchment paper and you have your tools, colors, and cookie bases ready before you begin heating.
Melting Isomalt: Achieving the Perfect Consistency
Place the saucepan with the isomalt (and water if using granules) over medium heat. If using granules and water, stir gently with a clean stainless steel or silicone spatula until the isomalt dissolves completely. Once dissolved (or if using nibs), insert your candy thermometer. Stop stirring once the mixture boils and becomes clear. Stirring at high temperatures can induce crystallization.
Allow the temperature to rise steadily. For most isomalt cookie decorating techniques involving pouring or casting, you'll heat the isomalt to approximately 320-335°F (160-168°C). Some sources suggest heating slightly higher, up to 340°F (171°C), to ensure all moisture is gone, but be cautious not to scorch it.
Once the target temperature is reached, immediately remove the pan from the heat. You can briefly dip the bottom of the pan in a shallow bowl of ice water for just a second or two to stop the cooking process, but be very careful doing this. Let it sit for a few minutes to allow any bubbles to settle before pouring.
Adding color transforms clear isomalt into vibrant edible jewels or structural elements. The best time to add color is after the isomalt has reached its target temperature and has been removed from the heat, while it is still very hot but the vigorous bubbling has subsided slightly. This prevents the color from burning. Only use food colorings specifically designed for candy making or isomalt, as regular water-based food colors can make the isomalt cloudy or sticky due to the added moisture.
Using Gel Food Coloring for Isomalt
Gel food colorings can be used, but sparingly. Opt for highly concentrated gel pastes. Add just a tiny amount using a toothpick, as the color will become more concentrated as the isomalt cools. Stir the color in gently with a clean, heat-resistant tool. Be aware that the water content in gel colors, even minimal, can sometimes introduce cloudiness or increase the risk of stickiness, especially in humid environments. Some decorators prefer to warm the gel color slightly before adding it to the hot isomalt to minimize temperature shock.
Powdered Food Coloring Options for Isomalt
Powdered food colorings are often the preferred choice for isomalt cookie decorating techniques because they contain no water. Add a very small pinch of powdered color directly to the hot isomalt and stir gently until fully incorporated. Powdered colors tend to produce clearer, more vibrant results and reduce the risk of cloudiness or stickiness caused by moisture. Start with a minuscule amount, as powdered colors are highly concentrated, and add more gradually until you achieve the desired hue.
Once colored (or left clear), the hot isomalt is ready to be shaped. It remains workable for a limited time as it cools, so speed and preparation are key. Always wear heat-resistant gloves during any shaping process involving direct contact or pouring.
Isomalt Pulling Techniques for Delicate Accents
Isomalt pulling creates beautiful, ethereal strands and ribbons often used for delicate floral elements or abstract designs. Once the melted isomalt has cooled slightly to a temperature that is hot but manageable (around 200-220°F or 90-105°C – test a tiny piece first, wearing gloves! ), gather a portion and begin pulling and folding it repeatedly. As you pull and fold, air is incorporated, making the isomalt opaque and giving it a satin-like sheen. This technique is less common for direct application on cookies due to its opacity but can create separate elements like bows or flowers to attach later.
For cookie accents requiring transparency, pulling is generally avoided. However, very thin, clear pulled strands can be used sparingly before they become fully opaque. Practice is essential to find the right temperature and technique for achieving the desired effect, like creating fine, hair-like strands for specific artistic details on your cookies.
Casting Isomalt in Molds for Precise Shapes
Casting isomalt into silicone molds is one of the easiest and most precise isomalt cookie decorating techniques. Use molds specifically designed for candy or sugar work, ensuring they are clean and dry. Once the melted isomalt has cooled slightly to minimize bubbles (around 280-300°F or 138-149°C), carefully pour it into the mold cavities. Fill just to the top or slightly overfill if the mold is shallow, and gently tilt or tap the mold to help the isomalt settle and release any trapped air bubbles.
Allow the isomalt to cool and harden completely in the mold at room temperature (do not refrigerate, as condensation can cause stickiness). Once fully set (this can take 15-30 minutes depending on size), carefully flex the silicone mold to release the hardened isomalt shapes. These can be anything from geometric shapes and letters to intricate flowers or gems, ready to be attached to your cookies using a tiny dab of melted isomalt or royal icing.
Creating Isomalt Sails and Edible Gems
Isomalt sails are thin, curved pieces that add dramatic height and structure. To create them, pour a thin layer of melted isomalt onto a silicone mat. As it cools and becomes pliable but not yet brittle (like thick syrup or taffy), gently lift the mat and shape the isomalt sheet by draping it over a curved object, such as an overturned bowl, a crumpled piece of parchment paper, or even a rolling pin. Hold or support the shape until the isomalt hardens completely.
Edible isomalt gems are typically made by casting isomalt into faceted silicone molds designed for jewels. Pour the cooled isomalt (around 280-300°F or 138-149°C) carefully into the gem cavities, ensuring they are completely filled. You can layer colors or add edible glitter before pouring for added sparkle. Once hardened, pop them out of the molds. These techniques allow you to create stunning, glass-like elements that catch the light beautifully on your cookies.
Now that you understand the basics of working with isomalt, let's explore some creative isomalt cookie decorating techniques to inspire your next baking project.
Incorporating Isomalt into Royal Icing Designs
One popular method is to combine isomalt with royal icing. You can create "windows" on cookies by cutting out a shape from the cookie before baking. After baking and cooling, decorate the cookie with royal icing, leaving the cut-out area bare. Once the icing is dry, carefully fill the opening with melted, colored or clear isomalt (poured at a slightly lower temperature, around 270-290°F or 132-143°C, to prevent heat damage to the cookie or icing). This creates a stunning stained-glass effect.
Alternatively, you can use royal icing to pipe outlines or designs on a cookie, let them dry, and then carefully pour or pipe thin layers of isomalt into specific sections to create raised, glossy, or transparent areas within the icing design. This adds varied texture and visual interest. For example, icing a picture frame and filling the 'picture' area with clear isomalt, or using colored isomalt to fill in parts of a floral design outlined in icing are effective isomalt cookie decorating techniques.
Isomalt shards provide a contemporary, often dramatic effect, mimicking broken glass or ice. To create shards, simply pour a thin layer of colored or clear melted isomalt onto a silicone mat. Allow it to cool and harden completely. Once brittle, lift the mat and gently break the isomalt sheet into irregular pieces of various sizes. Be careful, as edges can be sharp.
These shards can then be attached to iced cookies using a tiny dab of melted isomalt or a strong edible adhesive like royal icing or edible glue. Arrange them artfully to look like shattered glass, ice crystals, or abstract geometric elements. This technique is relatively simple but adds significant visual impact, making it a popular choice in modern isomalt cookie decorating techniques.
Isomalt's structural integrity makes it excellent for creating three-dimensional elements that stand off the cookie surface. This can involve casting isomalt into molds for solid shapes like spheres or cubes, or using pulled/blown techniques (though more advanced) to create lighter, hollow forms. Cast elements are attached to the cookie base using a small amount of fresh melted isomalt as glue.
Another approach is building up layers. For instance, creating a small isomalt base on the cookie and then attaching other isomalt shapes or structures onto it. This allows for designs like tiny isomalt sculptures, abstract forms, or even architectural elements built directly onto the cookie, showcasing advanced isomalt cookie decorating techniques.
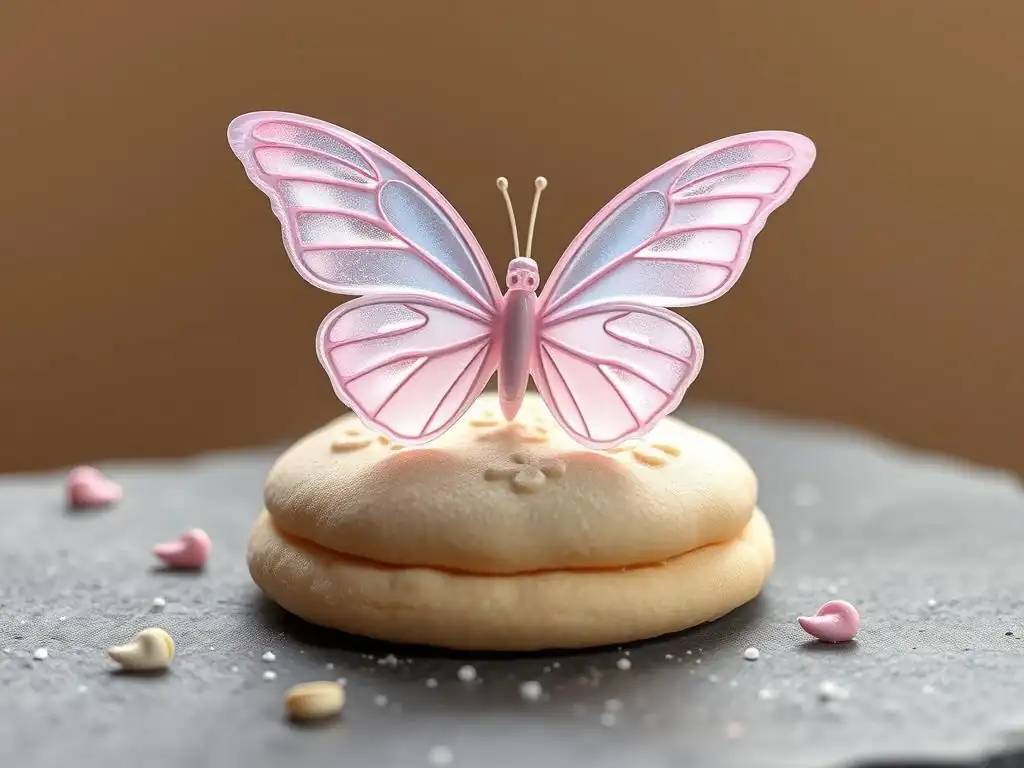
Isomalt butterfly wings are a popular and beautiful way to use isomalt's transparency and structural properties. They appear delicate and lifelike, perched atop a cookie body.
Description: Isomalt butterfly wings are thin, often vibrantly colored or clear, wing shapes made from hardened isomalt. They are typically created separately and then attached to a cookie decorated to look like a butterfly body. Their transparency allows light to pass through, mimicking real butterfly wings.
Instructions:
- Prepare melted isomalt (clear or colored).
- Print or draw butterfly wing templates on paper. Place the template under a silicone mat.
- Using a piping bag or squeeze bottle with a fine tip, carefully pipe the melted isomalt over the template outlines on the silicone mat. You can fill the shape completely for solid wings or pipe veins and fill sections with different colors for a more intricate look.
- While the isomalt is still warm and pliable, you can gently lift the mat and curve the wings slightly by draping them over a cylindrical object (like a rolling pin or bottle) to give them a natural shape.
- Allow the isomalt wings to cool and harden completely on the mat.
- Carefully peel the hardened wings from the silicone mat.
- Decorate a cookie base to resemble a butterfly body using royal icing or fondant.
- Attach the isomalt wings to the cookie body using a small dab of freshly melted isomalt (applied carefully with a toothpick) or strong royal icing. Hold in place until set.
Isomalt geode cookies are a stunning example of how isomalt can mimic natural formations, creating a realistic crystal effect on a cookie.
Description: Geode cookies feature a central "crack" or opening filled with layers of colored isomalt crystals, often surrounded by textured royal icing or edible glitter to resemble rock or crystal growth. The isomalt provides the translucent, sparkling crystal appearance.
Instructions:
- Bake and cool your cookies. Cut an irregular shape out of the center of some cookies before baking if you want a deep cavity, or simply create an indentation on the surface of baked cookies.
- Decorate the area around the geode cavity with royal icing, texturing it to look like rock or stone. You can use techniques like stippling, scraping, or applying crushed cookies/edible glitter. Let the icing dry completely.
- Melt clear or lightly colored isomalt.
- While the isomalt is cooling slightly (around 280-300°F or 138-149°C), add edible glitter, luster dust, or small edible pearls directly into the geode cavity on the cookie.
- Carefully pour the melted isomalt into the prepared cavity, filling it to create a flat or slightly raised surface. You can pour multiple layers of slightly different colors or add more glitter between layers for depth.
- Allow the isomalt to cool and harden completely.
- Once hardened, you can paint the edges of the isomalt geode with edible gold or silver paint for a realistic touch. Add more edible glitter or sugar crystals around the isomalt edge if desired to blend it into the "rock" texture.
Troubleshooting Common Isomalt Decorating Problems
Even experienced bakers encounter issues with isomalt. Understanding common problems and their solutions is part of mastering isomalt cookie decorating techniques.
Preventing Bubbles in Isomalt Decorations
Bubbles can mar the clarity of your isomalt pieces. They are often introduced by stirring the isomalt while it's at high temperatures or by pouring it too quickly. To minimize bubbles, avoid stirring once the isomalt boils and becomes clear. Heat it steadily without agitation.
After reaching the target temperature and removing from heat, let the isomalt sit for a few minutes (5-10 minutes is often sufficient for a small batch) to allow bubbles to rise to the surface and dissipate before pouring. Pour the isomalt slowly and steadily into molds or onto your surface, pouring into one spot and letting it spread naturally rather than moving the pour stream around. If surface bubbles remain in a mold, you can sometimes carefully pop them with a toothpick or a quick pass of a food-safe torch from a safe distance, though this requires practice.
Fixing Cloudy or Dull Isomalt
Cloudiness or dullness in isomalt is usually caused by moisture absorption (humidity), not heating to a high enough temperature to remove all moisture, or adding water-based colorants. To prevent this, ensure you heat the isomalt to the correct temperature (320-340°F or 160-171°C) to evaporate all added water (if using granules) and inherent moisture. Use distilled water if necessary.
Store finished isomalt pieces and decorated cookies in a cool, dry environment, ideally in an airtight container with food-safe desiccant packets (like silica gel, clearly marked as food-safe). If a piece becomes slightly dull after cooling, you can sometimes restore shine by briefly passing a food-safe torch over the surface, being very careful not to melt or burn the isomalt.
Avoiding Isomalt Burns: Safety Tips
Burns are the most serious risk when working with isomalt. Always treat molten isomalt with extreme caution. As mentioned earlier, wear heat-resistant gloves whenever handling hot isomalt or anything it has touched. Work on a stable, non-slip surface.
Keep a bowl of ice water readily available for immediate first aid in case of contact. Never try to wipe off hot isomalt. If it gets on skin, immediately immerse the area in ice water and keep it there while seeking medical help. Work calmly and avoid rushing. Ensure no pets or children are in your workspace. These safety steps are as important as the isomalt cookie decorating techniques themselves.
Isomalt Crystalizing: Solution
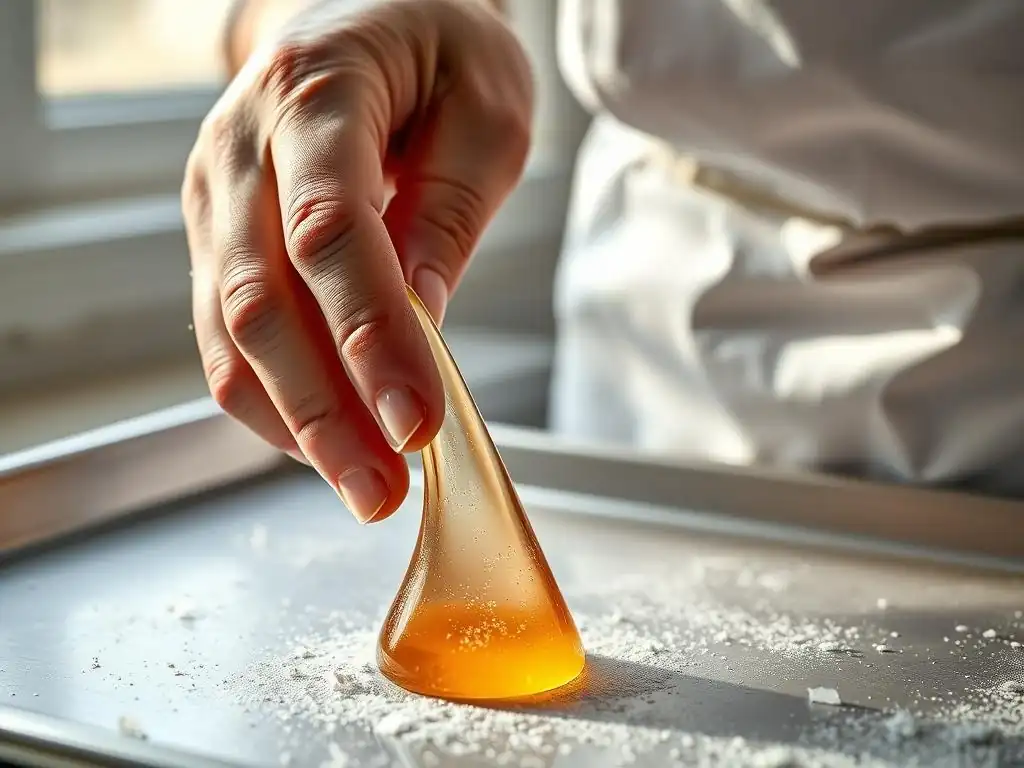
Crystallization results in opaque, grainy isomalt instead of a clear, glassy finish. This can happen if sugar crystals are introduced into the melting isomalt (e.g., from stirring at high temperatures with a spatula that has a tiny crystal on it, or from not wiping down the sides of the pan when using granulated isomalt and water). Using tap water can also cause crystallization due to minerals.
If your isomalt crystallizes while melting, it's difficult to fix perfectly for clear work. You can try adding a tiny amount of distilled water (maybe a tablespoon per cup of isomalt) and reheating it very slowly to dissolve the crystals, but success isn't guaranteed. Prevention is better: use distilled water, avoid stirring at high temperatures, and ensure all tools and pans are spotlessly clean before starting.
Isomalt Sticking to Molds: Solution
Isomalt sticking to molds usually happens if the mold isn't suitable for isomalt/candy work, isn't clean and dry, or if the isomalt wasn't heated to a high enough temperature (leaving too much residual moisture). Ensure you are using high-quality silicone molds designed for candy or high-temperature sugar work.
Make sure molds are completely dry before pouring. If you consistently have sticking issues, you can try lightly spraying molds with a very fine mist of a neutral cooking spray (like canola or coconut oil spray) and wiping out any excess, or using a mold release spray specifically for candy, though this can sometimes affect clarity. Ensure the isomalt is heated to the proper temperature (320-340°F) to minimize residual moisture before pouring.
Proper storage is crucial to keep your beautiful isomalt cookie decorations looking their best and preventing them from becoming sticky or dull.
Best Practices for Preserving Isomalt Decorations
The enemy of isomalt decorations is humidity. Store cookies decorated with isomalt in a cool, dry environment. An airtight container is essential to protect them from moisture in the air. Avoid storing them in the refrigerator, as the rapid temperature change upon removal will cause condensation to form on the isomalt, leading to stickiness and cloudiness.
Consider adding food-safe desiccant packets (available online or at craft stores) to the airtight storage container. Place the packets in the bottom of the container and layer the cookies on top, separated by parchment paper if stacking. This helps absorb excess moisture and keeps the isomalt sparkling. Handle the cookies as little as possible, as moisture and oils from hands can also affect the isomalt surface.
Preventing Isomalt from Becoming Sticky
The primary way to prevent isomalt from becoming sticky is diligent storage in a low-humidity environment. As mentioned, airtight containers with desiccant packets are your best defense. Ensure the isomalt was cooked to the correct temperature to remove residual moisture.
If decorations do become slightly sticky due to exposure, sometimes a brief exposure to dry air or placing them back in an airtight container with fresh desiccant packets can help dry them out slightly. However, severely sticky isomalt is difficult to fully recover. Prevention through proper cooking and storage is the most effective strategy for maintaining the integrity of your isomalt cookie decorating techniques.
Working with isomalt may seem intimidating at first due to the high temperatures involved, but with the right tools, preparation, and practice, you can unlock a new dimension in your cookie decorating. The ability to create clear, colored, and structural elements offers endless possibilities for adding sparkle, depth, and artistic flair to your baked creations.
Embrace the Versatility of Isomalt in Your Baking
From delicate butterfly wings and sparkling geode centers to modern shards and classic cast gems, isomalt's versatility allows you to achieve effects simply not possible with icing alone. Incorporating these isomalt cookie decorating techniques into your repertoire expands your creative boundaries and allows you to produce truly stunning, professional-looking cookies that will impress everyone. Don't be afraid to experiment with different colors, shapes, and techniques to find your signature style.
While this guide covers the essential isomalt cookie decorating techniques, there's always more to learn. Look for video tutorials online showcasing specific techniques like pulling or blowing (though blowing is less common for cookies). Many experienced sugar artists offer classes or workshops that delve deeper into advanced sugar work, including isomalt. Practice small batches frequently to get comfortable with the material's working temperature and speed. The more you practice, the more confident you'll become in handling this exciting medium.
Frequently Asked Questions
Isomalt is a sugar substitute used in baking and candy making, particularly for creating decorative elements. It's favored because it's less prone to crystallization than sugar and can be molded into various shapes.
Isomalt should be melted slowly and carefully in a microwave-safe container or on the stovetop. Use a candy thermometer to ensure it reaches the correct temperature, and always wear heat-resistant gloves to prevent burns.
BakeWithEase likely covers techniques like pouring melted Isomalt into molds, creating Isomalt sails or shards, and using it as an adhesive to attach decorations to cookies.
What are some common mistakes to avoid when working with Isomalt?
Avoid overheating Isomalt, as it can burn easily. Also, be careful not to introduce moisture, which can make it sticky. Proper storage of leftover Isomalt is also important.
BakeWithEase.com offers step-by-step guides in the "Cookies" and "Decorating" sections. Search for "Isomalt" on the website to find specific recipes and techniques using Isomalt.
The art of cookie decorating continues to evolve, but the captivating allure of isomalt remains a steadfast element, adding a unique sparkle and structural complexity that elevates any design. From simple shards to intricate sculptures, isomalt offers a level of sophistication previously unattainable with traditional methods, pushing creative boundaries and delighting both bakers and consumers alike.
The impact of isomalt on the world of baking is undeniable. It's moved beyond a niche technique, becoming increasingly accessible and integrated into mainstream baking trends. This accessibility, coupled with the sheer visual impact, has fostered a vibrant community of bakers pushing the limits of what's possible. The beauty of baking lies not just in the taste, but in the artistry of presentation,
a sentiment echoed by countless bakers who embrace isomalt's transformative power. This quote perfectly encapsulates the shift towards a more visually-driven appreciation of baked goods, a shift isomalt has significantly contributed to.
Now, it's your turn to explore the shimmering possibilities of isomalt. Don't be intimidated by the initial learning curve; with practice and patience, you can master this technique and add a touch of magic to your own cookie creations. Imagine the delighted expressions on the faces of your friends and family as they admire your exquisitely decorated cookies, each one a testament to your skill and creativity. Embrace the challenge, experiment with different designs, and let your imagination run wild. The world of isomalt awaits!
Unleash Your Inner Sugar Artist: Master Isomalt Accents!
Thanks for taking the time to explore the art of isomalt cookie decorating! We hope you've gained valuable insights and inspiration to elevate your baking game. Ready to transform your cookies?
- Craft your first isomalt masterpiece: Start with a simple design from the article – remember, practice makes perfect! Even small accents will make a big impact.
- Share your creations: Show off your beautiful, isomalt-adorned cookies on social media using #BakeWithEaseIsomalt. Let's inspire each other!
- Experiment with flavors and colors: Don't be afraid to get creative! Try adding extracts or food coloring to your isomalt for unique flavor and color combinations.
What unique isomalt design will you create to amaze your friends and family next?