
Mastering Consistency: Piping vs. Flooding for Advanced Designs


Welcome to BakeWithEase, your guide to unlocking the sweet secrets of baking! Are you ready to transform your desserts from ordinary to extraordinary? This week, we delve into the art of Perfecting Piping Consistency Buttercream Frosting. But what exactly does it take to achieve that flawlessly smooth finish, and how does it differ from a flooding consistency? Discover the techniques and secrets to elevate your pastry designs and create truly stunning baked masterpieces. Let's get started and explore the delicious details!
- Mastering Royal Icing Consistency: Outlining vs. Filling for Detailed Cookie Designs
- Introduction to Detailed Cookie Decorating Techniques: Outlining and Filling
- Understanding Outlining Consistency for Royal Icing
- Mastering Filling Consistency for Smooth Cookie Surfaces
- Outlining vs. Filling: A Detailed Comparison for Cookie Decorating
- Advanced Techniques: Combining Outlining and Filling for Stunning Cookie Designs
- Recipes for Optimal Royal Icing Consistency for Cookie Decorating
- Troubleshooting Common Issues in Advanced Cookie Decorating with Royal Icing
- Tips and Tricks for Maintaining Perfect Royal Icing Consistency
- Conclusion: Elevate Your Cookie Decorating with Perfect Royal Icing Consistency
-
Frequently Asked Questions
- How does the perfect buttercream consistency differ between piping and flooding?
- What are some common signs that my piping buttercream is too stiff?
- How can I adjust my buttercream consistency if it's too thick for flooding?
- What ingredients affect buttercream consistency the most?
- Does the type of butter used impact the buttercream's piping consistency?
- Final Reflection: The Enduring Pursuit of Buttercream Perfection
- Unleash Your Inner Pastry Chef: Perfecting Piping & Flooding Techniques!
Achieving the perfect royal icing consistency is arguably the most critical factor in creating stunning, professional-looking decorated cookies. Think of royal icing as your paint; if the paint is too thick, it won't flow smoothly, resulting in jagged lines and uneven surfaces. If it's too thin, it will run off the cookie or bleed into other colors, ruining your intricate designs. The difference between a crisp, delicate outline and a messy, bleeding edge often comes down solely to consistency. Mastering this aspect is foundational for anyone looking to elevate their cookie decorating skills beyond simple swirls.
Precision in cookie decorating, especially when tackling complex patterns or fine details, demands royal icing that behaves predictably. For instance, outlining a small detail like a flower petal requires an icing that holds its shape immediately after piping, preventing it from spreading. Conversely, filling a large area like the base of a cookie needs an icing that is thin enough to flow and self-level into a perfectly smooth surface, free of peaks or air bubbles.
Perfecting piping consistency for outlining and achieving the right flow for filling are distinct skills, each vital for different aspects of a single design. Without the correct consistency for each technique, your ability to execute detailed patterns and achieve clean lines will be severely limited.
In the world of royal icing cookie decoration, outlining and filling (often called flooding) are the two fundamental techniques used to cover cookies with icing and create designs. Outlining involves piping a line of relatively thick royal icing around the perimeter of an area you wish to decorate or fill. This line acts as a dam or barrier, preventing the thinner "filling" icing from flowing over the edge. The outlining consistency needs to be firm enough to maintain its shape and not spread.
Filling, on the other hand, involves using a much thinner consistency of royal icing to flood the area contained within the outline. This thinner icing is designed to flow easily and spread to create a smooth, even layer. After filling, the cookie is typically left to dry completely, forming a hard, smooth surface that can then be decorated further. These two techniques are almost always used in conjunction to create the base layer of icing on most decorated cookies, and understanding the specific consistency required for each is key to success.
Understanding Outlining Consistency for Royal Icing
Achieving the Perfect Outlining Consistency: A Detailed Guide
Achieving the perfect outlining consistency for royal icing is about finding the balance where the icing is thick enough to hold a defined shape when piped, but not so stiff that it's difficult to pipe smoothly. A common starting point for outlining consistency is typically achieved by mixing powdered sugar with liquid (often water or milk, plus meringue powder or egg whites) until it reaches a consistency similar to toothpaste. This isn't a hard rule, as humidity and ingredients can vary, but it provides a good visual benchmark.
To adjust your icing to this consistency, begin with your basic royal icing recipe. If it's too thick, add liquid very gradually, perhaps 1/4 teaspoon at a time, mixing thoroughly after each addition. If it's too thin, add more sifted powdered sugar, again, a tablespoon at a time.
The goal is an icing that, when a spoonful is dropped back into the bowl, holds a distinct peak for several seconds before slowly melting back into the mass. A good test is to load some into a piping bag and pipe a line on parchment paper; it should hold a clean line without spreading significantly or breaking.
Tools and Equipment for Outlining Royal Icing Effectively
Effective outlining relies not just on the icing's consistency but also on the right tools. The most common tool for outlining is a piping bag fitted with a small round piping tip, typically a size #1, #2, or #3. The size of the tip you choose depends on the desired thickness of your outline – a #1 tip creates a very fine line, while a #3 creates a thicker one. Ensure your tips are clean and free of any dried icing, as even a tiny blockage can disrupt the flow and cause breaks in your line.
Beyond the piping bag and tip, having couplers can be incredibly useful. Couplers allow you to change piping tips on the same bag of icing without having to empty the bag. This is handy if you need to switch between, say, a #2 tip for fine details and a #3 tip for a border.
Additionally, a scribe tool or toothpick is essential for gently guiding the icing line or popping any small air bubbles that might appear in the piped line. Using good quality piping bags that are easy to handle and don't split under pressure is also recommended for a smoother piping experience.
Techniques for Testing Your Royal Icing Outlining Consistency
Testing your royal icing consistency before you start decorating is crucial. One widely used method is the "counting method." Drop a spoonful of icing back into the bowl and observe how long it takes for the peak to disappear and the icing surface to become smooth again. For outlining, you're typically looking for a consistency that takes about 15-20 seconds to smooth over. This means it's thick enough to hold a shape but still has a slight flow.
Another practical test is the "line test" on parchment paper. Load some icing into a piping bag and pipe a straight line. Does it break easily? Is it jagged? Does it spread significantly after being piped? A correctly-thickened outlining icing should produce a smooth, continuous line that holds its shape without spreading more than a millimeter or two. If the line is too wobbly or breaks, your icing is likely too thick; if it spreads too much, it's too thin. Adjust incrementally and re-test until you achieve the desired result.
Troubleshooting Common Outlining Problems: Breaks, Blobs, and Uneven Lines
Even with the right consistency, you might encounter issues when outlining. Breaks in your line often indicate your icing is too thick, making it difficult to flow continuously, or you might be applying uneven pressure on the piping bag. To fix this, add a tiny amount of liquid (like 1/4 teaspoon of water) to your icing and mix well, then try piping again. Ensure you maintain steady, even pressure as you pipe, lifting the tip slightly off the surface of the cookie to let the icing fall into place rather than dragging the tip along the surface.
Blobs and uneven lines can result from inconsistent pressure, air bubbles in the icing, or a partially clogged tip. To address air bubbles, gently tap your piping bag on the counter before starting to force bubbles upwards, or use a scribe tool to pop any bubbles you see in the icing.
If your tip is clogged, clear it with a toothpick or swap it out for a clean one. Practice is key here; the more you practice piping lines on parchment paper, the better you'll become at maintaining consistent pressure and creating smooth, even outlines, truly perfecting piping consistency for your cookie designs.
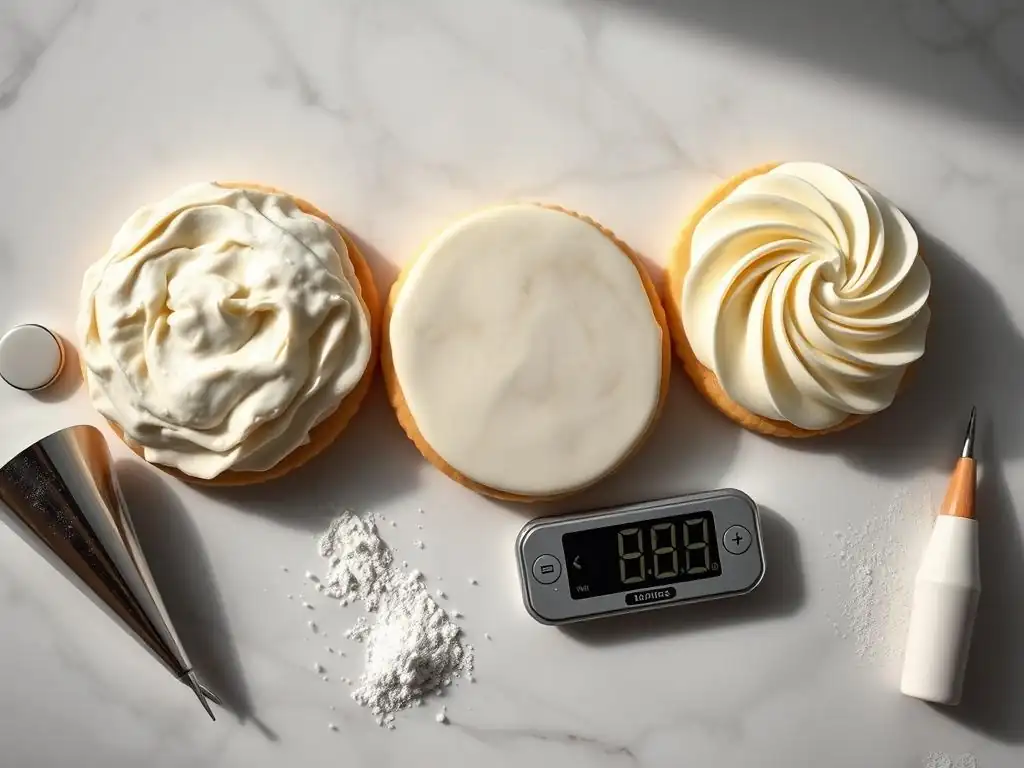
What is Filling Consistency Royal Icing?
Filling consistency royal icing, often referred to as flooding consistency, is significantly thinner than outlining consistency. Its primary purpose is to fill in the areas outlined on a cookie, creating a smooth, even, and level surface. Unlike outlining icing which needs to hold its shape, filling icing needs to flow easily and spread out on its own to cover the designated area without leaving any peaks or lines from where it was applied.
This thinner consistency allows the icing to "flood" the outlined area, settling into a flat layer as it dries. The key characteristic of filling consistency is its ability to self-level. When you apply it, it should spread out and become smooth within a short period, typically 5-10 seconds. This self-leveling property is what gives flooded cookies their characteristic pristine, glass-like finish once dry.
How to Achieve the Ideal Filling Consistency: Step-by-Step Instructions
To achieve the ideal filling consistency, you'll typically start with your outlining consistency royal icing and gradually thin it down by adding liquid. Water is the most common liquid used for thinning royal icing. Begin by adding a small amount of water, perhaps 1/2 teaspoon to a cup of outlining icing, and stir it in completely. The key is to add liquid in small increments and mix thoroughly each time, testing the consistency as you go.
A reliable way to test filling consistency is the "counting method" again. Drop a spoonful of the thinned icing back into the bowl. You are aiming for a consistency where the icing takes approximately 5-10 seconds for the peak to disappear and the surface to become smooth again.
If it takes longer than 10 seconds, it's still too thick and won't self-level properly. If it disappears almost instantly (under 5 seconds), it's too thin and might run over your outline or dry unevenly. Add liquid or powdered sugar accordingly, testing after each adjustment until you hit that sweet spot between 5 and 10 seconds.
While you can use a piping bag with a larger round tip (like a #3 or #4) or even just a cut corner of a disposable piping bag to apply filling icing, a squeeze bottle is often the preferred tool for many decorators. Squeeze bottles allow for faster application over larger areas and offer good control over the flow of the thinner icing. Having bottles with fine tips can also be useful for getting into smaller outlined sections.
Regardless of whether you use a piping bag or a squeeze bottle, a scribe tool or toothpick is absolutely indispensable when filling cookies. This tool is used to gently nudge the icing to the edges of the outline, ensuring full coverage, and more importantly, to pop any surface air bubbles that rise to the top after the area is filled. Working quickly and efficiently once the icing is applied is also important, as the icing can start to set relatively fast depending on humidity.
Tips for Preventing Air Bubbles and Achieving a Flawless Filled Surface
Air bubbles are the nemesis of a perfectly smooth flooded surface. They can form during the mixing process or get trapped when applying the icing. To minimize them, mix your royal icing on a low speed if using a stand mixer, as high speeds whip more air into the mix. After mixing and coloring your icing, let it rest covered with plastic wrap pressed directly onto the surface for 15-20 minutes; this allows trapped air bubbles to rise.
When filling the cookie, apply the icing evenly within the outlined area. Don't overfill, but ensure there's enough icing to spread. Once the area is filled, use your scribe tool or toothpick to gently coax the icing to the edges and pop any visible bubbles by gently swirling the tool through them.
Holding the cookie up and gently tapping the bottom against your hand or the counter can also help bring stubborn bubbles to the surface to be popped and helps the icing settle smoothly. Working in a dust-free environment is also helpful to prevent tiny particles from landing on your wet icing and marring the smooth finish.
Outlining: Precision and Detail Work
Outlining consistency royal icing is tailored for precision. Its thickness allows you to pipe fine, controlled lines that hold their shape immediately. This makes it perfect for creating borders, intricate patterns like lace or filigree, writing text, or piping small decorative elements directly onto a dried flooded surface. The goal is sharpness and definition.
Think of outlining as the drawing phase of your cookie art. You use this thicker consistency to sketch the boundaries or add the delicate details that define the design. A typical outlining consistency has a higher ratio of powdered sugar to liquid compared to filling consistency, resulting in a stiffer, more controllable flow when piped. This stiffness prevents the line from spreading outwards, maintaining the crisp edge needed for detailed work or to contain the subsequent flood of thinner icing. Perfecting piping consistency specifically refers to mastering this controlled application for outlining.
Filling: Creating a Smooth Base
Filling consistency, in contrast, is about creating a flawless, smooth canvas. This thinner icing is designed to spread and level out on its own, eliminating any brushstrokes or piping lines once dry. It's primarily used to cover large areas of the cookie evenly, forming the base layer upon which further decorations can be built.
This process is often called flooding because the icing literally flows to fill the space. The desired outcome is a uniform, flat surface that is free of air bubbles and texture. The self-leveling property is key; you apply the icing, nudge it into place with a tool, and then trust it to settle into a perfectly smooth finish as it dries. This smooth base is ideal for techniques like wet-on-wet decorating, marbling, or later adding details like piping or painting onto the dried surface.
Consistency Differences: Outlining vs. Filling Royal Icing
The fundamental difference between outlining and filling consistency lies in their viscosity and flow properties. Outlining consistency is relatively thick and slow-flowing, typically taking 15-20 seconds for a dropped peak to disappear. It holds a sharp line when piped. Filling consistency is much thinner and free-flowing, usually taking only 5-10 seconds for a dropped peak to disappear, and it self-levels readily.
This difference in viscosity is achieved by adjusting the liquid content. Outlining icing uses less liquid relative to powdered sugar, making it stiffer. Filling icing uses more liquid, making it thinner and more fluid. For instance, if a cup of outlining icing might contain roughly 2 tablespoons of water (beyond the initial recipe liquid), the same amount of filling icing might contain 3-4 tablespoons or more, depending on the desired flow and humidity. Mastering the art of adjusting between these two consistencies from a single batch of base royal icing is a core skill in advanced cookie decorating.
Applications: When to Use Outlining and When to Use Filling
Outlining consistency is used whenever you need a defined line or detail that holds its shape. This includes:
- Creating borders around the edge of a cookie.
- Dividing areas on a cookie for different colors of filling.
- Piping intricate patterns like lace, scrolls, or small flowers directly onto a dried base.
- Adding text or monograms.
- Creating dimensional details that stand up from the cookie surface.
Filling consistency is used to cover areas with a smooth, even layer. This includes:
- Flooding the main body of a cookie after an outline has been piped.
- Filling in specific sections within an outline, like areas of a picture or pattern.
- Creating a smooth background for subsequent decoration techniques like painting, airbrushing, or applying edible images.
- Used in wet-on-wet techniques where thinner icing is applied onto wet filling icing.
Knowing when to use each consistency, and being able to quickly adjust your icing between them, is vital for executing complex cookie designs efficiently and effectively.

Creating Layered Designs with Outlining and Filling
Combining outlining and filling techniques allows for the creation of intricate layered designs with depth and dimension. One common method is to outline and fill sections of a design and let them dry before adding the next layer. For example, you might outline and fill a dress on a cookie figure, let it dry completely (which can take several hours, often 6-8 hours or even overnight depending on humidity), and then outline and fill details like sleeves or a collar on top of the dried base layer.
This layering approach is essential for designs where elements overlap or where you want distinct raised areas. By allowing each layer to dry fully, you prevent colors from bleeding into one another and create subtle height differences that add visual interest. This also allows you to pipe fine details with outlining consistency directly onto the dried, smooth flooded surface, achieving crisp lines that wouldn't be possible on wet icing.
While filling creates a smooth, flat base, outlining consistency can be used to add texture and dimension. Piping dots, lines, or swirls with outlining icing directly onto a dried flooded surface creates raised elements that add tactile and visual interest. For instance, you could flood a section of a cookie and, once dry, use outlining consistency to pipe small beads around the edge or create a basketweave texture.
Another technique is to use a slightly thicker outlining consistency (closer to toothpaste) to pipe details that hold significant height, like small flowers or leaves. This adds a three-dimensional quality to your cookie art. The combination of the smooth, flat areas created by filling and the raised details created by outlining allows for a wide range of creative possibilities, transforming a simple cookie into a miniature work of art.
Wet-on-wet and marbling are advanced techniques that utilize the unique properties of filling consistency royal icing. In wet-on-wet, you flood a section of the cookie with one color of filling consistency icing, and while it is still wet, you immediately drop or pipe dots, lines, or swirls of another color (or colors) of the same filling consistency icing onto the wet base. Because both icings are wet and have similar flow properties, the added colors sink slightly into the base layer.
Using a scribe tool, you can then gently drag through the wet icings to create patterns like hearts, spiderwebs, or feathers. The key is that both the base and the added colors must be at the correct filling consistency (often the same 5-10 second count) and applied while wet. Marbling is a variation where you apply lines or swirls of different colors onto a wet flooded surface and then swirl them together with a tool to create a marbled effect. These techniques rely entirely on having the correct, fluid filling consistency for all colors involved.
Basic Royal Icing Recipe for Outlining
A reliable basic royal icing recipe is the starting point for both outlining and filling consistencies. Here is a common recipe base:
Ingredients:
- 4 cups (approx. 450g) confectioners' (powdered) sugar, sifted
- 3 tablespoons (approx. 25g) meringue powder
- 1/2 cup (approx. 120ml) warm water
- 1 teaspoon vanilla extract (optional)
Instructions:
- In a large bowl, whisk together the sifted powdered sugar and meringue powder. Sifting is crucial to prevent clogs in your piping tips later.
- Add the warm water and vanilla extract (if using).
- Using a stand mixer fitted with the whisk attachment, mix on low speed until the ingredients are just combined.
- Increase the speed to medium-high and beat for 5-7 minutes, or until the icing is thick, glossy, and stiff peaks form. This is your stiff or outlining consistency base.
- Keep the icing covered with damp paper towels and plastic wrap pressed directly onto the surface to prevent it from drying out.
This stiff consistency is typically suitable for piping dimensional details or acting as a very firm outline. You will likely need to add a tiny bit of liquid to reach a slightly softer outlining consistency (the 15-20 second count) suitable for most outlining tasks.
Royal Icing Recipe for Filling
You don't typically make a separate batch of icing specifically for filling from scratch; instead, you thin down a batch of your basic outlining consistency icing.
Using the stiff outlining consistency icing prepared from the basic recipe above:
- Take a portion of the stiff icing and place it in a separate bowl.
- Add water, a very small amount at a time (e.g., 1/4 to 1/2 teaspoon for every cup of icing).
- Stir gently but thoroughly with a spoon or spatula, pressing the icing against the side of the bowl to help incorporate the water without adding excess air.
- Test the consistency by dropping a spoonful back into the bowl. You are looking for the icing to smooth over in 5-10 seconds.
- Continue adding tiny amounts of water and testing until the desired filling consistency is achieved.
It's always easier to add more liquid than to remove it, so be patient and add water incrementally. This method allows you to create different consistencies from a single batch of base icing, saving time and effort.
Modifying Recipes for Different Humidity Levels
Humidity significantly impacts how royal icing behaves and dries. In high humidity, royal icing can take much longer to dry, sometimes remaining soft or sticky for hours, and it's more prone to color bleeding. It might also seem thinner than it is. In low humidity, icing dries very quickly, which can be good for speed but can also lead to cracking or difficulty achieving smooth surfaces if you don't work fast enough.
When dealing with high humidity, you might need to use slightly less liquid in your initial recipe or when thinning for filling consistency. Adding a small amount of corn syrup (e.g., 1 teaspoon per cup of icing) can also help royal icing dry harder and more quickly in humid conditions, and it adds a subtle sheen. Conversely, in very dry conditions, you might find your icing stiffens up rapidly in the piping bag or bowl.
Keeping your icing well-covered is essential, and you might need to add a tiny drop of water more frequently to maintain your working consistency. Paying attention to the environment and making slight adjustments to your liquid ratios is key to perfecting piping consistency and filling consistency no matter the weather.

Royal Icing Too Thick: Solutions and Adjustments
If your royal icing is too thick for the task at hand – for outlining, it breaks or is hard to pipe; for filling, it doesn't spread or self-level – the solution is simple: add more liquid. For outlining consistency, add water very sparingly, perhaps just a few drops or 1/4 teaspoon at a time, mixing well until it reaches the desired 15-20 second count.
If your filling icing is too thick (taking longer than 10 seconds to smooth out), add water 1/2 teaspoon at a time per cup of icing, stirring until fully incorporated. Always mix gently to avoid introducing air bubbles. Test after each addition. Remember, it's much easier to thin icing than to thicken it, so err on the side of caution when adding liquid.
If your royal icing is too thin – for outlining, it spreads too much; for filling, it runs over the outline or takes less than 5 seconds to smooth out – you need to thicken it by adding more sifted powdered sugar. Add powdered sugar a tablespoon at a time to the icing.
Stir the powdered sugar in thoroughly. If you are working with a small amount of icing, you can often just add the sugar and stir by hand. For larger quantities, you might use your mixer on a very low speed for just a moment. Test the consistency after each addition by dropping a spoonful back into the bowl. Repeat until you reach the desired 15-20 second count for outlining or 5-10 second count for filling. Adding too much sugar at once can make the icing lumpy, so add incrementally.
Dealing with Clogging Nozzles
Clogged piping nozzles are a frustrating but common issue, often caused by unsifted powdered sugar, small dried bits of icing, or air bubbles. To prevent clogs, always sift your powdered sugar meticulously before making your icing. Keep your icing covered at all times when not in use to prevent a crust from forming, which can break off and cause clogs.
If a nozzle clogs while you're piping, stop immediately. Use a toothpick or scribe tool to try and dislodge the blockage from the tip of the nozzle. Sometimes gently squeezing the bag can help force it out. If the clog persists, you may need to remove the tip, clean it thoroughly (a small brush or pipe cleaner is helpful), and reload the bag. Using couplers allows you to swap out a clogged tip quickly without disturbing the rest of the icing in the bag.
Color bleeding occurs when colors from adjacent sections of icing seep into each other, ruining crisp lines. This is often caused by high humidity, icing that is too thin, or applying wet icing next to another wet color. To prevent bleeding, ensure your outlining consistency is firm enough to act as a barrier, and your filling consistency is correct (not too thin).
Crucially, allow outlined and filled areas to dry sufficiently before adding adjacent colors or details. For instance, if you are flooding a cookie with multiple colors separated by outlines, flood one color, let it skin over (develop a slight crust) or even dry for an hour or two before flooding the adjacent color. For complex designs, it's best to let colors dry completely (several hours or overnight) before adding new colors or details next to them. Using high-quality gel food colors rather than liquid colors can also help, as they add less moisture to the icing.
Tips and Tricks for Maintaining Perfect Royal Icing Consistency
Storing and Reusing Royal Icing
Proper storage is essential for maintaining your royal icing's consistency and usability. Royal icing dries out rapidly when exposed to air. Always store unused royal icing in an airtight container. To prevent a crust from forming on the surface, press a piece of plastic wrap directly onto the surface of the icing before sealing the container.
Stored in the refrigerator, royal icing can last for several weeks. Before reusing, let it come to room temperature. It will likely need to be gently stirred or remixed on a very low speed, as the water may separate slightly. You will almost certainly need to adjust the consistency again by adding a few drops of water or a tiny bit of powdered sugar to bring it back to your desired outlining or filling consistency. Never use icing that has gone bad (it will smell off or look discolored).
Adjusting Consistency Based on Environmental Factors
As mentioned earlier, humidity is a major factor. Always be prepared to slightly adjust your icing consistency based on the weather. On a humid day, your icing might feel thinner and take longer to dry. You might need to use a slightly thicker consistency for both outlining and filling than you would on a dry day. Conversely, on a very dry day, your icing might stiffen up quickly. Keep a small spray bottle of water or a tiny bowl of water and a brush handy to add micro-adjustments as you work.
Temperature also plays a role, though less significant than humidity. Warmer temperatures can make icing feel a bit runnier. The key is constant evaluation; as you work, periodically check your icing's flow and adjust as needed. Don't make a large batch of one consistency and assume it will stay perfect throughout your decorating session. Perfecting piping consistency and filling consistency is an ongoing process during decoration.
The Importance of Mixing Speed in Royal Icing Preparation
The speed at which you mix your initial batch of royal icing impacts its structure and consistency. While you need to beat the icing on medium-high speed to incorporate air and achieve that thick, stiff, glossy consistency for your base, overmixing or mixing at too high a speed for too long can incorporate excessive amounts of tiny air bubbles.
These micro-bubbles can cause issues later, like creating a foamy texture or leading to pinholes in your flooded surface as they pop during drying. After the initial whipping to stiff peaks, any subsequent mixing, especially when adding color or adjusting consistency, should be done on the lowest speed of your mixer or preferably by hand with a spatula. Gentle mixing helps maintain a smooth texture and minimizes trapped air, contributing to a smoother final result when perfecting your outlining and filling.
Recap: Key Takeaways for Outlining and Filling Techniques
Mastering royal icing consistency is the bedrock of beautiful cookie decorating. We've seen that outlining consistency, thicker and less flowy (15-20 second count), is vital for creating crisp borders and detailed lines that hold their shape. Filling consistency, thinner and self-leveling (5-10 second count), is essential for achieving smooth, flawless surfaces to cover cookies.
Successfully using these techniques requires not only understanding the desired consistency for each but also having the right tools, knowing how to test and adjust your icing, and anticipating common problems like air bubbles or clogging. From creating intricate lace patterns with outlining to achieving a mirror-smooth base with filling, the ability to control your icing's flow is paramount.
Final Thoughts on Mastering Royal Icing Consistency for Advanced Designs.
Developing an intuitive feel for royal icing consistency takes practice. Don't be discouraged if your first few attempts aren't perfect. Pay attention to how the icing feels as you mix it and how it behaves when you test it. Practice piping lines and flooding small areas on parchment paper before moving to your actual cookies.
Remember that environmental factors like humidity play a significant role, so be prepared to make small adjustments as you work. By diligently focusing on achieving and maintaining the correct consistency for both outlining and filling, you will unlock a world of possibilities in advanced cookie decorating, allowing you to create stunning, detailed, and professional-looking edible art. Keep practicing, keep experimenting, and enjoy the rewarding process of perfecting piping consistency and achieving flawless flooded finishes!
Frequently Asked Questions
How does the perfect buttercream consistency differ between piping and flooding?
The key difference lies in the viscosity. Piping buttercream needs to be firmer to hold its shape, while flooding buttercream should be thinner and self-leveling. Think toothpaste versus thick paint.
What are some common signs that my piping buttercream is too stiff?
If your buttercream is too stiff, it will be difficult to squeeze out of the piping bag, and you'll likely see breaks or cracks in your piped designs. It may also be difficult to achieve smooth lines.
How can I adjust my buttercream consistency if it's too thick for flooding?
Add small amounts of liquid, like milk or water, one teaspoon at a time, mixing thoroughly after each addition. Continue until you reach a smooth, pourable consistency.
What ingredients affect buttercream consistency the most?
The ratio of butter to powdered sugar is crucial. Too much butter can make it too soft, while too much sugar can make it too stiff. Temperature also plays a significant role.
Does the type of butter used impact the buttercream's piping consistency?
Yes, the type of butter makes a difference. European-style butter with a higher fat content often produces a smoother and more stable buttercream compared to standard butter.
Final Reflection: The Enduring Pursuit of Buttercream Perfection
The quest for flawlessly consistent buttercream frosting transcends mere aesthetics; it's a testament to the power of precision and practice in the culinary arts. Mastering the techniques of piping and flooding, as explored in this article, isn't just about creating visually stunning cakes; it's about understanding the fundamental properties of your ingredients and the subtle nuances of each method. This understanding allows for greater control and ultimately, the creation of truly exceptional desserts.
The impact of consistent buttercream application extends far beyond the individual baker. It influences the overall perception of quality in the baking industry, shaping expectations and inspiring creativity. The pursuit of this seemingly small detail speaks volumes about dedication to craft and the pursuit of excellence. The details are not the details. They make the design.
– Charles Eames. This quote perfectly encapsulates the importance of mastering techniques like piping and flooding, transforming a simple cake into a work of art.
Now, consider your own baking journey. What techniques have you mastered, and where do you still see room for improvement? I encourage you to experiment with both piping and flooding techniques, paying close attention to the consistency of your buttercream. Embrace the challenges, celebrate the successes, and remember that the pursuit of perfection, in baking as in life, is a continuous and rewarding process. The journey towards mastering consistent buttercream is a testament to your dedication and a delicious reward in itself.
Unleash Your Inner Pastry Chef: Perfecting Piping & Flooding Techniques!
Thanks for taking the time to explore the art of piping and flooding! We hope you now feel more confident in achieving those professional-looking cake designs. Ready to put your newfound skills to the test?
- Practice your favorite technique: Choose one piping or flooding method from the article and dedicate some time this week to perfecting it. Try different pressure levels, nozzle sizes, and even create your own unique designs!
- Share your creations: Show us your masterpiece! Post a picture of your piped or flooded creation on social media and tag us – we'd love to see your progress.
- Explore advanced techniques: Dive deeper into the world of cake decorating! Try experimenting with different icing consistencies or explore new piping techniques to further elevate your skills.
What's your favorite tip from the article, and what exciting design are you going to tackle first?