
Elevate Your Cookie Art with Edible Pearls and Dragees

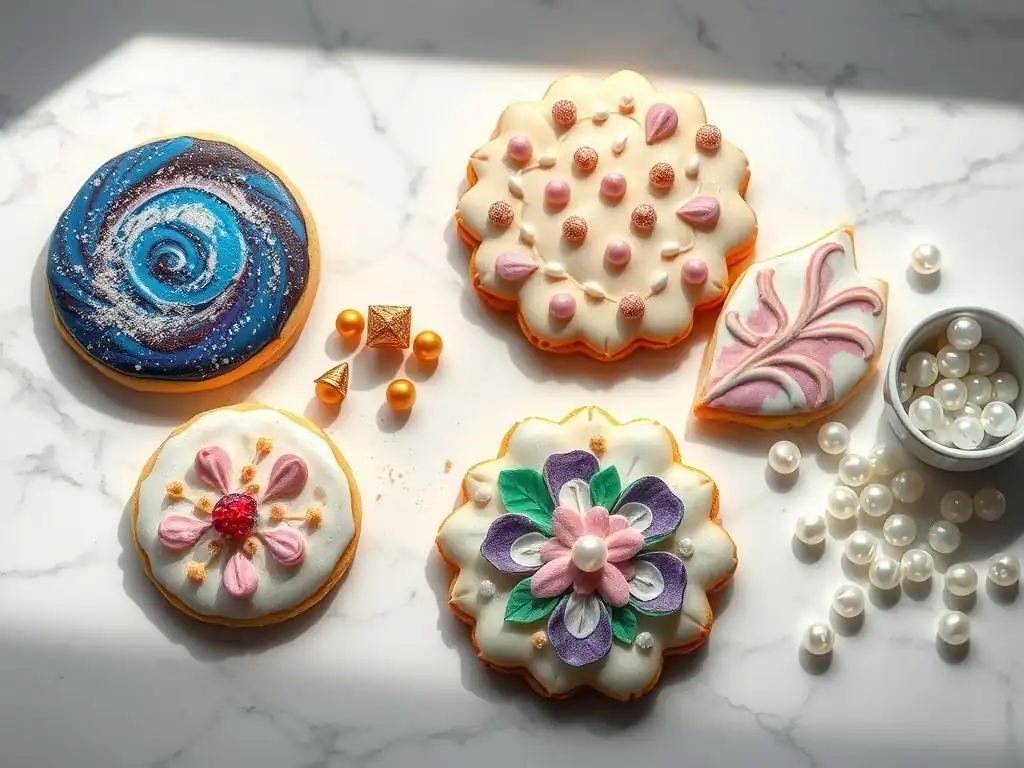
Welcome to BakeWithEase, your haven for stress-free baking adventures! Ready to transform ordinary cookies into dazzling edible masterpieces? Dive in and discover the secrets to elevate your cookie art with edible pearls and dragees. But what are the best types of edible pearls to use? And how can you ensure they stay perfectly in place? Keep reading to unlock the secrets to stunning, professional-looking cookies that are sure to impress!
- Introduction to Edible Pearls and Dragees for Cookie Decoration
- Understanding Different Types of Edible Pearls and Dragees
- Essential Tools and Materials for Applying Edible Pearls
- Step-by-Step Guide: Applying Edible Pearls and Dragees to Cookies
- Advanced Techniques for Edible Pearl and Dragee Cookie Art
- Troubleshooting Common Issues When Decorating with Edible Pearls
- Inspiration and Design Ideas for Edible Pearl Cookie Decorating
- Storing and Handling Cookies Decorated with Edible Pearls and Dragees
- Where to Buy High-Quality Edible Pearls and Dragees
- Conclusion: Unleash Your Creativity with Edible Pearls and Dragees
- Frequently Asked Questions
- Final Reflection: The Enduring Allure of Edible Elegance
- Unleash Your Inner Pastry Artist!
Discover the Magic of Edible Pearls and Dragees
Edible pearls and dragees are small, hard decorative confectionery pieces that can transform simple baked goods into dazzling works of art. Historically, dragees were often silver-coated almonds, a traditional sweet for celebrations. Today, the term encompasses a wide variety of shapes, sizes, and finishes, typically made from sugar, starch, and sometimes gelatin, often coated with a shimmering or metallic finish. These tiny embellishments offer a straightforward way to add elegance, sparkle, and texture to your cookie designs, making them a favorite among both novice and experienced cookie decorators.
The appeal of using edible pearls and dragees in cookie art lies in their ability to instantly elevate the visual presentation. A plain sugar cookie can become a festive ornament or a sophisticated wedding favor with just a few carefully placed pearls or a scattering of shimmering dragees. They catch the light beautifully, adding a touch of luxury that sprinkles or sanding sugar alone cannot achieve. Incorporating these elements into your decorating repertoire opens up a world of creative possibilities for achieving professional-looking results right in your own kitchen.
Using edible pearls and dragees provides a unique dimension to your cookie decorating projects that other decorative elements might lack. Unlike softer sprinkles or jimmies, pearls and dragees offer a firm, often glossy or metallic texture that provides a strong visual contrast to smooth icing. They can mimic everything from delicate dewdrops and sparkling jewels to bold structural elements, depending on their size and placement. This versatility makes them ideal for a wide range of themes, from elegant bridal shower cookies to whimsical birthday treats.
Beyond aesthetics, edible pearls and dragees are relatively easy to work with once you understand the basic techniques. They adhere well to various types of icing when applied correctly and are widely available in numerous colors and sizes. For anyone looking to enhance their edible pearls cookie decorating skills, mastering the application of these small but impactful decorations is a crucial step. They allow for intricate detailing that can make your cookies truly stand out, transforming them from simple baked goods into edible masterpieces.
Understanding Different Types of Edible Pearls and Dragees
Edible pearls, often round or oval, come in a remarkable range of sizes, offering different effects for your cookie designs. The smallest pearls, often just 1mm or 2mm in diameter, are perfect for creating subtle shimmer or filling in small spaces, sometimes referred to as nonpareils with a pearl finish. Medium sizes, around 3mm to 4mm, are versatile for borders, patterns, or individual accents.
Larger pearls, from 6mm up to 10mm or even larger, can serve as focal points, mimicking beads or gemstones on your edible canvas. Choosing the right size is key to achieving the desired scale and detail for your cookie art.
Finishes also vary widely, contributing significantly to the final look of your edible pearls cookie decorating. Classic finishes include matte white, which resembles actual pearls, and various shades of shimmer (like iridescent or opalescent), which provide a subtle sparkle. Metallic finishes, such as silver, gold, rose gold, and bronze, offer a high-shine, luxurious appearance. There are also colored pearls with matte, shimmer, or metallic coatings. Understanding these options allows you to select the perfect pearls to match the theme and style of your cookie project, whether you're aiming for understated elegance or bold glamour.
Dragees offer even more variety than standard pearls, extending beyond simple spheres to include diverse shapes and textures. While the term "dragee" is sometimes used interchangeably with "pearl," it often specifically refers to larger, harder, sometimes irregularly shaped pieces, or those with a very hard, often metallic coating. Beyond the traditional silver balls (which can range from 2mm nonpareil size up to 10mm or larger), you'll find dragees in various colors, often with a high-shine metallic finish. These metallic dragees are excellent for adding pops of intense color and sparkle.
The shapes available in dragees can include rods (sometimes called jimmies or sprinkles, but with a harder, often metallic finish), stars, hearts, and even more elaborate forms. Textures can range from smooth and highly polished to slightly irregular or faceted. This diversity makes dragees fantastic for creating dynamic and eye-catching cookie designs. Using a mix of sizes and shapes, such as combining 4mm silver balls with 8mm gold rods, can add depth and visual interest to your edible pearls cookie decorating efforts, allowing for creative freedom in your artistic expression.
Selecting the appropriate edible pearls and dragees depends entirely on the specific vision for your cookie art. Consider the size of your cookie and the level of detail you want to achieve. For intricate patterns on smaller cookies, smaller pearls (1-3mm) are often more suitable, while larger cookies can accommodate a mix of sizes, including larger dragees (6mm+) for impact.
The color palette of your icing and other decorations should also guide your choice of pearl and dragee colors and finishes. A vintage-themed cookie might call for matte white or antique gold pearls, whereas a modern design could feature bright metallic dragees.
Think about the overall texture you want to create. A smooth, elegant look is best achieved with uniform, highly polished pearls. For a more whimsical or festive feel, mixing different sizes and shapes of dragees can add a playful texture.
If you plan to use edible pearls for cookie decorating that will be handled frequently (like party favors), ensure the pearls and dragees are securely attached, which might influence your choice of adhesive and application method. Always check the ingredient list if catering to allergies, as some metallic dragees contain non-toxic but non-digestible components like small silver rods, which should be used with caution, especially for young children.
Essential Tools and Materials for Applying Edible Pearls
Must-Have Tools for Precise Pearl and Dragee Placement
Achieving precision when applying small edible pearls and dragees is crucial for creating clean, professional-looking cookie art. While it might be tempting to use your fingers, several tools make the process significantly easier and more accurate. Tweezers specifically designed for food handling or crafting are indispensable. Their fine tips allow you to pick up individual pearls or small dragees and place them exactly where you want them without smudging or damaging the icing. Straight-tipped tweezers are good for general placement, while angled tips can be helpful for reaching awkward spots.
Another useful tool is a scribe or toothpick. These can be used to gently nudge pearls into position after placement or to create small indents in wet icing where a pearl should sit, helping it adhere better. A small, soft brush can also be handy for brushing away excess nonpareils or stray particles.
For applying larger quantities or creating pearl borders, a small spoon or even a specialized sprinkle funnel can help distribute the pearls or dragees before you refine the placement with tweezers. Having the right tools on hand will dramatically improve the quality and efficiency of your edible pearls cookie decorating process.
To ensure your beautiful edible pearls and dragees stay firmly in place on your cookies, you'll need a reliable food-safe adhesive. The most common and versatile adhesive is royal icing. Applied thinly, it dries hard and provides a strong bond. You can use fresh royal icing, which is still wet, or apply a small dot of slightly thicker icing to already dried flood icing. The consistency of the royal icing is important; it should be thick enough to hold the pearl without spreading too much, but thin enough to apply easily.
Another popular option is edible glue. This clear, liquid adhesive is specifically formulated for attaching edible decorations. It's particularly useful for applying decorations to dry surfaces, like fondant or crusted royal icing. A tiny dot applied with a toothpick or fine brush is usually sufficient.
Melted chocolate or candy melts can also serve as an adhesive, especially for heavier dragees or when working on chocolate-covered cookies. The key is to use just enough adhesive to secure the decoration without it being visible or creating a messy appearance. The choice of adhesive will often depend on the type of icing used on the cookie and the size and weight of the edible pearls or dragees being applied.
Proper preparation of your cookies is essential before you begin adding edible pearls and dragees. Start with well-baked and completely cooled cookies. The surface you'll be decorating should be ready to receive the embellishments. This often means flooding the cookie with royal icing and allowing it to reach the correct stage of dryness, depending on your design. If you're pressing pearls into wet flood icing, you need to work quickly before a skin forms. If you're attaching pearls to dried icing, ensure the surface is smooth and free of grease.
For designs where pearls or dragees cover a large area, like a fully beaded surface, you might apply a thin, even layer of your adhesive (like slightly thinned royal icing or edible glue) over the entire area first, then scatter the decorations and gently press them into place. For precise patterns or individual placements, plan your design beforehand, perhaps by lightly sketching it onto the dry cookie surface with an edible marker.
Having a clear plan and a properly prepared cookie surface will make the application of edible pearls for cookie decorating much smoother and more successful, leading to beautiful and durable results.
Preparing Your Edible Pearls and Dragees for Application
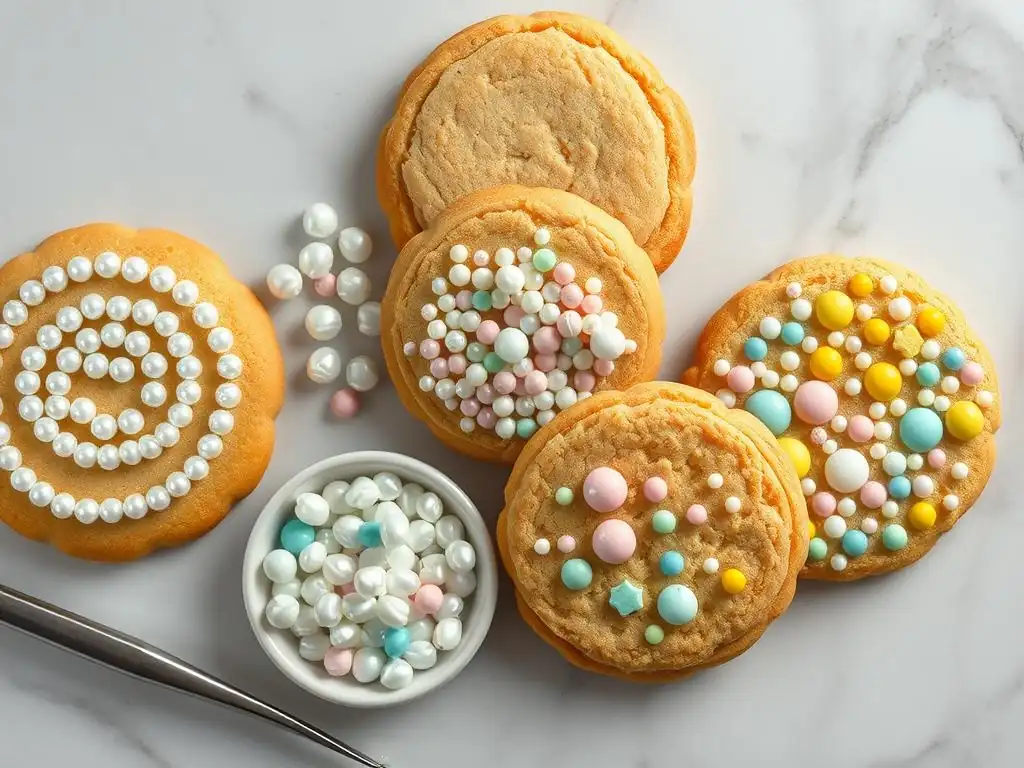
Before you start applying edible pearls and dragees, it's helpful to organize them. Pour the pearls or dragees you plan to use into small dishes or bowls. This makes them easy to access and prevents contamination of the main supply. If you're using multiple sizes or colors, keep them separate. Having them ready in shallow containers allows you to easily pick up individual pieces with tweezers or scoop them with a spoon.
Ensure your workspace is clean and well-lit. Have all your necessary tools – tweezers, scribe tool, brush, and adhesive – within easy reach. If using royal icing as an adhesive, have a small piping bag or a bowl with a toothpick ready. This preparation step seems simple, but it streamlines the application process, especially when working on detailed edible pearls cookie decorating projects, minimizing interruptions and potential mistakes.
Applying Individual Pearls for Delicate Accents
Applying individual edible pearls is ideal for creating delicate details like jewelry on a cookie figure, water droplets, or small floral centers. First, ensure your cookie surface is ready – either wet flood icing that is still tacky, or dried icing with a small dot of adhesive applied. If using wet icing, gently press the pearl into the surface. The icing will grab it as it sets. For dried icing, use a toothpick or fine brush to apply a tiny dot of edible glue or slightly thicker royal icing where you want the pearl to go.
Once the adhesive is in place, use food-safe tweezers to pick up a single pearl. Carefully position the pearl on the adhesive dot or press it gently into the wet icing. Take your time to ensure precise placement. If the pearl isn't sitting quite right, use a scribe tool or the tip of your tweezers to nudge it into the correct position before the adhesive sets. This technique is fundamental for achieving intricate and refined edible pearls cookie decorating designs.
Creating borders and patterns with edible pearls can add significant elegance to your cookies. For a simple border around the edge of a cookie or a section of icing, you can pipe a thin line of royal icing along the desired path. While the icing is still wet, carefully place pearls side-by-side along the line using tweezers. Work in small sections so the icing doesn't crust before you place the pearls.
For more complex patterns, like geometric designs or swirls, you can either pipe lines of icing to follow your design and place pearls along them, or apply small dots of icing precisely where each pearl should sit. Alternatively, for filling an area with pearls, apply a thin, even layer of adhesive over the entire area, then scatter the pearls over it. Gently press them down with a flat tool or your finger (covered with plastic wrap to prevent sticking) to ensure they are all in contact with the adhesive.
Once set, carefully tilt the cookie to let any unattached pearls roll off. This method is effective for creating a dense, beaded effect in edible pearls cookie decorating.
Working with Dragees for Bold and Eye-Catching Designs
Dragees, especially the larger, metallic varieties, are excellent for creating bold, eye-catching elements in your cookie art. Their size and shine make them stand out. Use larger dragees (6mm+) as central design elements, like ornaments on a Christmas cookie or decorative buttons on a garment cookie. Apply a dot of strong adhesive, such as slightly thicker royal icing or melted chocolate, for each dragee, as their weight requires a more secure bond.
Smaller dragees (2-4mm) can be used similarly to pearls for borders or filling areas, but their metallic finish provides a different aesthetic. Consider using metallic rods (jimmies) to create spikey or linear textures, or metallic stars or hearts for themed cookies. When working with metallic dragees, be mindful that their color coating can sometimes be delicate. Handle them carefully with tweezers. Incorporating various sizes and shapes of dragees can add dynamic texture and visual interest, making your edible pearls cookie decorating truly pop.
Creating Ombre Effects with Edible Pearls
An advanced technique in edible pearls cookie decorating is creating an ombre effect using pearls of varying shades or finishes. This involves transitioning from one color or finish to another, or from a dense application to a sparse one. For example, you could use pearls that transition from dark blue to light blue, or from metallic silver to iridescent white. Start by applying the darkest or most metallic pearls in the area where you want the effect to begin, using your adhesive method of choice.
Gradually transition to the next shade or finish, placing the pearls closer together where the colors meet to create a smooth blend. Continue this process until you reach the lightest or most iridescent pearls. The key is to have multiple shades or finishes of pearls that are close in size to allow for a seamless transition. This technique requires careful planning and placement but results in a stunning, gradient effect that adds a sophisticated touch to your edible pearls cookie decorating.
Designing Intricate Patterns with Dragees
Beyond simple borders, dragees can be used to create intricate patterns that add complexity and visual interest. This can involve using different sizes and shapes of dragees within the same design, or arranging them in complex geometric or organic patterns. For example, you could use small metallic silver dragees to outline a shape, then fill it with larger metallic gold dragees or rods.
Precision is paramount for intricate patterns. It's often helpful to lightly sketch the pattern onto the dried cookie surface with an edible marker first. Then, apply adhesive along the lines of your design and carefully place the dragees using fine tweezers. For repetitive patterns, like scales or interlocking shapes, work systematically in small sections to ensure uniformity. This level of detail in edible pearls cookie decorating transforms cookies into true works of art.
Combining Edible Pearls and Dragees for Unique Textures
Combining edible pearls and dragees within a single design allows you to create unique textures and visual contrasts. For instance, you could use smooth, matte white pearls to create a delicate lace pattern and then accent it with strategically placed larger, metallic gold dragees that catch the light. Or, use shimmering pearls to cover a large area, creating a soft, luminous base, and then add clusters of metallic rods or stars for dynamic texture.
Consider the interplay of different sizes, shapes, and finishes. A design might feature tiny iridescent pearls scattered like fairy dust, with larger, faceted dragees placed as sparkling jewels. Experiment with layering – applying a base layer of smaller sprinkles or sanding sugar and then adding larger pearls or dragees on top for dimension. This mixed-media approach to edible pearls cookie decorating opens up endless possibilities for creative expression and stunning visual effects.
Creating a Textured Effect with Sanding Sugar and Dragees
Combining sanding sugar with edible pearls and dragees is an excellent way to add varied texture and sparkle to your cookie designs. Sanding sugar provides a fine, crystalline texture that contrasts beautifully with the smooth, hard surface of pearls and dragees. To achieve this, first apply a layer of adhesive (like thinned royal icing or edible glue) to the area you want to cover.
While the adhesive is still wet, generously sprinkle sanding sugar over the area. Gently shake off the excess. Once the sanding sugar is set, you can then strategically place edible pearls or dragees onto the sugared surface, securing them with small dots of slightly thicker adhesive if needed. The sanding sugar provides a sparkling base, while the pearls and dragees add distinct points of light and texture, resulting in a multi-dimensional effect perfect for adding depth to your edible pearls cookie decorating.
Using Royal Icing to Securely Attach Larger Dragees
Larger dragees, especially those 6mm or more in diameter, require a more robust adhesive than edible glue alone or thin royal icing. Slightly thicker royal icing is often the best choice for securely attaching these heavier embellishments. The icing should be thick enough to hold its shape when piped but still soft enough for the dragee to be pressed into it.
Pipe a small dot or mound of this thicker royal icing onto the cookie where the dragee will be placed. The amount needed will depend on the size of the dragee; generally, just enough to cover the back surface that will contact the cookie. Carefully place the dragee onto the icing dot and gently press down until it feels secure.
Be careful not to press too hard, which could squeeze icing out around the edges. Allow ample time for the royal icing to dry completely, which will ensure the dragee is firmly anchored. This technique is crucial for durable edible pearls cookie decorating, especially for elements that might be prone to falling off.
Troubleshooting Common Issues When Decorating with Edible Pearls
Preventing Pearls from Falling Off
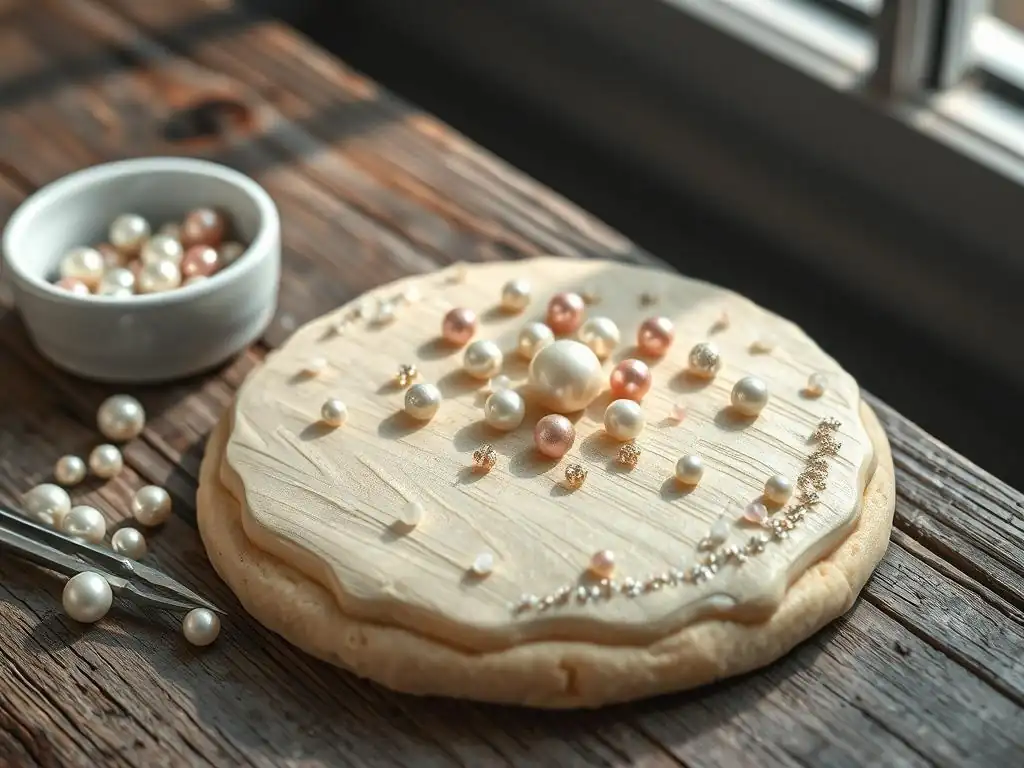
One of the most frustrating issues in edible pearls cookie decorating is having your beautiful embellishments fall off after the icing has dried. This usually happens because the adhesive wasn't strong enough, the pearls weren't pressed firmly enough into the adhesive, or the surface wasn't prepared correctly. To prevent this, always use a reliable food-safe adhesive like fresh royal icing (for wet application) or slightly thickened royal icing or edible glue (for dry application).
Ensure you apply a sufficient amount of adhesive for the size and weight of the pearl or dragee. For individual placement on dried icing, a small dot is needed for each pearl. For larger areas, ensure the adhesive layer is even and covers the entire intended area. Gently but firmly press each pearl or dragee into the adhesive to ensure good contact.
Allow adequate drying time in a cool, dry place. If you're using wet flood icing, ensure the icing is still tacky enough to grab the pearls when you apply them. Working efficiently before the icing skins over is key.
Avoiding Color Bleeding with Dragees
Metallic dragees, particularly those with vibrant colors like red, blue, or black, can sometimes experience color bleeding, especially if exposed to moisture or high humidity before the icing is fully set. This can mar the surrounding icing and ruin your design. To minimize the risk of bleeding, ensure your royal icing is completely dry before applying metallic dragees to its surface using edible glue.
If you are pressing dragees into wet flood icing, use them sparingly, especially if they are known to bleed, and work in a low-humidity environment. Some brands of dragees are more prone to bleeding than others; researching reputable suppliers known for quality edible pearls and dragees can help. Storing decorated cookies in a cool, dry environment away from direct sunlight is also crucial once they are finished, as humidity is a major culprit for color transfer.
Achieving a Smooth and Even Finish
Achieving a smooth and even finish when covering an area with edible pearls or dragees requires careful technique and attention to detail. When scattering pearls over a layer of adhesive, try to distribute them as evenly as possible before pressing them down. Use a flat tool, like an offset spatula or a piece of parchment paper and your hand, to gently press the pearls into the adhesive, ensuring they are all at roughly the same level.
For borders or lines, consistent application of the adhesive line and uniform placement of the pearls side-by-side are key. Work slowly and use your tweezers to adjust any misaligned pearls before the adhesive sets. For large dragees, ensure the adhesive dot is centered and the dragee is placed squarely on top. Practice is essential for mastering the even application of edible pearls for cookie decorating; start with simpler designs and gradually work up to more complex patterns.
Edible pearls are perfect for creating elegant and sophisticated wedding cookie designs. Use small white or ivory pearls to mimic strands of pearls on a wedding dress cookie or to create delicate lace patterns on a heart or plaque cookie. Medium-sized pearls (3-4mm) can be used to form borders around monograms or names written in royal icing.
Larger pearls (6mm+) can act as focal points, like the center of an icing flower or as decorative elements on a tiered cake cookie design. Combine matte and shimmering pearls for subtle texture. A popular design involves covering a plain cookie shape entirely with small white or ivory pearls for a luxurious, textured look reminiscent of a beaded clutch or a classic pearl necklace. These examples showcase the timeless beauty edible pearls bring to cookie decorating for special occasions.
Dragees, especially metallic and colored varieties, are fantastic for adding festive sparkle to holiday cookies. Use metallic gold and silver dragees to create ornaments on Christmas tree cookies or to outline star shapes. Red and green metallic dragees can add vibrant pops of color to wreaths or poinsettia designs.
Larger metallic dragees (6mm+) can serve as shiny baubles on a gingerbread house cookie. Metallic rods or jimmies can mimic icicles or beams of light. For New Year's cookies, use silver and gold dragees to create sparkling champagne bubbles or clock hands. The bold nature of dragees makes them ideal for adding a celebratory feel to your edible pearls cookie decorating during the holiday season.
Edible pearls and dragees can bring sparkle and fun to birthday cookies for all ages. For a princess or fairy-themed party, use shimmering and iridescent pearls to decorate crowns, wands, or butterfly wings. Rainbow-colored metallic dragees can add pops of color to balloon or present cookies.
For a more grown-up celebration, use metallic dragees in sophisticated colors like rose gold or black to create modern geometric patterns or to accent iced numbers or letters. Consider using a mix of pearl sizes and dragee shapes to create a dynamic, festive look on cake-shaped cookies or cupcakes. The versatility of edible pearls and dragees allows for endless creative possibilities in edible pearls cookie decorating tailored to any birthday theme.
A floral monogram cookie is a beautiful and personalized design, and edible pearls make perfect accents for this style. Start by flooding a cookie with a smooth layer of royal icing and allowing it to dry. Pipe a monogram letter onto the dried surface. Then, pipe delicate floral elements (like leaves, vines, or small blossoms) around the monogram using green and colored royal icing.
While the floral icing is still wet, or using a small dot of edible glue on dried icing, place small white or ivory edible pearls (1-3mm) in the centers of the flowers or along the vines like dewdrops. You could also use slightly larger pearls (3-4mm) to create a subtle border around the entire cookie or the monogram itself. The pearls add a touch of elegance and realism to the floral elements, enhancing the overall sophistication of this edible pearls cookie decorating idea.
A classic Christmas tree cookie can be transformed into a sparkling masterpiece using multi-colored dragees as ornaments. After icing the tree cookie with green royal icing and allowing it to dry, pipe small dots of royal icing (or edible glue) onto the surface where you want the ornaments to hang.
Use tweezers to pick up various colored metallic dragees (red, gold, silver, blue, green, etc.) ranging from 2mm to 6mm in size. Carefully place a dragee onto each dot of adhesive, pressing gently to secure. You can also add a larger dragee or a metallic star shape at the top as a tree topper, using a slightly larger dot of adhesive. This is a simple yet effective example of how dragees can add vibrant color and festive sparkle to your edible pearls cookie decorating for the holidays.

Proper storage is crucial to maintain the freshness and appearance of cookies decorated with edible pearls and dragees. Once the icing and all embellishments are completely dry and set (this can take 24 hours or more for royal icing), store the cookies in an airtight container. Layer the cookies carefully, using parchment paper or wax paper between layers to prevent them from sticking together or damaging the decorations.
Store the container in a cool, dry place away from direct sunlight. Temperature fluctuations and humidity are enemies of decorated cookies; humidity can cause colors to bleed and textures to soften, while heat can melt adhesives like chocolate. Avoid refrigeration unless absolutely necessary for the cookie base itself, as condensation upon removal can damage the decorations. Stored correctly, sugar cookies decorated with royal icing and edible pearls or dragees can remain fresh for several weeks.
Preventing Damage to Edible Pearl and Dragee Decorations
Edible pearls and dragees, especially larger or metallic ones, can be prone to scratching or falling off if not handled and stored properly. Once they are securely attached and the adhesive is dry, minimize handling the decorated surface. When packaging cookies for gifts or transport, ensure they are packed snugly enough to prevent shifting but not so tightly that the decorations are crushed.
Use individual bags or compartments within a box whenever possible. If stacking, always use a protective layer like parchment paper. Advise recipients or those handling the cookies to handle them carefully, avoiding rubbing the decorated surfaces. While edible pearls and dragees are relatively durable once set, rough handling can dislodge them or scratch their delicate finishes, compromising the beautiful edible pearls cookie decorating you've created.
Where to Buy High-Quality Edible Pearls and Dragees
Finding high-quality edible pearls and dragees is key to achieving professional-looking results in your cookie decorating. Many specialized cake and cookie decorating supply stores, both online and brick-and-mortar, carry a wide selection. Look for suppliers known for their quality ingredients and range of products. Popular online retailers specializing in baking supplies are excellent sources. Craft stores with a dedicated baking section may also carry some options.
When choosing brands, look for those specifically marketed for confectionery decoration. Reputable brands often provide consistent sizing, vibrant colors, and durable finishes. Read product descriptions carefully to understand the ingredients and any disclaimers (e.g., "for decoration only" for certain metallic finishes). Checking reviews from other cookie decorators can also provide insight into the quality and usability of specific brands of edible pearls and dragees.
Tips for Finding Affordable Edible Pearls and Dragees
Edible pearls and dragees can sometimes be an investment, especially for large quantities or specialty finishes. To find more affordable options for your edible pearls cookie decorating, consider buying in bulk if you use them frequently or are working on a large project. Many online suppliers offer better per-ounce pricing for larger quantities.
Look for sales around holidays or during baking-related events. Generic or store brands can sometimes offer a more budget-friendly alternative to premium brands, though it's wise to check their quality if possible. Comparison shopping across different suppliers for the specific sizes and colors you need can also yield savings. While saving money is great, be wary of extremely cheap options that might have inconsistent sizing, dull finishes, or questionable ingredients. Balancing cost with quality is important for successful and safe edible pearls cookie decorating.
Conclusion: Unleash Your Creativity with Edible Pearls and Dragees
Mastering the art of edible pearls cookie decorating is a rewarding journey that allows you to add unparalleled sparkle, texture, and sophistication to your baked creations. By understanding the different types of edible pearls and dragees available, gathering the right tools, and practicing application techniques, you can transform simple cookies into stunning edible art. From delicate pearl accents on wedding cookies to bold metallic dragees on festive holiday treats, these small embellishments offer a vast playground for creativity.
Remember that patience and practice are key. Start with simpler designs, experiment with different sizes and adhesives, and gradually work your way up to more intricate patterns and techniques like ombre effects or combining different types of embellishments. With each cookie you decorate, you'll gain confidence and skill, unlocking new possibilities for expressing your artistic vision through edible pearls cookie decorating.
Edible pearls and dragees are just one facet of the exciting world of cookie decorating. At BakeWithEase.com, we offer a wealth of resources to help you expand your skills. Explore our guides on mastering royal icing consistency, piping techniques for intricate details, working with fondant for smooth finishes, and using other decorative elements like sanding sugar, edible glitter, and sprinkles.
Whether you're a beginner just learning the basics or an experienced decorator looking to refine your techniques, BakeWithEase.com provides step-by-step tutorials, helpful tips, and inspiration for all your baking and decorating projects. Continue exploring our site to discover new methods, troubleshoot challenges, and find fresh ideas to keep your edible creations beautiful and delicious. Happy baking and decorating!
Frequently Asked Questions
Edible pearls and dragees are small, spherical decorations made from sugar or chocolate that add visual appeal and texture to cookies. They are typically used for accenting designs and creating elegant details.
Are edible pearls safe to eat?
Yes, edible pearls and dragees are generally safe to eat, as they are made from food-grade ingredients. However, some may contain non-toxic metallic coatings that are intended for decoration only and should be consumed in moderation. Always check the product label.
The best ways to attach edible pearls are with a thin layer of royal icing, melted chocolate, or a dab of corn syrup. Apply a small amount to the cookie surface and gently press the pearl into place.
It depends on the type of edible pearl. Some are heat-sensitive and may melt or discolor during baking. It is generally recommended to add them after baking once the cookies have cooled.
Edible pearls and dragees are widely available at baking supply stores, craft stores, and online retailers. Look for options in various sizes, colors, and finishes to suit your decorating needs.
Final Reflection: The Enduring Allure of Edible Elegance
The art of cookie decorating continues to evolve, and the strategic use of edible pearls and dragees represents a powerful trend in elevating simple treats into miniature masterpieces. These tiny, shimmering additions aren't just decorative; they add a layer of sophistication and visual interest that significantly impacts the overall aesthetic appeal and perceived value of your creations. This isn't just about following a trend; it's about mastering a technique that can transform your baking into a truly memorable experience.
The impact of these small details on the culinary landscape is undeniable. From professional bakers showcasing intricate designs to home bakers adding a touch of personalized flair, edible pearls and dragees have become a staple in the modern baker's arsenal. The details are not the details. They make the design.
- Charles Eames. This quote perfectly encapsulates the power of these seemingly insignificant elements; they are the very essence of what elevates a good cookie to a great one. Their versatility allows for endless creative possibilities, pushing the boundaries of what's considered possible in cookie artistry.
Now, consider your own baking journey. What new heights of creativity can you reach by incorporating these shimmering gems into your next project? Don't be afraid to experiment, to play with color and texture, to let your imagination run wild. The possibilities are as limitless as your creativity, and the joy of transforming ordinary cookies into extraordinary works of art is a reward in itself. Embrace the elegance, embrace the detail, and elevate your cookie game to the next level.
Unleash Your Inner Pastry Artist!
Thanks for taking the time to explore the world of edible pearls and dragees! We hope you've discovered exciting new ways to elevate your baking creations. Ready to transform your cookies into miniature masterpieces?
- Craft your dream cookie: Put your newfound knowledge into practice! Experiment with different pearl and dragee combinations to create your signature cookie design. Don't be afraid to get creative!
- Share your sparkling creations: Show off your beautiful, pearl-adorned cookies on social media! Use #BakeWithEasePearls to connect with other bakers and inspire others.
- Explore new techniques: Dive deeper into advanced decorating techniques using edible pearls and dragees. Search online for tutorials or consider joining a local cake decorating class.
What incredible cookie designs will you dream up next?