
Create Realistic Brick or Stone Textures on Cookies

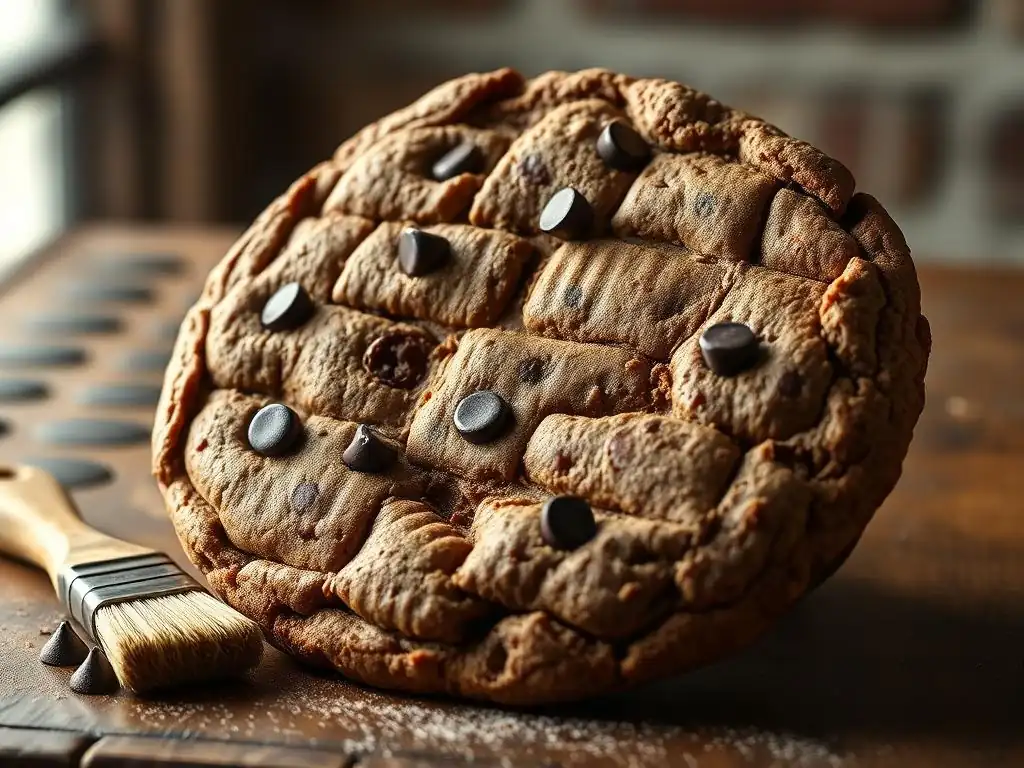
Welcome to BakeWithEase, your kitchen companion for all things baking! Ever dreamt of creating cookies that are not just delicious, but visually stunning? Dive into our latest tutorial and unlock the secrets to achieving a realistic cookie brick texture. Discover how you can transform ordinary cookies into edible works of art, impressing friends and family with your newfound skills. Intrigued? Let's get started and explore this surprisingly simple technique!
- Create Realistic Brick or Stone Textures on Cookies: A BakeWithEase Tutorial
- Introduction: Elevate Your Cookie Decorating with Realistic Textures
-
Essential Tools and Ingredients for Brick and Stone Cookie Textures
- Cookie Dough Recipe Recommendations for Optimal Texture
- Royal Icing: Achieving the Perfect Consistency for Textured Cookies
- Tools for Impressing Brick and Stone Patterns: A Detailed Guide
- Food Coloring: Creating Realistic Brick and Stone Color Palettes
- Optional: Edible Dusts and Luster Dusts for Added Realism
-
Step-by-Step Guide: Creating a Realistic Brick Cookie Texture
- Step 1: Baking Your Cookies and Preparing for Decoration
- Step 2: Achieving the Base Coat with Royal Icing
- Step 3: Impressing the Brick or Stone Pattern
- Step 4: Coloring and Highlighting the Texture
- Step 5: Adding Finishing Touches for Stone and Brick Realism
- Step 1: Baking Your Cookies and Preparing for Decoration
- Step 2: Achieving the Base Coat with Royal Icing
- Step 3: Impressing the Stone Pattern
- Step 4: Coloring and Highlighting the Texture
- Step 5: Adding Finishing Touches for Stone Realism
- Troubleshooting Common Issues When Creating Cookie Textures
- Advanced Techniques for Realistic Cookie Textures
- Inspiration and Ideas for Brick and Stone Textured Cookies
- Conclusion: Mastering the Art of Realistic Cookie Textures with BakeWithEase
-
Frequently Asked Questions
- How do I achieve a realistic brick texture on a cookie?
- What type of cookie is best suited for creating a brick or stone texture?
- What materials do I need for a realistic cookie brick texture tutorial?
- Can I use royal icing to create the brick texture instead of paint or dust?
- How do I prevent the brick texture from smudging or fading after applying it to the cookie?
- Final Reflection: The Enduring Allure of Edible Architecture
- Unleash Your Inner Artisan: Craft Stunning Brick & Stone Cookies!
Adding realistic textures like brick and stone to your cookies transforms them from simple baked goods into impressive edible art. These textures provide depth and visual interest that flat icing alone cannot achieve. Imagine a gingerbread house cookie that actually looks like it's built with miniature bricks, or a castle cookie with walls that appear to be constructed from rough, aged stone. Such details captivate viewers and elevate your cookie decorating skills to a new level, making your creations stand out at parties, events, or as thoughtful, personalized gifts.
Mastering the art of creating realistic cookie textures opens up a world of creative possibilities. It allows you to tell stories with your cookies, designing scenes and structures that are not only delicious but also visually stunning. Whether you're aiming for the rustic charm of an old stone cottage or the sturdy appearance of a classic brick building, these techniques provide the foundation for truly remarkable edible creations. This realistic cookie brick texture tutorial and its stone counterpart will guide you through the process.
In this comprehensive guide, you'll learn the fundamental techniques required to create convincing brick and stone textures on your cookies using royal icing and simple tools. We will cover everything from preparing your cookie base and achieving the perfect royal icing consistency to impressing patterns and applying color for maximum realism. This realistic cookie brick texture tutorial breaks down each step, making complex techniques accessible to bakers of various skill levels, including those venturing into advanced cookie decorating.
You will discover how different tools, from silicone mats to household items, can be used to imprint detailed patterns. Furthermore, we'll explore various coloring methods, such as washes and dry brushing, to add depth, shading, and a weathered appearance that brings your textures to life. By the end of this tutorial, you'll have the knowledge and confidence to tackle intricate designs and create cookies that look incredibly realistic, whether they mimic ancient stone walls or modern brickwork.
At BakeWithEase, we are dedicated to helping bakers expand their skills and explore the more intricate aspects of cookie decoration. We believe that advanced techniques should be approachable and enjoyable. This realistic cookie brick texture tutorial is part of our ongoing effort to provide detailed, step-by-step instructions for creating stunning edible art. We aim to demystify complex processes, breaking them down into manageable steps that yield impressive results.
Our resources are designed to support your creative journey, offering tips, tricks, and troubleshooting advice to help you overcome common challenges. We understand that mastering realistic textures takes practice, and we are here to provide the guidance you need. From selecting the right ingredients to perfecting your technique, BakeWithEase is your partner in achieving beautiful and delicious cookie creations that showcase your growing expertise in advanced cookie decorating.
Choosing the right cookie dough is the first step in creating cookies that can support realistic textures. You need a dough that holds its shape well during baking and is sturdy enough to withstand the texturing process without crumbling. Sugar cookie recipes are a popular choice because they bake flat and firm, providing an excellent canvas.
A reliable no-spread sugar cookie recipe, often containing a higher ratio of flour to fat or specific leavening agents, is ideal. For example, a recipe using cake flour or a combination of baking powder and baking soda in precise amounts can help achieve a stable structure.
Beyond classic sugar cookies, gingerbread dough is also fantastic for brick and stone textures, especially for themed cookies like houses or castles. Gingerbread dough is typically very firm and maintains intricate shapes beautifully during baking. Ensure your chosen recipe results in cookies that are not too thin – aiming for a thickness of about 6-8 mm (approximately 1/4 to 1/3 inch) provides a good base for impressing patterns without the cookie breaking. Always chill your rolled-out dough thoroughly before cutting and baking to help maintain sharp edges.
The consistency of your royal icing is absolutely critical for creating realistic textures. For this application, you'll need two main consistencies: a flood consistency for the base coat and a thicker consistency for applying over the texture or for details like grout lines. The flood consistency should be smooth and spreadable, leveling out on its own but not so thin that it runs off the cookie. A good test is the "10-second rule": when you drop a ribbon of icing back into the bowl, it should disappear smoothly within about 8-12 seconds.
The thicker icing consistency, sometimes referred to as piping or stiff consistency, is used after the texture has been impressed into the base coat. This icing should hold its shape well when piped but still be pliable enough to spread thinly over the textured surface. Achieving the right consistency often involves starting with a stiff icing and gradually adding small amounts of water (literally drops at a time) until it reaches the desired flow. Undermixing can leave air bubbles, while overmixing can cause icing to become brittle, so gentle mixing after adding water is key.
Tools for Impressing Brick and Stone Patterns: A Detailed Guide
A variety of tools can be used to create realistic brick and stone patterns on your royal icing base. Silicone texture mats specifically designed for sugarcraft or fondant are excellent options; they come in various patterns like cobblestone, random stone, or uniform brick. To use these, you typically apply a thin layer of royal icing to your cookie base, let it set partially (until it forms a slight crust but is still soft underneath), and then gently press the mat onto the surface to transfer the pattern.
Beyond specialized mats, common household items or craft tools can also work. For a brick pattern, a ruler or even the edge of a credit card can be used to lightly score horizontal and vertical lines into the partially set icing. For stone, crumbled aluminum foil, crinkled plastic wrap, or even rough-textured paper towels can be pressed gently onto the surface to create an organic, irregular stone-like texture. Experimentation is key here – sometimes the most unexpected items yield the most realistic results in a realistic cookie brick texture tutorial.
Food Coloring: Creating Realistic Brick and Stone Color Palettes
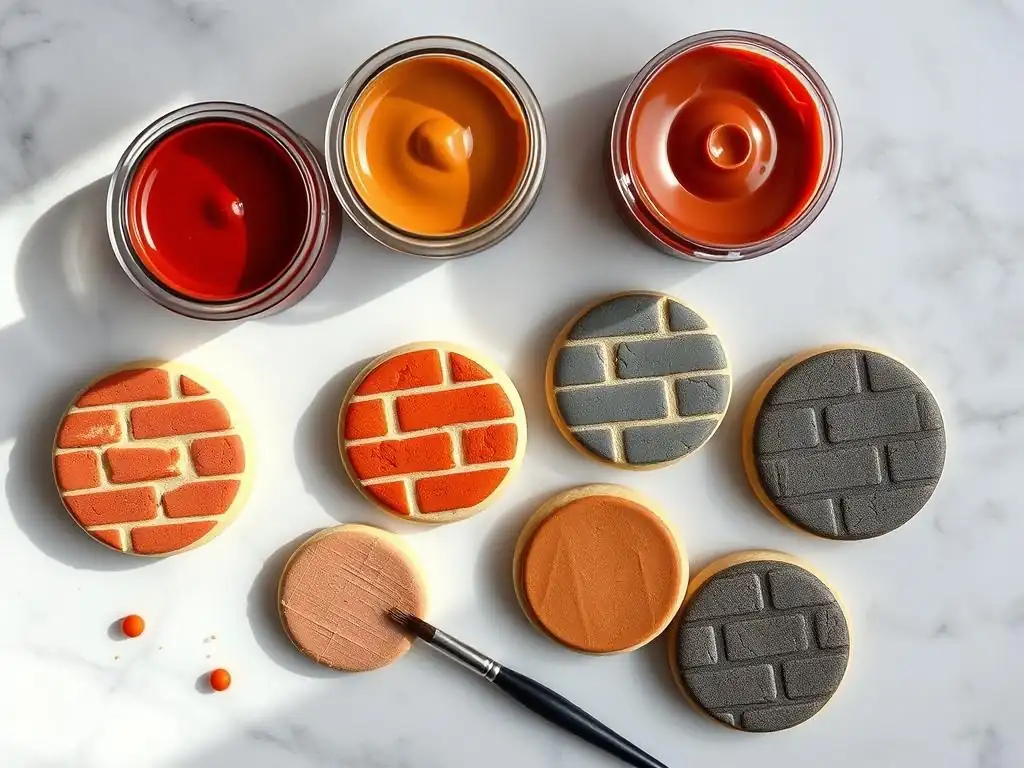
Achieving realistic brick and stone textures relies heavily on effective coloring techniques. You'll need a range of gel or powder food colorings. Gel colors are concentrated and provide vibrant hues without adding excess liquid, which can thin your icing. For brick, typical colors include various shades of red, brown, orange, and even hints of gray or black for aged bricks. For stone, think grays, blues, browns, greens, and earthy tones, often with subtle variations within the same cookie.
You will use these colors in different ways: for the base flood coat, potentially for washes applied over the texture, and for dry brushing techniques. Having a palette of primary colors plus black and white allows you to mix custom shades to match specific types of brick or stone you want to replicate. For instance, mixing red with a touch of brown and gray can create a weathered red brick effect, while varying shades of gray and brown can mimic natural stone variations.
Optional: Edible Dusts and Luster Dusts for Added Realism
Edible dusts and luster dusts are fantastic for adding depth, shading, and a touch of realism to your textured cookies. Edible dusts (sometimes called petal dusts or food-grade pigments) come in matte finishes and are perfect for creating shadows, emphasizing the texture, and adding a weathered or aged look. For instance, a dark brown or black edible dust can be dry-brushed into the crevices of a stone pattern to make it appear deeper and more defined.
Luster dusts, on the other hand, have a metallic or pearlescent sheen. While perhaps less common for purely realistic brick or stone, subtle applications of certain luster dusts (like a dull silver or bronze) can sometimes enhance the mineral-like appearance of stone or add an interesting dimension. These dusts are typically applied dry with a soft brush, or mixed with a clear alcohol-based extract (like vodka or lemon extract) or edible spirits to create a paint. Using dusts is an advanced step that truly elevates the realism of your realistic cookie brick texture tutorial results.
Begin by baking your cookies using a reliable no-spread recipe, ensuring they are uniform in thickness (around 6-8 mm) and baked until firm but not overly browned. Allow the cookies to cool completely on a wire rack before attempting to decorate them. Any residual heat can affect the royal icing. Once cooled, gently brush off any loose crumbs from the surface of the cookies to ensure a clean base for your icing.
Prepare your workspace by gathering all necessary tools and ingredients: cooled cookies, prepared royal icing (flood consistency and thicker consistency), food colorings, texture tools, brushes, and a scribe tool or toothpick. Having everything organized before you start will make the decorating process smoother and more efficient, which is key when working with royal icing's setting times.
Step 2: Achieving the Base Coat with Royal Icing
Ensuring a Smooth and Even Base for Texture
The first step in creating realistic brick texture is to cover your cooled cookie with a smooth, even base coat of royal icing. Use your flood consistency icing for this. Outline the cookie first, then fill the center area, using a scribe tool or toothpick to guide the icing to the edges and pop any air bubbles. The goal is a perfectly flat and uniform surface, as any bumps or unevenness will show through the texture.
Allow this base layer to crust over partially. This is a crucial step; if the icing is too wet, pressing the texture tool will sink too deep and create a mess. If it's too dry, the pattern won't impress at all. The ideal stage is when the surface feels dry to the touch but the icing underneath is still soft and pliable. This usually takes anywhere from 30 minutes to 2 hours, depending on humidity and icing consistency.
Step 3: Impressing the Brick or Stone Pattern
Using Texture Mats, Stamps, or Hand-Crafted Tools
Once your base icing layer has crusted partially, it's time to impress the brick pattern. If using a silicone texture mat, gently lay it over the cookie, textured side down. Apply light, even pressure across the entire surface of the mat to transfer the pattern into the soft icing below. Avoid pressing too hard, which could break the cookie or squeeze icing out the sides. Carefully lift the mat straight up.
For a hand-scored brick pattern, use a ruler or straight edge as a guide and a scribe tool or toothpick to lightly draw the horizontal "mortar" lines into the partially set icing. Space these lines evenly, perhaps 1-1.5 cm apart for a standard cookie size. Once the horizontal lines are done, draw shorter vertical lines between them, staggering the placement on alternating rows to mimic a traditional brick bond pattern. Practice on a spare cookie or a piece of parchment paper first to get a feel for the right pressure and timing.
Tips for Preventing the Cookie from Breaking During Impressing
Preventing cookie breakage during the texturing process is essential for a successful realistic cookie brick texture tutorial. The most common culprit is pressing too hard, especially with rigid tools like rulers or stamps. Use gentle, controlled pressure. If using a mat, you can place the cookie on a slightly padded surface (like a thin foam mat or a few layers of paper towels) to absorb some of the pressure.
Ensure your cookies are baked to the correct thickness (6-8 mm is recommended) and are completely cooled and firm. Thin or underbaked cookies are much more prone to snapping. If hand-scoring, use a light touch and let the tool glide over the icing surface rather than digging into it. If you find the icing is too hard to impress the pattern, it may have dried too much; try working more quickly on subsequent cookies, or lightly mist the surface with water using an airbrush (very carefully, if you have one) before impressing.
Step 4: Coloring and Highlighting the Texture
Applying Food Coloring for Depth and Dimension
After the brick pattern is impressed and the icing has fully dried (this can take 6-24 hours depending on humidity), you can begin coloring. One effective method is using diluted food coloring washes to stain the textured surface. Mix gel food coloring (various shades of red, brown, orange, gray) with a few drops of water or clear extract to create thin washes. Apply a wash over the entire cookie surface using a soft brush, allowing the color to settle into the impressed lines and textures.
Immediately after applying the wash, gently blot the surface with a paper towel or clean, dry brush to lift some of the color from the raised areas, leaving the pigment concentrated in the crevices. This technique instantly creates depth and shadow, mimicking the way light interacts with a real brick surface. You can layer different washes once the previous one is dry to build up complex, realistic brick tones, like adding a gray wash over a red base for aged bricks.
Using Dry Brushing Techniques for Realistic Shading
Dry brushing is another powerful technique for adding realism to your brick texture. For this, you use a clean, dry brush and a small amount of undiluted edible dust or gel coloring applied directly to the brush and then wiped almost entirely off onto a paper towel. This leaves only a tiny amount of pigment on the brush bristles.
Gently brush this minimal color over the raised areas of the brick pattern. The dry pigment will adhere to the peaks of the texture, highlighting them and adding subtle variations in color, much like natural weathering or mortar residue on real bricks. Use darker colors like black or dark brown dusts sparingly in the crevices for deeper shadows, and lighter colors like white or light gray on the highlights. This method allows for precise control over shading and can dramatically enhance the 3D effect of the realistic cookie brick texture tutorial.
Step 5: Adding Finishing Touches for Stone and Brick Realism
Edible Dusts for a Weathered Look
To give your brick texture a truly aged and weathered appearance, edible dusts are indispensable. Once your base coloring and dry brushing are complete, use a small, fine brush to apply edible dusts, such as dark brown, black, or even a touch of green, very lightly and randomly over the surface, particularly in areas where dirt or moss might accumulate on real bricks.
Focus on dusting around the edges of the cookie or in areas that might be exposed to the elements in a real-world scenario. Use a very light hand and build up the color gradually. For example, a tiny amount of dark green dust in some crevices can suggest moss growth, while a light application of gray or black dust can simulate soot or grime. Blotting with a dry paper towel can soften the effect if it becomes too intense, contributing to a more convincing realistic cookie brick texture tutorial result.
Adding Grout Lines for Increased Definition
Defining the grout lines between the bricks adds significant realism. You can achieve this using several methods. One way is to apply a thin wash of a lighter color (like gray, off-white, or a pale brown) over the entire textured surface after the main brick colors are dry, and then immediately wipe the raised brick areas clean with a damp cloth or paper towel. This leaves the lighter color only in the recessed grout lines.
Alternatively, you can use a very thin piping bag or a fine brush and a slightly thicker icing consistency (like piping consistency, thinned down slightly) in a gray or off-white color to carefully trace the impressed lines. This method provides crisp, raised grout lines, offering a different kind of realism. Whichever method you choose, adding distinct grout lines helps separate the individual bricks and enhances the overall definition of your realistic cookie brick texture tutorial.
Just like with brick textures, begin by baking sturdy, no-spread cookies, ideally around 6-8 mm thick. Allow them to cool completely on a wire rack. Ensure the cookie surface is free of crumbs. Prepare your workspace with cooled cookies, flood and thicker consistency royal icing, food colorings (especially grays, blues, browns, and greens), stone texturing tools (mats, foil, etc. ), brushes, and a scribe tool.
A firm, flat cookie base is crucial for success. For stone textures, slightly irregular cookie shapes can sometimes add to the natural look, though standard shapes work perfectly fine too. Just ensure the surface receiving the icing is relatively flat.
Step 2: Achieving the Base Coat with Royal Icing
Ensuring a Smooth and Even Base for Texture
Apply a smooth, even base coat of flood consistency royal icing to your cooled cookie. Use a scribe tool to ensure full coverage and a flat surface, removing any air bubbles. For stone, you might choose a base color that will serve as the undertone for your stone, such as a light gray, pale brown, or even a very light blue-gray. This base color will show through in places and influence the final look.
Allow this base layer to crust over partially, exactly as described in the brick tutorial. The icing should be dry enough on the surface to touch without sticking, but still soft underneath so that it can be impressed by your texturing tool. This stage is critical for capturing the fine details of a stone pattern.
Step 3: Impressing the Stone Pattern
Using Texture Mats, Stamps, or Hand-Crafted Tools
Once the base icing is partially set, gently press your chosen stone texturing tool onto the surface. If using a silicone stone mat (like cobblestone or random stone), place it textured-side down and apply even, gentle pressure across the cookie. Lift the mat straight up to reveal the impressed pattern.
For a hand-crafted stone texture, crumble a piece of aluminum foil or crinkle plastic wrap tightly. Gently press and lift the crumpled material onto the partially set icing surface multiple times, varying the angles slightly to create an irregular, organic texture that mimics the natural variations of stone. You can also try pressing a piece of rough paper towel for a different effect. The goal is to create random indentations and raised areas.
Tips for Preventing the Cookie from Breaking During Impressing
As with brick textures, gentle pressure is paramount to avoid breaking the cookie. Ensure your cookies are thick enough (6-8 mm) and fully cooled. When using texture mats or hand-crafted tools, try placing the cookie on a slightly cushioned surface. If using foil or plastic wrap, crumple it tightly so there are no hard points that could pierce the cookie.
If the icing seems too resistant to the texture, it may have dried too much; work faster or consider the light misting technique if you have the tools. If the cookie feels fragile, try supporting it from underneath with your other hand while applying pressure with the texturing tool. Practice on a few less-important cookies to perfect the technique and pressure needed for your specific tools and icing consistency.
Step 4: Coloring and Highlighting the Texture
Applying Food Coloring for Depth and Dimension
After the stone pattern is impressed and the icing is fully dry (allow 6-24 hours), it's time to color. Stone patterns benefit greatly from layered coloring. Start with a base wash using diluted gel food coloring in a medium tone (like a mid-gray or brown). Apply it over the entire cookie, allowing it to settle into the impressed texture. Blot immediately with a paper towel to lift color from the raised areas, enhancing the depth.
Once the first wash is dry, apply subsequent washes of different, related colors (e.g., add washes of blue-gray, green-gray, or reddish-brown) in certain areas to mimic the mineral variations found in natural stone. You can also use a slightly less diluted wash applied with a fine brush to color individual "stones" within the pattern different shades for added realism.
Using Dry Brushing Techniques for Realistic Shading
Dry brushing is essential for bringing stone textures to life. Load a dry brush with a small amount of edible dust or gel color (black, dark brown, or a dark version of your stone color), wipe most of it off, and gently brush it over the raised areas of the stone texture. This highlights the peaks and creates the illusion of light and shadow.
Use darker dusts (like black or dark gray) to emphasize the deeper crevices and give the texture more definition. Use lighter dusts (like white, light gray, or a pale brown) on the very highest points to simulate highlights. Vary the direction and pressure of your brushing to create a more organic, less uniform look, reflecting the irregular surface of real stone. This technique is a cornerstone of a convincing realistic cookie brick texture tutorial for stone.
Step 5: Adding Finishing Touches for Stone Realism
Edible Dusts for a Weathered Look
To add a weathered, aged, or natural look to your stone texture, apply edible dusts sparingly. Use earthy tones like browns and greens to suggest dirt, moss, or lichen growth, particularly in crevices or lower areas of the cookie. A touch of dark brown or black dust can simulate soot or age.
Apply these dusts with a very light hand using a fine brush, focusing on areas where natural weathering would occur. You can also use a soft, fluffy brush to blend the dusts subtly for a more natural transition. Remember, less is often more when creating subtle weathering effects; you can always add more, but it's difficult to remove excess dust.
Creating Textured Stone Effects
For certain types of stone, like rough-cut or volcanic rock, you might want to add additional surface texture after the base pattern is impressed and colored. One way to do this is to mix edible dusts or very fine crushed edible glitter (food-safe, of course!) with a small amount of clear extract to form a thick paste. Dab or stipple this paste onto the surface of the "stones" using a brush or sponge to create a rough, grainy appearance.
Alternatively, you can use a very thick royal icing consistency, tinted appropriately, and stipple it onto the surface after the base color is dry. This adds a raised, granular texture on top of the impressed pattern. These advanced techniques can further enhance the realism and specific type of stone you are trying to replicate in your realistic cookie brick texture tutorial.
Icing Too Thin or Too Thick: Adjusting Royal Icing Consistency
Achieving the correct royal icing consistency is paramount, and it's a common stumbling block in a realistic cookie brick texture tutorial. If your flood icing base is too thin, it will run off the cookie or create a very shallow impression that loses detail when you apply the texture tool. To thicken it, add a very small amount of sifted powdered sugar or meringue powder, mixing gently until the desired consistency is reached (check with the 10-second rule).
If your icing is too thick for the base coat, it won't level smoothly, resulting in a bumpy surface that makes texturing difficult. To thin it, add water or clear extract a single drop at a time, stirring gently after each addition until the icing flows correctly. For the thicker icing used over textures, if it's too stiff, it will be hard to spread thinly; add water drop by drop. If it's too thin, it won't hold the texture; add powdered sugar. Always adjust gradually.
Pattern Not Impressing Deeply Enough
If the brick or stone pattern isn't impressing deeply into your royal icing base, the most likely reason is that the icing has dried too much before you applied the texture tool. The surface needs to be crusted but the layer underneath still soft. Try working faster on your next cookie, or reduce the drying time before impressing. Humidity levels significantly affect drying time; in low humidity, icing dries much faster.
Another possibility is that you are not applying enough pressure, or the texture tool itself doesn't have a deep enough pattern. Ensure you are applying even pressure across the entire surface of the cookie. If using a mat, check that it has a pronounced texture. If hand-scoring, make sure your lines are visible indentations, not just faint marks. Practice on a test surface to gauge the right timing and pressure.
Color Blending Issues: Achieving Realistic Shades
Sometimes, achieving realistic color blends for brick or stone can be challenging, resulting in flat or unnatural-looking effects. This often happens if washes are too concentrated, not blotted properly, or if dry brushing is applied too heavily. To improve blending, ensure your washes are diluted enough to be translucent; they should stain the icing rather than paint it opaque.
When blotting washes, use a clean, dry paper towel and press gently to lift excess color from the raised areas, immediately after applying the wash. For dry brushing, wipe almost all the color off the brush before applying it to the cookie; build up the color slowly with multiple light passes rather than one heavy application. Experiment with layering different shades of washes and dusts to create depth and variation, observing real brick or stone for color inspiration.
Cookie breakage during texturing is frustrating but usually preventable. The primary causes are cookies being too thin, underbaked, or excessive pressure being applied with the texturing tool. Ensure your cookie recipe yields a sturdy result and that cookies are baked to the recommended thickness (around 6-8 mm). Always let cookies cool completely before decorating.
When impressing the texture, use gentle, even pressure. If using a texture mat, placing the cookie on a slightly yielding surface like a thin foam mat can help absorb shock. If hand-scoring or using rigid tools, use a light touch and support the cookie from underneath if possible. If you consistently experience breakage, consider slightly increasing the thickness of your rolled dough or adjusting your baking time.
Creating Faux Stone Inlays and Accents
For an even more complex and realistic look, you can create the appearance of stone inlays or accents within your brick texture, or vice versa. This involves masking techniques. After your base brick texture is fully dry and colored, use a template or freehand outline the shape where you want the "inlay" to appear. Carefully flood this area with a different base color of royal icing (perhaps a gray for stone within red bricks).
Once this inlay section is partially set, use a smaller texture tool (like crumbled foil or a small stone-pattern stamp) to impress a stone texture specifically within that area. After it dries, color the inlay using stone coloring techniques, contrasting it with the surrounding brick. This advanced method requires precision and patience but yields stunning results, adding another dimension to your realistic cookie brick texture tutorial designs.
Layering Textures for Added Depth
Beyond simple impressed patterns, layering different textures can create incredible depth and realism, especially for weathered or aged surfaces. For instance, after impressing a base stone pattern and letting it dry, you could use a very thick consistency of icing (tinted to match) applied sparingly with a palette knife or sponge in certain areas to create rough, raised patches that mimic crumbling stone or mortar.
Another technique is to apply a thin layer of icing or edible glue over parts of the dried texture and then sprinkle finely crushed edible crumbs (like crushed cookies or edible glitter) over it to create a gritty, granular surface on top of the impressed pattern. Combining impressed patterns with applied textures through stippling, dabbing, or crumbling adds multiple layers of visual interest and tactile realism.
Using Edible Markers for Fine Detail Work
Edible markers, particularly those with fine tips, are excellent for adding micro-details that enhance realism. After your textured and colored icing is completely dry, use edible markers in appropriate colors (black, dark brown, gray) to draw in fine cracks, fissures, or moss details on the stone surface. For brick, you could use a dark marker to deepen the grout lines in specific areas or add small imperfections to individual bricks.
This technique allows for very precise control, making it ideal for adding the subtle imperfections that make a texture look truly realistic rather than uniform. Use a light hand and build up the detail gradually. Ensure the icing surface is fully dry before using markers, as moisture can cause the ink to bleed.
Incorporating Other Decorative Elements (e.g., Edible Moss)
To push the realism even further, consider incorporating other edible decorative elements. For stone textures, creating edible moss is a popular technique. This can be made by crumbling green-tinted cookie crumbs or cake pop dough, or by mixing green edible dusts with a small amount of clear extract or piping gel to create a paste that is then textured with a brush or fork.
Apply the "moss" paste or crumbs sparingly with edible glue onto areas of the stone texture where moss would naturally grow, such as in crevices or on shaded surfaces. For brick textures, you might add edible vines or small flowering elements made from gum paste or fondant to suggest a building overtaken by nature. These elements add narrative and environmental context to your realistic cookie brick texture tutorial creations.
Brick house cookies are a classic application for realistic brick texture. Design cookie shapes that resemble house walls, roofs, and chimneys. Use the realistic cookie brick texture tutorial techniques to create the brickwork on the walls and chimney pieces. You can make different sections (front wall, side walls, roof pieces) and assemble them after decorating using royal icing as edible "glue."
Consider adding details like windows and doors using different colors of royal icing, edible markers, or even small pieces of fondant. You can create variations like an old, weathered brick cottage using gray and brown dusts, or a bright red brick townhouse with crisp white grout lines. These cookies are perfect for holidays, housewarming gifts, or architectural themes.
Realistic stone texture is perfect for creating edible pathways or garden scenes on larger cookies or cookie platters. Bake large, irregularly shaped cookies to represent ground or garden beds. Use the stone texturing techniques to create a winding pathway across the surface, perhaps using a cobblestone or random stone pattern.
Around the pathway, you can add green icing for grass, pipe small flowers, or use crushed cookie crumbs mixed with green dust for a realistic soil or moss effect. This allows you to create miniature edible landscapes that are both visually appealing and delicious, showcasing your mastery of realistic cookie brick texture tutorial techniques for stone.
Castle wall cookies allow you to combine stone texture with structural elements. Bake cookie shapes that form castle turrets, walls, and gatehouses. Apply realistic stone texture to all the wall pieces using gray and brown tones with dark dusts for deep shadows.
Assemble the castle pieces using royal icing, then add details like battlements (piped icing or small cookie cutouts), windows, and drawbridges. You can use different stone textures on different parts of the castle to suggest different ages or types of construction within the structure. These make spectacular centerpieces for parties or themed events.
Combining Brick and Stone Textures in a Single Design
Don't feel limited to using only one texture per cookie or project. Combining brick and stone textures in a single design can create a more complex and interesting visual. For example, a cookie depicting a building could have a stone foundation with brick walls above it, or a brick house with stone accents around the windows or doorway.
To combine them, plan your design carefully. You might texture and color one section (e.g., the stone foundation) and let it dry completely before applying the base icing for the adjacent section (the brick wall) right up to the edge of the dry stone area. Then, texture and color the brick section. This requires careful masking and drying times but results in highly detailed and realistic edible structures, truly demonstrating advanced cookie decorating skills learned from a comprehensive realistic cookie brick texture tutorial.
Creating realistic brick and stone textures on cookies involves a series of detailed steps, from selecting the right cookie base and achieving the perfect royal icing consistency to impressing patterns and applying layered coloring and dry brushing techniques. We've covered how to prepare your cookies, apply a smooth flood icing base, and impress patterns using tools like texture mats or household items.
Key coloring techniques, including washes and dry brushing with food coloring and edible dusts, are essential for adding depth, dimension, and realism. Troubleshooting common issues like icing consistency, pattern depth, color blending, and cookie breakage helps ensure a smoother decorating process. By mastering these techniques, you can transform simple cookies into stunning edible art that mimics the appearance of real architectural materials.
This realistic cookie brick texture tutorial is just one example of the advanced cookie decorating techniques you can explore on BakeWithEase.com. Our website offers a wide range of tutorials covering various aspects of intricate cookie design, including detailed piping techniques, airbrushing, working with fondant and gum paste, creating edible images, and much more.
Visit our "Advanced Cookie Decorating" section to discover guides on topics like creating stained glass effects, painting on cookies, sculpting 3D cookie designs, and using different edible mediums. We are constantly adding new content to help you expand your skills and unleash your creativity in the kitchen.
We love seeing what you create! After you've tried this realistic cookie brick texture tutorial and created your own amazing brick or stone textured cookies, we encourage you to share them with the BakeWithEase community. Show off your results, whether they are brick houses, stone pathways, castle walls, or your own unique designs.
Sharing your work inspires others and provides an opportunity to receive feedback and connect with fellow baking enthusiasts. Tag us on social media or submit your photos through our website gallery. We can't wait to see the incredible, realistic textures you bring to life on your cookies!
Frequently Asked Questions
The key is using a combination of stencils or embossers and edible paint or dust to create depth and dimension. Experiment with different techniques to achieve the desired realistic effect.
A sugar cookie or shortbread cookie with a smooth, flat surface is ideal. These types of cookies provide a good canvas for applying the texture and allow for clear definition of the brick pattern.
You'll need cookie dough, a stencil or embosser, edible paint or dust, brushes, and optionally, a palette knife for blending. Also, consider using cookie cutters to create brick shapes.
Can I use royal icing to create the brick texture instead of paint or dust?
Yes, royal icing can be used, but it requires more skill to create a realistic textured effect. Diluted royal icing, applied in layers, can mimic the brick's depth and imperfections.
Allow the edible paint or dust to dry completely before handling the cookie. Consider using a food-safe sealant spray to protect the texture, especially for cookies that will be handled frequently or packaged.
Final Reflection: The Enduring Allure of Edible Architecture
The art of creating realistic brick and stone textures on cookies transcends mere decoration; it's a testament to the boundless creativity within the culinary arts. This tutorial, focused on achieving hyperrealistic textures, demonstrates how seemingly simple ingredients and techniques can transform ordinary cookies into miniature architectural marvels. The demand for unique and visually stunning baked goods continues to grow, making this skill increasingly relevant in both professional and home baking.
The impact of detailed food artistry, like the techniques explored here, is undeniable. It's not just about the visual appeal; it's about the experience. It's about sparking wonder and conversation, transforming a simple treat into a piece of edible art that invites closer inspection and appreciation. As the saying goes, We eat first with our eyes,
and this principle holds true whether it's a Michelin-star meal or a beautifully crafted cookie. This tutorial aims to empower bakers of all levels to elevate their creations and engage with this exciting aspect of food design.
Now, it's your turn. Don't be afraid to experiment with different icing consistencies, coloring techniques, and even the types of cookies you use as your canvas. Embrace the challenge of transforming your baking into a miniature architectural masterpiece. The possibilities are as limitless as your imagination, and the joy of creating something truly unique and delicious is a reward in itself. So, gather your ingredients, unleash your creativity, and let the baking begin!
Thanks for joining us on this delicious journey into textured cookie artistry! You've just learned how to create incredibly realistic brick and stone designs – skills that will impress even the most discerning cookie connoisseurs. Ready to take your baking to the next level?
- Master the technique: Practice your newly acquired skills and create your own stunning brick and stone cookie masterpieces. Experiment with different colors and icing consistencies!
- Share your creations: Show off your amazing cookies on social media using #BakeWithEaseStoneCookies and inspire others!
- Challenge yourself: Try replicating a famous building or landscape using your new cookie-decorating techniques.
What incredible textured cookie designs will you create next?