
Create Mesmerizing Geode Effects on Your Cookies

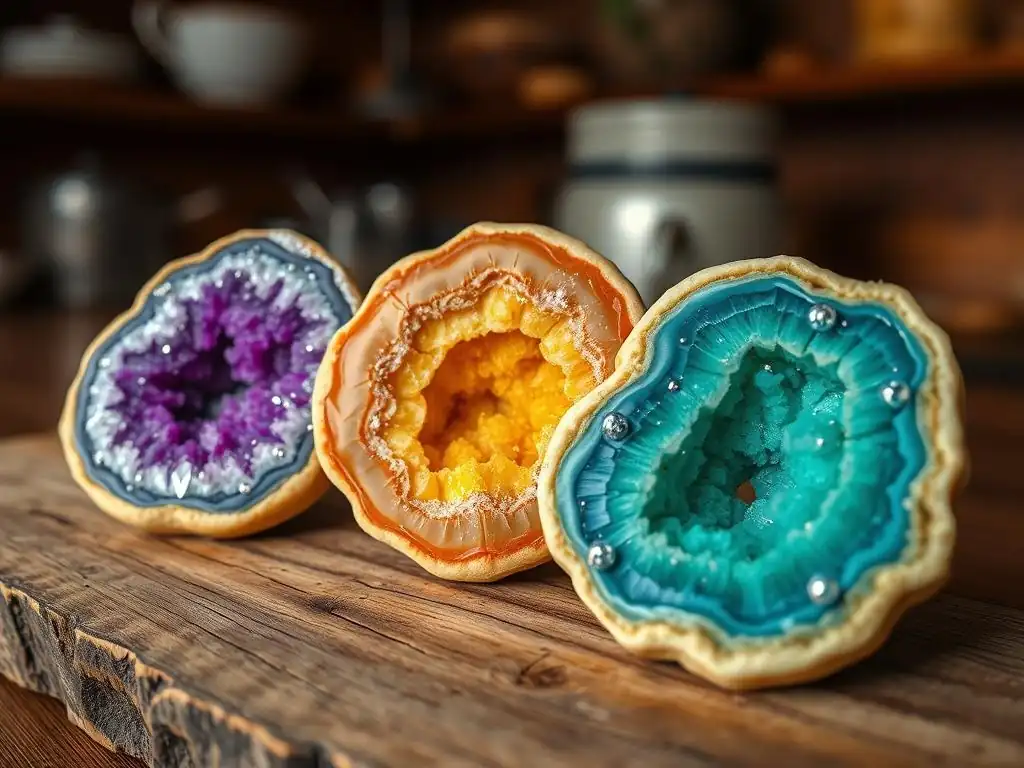
Welcome to BakeWithEase, your baking sanctuary! Ever dreamt of crafting edible masterpieces that shimmer and shine? Prepare to be amazed as we unveil the secrets to creating breathtaking Geode Cookies. This tutorial will guide you through each step of the process, turning ordinary cookies into dazzling works of art. Get ready to unlock your inner artist and impress everyone with these gem-inspired delights!
- Create Mesmerizing Geode Effects on Your Cookies: A BakeWithEase Tutorial
- Introduction to Geode Cookie Artistry
- Geode Cookies Tutorial Recipe: Step-by-Step Guide
- Baking the Perfect Cookie Base for Your Geode Design
- Icing and Preparing the Cookie Canvas
- Crafting the Geode Effect: Sugar Crystals and Beyond
- Advanced Geode Cookie Decorating Techniques
- Geode Cookie Recipe Variations and Creative Ideas
- Tips and Tricks for Perfect Geode Cookies Every Time
- Conclusion: Mastering the Art of Geode Cookies with BakeWithEase
-
Frequently Asked Questions
- How difficult is it to follow the Geode Cookies Tutorial Recipe from BakeWithEase?
- What are the key ingredients I need to create the mesmerizing geode effects?
- Does the Geode Cookies Tutorial Recipe cover different geode color combinations and patterns?
- Can I adapt the Geode Cookies Tutorial Recipe to use other types of cookies besides sugar cookies?
- Where can I find the specific brands of ingredients recommended in the Geode Cookies Tutorial Recipe?
- Final Reflection: The Enduring Allure of Geode Cookies
- Unleash Your Inner Geode Baker!
Geode cookies are edible works of art designed to mimic the stunning natural beauty of mineral formations found within rocks. These intricate cookies feature a "cracked open" section revealing a sparkling interior made from sugar crystals, edible glitter, and sometimes even candy. The effect is visually striking and has become immensely popular in the world of cookie decorating, captivating bakers and recipients alike with their unique texture and vibrant colors. Their rise in popularity is partly due to social media platforms like Instagram and Pinterest, where their photogenic quality makes them perfect for sharing.
The appeal of geode cookies lies in their ability to transform a simple baked good into a dazzling centerpiece. Unlike traditional iced cookies, the geode technique introduces dimension and sparkle, creating a sophisticated and often luxurious look. They are frequently used for special occasions like weddings, anniversaries, and birthdays, adding a touch of unexpected glamour to dessert tables. Mastering the geode cookies tutorial recipe allows bakers to push the boundaries of their creativity and produce truly memorable edible art.
Learning how to create geode effects on your cookies is a fantastic way to advance your cookie decorating repertoire beyond flat icing or basic piping. This technique requires precision, patience, and an understanding of materials like royal icing consistency and sugar crystal properties. It encourages experimentation with color palettes and textures, opening up a new dimension of artistic expression in baking. Successfully executing a geode effect builds confidence and adds a unique skill to your baking arsenal.
This geode cookies tutorial recipe will guide you through each stage, from selecting the right cookie base to applying the final shimmering touches. While it might seem complex at first glance, breaking it down into manageable steps makes it accessible. By following this guide, you'll learn not just the mechanics but also the nuances – how to achieve natural-looking cracks, layer colors for depth, and ensure your sugar crystals stay vibrant. Prepare to impress yourself and others with these stunning creations.
Before diving into the decorating process, ensure you have all the necessary ingredients for both the cookie base and the royal icing, as well as the decorative elements. Having everything measured and ready streamlines the process significantly. A standard batch of sugar cookies for decorating might require about 3 cups of all-purpose flour, 1 cup of unsalted butter, 1 cup of granulated sugar, 1 large egg, and flavorings like vanilla extract.
For the royal icing, which is crucial for the geode effect, you'll typically need around 4 cups of confectioners' sugar, 3 tablespoons of meringue powder, and about 1/2 cup of warm water. You'll also need gel food coloring in various shades appropriate for your chosen geode colors (think blues, purples, pinks, greens, or natural quartz-like clear tones). And, of course, the star of the show: sugar crystals in various sizes and colors, edible glitter, or other edible sparkling elements.
*   All-purpose flour
*   Unsalted butter
*   Granulated sugar
*   Large egg
*   Vanilla extract (or other flavorings)
*   Confectioners' sugar
*   Meringue powder
*   Warm water
*   Gel food coloring
*   Sugar crystals (coarse and fine)
*   Edible glitter (optional)
*   Edible gold or silver paint (optional)
Having the right tools makes the geode cookie decorating process much smoother and helps achieve professional-looking results. Basic baking tools like mixing bowls, measuring cups and spoons, a rolling pin, and cookie cutters are essential for the cookie base. For the decorating part of this geode cookies tutorial recipe, specific items are needed.
You will definitely need piping bags and tips (small round tips like PME #1 or #2 are excellent for outlining). Scribe tools or toothpicks are indispensable for manipulating icing and nudging sugar crystals into place. Small offset spatulas or spoons are useful for flooding larger areas. Small brushes are needed if you plan to use edible paints. Additionally, a clean workspace covered with parchment paper or silicone mats is helpful for containing the sugar crystals and making cleanup easier.
*   Mixing bowls
*   Measuring cups and spoons
*   Rolling pin
*   Cookie cutters (any shape, but irregular shapes can enhance the geode look)
*   Piping bags
*   Piping tips (small round)
*   Scribe tool or toothpicks
*   Small offset spatula or spoon
*   Small brushes (for edible paint)
*   Parchment paper or silicone mats
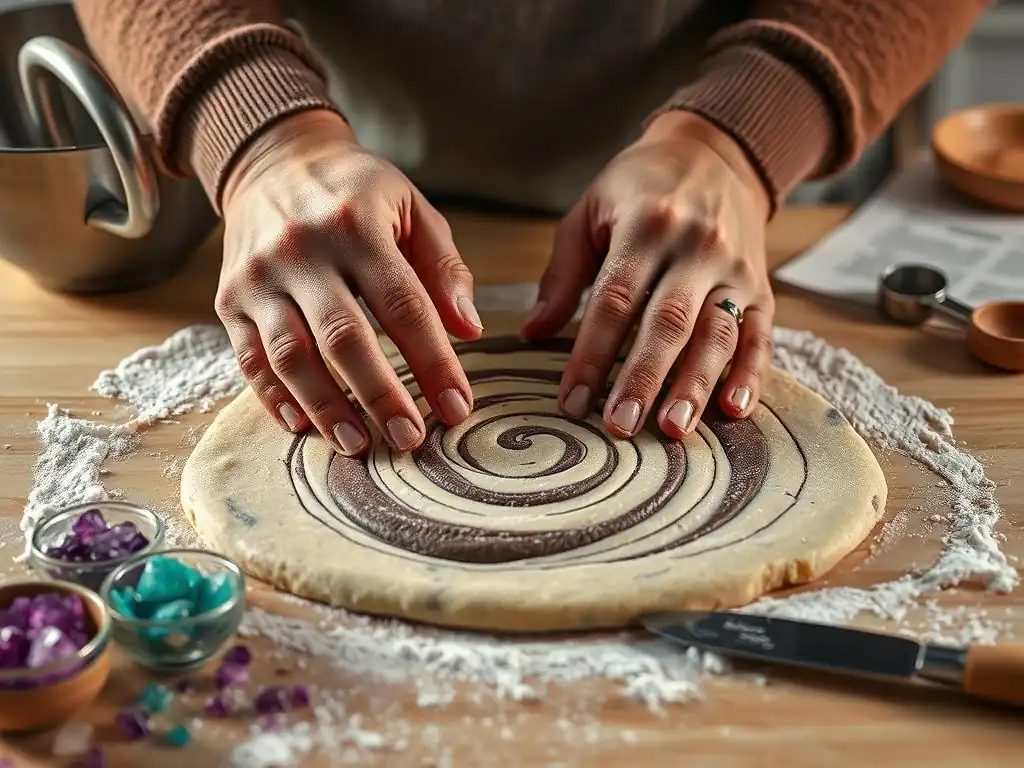
The foundation of a great geode cookie is a sturdy, flat cookie base. Not all cookie recipes are suitable for detailed decorating. You need a dough that holds its shape well during baking and doesn't spread excessively. A classic cut-out sugar cookie recipe is usually the best choice for this geode cookies tutorial recipe because it provides a smooth, stable surface for the intricate icing work. Look for recipes specifically designed for cut-out cookies, often containing a higher ratio of flour to fat compared to softer cookie types.
Avoid doughs that are very soft, chewy, or prone to significant spreading, as these will distort your intended shape and make icing application difficult. The dough should be firm enough to roll out to about 1/4 inch thickness and transfer to a baking sheet without losing definition. Chilling the dough before rolling and cutting is a critical step, often recommended for at least 30-60 minutes, sometimes longer, to ensure minimal spread in the oven.
A smooth, flat cookie surface is paramount for achieving a professional-looking geode effect. Uneven surfaces can lead to pooling or cracking in your royal icing. One key tip is to roll your dough to a consistent thickness across the entire sheet, typically around 1/4 inch. Using rolling pin guides can help achieve this uniformity.
When placing cut-out dough onto your baking sheet (preferably lined with parchment paper or a silicone mat), handle them gently to avoid distorting the edges. Baking at the correct temperature is also vital; typically, sugar cookies bake at around 325°F to 350°F (160°C to 175°C) for 10-12 minutes, or until the edges are just lightly golden. Over-baking can cause bubbling or unevenness.
If your cookies puff up slightly, you can gently press them down with a flat spatula immediately after removing them from the oven to create a flatter surface before they cool completely. Ensure cookies are completely cool before attempting to ice them.
Royal icing is the standard medium for detailed cookie decorating due to its ability to dry hard and smooth, creating a perfect canvas for your geode design. A reliable royal icing recipe for this geode cookies tutorial recipe involves combining 4 cups of sifted confectioners' sugar with 3 tablespoons of meringue powder. Whisk these dry ingredients together thoroughly.
Gradually add about 1/2 cup of warm water while mixing on low speed. Once combined, increase the speed to medium-high and beat for 5-7 minutes until the icing is stiff and glossy. The consistency is crucial for different stages: a thicker consistency is needed for outlining the geode shape and the cookie edges, while a thinner consistency ("flood" consistency) is used to fill in areas smoothly. You can adjust consistency by adding small amounts of water (to thin) or sifted confectioners' sugar (to thicken).
Coloring Your Royal Icing: Achieving the Perfect Geode Hues
Selecting and mixing your colors is a fun and artistic part of creating geode cookies. Gel food coloring is highly recommended over liquid coloring because it is concentrated and won't add excess moisture to your icing, which can affect its drying time and consistency. For a realistic geode effect, choose 2-4 shades of the same color family (e.g., light blue, medium blue, dark blue, and a touch of black or dark gray) plus white.
Start by dividing your stiff royal icing into several bowls, one for each color you plan to use. Add gel coloring incrementally using a toothpick, mixing thoroughly until you achieve the desired shade. Remember that colors can deepen slightly as they dry. For the geode effect, you'll need different consistencies of these colors – some thicker for definition lines and some thinner for flooding. Aim for a range of vibrancy, from pale translucent colors to deep, saturated tones, mimicking the layers found in natural geodes.
Applying the Base Layer of Icing for a Smooth Foundation
Before creating the geode effect, you need a smooth, dry base layer of royal icing on the cookie. This usually involves outlining the cookie shape with a medium-consistency icing and then flooding the interior with a thinner, flood-consistency icing. For geode cookies, you might first outline the entire cookie edge and flood it with white or a pale base color and let it dry completely. This provides a clean background for the geode section.
Alternatively, you can apply the geode technique directly onto a partially iced cookie. Decide where you want your "geode crack" to be. Outline the outside of this intended geode area with a medium-consistency icing. Then, fill the remaining area of the cookie (the part that won't be the geode) with flood-consistency icing in your chosen base color.
Use a scribe tool or toothpick to gently spread the icing to the edges and pop any air bubbles. Allow this base layer to dry fully – this can take 6-12 hours, sometimes longer depending on humidity. A completely dry base is essential before adding the geode details.
Crafting the Geode Effect: Sugar Crystals and Beyond
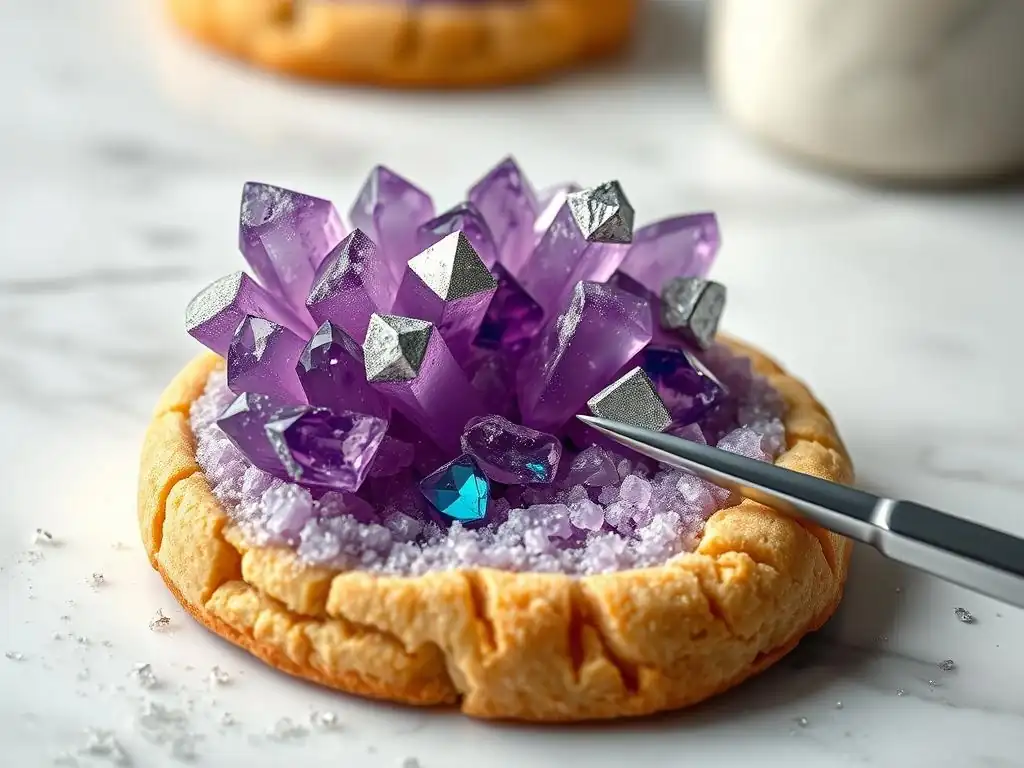
The sparkle of sugar crystals is the hallmark of a geode cookie. Using a variety of sizes and textures of edible sugar crystals will give your geode depth and a more natural, crystalline appearance. Coarse sanding sugar provides larger facets that catch the light dramatically, while finer sugar crystals or edible glitter fill in gaps and add a subtle shimmer. Rock candy pieces, crushed into smaller chunks, can also mimic larger crystal formations.
Look for sugar crystals specifically labeled as "sanding sugar," "coarse sugar," or "edible glitter." Ensure they are food-grade and suitable for consumption. Using a mix, such as clear coarse sugar combined with finer colored sugar crystals, can create a realistic layered effect. For instance, you might use larger clear crystals as the core and surround them with smaller, colored crystals fading outwards.
How to Color Sugar Crystals for a Realistic Geode Look
While you can buy pre-colored sugar crystals, coloring them yourself gives you complete control over your palette and allows you to match your icing colors perfectly. This is a simple process. Place the sugar crystals in a zip-top bag or a container with a lid. Add a tiny drop of gel food coloring – remember, a little goes a long way!
Seal the bag or container and shake vigorously until the color is evenly distributed. You can also use a spoon to mix if in a bowl. For a marbled or layered effect, you can add multiple colors and mix them only partially. If the color isn't intense enough, add another tiny drop and repeat. Let the colored sugar crystals sit for a bit to allow the color to adhere fully before using them. This process works best with lighter colored or clear sugar crystals.
Arranging the Sugar Crystals to Mimic Natural Geode Formations
This is where the artistry of the geode cookies tutorial recipe truly shines. Once your base icing layer is completely dry, outline the shape of your intended geode "crack" with a medium-consistency royal icing in a color slightly darker than your base or the innermost geode color. While this outline is still wet, immediately begin applying your sugar crystals and other elements.
Start by placing larger rock candy pieces or coarse sugar crystals in the center of the outlined area, pressing them gently into the wet icing. Then, work outwards, layering different sizes and colors of sugar crystals. Apply more wet icing in stages if needed, working in small sections so the icing doesn't dry before you can apply the crystals.
Use a scribe tool or toothpick to arrange the crystals and nudge them into place, creating a natural, irregular pattern. Think about how crystals grow outwards from a central point in a real geode. Allow the icing holding the crystals to dry completely.
Alternative Geode Materials: Exploring Edible Glitter, Candy, and More
While sugar crystals are traditional, you can incorporate other edible elements to enhance your geode cookies. Edible glitter, particularly superfine varieties or flakes, can add extra sparkle and fill in small gaps between crystals. Crushed hard candies, like jolly ranchers or clear sugar candies, can be melted and poured into the geode area (carefully, after baking) to create a glass-like, crystalline appearance, although this method requires different timing and technique than the royal icing method described here.
Small edible pearls or dragees can be used sparingly to add texture or highlight certain areas. For a truly luxurious look, consider adding edible metallic leaf or flakes among the crystals. Experiment with different materials to see what textures and effects you can create. The key is to use food-safe, edible items and ensure they are properly secured with wet royal icing.
Creating Depth and Dimension in Your Geode Design
Achieving realistic depth is key to a mesmerizing geode effect. This is primarily done through layering and color variation. Start with your deepest, darkest colors and largest crystals in the center of the geode area. As you move outwards, use progressively lighter shades of icing and smaller sugar crystals. You can apply thin layers of colored royal icing between layers of crystals, allowing each layer to set slightly before adding the next.
Another technique is to slightly build up the height of the icing and crystals in the center, tapering down towards the edges. This gives the impression of a cavity filled with crystals. Use a scribe tool to gently push some crystals deeper into the wet icing and leave others standing slightly taller. Varying the angle at which crystals are embedded also adds dimension. A well-executed geode cookie tutorial recipe emphasizes this layering technique to move beyond a flat, sparkly surface.
Using Edible Gold or Silver Paint for a Luxurious Touch
Edible metallic paints, like gold or silver, can elevate your geode cookies to a new level of sophistication. These paints are often made from edible metallic dust mixed with a liquid medium like clear extract (such as lemon or vodka, which evaporates quickly). You can use a fine brush to paint the edges of your geode "crack" after the crystals and icing have dried.
Applying a thin line of gold or silver paint along the border between the geode area and the solid-colored cookie base creates a beautiful, refined outline, mimicking the way minerals are often framed in rock. You can also lightly brush the tops of some of the sugar crystals within the geode to add shimmering highlights. Practice on a spare cookie first to get a feel for the consistency and application. A little metallic paint can go a long way in adding a touch of luxury to your geode cookies.
Even with a detailed geode cookies tutorial recipe, you might encounter common issues. One frequent problem is royal icing cratering, where the surface sinks in the center as it dries. This often happens with flood icing that is too thin or applied too thickly. Using the correct consistency and applying icing in thinner layers can help prevent this. Another issue is sugar crystals not adhering properly; ensure the underlying royal icing is still wet when you apply the crystals.
Bleeding colors can also occur, especially if liquid food coloring is used or if colors are applied when the layer beneath isn't fully dry. Using gel colors and ensuring each layer of icing is completely dry before adding wet elements or crystals is crucial. Finally, dull crystals can result from exposure to humidity; storing finished cookies properly (see below) helps maintain their sparkle. Patience is key; allow adequate drying time between steps.
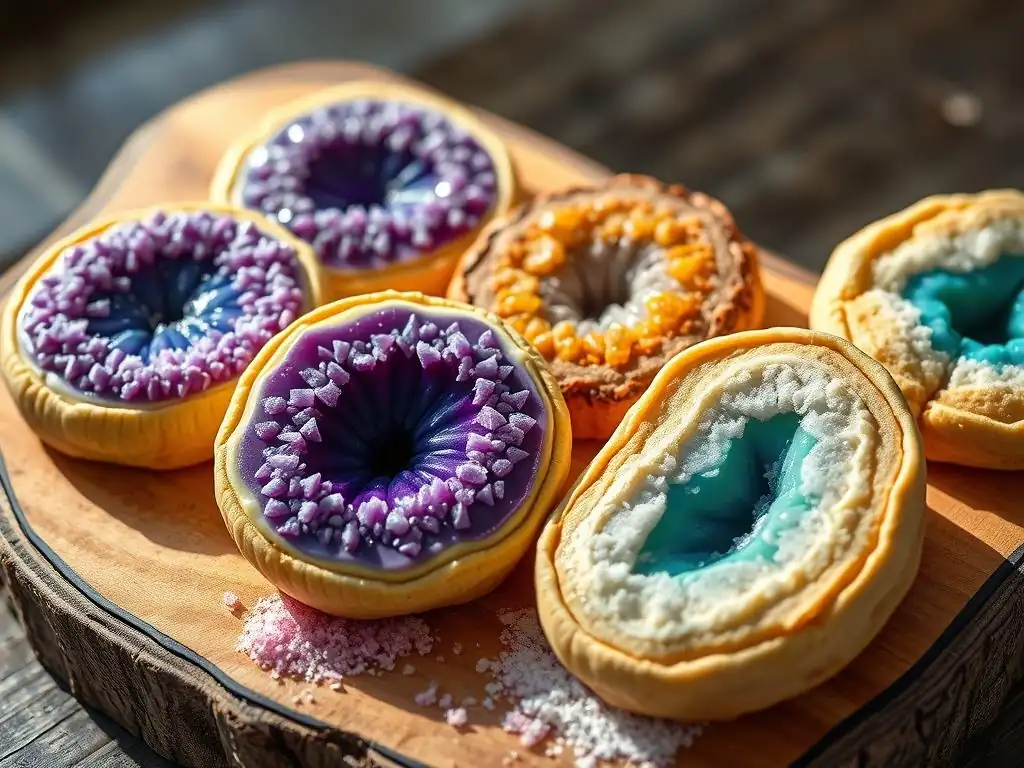
While round cookies are classic, geode effects look stunning on a variety of shapes. Irregular, organic shapes can enhance the natural look of the geode, making it appear as if a rock was genuinely cracked open. Try using abstract or asymmetrical cutters. Geometric shapes like hexagons or squares can also provide an interesting contrast to the organic geode design within.
Larger cookies offer more surface area to create intricate geode patterns with multiple layers and colors. Smaller cookies might require a simpler geode design with fewer colors or crystal sizes. You can even apply small geode accents to larger iced cookies, creating a series of mini geodes rather than one large central one. The versatility of this geode cookies tutorial recipe means you aren't limited to just one shape or size.
While vanilla is a standard flavor for sugar cookies, don't hesitate to experiment! Consider adding almond extract, lemon zest, or even a touch of cardamom to your cookie dough for a subtle flavor twist. Ensure the flavor complements the visual design. For example, a lemon cookie base might pair beautifully with vibrant yellow or green geode crystals.
Your royal icing can also be flavored. Adding a drop of clear extract like vanilla, almond, or even a food-grade floral extract (like rosewater, used sparingly) can add another dimension to your geode cookies. Just be cautious not to add oil-based flavorings to royal icing made with meringue powder, as oil can break down the protein structure and prevent it from drying properly. A flavored cookie base and icing can make your stunning geode creations taste as good as they look.
Geode cookies are exceptionally well-suited for commemorating special events. For anniversaries, they can symbolize the beauty and strength that develops over time, like a precious stone. You could use colors that match wedding themes, birthstones, or favorite colors of the couple. For a 50th anniversary, gold geode accents would be particularly fitting.
For birthdays, customize the geode colors to match party themes or the birthday person's preferences. For holidays, use seasonal colors – deep reds and greens for Christmas, pastels for Easter, or oranges and blacks for Halloween (perhaps mimicking volcanic rock). The geode cookies tutorial recipe provides a flexible framework that can be adapted for virtually any celebration, making each batch uniquely special.
Preventing Sugar Crystals from Dissolving or Bleeding
Humidity is the nemesis of sparkly sugar crystals. Excess moisture in the air can cause them to absorb water, lose their facets, and even bleed their color into the surrounding icing. To prevent this, ensure your royal icing is completely dry before adding sugar crystals (unless you are embedding them into wet icing, in which case the issue is the drying process). Work in a low-humidity environment if possible.
Once the geode cookies are decorated, store them in an airtight container at room temperature. Avoid refrigerating or freezing them, as condensation can form when they are brought back to room temperature, potentially damaging the geode effect. Adding a small packet of food-safe desiccant to the storage container can help absorb excess moisture and keep your crystals sparkling.
Proper storage is crucial to preserve the beauty of your finished geode cookies. After the royal icing and crystals have dried fully (which can take 12-24 hours depending on humidity and thickness), store them in a single layer in an airtight container. If you must stack them, place a sheet of parchment paper or wax paper between layers to prevent the crystals from getting knocked off or damaging the cookies above.
Keep the container at cool, room temperature, away from direct sunlight or heat sources, which can also affect the icing and crystals. As mentioned, avoid the refrigerator due to potential condensation. Stored correctly, geode cookies can maintain their appearance and freshness for several days, allowing you to make them in advance for an event.
Presenting your stunning geode cookies enhances their impact. Once they are dry and stored properly, consider how you will display or package them. For gifting, individual cellophane bags tied with ribbon showcase each cookie's unique design. For a party or event, arrange them on a platter or tiered stand, allowing the light to catch the sparkle of the crystals.
If transporting the cookies, ensure they are packed securely in a sturdy container with minimal movement to prevent chipping or breakage of the delicate crystal areas. Sharing photos of your creations online is also part of the fun! Good lighting is key to capturing the sparkle. Mastering the geode cookies tutorial recipe is just the first step; presenting them beautifully is the grand finale.
You've done it! Following this geode cookies tutorial recipe, you've transformed simple cookies into dazzling edible geodes. Take a moment to admire your work and celebrate your newfound skill. Each cookie will be unique, just like natural geodes, showcasing your creativity and patience. The process, though intricate, is incredibly rewarding, resulting in stunning treats that are sure to impress anyone who sees (and eats!) them.
Share your creations with friends and family, or proudly display them at your next gathering. The sparkle and depth of the geode effect make these cookies true conversation starters. Remember the techniques you've learned, from choosing the right dough and icing consistency to layering colors and crystals for maximum impact.
Mastering the geode effect is a significant step in advanced cookie decorating, but the journey doesn't have to end here. BakeWithEase.com offers a wealth of resources for expanding your skills further. Explore tutorials on intricate piping techniques, wafer paper flowers, airbrushing, or working with edible paints and dusts.
Each new technique you learn adds another tool to your creative kit, allowing you to tackle even more complex and beautiful cookie projects. Keep practicing, keep experimenting, and keep exploring the wonderful world of cookie artistry with BakeWithEase.com as your guide.
Frequently Asked Questions
The tutorial is designed for bakers of all levels, with step-by-step instructions. It focuses on easy-to-find ingredients and techniques for creating the geode effect.
What are the key ingredients I need to create the mesmerizing geode effects?
You'll primarily need sugar crystals (various sizes and colors), clear piping gel, and your favorite cookie recipe. The tutorial likely specifies precise quantities and alternative ingredients if needed.
While the tutorial may showcase a specific example, it likely includes guidance on experimenting with different colors and arranging the sugar crystals to create various unique geode patterns.
Yes, you can adapt the recipe to other sturdy cookie bases, but consider the cookie's surface and texture for best adhesion of the geode elements.
BakeWithEase likely provides links to recommended brands, but you can also use comparable alternatives available at your local grocery store or online retailers.
The art of baking is not merely about creating delicious treats; it's about crafting edible masterpieces. This exploration into the mesmerizing world of geode cookies has revealed a surprisingly accessible path to creating stunning, visually captivating desserts. The techniques, while requiring a bit of patience and precision, ultimately empower bakers of all skill levels to achieve professional-looking results.
The impact of visually stunning food on our culture is undeniable. From the carefully curated Instagram feeds to the elaborate cake designs on television baking shows, we are increasingly drawn to food that is as pleasing to the eye as it is to the palate. Food is symbolic of love when words are inadequate.
- Alan D. Wolfelt. This sentiment rings true for geode cookies; their intricate beauty speaks volumes before a single bite is taken, transforming a simple cookie into a small work of art, a conversation starter, and a memorable experience.
Now, it's your turn. Don't be intimidated by the seemingly complex process. Gather your ingredients, embrace the creative process, and let your inner artist shine through. Experiment with different colors, textures, and even flavors to personalize your geode cookies. The beauty of this technique lies in its adaptability; the possibilities are truly endless. So, what breathtaking geode creation will you bake next?
Unleash Your Inner Geode Baker!
Thanks for joining us on this sparkling journey into the world of geode cookies! We hope you've gained some delicious inspiration and newfound confidence in your baking abilities. Ready to transform your kitchen into a geode wonderland?
- Craft your own dazzling geode cookies: Put your newfound skills to the test! Experiment with different color combinations and crystal structures to create your unique masterpiece.
- Share your creations: Show off your geode baking prowess on social media using #BakeWithEaseGeodes and inspire others!
- Dive deeper into our cookie decorating techniques: Explore our other articles on BakeWithEase.com for more amazing baking ideas!
What unique twist will you add to your next geode cookie creation?