
Dive into WetonWet Royal Icing Artistry

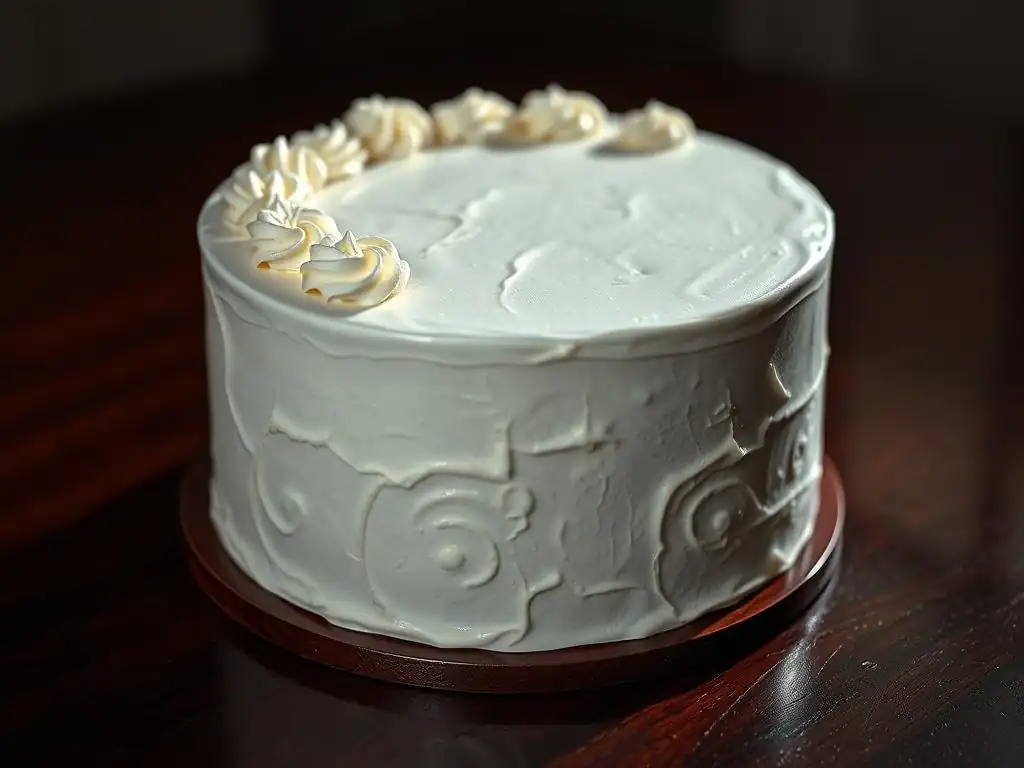
Welcome to BakeWithEase, your sanctuary for all things baking! Ever wondered how to achieve flawlessly smooth and intricate designs on your cookies and cakes? Unlock the secrets of the WetonWet royal icing technique in our comprehensive tutorial. Prepare to be amazed as we guide you through each step, transforming ordinary treats into edible masterpieces. Are you ready to elevate your baking to the next level? Let's get started!
- Understanding Floral Royal Icing: Introduction to Realistic Cookie Flowers
- Essential Tools and Ingredients for Your Floral Royal Icing Project
- Step-by-Step Floral Royal Icing Tutorial: From Base to Bloom
- Advanced Floral Royal Icing Techniques: Achieving Hyperrealism
- Troubleshooting Common Floral Royal Icing Problems
- Floral Royal Icing Design Ideas and Inspiration
- Tips and Tricks for Floral Royal Icing Success
- Conclusion: Elevate Your Cookie Art with Realistic Floral Icing
-
Frequently Asked Questions
- What exactly is the WetonWet royal icing technique?
- Is the WetonWet technique difficult for beginners?
- What kind of royal icing consistency is best for the WetonWet method?
- Where can I find reliable WetonWet royal icing tutorials?
- What are some common mistakes to avoid when using the WetonWet technique?
- Final Reflection: The Enduring Allure of Wet-on-Wet Royal Icing
- Unleash Your Inner Royal Icing Artist!
What is Floral Royal Icing? Exploring Petal Piping and Arrangement
Floral royal icing is a specialized application of standard royal icing, focusing on creating three-dimensional, realistic flower and foliage elements directly onto cookies. Unlike techniques that involve flooding or simple outlines, this method requires precise control over icing consistency and piping pressure to form delicate petals, leaves, buds, and stems. It transforms a flat cookie surface into a miniature edible garden, adding significant visual appeal and complexity. The process often involves building layers of icing, allowing elements to dry partially or fully before adding subsequent details, resulting in depth and texture.
The core techniques in floral royal icing include various forms of petal piping, where different tips are used to shape individual petals or entire flower centers. For instance, a tear-drop tip (#101, #102, #104) is commonly used for roses, apple blossoms, and ruffles, while a star tip (#18, #21) can form centers or small florets like hydrangeas. Leaf tips (#67, #352) are essential for creating realistic foliage with defined veins. Arrangement is key; once individual elements or clusters are piped, they are strategically placed on the cookie to create a balanced and aesthetically pleasing composition, mimicking natural floral arrangements.
Choosing floral icing elevates standard decorated cookies into sophisticated edible art pieces, perfect for special occasions like weddings, baby showers, birthdays, or high-end events. The intricate details and dimensional quality of piped flowers offer a level of elegance and perceived value that simpler flat designs cannot match. This technique allows for incredible realism, replicating the beauty of nature with edible ingredients. It provides a unique way to personalize cookies, matching specific floral themes or color palettes requested by clients or for personal celebrations.
Beyond aesthetics, mastering floral royal icing techniques offers a rewarding challenge for bakers and decorators looking to expand their skill set. While a WetonWet royal icing tutorial focuses on smooth, flat blending, floral work explores texture, dimension, and structure. Achieving realistic petal shapes and natural-looking arrangements requires practice and patience, but the result is a truly stunning and memorable cookie. This level of detail differentiates cookies, making them stand out as artisanal creations rather than simple baked goods.
Essential Tools and Ingredients for Your Floral Royal Icing Project
Must-Have Tools for Precise Flower Piping
Successful floral royal icing relies heavily on having the right tools for precision and control. Essential items include a variety of piping bags (both disposable and reusable silicone bags are popular), couplers for easily changing tips without changing bags, and a selection of piping tips.
For floral work, a basic set should include round tips (#1, #2, #3) for details and centers, star tips (#18, #21) for florets and textures, leaf tips (#67, #352) for foliage, and crucially, petal tips (#101, #102, #104) for forming petals of various sizes. Flower nails are also indispensable for piping flowers like roses or apple blossoms off-cookie before transferring them.
Additional helpful tools include a scribe tool or toothpick for manipulating small details and correcting mistakes, small offset spatulas for applying base layers or transferring delicate flowers, and drying racks or foam blocks to support piped flowers as they set. Having multiple piping bags prepared with different colors and consistencies before starting is a major time-saver. For advanced work, specialized tips like ruffle tips or grass tips can add further dimension and variety to arrangements.
Royal Icing Recipe for Floral Designs: Achieving Stiff and Medium Consistencies
The foundation of beautiful floral cookies is a reliable royal icing recipe, but more importantly, achieving the correct consistencies for different applications. A standard recipe typically involves powdered sugar, meringue powder (or egg whites), and water, sometimes with added flavoring or corn syrup for elasticity. For piping dimensional flowers and leaves, a stiff consistency is crucial.
This icing should hold a firm peak without drooping, similar to toothpaste. It's achieved by using less water relative to the powdered sugar and meringue powder. A small batch might use approximately 1/4 cup of water per pound of powdered sugar, but this can vary based on humidity and ingredients.
For base layers, flooding leaves, or creating smoother elements, a medium consistency is needed. This icing should flow slowly when dropped from a spoon, forming a ribbon that sinks back into the bowl after several seconds (often described as '15-second icing'). This is achieved by gradually adding small amounts of water to the stiff icing until the desired flow is reached. Having both stiff and medium consistencies prepared is essential for creating realistic floral designs, where petals require structure (stiff) but some elements like leaves or centers might benefit from a smoother finish (medium).
Gel Food Coloring for Floral Icing: Creating Realistic Color Variations
Creating realistic floral designs demands a wide spectrum of natural-looking colors, and gel food colorings are the preferred medium for tinting royal icing. Unlike liquid colorings, gel colors are highly concentrated, requiring only a small amount to achieve vibrant hues without significantly altering the icing's consistency.
A core palette of primary colors (red, yellow, blue), along with green, brown, black, and white, can be mixed to create an almost endless range of shades needed for petals, leaves, and centers. For example, mixing red and yellow gels creates various oranges, while adding a touch of brown or black can create muted, natural tones like dusty rose or olive green.
Achieving realistic color variations often involves mixing custom shades. For instance, a vibrant green might be too artificial for leaves; adding a tiny amount of brown or even purple gel can create a more natural, earthy tone. Similarly, for petals, subtle variations in shade within the same flower can add depth.
Start with a base color and divide the icing, adding slightly more of one color or a touch of a complementary color to create lighter and darker variations of the same hue. Gel colors are added using a toothpick or food-safe brush, mixing thoroughly until the color is uniform. Remember that colors often deepen slightly as the icing dries.
Step-by-Step Floral Royal Icing Tutorial: From Base to Bloom
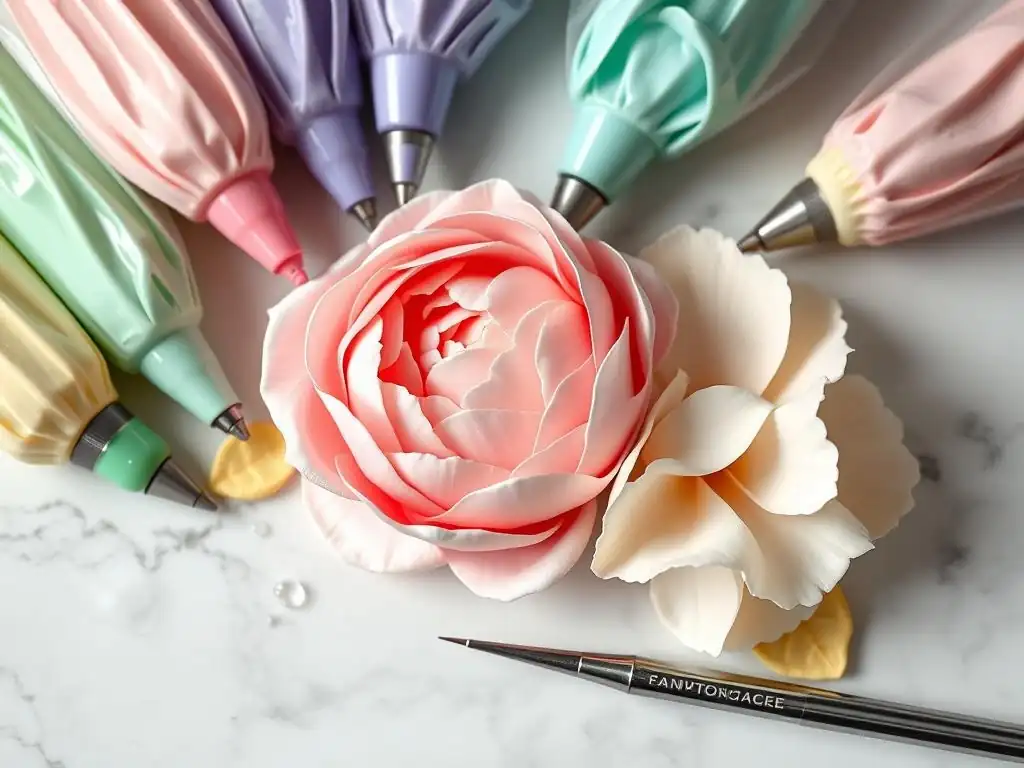
Step 1: Preparing Your Royal Icing for Flower Creation
The first crucial step is to prepare your royal icing according to your chosen recipe, ensuring you have both stiff and medium consistencies ready. Divide the icing into separate bowls for each color you plan to use. Using gel food colorings, tint each batch to the desired shades for your petals, leaves, centers, and base layer.
Remember to start with a small amount of color and gradually add more until the desired intensity is reached. Keep the icing covered with plastic wrap pressed directly onto the surface to prevent it from drying out, as royal icing hardens rapidly when exposed to air.
Once colored, fill your piping bags. For stiff icing used for dimensional petals and leaves, you can use couplers to easily switch between different petal or leaf tips. For medium consistency icing used for flooding or smoother elements, use a round tip (#2 or #3 is common for outlines and small fills). Ensure bags are filled no more than two-thirds full for comfortable handling and control. Twist or secure the open end of the bag to prevent icing from squeezing out the top.
Before adding floral elements, the cookie itself needs a smooth, dry base layer of royal icing. This provides a clean canvas for your floral arrangement. Outline the cookie shape with medium consistency royal icing using a round tip (#2 or #3). Then, 'flood' the outlined area by filling it with the same consistency icing. Use a scribe tool or toothpick to gently spread the icing to the edges and pop any air bubbles. This creates a smooth, even surface.
Allow the base layer to dry completely. This is perhaps the most time-consuming step, but essential. Depending on humidity, icing thickness, and consistency, this can take anywhere from 6 to 24 hours. Ideally, let them dry uncovered in a cool, dry place. A dehydrator set to a low temperature (around 100-115°F or 38-46°C) can significantly speed up this process, often reducing drying time to 2-4 hours for a thin flood layer. Ensure the surface is hard to the touch before proceeding.
Step 3: Piping Basic Flower Elements: Petals, Leaves, and Centers
Now comes the artistry! Using your stiff consistency royal icing and appropriate piping tips, begin piping your floral elements. You can pipe directly onto the dried cookie base or, for more complex flowers like roses, pipe them onto a flower nail or parchment paper squares and transfer them later.
- Techniques for Piping Roses: A classic rose is piped using a petal tip (like #104). Start by piping a small cone or bud base on a flower nail using stiff icing. Hold the petal tip with the wider end down and the narrower end up. Pipe a tight 'bud' around the cone. Then, pipe individual petals around the bud, overlapping slightly. Keep the wider end of the tip towards the base and the narrow end outward, wiggling slightly to create ruffles. Rotate the nail as you pipe layers of petals, making them slightly larger as you move outwards. Practice is key to mastering the pressure and angle.
- Techniques for Piping Hydrangeas: Hydrangeas are simpler clusters of small florets, often piped directly onto the cookie base. Use a small open star tip (#16, #18, or #21) and stiff or medium-stiff icing. Apply firm, even pressure to pipe a small star shape, then stop pressure and pull the bag away quickly to form a distinct floret. Pipe clusters of these florets close together to form the hydrangea head. Varying the pressure slightly can create florets of different sizes within the cluster for a more natural look.
Leaves are typically piped using a leaf tip (#67 or #352) and stiff green icing. Hold the tip with the opening horizontal. Apply pressure to let the icing fill the tip, then pull the bag away while slightly wiggling the tip back and forth to create a ribbed effect, resembling a leaf vein. Stop pressure and pull away to finish the tip of the leaf. Centers for flowers can be piped dots using a small round tip (#1 or #2) or small stars using a star tip.
Once you have piped your individual floral elements, either directly onto the cookie base or off-cookie onto parchment/nails, it's time to assemble the arrangement. If piping directly, plan your layout beforehand. Start with larger elements or focal points and then fill in around them with smaller flowers, buds, and leaves. Use stiff icing as a 'glue' to attach any off-cookie piped flowers or elements to the base.
Consider balance and flow in your design. An asymmetrical arrangement can often look more natural than a perfectly symmetrical one. Groupings of flowers and leaves tend to be more visually appealing than scattered individual elements. Use leaves to fill gaps, add color contrast, and provide a natural backdrop for the flowers. You might use medium consistency icing to pipe smooth stems or branches before adding the dimensional flowers and leaves on top. Allow elements to set slightly before adding adjacent pieces to avoid crushing delicate details.
After assembling your floral arrangement, the entire cookie needs ample time to dry completely. This allows the dimensional icing elements to harden fully, making them durable and less prone to damage. Depending on the thickness of the piped flowers and leaves, this drying process can take anywhere from 12 to 48 hours or even longer in humid conditions.
Leaving cookies uncovered in a cool, dry room is best. Using a fan or a dehydrator on a very low setting can accelerate drying, but be cautious not to use too much heat, which can cause colors to bleed or icing to become brittle.
Once the icing is bone dry, you can add finishing touches. This might include piping tiny dots for stamens using a small round tip, adding subtle color variations with dusting powders (see advanced techniques), or adding a final layer of clear piping gel for a dewy effect on leaves. Ensure all layers are completely dry before stacking or packaging the cookies to prevent breakage or smudging of the delicate floral details.
Advanced Floral Royal Icing Techniques: Achieving Hyperrealism

Working with Dusting Powders for Shading and Depth
Taking floral royal icing from beautiful to breathtaking often involves adding subtle shading and depth using edible dusting powders. These fine powders, available in various colors (petal dusts, luster dusts, pearl dusts), can be applied dry with a soft brush onto the completely dried royal icing flowers and leaves. This technique allows you to add realistic shadows, highlights, and color gradients that are difficult to achieve with just colored icing. For instance, a touch of darker green dust applied near the base of a leaf and along the veins can make it appear more dimensional.
To use dusting powders, you'll need a set of small, clean, food-safe brushes dedicated solely to this purpose. Dip the brush lightly into the powder, tap off any excess, and gently brush or stipple the color onto the desired areas of the dried icing. For more intense color or to create a paint-like consistency, you can mix the dusting powder with a clear alcohol like vodka or lemon extract (which evaporates quickly) to create an edible paint.
This allows for fine details and line work. Experimenting with different colors and application techniques is key to achieving realistic shading and bringing your flowers to life.
Creating Multi-Layered Flowers for Dimension
Achieving hyperrealism in floral royal icing often requires building flowers in multiple layers, allowing each layer to dry before adding the next. This technique adds significant dimension and structure. For example, to create a realistic peony or garden rose, you might pipe an initial base layer of petals and let them set. Then, pipe a second layer of slightly larger petals overlapping the first, shaping them to curl outward naturally. After that layer sets, add a third, and potentially more, increasing the size and changing the angle of the petals with each layer.
This layered approach is time-consuming due to the necessary drying time between steps, but it allows for the creation of complex, full blooms that have a natural form and depth. It also enables the use of different shades of icing within a single flower, piping darker shades for inner petals and lighter shades for outer ones, further enhancing the realistic appearance. Building flowers layer by layer also makes them more robust once fully dry.
Using Wafer Paper for Realistic Flower Details
Wafer paper, a thin, edible paper made from potato starch, water, and vegetable oil, is another excellent medium for adding realistic details to floral royal icing. While royal icing is perfect for structured elements and piping, wafer paper can be cut, shaped, and manipulated to create incredibly delicate and translucent petals or ruffled edges that are difficult to achieve with icing alone.
For example, very fine, delicate petals for poppies or sweet peas can be cut from wafer paper, gently shaped using ball tools or simply by hand, and then attached to the cookie or a royal icing base using a tiny amount of piping gel or light corn syrup.
Wafer paper can also be colored using edible food pens or airbrushing before being shaped and attached. It adds a different texture and level of fragility to the floral arrangement, contrasting beautifully with the firmer royal icing elements. Combining wafer paper elements with piped royal icing elements allows for a greater range of textures and realism in your floral cookie art.
Troubleshooting Common Floral Royal Icing Problems
Royal Icing Cracking: Causes and Solutions
Royal icing cracking after it dries is a frustrating, but common, problem. It often happens when a layer of icing dries too quickly on the surface while the underlying icing remains wet. As the wet icing dries and shrinks, the hardened crust on top cracks. This is particularly common with large flooded areas or thick piped elements. High humidity can also contribute by slowing down the drying of the inner layers.
To prevent cracking, try to ensure even drying. Drying cookies in a low-temperature dehydrator (around 100-115°F or 38-46°C) helps the icing dry from the inside out, significantly reducing cracking. Avoid drying in direct sunlight or under a fan that is too strong, as this can promote surface crusting.
Adding a tiny amount of corn syrup or glycerin (a few drops per cup of icing) can also increase elasticity and help prevent cracking in flood icing. If cracks do occur, small ones can sometimes be filled with a thin line of the same color icing using a fine tip (#1 or #0), or strategically covered with piped leaves or other floral elements.
Flowers Breaking: Prevention and Repair
Delicate piped floral elements, especially thin petals or leaves, can be prone to breaking once dry. This often happens during handling, packaging, or transport. The primary prevention method is ensuring the icing is completely dry before moving or stacking cookies. Thick, layered flowers need significant drying time, sometimes 48 hours or more. Using a strong, stiff consistency for dimensional piping provides better structural integrity.
If a piped flower breaks off or a petal snaps, don't despair! Small breaks can often be repaired using a tiny dab of fresh stiff royal icing as an adhesive. Apply the icing to the broken surface and carefully press the piece back into place. Use a scribe tool to clean up any excess icing around the repair.
If an entire flower breaks off, you can reattach it to the cookie base using a small amount of stiff icing. Allow the repair to dry fully before handling the cookie again. While repairs might not be invisible upon close inspection, they can save a cookie that would otherwise be discarded.
Achieving Realistic Petal Texture
Achieving realistic petal texture goes beyond just piping the correct shape; it involves manipulating the icing to mimic the delicate, sometimes ruffled, or veined surface of real flower petals. Using the right tip is fundamental – petal tips (#101, #102, #104) are designed to create thin edges and thicker bases, mimicking natural petals. The technique of wiggling the tip slightly while piping, especially with petal tips, creates natural-looking ruffles and movement.
For veining on leaves or larger petals, a leaf tip (#67, #352) is essential, as the shape of the tip opening automatically creates a central vein and side ribs when piped correctly with a slight wiggle. For subtle texture on smooth petals (like a rose), you can sometimes gently imprint veins using a veining tool or the back of a knife before the icing fully hardens. For very fine details or to enhance natural texture, applying dusting powders with a brush can create shadows that highlight the form and texture of the piped icing.
Floral Royal Icing Design Ideas and Inspiration
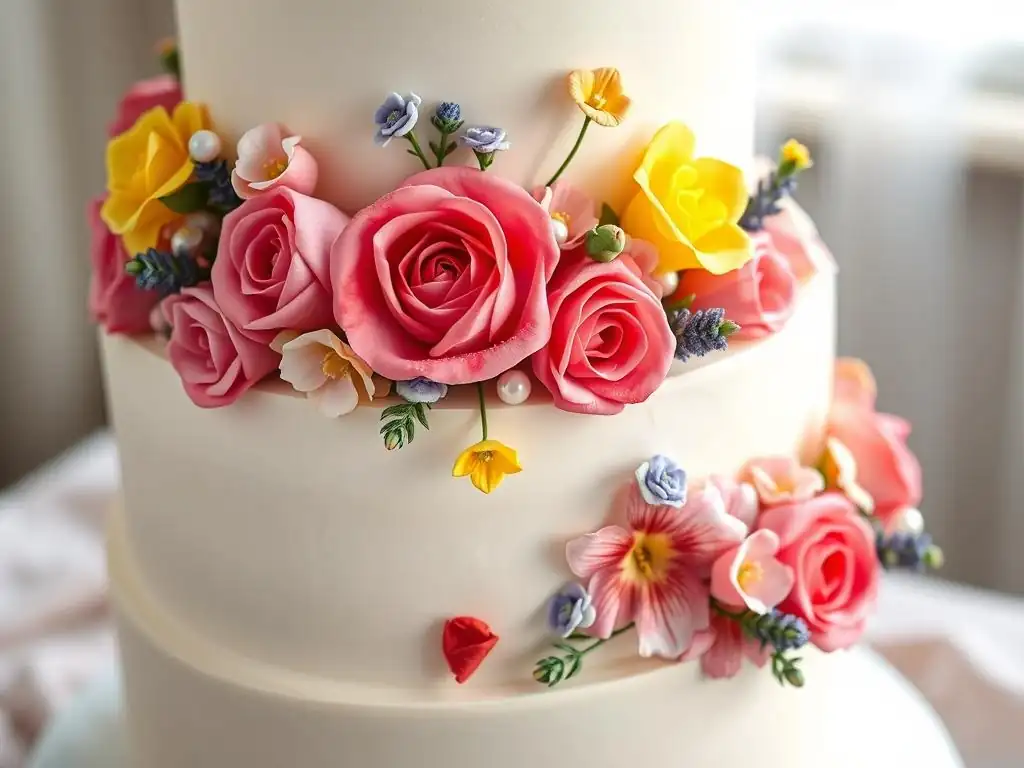
Floral royal icing allows for an incredible variety of designs, limited only by imagination and skill. Simple designs might feature a single large bloom like a peony or rose as the focal point, surrounded by a few leaves and buds.
More complex arrangements can fill the entire cookie surface with a dense cluster of various flower types – perhaps a mix of roses, hydrangeas, filler flowers like baby's breath (piped with small dots using a #1 tip), and abundant foliage. Designs can mimic wild bouquets, structured arrangements, or even specific botanical studies focusing on a single type of flower in detail.
Examples include creating cookies that look like miniature wreaths made entirely of piped leaves and small flowers, or designs where flowers spill over the edge of the cookie. Monogram cookies can be adorned with floral clusters wrapped around the letter. The style can range from whimsical and colorful to highly realistic and muted, depending on the desired effect and color palette used. Exploring different flower types – from delicate cherry blossoms (small ruffled petals) to bold sunflowers (layered petals with a textured center) – offers endless design possibilities.
Inspiration Gallery for Wedding, Birthday, and Spring Themes
Floral royal icing is incredibly versatile for themed cookies. For weddings, elegant designs often feature classic flowers like roses, peonies, or lilies in soft whites, creams, and pastels, perhaps with metallic gold or silver accents using luster dusts. Cookies can match the bridal bouquet or wedding colors. A WetonWet royal icing tutorial might be useful for the base layer if a smooth, marbled background is desired before adding piped florals.
Birthday themes can be vibrant and fun, incorporating bright, cheerful colors and a mix of popular flowers. Spring themes naturally lend themselves to floral designs, featuring tulips, daffodils, cherry blossoms, and fresh green leaves in bright, hopeful colors. Consider creating sets of cookies where each cookie features a different type of flower or a different angle of the same flower for a cohesive collection. Look to real flower photos, botanical illustrations, and even fabric patterns for color and arrangement inspiration.
Tips and Tricks for Floral Royal Icing Success
Achieving the Ideal Royal Icing Consistency for Different Flower Types
Mastering royal icing consistency is paramount for successful floral piping. As discussed, stiff consistency is needed for standing petals and leaves that hold their shape, like roses, zinnias, or structured leaves. If the icing is too soft, piped petals will droop and lose definition. If it's too stiff, it will be difficult to pipe smoothly and may cause hand strain, and the icing might break rather than flow.
Medium consistency is useful for smoother elements like filling in the base of leaves, piping stems, or creating smaller, less structured florets like hydrangeas or filler flowers. For details like tiny dots for stamens or fine outlines, a slightly thinner consistency (closer to 5-10 second icing) is needed. It's helpful to test your consistency on a piece of parchment paper before piping onto the cookie.
Pipe a test petal or leaf; if it holds its shape crisply, it's likely stiff enough. If it immediately slumps, it's too soft. Add powdered sugar to stiffen or tiny amounts of water to thin.
Mastering Piping Pressure for Delicate Petals
Consistent and controlled piping pressure is critical for creating uniform and delicate petals. For most petals piped with a petal tip, you need steady, even pressure to push the icing out smoothly. The amount of pressure will determine the size and thickness of the petal.
To create a petal with a thin edge and a thicker base (like those on a rose), hold the petal tip with the wider end down and the narrow end pointing away from the center of the flower. Apply pressure, move the bag slightly, and then ease off pressure as you pull away, allowing the narrow end of the tip to form the delicate edge.
For small, quick elements like hydrangea florets or dots, a quick squeeze and release of pressure is needed. Practice piping lines, dots, and simple shapes on parchment paper to get a feel for how different pressures affect the icing flow. Varying pressure within a single petal can create natural curves and movement. It takes practice to develop the muscle memory for consistent pressure, especially for repetitive elements like rose petals.
Proper storage is essential to preserve the beauty and freshness of your floral decorated cookies. Once the royal icing is completely dry (which can take 24-48 hours for dimensional elements), store them in an airtight container at room temperature. Layer the cookies carefully, preferably with parchment paper or wax paper in between layers, to prevent the delicate piped flowers from being damaged. Avoid stacking them too high.
Do not refrigerate or freeze royal icing decorated cookies, as condensation can damage the icing, causing colors to bleed or the icing to become sticky or dull. Stored correctly at room temperature, royal icing cookies can maintain their quality and appearance for several weeks, though they are best enjoyed within one to two weeks for optimal freshness. For transport, pack them securely in a box with padding to prevent movement and potential breakage of the fragile floral elements.
Mastering floral royal icing is a journey that transforms simple cookies into stunning, edible works of art. It requires patience, practice, and attention to detail, but the reward is the ability to create lifelike flowers and foliage that impress and delight. While a WetonWet royal icing tutorial focuses on achieving smooth, blended surfaces, the world of floral icing delves into dimension, texture, and sculptural form.
By understanding the right tools, preparing your icing to the perfect consistency, and practicing fundamental piping techniques, you can begin to build beautiful floral arrangements on your cookies. Don't be discouraged by initial attempts; like any art form, improvement comes with practice. Experiment with different flower types, color palettes, and arrangement styles. Embrace the challenge of advanced techniques like dusting powders and multi-layering to push the boundaries of realism. With dedication, you can elevate your cookie decorating skills and create breathtaking floral cookies that are truly sweet masterpieces.
Frequently Asked Questions
What exactly is the WetonWet royal icing technique?
The WetonWet technique involves applying wet royal icing onto a still-wet base layer of royal icing. This allows you to create seamless designs and patterns before the icing sets, resulting in a smooth, even surface.
Is the WetonWet technique difficult for beginners?
While it requires some practice, the WetonWet technique is manageable for beginners. Start with simple designs and focus on controlling the consistency of your icing. BakeWithEase.com offers step-by-step tutorials.
What kind of royal icing consistency is best for the WetonWet method?
You need two consistencies: a flood consistency for the base layer and a slightly thicker piping consistency for the decorations. This contrast helps prevent the colors from bleeding together too much.
Where can I find reliable WetonWet royal icing tutorials?
BakeWithEase.com is your go-to resource, offering a detailed WetonWet royal icing tutorial with easy-to-follow instructions and tips. The site focuses on simple recipes and techniques.
What are some common mistakes to avoid when using the WetonWet technique?
Avoid using icing that is too runny, as it will bleed and distort the design. Also, work quickly before the base layer sets, and ensure proper consistency control for optimal results.
Final Reflection: The Enduring Allure of Wet-on-Wet Royal Icing
The delicate dance of wet-on-wet royal icing, once a niche skill, is experiencing a vibrant resurgence in the age of online tutorials and visual artistry. This technique, demanding precision and patience, offers a unique pathway to creating breathtakingly detailed and textured cookies, cakes, and other edible masterpieces. Its accessibility, thanks to readily available resources and the supportive online community, makes it a captivating craft for both seasoned bakers and enthusiastic beginners alike.
The impact of wet-on-wet royal icing extends beyond mere aesthetics; it represents a powerful connection to tradition, a modern interpretation of age-old techniques, and a celebration of creativity. It's a testament to the enduring human desire to transform simple ingredients into works of art. The best things in life are the simple things, and the simplest things are often the most beautiful.
This sentiment perfectly encapsulates the magic of transforming humble icing into something extraordinary. The intricate details, the subtle shading, the almost ethereal quality of the finished product – these are all testaments to the power of patience and dedication.
Now, it's your turn. Consider the possibilities. Perhaps you've always been drawn to the intricate beauty of hand-decorated cakes, but felt intimidated by the process. Or maybe you're a seasoned baker seeking to expand your skillset and explore new creative avenues. Regardless of your experience level, I invite you to embrace the challenge, to pick up your piping bag, and to embark on your own journey into the captivating world of wet-on-wet royal icing. Let your creativity flow, and discover the joy of transforming simple ingredients into edible works of art.
Unleash Your Inner Royal Icing Artist!
Thanks for joining us on this journey into the captivating world of Wet-on-Wet royal icing! We hope you've discovered new techniques and inspiration to elevate your baking. Now it's time to put your newfound knowledge into practice.
- Create your masterpiece! Try a Wet-on-Wet design you’ve learned about today – even a simple one is a great start!
- Share your creation! Post a picture of your finished project on social media and tag us – we’d love to see your baking journey.
- Explore further! Dive deeper into Wet-on-Wet techniques by experimenting with different color combinations and piping consistencies.
What unique Wet-on-Wet design will you create next, and what exciting flavor combinations will you pair it with?