
Troubleshooting Advanced Cookie Decorating Challenges Solved


Welcome to BakeWithEase, your haven for all things baking!
Ready to elevate your cookie game? Dive into the delicious details of Troubleshooting Advanced Cookie Decorating Challenges Solved. We know even seasoned bakers face hurdles, so we've compiled solutions to common (and not-so-common) problems. Discover how to fix those royal icing mishaps, prevent color bleeding, and achieve flawlessly intricate designs. Curious how to take your cookie creations from good to gorgeous? Let's get baking!
- Troubleshooting Intricate Royal Icing Designs | BakeWithEase.com
- Common Royal Icing Issues and Solutions
- Advanced Royal Icing Techniques and Problem Prevention
- Essential Tools for Overcoming Decorating Hurdles
- Royal Icing: Pro Tips and Tricks
- Conclusion: Mastering Intricate Royal Icing Designs
-
Frequently Asked Questions
- How do I prevent my royal icing from cracking on my cookies?
- What causes my colors to bleed into each other when decorating cookies with royal icing?
- How can I achieve a perfectly smooth, glossy finish on my royal icing?
- My cookie designs look bumpy and uneven; how can I fix this?
- What can I do to prevent my cookies from spreading while baking, especially when using intricate shapes?
- Final Reflection: Mastering the Art of the Perfect Cookie
- Unleash Your Inner Cookie Artist!
Troubleshooting Intricate Royal Icing Designs | BakeWithEase.com
Why Intricate Royal Icing Designs Can Be Challenging
Embarking on advanced cookie decorating using royal icing opens up a world of creative possibilities, but it also introduces a unique set of challenges. Unlike simple flood-and-outline designs, intricate patterns involving fine lines, multiple layers, and delicate details require precision, patience, and a deep understanding of the medium. Common hurdles include achieving the perfect icing consistency for different techniques, preventing colors from bleeding into one another, and ensuring clean, crisp lines that define the design. These advanced cookie decorating problems can be frustrating, turning a beautiful vision into a less-than-perfect reality if not properly addressed.
Successfully executing complex royal icing designs demands more than just artistic flair; it requires technical skill and the ability to troubleshoot issues as they arise. Factors like humidity, icing preparation, drying time, and even the quality of your tools play significant roles in the outcome. Mastering these elements is key to overcoming the inherent advanced cookie decorating problems associated with detailed work. This guide is designed to help you navigate these difficulties, providing practical solutions and techniques to elevate your cookie decorating skills and achieve stunning, professional-looking results every time.
Setting the Stage: What We'll Cover in This Guide
This comprehensive guide will delve into the most common and frustrating advanced cookie decorating problems encountered when working with intricate royal icing designs. We will break down specific issues, from inconsistent icing texture and color bleeding to the dreaded craters and air bubbles that can mar a smooth surface. For each problem identified, we will provide detailed explanations of why it occurs and offer practical, step-by-step solutions grounded in proven techniques.
Beyond troubleshooting, we will explore advanced royal icing techniques like wet-on-wet and airbrushing, discussing their potential pitfalls and how to avoid them. Essential tools that are indispensable for intricate work will be highlighted, along with professional tips and tricks for maintaining your workspace and properly storing your finished creations. By the end of this guide, you will have a solid understanding of how to prevent and solve common advanced cookie decorating problems, empowering you to tackle even the most complex designs with confidence and achieve beautiful, flawless cookies.
Common Royal Icing Issues and Solutions

Problem 1: Royal Icing Consistency Issues
Identifying Incorrect Royal Icing Consistency
One of the most critical factors in successful royal icing decorating is achieving the correct consistency, and this becomes even more vital when tackling advanced cookie decorating problems involving fine details and flooding large areas. Icing that is too thick will be difficult to pipe smoothly, causing jagged lines and hand fatigue, and it won't flood evenly without leaving peaks.
Conversely, icing that is too thin will run over the edges of your outline, bleed into other colors easily, and may dry with a dull, translucent finish or create craters. Recognizing the symptoms of incorrect consistency is the first step to fixing many advanced cookie decorating problems.
A good test for consistency is the "count" test: lift your spoon or spatula and let the icing drizzle back into the bowl. For outlining and fine details, you'll want a thicker consistency that settles back into the bowl in about 15-20 seconds. For flooding, a thinner consistency that takes about 8-12 seconds to disappear is usually ideal. If your icing falls instantly (too thin) or takes longer than 20 seconds (too thick), you need to adjust it. Learning to read your icing's flow is fundamental to overcoming advanced cookie decorating problems related to texture.
Solution: Adjusting Royal Icing for Perfect Decorating
Adjusting royal icing consistency is a fundamental skill for any decorator, especially when facing advanced cookie decorating problems. The key is to make small adjustments gradually. For thickening, add a tiny amount of sifted powdered sugar or meringue powder. For thinning, add water very slowly, often just a few drops at a time, mixing thoroughly after each addition and re-testing the consistency.
It's often helpful to separate your batch of royal icing into smaller bowls and adjust each bowl to the specific consistency needed for different parts of your design – one for outlining, one for flooding, and perhaps one for even thicker details like piping flowers. This proactive approach prevents many advanced cookie decorating problems before they even start. Remember, it's much easier to thin thick icing than to thicken thin icing, so err on the side of starting slightly too thick.
Thinning Royal Icing: A Step-by-Step Guide
Thinning royal icing requires precision to avoid over-thinning, which is a common source of advanced cookie decorating problems. Start with your base icing, which should be quite thick (perhaps a 20-25 second count).
- Place a small amount of water (start with 1/4 teaspoon or just a few drops for a small batch) in a separate bowl or directly into the icing you wish to thin.
- Gently fold or mix the water into the icing using a spatula or spoon. Avoid vigorous whisking, which can introduce air bubbles.
- Mix until the water is fully incorporated and the icing appears uniform.
- Perform the consistency test (e.g., the count test) to check the flow.
- If it's still too thick, repeat steps 1-4, adding only a few more drops of water each time. Continue this process until you reach your desired consistency (e.g., 8-12 seconds for flooding). This careful, iterative approach minimizes the risk of creating advanced cookie decorating problems like bleed-through or craters from overly thin icing.
Thickening Royal Icing: Achieving the Right Texture
Thickening royal icing is necessary if you've accidentally added too much liquid or if you need a stiffer consistency for piping intricate details, borders, or floral elements. This adjustment helps prevent advanced cookie decorating problems like icing spreading too much or losing its shape.
- Sift a small amount of powdered sugar (start with 1-2 tablespoons for a medium batch) or a tiny pinch of meringue powder into the icing. Sifting prevents lumps.
- Gently fold or mix the dry ingredients into the icing until fully incorporated.
- Test the consistency. If using powdered sugar, allow it to rest for a few minutes to ensure it's fully absorbed and the consistency stabilizes.
- If the icing is still too thin for your needs, repeat steps 1-3, adding only small amounts of dry ingredients at a time. Patience is key here; adding too much at once can result in icing that is too stiff and difficult to work with, creating new advanced cookie decorating problems.
Understanding Why Color Bleeding Occurs
Color bleeding is one of the most frustrating advanced cookie decorating problems, where colors from one section of a design seep into an adjacent color, blurring lines and ruining intricate patterns. This typically happens when wet icing of different colors touch each other. Humidity is a major culprit; high moisture in the air slows down drying time, keeping the icing wet for longer and increasing the likelihood of bleeding. Using too much liquid food coloring is another common cause, as the excess moisture promotes migration.
Furthermore, the type of food coloring used makes a difference. Liquid food colorings contain a high percentage of water, making them more prone to causing bleeding compared to gel or paste food colorings, which are more concentrated and require less to achieve vibrant hues. Inadequate drying time between layers of icing is perhaps the most frequent reason for this advanced cookie decorating problem; if the base layer or outline isn't sufficiently dry before the next color is applied, the wet areas will merge.
Solution: Preventing Color Bleeding in Decorated Cookies
Preventing color bleeding requires careful technique and patience. The primary solution is ensuring adequate drying time between applying different colors or layers of icing. For instance, after outlining a cookie, let the outline dry for 15-30 minutes (or longer in humid conditions) before flooding the section. When flooding adjacent areas with different colors, either use the wet-on-wet technique (where bleeding is intentional and controlled for marbling effects) or allow the first color to dry completely before piping or flooding the next color right up against it.
Controlling humidity is also crucial. Using a fan to gently blow air across the cookies as they dry can significantly speed up the process and reduce the chance of bleeding. A food dehydrator set to a low temperature (around 90-100°F or 32-38°C) is an excellent tool for drying cookies quickly and efficiently, preventing this advanced cookie decorating problem.
Using Gel Food Coloring Correctly
Gel food colorings are highly recommended for royal icing because they are concentrated and contain minimal liquid, reducing the risk of thinning the icing or causing bleeding. When coloring icing, start with a very small amount of gel coloring on a toothpick or a small spoon. A tiny dab is often enough to achieve vibrant colors.
Mix the gel coloring into the icing thoroughly, ensuring no streaks remain. If you need a deeper shade, add more coloring incrementally, mixing well after each addition. Over-saturating the icing with color, even gel, can sometimes lead to bleeding or bitterness, so use only what is necessary. Using high-quality gel pastes specifically designed for icing helps achieve intense colors without introducing excess moisture, effectively combating one of the root causes of advanced cookie decorating problems like bleeding.
Allowing Sufficient Drying Time Between Layers
Sufficient drying time is non-negotiable when working with multiple colors or layers in intricate royal icing designs to avoid advanced cookie decorating problems like bleeding and craters. The amount of time needed depends heavily on humidity, icing consistency, and thickness. A thin outline might dry to the touch in 15 minutes, while a flooded section might take 6-8 hours or even longer to dry completely hard.
For designs where colors touch or layers overlap, allow the first layer to dry until it is completely crusted over and firm enough to gently touch without leaving a mark. For areas that will have subsequent layers piped directly onto them, it's often best to let them dry for several hours or overnight, especially in humid conditions. Using a fan or dehydrator can significantly speed this process up, turning hours into minutes for crusting and reducing overnight drying time.
Using AmeriColor Gel Pastes for Minimal Bleeding
Specific brands of food coloring are known for their quality and performance in royal icing, and AmeriColor gel pastes are frequently cited by professional decorators for their vibrant colors and minimal tendency to bleed. These gel pastes are highly concentrated, meaning you need very little product to achieve intense hues, thus adding less moisture to your icing.
While no food coloring is entirely immune to bleeding under extreme conditions (like very high humidity coupled with insufficient drying time), using high-quality gel pastes like AmeriColor significantly reduces the risk compared to liquid alternatives. This choice of ingredient is a simple yet effective strategy in preventing advanced cookie decorating problems related to color integrity. Always store your gel colors properly to maintain their quality and consistency.
Problem 3: Achieving Sharp Lines and Intricate Details
The Importance of Precision in Detailed Designs
Achieving sharp lines and intricate details is the hallmark of advanced cookie decorating, allowing you to create stunning, realistic, or highly stylized designs. Precision in piping is paramount; shaky hands, inconsistent pressure, or incorrect icing consistency can lead to wobbly lines, uneven thickness, and blurred details, all common advanced cookie decorating problems. Every element, from a delicate swirl to a tiny dot, relies on controlled application of the icing.
The ability to execute fine details accurately is what elevates a decorated cookie from simple to spectacular. Whether you're outlining complex shapes, adding filigree, piping lettering, or creating fine textures, the clarity and sharpness of your lines are crucial. Without precision, even the most beautiful design concept can fall flat, making the mastery of piping techniques essential for tackling advanced cookie decorating problems related to detail work.
Solution: Techniques for Crisp Lines and Detailed Work
Overcoming advanced cookie decorating problems related to precision involves practicing fundamental piping techniques and utilizing the right tools. Start with good posture and a steady hand, perhaps resting your piping hand on your other hand or the table if needed for stability. Ensure your icing is the correct consistency – usually a medium-thick consistency (around 15-20 second count) that holds its shape but flows smoothly.
Practice piping lines and shapes on parchment paper before moving to your cookies. This allows you to get a feel for the icing flow and pressure needed. When piping lines, hold the piping bag slightly above the surface of the cookie and let the icing fall onto the surface, guiding it with your tip but not dragging the tip through the icing. This "floating" technique helps create smoother, more consistent lines, mitigating advanced cookie decorating problems like jagged edges.
Mastering the Piping Bag Technique
Proper handling of the piping bag is fundamental to achieving crisp lines and overcoming advanced cookie decorating problems. Fill your piping bag no more than two-thirds full to maintain control. Twist the top of the bag closed to prevent icing from squeezing out the wrong end and to maintain consistent pressure.
Hold the bag comfortably in your dominant hand, using your fingers to apply steady, even pressure. Guide the tip with your non-dominant hand if necessary for intricate work. Angle the tip relative to the cookie surface depending on the desired effect (e.g., straight down for dots, at an angle for lines).
Practice applying consistent pressure from start to finish of your line or shape and stopping pressure just before you lift the bag away, giving a slight flick of the wrist to break the icing cleanly. This controlled process is vital for preventing advanced cookie decorating problems like blobs at the end of lines.
Using a Scriber Tool for Detailing
A scriber tool (or a toothpick) is an indispensable tool for advanced cookie decorating problems involving fine details, corrections, and manipulating icing. After piping a line, if it's slightly wobbly or needs adjustment, you can gently use the tip of the scriber to nudge the wet icing into place.
The scriber is also perfect for popping small air bubbles in flooded areas, pulling icing into tight corners, or creating delicate swirls and textures in wet icing. For very intricate designs, you can even pipe a small amount of icing onto the cookie and then use the scriber to push and pull it into fine lines or shapes, offering a level of control difficult to achieve with a piping tip alone. This tool is a secret weapon against many advanced cookie decorating problems.
Using PME #1.5 Piping Tip for Fine Lines
For truly intricate details and ultra-fine lines, the PME #1.5 piping tip is a standard choice among professional decorators. This metal tip has a very small opening, allowing for extremely thin lines, delicate lettering, and detailed filigree work. Using such a fine tip requires a perfectly smooth icing consistency, free of any lumps or undissolved sugar, which could clog the tip – another potential advanced cookie decorating problem.
Ensure your icing is sifted thoroughly and perhaps even pushed through a sieve after coloring to guarantee smoothness when using such a fine tip. Practice with this tip to get a feel for the required pressure and flow rate. While challenging at first, mastering the use of a very fine tip like the PME #1.5 is essential for executing the most complex and detailed aspects of advanced cookie decorating designs.
Problem 4: Preventing Craters and Air Bubbles in Royal Icing
Identifying the Cause of Craters and Air Bubbles
Craters and air bubbles are frustrating advanced cookie decorating problems that appear as small or large holes in the smooth, dried surface of flooded royal icing. Air bubbles are trapped pockets of air within the icing, and craters form when these bubbles rise to the surface during drying and pop, leaving a void that doesn't fill in because the surrounding icing has already begun to set.
The primary cause of trapped air bubbles is over-mixing or mixing royal icing at too high a speed, especially when using an electric mixer. Whisking incorporates air into the mixture. Using icing that is too thick for flooding can also trap air more easily. While some bubbles are almost inevitable, excessive bubbles and subsequent craters are definite advanced cookie decorating problems that detract from a flawless finish.
Solution: Eliminating Craters and Air Bubbles for a Smooth Finish
Preventing craters and bubbles starts with how you prepare your royal icing. Once the icing is made and colored, let it rest for 10-15 minutes to allow some of the trapped air to rise to the surface. Before filling your piping bags, gently stir the icing with a spatula, pressing it against the sides of the bowl to help release more air.
After flooding a section of a cookie, gently tap the cookie flat on your workspace surface a few times. This tapping action helps encourage air bubbles to rise. You can also use a scriber tool or a toothpick to gently swirl through the wet icing or poke any visible bubbles to pop them before the icing crusts over. Addressing these issues while the icing is still wet is key to avoiding these common advanced cookie decorating problems.
Proper Mixing Techniques for Royal Icing
To minimize trapped air from the start, use proper mixing techniques when making your royal icing. If using a stand mixer, use the paddle attachment, not the whisk attachment, which incorporates significantly more air. Mix on a low speed once ingredients are combined, just until the icing reaches the desired consistency. Avoid whipping the icing for extended periods.
If mixing by hand, use a spoon or spatula and a folding motion rather than a whisking motion. While hand mixing is more effort, it naturally incorporates less air than mechanical mixers. Proper mixing prevents many advanced cookie decorating problems related to icing texture and appearance.
Releasing Trapped Air Bubbles
After flooding a cookie section, gently but firmly tap the cookie on a flat surface. Hold the cookie horizontally and tap it against the counter several times, rotating it if necessary, to encourage bubbles to rise. You will often see small bubbles appear on the surface after tapping.
Immediately after tapping, use a scriber tool or toothpick to gently poke any visible bubbles. Swirl the tip of the tool slightly over the bubble to help the icing fill the void. For larger flooded areas, you can lightly drag the scriber tool through the wet icing in a swirling or zig-zag pattern to help distribute the icing evenly and release trapped air. Do this quickly before the icing starts to crust. This proactive step significantly reduces the likelihood of craters, solving a common advanced cookie decorating problem.
Problem 5: Working with Multiple Colors and Layers
The Complexity of Multi-Layered Cookie Designs
Multi-layered and multi-colored cookie designs are visually stunning but introduce significant complexity and potential advanced cookie decorating problems. Planning the sequence of colors and layers is crucial. If colors are applied in the wrong order or without sufficient drying time, bleeding is almost guaranteed. Different colors may also require different consistencies or drying times, adding another layer of challenge.
Managing multiple piping bags with different colors and consistencies simultaneously requires organization and efficiency. Ensuring that edges where colors meet are clean and that subsequent layers are applied smoothly without damaging the dried base layer are common hurdles. These designs demand not only artistic skill but also careful execution and patience to avoid frustrating advanced cookie decorating problems.
Solution: Successfully Layering Colors and Designs
Successful multi-layered decorating hinges on meticulous planning and respecting drying times. Sketch out your design beforehand, noting the order in which colors and layers should be applied. Generally, start with the lowest layer or background color, allow it to dry completely, then add the next layer, and so on. For adjacent colors that should remain distinct, pipe a dam or outline of one color and let it crust before flooding the adjacent area with a different color.
Use a fan or dehydrator to speed up drying between layers, especially for the base layer. This is perhaps the most effective way to prevent advanced cookie decorating problems like bleeding when working with multiple colors. Keep your workspace organized, labeling piping bags if necessary, and have all your required colors mixed and ready before you begin decorating.
Planning Your Color Scheme
Planning your color scheme involves deciding not just which colors to use, but where they will go and in what order they will be applied. Consider which colors will be adjacent to each other and which will be layered on top. If using dark and light colors next to each other, be extra vigilant about drying time to prevent the dark color from bleeding into the light one – a classic advanced cookie decorating problem.
Sketching your design on paper helps visualize the steps. Number the sections based on the order of application. Consider if any areas can be flooded with the same consistency simultaneously, or if they require separate steps. This pre-planning significantly reduces on-the-fly confusion and minimizes the chance of making mistakes that lead to advanced cookie decorating problems.
Allowing Each Layer to Dry Completely
This cannot be stressed enough: allow each layer of royal icing to dry completely before adding the next layer or adjacent color. "Completely dry" means the icing is hard to the touch, and you can gently run a finger over it without denting or smudging it. Depending on humidity and thickness, this can take anywhere from a few hours to overnight.
Applying wet icing onto partially dried icing is a recipe for advanced cookie decorating problems like smudging, cracking, and severe color bleeding. Using a fan directed at the cookies or placing them in a low-temperature food dehydrator (around 90-100°F or 32-38°C) can dramatically speed up this drying process, making multi-layered designs much more manageable and reducing the risk of failure.
Refrigerating Cookies Between Layers to Prevent Mixing
While air drying or using a fan/dehydrator is the standard for drying royal icing, sometimes a brief stint in the refrigerator can help firm up a layer quickly, especially in very humid environments, potentially helping to mitigate advanced cookie decorating problems like colors running slightly before they crust. However, be cautious with this method.
Refrigeration can introduce condensation when the cold cookie is brought back into warmer room temperature, which can cause colors to spot or bleed. If you choose to refrigerate, place the cookies in an airtight container before chilling, and allow the container to come mostly back to room temperature before opening it. This minimizes condensation risk. Use this method sparingly and primarily for speeding up crusting on a base layer, not as a substitute for proper drying time between complex layers.
Advanced Royal Icing Techniques and Problem Prevention
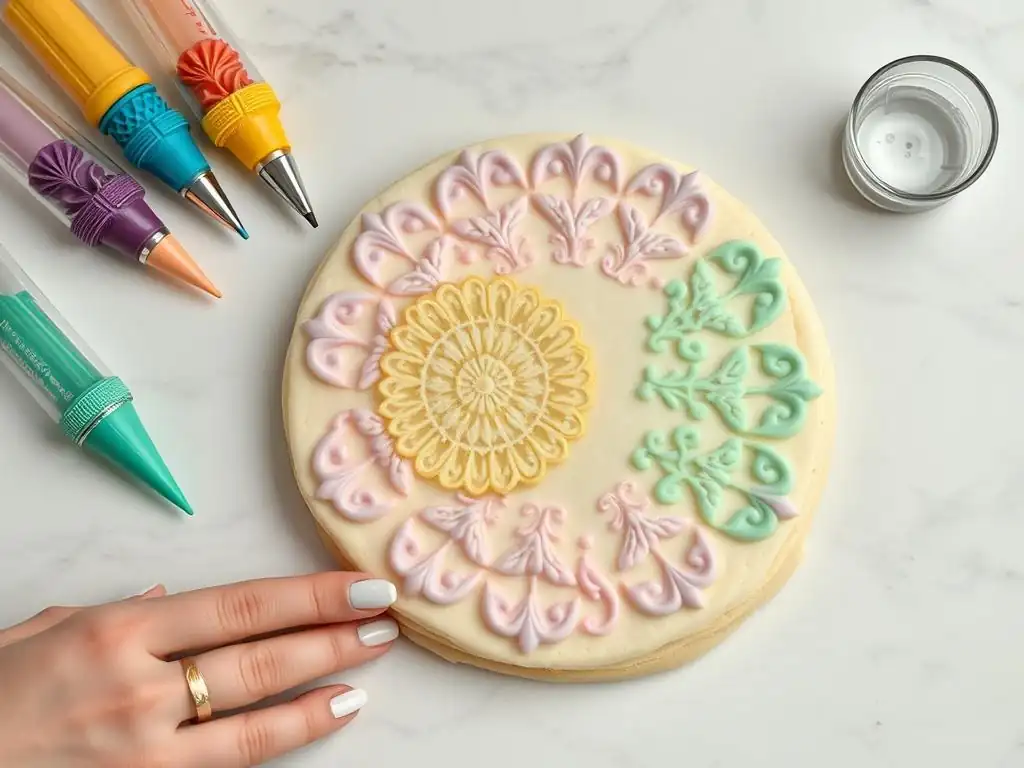
Mastering the Wet-on-Wet Technique
The wet-on-wet technique involves applying wet royal icing onto a wet flooded base coat, allowing the colors to merge and create smooth patterns like marbling, swirls, or polka dots that lie flat on the cookie surface. This technique is beautiful but requires speed and precise timing, presenting its own set of advanced cookie decorating problems if not executed correctly.
The main challenge is the timing: the base layer must still be wet enough for the added icing to sink into it, but not so wet that the colors spread uncontrollably. The consistency of both the base icing and the added colors must be just right – typically a flooding consistency (8-12 second count) for both. Working quickly before the base layer crusts is essential.
Common Wet-on-Wet Problems and How to Fix Them
One common advanced cookie decorating problem with wet-on-wet is the added colors not sinking fully into the base, resulting in raised lines instead of a smooth, flat surface. This usually means the base layer has started to crust. The fix? You can't really fix it on that cookie; you need to work faster on the next one or ensure your base icing consistency is slightly thinner.
Another issue is colors spreading too much, losing their defined pattern. This indicates the icing is too thin, or you're using too much of the added color. Adjust your icing consistency to be slightly thicker (closer to a 12-second count) for more control. If a mistake happens, immediately scrape off the wet icing and start over on that cookie before the icing sets. Practice is key to mastering the timing and consistency needed for this technique, minimizing these advanced cookie decorating problems.
Airbrushing adds a smooth, professional finish, gradients, and stenciled designs to cookies, offering possibilities beyond traditional piping. However, airbrushing comes with its own advanced cookie decorating problems, such as uneven coverage, overspray, speckling, and color bleeding, especially if the base icing isn't completely dry.
Ensuring your royal icing base is bone dry is paramount before airbrushing – ideally, let it dry overnight or use a dehydrator. Use edible airbrush colors specifically designed for this purpose. Thin colors can cause speckling; thick colors can clog the airbrush. Maintaining the airbrush equipment is also crucial; clogs are a frequent advanced cookie decorating problem.
Airbrushing Issues and Troubleshooting Tips
If your airbrush sprays unevenly or sputters, check the color consistency – it might be too thick. Clean your airbrush thoroughly between uses, paying close attention to the needle and nozzle, as dried color is the most common cause of clogs. If the airbrush isn't spraying at all, check the air pressure and ensure the needle isn't stuck forward.
Overspray can be prevented by using stencils or masking off areas you don't want colored. Hold the airbrush at a consistent distance and angle from the cookie surface and move in smooth, even strokes. For gradients, start spraying off the cookie and move onto it, releasing the trigger before moving off again. Practice on paper towels to get a feel for the coverage before working on your cookies, helping to avoid frustrating advanced cookie decorating problems.
Working with Edible Markers for Intricate Details
Edible markers are fantastic for adding tiny details, outlines, lettering, or coloring small areas on dried royal icing. They offer precision similar to drawing on paper, making them useful for intricate work. However, using edible markers on royal icing isn't always straightforward and can lead to advanced cookie decorating problems.
The surface texture of the dried icing matters; a perfectly smooth, hard surface works best. If the icing is soft, sticky, or has any moisture, the marker tip can get damaged or the color can bleed. Pressing too hard can also indent the icing or cause bleeding. The quality of the marker itself is also a factor; cheap markers may have inconsistent color or dry out quickly.
Edible Marker Problems and Solutions
A common advanced cookie decorating problem with edible markers is the color not flowing smoothly or the tip drying out. Ensure your royal icing is completely dry and hard before using markers – often 24 hours of drying time is best. If the tip seems dry, try dabbing it gently on a clean, damp paper towel for a second to reactivate the color, but be careful not to get it too wet.
If the marker is leaving patchy color or indenting the icing, you might be pressing too hard, or the icing isn't dry enough. Use a light touch, just letting the tip glide over the surface. If you need to cover a larger area, consider using thinned royal icing or airbrushing instead of a marker, as markers are best suited for fine lines and small details. Store markers properly, usually tip-down, to keep them ready for use.
Essential Tools for Overcoming Decorating Hurdles
The Right Piping Bags and Tips
Having a variety of high-quality piping bags and tips is essential for advanced cookie decorating. Disposable piping bags are convenient and hygienic, while reusable silicone or nylon bags offer durability. The key is choosing bags that are strong enough not to burst under pressure.
A collection of piping tips, especially small round tips like PME #1.5, #1, #2, and #3, is necessary for different line thicknesses and details. Investing in good quality seamless tips ensures smooth icing flow without ridges. Having multiple bags prepared with different colors and tips ready to go streamlines the decorating process and helps prevent advanced cookie decorating problems caused by rushing or constantly changing tips.
The Importance of a Good Scriber Tool
As mentioned earlier, a scriber tool is invaluable. Look for one with a fine, sharp point, often made of metal, attached to a comfortable handle. While a toothpick can work in a pinch, a dedicated scriber is more durable, has a finer point, and is easier to handle for detailed work and manipulating icing.
Use your scriber for popping air bubbles, nudging icing into shape, cleaning up edges, creating wet-on-wet designs, and even gently removing mistakes while the icing is still wet. It's a simple tool, but mastering its use is crucial for tackling many advanced cookie decorating problems and achieving a flawless finish.
If you plan to incorporate airbrushing into your advanced cookie decorating, investing in a dedicated edible airbrush kit is necessary. Look for a kit that includes a compressor with adjustable pressure and a gravity-feed airbrush gun, which is easiest to use and clean for edible colors.
Ensure you also have edible airbrush colors specifically formulated for use in airbrush machines. Proper cleaning supplies, such as airbrush cleaning solution and small brushes, are also essential to prevent clogs – a frequent advanced cookie decorating problem with this equipment. Regular maintenance will keep your airbrush functioning smoothly.
Royal Icing: Pro Tips and Tricks

Maintaining a Clean Workspace
Keeping a clean and organized workspace is vital for efficient and successful advanced cookie decorating. Have all your tools, colors, and cookies ready before you start. Cover unused icing to prevent it from crusting over. Clean up spills or mistakes immediately while they are still wet and easy to remove.
Working in a clean environment helps prevent dust, crumbs, or other debris from falling into your wet icing, which can ruin a smooth finish and create unnecessary advanced cookie decorating problems. A tidy workspace also allows you to focus on the intricate details of your design without distractions.
Proper storage is essential to protect your beautiful, finished cookies and prevent them from being damaged or affected by humidity, which can reactivate colors and cause bleeding. Once the royal icing is completely dry (often 24 hours or more), store cookies in a single layer in an airtight container at room temperature.
Avoid stacking cookies directly on top of each other unless they are completely dry and separated by parchment paper, as any slight stickiness can cause damage. Store cookies away from direct sunlight or heat sources, which can affect the color. Correct storage ensures your hard work lasts and prevents frustrating advanced cookie decorating problems after the fact.
Learning from Mistakes: Embracing the Learning Curve
Advanced cookie decorating is a skill that improves with practice. You will encounter advanced cookie decorating problems – colors will bleed, icing will crater, and lines may be wobbly. Embrace these moments as learning opportunities. Analyze what went wrong: Was the icing consistency off? Was the drying time too short? Was the humidity too high?
Keep a small notebook to jot down observations about what worked and what didn't. Each "failed" cookie is a lesson that helps you refine your techniques. Don't be discouraged; even experienced decorators face challenges. The willingness to learn from mistakes is perhaps the most important tool for mastering advanced cookie decorating.
Conclusion: Mastering Intricate Royal Icing Designs
Mastering intricate royal icing designs requires attention to detail, patience, and the ability to troubleshoot common advanced cookie decorating problems. Key takeaways include understanding and controlling royal icing consistency, using high-quality gel colors correctly, allowing ample drying time between layers (aided by fans or dehydrators), and practicing precise piping techniques with the right tools like fine tips and a scriber.
By addressing issues like color bleeding, craters, air bubbles, and achieving crisp lines proactively, you can dramatically improve the quality of your decorated cookies. Planning multi-layered designs, maintaining a clean workspace, and properly storing your finished art are also crucial steps in the process. Remember that overcoming advanced cookie decorating problems is part of the journey to becoming a skilled decorator.
Continued Learning and Resources on BakeWithEase.com
This guide has provided solutions to many common advanced cookie decorating problems, but the world of royal icing is vast and there's always more to learn. Continue practicing the techniques discussed here and don't be afraid to experiment with new designs and methods.
BakeWithEase.com offers a wealth of additional resources, including detailed tutorials on specific techniques, step-by-step guides for various designs, and tips for working with different types of icing and tools. Explore our site for more inspiration and guidance as you continue to hone your advanced cookie decorating skills and tackle increasingly complex and beautiful cookie projects.
Frequently Asked Questions
Cracking often occurs due to the icing drying too quickly. Use a humidifier or fan to slow the drying process. Also, ensure your royal icing has the correct consistency – not too thick.
Color bleeding usually happens when the icing is too thin or the colors are oversaturated. Use gel food coloring sparingly and allow the base layer to fully dry before adding detail work.
How can I achieve a perfectly smooth, glossy finish on my royal icing?
Achieving a smooth finish requires the right consistency and technique. Use a "flood consistency" royal icing and gently shake or tap the cookie to help the icing settle and remove air bubbles.
Unevenness is often due to inconsistent icing application. Use a piping bag with a small, round tip and maintain consistent pressure. Ensure your base coat is also smooth and even.
Cookie spreading can be minimized by chilling the dough thoroughly before baking. Use cold butter and avoid overmixing the dough. Also, bake on a parchment-lined baking sheet.
The pursuit of the perfect cookie is a journey, not a destination, and the challenges encountered along the way are as crucial to the process as the final, flawlessly decorated treat. This article has explored some of the most frustrating hurdles faced by advanced cookie decorators, from inconsistent flooding to intricate detailing gone wrong. These aren't just minor setbacks; they represent the constant push for improvement and innovation within a craft that demands both precision and artistry.
The world of advanced cookie decorating is a testament to human creativity and patience. It's a space where seemingly small details—the perfect consistency of icing, the precise application of a delicate stencil—can transform an ordinary biscuit into a miniature masterpiece. The dedication and skill involved are truly inspiring. The details are not the details. They make the design.
- Charles Eames. This quote perfectly encapsulates the importance of meticulous attention to detail in achieving truly exceptional results in cookie decorating. The ongoing evolution of techniques and the sharing of knowledge within the community only serves to elevate the art form further.
Now, it's your turn. Don't be discouraged by the challenges you face. Embrace them as opportunities for growth and learning. Remember the techniques discussed, experiment with new approaches, and most importantly, never stop striving for that perfect cookie. The journey itself, with all its triumphs and setbacks, is what truly defines the mastery of this delightful and intricate art. Let your creativity flow, and may your cookies always be as beautiful as they are delicious.
Thanks for diving deep into the world of advanced cookie decorating! We hope you gained valuable insights and new techniques to elevate your baking game. Ready to put your newfound skills to the test?
- Master a new decorating technique: Choose one challenge from the article—perhaps the perfect piping rose or intricate lacework—and dedicate some time this week to practicing it. Really focus on mastering that one skill.
- Share your creations: Post a picture of your masterpiece on social media and tag us! Let's celebrate your success together – we'd love to see your progress.
- Join our community forum: Got more questions or want to share tips with fellow bakers? Head over to our forum to connect with others who share your passion for cookie decorating.
What unexpected cookie decorating challenge are you excited to tackle next?