
Paint with Cocoa Butter for Rich Colors and Details on Cookies

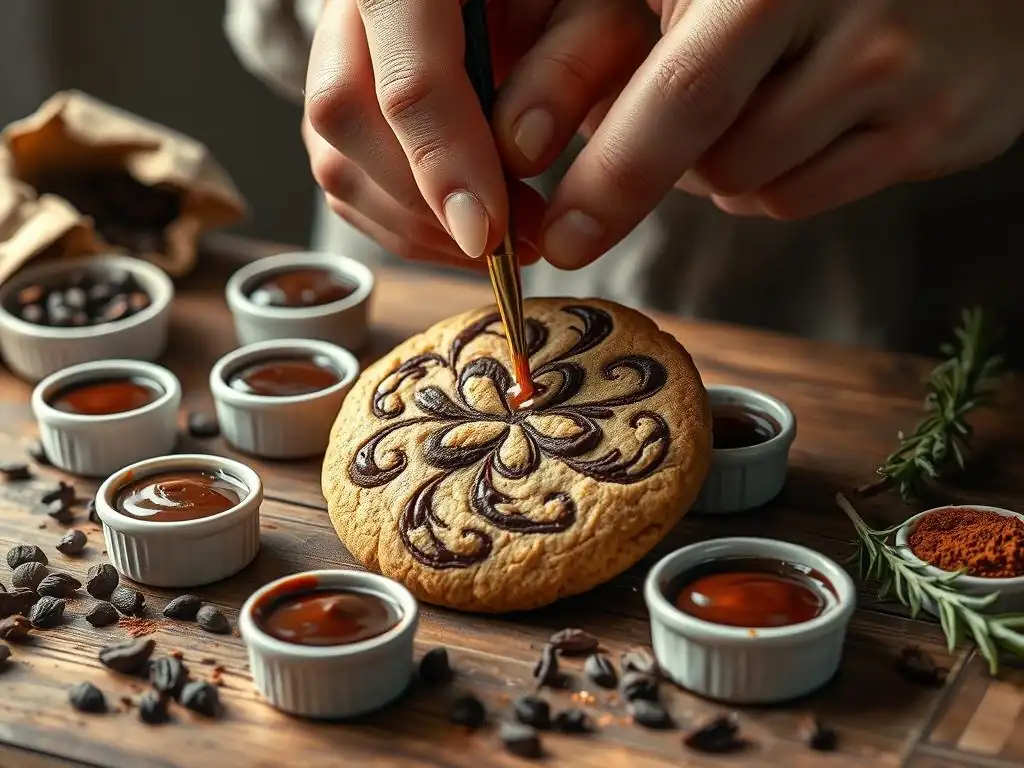
Welcome to BakeWithEase, your haven for baking brilliance! Ever dreamt of transforming ordinary cookies into edible masterpieces? Dive into the world of cocoa butter cookie painting, where vibrant colors and intricate details meet deliciousness. Discover how this surprising technique unlocks a new level of artistic expression in your pastry creations, and learn to paint like a pro. Ready to elevate your cookie game? Let's get started!
- Introduction to Cocoa Butter Cookie Painting
- Understanding Cocoa Butter for Cookie Art
- Essential Supplies for Cocoa Butter Cookie Painting
- Preparing Your Cocoa Butter Paints
- Step-by-Step Guide to Painting Cookies with Cocoa Butter
- Cocoa Butter Cookie Painting Techniques: Mastering the Details
- Troubleshooting Common Issues in Cocoa Butter Cookie Painting
- Cocoa Butter Cookie Painting Ideas and Inspiration
- Storing Your Decorated Cocoa Butter Cookies
- Conclusion: Unleash Your Creativity with Cocoa Butter Cookie Painting
- Frequently Asked Questions
- Final Reflection: The Enduring Allure of Cocoa Butter Cookie Art
- Unleash Your Inner Cookie Artist!
Taking your cookie decorating from beautiful to breathtaking often involves exploring new mediums, and cocoa butter cookie painting offers an incredible way to achieve depth, realism, and vibrant color that's hard to match with traditional methods alone. Imagine cookies with intricate floral patterns that look like they were painted on canvas, or character designs with subtle shading and highlights. This is the level of detail and artistry that cocoa butter allows.
It's a technique favored by professional cookie artists for its unique properties, providing a smooth, durable finish and the ability to layer colors without disturbing underlying layers once set. Mastering cocoa butter cookie painting opens up a whole new dimension of creative expression on your edible canvases.
While royal icing is fantastic for outlining and flooding, and fondant offers a smooth base, cocoa butter provides a paint-like consistency when melted and colored, allowing for brushstrokes, blending, and fine line work that mimics traditional painting techniques. This makes it ideal for adding realistic textures, achieving gradients, and incorporating tiny details that bring designs to life.
The process, while requiring some practice to get the temperature and consistency just right, is incredibly rewarding, transforming simple baked goods into edible works of art. It’s an advanced skill, but one that is accessible with the right guidance and a little patience.
Cocoa butter stands out as a superior medium for detailed cookie art primarily due to its unique behavior related to temperature. Unlike water-based mediums like food coloring mixed with alcohol or extract, cocoa butter is fat-based. This means it doesn't introduce moisture to your cookies, which can cause bleeding, softening, or an undesirable texture change over time.
When melted, it's liquid and flows beautifully for painting; when cooled, it sets hard, creating a durable, smudge-proof finish that protects your design. This solidification property is key – once a layer of cocoa butter paint is dry (which happens relatively quickly at room temperature or faster if chilled), you can paint over it without reactivating the layer underneath, enabling intricate layering and fine details.
Furthermore, cocoa butter provides a rich, slightly glossy finish that enhances the vibrancy of the colors. It pairs exceptionally well with oil-based or powdered food colors designed for chocolate or fat-based mediums, ensuring bright, true hues. The ability to control the opacity by adjusting the ratio of color to cocoa butter allows for everything from translucent washes to opaque, bold strokes. For anyone serious about pushing the boundaries of their cookie decorating skills and achieving professional-looking results, incorporating cocoa butter cookie painting into their repertoire is a logical and highly effective step.
At BakeWithEase, we believe that advanced techniques like cocoa butter cookie painting should be demystified and made accessible to passionate home bakers. Our approach focuses on breaking down complex processes into manageable steps, explaining the 'why' behind each action, and providing practical tips based on real-world baking and decorating experience.
We understand that venturing into new mediums can feel daunting, so we aim to build confidence through clear, encouraging instruction. This guide is designed to walk you through every aspect of cocoa butter cookie painting, from understanding the material properties to troubleshooting common issues, empowering you to create stunning edible art.
We emphasize using the right tools and high-quality ingredients, but also offer budget-friendly alternatives where possible. Our goal is not just to teach you a technique, but to help you understand the principles behind it, allowing you to adapt and innovate. Whether you're aiming to paint hyper-realistic portraits, intricate floral patterns, or vibrant abstract designs on your cookies, BakeWithEase provides the foundational knowledge and detailed guidance you need to succeed. We encourage experimentation and practice, knowing that every brushstroke is a step towards mastering this beautiful form of edible art.
What is Cocoa Butter and Its Properties?
Cocoa butter is the pure fat extracted from the cocoa bean. It's the key ingredient that gives chocolate its smooth texture and melt-in-your-mouth quality. In its unrefined state, it has a pale yellow color and a mild chocolate aroma, though refined versions are often whiter and less aromatic.
The crucial property of cocoa butter for cocoa butter cookie painting is its melting point, which is typically around 30-34°C (86-93°F) – conveniently just below average human body temperature. This low melting point means it's solid at room temperature but melts easily when warmed, making it perfect for creating a paint that sets quickly.
Chemically, cocoa butter is composed primarily of saturated and monounsaturated fats, specifically stearic, palmitic, and oleic acids. These fatty acids contribute to its stability and long shelf life compared to some other fats. For cookie decorating, its solid state at room temperature is a significant advantage, as it means your painted designs will be durable and resistant to smudging once set. This allows for easy handling and packaging of decorated cookies without damaging the intricate artwork. Understanding that you are essentially painting with a type of solid fat that liquefies with heat is fundamental to mastering this technique.
Comparing cocoa butter to royal icing and fondant highlights why it's uniquely suited for detailed painting. Royal icing, made from powdered sugar, meringue powder (or egg whites), and water, dries hard and is excellent for outlines, flooding, and creating dimensional details like flowers or leaves through piping. However, because it's water-based, adding too much liquid color can compromise its structure or cause colors to bleed, and achieving subtle shading or realistic blending with thin layers can be challenging. Royal icing is opaque and sets quickly, but layering wet-on-dry can sometimes leave visible lines.
Fondant is a sugar paste that provides a smooth, even surface, often used to cover cookies entirely. It can be painted on, but typically requires using alcohol-based colors (like vodka mixed with gel colors) which evaporate quickly. While this works for certain effects, the alcohol can sometimes subtly alter the fondant's surface, and achieving the fluidity and blending capabilities of melted cocoa butter is difficult.
Cocoa butter, being fat-based, doesn't interact with the cookie or base layer (like dried royal icing or chocolate) in the same way. It flows smoothly, allows for easy blending while wet, and sets to a solid, non-tacky finish, making it superior for achieving paint-like effects, realistic textures, and intricate, layered designs in cocoa butter cookie painting.
The benefits of using cocoa butter for detailed cookie designs are numerous and significant for advanced decorators. Firstly, its fat-based nature means colors mixed into it remain vibrant and true, without the dulling or bleeding issues sometimes encountered with water-based mediums on certain surfaces. You can achieve incredibly intense colors or subtle, translucent washes simply by adjusting the color-to-cocoa butter ratio. A small amount of high-quality oil-based or powdered food color goes a long way when mixed with melted cocoa butter.
Secondly, the ability to layer colors is a major advantage for cocoa butter cookie painting. Once a layer of cocoa butter paint has set (which takes just a few minutes at room temperature), you can paint directly over it without lifting or disturbing the layer underneath. This allows for building up complex designs, adding shadows and highlights, and creating depth and dimension that are difficult to achieve with single-layer mediums. This layering capability is essential for realistic rendering and intricate patterns.
Thirdly, the finished result is durable and smudge-proof. Once set, cocoa butter paint creates a solid coating that protects the design. This is particularly beneficial for cookies that will be handled, packaged, or shipped. The finish is smooth and often has a slight sheen, adding a professional touch. Finally, cocoa butter is edible and tastes neutral or subtly chocolatey, ensuring your beautiful cookies are also delicious.
The Role of Temperature in Cocoa Butter Painting
Temperature control is arguably the most critical factor in successful cocoa butter cookie painting. Because cocoa butter melts at a relatively low temperature and solidifies as it cools, maintaining the correct temperature for your paint is essential for optimal flow, consistency, and setting. If the cocoa butter is too hot, it will be very thin and might spread too much, potentially bleeding into other colors or creating translucent, streaky layers. It also increases the risk of damaging any underlying layers, such as dried royal icing, especially if they are thin.
Conversely, if the cocoa butter paint is too cool, it will start to thicken and solidify on your palette or brush. This results in a paint that is difficult to apply smoothly, leading to thick, uneven brushstrokes, clumping, and making fine details nearly impossible. The ideal temperature keeps the cocoa butter liquid enough to flow smoothly off the brush, allowing for controlled application, blending, and fine lines, but not so hot that it's difficult to manage.
This 'sweet spot' is typically just above its melting point, often achieved and maintained using a gentle heat source like a food-safe warming plate, a double boiler setup, or even carefully using a heat gun to re-melt small amounts on the palette as you work. Consistent temperature ensures consistent results in your cocoa butter cookie painting.
Cocoa Butter: Choosing the Right Type for Painting
When selecting cocoa butter for cocoa butter cookie painting, you'll typically encounter it in several forms: wafers, blocks, or sometimes even powder (though wafers or blocks are more common for melting and coloring). The most important factor is ensuring it is 100% pure cocoa butter and food-grade. Avoid confectionery coatings or compound chocolates that contain other fats, as these will behave differently and won't give you the desired results. Look for high-quality, pure cocoa butter specifically intended for chocolate making or confectionery.
You might find both refined and unrefined options. Unrefined cocoa butter retains more of the natural cocoa aroma and a pale yellow tint, which might subtly affect the color of your paints, especially light shades. Refined cocoa butter is processed to remove most of the color and aroma, resulting in a whiter, neutral base that is often preferred for achieving true, vibrant colors in cocoa butter cookie painting. Both types will work, but refined offers a cleaner canvas for your colors. Wafers are often the most convenient form as they melt easily and are pre-portioned.
Food-Grade Coloring: Oil-Based vs. Powdered
Choosing the correct type of food coloring is crucial for successful cocoa butter cookie painting. Since cocoa butter is a fat, you must use fat-soluble colorings. Water-based gel or liquid colors will not mix properly; they will bead up and separate, leading to an uneven, splotchy paint. The best options are oil-based food colorings or powdered food colorings specifically designed for use with chocolate or fat-based mediums.
Oil-based colors are liquid or gel consistency and mix smoothly into melted cocoa butter, providing vibrant hues. A little goes a long way, so start with a small amount and add more to achieve your desired shade. Powdered food colorings (like petal dusts or specific chocolate color powders) also work wonderfully and can offer very intense pigments.
They need to be thoroughly mixed into the melted cocoa butter to ensure no grainy texture remains. Avoid standard gel paste colors unless they are explicitly labeled as oil-based or suitable for chocolate. Using the right coloring agent is key to achieving beautiful, consistent results in your cocoa butter cookie painting.
Brushes: Selecting the Best Tools for Fine Details
Just like traditional painting, the quality and type of brushes you use significantly impact the outcome of your cocoa butter cookie painting. Because you'll often be working with melted cocoa butter, which is a fat, natural hair brushes (like sable or squirrel) are often preferred over synthetic ones. Natural bristles tend to hold and release fat-based paints more smoothly and maintain a finer point for detailed work. However, high-quality synthetic brushes designed for oil paints can also perform well.
You will need a variety of sizes and shapes. For fine details, outlines, and intricate work, small round brushes (sizes 0, 00, 000, or even smaller) with a sharp point are essential. For filling in larger areas or base coating, larger flat or round brushes can be useful.
Having a few angled brushes can help with specific strokes. It's wise to dedicate a set of brushes solely for edible use and clean them thoroughly with warm, soapy water (dish soap works well to cut the fat) immediately after use to prevent the cocoa butter from solidifying and ruining the bristles. Investing in a few good quality brushes will make a noticeable difference in the precision of your cocoa butter cookie painting.
Palette and Mixing Tools for Cocoa Butter Paints
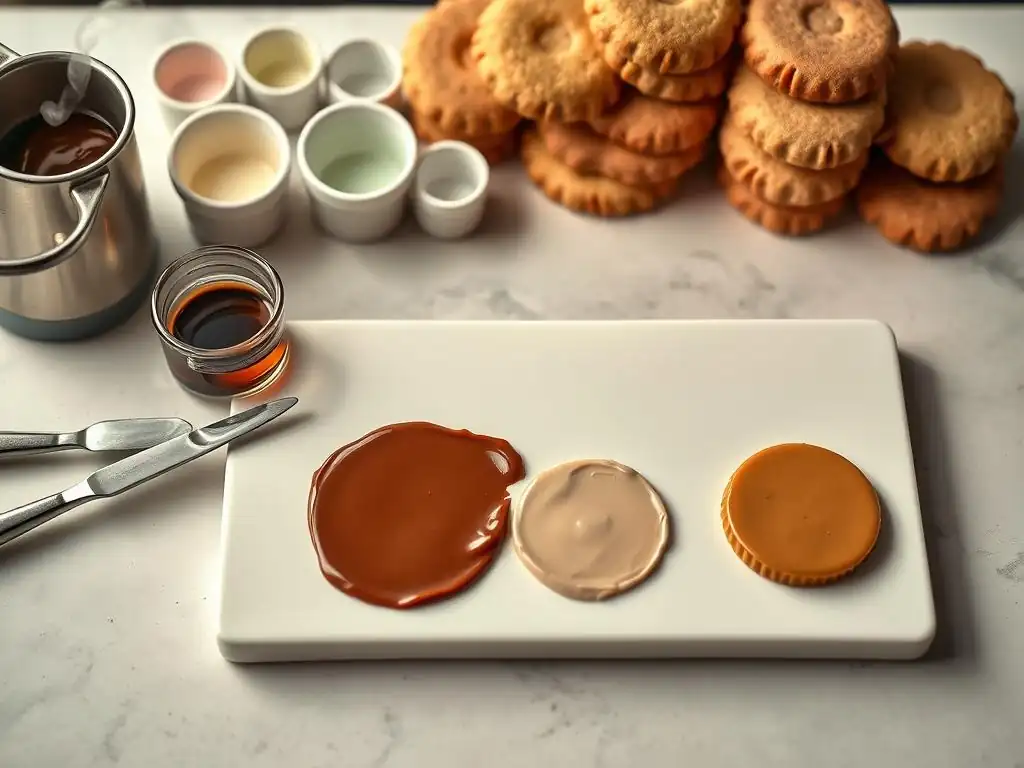
You'll need a surface to melt your cocoa butter and mix your colors. A simple ceramic plate, a glass palette (like those used for traditional painting), or even a small heat-safe bowl set over a gentle warming source works well. Some decorators use electric warming plates specifically designed for melting chocolate or candy melts, which offer consistent, low heat. A microwave-safe bowl or beaker is also necessary for the initial melting of the cocoa butter.
For mixing colors, small palette knives, metal spatulas, or even toothpicks can be used. You'll want tools that are easy to clean and won't absorb the fat. Small containers or wells on your palette can help keep different colors separate. Some artists use a heated palette setup, which keeps the mixed cocoa butter paints liquid while they work, eliminating the need to constantly reheat. This can be a significant advantage for complex designs requiring multiple colors. Having a dedicated, clean palette setup is fundamental to an organized and efficient cocoa butter cookie painting process.
Other Helpful Supplies: Heat Gun, Paper Towels
Beyond the core supplies, a few other items can be incredibly helpful for cocoa butter cookie painting. A small heat gun (used on a low setting) is invaluable for gently warming areas of your painted cookie to facilitate blending, smooth out brushstrokes, or quickly re-melt cocoa butter that has started to set on the cookie or your palette. It provides precise, controlled heat exactly where you need it. Be cautious not to overheat, as this can cause the cocoa butter to separate or damage the cookie.
Clean, lint-free paper towels are essential for wiping excess paint off your brushes and for cleaning brushes between color changes. Having a dedicated container for brush cleaning solution (warm soapy water) within easy reach is also important. A small fan can be useful for quickly setting layers of cocoa butter paint between steps, especially if you live in a warm environment. Finally, having a steady hand rest or support can help maintain control for very fine detail work, allowing you to execute precise movements during your cocoa butter cookie painting.
Preparing Your Cocoa Butter Paints
Melting Cocoa Butter: Techniques for Perfect Consistency
Melting cocoa butter to the correct consistency is the foundational step for successful cocoa butter cookie painting. Cocoa butter needs to be melted gently and evenly. Overheating can damage its structure, leading to a grainy texture or bloom later on, and also makes the paint too thin to control. The best methods involve indirect heat. A double boiler setup, where a heat-safe bowl containing the cocoa butter is placed over a pot of simmering (not boiling) water, is a classic method. Stir occasionally until fully melted.
Alternatively, cocoa butter wafers can be melted in the microwave in short bursts (15-30 seconds at a time) on a low power setting (50% or lower), stirring thoroughly after each burst. This method requires vigilance to prevent scorching. Once melted, the temperature should be just above its melting point, ideally between 32-35°C (90-95°F).
At this temperature, it should be fully liquid and flow smoothly. If it's too thick, it needs gentle warming; if it's too thin and greasy-looking, it might be too hot and needs to cool slightly. Achieving this perfect liquid state is key to smooth application in cocoa butter cookie painting.
Coloring Cocoa Butter: Achieving Vibrant Hues
Once your cocoa butter is melted and at the correct working temperature, it's time to add color. Remember to use only oil-based or powdered food colorings. Start with a very small amount of color, as these pigments are often highly concentrated. Add the color to the melted cocoa butter on your palette or in a mixing bowl.
Mix thoroughly using a small spatula or palette knife until the color is completely dispersed and there are no streaks or clumps of pigment. For powdered colors, ensure they are fully dissolved and blended into the fat. If using oil-based gels, mix until the color is uniform. To achieve more intense colors, gradually add more coloring, mixing well after each addition.
To lighten a color, add more melted, uncolored cocoa butter. Test the color on a piece of parchment paper or a scrap cookie; remember that the color may appear slightly different when it sets compared to when it's liquid. Achieving vibrant, consistent hues is essential for impactful cocoa butter cookie painting.
Mixing Colors: Creating Custom Shades for Your Designs
Creating custom shades for your cocoa butter cookie painting expands your artistic possibilities exponentially. Just like traditional painting, you can mix primary colors (red, blue, yellow – using oil-based versions) to create a wide spectrum of secondary and tertiary colors. For example, mixing blue and yellow cocoa butter paint will yield green, while mixing red and yellow will create orange. Adding a touch of black or brown can deepen a color, while adding white (using a white oil-based color or titanium dioxide powder mixed into cocoa butter) can create pastel shades.
It's best to mix larger quantities of frequently used custom colors at the start of your painting session to ensure consistency across your project. Mix colors on your palette, adding small amounts of each base color until you achieve the desired hue. Keep notes or take photos if you need to recreate a specific shade later. Remember that the temperature of the cocoa butter will affect how easily the colors mix; ensure it's liquid but not too hot. Mastering color mixing allows you to bring complex, nuanced visions to life through cocoa butter cookie painting.
Tips for Maintaining the Right Cocoa Butter Consistency
Maintaining the correct consistency of your cocoa butter paints throughout your decorating session is crucial. As you work, the cocoa butter on your palette will naturally start to cool and solidify, especially in cooler environments. If your paint becomes too thick, it will be difficult to work with. The ideal working temperature range is typically 32-35°C (90-95°F), which allows for smooth flow and controlled application.
To maintain this consistency, you can use a heated palette, a warming plate set on low, or a double boiler setup with very gentle heat underneath your palette. As you paint, if a color starts to thicken, you can gently warm it with a heat gun held several inches away, stirring with your brush to re-liquefy it. Alternatively, you can have a small amount of plain melted cocoa butter on hand to mix into thickening paints.
Working quickly, especially with fine details, also helps before the paint sets. Regularly checking and adjusting the temperature of your cocoa butter paints is a key skill in successful cocoa butter cookie painting.
The foundation of great cocoa butter cookie painting is a perfectly baked cookie. Sugar cookies are a popular choice due to their smooth surface and sturdy structure. Ensure your cookies are completely cool and dry before you begin decorating. Any residual heat can melt the cocoa butter prematurely, and moisture can cause issues with adherence or bleeding.
Some decorators prefer to apply a base layer before painting with cocoa butter. This could be a smooth layer of dried royal icing, a thin coating of melted and set chocolate or candy melts, or simply painting directly onto the bare cookie surface. A base layer can provide a uniform color background and a very smooth canvas, which is particularly helpful for detailed work.
If using royal icing, ensure it is completely dry – ideally left overnight or dried in a dehydrator – before applying any cocoa butter paint. A smooth, stable surface is paramount for achieving clean lines and details in your cocoa butter cookie painting.
Step 2: Base Coating (Optional)
Applying a base coat using cocoa butter paint can provide a vibrant, opaque background for your detailed designs. This step is optional but can be very effective, especially if you want a colored background that isn't achievable with royal icing or if you're painting directly onto the cookie. To base coat, melt a larger quantity of cocoa butter and mix in your desired color until you achieve the opacity you need.
Apply the colored cocoa butter evenly over the cookie surface using a larger, soft brush. Work quickly as the cocoa butter will start to set. You can apply one or two coats for full opacity, allowing each coat to set completely before applying the next. Aim for a thin, smooth layer. Once the base coat is fully set – it should be dry and hard to the touch, usually within a few minutes – you have a perfect colored canvas ready for the intricate details of your cocoa butter cookie painting.
Step 3: Painting Your Design: Layering and Detailing
This is where the magic of cocoa butter cookie painting happens. Using your prepared cocoa butter paints and fine brushes, begin applying your design. Start with the background elements or larger color blocks, then move to details. Remember that cocoa butter sets quickly, so work efficiently, especially when blending.
Apply paint in thin layers. You can layer colors once the underlying layer is set, which allows for building up depth and complexity. For blending, apply two colors side-by-side while they are both still wet and gently blend them together with a clean brush.
For adding details like lines, dots, or small shapes, ensure your paint is at the correct consistency – liquid but not too thin – and use a fine-tipped brush. Practice your brushstrokes on a piece of parchment paper before applying them to the cookie. Take your time, allow layers to set, and build your design gradually, bringing your cocoa butter cookie painting vision to life.
Step 4: Setting the Cocoa Butter Paint for a Durable Finish
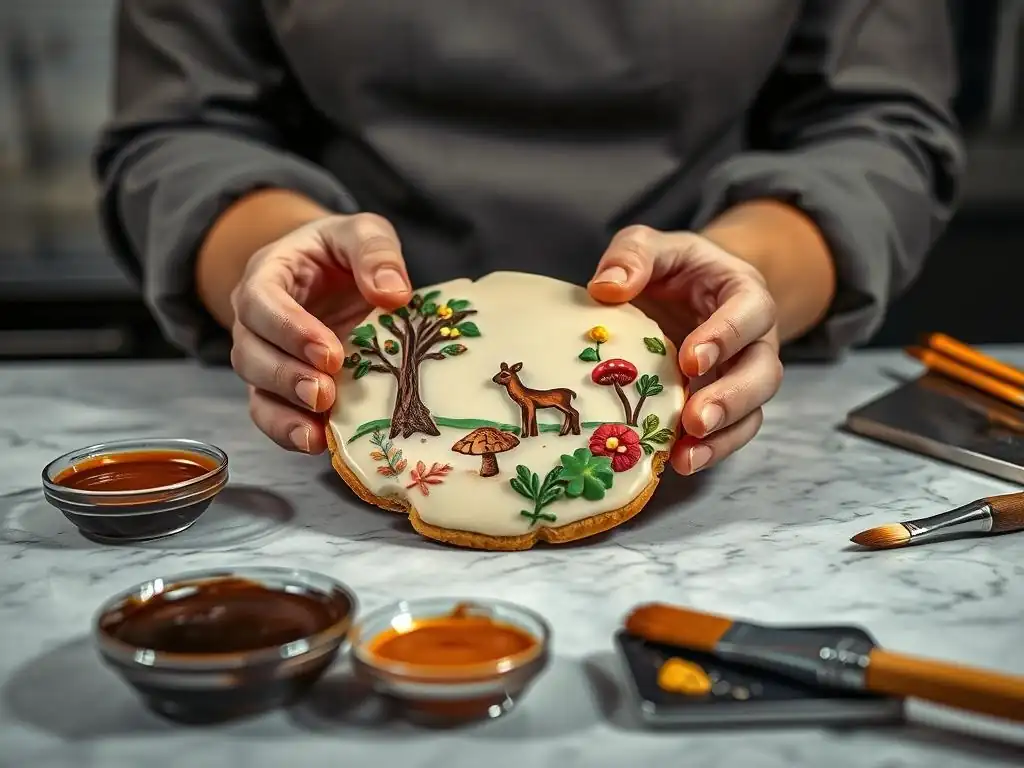
Once you have finished painting a section or the entire design, the cocoa butter paint needs to set completely to become durable and smudge-proof. At average room temperature (around 20-22°C or 68-72°F), thin layers of cocoa butter paint will typically set within 5-10 minutes. Thicker applications may take a bit longer.
To speed up the setting process, especially when working on multiple layers or in warmer conditions, you can gently cool the cookies. Placing them in the refrigerator for a few minutes (3-5 minutes is usually sufficient) will quickly solidify the cocoa butter. Avoid placing them in the freezer for extended periods, as extreme temperature changes can sometimes cause issues.
Once the cocoa butter feels completely hard and dry to the touch, the layer or the entire design is set and ready for handling, further layering, or packaging. Proper setting ensures the longevity and robustness of your cocoa butter cookie painting.
Step 5: Adding Final Touches and Embellishments
After your cocoa butter cookie painting is fully set, you can add final touches and embellishments to enhance your design. This could include outlining elements with a very fine brush and a slightly darker shade of cocoa butter paint, adding metallic accents using edible gold or silver dust mixed with a tiny amount of clear alcohol (like vodka) or lemon extract (note: use alcohol/extract after the cocoa butter is set, as alcohol will not mix with the cocoa butter itself), or adding edible glitter or sprinkles to specific areas before the cocoa butter fully sets.
You can also use other mediums in conjunction with cocoa butter, such as adding royal icing details for dimension or attaching small sugar decorations. Just ensure that any additional wet mediums are applied carefully so they don't disturb the cocoa butter paint. Take a step back and look at your finished piece to see if any small details are missing or could enhance the overall effect. These final touches can elevate your cocoa butter cookie painting from great to truly spectacular.
Dry Brushing Technique for Texture
The dry brushing technique is excellent for adding texture, shading, and a slightly diffused look to your cocoa butter cookie painting. It's particularly effective for creating effects like fur, wood grain, soft shadows, or a dusty appearance. To perform dry brushing, dip your brush into a small amount of cocoa butter paint, then wipe almost all of it off onto a paper towel or the edge of your palette until the brush seems nearly dry.
With the brush holding minimal paint, lightly sweep or dab it over the cookie surface. The brush strokes will be visible, and the paint will deposit unevenly, highlighting the texture of the surface (even if it's just the slight texture of dried royal icing or the cookie itself). For more intense texture, use a brush with stiffer bristles. Experiment with the amount of paint left on the brush and the pressure you apply to achieve different effects. This technique requires practice but is invaluable for adding realistic details to your cocoa butter cookie painting.
Wet-on-Wet Technique for Blending Colors
The wet-on-wet technique in cocoa butter cookie painting is used to blend colors smoothly together, creating gradients, soft transitions, and seamless shading. This technique must be performed while the cocoa butter paints are still liquid on the cookie surface. Apply one color, then immediately apply a second color next to or overlapping the first.
While both colors are still wet, gently merge them using a clean brush or by lightly swirling the brush where the colors meet. The key is to work quickly before the cocoa butter starts to set.
You can use a heat gun on a very low setting held at a distance to keep the area slightly warm and extend the working time for blending, but be careful not to melt adjacent areas you don't want to blend. This technique is perfect for creating realistic skin tones, soft backgrounds, or blended elements like flower petals, adding depth and realism to your cocoa butter cookie painting.
Layering Colors for Depth and Dimension
Layering colors is a fundamental technique in cocoa butter cookie painting, allowing you to build up complex images with depth and dimension. Because cocoa butter sets quickly and doesn't reactivate underlying dry layers, you can paint layer upon layer without muddying your colors. Start with your base colors or background elements, allow them to set completely, and then add subsequent layers for details, shadows, highlights, and textures.
For example, when painting a leaf, you might start with a base layer of medium green, allow it to set, then add darker green shadows, allow that to set, and finally add lighter green or yellow highlights. Each layer adds complexity and realism. You can also layer translucent washes to build up color intensity gradually. This technique requires patience as you wait for each layer to dry, but it is essential for achieving realistic effects and intricate designs in your cocoa butter cookie painting.
Creating Realistic Effects with Cocoa Butter Paints
Achieving realism in cocoa butter cookie painting involves combining several techniques, including layering, blending (wet-on-wet), and dry brushing. To create realistic textures like fur, use the dry brushing technique with fine strokes. For realistic skin tones or gradients, utilize wet-on-wet blending. To paint realistic eyes or reflective surfaces, employ layering to build up colors and add precise highlights.
Observe real-life objects or reference photos to understand how light hits surfaces and creates shadows and highlights. Translate this understanding into your painting by applying darker shades in areas of shadow and lighter shades or pure white (mixed with cocoa butter) in areas of highlight. Building up these variations in tone and color through careful layering and blending is key. Practice painting simple realistic elements like spheres, cubes, or folds of fabric on practice cookies to hone your skills before tackling more complex subjects in your cocoa butter cookie painting.
Achieving Fine Lines and Intricate Details
Cocoa butter is an excellent medium for achieving extremely fine lines and intricate details in your cookie art. The key is having the right consistency of paint and using the correct brushes. For fine lines, the cocoa butter paint needs to be liquid enough to flow smoothly but not so thin that it spreads uncontrollably. A consistency similar to ink or thin acrylic paint is usually ideal.
Use the smallest round brushes you have (sizes 000, 00, or 0) with a sharp point. Load the brush with paint, removing any excess, and draw the line with a steady hand. For intricate patterns, break the design down into small, manageable sections. Allow lines to set before adding adjacent or crossing lines to prevent blurring. Practicing your lines and brush control on parchment paper before working on the cookie is highly recommended. With practice, you can achieve incredibly delicate and detailed work, making your cocoa butter cookie painting truly stand out.
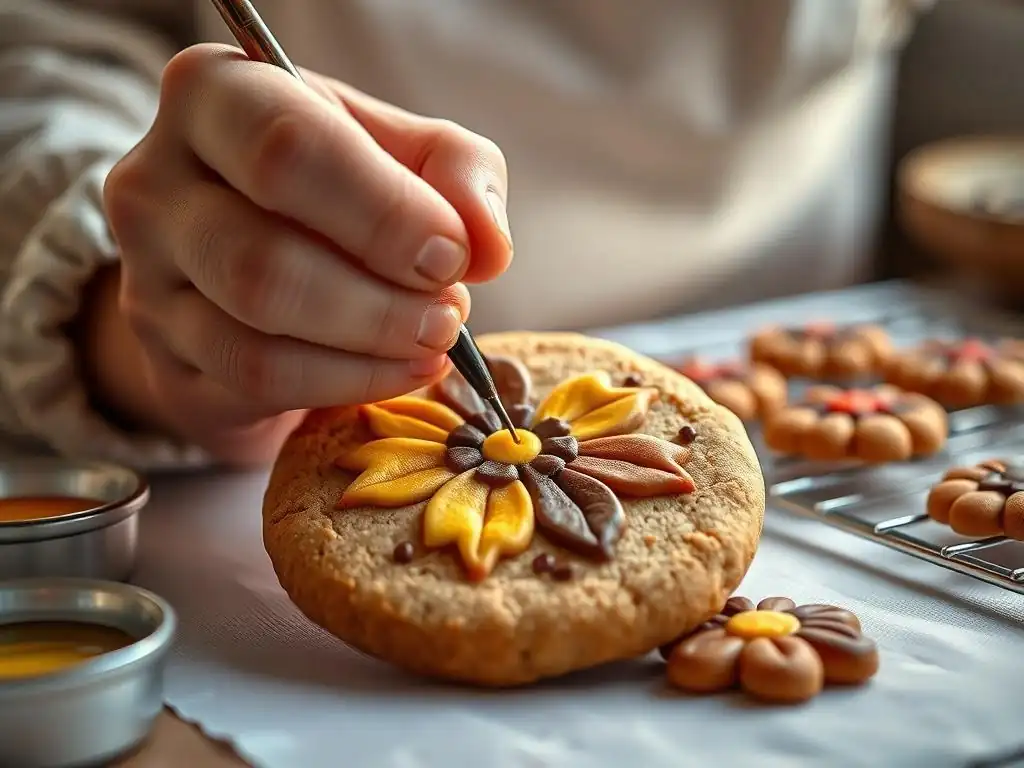
Cocoa Butter Not Melting Properly
If your cocoa butter isn't melting properly, it could be due to insufficient heat, or it might not be pure cocoa butter. Ensure you are using a gentle, indirect heat source like a double boiler or microwave on a low power setting. If using the microwave, stir frequently between short intervals (e.g., 15-20 seconds). Cocoa butter melts between 30-34°C (86-93°F); if your environment is cooler, it will need external heat.
Also, verify that you are using 100% pure cocoa butter and not a compound coating or confectionery melt, which may contain other fats with different melting points. If the cocoa butter seems grainy after melting, it might have been overheated or cooled and reheated improperly (though tempering isn't usually strictly necessary for cookie painting, overheating can still cause issues). Ensure your equipment is dry, as even a tiny amount of water can cause cocoa butter to seize and become unusable for painting. Patience and gentle heat are key to getting the right consistency for your cocoa butter cookie painting.
Colors Bleeding or Fading
Colors bleeding in cocoa butter cookie painting is less common than with water-based mediums, but it can happen if the underlying layer isn't fully set, or if you are using excessive heat (like a heat gun too close) which re-melts underlying paint. Ensure each layer is completely set and hard to the touch before painting over it. Work in a cool environment if possible, or use refrigeration briefly to set layers.
Fading can occur if the colorant used isn't suitable for fat-based mediums or if it's not a high-quality, lightfast edible pigment. Always use oil-based or powdered colors specifically designed for chocolate. Storing finished cookies away from direct sunlight will also help prevent color degradation over time. If you experience significant bleeding or fading, double-check your color types and ensure your layers are fully set before proceeding with your cocoa butter cookie painting.
Paint Cracking or Peeling
Paint cracking or peeling can sometimes happen, although it's relatively rare with pure cocoa butter if applied in thin layers. One cause could be applying a very thick layer of cocoa butter paint, which might be more brittle once set, especially if the cookie flexes slightly. Applying paint in thin, multiple layers is always preferable for both detail and durability.
Another potential reason is painting onto a surface that isn't completely dry or stable, such as slightly soft royal icing. Ensure your base layer (if any) is rock hard before painting. Extreme temperature fluctuations during storage might also contribute to cracking, so store cookies at a stable room temperature. If you encounter cracking, try applying thinner layers in the future and ensuring your cookie base is completely set before starting your cocoa butter cookie painting.
Achieving the Right Consistency for Smooth Application
Struggling to get the right consistency for smooth application is a common challenge in cocoa butter cookie painting. If the paint is too thick, it's likely too cool. Gently warm it on your palette using a warming plate or heat gun until it flows smoothly off your brush. If it's too thin and feels greasy or spreads too much, it's too hot and needs to cool down slightly.
The ideal consistency should allow the paint to flow freely enough for fine lines and smooth strokes but have enough body to hold its shape slightly and provide good color coverage. It's a delicate balance that improves with practice. Keep a thermometer handy to check the temperature of your melted cocoa butter until you develop a feel for the right consistency by eye and brush feel. Adjusting the temperature is the primary way to control the flow and consistency of your cocoa butter paint for optimal cocoa butter cookie painting results.
Unleash your creativity with the vast possibilities of cocoa butter cookie painting! The technique is perfect for creating stunning floral designs, from detailed roses with layered petals to delicate wildflowers with fine stems and leaves. Paint realistic animal portraits, capturing the texture of fur and the sparkle in eyes. Create miniature landscapes, complete with blended skies, textured trees, and detailed foregrounds.
Inspired by fine art? Recreate famous paintings on cookies, mimicking brushstrokes and color palettes. Design intricate patterns like mandalas or lace using fine lines and dots. Paint characters from movies, books, or games, achieving subtle shading and highlights that bring them to life. Use cocoa butter to add metallic accents or pearl finishes to elevate your designs. Look to nature, photography, or traditional art for inspiration. With cocoa butter, your cookies become a canvas for almost any artistic vision you can imagine, pushing the boundaries of edible art and creating truly unique pieces through cocoa butter cookie painting.
Best Practices for Maintaining Color and Texture
Proper storage is essential to preserve the beauty and quality of your cocoa butter cookie painting. Once the cocoa butter is completely set, the cookies can be stored at room temperature in an airtight container. Layer cookies carefully, using parchment paper or wax paper between layers to prevent the painted surfaces from touching and potentially sticking or scratching.
Keep the container away from direct sunlight, heat sources, and excessive moisture. Direct sunlight can cause colors to fade over time, and heat can soften or melt the cocoa butter. A stable room temperature (around 20-22°C or 68-72°F) is ideal. Storing cookies in these conditions helps maintain the vibrant colors and the smooth, hard texture of the cocoa butter paint, ensuring your cocoa butter cookie painting remains pristine.
Preventing Blooming and Other Storage Issues
One potential issue when storing cocoa butter creations is "bloom," which can manifest as a grayish, fuzzy, or streaky appearance on the surface. There are two main types: sugar bloom (caused by moisture drawing sugar to the surface) and fat bloom (caused by fat crystals separating and rising to the surface, often due to temperature fluctuations). While fat bloom is more common in chocolate itself, it can potentially affect cocoa butter paint if not handled or stored correctly.
To prevent blooming and other storage issues with your cocoa butter cookie painting, avoid significant temperature fluctuations. Do not move cookies directly from a cold refrigerator to a warm, humid room, as condensation can cause sugar bloom. Store them at a consistent, moderate temperature. Ensuring the cocoa butter was melted gently and not overheated during the painting process can also help prevent fat bloom. Proper airtight storage protects against moisture and environmental factors. By following these best practices, you can significantly extend the shelf life and visual appeal of your stunning cocoa butter cookie painting creations.
Cocoa butter cookie painting is a rewarding advanced technique that allows you to create truly stunning, detailed, and vibrant edible art. By understanding the unique properties of cocoa butter, selecting the right supplies, mastering temperature control, and practicing key painting techniques like layering, blending, and dry brushing, you can transform simple cookies into intricate masterpieces. While it requires patience and practice, the ability to achieve fine lines, realistic shading, and durable, brilliant colors makes cocoa butter an unparalleled medium for detailed cookie decoration.
Embrace the learning process, experiment with colors and techniques, and most importantly, have fun bringing your artistic visions to life on a delicious canvas. Start exploring the world of cocoa butter cookie painting today and elevate your cookie art to new heights!
Frequently Asked Questions
Cocoa butter cookie painting involves using colored cocoa butter to create intricate designs on cookies. It's a great way to add professional-looking details and rich, vibrant colors that are edible and delicious!
You should use 100% pure cocoa butter, preferably deodorized to avoid any strong cocoa flavor interfering with your designs. Make sure it's food-grade and suitable for melting and painting.
You can color cocoa butter with oil-based food coloring or powdered food coloring specifically designed for fats. Avoid water-based colors, as they will cause the cocoa butter to seize and become unusable.
You'll need small paintbrushes (various sizes), a palette or small containers for your colored cocoa butter, and a heat source (like a warming plate or double boiler) to keep the cocoa butter melted. Also, consider using stencils for precise designs.
Ensure the cookies are completely cooled before painting. Also, avoid applying too thick a layer of cocoa butter at once. Multiple thin layers are preferable to prevent cracking.
The artistry of painting cookies with cocoa butter isn't just a fleeting trend; it's a testament to the enduring power of creativity and the simple joy of handcrafted treats. This technique, explored in detail throughout this article, offers a unique blend of edible artistry and delicious results, proving that even the most seemingly mundane tasks can be elevated to an art form. The vibrant colors and intricate details achievable with cocoa butter open up a world of possibilities for bakers of all skill levels.
The impact of this simple technique extends beyond the individual baker, touching upon a broader cultural appreciation for handmade goods and the slow, mindful process of creation. It's a rebellion against the mass-produced, a return to the tactile satisfaction of working with your hands and creating something beautiful and delicious. As the renowned chef Julia Child once said, Find something you're passionate about and keep tremendously interested in it.
This perfectly encapsulates the spirit of cocoa butter cookie painting – a passion project that yields both stunning results and immense personal satisfaction.
Now, it's your turn. Consider the possibilities. Imagine the designs you could create, the flavors you could combine, the joy you could bring to others with your unique cocoa butter cookie creations. Don't just read about this technique; experience it. Gather your ingredients, let your imagination run wild, and discover the artist within. The world of cocoa butter cookie painting awaits – and your masterpiece is just a brushstroke away.
Thanks for taking the time to explore the world of cocoa butter cookie painting! We hope you’ve discovered a new level of detail and richness you can bring to your baking. Now it's time to put your newfound knowledge into practice.
- Master the Melt: Experiment with different melting techniques to achieve your perfect cocoa butter consistency for painting. Try a double boiler, microwave, or even a carefully warmed saucepan.
- Share Your Creations: Show off your beautifully painted cookies! Post pictures on social media and tag us—we'd love to see your artistic masterpieces.
- Dive Deeper: Explore other natural food colorings and discover how to achieve even more vibrant hues for your baked goods. (Think turmeric, beetroot, or spirulina!)
What incredible cookie designs will you create next?