
Impress Your Guests: Simple LargeBatch Treats Guide

Welcome to BakeWithEase!
Are you ready to dazzle at your next gathering without spending all day in the kitchen? Dive into our guide to large batch dessert recipes and discover the secrets to effortless entertaining. We'll show you how to create delicious, impressive treats that will have your guests begging for more. Intrigued? Keep reading to unlock our simple secrets for baking success!
- Impress Your Guests: Simple Large-Batch Treats Guide - BakeWithEase
- Introduction: Effortless Baking for a Crowd with BakeWithEase
- Why Choose Large-Batch Dessert Recipes?
- Planning Your Large-Batch Dessert Menu
- Essential Tools and Equipment for Large-Batch Baking
- Our Top 5 Simple Large-Batch Dessert Recipes
- Tips for Success: Mastering Large-Batch Dessert Baking
- Scaling Recipes Up: How to Adjust for Larger Quantities
- Serving and Presentation Ideas for Your Large-Batch Treats
- Conclusion: Bake With Ease and Delight Your Guests!
- Frequently Asked Questions
- Final Reflection: The Sweetness of Shared Moments
- Unleash Your Inner Baker: Elevate Your Next Gathering!
Impress Your Guests: Simple Large-Batch Treats Guide - BakeWithEase
Introduction: Effortless Baking for a Crowd with BakeWithEase
BakeWithEase: Your Partner for Easy and Delicious Large-Batch Baking
Planning a party, holiday gathering, or just a large family dinner can feel overwhelming, especially when it comes to the dessert course. The thought of baking enough treats to satisfy everyone might seem daunting, conjuring images of endless hours in the kitchen and mountains of dirty dishes. But what if there was a way to bake delicious, crowd-pleasing desserts without the stress?
That's where BakeWithEase comes in, offering simple, straightforward guidance specifically tailored for baking on a larger scale. We believe that creating delightful large batch dessert recipes should be an enjoyable part of the planning, not a source of anxiety.
At BakeWithEase, we demystify the process of baking for many. We provide tested methods, practical tips, and easy-to-follow large batch dessert recipes that ensure your treats turn out perfectly every time, no matter the size of your guest list.
From choosing the right recipes that scale well to utilizing essential tools and mastering efficient techniques, we cover everything you need to confidently bake for a crowd. Our goal is to help you spend less time worrying about the dessert and more time enjoying the company of your guests, all while serving up homemade goodness that will leave a lasting impression.
Why Choose Large-Batch Dessert Recipes?
Stress-Free Entertaining: The Benefits of Baking in Bulk
Choosing large batch dessert recipes significantly reduces the stress associated with entertaining. Instead of baking multiple small batches throughout the day or even the week leading up to an event, you can consolidate your baking efforts into fewer, more efficient sessions. Imagine making one large pan of brownies that yields 48 servings, versus baking four standard 8x8 pans individually. This consolidation drastically cuts down on prep time, mixing time, and oven time, freeing you up to focus on other aspects of hosting, or simply relaxing before your guests arrive.
Furthermore, baking in bulk simplifies the cleanup process. Fewer mixing bowls, fewer baking sheets, and less overall mess mean less time spent scrubbing and more time enjoying the fruits of your labor. This streamlined approach makes hosting large gatherings much more manageable and enjoyable, transforming the potentially chaotic task of dessert preparation into a smooth, stress-free operation. Embracing large scale baking allows you to be a present and relaxed host, rather than being stuck in the kitchen until the last minute.
Save Time and Money with Bulk Dessert Preparation
Opting for large batch dessert recipes is not only convenient but also economically savvy. Buying ingredients in larger quantities, like a 10-pound bag of flour or a bulk package of chocolate chips, is typically more cost-effective per unit than purchasing smaller packages. When you're baking for many, these savings can add up significantly, making your entertaining budget stretch further. Additionally, using ingredients efficiently in bulk recipes minimizes waste, as you're less likely to have small leftover amounts of various components.
Beyond ingredient costs, baking in bulk saves precious time, which is often the most valuable resource when preparing for a party. Consider the time saved by preheating the oven just once for a massive batch of cookies that fills multiple trays simultaneously, compared to heating it repeatedly for small batches.
Preparing large batches of easy desserts also means less active cooking time; you're mixing one big bowl instead of several, and monitoring one or two large pans in the oven instead of a continuous stream of smaller ones. This efficiency allows you to knock out the dessert contribution quickly, leaving you with more time for decorating, cooking other dishes, or simply taking a break.
Perfect for Parties: Delicious Treats for Every Occasion
Large batch dessert recipes are inherently designed for sharing, making them the ideal choice for any party or large gathering. Whether it's a birthday celebration, a holiday feast, a potluck, or a casual backyard BBQ, having an abundance of delicious treats ready to go is a host's dream. Desserts baked in bulk, such as sheet pan cookies, bar cookies, or large cobblers, are easy to transport, serve, and enjoy, catering perfectly to the flow of a party where guests might be mingling and snacking over an extended period.
The variety available within large batch dessert recipes means you can easily cater to different tastes and preferences within your guest list. You could prepare a large pan of classic chocolate chip cookie bars alongside a refreshing lemon bar recipe, ensuring there's something for everyone. This approach not only simplifies your baking but also enhances the guest experience, offering choices and ensuring no one misses out on a sweet ending to the meal. Baking for a crowd becomes a joyous act of sharing, creating a focal point of deliciousness that brings people together.
Consider Your Guests' Dietary Needs and Preferences
When planning large batch dessert recipes for a gathering, the first step is always to consider the people you're baking for. Do any of your guests have allergies, such as nuts or gluten? Are there vegetarians or vegans attending? Understanding these needs upfront is crucial for ensuring everyone can safely enjoy your treats. It might mean making one large batch of a standard recipe and a smaller, separate batch of a modified version (like gluten-free brownies), or choosing recipes that are naturally accommodating, such as a fruit cobbler that can be easily made vegan.
Polling your guests informally or sending out a quick message can provide valuable insights into preferences beyond dietary restrictions. Are they chocolate lovers, fruit enthusiasts, or do they prefer something light and refreshing? While you can't please everyone with a single dessert, offering a couple of different large batch dessert recipes can cater to a wider range of tastes. For instance, pairing a rich, decadent chocolate sheet cake with a bright, citrusy large batch of lemon bars ensures variety and increases the likelihood that every guest finds something they love.
Choose Recipes That Can Be Made Ahead
One of the biggest advantages of baking for a crowd is the ability to prepare many things in advance. When selecting large batch dessert recipes, prioritize those that hold up well or even improve with a day or two of storage. Cookies, brownies, bar cookies, and many types of cakes and cobblers are excellent candidates for make-ahead baking. These desserts can often be baked entirely, cooled completely, and then stored at room temperature, in the refrigerator, or even frozen until closer to the event.
Making components ahead is another strategy. Pie crusts, cookie dough, and crumble toppings can often be prepared days in advance and stored appropriately. This breaks down the baking process into smaller, more manageable tasks spread out over time, reducing the last-minute rush. For example, you could make a large batch of cookie dough on Monday, bake the cookies on Wednesday, and then simply arrange them on a platter on Saturday for a weekend party. This phased approach makes tackling even large batch dessert recipes feel less daunting and allows you to enjoy the anticipation of your event.
Select Desserts That Travel Well (If Needed)
If your gathering isn't at your home, or if you need to transport your treats to a different location, choosing large batch dessert recipes that travel well is essential. Desserts that are sturdy, don't require refrigeration (or can withstand being out for a few hours), and are easy to portion and pack are ideal. Bar cookies, brownies, cookie bites, and loaf cakes (baked in multiple loaves) are fantastic options. They can be cut into portions ahead of time and packed snugly into containers, minimizing the risk of damage during transit.
Avoid delicate desserts like layered cakes with unstable frostings, pastries with flaky crusts that might crumble easily, or anything that needs to be served at a very specific temperature unless you have reliable temperature-controlled carriers. A large pan of rice krispie treats, for example, is incredibly portable and requires no special handling beyond keeping it covered. When selecting your bulk dessert recipes, always visualize the journey from your kitchen to the serving table and choose options that will arrive looking just as good as they did when they left the oven.
Essential Tools and Equipment for Large-Batch Baking
Must-Have Baking Pans and Dishes
Baking large batch dessert recipes requires appropriately sized vessels. Standard 9x13 inch baking pans are incredibly versatile for cakes, brownies, and bar cookies, yielding around 24-36 servings depending on how you cut them. For even larger quantities, consider investing in half sheet pans (typically 18x13 inches), which can hold a massive amount of cookie dough or a generous single layer cake, easily yielding 48-72 servings. Having multiple pans of these sizes allows you to bake more at once if your oven permits.
Beyond sheet pans, consider extra-large mixing bowls, loaf pans (if making multiple loaves), and perhaps larger muffin tins if you plan on making mini muffins or cupcakes in bulk. Casserole dishes, especially deep ones, are perfect for large fruit crisps, crumbles, and cobblers. Ensure your bakeware is sturdy and conducts heat evenly for consistent results across your large batches. Using parchment paper is highly recommended for large pans to ensure easy release and simplify cleanup, especially with sticky bar cookies or brownies.
Measuring Cups and Spoons for Accuracy
Accuracy is paramount in baking, and this holds true even more so when scaling up large batch dessert recipes. While you might eyeball ingredients for a small batch, precise measurements are critical for ensuring a large batch turns out correctly. Invest in a good set of dry measuring cups (with levelers) and liquid measuring cups in various sizes, including larger ones (like 4-cup capacity) if you're dealing with significant volumes of liquids.
Having multiple sets of measuring spoons can also speed up the process, allowing you to measure different ingredients without washing in between. For truly large quantities, a kitchen scale becomes an invaluable tool. Measuring ingredients by weight (grams or ounces) is far more accurate than volume measurement, especially for staples like flour, sugar, and butter. This precision helps maintain the correct ratios when multiplying a recipe, leading to more consistent and reliable outcomes for your large scale baking projects.
Mixing Bowls and Electric Mixers: The Key to Efficiency
Mixing large quantities of ingredients by hand can be incredibly tiring and may not fully incorporate everything, leading to inconsistent results. For large batch dessert recipes, generously sized mixing bowls and an electric mixer are essential for efficiency and proper ingredient distribution. You'll need bowls large enough to comfortably hold the doubled or tripled volume of your recipe's ingredients, allowing room for mixing without spills. A 6-quart or larger mixing bowl is often necessary for a standard large batch recipe.
A stand mixer is a powerhouse for large batch baking, capable of handling heavy doughs and batters that would strain a hand mixer or your arm. The larger capacity bowl of a stand mixer is perfect for whipping up big batches of cookie dough, cake batter, or frosting.
If you don't have a stand mixer, a powerful hand mixer with sturdy beaters can work for many recipes, but ensure your mixing bowl is large enough to accommodate its use effectively. Having these tools significantly reduces the physical effort and time required for mixing, making the process of preparing large batch dessert recipes much smoother.
Our Top 5 Simple Large-Batch Dessert Recipes
These chocolate chip cookie bars are a crowd-pleasing classic, perfect for large gatherings because they bake up in one pan and are easy to slice and serve. Yielding approximately 36-48 bars from a 9x13 inch pan, they offer the chewy, gooey goodness of traditional chocolate chip cookies with minimal scooping and individual handling. This is a go-to solution when you need a significant quantity of beloved cookies quickly and efficiently, making them a staple in large batch dessert recipes.
The simplicity lies in pressing the dough into a single layer and baking. Unlike scooping dozens of individual cookies, which requires multiple baking sheets and rotations in the oven, these bars are a one-pan wonder. The result is a consistently baked treat with delightfully chewy edges and a soft center, packed with melted chocolate chips. They are robust enough to travel well and can be made a day or two ahead of time, making them an excellent choice for stress-free entertaining.
Ingredients for Chocolate Chip Cookie Bars
For a 9x13 inch pan, you will need:
- 1 cup (2 sticks) unsalted butter, softened
- 1/2 cup granulated sugar
- 1 1/2 cups packed light brown sugar
- 2 large eggs
- 1 teaspoon vanilla extract
- 2 1/2 cups all-purpose flour
- 1 teaspoon baking soda
- 1/2 teaspoon salt
- 2 cups semi-sweet chocolate chips (or a mix of milk and dark)
Step-by-Step Instructions for Baking Cookie Bars
- Preheat your oven to 350°F (175°C). Grease and flour or line a 9x13 inch baking pan with parchment paper, leaving an overhang on the sides for easy lifting.
- In a large mixing bowl (preferably using a stand mixer or hand mixer), cream together the softened butter, granulated sugar, and light brown sugar until light and fluffy, about 2-3 minutes.
- Beat in the eggs one at a time, ensuring each is fully incorporated before adding the next. Stir in the vanilla extract.
- In a separate medium bowl, whisk together the all-purpose flour, baking soda, and salt.
- Gradually add the dry ingredients to the wet ingredients, mixing on low speed just until combined. Do not overmix.
- Stir in the chocolate chips using a spoon or spatula.
- Press the dough evenly into the prepared baking pan. An offset spatula or the back of a greased measuring cup can help distribute the dough smoothly.
- Bake for 25-30 minutes, or until the edges are golden brown and the center looks set but still slightly soft. Be careful not to overbake.
- Let the bars cool completely in the pan on a wire rack before lifting out using the parchment paper overhang.
Tips for Perfect Cookie Bars Every Time
For extra chewy bars, slightly underbake them – they will continue to set as they cool. If you prefer crispier edges, bake for a few extra minutes until the edges are darker golden brown. Ensure your butter is properly softened, not melted, for the correct dough consistency.
Adding a sprinkle of flaky sea salt over the top of the warm bars just after they come out of the oven enhances the chocolate flavor and adds a delightful contrast. Store cooled bars in an airtight container at room temperature for up to 3-4 days. For easier cutting, chill the cooled slab of bars in the refrigerator for about 30 minutes before slicing into squares or rectangles.
Recipe 2: No-Bake Peanut Butter Bars: A Quick and Easy Treat
No-bake peanut butter bars are the ultimate easy large batch dessert recipe. They require minimal effort, no oven time, and yield a rich, satisfying treat that appeals to almost everyone. This recipe is ideal for warm weather gatherings or anytime you need a delicious dessert prepared quickly and efficiently for a crowd. A standard 9x13 inch pan can produce around 36-48 bars, making it a perfect solution for large scale baking without the heat of the oven.
The beauty of no-bake bars lies in their simplicity and speed. With just a few common pantry ingredients, you can whip up the base and topping in minutes. Once assembled and chilled, they are ready to be sliced and served. This makes them incredibly convenient for last-minute additions to a party menu or for situations where oven space is limited. They are also relatively sturdy, making them a good option for transporting to an event.
Ingredients for No-Bake Peanut Butter Bars
For a 9x13 inch pan, you will need:
- Base:
- 1 1/2 cups graham cracker crumbs (about 10-12 full sheets)
- 1/2 cup unsalted butter, melted
- 1/4 cup granulated sugar
- 1 1/2 cups creamy peanut butter (natural or conventional)
- 2 cups powdered sugar
- Topping:
- 1 cup semi-sweet chocolate chips
- 2 tablespoons unsalted butter
Step-by-Step Instructions for No-Bake Bars
- Line a 9x13 inch baking pan with parchment paper, leaving an overhang on the sides.
- For the base: In a large bowl, combine the graham cracker crumbs, melted butter, and granulated sugar. Mix until well combined. Press this mixture firmly into the bottom of the prepared pan. You can use the bottom of a glass or a flat spatula to compact it evenly.
- In a separate large bowl, combine the creamy peanut butter and powdered sugar. Mix thoroughly until a thick dough forms. This can be quite stiff; a sturdy spoon or stand mixer helps.
- Evenly spread the peanut butter mixture over the graham cracker crust. This can be tricky; warming the peanut butter slightly or using damp hands can help spread it smoothly.
- For the topping: In a microwave-safe bowl, combine the chocolate chips and 2 tablespoons of butter. Microwave in 30-second intervals, stirring after each, until completely melted and smooth. Alternatively, melt in a double boiler on the stovetop.
- Pour the melted chocolate mixture evenly over the peanut butter layer and spread with a spatula.
- Refrigerate for at least 2-3 hours, or until the chocolate layer is set.
- Lift the set bars out of the pan using the parchment paper overhang and cut into squares.
Variations and Add-ins for Peanut Butter Bars
Add a layer of crushed pretzels to the graham cracker base for a salty crunch. Swirl white chocolate or a mix of peanut butter and chocolate on top for visual appeal and extra flavor. Incorporate miniature marshmallows or chopped peanuts into the peanut butter layer before adding the chocolate topping.
A touch of flaky sea salt sprinkled over the warm chocolate topping before it sets also elevates the flavor profile. For a richer chocolate layer, use dark chocolate chips instead of semi-sweet. Ensure all ingredients are at room temperature (except for the melted butter) for easier mixing of the peanut butter layer.
Recipe 3: Classic Brownie Bites: Perfect for Sharing
Brownie bites are an excellent choice for large batch dessert recipes, offering individual portions that are easy to grab and enjoy at a party. Baking brownies in mini muffin tins yields consistently sized, perfectly chewy bites with appealing crispy edges. A single batch can easily produce 48-60 bites, making them incredibly efficient for serving a large number of guests without the need for cutting at the event.
These bites offer all the rich, fudgy goodness of a classic brownie but in a convenient, pop-able format. Their small size makes them less messy than traditional brownie squares, ideal for mingling guests. They can be baked ahead of time and stored, and their sturdy structure makes them simple to transport. Offering brownie bites is a surefire way to satisfy chocolate cravings among your guests.
Ingredients for Brownie Bites
For approximately 48-60 bites (using mini muffin tins), you will need:
- 1 cup (2 sticks) unsalted butter, melted
- 2 cups granulated sugar
- 1 teaspoon vanilla extract
- 4 large eggs
- 1 1/2 cups all-purpose flour
- 1 cup unsweetened cocoa powder (natural or Dutch-process)
- 1/2 teaspoon baking powder
- 1/2 teaspoon salt
- 1 cup chocolate chips (optional, for extra fudginess)
Step-by-Step Instructions for Baking Brownie Bites
- Preheat your oven to 350°F (175°C). Grease mini muffin tins generously or line with mini paper liners.
- In a large bowl, combine the melted butter, granulated sugar, and vanilla extract. Whisk until well combined.
- Add the eggs one at a time, whisking well after each addition until the mixture is smooth and glossy.
- In a separate medium bowl, whisk together the all-purpose flour, cocoa powder, baking powder, and salt.
- Gradually add the dry ingredients to the wet ingredients, stirring with a spatula or wooden spoon until just combined. Do not overmix. If using chocolate chips, stir them in now.
- Fill each mini muffin cup about two-thirds full with batter. A small scoop (like a 1-tablespoon cookie scoop) works well for this.
- Bake for 12-15 minutes, or until a toothpick inserted into the center of a bite comes out with moist crumbs attached (not completely clean). Be careful not to overbake, as they can become dry quickly due to their size.
- Let the brownie bites cool in the tins for 5-10 minutes before carefully transferring them to a wire rack to cool completely.
Serving Suggestions for Brownie Bites
Serve brownie bites plain for a simple, delicious treat. For a more festive presentation, dust them lightly with powdered sugar once cooled. You can also top them with a swirl of frosting (chocolate or cream cheese are great choices) after they are fully cooled.
Offer small bowls of toppings alongside the bites, such as mini chocolate chips, sprinkles, chopped nuts, or a drizzle of caramel or hot fudge sauce, allowing guests to customize their own. Arrange them neatly on platters or tiered stands for an attractive display. Brownie bites are also perfect for packing into small bags or boxes as party favors.
Recipe 4: Fruit Cobbler for a Large Gathering
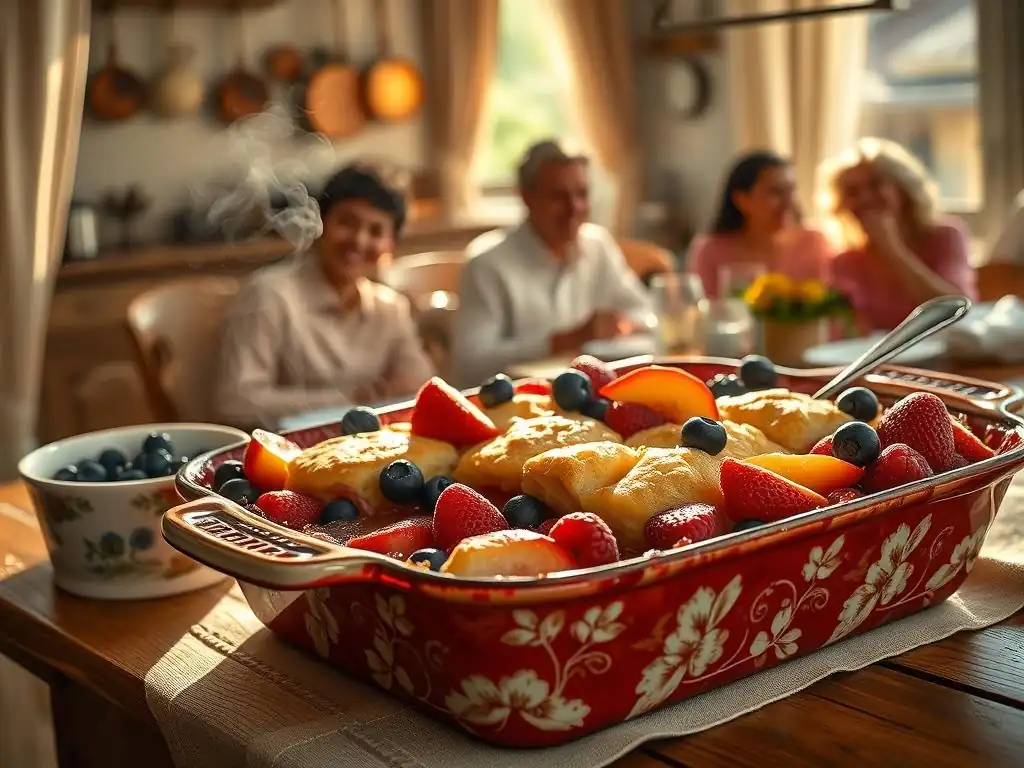
A fruit cobbler is a wonderfully comforting and relatively simple large batch dessert recipe, perfect for serving a crowd, especially during fruit season. Baked in a large casserole dish or even a full sheet pan (for a very large group), a cobbler provides a warm, bubbly fruit filling topped with a sweet biscuit or crumble topping. A standard 9x13 inch dish yields about 12-15 servings, while a larger pan can easily double that or more.
Cobblers are forgiving and adaptable, allowing you to use seasonal fruits like peaches, berries, apples, or a combination. The topping is typically a simple mixture that comes together quickly. Served warm, perhaps with a scoop of ice cream, it's a dessert that feels both homemade and celebratory, ideal for family dinners, potlucks, or summer BBQs.
Ingredients for Fruit Cobbler
For a 9x13 inch baking dish, you will need:
- Fruit Filling:
- 6-8 cups fresh or frozen fruit (e.g., sliced peaches, berries, apple slices)
- 1/2 cup granulated sugar (adjust based on fruit sweetness)
- 2-3 tablespoons cornstarch or flour (for thickening)
- 1 tablespoon lemon juice (optional, especially for sweeter fruits)
- 1/2 teaspoon ground cinnamon or other spice matching the fruit (optional)
- Topping:
- 1 1/2 cups all-purpose flour
- 1/4 cup granulated sugar
- 1/4 cup packed light brown sugar
- 1 teaspoon baking powder
- 1/2 teaspoon salt
- 1/2 cup (1 stick) cold unsalted butter, cut into cubes
- 1/2 cup milk or buttermilk
Step-by-Step Instructions for Baking Fruit Cobbler
- Preheat your oven to 375°F (190°C). Lightly grease a 9x13 inch baking dish.
- For the fruit filling: In a large bowl, combine the fruit, sugar, cornstarch (or flour), lemon juice (if using), and spice (if using). Toss gently to coat the fruit evenly. If using frozen fruit, you may need slightly more thickening agent. Pour the fruit mixture into the prepared baking dish.
- For the topping: In a medium bowl, whisk together the flour, granulated sugar, brown sugar, baking powder, and salt. Cut in the cold butter using a pastry blender, fork, or your fingertips until the mixture resembles coarse crumbs with some pea-sized pieces of butter remaining.
- Pour the milk or buttermilk into the dry ingredients and stir gently with a fork until just combined. Do not overmix; the dough will be shaggy.
- Drop spoonfuls of the topping mixture evenly over the fruit filling, leaving some gaps for the fruit to bubble through.
- Place the dish on a baking sheet (to catch any drips) and bake for 35-45 minutes, or until the topping is golden brown and the fruit filling is bubbly around the edges.
- Let the cobbler cool slightly on a wire rack before serving warm.
Choosing the Right Fruit for Your Cobbler
Almost any fruit can be turned into a delicious cobbler! Peaches and berries (like blueberries, raspberries, or mixed berries) are classic and easy choices, requiring minimal prep beyond washing and slicing (for peaches). Apples, pears, or even cherries also work wonderfully but may require slightly longer baking times to soften the fruit.
When using fruits with high water content (like berries or rhubarb), ensure you use enough cornstarch or flour to thicken the juices adequately, preventing a watery filling. A general rule is 1 tablespoon of thickener per 3-4 cups of fruit, adjusting up or down based on the specific fruit and its ripeness. Combining different fruits, like apple and blackberry or peach and raspberry, can create complex and delightful flavor profiles in your large batch cobbler.
Recipe 5: Lemon Bars: A Refreshing Dessert Option
Lemon bars are a bright, tangy, and refreshing large batch dessert recipe, perfect for cutting through the richness of a meal or serving at a spring or summer gathering. Their vibrant citrus flavor and smooth texture make them a popular choice, and baking them in a large pan makes preparing enough for a crowd simple and efficient. A 9x13 inch pan typically yields 24-36 bars, providing a substantial quantity of these delightful treats.
The recipe consists of a simple shortbread crust topped with a tangy lemon custard, baked until set. Once cooled and dusted with powdered sugar, they offer a beautiful presentation and a burst of flavor. They are relatively sturdy once chilled, making them suitable for transporting, and can be made a day in advance, allowing you to focus on other party preparations closer to the event.
Ingredients for Lemon Bars
For a 9x13 inch pan, you will need:
- Crust:
- 2 cups all-purpose flour
- 1/2 cup powdered sugar
- 1 cup (2 sticks) cold unsalted butter, cut into cubes
- Filling:
- 2 cups granulated sugar
- 1/4 cup all-purpose flour
- 6 large eggs
- 1 cup fresh lemon juice (from about 4-6 lemons)
- Zest of 2 lemons (optional, for extra flavor)
- 1/2 teaspoon baking powder
- Topping:
- Powdered sugar, for dusting
Step-by-Step Instructions for Baking Lemon Bars
- Preheat your oven to 350°F (175°C). Line a 9x13 inch baking pan with parchment paper, leaving an overhang on the sides.
- For the crust: In a medium bowl, combine the flour and powdered sugar. Cut in the cold butter using a pastry blender, fork, or your fingertips until the mixture resembles coarse crumbs. Press the mixture evenly into the bottom of the prepared pan, compacting it firmly.
- Bake the crust for 18-20 minutes, or until lightly golden brown around the edges.
- For the filling: While the crust is baking, whisk together the granulated sugar and flour in a large bowl. Whisk in the eggs one at a time until smooth. Stir in the fresh lemon juice, lemon zest (if using), and baking powder until well combined.
- Once the crust is pre-baked, carefully pour the lemon filling evenly over the hot crust.
- Return the pan to the oven and bake for another 20-25 minutes, or until the center is just set (it should jiggle only slightly when the pan is gently shaken).
- Let the bars cool completely in the pan on a wire rack. Once cooled, refrigerate for at least 2-3 hours to allow the filling to set firmly.
- Lift the chilled bars out of the pan using the parchment paper overhang. Dust generously with powdered sugar before slicing into squares or rectangles.
Achieving the Perfect Tartness and Sweetness
The key to delicious lemon bars is balancing the tartness of the lemon with the sweetness of the sugar. Using fresh lemon juice is crucial for the best flavor; bottled juice won't provide the same bright, vibrant taste. The amount of sugar in the filling is designed to counteract the acidity of the lemon juice.
If you prefer a more intensely tart bar, you can slightly reduce the sugar in the filling (by 1/4 cup, for example), but be mindful that this can affect the texture and set of the custard. Adding lemon zest boosts the lemon flavor without adding extra acidity, providing a lovely aromatic note. Ensure the filling is baked until just set; overbaking can result in a rubbery texture, while underbaking means it won't set properly after chilling. The chilling step is essential for the filling to firm up and allow for clean slicing.
Tips for Success: Mastering Large-Batch Dessert Baking
Accurate Measurements: The Foundation of Great Baking
Precision in measuring ingredients becomes even more critical when you're working with large batch dessert recipes. Small errors in measuring flour, sugar, or leavening agents can have a more pronounced impact on the final outcome when multiplied across a larger quantity. Using the correct tools – dry measuring cups for dry ingredients (leveled off with a straight edge), liquid measuring cups for liquids (read at eye level), and measuring spoons for smaller quantities like baking soda or vanilla – is fundamental.
For maximum accuracy, especially with large volumes of flour or sugar, consider using a kitchen scale to measure by weight rather than volume. This eliminates variations caused by how ingredients are packed into cups. For example, a cup of flour can weigh anywhere from 4 ounces to 5 ounces depending on how it's scooped and packed, a difference that becomes significant when you need 5 or 6 cups for a large batch recipe. Consistent measurement ensures consistent results every time you bake for a crowd.
Proper Mixing Techniques: Avoiding Over-Mixing
While you need to ensure all ingredients are well combined in large batch dessert recipes, it's equally important to avoid over-mixing, particularly once flour is added to the batter or dough. Over-mixing develops gluten, which can lead to tough cakes, dry cookies, or dense brownies. Use a stand mixer on low speed or mix by hand only until the dry ingredients are just incorporated and no streaks of flour remain.
For batters where you're creaming butter and sugar (like the cookie bars), proper creaming creates air pockets that contribute to texture and lift. Ensure this step is done thoroughly. When adding dry ingredients, fold gently or mix on the lowest speed. For recipes like the no-bake bars, ensure the peanut butter and powdered sugar are fully combined for a smooth consistency, even if it requires some effort. Understanding the role of mixing in each specific recipe is key to achieving the desired texture in your bulk dessert creations.
Oven Temperature and Baking Time: Ensuring Even Baking
Baking large batch dessert recipes often means filling your oven more completely than usual, which can affect temperature consistency and airflow. It's crucial to ensure your oven is preheated fully to the correct temperature before placing your large pans inside. An oven thermometer is a valuable tool for verifying that your oven's internal temperature matches the setting, as many ovens can be off by 25°F or more.
When baking multiple large pans at once, you might need to rotate them halfway through the baking time to ensure even browning and doneness. Pans placed on different racks or closer to the heating elements can bake faster. Monitor your desserts closely, especially towards the end of the suggested baking time, as baking times can vary based on your oven and the exact size/thickness of your batch.
Use visual cues (like golden edges, set centers) and tools (like toothpicks) to determine doneness rather than relying solely on the clock. This attention to detail ensures your large scale baking results in perfectly baked treats every time.
Cooling and Storing Your Desserts Properly
Proper cooling is a critical step in baking, especially with large batch dessert recipes. Hot desserts continue to cook from residual heat after coming out of the oven. Allowing them to cool properly on a wire rack allows air circulation, stops the cooking process, and helps them set correctly. Cakes, brownies, and bars baked in pans should typically cool in the pan for a specified time (often 10-20 minutes) before being transferred to a wire rack to cool completely. Cookies should be transferred from the hot baking sheet to a wire rack almost immediately.
Once completely cool, storing your large quantity of desserts correctly is essential for maintaining freshness and texture. Airtight containers are your best friend. Store cookies, brownies, and bars at room temperature for 3-4 days. Refrigerate cream cheese-based or custard fillings (like the lemon bars) in an airtight container for up to a week. For longer storage, many large batch desserts like cookies, brownies, and some cakes freeze beautifully when wrapped tightly, allowing you to bake even further ahead of your event.
Scaling Recipes Up: How to Adjust for Larger Quantities
Understanding Ratios and Proportions
Successfully scaling up a recipe to create large batch dessert recipes requires more than simply multiplying every ingredient amount. While multiplying is the starting point, understanding the ratios and proportions of key ingredients is vital. The relationship between flour, leavening agents (baking soda/powder), fats, and liquids is delicate. Doubling a recipe often works straightforwardly, but tripling or quadrupling may require slight adjustments, particularly with leavening, spices, and flavor extracts, which can become overpowering if strictly multiplied.
Consider the surface area and depth of your larger pan compared to the original recipe's pan. A larger, shallower pan might require less leavening than a smaller, deeper one because the heat penetrates differently. Similarly, the amount of liquid might need minor adjustments if the larger batch takes significantly longer to bake, leading to more evaporation. Focusing on the fundamental ratios – for example, the ratio of flour to fat in a crust, or sugar to eggs in a custard – helps maintain the integrity of the original recipe's structure and flavor when increasing quantities for large scale baking.
Converting Recipes with Confidence
Converting a standard recipe into large batch dessert recipes can be approached systematically. First, identify the original recipe's yield and the pan size used. Then, determine the new pan size you'll use and its capacity relative to the original. For example, a 9x13 inch pan has roughly double the volume/surface area of an 8x8 inch pan. A half sheet pan (18x13 inches) is roughly double the size of a 9x13. Use these ratios to initially multiply your ingredients.
Pay special attention to eggs; it's often best to round to the nearest whole egg if a direct multiplication results in a fraction, or calculate the total volume needed for the eggs and use a combination of whole eggs and perhaps an extra yolk or white if necessary for texture. Leavening agents (baking soda/powder) and salt should be increased carefully; sometimes slightly less than a direct multiple is needed to avoid a chemical or overly salty taste. Liquids might also need slight reduction if the batter will be significantly thicker in a larger pan.
Testing and Adjusting Your Recipe as Needed
Even with careful calculation, scaling up large batch dessert recipes can sometimes require a little trial and error, especially for recipes you haven't converted before. If time allows, consider doing a half-batch test in a smaller, proportionally sized pan before committing to the full large batch. This allows you to check for flavor balance, texture, and baking time without wasting a large quantity of ingredients.
As you bake your large batch, observe closely. Does the batter look too thick or thin? Is it baking evenly? Note any necessary adjustments for future attempts. Perhaps the edges are browning too quickly, suggesting the need to reduce oven temperature slightly or shield the edges with foil. Maybe the center is taking longer than expected, indicating a need for more time or rotating the pan. Keep notes on your scaled-up recipes; these adjustments will become your personal perfected large batch dessert recipes, ensuring consistent success for all your future large gatherings.
Serving and Presentation Ideas for Your Large-Batch Treats
Creative Plating and Garnish Techniques
Even though you're serving large batch dessert recipes, presentation still matters! Instead of simply placing a large slab of bars on a table, take a few moments to plate them creatively. Arrange brownie bites or cookie bars on tiered stands for visual height and interest. Use colorful platters or trays that complement the occasion. For cobblers, serve them warm in attractive serving dishes with spoons ready for scooping.
Garnishes can elevate even the simplest large batch treats. A dusting of powdered sugar over brownies or lemon bars adds a touch of elegance. A sprig of mint or a few fresh berries can brighten up a fruit cobbler. A drizzle of chocolate sauce or caramel can add flair to cookie bars or brownie bites. Edible flowers or colored sprinkles can also add a festive touch, making your large scale baking efforts look as impressive as they taste.
Displaying Your Desserts Attractively
How you display your large batch dessert recipes can significantly enhance their appeal at a party. Create a dedicated dessert station or table. Group similar items together. Use varying heights with cake stands or inverted bowls covered with tablecloths. Label your desserts, especially if you have different types or have made variations (like a gluten-free option), so guests know what they are choosing.
Ensure there are appropriate serving utensils available for each dessert – tongs for cookies or bars, serving spoons for cobblers. Consider the flow of traffic around the dessert table to make it easy for guests to serve themselves without crowding. A well-organized and visually appealing dessert display makes your large batch treats even more inviting and shows the care you put into hosting.
Consider Individual Portions for Easy Serving
While large batch dessert recipes are great for baking efficiency, pre-portioning them for serving can greatly simplify things for your guests and reduce mess. Bar cookies and brownies are easily cut into uniform squares or rectangles before the party starts. Brownie bites and mini muffins are already perfectly portioned.
For desserts like cobblers or crisps, consider serving them in individual ramekins if you have enough, or provide clear serving instructions and adequate space around the dish for guests to scoop easily. Offering pre-portioned treats makes it easy for guests to grab and mingle, and it also helps manage portion sizes, ensuring there's enough for everyone to enjoy your delicious large scale baking creations.
Conclusion: Bake With Ease and Delight Your Guests!
Enjoy the Process of Baking for Large Gatherings
Baking for a crowd, when approached with simple large batch dessert recipes and the right mindset, can be an incredibly rewarding experience. It allows you to share your love of baking and treat your guests to homemade goodness. By planning ahead, choosing efficient recipes, and utilizing the right tools, the process becomes less about stress and more about the joy of creating something delicious to share. Embrace the fun of transforming simple ingredients into an abundance of delightful treats that will bring smiles to many faces.
Remember that minor imperfections are part of the charm of homemade goods. What guests will truly appreciate is the effort and thoughtfulness you put into providing delicious desserts for them to enjoy. So, put on some music, gather your ingredients, and enjoy the process of creating your large batch dessert recipes.
There's something uniquely special about sharing homemade desserts. They carry a warmth and personal touch that store-bought options often lack. Your large batch treats aren't just food; they're a way to show care and hospitality to your guests. Seeing friends and family gather around a table, enjoying a slice of your cobbler or reaching for a brownie bite, is a truly satisfying feeling.
These large scale baking projects become part of the memories created at your gatherings. The aroma filling your home, the visual feast of a dessert spread, and the delicious taste all contribute to the overall experience. So, bake generously, share freely, and revel in the joy that your homemade large batch dessert recipes bring to your guests.
BakeWithEase: Your Resource for All Things Baking
Whether you're a seasoned pro or just starting your baking journey, BakeWithEase is here to support you. We provide simple, reliable large batch dessert recipes, techniques, and tips to help you bake with confidence and ease, no matter the occasion or the number of guests. Our resources are designed to make baking accessible and enjoyable for everyone.
From mastering the basics of large scale baking to discovering new and exciting bulk dessert recipes, BakeWithEase is your trusted partner in the kitchen. Explore our site for more inspiration, guides, and recipes tailored for all your baking needs. Let us help you make your next large gathering a sweet success!
Frequently Asked Questions
What are large batch dessert recipes?
Large batch dessert recipes are designed to serve multiple people, making them ideal for parties, gatherings, or any occasion where you want to impress a crowd with delicious treats.
How do I ensure my large batch desserts turn out well?
To ensure success, follow the step-by-step guides provided on BakeWithEase, and pay attention to ingredient measurements and oven temperatures for consistent results.
Can I modify recipes to accommodate special dietary needs?
Absolutely! Many of the large batch dessert recipes can be adjusted for gluten-free, vegan, or low-sugar diets by substituting ingredients, so everyone can enjoy your treats.
What types of desserts are best suited for large batches?
Desserts like cookies, cakes, and brownies are particularly well-suited for large batches as they are easy to prepare and can be easily portioned for serving.
Where can I find inspiration for large batch dessert recipes?
You can explore a variety of large batch dessert recipes on BakeWithEase.com, where you'll find a plethora of simple recipes, techniques, and tips tailored for bakers of all levels.
The art of baking large-batch desserts isn't just about satisfying a crowd; it's about cultivating connection and creating lasting memories. In a world increasingly dominated by individual experiences, the simple act of sharing a homemade treat, baked with love and in generous quantities, becomes a powerful antidote to isolation. This guide has explored the practicalities – from scaling recipes to efficient baking techniques – but the true reward lies far beyond the perfectly frosted cupcake.
The joy of gathering around a table laden with homemade goodies transcends mere culinary skill; it's a testament to the enduring power of human connection. It's about fostering a sense of community, whether it's a family gathering, a neighborhood potluck, or even a simple afternoon tea with friends. As Maya Angelou wisely said, I've learned that people will forget what you said, people will forget what you did, but people will never forget how you made them feel.
And what better way to make someone feel cherished than with a warm, delicious dessert, baked with intention and shared with generosity?
Now, consider your own life. What moments could be enhanced by the simple act of sharing a large-batch treat? Think about the upcoming holidays, birthdays, or even a spontaneous gathering with loved ones. Don't just bake; create. Infuse your baking with intention, and watch as a simple dessert transforms into a powerful symbol of connection, leaving a lasting impression on those you share it with. Let the sweetness of shared moments become a regular part of your life.
Unleash Your Inner Baker: Elevate Your Next Gathering!
Thanks for joining us on this delicious journey into the world of large-batch baking! We hope you’ve discovered some new techniques and recipes to impress your friends and family. Ready to take your baking skills to the next level?
- Dive into our recipe collection: Explore our extensive library of large-batch treat recipes, categorized by occasion and dietary needs, to find your next baking adventure. We’ve got something for everyone!
- Share your baking triumphs: Show off your creations! Tag us on social media with your photos using #BakeWithEaseLargeBatch. We love seeing your masterpieces.
- Challenge yourself with a new recipe: Try one of the more complex recipes you've bookmarked – you might surprise yourself with your newfound skills!
What incredible large-batch treat will you create next to wow your guests?