
Gelato Secrets: Achieve That Smooth, Dense Texture at Home

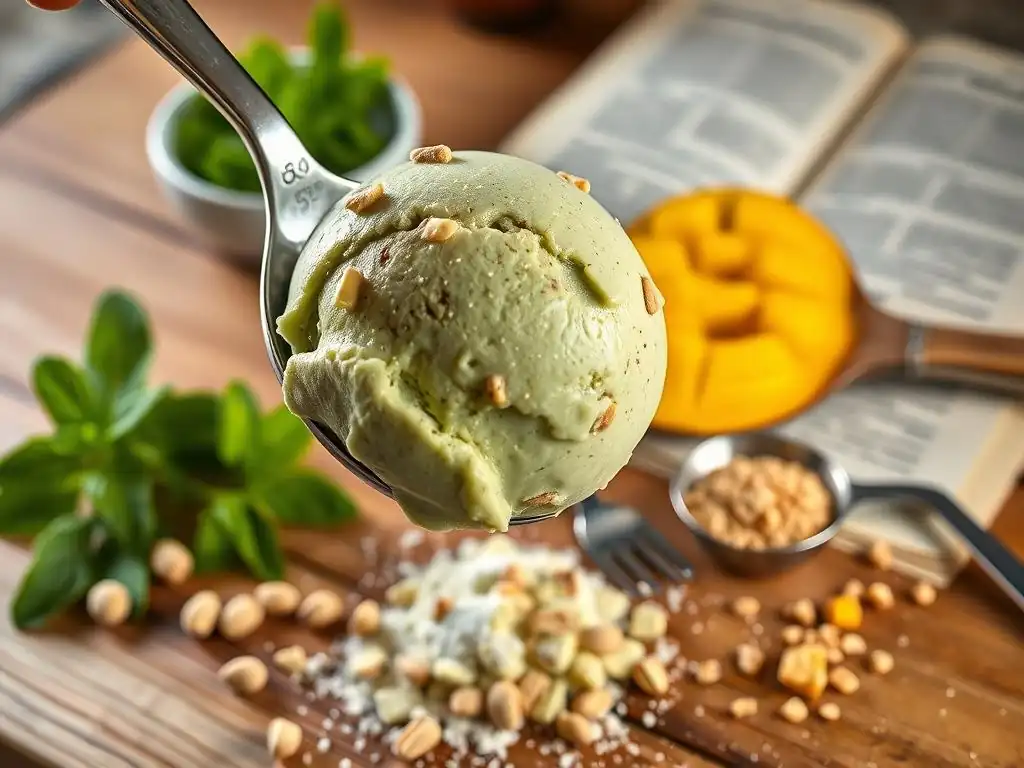
Welcome to BakeWithEase, your kitchen companion for all things baking! Ever dreamt of crafting perfectly smooth, dense gelato in your own home? Unlocking that professional texture is easier than you think. Dive in to discover the secrets behind achieving authentic gelato, transforming simple ingredients into a frozen masterpiece. What's the key to that velvety consistency? Let's find out…
- Introduction to Homemade Gelato: The Pursuit of Perfect Texture
- Understanding Gelato: What Makes it Different?
- Essential Ingredients for Achieving Smooth Gelato at Home
-
Mastering the Gelato-Making Process: Step-by-Step Guide
- Step 1: Creating the Gelato Base (White Base or Custard Base)
- Step 2: Pasteurizing the Gelato Base for Safety and Texture
- Step 3: Adding Flavors and Mix-Ins to Your Gelato
- Step 4: Churning the Gelato to Achieve a Smooth Texture
- Step 5: Hardening and Maturing the Gelato for Optimal Flavor and Texture
- Key Techniques for a Smooth Gelato Texture
- Troubleshooting Common Gelato Texture Problems
- Gelato Flavor Ideas to Inspire Your Homemade Creations
- Advanced Gelato Techniques for the Home Baker
- Conclusion: Enjoying Your Homemade Smooth-Textured Gelato.
-
Frequently Asked Questions
- How can I achieve a truly smooth texture in my homemade gelato?
- What are the best ingredients to use for achieving a dense gelato?
- What type of ice cream maker is recommended for making gelato at home?
- Why is the ripening process important for homemade gelato?
- Can I use pre-made ingredients, like ice cream base mixes, to make gelato?
- Final Reflection: The Pursuit of Perfect Gelato
- Unlock Your Gelato Mastery: Craft the Perfect Scoop!
Introduction to Homemade Gelato: The Pursuit of Perfect Texture
Making authentic gelato at home is a rewarding culinary adventure, promising a dessert experience far superior to typical store-bought ice cream. The defining characteristic of great gelato is its incredibly smooth, dense texture that melts slowly and intensely on the tongue, delivering concentrated flavor. Achieving this requires a deeper understanding of ingredients and technique than simply freezing a sweet mixture.
This article will guide you through the secrets behind that coveted homemade gelato smooth texture, exploring the fundamental differences between gelato and ice cream, the critical role of ingredients, and the step-by-step process to create this Italian masterpiece in your own kitchen. We'll also tackle common issues and offer tips for troubleshooting, ensuring your journey to perfect homemade gelato is a success.
Understanding Gelato: What Makes it Different?
Gelato, meaning "frozen" in Italian, is often confused with ice cream, but the two differ significantly in composition and preparation, leading to distinct textural and flavor profiles. Understanding these differences is key to unlocking the secrets of achieving that signature smooth, dense texture in your homemade gelato.
Gelato vs. Ice Cream: Key Differences in Ingredients and Technique
The primary distinctions between gelato and ice cream lie in their fat content, sugar levels, and the amount of air incorporated during churning. Traditional gelato uses more milk and less cream and often no egg yolks (though custard bases exist), resulting in a lower fat content, typically ranging from 4% to 9%. In contrast, ice cream often contains 10-20% fat, primarily from heavy cream and egg yolks. This lower fat content in gelato allows flavors to shine through more intensely as fat coats the palate.
Furthermore, gelato is churned at a slower speed than ice cream, incorporating less air. This is known as lower "overrun." While premium ice creams might have 25-50% overrun, gelato typically has only 15-30% overrun. Less air means a denser product. Gelato is also served at a slightly warmer temperature than ice cream (around -12°C to -15°C or 5°F to 9°F compared to ice cream's -18°C or 0°F), which contributes to its softer, smoother texture and allows the flavors to be perceived more strongly.
The Importance of Low Overrun for Gelato's Dense Texture
Overrun is the percentage increase in volume of the frozen mixture due to the incorporation of air during churning. As mentioned, gelato's characteristic density is a direct result of its low overrun. Imagine two frozen desserts made from the same base ingredients: one with 20% air (gelato) and one with 80% air (some commercial ice creams). The one with less air will feel heavier, richer, and more substantial on the tongue.
Achieving low overrun in homemade gelato is primarily a function of your ice cream maker's speed and the chilling process. Gelato machines are designed to churn slower than typical ice cream makers. However, even with a standard home machine, you can minimize overrun by ensuring your base is extremely cold before churning and by not over-churning – stop as soon as the mixture reaches a soft-serve consistency. This deliberate limitation of air is fundamental to creating that signature smooth homemade gelato texture.
Why Texture Matters: The Sensory Experience of Authentic Gelato
Texture is not just a secondary characteristic; it's integral to the overall enjoyment of gelato. The smooth, dense mouthfeel is what differentiates it from other frozen desserts. When you take a spoonful of well-made gelato, it should feel incredibly creamy and substantial, melting slowly and evenly without any graininess or iciness.
This unique texture enhances the flavor experience. Because it melts slower and coats the mouth differently than ice cream, the flavors linger longer and feel more vibrant. The pursuit of a perfect homemade gelato smooth texture is about elevating the entire sensory experience, transforming simple ingredients into a luxurious and intensely flavored treat that truly captures the essence of authentic Italian gelato.
Essential Ingredients for Achieving Smooth Gelato at Home
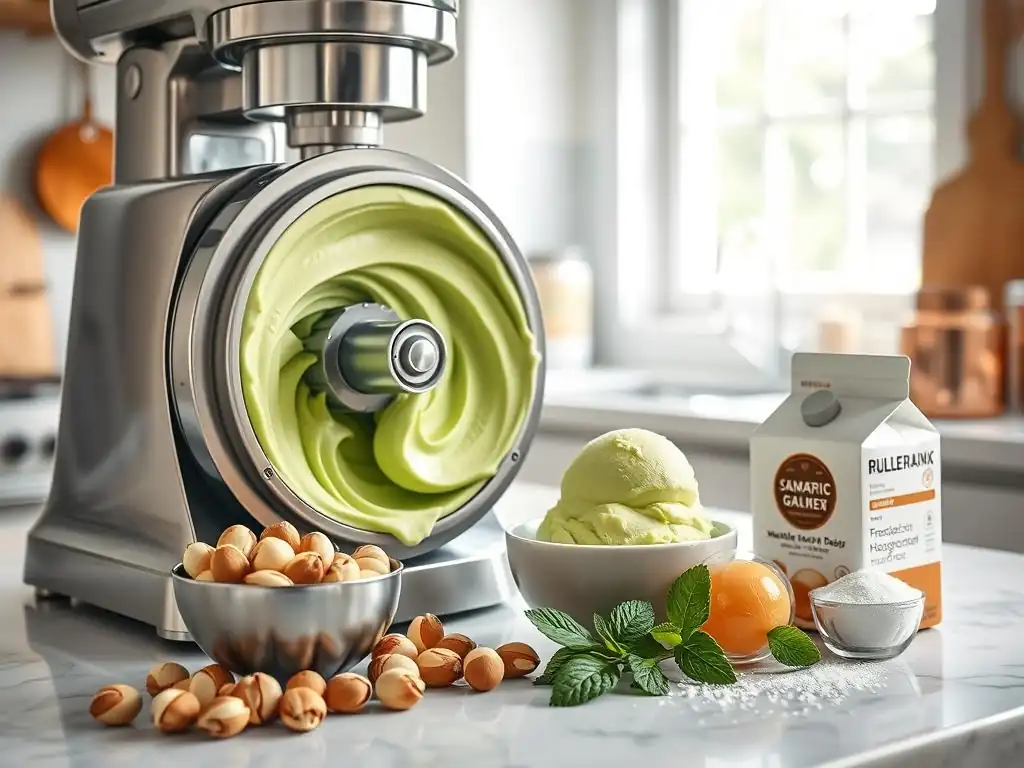
The quality and type of ingredients used are paramount in creating a smooth homemade gelato texture. Each component plays a specific role, from providing the creamy base to preventing the formation of undesirable ice crystals. Using high-quality ingredients lays the foundation for success.
The Role of High-Quality Milk and Cream in Gelato
The base of most gelato is milk and cream. Using high-quality, fresh dairy is crucial for flavor and texture. While ice cream relies heavily on cream for richness, gelato emphasizes milk. Whole milk provides necessary protein and some fat, contributing to structure and smoothness. Heavy cream adds richness and helps prevent ice crystal formation due to its fat content.
A typical gelato base might use a ratio of milk to cream closer to 2:1 or even 3:1 by volume, compared to ice cream which might be 1:1 or even more cream-heavy. For example, a common recipe might use 500ml of whole milk and 250ml of heavy cream. This specific ratio contributes to the lower overall fat content characteristic of gelato, which, when combined with low overrun, results in a denser, smoother product than higher-fat, higher-overrun ice cream.
Sugar's Function: Sweetness, Texture, and Freezing Point Depression
Sugar is more than just a sweetener in gelato; it significantly impacts texture. Sucrose (standard granulated sugar) is the most common sugar used, but dextrose or glucose syrup are often added, especially in professional recipes. These alternative sugars are less sweet than sucrose and have a greater effect on lowering the freezing point of the mixture.
Lowering the freezing point is critical for achieving a smooth texture. Water freezes at 0°C (32°F), but the presence of dissolved sugars means the gelato base will freeze at a lower temperature, perhaps around -15°C (5°F). This allows the gelato to remain relatively soft and scoopable even at freezing temperatures, preventing it from becoming rock-hard and icy. Aiming for a total sugar content of roughly 15-22% of the base weight is a common practice to balance sweetness and texture. Too little sugar results in a hard, icy texture; too much can make it too soft or even slushy.
Stabilizers in Gelato: Preventing Ice Crystal Formation
Stabilizers are ingredients added in tiny amounts to improve the texture and shelf life of frozen desserts by preventing or minimizing the growth of ice crystals. While not always strictly necessary for a batch consumed immediately, they significantly contribute to a consistently smooth homemade gelato texture, especially after storage. They work by binding to water molecules, making them less available to form large crystals.
Using even a small amount of a suitable stabilizer can make a noticeable difference in preventing graininess and maintaining smoothness as the gelato sits in the freezer. They are particularly helpful in recipes with high water content, such as fruit-based gelatos (sorbettos often use stabilizers too).
Common Gelato Stabilizers: Locust Bean Gum, Guar Gum, Carrageenan
Several stabilizers are commonly used in gelato making, each with slightly different properties:
- Locust Bean Gum (LBG): Derived from the seeds of the carob tree, LBG is a popular choice. It works synergistically with dairy proteins and helps create a smooth, elastic texture. It's often used at concentrations of 0.1% to 0.3% of the total weight of the base.
- Guar Gum: Extracted from guar beans, guar gum is another effective stabilizer, particularly good at preventing ice crystal formation. It's typically used at slightly lower concentrations than LBG, around 0.1% to 0.2%.
- Carrageenan: Sourced from red seaweed, carrageenan (specifically kappa or iota types) is often used in dairy products. It interacts with milk proteins to create a stable gel structure, contributing to creaminess and preventing separation. It's used at very low concentrations, often less than 0.1%.
Using stabilizers requires precision; too much can result in a gummy or slimy texture. It's best to follow recipe guidelines specifically designed for stabilizer use, often involving heating the base to activate them.
Flavoring Gelato: Fresh, Natural Ingredients for the Best Taste
The intense flavor of gelato comes from using high-quality, natural flavorings. Unlike ice cream, which can rely on fat to carry flavor, gelato's lower fat content means the flavorings themselves must be potent and pure. This is why traditional Italian gelato often features simple, direct flavors like intense pistachio, rich hazelnut, or vibrant fresh fruit.
For fruit flavors, using ripe, seasonal fruit is essential. Pureeing or macerating fresh fruit and incorporating it into the base after it has cooled preserves its bright flavor. For nut flavors like pistachio or hazelnut, using finely ground, roasted nuts or high-quality nut pastes provides the most authentic taste. Chocolate gelato benefits from high-quality cocoa powder or melted dark chocolate with a high cocoa percentage (e.g., 70% cacao). Using real vanilla beans or pure vanilla extract is crucial for vanilla gelato. The purity of these flavorings contributes significantly to the overall quality and enjoyment of your homemade gelato.
Mastering the Gelato-Making Process: Step-by-Step Guide
Creating delicious, smooth homemade gelato involves a series of steps, each contributing to the final texture and flavor. Following these steps carefully will significantly increase your chances of success in achieving that desired smooth, dense texture.
Step 1: Creating the Gelato Base (White Base or Custard Base)
Most gelato recipes start with one of two primary base types:
- White Base (Base Bianca): This is the simplest base, made from milk, cream, and sugar, often heated to dissolve the sugar and sometimes thickened with a stabilizer or milk powder. It's quick and versatile.
- Custard Base (Base Gialla): This base includes egg yolks in addition to milk, cream, and sugar. The mixture is heated to cook the yolks and create a rich custard. While adding richness, the eggs also contribute to smoothness and stability.
Regardless of the base type, accuracy in measuring ingredients is key. Use a digital scale for best results, especially when working with stabilizers or aiming for specific sugar/fat percentages. Combine your milk, cream, and sugar in a saucepan. If using a white base with stabilizer, whisk it in now. If using a custard base, whisk egg yolks and sugar separately before tempering them into the heated milk mixture.
Step 2: Pasteurizing the Gelato Base for Safety and Texture
Heating the gelato base, whether a simple white base or a custard base, serves multiple purposes: it dissolves the sugar completely, hydrates any stabilizers or milk powder, blends the ingredients, and pasteurizes the mixture for food safety. Pasteurization typically involves heating the base to 75°C (167°F) for about 15 seconds, or 65°C (149°F) for 30 minutes. Many home recipes simply recommend heating until steaming or just below boiling, around 80-85°C (175-185°F), while stirring constantly.
After heating, it is absolutely critical to cool the base down rapidly. An ice bath is ideal for this. Submerge the saucepan in a larger bowl filled with ice water and stir the base until it cools to room temperature. Then, cover the base and refrigerate it for at least 4-8 hours, or preferably overnight. This chilling period is vital; it allows flavors to meld, fats to solidify, and stabilizers to fully hydrate, all contributing to a better texture and more efficient churning. Don't skip this step!
Step 3: Adding Flavors and Mix-Ins to Your Gelato
Once your base is thoroughly chilled, it's time to add your primary flavorings. The method depends on the type of flavoring:
- Liquid extracts (like vanilla): Stir in just before churning.
- Purees (fruit, nut): Blend into the chilled base.
- Solid ingredients (chocolate, nuts, fruit pieces): These are typically added during the last few minutes of churning or folded in gently after churning.
Adding flavors to a cold base helps preserve their freshness and intensity. For sensitive flavors like citrus zest or delicate fruit purees, adding them after the heating step but before chilling is often recommended.
Tips for Incorporating Fruits, Nuts, and Chocolate
- Fruits: If using fresh fruit, puree it finely. For fruits with high water content, consider slightly reducing the puree or macerating the fruit in some sugar beforehand to draw out excess liquid. For pieces of fruit, freeze them first on a tray before adding to the gelato during churning to prevent them from freezing into hard, icy nuggets.
- Nuts: Use high-quality, roasted nuts. Grind them into a fine paste or chop them very finely. Nut pastes provide a more intense flavor and smooth consistency. Add pastes to the chilled base and blend well. Add chopped nuts during the last few minutes of churning.
- Chocolate: For chocolate gelato, melt high-quality chocolate and whisk it into the hot base before chilling. For stracciatella, melt dark chocolate (around 70% cacao) and drizzle it into the churned gelato during the last minute or two of churning. The cold gelato will immediately harden the chocolate into shards.
Step 4: Churning the Gelato to Achieve a Smooth Texture
Churning is where the magic happens – the mixture is frozen while being agitated to incorporate a small amount of air and prevent large ice crystals from forming. The goal is to freeze the mixture relatively quickly while keeping the air incorporation low for that dense gelato texture.
Ensure your ice cream maker is properly prepared (freezer bowl frozen solid, or compressor pre-cooled). Pour the chilled base into the machine and churn according to the manufacturer's instructions, but stop as soon as the gelato reaches a soft-serve consistency. This usually takes 15-30 minutes depending on the machine and base temperature. Over-churning can incorporate too much air, resulting in a lighter, less dense texture.
Choosing the Right Ice Cream Maker for Gelato
The type of ice cream maker affects the churning process and the resulting texture:
- Freezer Bowl Machines: These are affordable but require pre-freezing the bowl for 12-24 hours. They work well for small batches but can struggle with larger quantities or multiple batches as the bowl thaws. Ensure the bowl is fully frozen for best results and fastest churning, which helps achieve a smooth homemade gelato texture.
- Compressor Machines: These are more expensive but have a built-in freezing unit, allowing you to make multiple batches without pre-freezing. They maintain a consistent freezing temperature, often resulting in faster churning and potentially smoother results. Look for models with slower churning speeds if gelato is your primary goal.
Step 5: Hardening and Maturing the Gelato for Optimal Flavor and Texture
After churning, your gelato will be the consistency of soft-serve. While delicious, it needs to harden in the freezer to reach its ideal texture. Transfer the churned gelato to an airtight container immediately. Press plastic wrap directly onto the surface of the gelato to prevent freezer burn.
Place the container in the coldest part of your freezer for at least 4-6 hours, but ideally 8-12 hours or overnight. This hardening phase, sometimes called "maturing," allows the fat to fully solidify and the flavors to deepen. Serving gelato directly from the churner is too soft and doesn't fully showcase its potential smooth, dense texture. The final hardening process is crucial for achieving the perfect scoopable consistency.
Key Techniques for a Smooth Gelato Texture
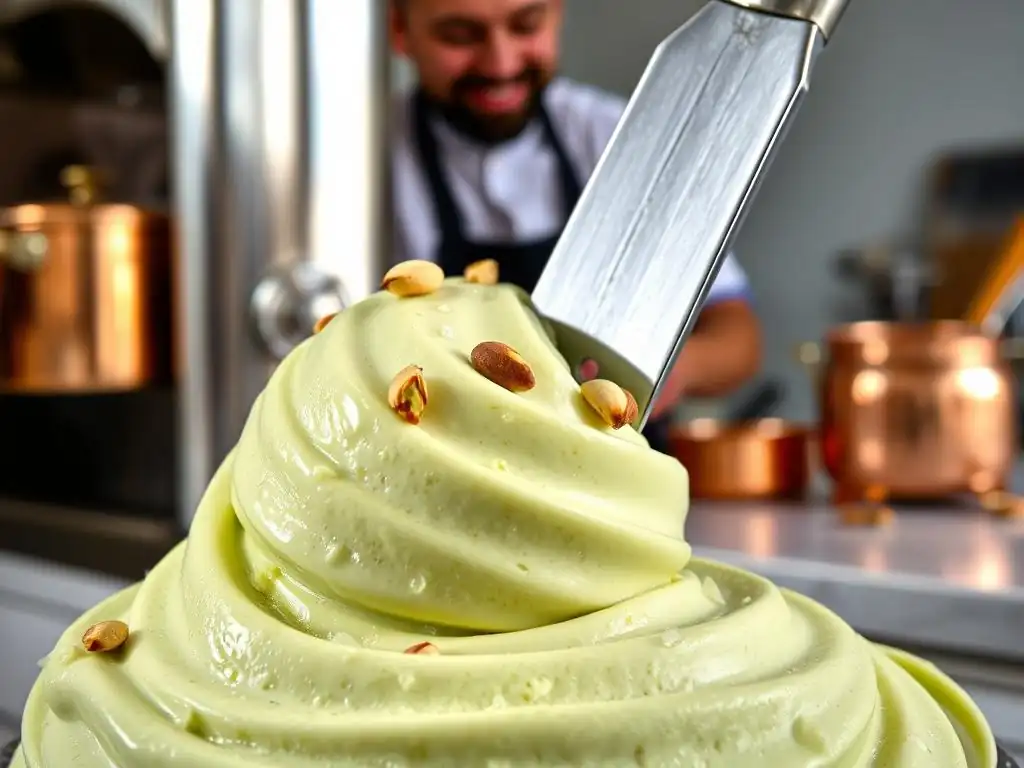
Beyond ingredients and the basic process, several techniques can be employed to specifically enhance and preserve the smooth homemade gelato texture you're aiming for. These involve managing fat, freezing speed, crystal formation, and storage.
Achieving the Right Fat Content for Gelato
As discussed, gelato has a lower fat content than ice cream, but fat is still essential for smoothness. Too little fat can lead to an icy texture, while too much goes against the definition of gelato and can mask flavors. The ideal range for gelato is typically between 4% and 9% total fat. This is achieved by balancing the ratio of whole milk (around 3-4% fat) and heavy cream (around 35-40% fat).
Calculating the exact percentage requires knowing the fat content of your specific dairy products and the weight of each ingredient. For example, using 500g whole milk (approx 3.5% fat = 17.5g fat) and 250g heavy cream (approx 38% fat = 95g fat) results in a total of 112.5g fat in 750g base, which is about 15% fat – too high for typical gelato.
A more appropriate ratio might be 700g whole milk (24.5g fat) and 150g heavy cream (57g fat), totaling 81.5g fat in 850g base, resulting in ~9.6% fat. Adjusting these ratios based on recipe goals and desired richness is key to controlling the final smooth texture.
The Importance of Rapid Freezing in Small Batches
Speed matters when it comes to freezing. The faster the mixture freezes, the smaller the ice crystals will be. Large ice crystals result in a grainy or icy texture, while small crystals contribute to smoothness. This is why pre-chilling the base thoroughly and ensuring your ice cream maker's freezer element (bowl or compressor) is as cold as possible is vital.
Working in smaller batches can also help achieve faster freezing. Don't overfill your ice cream maker; usually, filling it to no more than two-thirds capacity allows for better churning action and faster freezing. Freezing in the coldest part of your freezer after churning also promotes rapid hardening and smaller crystal formation, preserving that smooth homemade gelato texture.
Avoiding Ice Crystals: Tips and Tricks
Ice crystals are the nemesis of smooth gelato. They form when water molecules migrate and refreeze into larger structures. Several factors help prevent this:
- Properly chilled base: A colder base freezes faster in the churner.
- Correct sugar balance: Sugar depresses the freezing point, keeping the gelato softer.
- Using stabilizers: As mentioned, stabilizers bind water, reducing crystal formation.
- Alcohol (in moderation): A small amount of alcohol (like a tablespoon of liqueur) can also lower the freezing point.
- Fat content: Sufficient fat helps coat water particles, hindering crystal growth.
- Airtight storage: Prevents moisture loss and the formation of surface ice crystals.
- [ ] Ensure base is chilled below 4°C (39°F) before churning.
- [ ] Check sugar percentage is within the 15-22% range.
- [ ] Consider adding a pinch of stabilizer for added security.
- [ ] Freeze churned gelato quickly in a cold freezer.
- [ ] Store in an airtight container with minimal headspace.
Proper Storage: Maintaining Gelato's Texture Over Time
Even perfectly made gelato can develop an icy texture if stored improperly. Temperature fluctuations are the main culprit. Every time gelato partially thaws and refreezes, existing ice crystals grow larger. To maintain that smooth homemade gelato texture:
- Use a high-quality, airtight container. Glass or sturdy plastic containers with tight-fitting lids are best.
- Press plastic wrap or parchment paper directly onto the surface of the gelato before lidding the container. This prevents air from contacting the surface and forming a layer of ice crystals.
- Store the container in the coldest part of your freezer, typically towards the back, away from the door where temperatures fluctuate most.
- Avoid repeatedly taking the gelato out and letting it soften significantly before returning it to the freezer. Scoop what you need and put it back quickly.
Following these storage tips helps preserve the initial smooth texture you worked hard to achieve.
Troubleshooting Common Gelato Texture Problems
Even with careful attention to detail, you might encounter textural issues when making homemade gelato. Understanding the potential causes can help you fix the current batch (sometimes!) and prevent the problem in future attempts.
Grainy Gelato: Identifying and Preventing Ice Crystals
Grainy gelato is almost always caused by the formation of large ice crystals. This can happen due to insufficient chilling of the base, slow freezing in the churner, inadequate sugar or fat content, lack of stabilizers, or temperature fluctuations during hardening and storage.
Prevention is the best cure: ensure your base is very cold, your machine is ready for rapid freezing, your ingredient ratios are correct, and you store the gelato properly. If a batch is already grainy, you might be able to save it by letting it melt fully in the refrigerator, then re-pasteurizing (heating gently to dissolve crystals), re-chilling thoroughly, and re-churning. However, this doesn't always work perfectly and can sometimes incorporate too much air.
Icy Gelato: Fixing the Problem and Understanding the Cause
Icy gelato is another symptom of large ice crystals, often more severe than simple graininess, resulting in a hard, unpleasant texture. Causes are similar to grainy gelato but might be more pronounced, such as a base with too little sugar or fat, or significant thawing and refreezing.
Beyond prevention (as outlined above), fixing an icy batch is difficult. If it's only slightly icy, allowing it to temper at room temperature for 10-15 minutes before scooping can help soften the crystals somewhat. For severely icy gelato, the re-melting and re-churning method mentioned for grainy gelato is your only real option, but success is not guaranteed. Focus on perfecting your technique for the next batch to ensure a consistently smooth homemade gelato texture.
Soft Gelato: Adjusting Sugar and Stabilizer Levels
If your gelato is consistently too soft, even after hardening, the most likely culprits are an excess of sugar or potentially too much stabilizer. Sugar significantly lowers the freezing point; too much can prevent the gelato from freezing firmly.
Review your recipe and measurements. If you've added significantly more sugar than recommended (e.g., over 22% of the total weight), reduce the amount in your next batch. If using stabilizers, ensure you are measuring them precisely (often with a milligram scale for tiny amounts) and not exceeding the recommended dosage (e.g., not more than 0.3% for LBG). Adjusting these levels gradually in future batches will help you find the right balance for your desired smooth texture and scoopability.
Hard Gelato: Tempering Techniques and Serving Tips
Conversely, if your gelato is too hard to scoop directly from the freezer, it likely has too little sugar or fat relative to its water content, causing it to freeze too solid at typical freezer temperatures. It could also be stored in a freezer that is set too cold (below -18°C or 0°F).
To serve hard gelato, the best technique is "tempering." Remove the container from the freezer and let it sit at room temperature for 10-20 minutes before attempting to scoop. The exact time will depend on the temperature of your room and the size of the container. This allows the gelato to soften slightly and develop its ideal smooth texture for scooping and eating. For future batches, consider slightly increasing the sugar or fat content, or ensuring your freezer isn't set excessively low.
Gelato Flavor Ideas to Inspire Your Homemade Creations
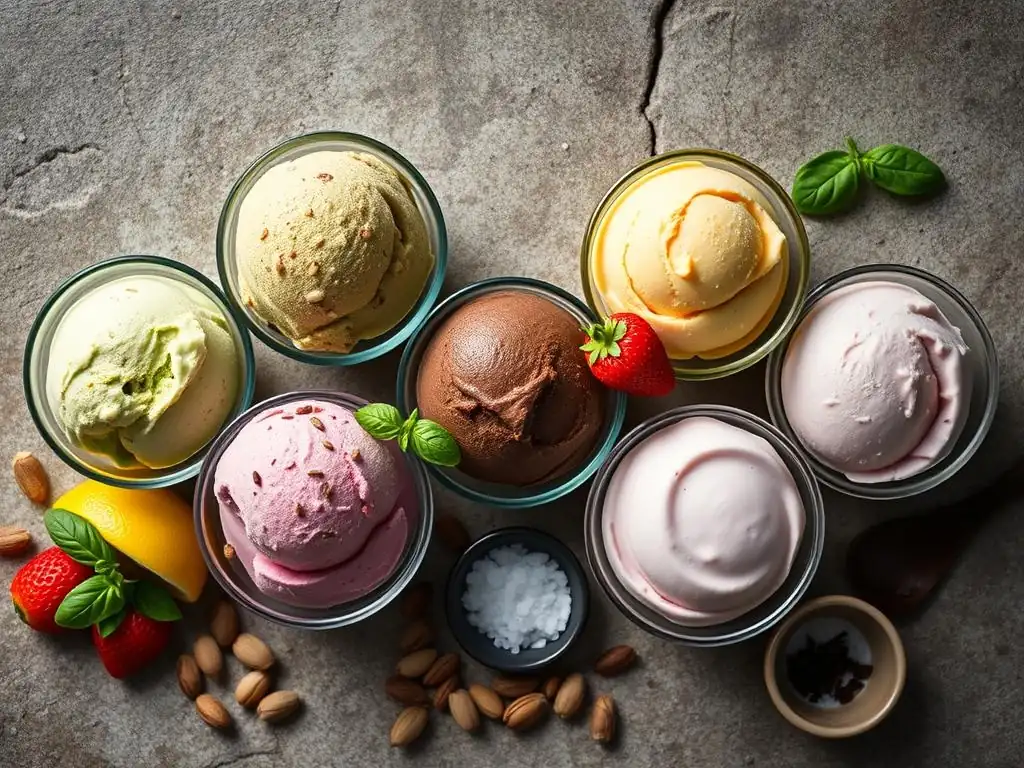
Once you've mastered the basics of achieving a smooth homemade gelato texture, the world of flavors opens up! Gelato's lower fat content makes it an excellent canvas for vibrant, true-to-ingredient flavors.
Classic Gelato Flavors: Pistachio, Hazelnut, Vanilla
These are timeless favorites for a reason, showcasing the pure essence of high-quality ingredients.
- Pistachio: Requires using pure pistachio paste made from 100% pistachios, ideally from Bronte, Sicily, for the most authentic flavor and vibrant green color (without artificial coloring).
- Hazelnut: Made with roasted hazelnut paste (e.g., from Piedmont hazelnuts) or finely ground, roasted hazelnuts. The rich, nutty flavor is a perfect complement to the creamy base.
- Vanilla: Simple yet sublime. Use real vanilla beans (scrape the seeds into the base and steep the pod) or high-quality pure vanilla extract. The quality of the vanilla is paramount here.
Fruity Gelato Flavors: Strawberry, Raspberry, Lemon
Fruit gelatos are refreshing and intensely flavorful, often having a slightly brighter, less creamy texture than dairy-heavy flavors due to the fruit's water content.
- Strawberry: Made with fresh, ripe strawberries pureed and often macerated with sugar to intensify flavor.
- Raspberry: Similar to strawberry, using fresh or frozen raspberries. The tartness provides a wonderful contrast to the sweetness of the base.
- Lemon: Often made like a sorbetto (dairy-free) or with a white base, using fresh lemon juice and zest for a bright, zesty flavor.
Chocolate Gelato Variations: Dark Chocolate, Milk Chocolate, Stracciatella
Chocolate is a versatile flavor in gelato, offering different experiences based on the type of chocolate used.
- Dark Chocolate: Uses high-quality cocoa powder or melted dark chocolate (60-70% cacao) for a deep, intense flavor.
- Milk Chocolate: Uses melted milk chocolate, resulting in a sweeter, creamier chocolate experience.
- Stracciatella: A classic Italian flavor consisting of fior di latte (a simple milk/cream base) with thin shards of dark chocolate mixed in during the final moments of churning.
Unique and Creative Gelato Flavors: Salted Caramel, Lavender Honey
Don't be afraid to get creative! The smooth base is perfect for carrying more complex or unusual flavor combinations.
- Salted Caramel: Incorporates homemade salted caramel sauce swirled into a fior di latte or white base. The balance of sweet and salty is addictive.
- Lavender Honey: Infuses milk/cream with culinary lavender before making the base, then sweetens with honey. Offers a delicate, floral, and sweet flavor profile.
Advanced Gelato Techniques for the Home Baker
For those looking to take their homemade gelato skills to the next level, exploring more advanced techniques can yield even more refined results and open up new possibilities.
Using a Pacojet for Ultra-Smooth Gelato
The Pacojet is a professional kitchen appliance that "pacotizes" frozen ingredients. Instead of churning, it micro-purees deep-frozen mixtures into an ultra-fine, super-smooth consistency on demand. While expensive, it produces gelato with an unparalleled smooth texture and intense flavor because it processes the ingredients when they are frozen solid, resulting in incredibly small ice crystals.
For the home enthusiast, replicating this micro-crystal structure is challenging with standard equipment. However, understanding the principle – freezing hard and then processing very finely – highlights why the final hardening step and serving temperature are so important for achieving the best texture with a home machine.
Creating Layered Gelato and Gelato Cakes
Once you can make smooth gelato, you can assemble more complex desserts. Layering different gelato flavors in a loaf pan or springform pan allows you to create beautiful and delicious gelato cakes or terrines.
To do this, churn one flavor, spread it evenly in your prepared pan, harden it in the freezer, then churn the next flavor and layer it on top. Repeat with subsequent flavors. Ensure each layer is sufficiently hardened before adding the next to prevent them from mixing. You can also incorporate layers of sponge cake, cookie crumbs, or fruit compotes. These creations demonstrate the versatility of your homemade gelato.
Infusing Flavors into Gelato Bases
Beyond simply adding extracts or purees, infusing liquids is a powerful way to impart subtle yet complex flavors. This involves steeping aromatic ingredients in the milk and cream base while it's being heated, then straining them out before chilling.
Examples include:
- Steeping coffee beans for coffee gelato.
- Infusing tea leaves (like Earl Grey or green tea) for tea-flavored gelato.
- Adding fresh herbs (mint, basil, lavender) or spices (cinnamon sticks, star anise) to the milk/cream mixture as it heats.
This technique extracts the flavor compounds into the liquid, resulting in a smooth base permeated with the desired aroma and taste, contributing to a sophisticated smooth homemade gelato texture and flavor profile.
Conclusion: Enjoying Your Homemade Smooth-Textured Gelato.
Creating homemade gelato with that signature smooth, dense texture is a process that rewards patience and precision. By understanding the fundamental differences from ice cream, focusing on quality ingredients, mastering the step-by-step process, and employing specific techniques to manage freezing and prevent ice crystals, you can achieve truly exceptional results in your own kitchen.
From classic flavors like pistachio and vanilla to vibrant fruit creations and unique infusions, the possibilities for your homemade gelato are endless. Don't be discouraged by initial attempts; practice makes perfect. With each batch, you'll gain a deeper understanding of the nuances involved in achieving that perfect smooth homemade gelato texture. So, grab your ingredients, prepare your machine, and get ready to indulge in the rich, dense, and intensely flavored delight that is authentic homemade gelato. Enjoy every scoop!
Frequently Asked Questions
How can I achieve a truly smooth texture in my homemade gelato?
The key is to minimize ice crystal formation. This can be done by using a high-fat content base, churning the gelato slowly and continuously, and ensuring rapid freezing.
What are the best ingredients to use for achieving a dense gelato?
Using a high proportion of milk solids compared to water is crucial. Also, adding a small amount of stabilizer, like locust bean gum or guar gum, can significantly improve density.
What type of ice cream maker is recommended for making gelato at home?
While any ice cream maker can work, those with built-in compressors are preferable. They maintain a consistent temperature, leading to smaller ice crystals and a smoother texture.
Why is the ripening process important for homemade gelato?
Ripening involves storing the freshly churned gelato in the freezer for a few hours. This allows the flavors to meld and the texture to further stabilize, resulting in a creamier and denser final product.
Can I use pre-made ingredients, like ice cream base mixes, to make gelato?
While convenient, pre-made mixes may not provide the optimal fat and sugar balance needed for authentic gelato. Using fresh, high-quality ingredients will generally yield a superior result.
Final Reflection: The Pursuit of Perfect Gelato
The quest for that impossibly smooth, dense texture in homemade gelato is more than just a culinary pursuit; it's a testament to the power of precision and patience in achieving culinary excellence. This article explored the science behind gelato's creamy texture, highlighting the crucial role of ingredients, techniques, and equipment in transforming simple ingredients into a luxurious treat. The methods outlined, from selecting the right fat content to mastering the art of churning, are designed to empower home cooks to replicate the quality found in the best gelaterias.
The pursuit of the perfect gelato texture mirrors our own pursuit of perfection in life. The small details, the meticulous attention to process, all contribute to a final product that is far greater than the sum of its parts. The details are not the details. They make the design.
- Charles Eames. This quote resonates deeply with the gelato-making process; each step, from ingredient selection to the final freeze, is crucial in achieving that sought-after smooth, dense texture. The journey itself, with its potential for both triumph and learning from mistakes, is as rewarding as the final spoonful.
Now, it's your turn. Don't be intimidated by the seemingly complex process. Embrace the challenge, experiment with different flavors and techniques, and savor the journey of creating your own perfect gelato. The reward? Not just a delicious dessert, but a deeper appreciation for the artistry and science behind this beloved Italian treat. So, gather your ingredients, put on your apron, and embark on your own gelato adventure. The smooth, dense texture awaits!
Unlock Your Gelato Mastery: Craft the Perfect Scoop!
Thanks for joining us on this delicious journey into the world of gelato! We hope you've learned the secrets to achieving that unbelievably smooth and dense texture at home. Now it's time to put your newfound knowledge to the test.
- Whip up your first batch of homemade gelato: Use your favorite flavor combination and let us know how it turns out! We'd love to hear about your successes (and even your minor mishaps! ).
- Share your gelato creation on social media: Tag us with #BakeWithEaseGelato so we can all enjoy your delicious handiwork.
- Experiment with unique flavor combinations: Think outside the box! What unexpected ingredients might elevate your gelato to the next level?
Ready to transform your kitchen into a gelateria? What innovative flavor combinations are you planning to try first?