
Yeast Fermentation 101: The Essential Guide for Bakers

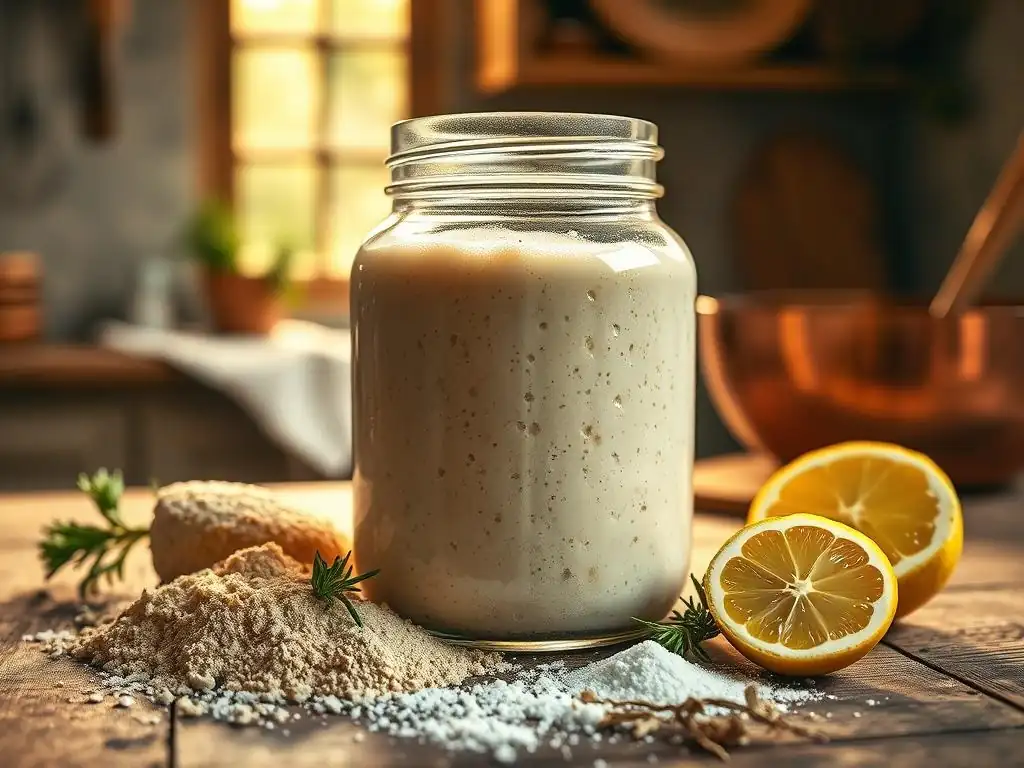
Welcome to BakeWithEase, your portal to unlocking the magic of baking! Ever wondered how a few simple ingredients can transform into a light and airy masterpiece? Dive into our Baking Science Deep Dive and discover the secrets behind yeast fermentation. This guide is specifically designed for baking beginners eager to understand the process. Are you ready to witness the amazing power of yeast and elevate your baking game? Let's get started!
- Understanding Yeast Fermentation for Bread Baking
- Introduction to Yeast Fermentation in Bread Making
- The Science of Yeast Fermentation in Bread Dough
- Types of Yeast for Bread: A Comparative Guide
-
The Bread Fermentation Process: A Practical Guide
- Step 1: Hydrating Dry Yeast (Proofing): When and How
- Step 2: Combining Yeast with Flour, Water, and Other Ingredients
- Step 3: Bulk Fermentation (First Rise): Time, Temperature, and Dough Development
- Step 4: Shaping, Proofing (Second Rise), and Optimizing Texture
- Step 5: Baking: Yeast Deactivation and Bread Structure Setting
-
Troubleshooting Common Yeast Fermentation Issues in Bread
- Dough Not Rising: Possible Causes and Solutions
- Over-Proofed Dough: Identification, Consequences, and Prevention
- Under-Proofed Dough: Indicators and Corrective Measures
- Importance of Dough Temperature for Consistent Fermentation
- Troubleshooting Table: Problem, Cause, Solution (e.g., Flat Bread, Inactive Yeast, Check Expiration Date)
- Tips and Tricks for Successful Yeast Fermentation in Bread Baking
- Bread Recipes to Practice Yeast Fermentation
- Advanced Yeast Fermentation Techniques for Bread Baking
- Conclusion: Mastering Yeast Fermentation for Exceptional Bread
-
Frequently Asked Questions
- What exactly is yeast fermentation in baking, and why is it important?
- What are the different types of yeast commonly used in baking?
- How can I tell if my yeast is still active and good to use?
- What are some common problems beginners face with yeast fermentation, and how can I avoid them?
- Can I substitute different types of yeast in a recipe, and if so, how do I adjust the amounts?
- Final Reflection: Unlocking the Magic of Yeast: A Baker's Journey
- Unleash Your Inner Baker: Take the Next Step!
Understanding Yeast Fermentation for Bread Baking
Introduction to Yeast Fermentation in Bread Making
What is Yeast Fermentation and Why is it Crucial for Bread?
Yeast fermentation is a biological process where yeast, a single-celled microorganism, consumes sugars and converts them into ethanol (alcohol) and carbon dioxide gas. Think of yeast as tiny living factories in your dough! This process is absolutely crucial for making most types of bread because the carbon dioxide gas produced gets trapped within the network of gluten in the dough. This trapped gas is what causes the dough to rise, creating that light, airy texture we love in a good loaf. Without sufficient yeast fermentation, your bread would be dense, flat, and brick-like.
Beyond just making the dough rise, yeast fermentation also significantly contributes to the flavor and aroma of the final baked bread. As the yeast consumes sugars, it produces a variety of complex compounds, including organic acids and other volatile substances. These byproducts develop over time during the fermentation process, adding depth, nuance, and that characteristic "bready" smell and taste. Mastering yeast fermentation is a foundational step for anyone venturing into baking, especially for beginners eager to bake delicious loaves.
Understanding the Fundamentals of Yeast Fermentation for Bread Bakers
For beginners diving into yeast fermentation baking, grasping a few core fundamentals is key. Firstly, yeast is alive and needs specific conditions to thrive: food (sugar), moisture, and a suitable temperature range. Too hot, and you might kill the yeast; too cold, and it becomes sluggish. Secondly, the dough itself provides the environment for fermentation – the flour contains starches that break down into sugars, and the water activates the yeast and allows the process to occur.
Understanding the time element is also vital. Fermentation isn't instantaneous; it requires patience. The longer the dough ferments (within limits), the more flavor develops and the more gas is produced for rising. Factors like the amount of yeast used, the dough temperature, and the type of flour all influence the speed and outcome of yeast fermentation. This guide aims to demystify these basics, making yeast fermentation baking approachable for beginners.
The Science of Yeast Fermentation in Bread Dough
How Yeast Metabolizes Sugars: The Fermentation Process Explained
At its core, yeast fermentation is the process by which yeast cells obtain energy in the absence of oxygen. In bread dough, yeast primarily feeds on simple sugars like glucose and fructose. These sugars are either present naturally in the flour (from the breakdown of starches by enzymes) or added directly, such as granulated sugar or honey. The yeast takes these sugars into its cells and, through a series of enzymatic reactions, breaks them down. The primary end products of this anaerobic respiration process are carbon dioxide (CO₂) and ethanol (alcohol).
The balanced chemical equation for the main fermentation reaction (though simplified) is roughly:
The Impact of Sugar Types on Yeast Activity and Bread Flavor
Different types of sugars affect yeast fermentation in varying ways. Simple sugars like glucose, fructose, and sucrose (table sugar, which is quickly broken down into glucose and fructose by yeast enzymes) are readily consumed by yeast and provide a quick burst of activity.
Adding a small amount of sugar (e.g., 1-2% of the flour weight) can help kickstart fermentation, especially in lean doughs (those without much added fat or sugar). However, too much sugar (above 5-10%) can actually slow down yeast activity by drawing water out of the yeast cells via osmosis, which can be detrimental to yeast fermentation, particularly for beginners experimenting with sweet doughs.
Complex carbohydrates like starch, which make up the bulk of flour, are not directly consumable by yeast. However, flour contains enzymes (amylases) that break down starch into simpler sugars that yeast can eat. This slower, sustained release of sugars from the starch provides a more prolonged food source for the yeast, contributing to a longer, slower fermentation that often results in more complex flavors. Sugars also contribute to crust browning during baking through the Maillard reaction and caramelization, further enhancing the flavor and appearance of the final loaf.
The Role of Carbon Dioxide and Ethanol in Bread Texture and Aroma
The two main products of yeast fermentation, carbon dioxide and ethanol, play distinct but crucial roles in bread making. Carbon dioxide gas is the primary leavening agent. As yeast produces CO₂, the gas gets trapped within the elastic gluten network formed by kneading the dough. This trapping of gas bubbles causes the dough to expand and rise, leading to a light, open crumb structure in the baked bread. The amount of CO₂ produced and retained directly impacts the bread's volume and texture.
Ethanol, the other major byproduct, is a type of alcohol. While it contributes minimally to the leavening process (it expands slightly with heat), its main contribution is to the flavor and aroma profile of the bread. Ethanol interacts with other compounds in the dough to create esters and other volatile substances that give bread its characteristic smell. During baking, the high temperatures cause most of the ethanol to evaporate, leaving behind its flavorful contributions. Understanding these roles is essential for beginners trying to master yeast fermentation baking.
Types of Yeast for Bread: A Comparative Guide
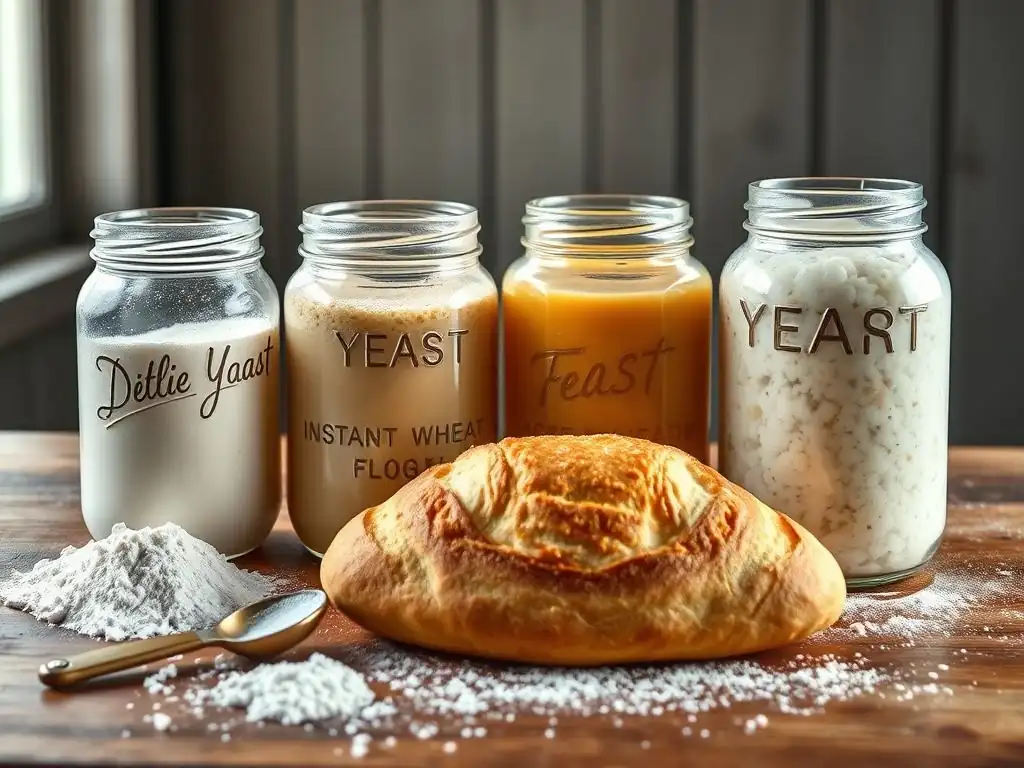
Active Dry Yeast: Usage, Hydration, and Storage
Active dry yeast is one of the most common types available, especially for home bakers. It consists of dehydrated yeast granules that are dormant. To activate active dry yeast, it typically needs to be "proofed" or dissolved in warm liquid (usually water or milk, around 105-115°F or 40-46°C) before being added to the dry ingredients.
This process rehydrates the yeast cells and ensures they are alive and active, often indicated by a foamy layer forming on the surface after 5-10 minutes. A standard packet contains about 2.25 teaspoons or 7 grams, which is usually sufficient for leavening 4-6 cups of flour.
Storing active dry yeast properly is important for maintaining its viability. Unopened packets or jars can be stored at room temperature in a cool, dry place for several months, often up to a year or more depending on the brand and packaging. Once opened, it's best to store active dry yeast in an airtight container in the refrigerator or freezer.
In the refrigerator, it can last for several months; in the freezer, it can last for a year or even longer. Always check the expiration date and perform a proofing test if unsure of its freshness, which is a good habit for beginners practicing yeast fermentation baking.
Instant Dry Yeast: Direct Incorporation and Benefits
Instant dry yeast is a more modern form of dry yeast that does not require proofing before use. Its granules are smaller and more porous than active dry yeast, allowing them to hydrate more quickly when mixed directly into the dry ingredients of a recipe. This convenience makes it particularly popular among beginners and busy bakers. Instant yeast is also generally more active than active dry yeast, meaning you might use slightly less of it in a recipe (often about 25% less) and fermentation might proceed a bit faster.
A key benefit of instant dry yeast is its reliability and ease of use, simplifying the initial steps of yeast fermentation baking for beginners. Like active dry yeast, instant yeast is sold in packets and jars. Storage recommendations are similar: store unopened packages in a cool, dry place, and opened packages in an airtight container in the refrigerator or freezer. While proofing isn't required, you can still test instant yeast by dissolving it in warm water with a pinch of sugar if you want to confirm its viability, though this is less commonly needed than with active dry yeast.
Fresh Yeast (Cake Yeast): Handling, Storage, and Flavor Contribution
Fresh yeast, also known as compressed yeast or cake yeast, is a moist block of active yeast cells. It is highly perishable and must be stored in the refrigerator, where it typically lasts only 1-2 weeks. Fresh yeast is about 70% moisture, making it more active initially but also requiring careful handling and storage. It should look creamy white or beige and crumble easily; if it's hard, discolored, or smells unpleasant, it's likely past its prime.
Many professional bakers and enthusiasts prefer fresh yeast for its subtle flavor contribution and consistent, steady rate of yeast fermentation. It is typically crumbled directly into the dry or wet ingredients of a recipe. The general conversion is that 1 part fresh yeast is equivalent to about 0.4 parts active dry yeast or 0.33 parts instant dry yeast by weight. While perhaps less common for absolute beginners due to its shorter shelf life, fresh yeast offers a unique experience in yeast fermentation baking.
Key Differences: Choosing the Right Yeast for Your Recipe
The primary differences between active dry, instant dry, and fresh yeast lie in their moisture content, required activation method, and shelf life. Active dry yeast needs proofing, instant dry yeast can be added directly, and fresh yeast is added directly but is highly perishable. Instant yeast is typically the most potent per unit weight, followed by active dry, and then fresh yeast (due to its high water content).
| Feature | Active Dry Yeast | Instant Dry Yeast | Fresh Yeast |
|---|---|---|---|
| Proofing | Required (warm liquid) | Not Required (add to dry) | Not Required (crumble in) |
| Activity | Moderate | High | High (but perishable) |
| Shelf Life | Long (sealed), Months (opened/fridge) | Long (sealed), Months (opened/fridge) | Short (1-2 weeks in fridge) |
| Storage | Cool, Dry; Fridge/Freezer after opening | Cool, Dry; Fridge/Freezer after opening | Refrigerator (must be refrigerated) |
| Conversion | 1 part | ~0.75 part (by weight) | ~2.5 parts (by weight) |
For beginners learning yeast fermentation baking, instant dry yeast is often the easiest to start with due to its convenience. However, understanding how to use all three types expands your baking repertoire and allows you to follow a wider range of recipes accurately.
The Bread Fermentation Process: A Practical Guide
Step 1: Hydrating Dry Yeast (Proofing): When and How
Proofing, or hydrating dry yeast, is a step required specifically when using active dry yeast. It's also a useful test for any type of dry yeast if you're unsure if it's still alive. To proof active dry yeast, measure out the amount specified in your recipe. Heat the liquid (usually water or milk) called for in the recipe to a warm temperature, typically between 105°F and 115°F (40°C-46°C). This temperature range is warm enough to activate the yeast without being so hot that it kills it.
Combine the warm liquid with the yeast in a small bowl. Often, a pinch of sugar is added as "food" to help the yeast wake up and become active quickly. Stir gently, then let the mixture sit undisturbed for 5 to 10 minutes.
If the yeast is active, you will see a foamy layer develop on the surface, indicating that the yeast is producing carbon dioxide. If no foam appears after 10 minutes, the yeast is likely dead or inactive, and you should discard it and start with fresh yeast. This proofing step is a simple yet crucial check for beginners practicing yeast fermentation baking.
Step 2: Combining Yeast with Flour, Water, and Other Ingredients
Once your yeast is proofed (if using active dry) or measured out (if using instant or fresh), it's time to combine it with the main ingredients: flour, water, and any other recipe components like salt, sugar, fat, or eggs. If using active dry yeast, add the proofed, foamy mixture to the other wet ingredients or directly to the dry ingredients as specified by the recipe.
If using instant yeast, simply whisk it directly into the flour and other dry ingredients before adding the liquid. For fresh yeast, crumble it into the liquid or the dry ingredients, ensuring it gets evenly distributed.
The order of adding ingredients can vary by recipe (e.g., some recipes mix wet first, some dry first), but the goal is always to distribute the yeast evenly throughout the dough so that fermentation can occur consistently. Salt should generally not come into direct, prolonged contact with yeast before mixing, as it can inhibit yeast activity by drawing out moisture. Many recipes call for adding salt after the initial mixing has begun or ensuring it's mixed into the flour before the liquid and yeast are added. This combination step initiates the environment where yeast fermentation begins.
Step 3: Bulk Fermentation (First Rise): Time, Temperature, and Dough Development
Bulk fermentation, often called the "first rise," is the period after mixing and kneading when the entire mass of dough is left to ferment as a single unit. This is a critical stage for developing both flavor and structure. During this time, the yeast actively produces CO₂, causing the dough to increase significantly in volume, often doubling in size. Simultaneously, enzymes in the flour and yeast begin breaking down components, and the gluten network continues to develop, becoming more elastic and capable of trapping gas.
The duration of bulk fermentation is highly dependent on the dough temperature and the amount of yeast used. A typical bulk fermentation at room temperature (around 70-75°F or 21-24°C) might take 1 to 2 hours for a standard loaf with commercial yeast. Warmer temperatures (like in a proofing box or warm oven with the light on) speed up fermentation, while cooler temperatures (like in the refrigerator) slow it down, allowing for longer flavor development (cold fermentation).
The dough should look visibly larger, often bubbly, and pass the "poke test" (gently poke the dough; if the indentation slowly springs back halfway, it's usually ready). This stage is foundational for successful yeast fermentation baking for beginners.
Step 4: Shaping, Proofing (Second Rise), and Optimizing Texture
After the bulk fermentation, the dough is typically "punched down" or gently degassed to release some of the large gas bubbles. This helps create a finer, more even crumb structure. The dough is then shaped into its final form (loaf, rolls, pizza crust, etc.). Shaping is important for creating surface tension and structure that will hold the dough's shape during the final rise and baking.
Following shaping, the dough undergoes a second fermentation period, often called proofing or the "final rise." This happens after the dough is shaped and placed in its baking vessel (like a loaf pan) or on a baking sheet. The second rise is usually shorter than the first, often taking 30-60 minutes, depending on the temperature and how much the dough was degassed during shaping. The dough should again increase noticeably in volume, though often not quite doubling.
It should look puffy and feel light. Over-proofing at this stage can lead to the dough collapsing in the oven. Proper proofing is essential for achieving the desired texture and volume in the final baked bread, a key skill for beginners mastering yeast fermentation baking.
Step 5: Baking: Yeast Deactivation and Bread Structure Setting
The final step in the process is baking. When the dough is placed in a hot oven, several things happen simultaneously. Initially, there's a rapid expansion of the dough known as "oven spring." This occurs because the trapped gases (CO₂ and ethanol) expand rapidly in the heat, and the yeast has a final burst of activity before dying. Yeast is typically killed at temperatures around 130-140°F (54-60°C).
As the internal temperature of the bread rises further, the gluten structure coagulates and sets, trapping the expanded gases and solidifying the bread's structure. Starch gelatinizes, absorbing moisture, and the crust begins to form and brown through the Maillard reaction and caramelization, contributing significantly to flavor and texture. The ethanol produced during fermentation evaporates. Baking transforms the proofed dough into a stable, flavorful loaf, marking the successful completion of the yeast fermentation process.
Troubleshooting Common Yeast Fermentation Issues in Bread
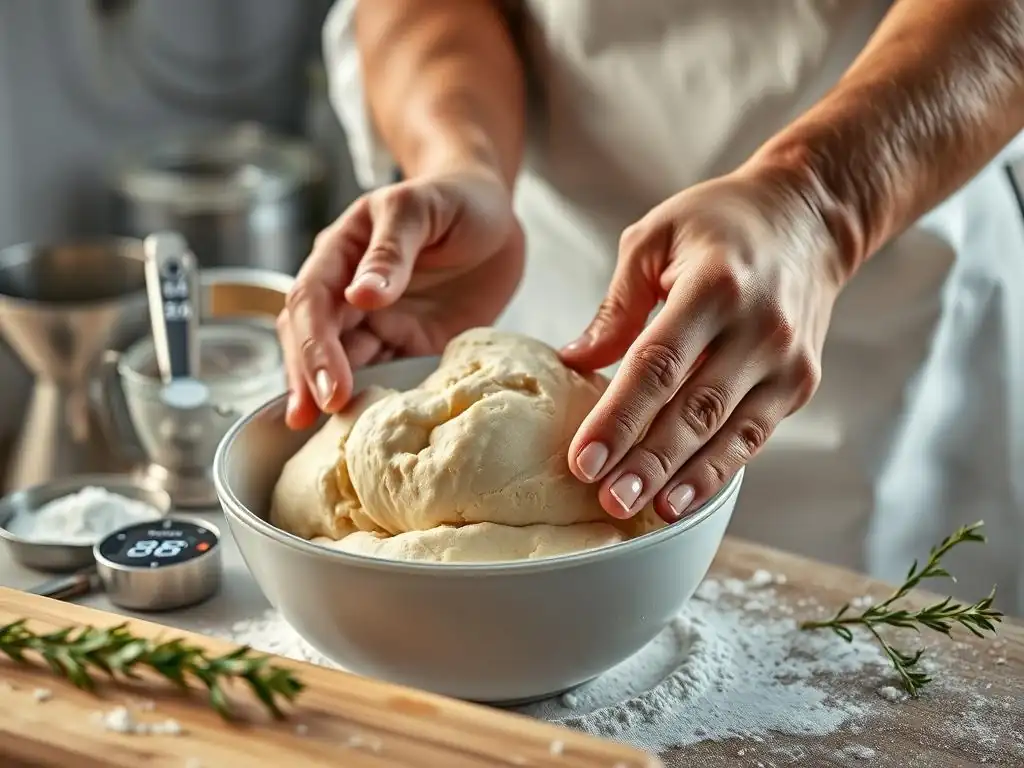
Dough Not Rising: Possible Causes and Solutions
One of the most frustrating issues for beginners in yeast fermentation baking is dough that simply won't rise. There are several common culprits. The most frequent is inactive or dead yeast. This can happen if the yeast is old, was stored improperly, or was killed by using liquid that was too hot (above 130°F or 54°C) during mixing.
- Solution: Always check the expiration date on your yeast packet or jar. If using active dry yeast, proof it first in warm water (105-115°F) with a pinch of sugar to verify its activity. If it doesn't foam, get fresh yeast. Ensure your liquid temperature is within the correct range when mixing. Another cause could be the environment being too cold; yeast ferments best between 70-80°F (21-27°C). Find a warmer spot for your dough to rise. Finally, too much salt or sugar can inhibit yeast; ensure you're measuring accurately and not adding excessive amounts, especially directly on the yeast.
Over-Proofed Dough: Identification, Consequences, and Prevention
Over-proofing occurs when the dough has fermented for too long or at too warm a temperature, allowing the yeast to produce too much gas and then start to collapse. You can identify over-proofed dough by its appearance: it will look overly puffy, potentially starting to deflate in places, and the poke test will leave an indentation that doesn't spring back at all. The dough may also smell strongly alcoholic.
- Consequences: Baking over-proofed dough often results in a loaf with poor structure, a dense or uneven crumb, and sometimes a gummy texture. The trapped gas bubbles become too large and fragile to withstand the oven spring, leading to collapse.
- Prevention: Pay attention to the recommended rise times in recipes, but also learn to judge the dough by its appearance and feel (the poke test is your friend!). If you anticipate a delay before baking, consider a cooler fermentation environment, like the refrigerator, which significantly slows down yeast activity. If dough does over-proof before shaping, you might be able to gently punch it down, reshape it, and give it a much shorter second rise. If it over-proofs during the second rise, sometimes baking it carefully can still yield an edible loaf, though the texture won't be ideal.
Under-Proofed Dough: Indicators and Corrective Measures
Under-proofed dough hasn't fermented long enough to produce sufficient gas for proper leavening. It will look dense, not significantly increased in volume, and feel heavy. The poke test will show an indentation that springs back very quickly and completely.
- Indicators: Small volume increase after rising, dense appearance, poke test springs back fully.
- Corrective Measures: If you realize your dough is under-proofed during the first rise, simply allow it more time in a warm place until it passes the poke test and has increased sufficiently in volume. If it's under-proofed during the second rise (after shaping), give it more time to proof in a warm spot before baking. Baking under-proofed dough results in a dense, heavy loaf with a tight crumb. It might also experience excessive, uncontrolled oven spring, potentially leading to cracks or blowouts in unexpected places on the crust. For beginners in yeast fermentation baking, learning to recognize the signs of properly proofed dough takes practice.
Importance of Dough Temperature for Consistent Fermentation
Dough temperature is arguably the single most critical factor influencing the rate of yeast fermentation. Yeast is most active within a specific temperature range, typically between 70°F and 80°F (21°C and 27°C). Temperatures below this range slow fermentation considerably, while temperatures above 80°F accelerate it. Temperatures above 100°F (38°C) can stress the yeast, and temperatures above 130-140°F (54-60°C) will kill it.
Maintaining a consistent dough temperature helps ensure predictable fermentation times and results. Factors influencing dough temperature include the temperature of your ingredients (especially the water), the temperature of your kitchen, and the friction heat generated during kneading (especially with a stand mixer). Using a thermometer to check your water temperature and even the dough temperature can be immensely helpful for beginners aiming for consistent yeast fermentation baking outcomes.
Troubleshooting Table: Problem, Cause, Solution (e.g., Flat Bread, Inactive Yeast, Check Expiration Date)
Here's a quick reference for common issues encountered by beginners learning yeast fermentation baking:
| Problem | Potential Cause(s) | Solution(s) |
|---|---|---|
| Dough doesn't rise | Inactive/dead yeast; Liquid too hot/cold; Environment too cold; Too much salt/sugar | Check yeast expiration; Proof active dry yeast; Use correct liquid temp (105-115°F); Find warmer spot (70-80°F); Measure ingredients accurately. |
| Flat bread | Over-proofed dough; Underveloped gluten; Not enough yeast | Adjust rise time/temp; Perform windowpane test to check gluten; Check yeast amount & activity. |
| Dense, heavy loaf | Under-proofed dough; Underveloped gluten; Not enough liquid | Allow longer rise time; Knead longer to develop gluten; Ensure correct hydration ratio. |
| Large, uneven holes | Over-proofed dough; Insufficient degassing/shaping; Too rapid rise | Reduce rise time/temp; Gently punch down/degas thoroughly; Improve shaping technique. |
| Crust is pale | Not enough sugar; Not baked long enough/high enough temp | Add small amount of sugar; Increase bake time or oven temperature (check recipe). |
| Dough smells strongly alcoholic | Over-proofed dough | Reduce rise time/temp; Use less yeast for longer fermentation. |
Tips and Tricks for Successful Yeast Fermentation in Bread Baking
Precise Ingredient Measurement: Yeast, Flour, and Water Ratios for Bread
Precision in measuring ingredients is fundamental for consistent results in yeast fermentation baking, particularly for beginners. While cups can be used, weighing ingredients, especially flour and water, is far more accurate. Flour density varies greatly depending on how it's stored and scooped. Using a kitchen scale ensures you have the exact amount specified in the recipe.
The ratio of yeast to flour and water is critical. Too little yeast, and the rise will be very slow or insufficient. Too much yeast, and the dough might over-proof quickly, develop off-flavors, and smell overly yeasty or alcoholic.
Recipes typically provide these ratios, but understanding the impact of slight variations helps troubleshoot. For instance, a common ratio for a standard loaf using instant yeast might be around 1-1.5% yeast relative to the flour weight (e.g., 5-7 grams of yeast per 500 grams of flour), while active dry might be slightly higher, and fresh yeast significantly higher due to moisture content. Hydration (water percentage relative to flour) impacts dough consistency and influences fermentation speed; higher hydration doughs tend to ferment faster.
Optimizing Water Temperature for Yeast Activation and Dough Development
The temperature of the water or liquid used in your dough mix has a direct and immediate impact on yeast activity and the overall dough temperature. As mentioned, using water that is too hot will kill the yeast, while water that is too cold will make the yeast sluggish. For activating active dry yeast, the ideal range is 105-115°F (40-46°C). When mixing instant yeast directly into dry ingredients, the water can be slightly cooler, perhaps 95-105°F (35-40°C), as it will warm up from the ambient temperature and kneading friction.
Beyond just activating the yeast, the water temperature influences the final dough temperature after mixing. Many recipes aim for a final dough temperature in the sweet spot for fermentation, around 75-78°F (24-26°C). You can use a formula called the "Desired Dough Temperature" (DDT) to calculate the ideal water temperature needed, taking into account the ambient temperature and flour temperature. While DDT might be advanced for absolute beginners, simply aiming for warm (not hot) water around 100°F (38°C) for most standard doughs is a good starting point for reliable yeast fermentation.
Using a Dough Thermometer: Ensuring Optimal Temperature for Yeast Activity
A simple instant-read thermometer is an invaluable tool for beginners serious about mastering yeast fermentation baking. It allows you to accurately measure the temperature of your water before adding yeast and, more importantly, the temperature of your mixed dough. As yeast activity is so temperature-dependent, knowing the dough's internal temperature provides a clear indication of how fast or slow fermentation is likely to proceed, allowing you to adjust rise times or ambient temperature accordingly.
For instance, if a recipe suggests a 1-hour rise at room temperature but your dough is only 68°F (20°C), you'll know it will likely take longer, perhaps 1.5 to 2 hours, to double. Conversely, if your dough is 80°F (27°C), it might be ready in less than an hour. Aiming for a consistent dough temperature batch after batch is key to achieving predictable and repeatable results in yeast fermentation.
The Windowpane Test: Assessing Gluten Development for Ideal Fermentation
The windowpane test is a technique used to assess whether the gluten network in your dough has been sufficiently developed through kneading. A well-developed gluten network is essential because it's this elastic structure that traps the carbon dioxide gas produced by yeast fermentation, allowing the dough to rise and hold its shape.
To perform the windowpane test, pinch off a small piece of dough (about the size of a golf ball). Gently stretch it between your fingers. If the dough can be stretched thinly enough to see light through it without tearing, forming a translucent "windowpane," then the gluten is well-developed. If it tears easily before you can stretch it thin, it needs more kneading. Dough with properly developed gluten will rise more effectively and produce a better texture, directly impacting the success of your yeast fermentation baking.
Bread Recipes to Practice Yeast Fermentation
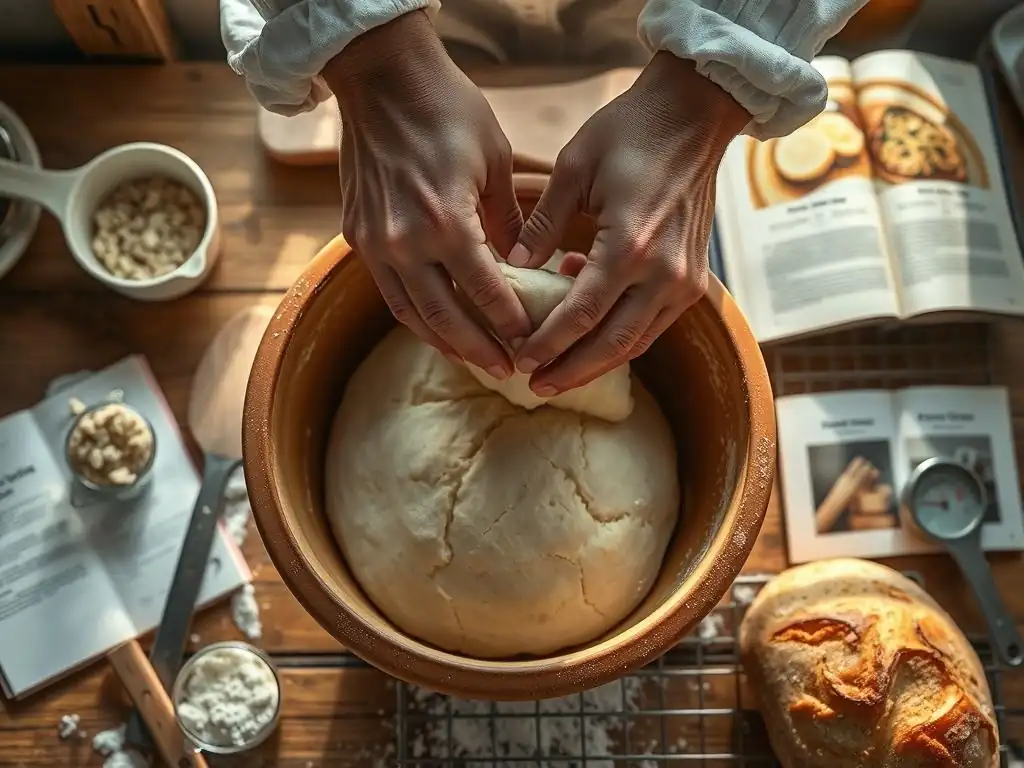
Basic White Bread Recipe: A Beginner's Guide to Yeast Fermentation
A basic white bread recipe is the perfect starting point for beginners learning yeast fermentation baking. It typically involves simple ingredients: flour, water, yeast, salt, and maybe a little sugar or fat. The process usually includes mixing, kneading, a bulk fermentation (first rise), shaping, a second fermentation (proofing), and baking.
- Example Ingredient Ratios (approximate for a 1.5 lb loaf):
- 500g Bread Flour
- 325g Warm Water (approx. 100°F / 38°C)
- 7g Instant Dry Yeast (approx. 2.25 tsp)
- 10g Salt (approx. 1.5 tsp)
- 15g Sugar (optional, approx. 1 tbsp)
Following such a recipe allows you to observe the yeast fermentation process firsthand: seeing the dough expand during the first rise, feeling it change texture, and watching it puff up during the second rise before baking. It provides a tangible way for beginners to practice the concepts of yeast activity, temperature, and time.
Pizza Dough Recipe: Mastering Yeast Fermentation for Pizza Crust
Pizza dough is another excellent recipe for practicing yeast fermentation. A good pizza crust relies heavily on proper fermentation for both texture (chewy yet airy) and flavor. Pizza dough often uses slightly less yeast and benefits from a longer, slower fermentation, sometimes even cold fermentation in the refrigerator for a day or two, which develops more complex flavors.
- Example Ingredient Ratios (approximate for two 12-inch pizzas):
- 300g "00" or Bread Flour
- 180-200g Warm Water (approx. 95-100°F / 35-38°C)
- 2-3g Instant Dry Yeast (approx. 0.75 tsp)
- 6g Salt (approx. 1 tsp)
- 10g Olive Oil (optional, approx. 1 tbsp)
Working with pizza dough allows beginners in yeast fermentation baking to experiment with different hydration levels (the water amount can vary significantly) and fermentation times, observing how these changes affect the dough's handling properties and the final crust's characteristics.
Sourdough Bread Recipe: Cultivating Wild Yeast for Tangy Flavor
While commercial yeast is a great starting point, exploring sourdough introduces you to the world of wild yeast fermentation. Sourdough relies on a "starter," a living culture of wild yeast and beneficial bacteria (primarily lactobacilli) that ferments the dough. This process is slower and produces organic acids (like lactic and acetic acid) in addition to CO₂, resulting in the characteristic tangy flavor of sourdough.
Learning sourdough is a more advanced step in yeast fermentation baking for beginners, as it requires maintaining a starter and understanding its activity. The fermentation process is often longer and more complex, involving multiple stages. However, the reward is a bread with a unique flavor profile that commercial yeast cannot replicate. It's a deep dive into a different facet of yeast fermentation.
Advanced Yeast Fermentation Techniques for Bread Baking
Sourdough Starters: Creating and Maintaining a Natural Yeast Culture
Creating and maintaining a sourdough starter is the cornerstone of sourdough baking and a fascinating advanced yeast fermentation technique. A starter is typically made by mixing flour and water and allowing it to ferment spontaneously over several days. Wild yeasts and bacteria present naturally in the flour and the environment colonize the mixture, forming a stable, symbiotic culture.
Maintaining a starter involves regular "feedings," where a portion of the starter is discarded (or used in recipes) and replaced with fresh flour and water. This provides the microorganisms with new food and keeps the culture active and healthy. Starters can be kept at room temperature with daily feedings or in the refrigerator with less frequent feedings (e.g., once a week).
Learning to read your starter's activity – its rise and fall, its smell, its texture – is a skill that deepens your understanding of yeast fermentation beyond using packaged yeast. It's a commitment, but incredibly rewarding for those looking to elevate their baking skills beyond the basics of yeast fermentation baking beginners typically start with.
Poolish and Biga: Utilizing Pre-Ferments for Complex Flavors
Pre-ferments like poolish and biga are mixtures of flour, water, and a small amount of commercial yeast (or starter) that are allowed to ferment for several hours or overnight before being added to the final dough. This technique falls under advanced yeast fermentation as it requires planning and understanding how the pre-ferment's maturity affects the final dough.
- Poolish: A very wet pre-ferment (equal parts flour and water by weight, 100% hydration). It's typically made with a tiny amount of yeast and ferments for 12-16 hours at room temperature or longer in the fridge. It contributes significant flavor and aeration.
- Biga: A stiffer pre-ferment (lower hydration, typically 50-60% water by weight). It's also made with a small amount of yeast and ferments for a similar duration. Biga contributes structure and a different flavor profile than poolish.
Using pre-ferments allows for a longer fermentation time for a portion of the flour, leading to more complex flavor development and improved dough structure compared to a direct mix method. They are a great way to add depth to your bread once you're comfortable with basic yeast fermentation.
Autolyse: Enhancing Gluten Development Through Flour Hydration
Autolyse (pronounced auto-leez) is a technique developed by Professor Raymond Calvel that involves mixing just the flour and water from a recipe and letting the mixture rest for 20 minutes to several hours before adding the yeast and salt and beginning kneading. This period allows the flour to fully hydrate and enzymes within the flour to begin breaking down proteins, which helps with gluten development.
This rest period allows the gluten proteins (gliadin and glutenin) to start bonding and forming the gluten network without the mechanical action of kneading. It also makes the dough easier to handle and knead after the rest. While not directly a yeast fermentation step itself, autolyse significantly impacts the dough's structure and handling, which in turn affects how well the dough can trap the gases produced by yeast fermentation, leading to improved volume and texture. It's a technique that complements successful yeast fermentation and is often used in recipes aiming for superior bread quality.
Conclusion: Mastering Yeast Fermentation for Exceptional Bread
Continuous Learning in Yeast Fermentation for Baking
Mastering yeast fermentation is a journey, not a destination. For beginners, understanding the basics of how yeast works, its ideal conditions, and the stages of fermentation is a powerful start. As you gain experience, you'll develop an intuition for how dough should look and feel at each stage, learning to adjust for variables like kitchen temperature and humidity. Every loaf you bake offers an opportunity to learn more about this dynamic biological process.
Experimenting with different types of yeast, varying fermentation times and temperatures (like cold fermentation), and exploring techniques like pre-ferments or autolyse will deepen your understanding and improve your results. Don't be discouraged by failures; they are valuable learning experiences. Keep baking, keep observing, and keep learning about yeast fermentation.
Further Resources for Expanding Your Knowledge of Yeast Fermentation
To continue your journey in mastering yeast fermentation for baking, there are many resources available. Cookbooks dedicated to bread baking often include detailed explanations of yeast and fermentation. Online forums and communities are great places to ask questions and share experiences with other bakers. Baking science websites and blogs delve deeper into the 'why' behind the processes.
Watching videos demonstrating techniques like kneading, shaping, and assessing dough readiness can also be incredibly helpful. The key is to combine theoretical knowledge with hands-on practice. The more you bake and pay attention to the role of yeast fermentation, the more confident and skilled you will become, moving from a beginner to a truly accomplished bread baker. Keep exploring the fascinating world of yeast fermentation!
Frequently Asked Questions
What exactly is yeast fermentation in baking, and why is it important?
Yeast fermentation is a biological process where yeast consumes sugars and produces carbon dioxide and alcohol. This process is crucial because the carbon dioxide creates air pockets that make dough rise, resulting in light and airy baked goods.
What are the different types of yeast commonly used in baking?
The most common types are active dry yeast, instant yeast, and fresh yeast. Each type has different activation requirements, with instant yeast being the most convenient as it can be added directly to dry ingredients.
How can I tell if my yeast is still active and good to use?
You can test yeast activity by mixing it with warm water and a small amount of sugar. If it foams within 5-10 minutes, the yeast is alive and ready to use. Lack of foaming indicates inactive yeast.
What are some common problems beginners face with yeast fermentation, and how can I avoid them?
Common issues include over-proofing (dough collapses) and under-proofing (dough doesn't rise enough). Avoid these by following recipe instructions carefully and monitoring dough volume, not just time.
Can I substitute different types of yeast in a recipe, and if so, how do I adjust the amounts?
Yes, but you need to adjust the amounts accordingly. Generally, you can substitute active dry yeast for instant yeast by using the same amount and blooming (activating) it first. Converting to or from fresh yeast requires specific conversions depending on the recipe.
Final Reflection: Unlocking the Magic of Yeast: A Baker's Journey
Understanding yeast fermentation is not just about rising dough; it's about unlocking the potential for truly exceptional baked goods. The seemingly simple process of yeast converting sugars into carbon dioxide and alcohol is, in reality, a complex dance of biology and chemistry that directly impacts the texture, flavor, and overall quality of your bread, pastries, and more. Mastering this fundamental process elevates baking from a task to a craft.
The impact of yeast fermentation extends far beyond the kitchen; it's a cornerstone of culinary history and a testament to humanity's ingenuity. From the ancient Egyptians' early experiments with leavened bread to the modern-day sourdough starter cultures, this process has shaped our food traditions and continues to inspire innovation. Bread is the staff of life,
a simple phrase that belies the profound cultural and historical significance of yeast fermentation and its role in nourishing generations. My own journey into understanding yeast fermentation has been one of continuous learning and discovery, fueled by the satisfaction of creating something delicious and beautiful from simple ingredients.
Now, it's your turn. Don't be intimidated by the science; embrace the process. Experiment with different flours, temperatures, and hydration levels. Observe the subtle changes in your dough, and learn to recognize the signs of a healthy, active fermentation. The rewards – a perfectly risen loaf, a flaky croissant, a chewy pizza crust – are well worth the effort. Each loaf you bake is a testament to your understanding of this ancient and fascinating process, a journey of discovery that will continue to enrich your baking experience for years to come.
Unleash Your Inner Baker: Take the Next Step!
Thanks for taking the time to explore the world of yeast fermentation with us! We hope you now feel more confident and excited about elevating your baking game. Ready to put your newfound knowledge into practice?
- Bake your first sourdough starter: This is the heart of it all – and it's easier than you think! Try out the recipe we linked within the article and document your progress.
- Share your baking journey: We'd love to see your creations! Tag us on social media with your photos using #BakeWithEaseYeast.
- Join our baking community forum: Connect with fellow bread enthusiasts, ask questions, and share tips and tricks for all things yeast!
What delicious yeast-leavened creation will you bake first?