
Master Gluten Development, Master Your Baking

Welcome to BakeWithEase, where we demystify the science behind delicious baking! Ever wondered how to achieve that perfect rise and chewy texture in your sourdough? This week, we're diving deep into gluten development and sharing an easy-to-follow Gluten development sourdough bread recipe that will transform your baking game. Unlock the secrets to a superior loaf and discover the techniques that separate good bread from truly exceptional bread. Ready to elevate your sourdough skills? Let's get started!
- Mastering Gluten Development for Artisan Bread Baking
- Understanding Gluten Development: The Key to Baking Success at BakeWithEase.com
- What is Gluten and Why is it Important for Baking?
- The Science of Gluten Development in Naturally Leavened Bread
- Mastering Gluten Development: Techniques and Tips for Better Baking
- High Hydration Bread Recipe: A Step-by-Step Guide
- Troubleshooting Gluten Development Issues in Your Baking
- Advanced Techniques for Gluten Control
- Gluten-Free Baking: Understanding the Alternatives (Brief Overview)
- Beyond Bread: Applying Gluten Development Principles to Other Bakes (Brief Overview)
- Conclusion: Unlock Your Baking Potential with Gluten Mastery
-
Frequently Asked Questions
- How important is gluten development in a sourdough bread recipe?
- What are some common techniques to encourage gluten development in a sourdough bread recipe?
- Can you over-develop gluten in a sourdough bread recipe, and what are the consequences?
- What type of flour is best for achieving optimal gluten development in a sourdough bread recipe?
- How does hydration level affect gluten development in a sourdough bread recipe?
- Final Reflection: The Transformative Power of Gluten
- Unlock Your Baking Potential: Gluten Mastery Awaits!
Mastering Gluten Development for Artisan Bread Baking
Welcome to BakeWithEase.com, your friendly guide to unlocking the secrets of exceptional baking! Today, we're diving deep into a fundamental concept that separates good bread from truly great bread: gluten development. Understanding and controlling this process is key to achieving that perfect crumb, chewy texture, and impressive oven spring in your loaves. Whether you're working on a classic sourdough bread recipe or trying your hand at a rustic boule, mastering gluten is essential.
Understanding Gluten Development: The Key to Baking Success at BakeWithEase.com
Gluten development is the magic that happens when water meets flour, specifically the proteins within wheat flour: gliadin and glutenin. When these proteins are hydrated and agitated (through mixing or kneading), they link together, forming a complex, elastic network. This network is what gives dough its structure, elasticity, and ability to trap gases produced during fermentation. Without proper gluten development, your bread will likely be dense, flat, and lack the desired texture. It's a crucial step in any bread-making journey, especially when tackling a sourdough bread recipe where fermentation plays such a significant role.
Think of gluten as the scaffolding of your bread. A strong, well-developed gluten structure can hold the shape of the loaf, support its rise, and create those beautiful air pockets (the crumb) that bakers strive for. Conversely, weak or underdeveloped gluten will result in a slack dough that spreads rather than rises, leading to a heavy, tight crumb. Mastering the art of encouraging and controlling this gluten network is a skill that will elevate all your bread baking, from simple sandwich loaves to complex artisan creations.
What is Gluten and Why is it Important for Baking?
Gluten is a naturally occurring protein composite found in wheat, barley, and rye. It's formed when the two primary proteins, gliadin and glutenin, come into contact with water. Gliadin provides extensibility (the ability to stretch), while glutenin provides elasticity (the ability to spring back). When you mix flour and water, these proteins begin to bond. The physical action of kneading or mixing helps align these bonds, strengthening the network. This elastic web is vital for trapping the carbon dioxide gas produced by yeast or sourdough starter during fermentation, causing the dough to rise.
The strength and elasticity of this gluten network are paramount for successful baking, particularly in bread. It's this network that allows dough to be shaped without collapsing and to expand significantly in the oven (oven spring). Without sufficient gluten development, dough would simply be a wet, sticky mass unable to hold its form or capture gas, resulting in a flat, dense product. Understanding how to manipulate this network through hydration, mixing, and fermentation is a core skill for any baker aiming for light, airy, and well-structured loaves.
Gluten's Role in Bread Structure and Texture
Gluten is the primary architect of bread's internal structure and contributes significantly to its texture. As the gluten network develops, it forms tiny pockets that fill with gas produced during fermentation. During baking, this gas expands, and the gluten network sets, creating the characteristic open or closed crumb structure of bread. A well-developed gluten network provides the elasticity needed for the dough to stretch and hold these gas bubbles, resulting in a light, airy texture.
Consider a classic sourdough bread recipe. The long fermentation period relies heavily on a robust gluten structure to trap the gases produced by the wild yeast and bacteria in the starter. This trapping is what gives sourdough its often irregular and open crumb. Furthermore, gluten contributes to the chewiness of bread. The more developed the gluten, the chewier the final product tends to be. Think of the difference between a soft sandwich loaf and a chewy baguette – a significant factor is the level of gluten development achieved through mixing, hydration, and fermentation techniques.
Gluten in Various Bread Styles: From Baguettes to Boules
The required level of gluten development varies depending on the type of bread you're making. For instance, a chewy baguette or a rustic boule typically requires a very strong, well-developed gluten network to support its structure and achieve an open crumb. These doughs often have higher hydration and undergo extensive kneading or folding to maximize gluten formation. The elasticity allows them to be shaped into specific forms and hold their shape during baking.
In contrast, softer breads like brioche or challah, which are rich in butter and eggs, require less intense gluten development. The fats and enrichments can actually interfere with gluten formation, and a softer crumb is desired. While gluten is still important for structure, the focus is less on maximum elasticity and more on creating a tender loaf. Understanding the desired outcome for a specific bread style helps guide your approach to mixing, kneading, and fermentation, ensuring you develop just the right amount of gluten for the perfect result.
The Science of Gluten Development in Naturally Leavened Bread
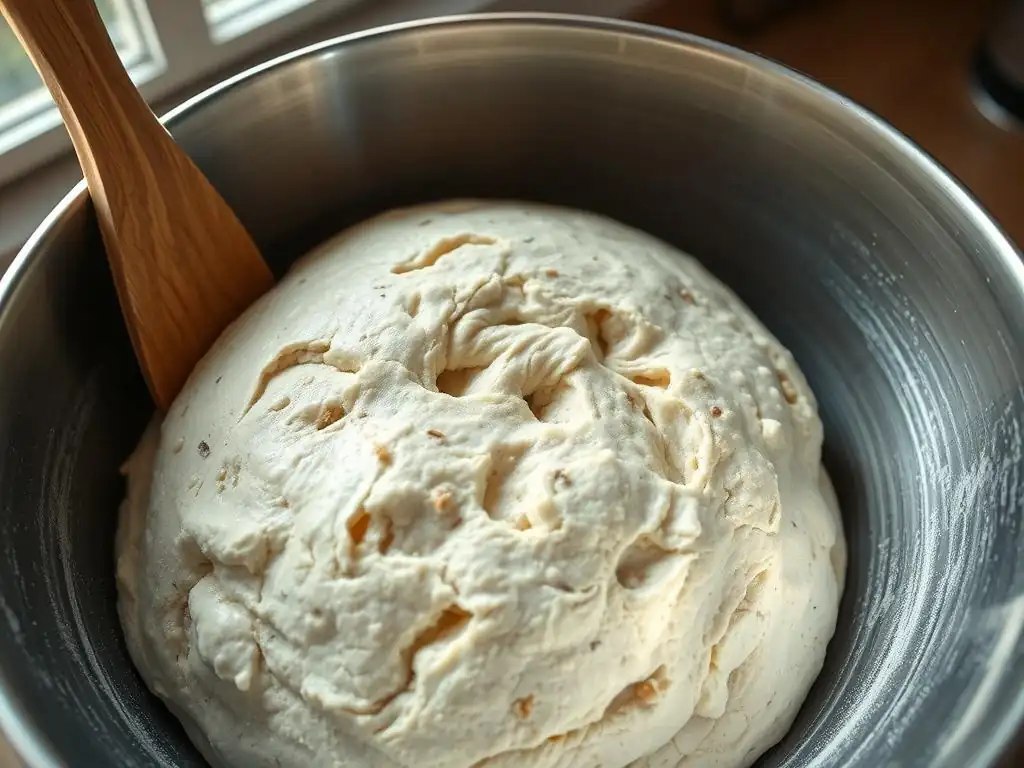
Naturally leavened bread, or sourdough, presents a fascinating case study in gluten development. The fermentation process, driven by a symbiotic culture of wild yeast and lactic acid bacteria (LAB) in the levain (sourdough starter), plays a much more active role in gluten development than in commercial yeast breads. While initial mixing is important, the extended bulk fermentation and proofing periods are where significant changes occur in the gluten network.
The LAB in sourdough produce acids, primarily lactic and acetic acids. These acids lower the pH of the dough, which has several effects on gluten. It can help activate enzymes (proteases) naturally present in the flour and starter, which gently break down some of the protein bonds in the gluten network.
While this sounds counterintuitive, a controlled breakdown can actually improve the extensibility of the dough, making it easier to shape and allowing for better oven spring. This slow, enzymatic action, combined with the physical manipulation during folding, contributes to the unique characteristics of sourdough dough and its gluten structure.
The Unique Characteristics of Levain Gluten
Gluten developed in a naturally leavened dough, using a levain (sourdough starter), often exhibits unique characteristics compared to dough made with commercial yeast. The acidic environment created by the lactic acid bacteria in the levain influences the protein structure. While the initial formation of the gluten network still occurs during mixing, the subsequent long fermentation allows for a more complex evolution of the gluten.
The enzymes present in the flour and activated by the acidic environment of the levain work slowly over many hours. These enzymes, particularly proteases, can modify the gluten structure by cleaving some of the protein chains. This enzymatic activity, when balanced, doesn't weaken the dough but rather enhances its extensibility and pliability. This makes sourdough dough often feel softer and silkier than commercial yeast doughs of similar hydration, while still retaining excellent strength and elasticity for trapping gases and achieving a beautiful crumb in your sourdough bread recipe.
How Long Fermentation Impacts Gluten Development
Long fermentation periods, typical in sourdough baking (often ranging from 4 to 12+ hours at room temperature, or even longer in the refrigerator), profoundly impact gluten development. During this extended time, the gluten network undergoes continuous modification. The gentle stretching and folding techniques used during bulk fermentation further align and strengthen the protein bonds without the aggressive tearing that can occur during intense mechanical kneading.
As the dough ferments, the acidic environment and enzymatic activity mentioned earlier work together to mature the gluten. This slow, patient process allows the gluten to become more extensible and less prone to tearing. The dough develops strength not just from initial mixing but from the patient work of time and gentle handling.
This is why a well-fermented sourdough dough, even one that feels quite slack initially, can transform into a strong, elastic mass capable of achieving impressive volume and an open crumb structure when baked. It's the synergy of time, temperature, levain activity, and gentle handling that perfects gluten development in naturally leavened bread.
Mastering Gluten Development: Techniques and Tips for Better Baking
Achieving optimal gluten development is a skill that improves with practice. It involves understanding how different factors like mixing, hydration, and temperature influence the gluten network. Incorporating specific techniques into your baking routine can significantly improve the structure and texture of your bread. For anyone working on a sourdough bread recipe, these techniques are particularly valuable for harnessing the power of natural fermentation.
From the initial moments when flour meets water to the final shaping, every step in the bread-making process contributes to how the gluten network forms and strengthens. Paying attention to dough consistency, temperature, and the timing of your folds will lead to more predictable and successful results. It's about finding the right balance between building strength and maintaining extensibility, ensuring the dough can hold its shape and expand beautifully in the oven.
The Importance of Initial Mixing and Kneading for Gluten Formation
The initial mixing and kneading phase is where the gluten network begins to form. When water is added to flour, the proteins gliadin and glutenin hydrate and start to bond. Mechanical action, whether by hand kneading, stand mixer, or even just vigorous mixing with a spoon, helps these proteins align and link together, building the gluten structure. The more you mix/knead (up to a point), the stronger and more developed the gluten becomes.
For many doughs, especially those with lower hydration or those using commercial yeast for a quicker rise, intensive kneading is crucial. For example, a dough for sandwich bread might be kneaded for 8-10 minutes in a stand mixer or 15-20 minutes by hand until it passes the "windowpane test" – stretching a small piece thin enough to see light through without tearing. While sourdough often relies more on folds during fermentation, the initial mixing is still vital to ensure all ingredients are incorporated and the gluten-forming process is initiated effectively.
Autolyse: A Powerful Technique for Enhanced Dough Hydration
Autolyse is a simple yet powerful technique that significantly aids gluten development and dough handling. It involves mixing just the flour and water from your recipe and letting the mixture rest for a period, typically 20 minutes to an hour. No salt or leavening (yeast or starter) is added during this phase. This resting period allows the flour to fully hydrate and gives the proteins a head start in bonding without the interference of salt (which can tighten gluten) or leavening agents.
During the autolyse, enzymatic activity (protease) begins to break down some of the protein structure, making the dough more extensible. The hydration is more thorough and uniform. After the autolyse, when you add the salt and leavening and resume mixing or kneading, the dough comes together much more easily and requires less physical effort to reach proper gluten development. This technique is particularly beneficial for higher hydration doughs and is a staple in many artisan and sourdough bread recipes, leading to a smoother, more extensible dough that's easier to work with.
Hydration's Impact on Dough Strength and Extensibility
Hydration, the ratio of water to flour in a dough (expressed as a percentage of the flour weight), has a profound impact on gluten development and dough characteristics. More water allows for more thorough hydration of the proteins, which is necessary for gluten formation. Higher hydration doughs (e.g., 75% hydration or more) typically result in a more open crumb structure and a lighter texture because the extra water facilitates greater expansion of the gluten network during fermentation and baking.
However, higher hydration also results in a stickier, more challenging dough to handle. While the potential for gluten development is high due to increased hydration, achieving it requires different techniques than kneading a lower hydration dough. Techniques like stretch and folds or coil folds are used during bulk fermentation to build strength and tension in high-hydration dough without excessive kneading. Conversely, lower hydration doughs (e.g., 60-65% hydration) are easier to handle and knead but tend to produce a tighter crumb. Finding the right hydration level is key to balancing desired texture with manageability.
Controlling Dough Temperature for Optimal Fermentation and Gluten Development
Dough temperature is a critical factor that influences the rate of fermentation and, consequently, the pace of gluten development and maturation in naturally leavened dough. Wild yeast and lactic acid bacteria in sourdough starters are most active within specific temperature ranges. Warmer temperatures (e.g., 75-80°F or 24-27°C) accelerate fermentation, leading to faster gas production and quicker gluten development. Cooler temperatures (e.g., 65-70°F or 18-21°C, or even colder in the refrigerator) slow down fermentation significantly.
Controlling dough temperature allows bakers to manage the pace of their bake. A warmer bulk fermentation might be used to speed things up, while a cooler, longer fermentation (like an overnight proof in the fridge) can develop more complex flavors and allow enzymes more time to gently modify the gluten, enhancing its extensibility. Maintaining a consistent dough temperature throughout the process is crucial for predictable results in your sourdough bread recipe. Using a probe thermometer to check dough temperature is a simple step that provides valuable control.
High Hydration Bread Recipe: A Step-by-Step Guide
Ready to put your gluten development knowledge to the test? This recipe for a rustic, high-hydration loaf (around 78-80% hydration) demonstrates how to handle a wetter dough and build strength through folding techniques. This approach is common in many artisan and sourdough bread recipes and results in a beautiful open crumb and crispy crust.
**Approximate Schedule (adjust based on ambient temperature):**
*   Morning: Mix, Autolyse, Add Starter/Salt, First Fold
*   Mid-day: Several sets of folds (every 30-60 mins)
*   Late Afternoon/Evening: Bulk Fermentation completes, Shape, Proof
*   Evening/Next Morning: Bake
Ingredients for a Rustic Loaf
Here are the ingredients you'll need. Precise measurements are crucial, especially for hydration calculations.
- 500g Strong Bread Flour (around 12-14% protein)
- 390-400g Water (approx. 78-80% hydration relative to flour)
- 100g Active Sourdough Starter (Levain) (approx. 20% hydration relative to flour)
- 10g Fine Sea Salt (2% relative to flour)
Note: The starter itself adds flour and water. A common way to calculate overall hydration is based on the total flour and total water from all sources (main flour + starter flour, main water + starter water). For simplicity here, we calculate starter and salt percentages based on the main flour weight, which is a common practice in many recipes.
Step 1: Mixing and Autolysing the Dough
Begin by combining the 500g of bread flour with 390g of water in a large mixing bowl. Mix with your hands or a spoon until no dry flour remains, forming a shaggy dough. This doesn't need to be smooth, just fully hydrated. Cover the bowl and let it rest for 30-60 minutes. This is the autolyse step, allowing the flour to hydrate and gluten development to begin passively.
After the autolyse, the dough should feel slightly smoother and more pliable. Now, add the 100g of active sourdough starter and the 10g of salt on top of the dough. Gently dimple the ingredients into the dough with your fingers, then begin mixing by hand (the "pincer method" or squeezing the dough between your fingers works well) or with a stand mixer on low speed for 2-3 minutes until the starter and salt are fully incorporated and the dough starts to show some initial strength. It will still be quite sticky.
Step 2: Folding Techniques for Strength Building
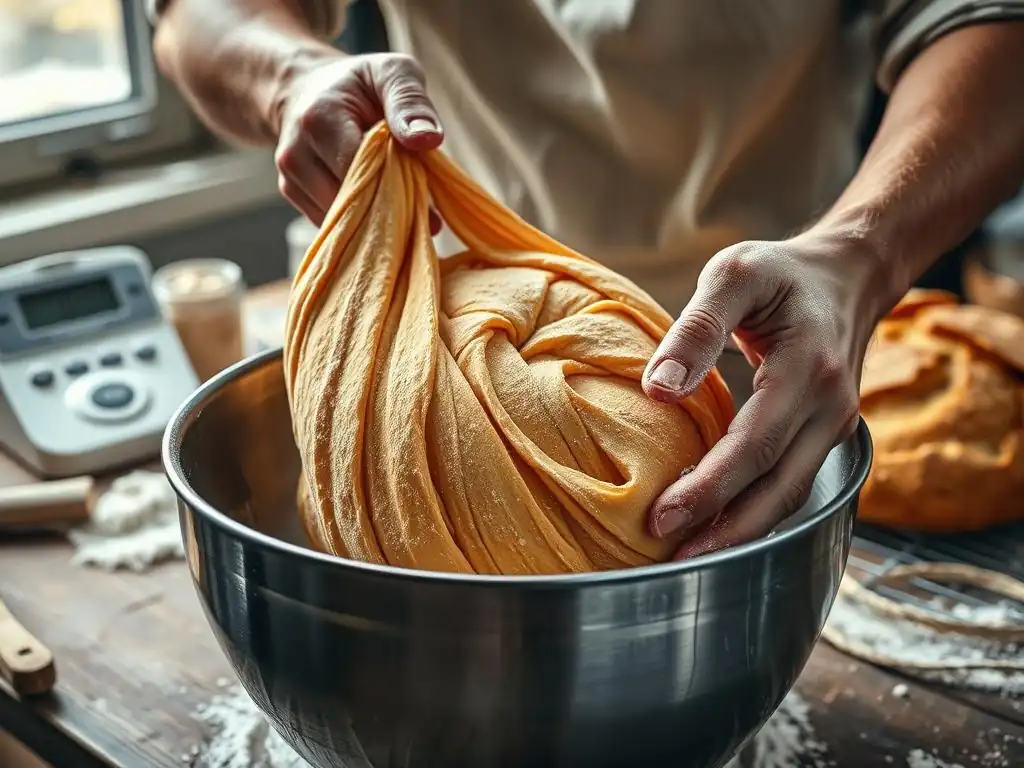
Since this is a high-hydration dough, we will build strength using a series of folds rather than intensive kneading. After the initial mix, let the dough rest for 20-30 minutes. Then, perform the first set of stretch and folds. With wet hands (to prevent sticking), grab one side of the dough, stretch it up gently, and fold it over the center. Rotate the bowl and repeat this 3-4 times until all sides have been folded. This process builds tension and aligns the gluten strands.
Repeat these stretch and folds every 30-60 minutes for the next 2-3 hours, depending on your dough's temperature and how quickly it's gaining strength. As you perform each set of folds, you'll notice the dough becoming progressively smoother, stronger, and less sticky. By the last set of folds, the dough should feel noticeably more elastic and hold its shape better when folded. You can also use coil folds for very wet doughs, which involve lifting the dough from the center with wet hands and letting the edges coil underneath.
Step 3: Bulk Fermentation and Gentle Handling
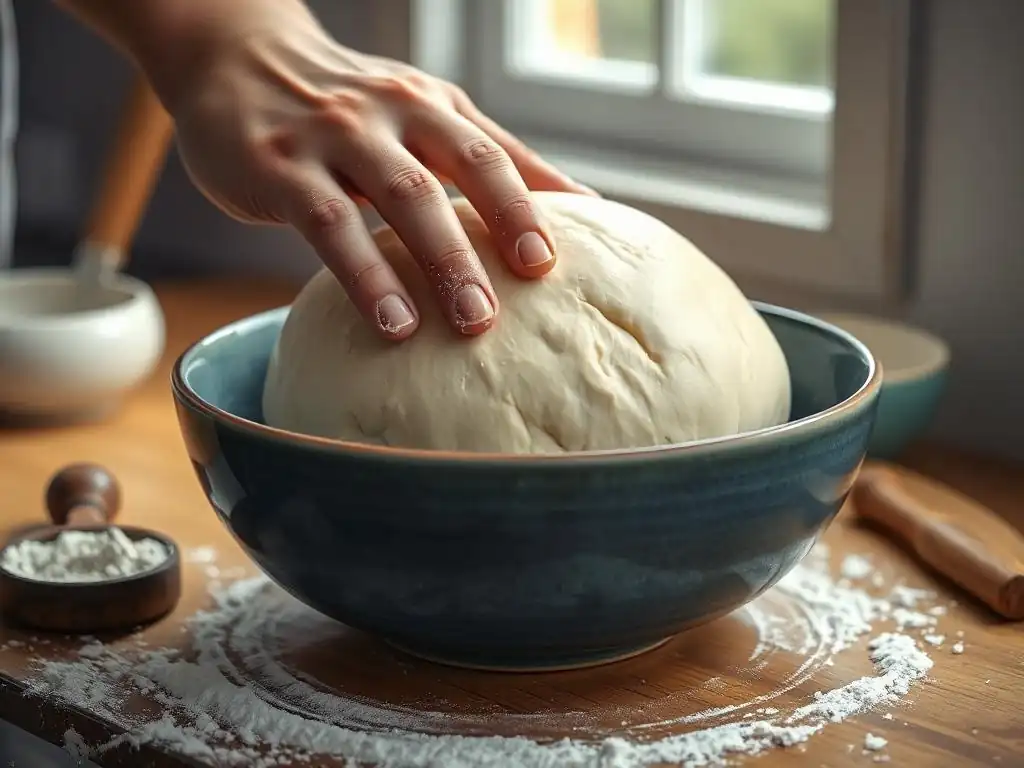
After the folding series is complete, the dough enters the main bulk fermentation period. The duration of bulk fermentation is highly dependent on temperature and starter activity, but it typically lasts 4-6 hours at room temperature (around 75°F/24°C) for this type of dough. During this time, the dough will increase significantly in volume (ideally 50-75%), become visibly bubbly, and feel airy.
- Task: Check dough volume increase.
- Task: Observe surface for bubbles.
- Task: Assess dough feel (airy, jiggly).
Avoid excessive handling during this phase to preserve the trapped gases and the developing gluten structure. If the dough seems to be spreading out too much, you can perform one final gentle fold early in the bulk fermentation. The goal is to let the dough ferment and develop flavor and strength simultaneously.
Step 4: Shaping and Proofing for Oven Spring
Once bulk fermentation is complete, gently turn the dough out onto a lightly floured surface. Be careful not to degas the dough too much. Lightly pre-shape the dough into a loose round or rectangle, depending on your final desired shape. Let it rest for 20-30 minutes, uncovered. This allows the gluten to relax after handling, making the final shaping easier.
For the final shape (e.g., a boule or batard), work quickly and gently to build tension on the surface of the dough while sealing the seam underneath. This surface tension is crucial for achieving good oven spring. Place the shaped dough seam-side up into a floured proofing basket (banneton). Cover the basket and place it in the refrigerator for a cold proof, typically 8-12 hours or even up to 24 hours. Cold proofing slows fermentation, develops more flavor, and makes the dough easier to score and handle before baking.
Step 5: Baking for a Crispy Crust and Open Crumb
Preheat your oven with a Dutch oven or baking stone inside to a high temperature, typically 475-500°F (245-260°C), for at least 30-60 minutes. The intense heat is essential for achieving maximum oven spring and a crispy crust. Carefully turn the cold dough out of the proofing basket onto parchment paper or directly into the hot Dutch oven. Score the surface of the dough with a sharp razor blade or lame. Scoring allows the dough to expand in a controlled manner during baking.
If using a Dutch oven, cover it with the lid (this traps steam released from the dough, which is crucial for crust development). Bake covered for 20-25 minutes. Then, remove the lid and continue baking for another 20-25 minutes, or until the crust is a deep golden brown and the internal temperature reaches around 205-210°F (96-99°C). If using a baking stone, create steam in the oven by pouring hot water into a preheated tray on the bottom rack. Let the bread cool completely on a wire rack before slicing to allow the internal structure to set.
Troubleshooting Gluten Development Issues in Your Baking
Even with a great sourdough bread recipe, sometimes things don't go as planned. Understanding common issues related to gluten development can help you diagnose problems and improve your next bake. Don't get discouraged by less-than-perfect loaves; view them as learning opportunities!
Two of the most frequent culprits behind poor bread outcomes are issues related to fermentation timing, which directly impacts the gluten structure's readiness for baking. A dough that is either under-proofed or over-proofed will behave poorly in the oven, often resulting in a dense crumb or a loaf that collapses.
Common Problems: Over-Proofing and Under-Proofing
Over-proofing occurs when the dough ferments for too long. The yeast and bacteria consume most of the available sugars, and the gluten network, which has been stretched to its limit by trapped gases, begins to degrade. The dough becomes fragile, loses its elasticity, and may even start to collapse. An over-proofed dough will often feel very light and airy but lack tension. It may spread out on the counter after shaping and won't hold its score well. In the oven, it will have little to no oven spring and result in a dense, gummy crumb.
Under-proofing, on the other hand, means the dough hasn't fermented long enough. The gluten network hasn't fully developed its strength or extensibility, and insufficient gas has been produced. An under-proofed dough will feel dense and tight.
It might be difficult to shape because the gluten hasn't relaxed enough. When baked, it will have explosive, uncontrolled oven spring (often tearing along the sides rather than the score) and a tight, dense crumb, sometimes with large, irregular tunnels (often called "golf balling"). Learning to read your dough's signs – its volume increase, feel, and appearance – is key to hitting the proofing sweet spot.
Solutions for Weak Dough: Flour Choice and Proper Hydration
If you consistently find your dough is weak, lacking structure and elasticity despite proper mixing and folding, the issue might lie with your ingredients or hydration. The protein content of your flour is a major factor; using a lower protein all-purpose flour instead of a strong bread flour will naturally result in weaker gluten development. Ensure you are using a high-quality bread flour with at least 12% protein for most artisan loaves.
Secondly, double-check your hydration level. While high hydration can lead to an open crumb, it also makes the dough harder to handle and requires specific techniques (like folds) to build strength. If you're new to baking or struggling with very wet doughs, try reducing the hydration slightly (e.g., by 5-10%) in your sourdough bread recipe. This will make the dough easier to manage and knead, allowing you to build strength more effectively. Sometimes, simply ensuring accurate measurements of both flour and water is the key to resolving hydration-related weakness.
Dealing with Sticky Dough: Bench Scrapers and Flour Management
Sticky dough is a common challenge, especially with higher hydration recipes. While some stickiness is normal, excessive stickiness can make shaping and handling frustrating and potentially lead to a denser loaf if you incorporate too much extra flour. The first line of defense is proper hydration and mixing; a well-developed gluten network is less sticky than an underdeveloped one because the water is better absorbed and bound by the proteins.
Using a bench scraper is invaluable for working with sticky dough. Use it to gently scrape the dough from the counter and to help with folding or shaping. Keep your hands and the bench scraper slightly wet (not floured) when handling very sticky dough, as water prevents sticking without adding dry flour into the dough's structure.
When you do need flour on the surface, use it sparingly – just enough to prevent sticking, not so much that you incorporate significant amounts into the dough, which can alter the hydration balance and toughen the crust. Patience and gentle handling are key when dealing with sticky dough.
Advanced Techniques for Gluten Control
Once you've mastered the basics of gluten development, you might want to explore more advanced techniques used by professional bakers to further fine-tune dough structure and flavor. These methods often involve manipulating ingredients or using specific processes to influence the enzymatic activity and protein interactions within the dough.
These techniques can significantly impact the final characteristics of your bread, from crumb texture to crust quality and overall flavor profile. Incorporating them can add another layer of complexity and control to your baking process, allowing you to achieve specific results in your sourdough bread recipe or other loaves.
Using Different Wheat Varieties to Adjust Dough Strength
Not all flours are created equal, and the type of wheat used significantly impacts gluten potential. Hard wheat varieties (like hard red spring or winter wheat) are higher in protein (12-14% or more) and yield strong, elastic gluten networks suitable for hearty breads, baguettes, and high-hydration doughs. Soft wheat varieties (like soft red or white wheat) have lower protein content (8-10%) and produce weaker, more extensible gluten, ideal for cakes, pastries, and biscuits where a tender crumb is desired.
Using flours milled from different wheat varieties, or blending them, allows bakers to control the final dough strength. For instance, adding a percentage of strong bread flour to a softer all-purpose flour can boost gluten development for a better bread structure. Similarly, using a portion of less processed, stone-ground flour can introduce more bran and germ, which can interfere slightly with gluten formation but add significant flavor and nutrition. Understanding the properties of different flours is a powerful tool for gluten management.
The Role of Enzymes in Fermentation and Dough Development
Enzymes, particularly amylase and protease, play a crucial role in the complex process of fermentation and indirectly impact gluten development. Amylase breaks down starches into simpler sugars, providing food for the yeast and bacteria. This sugar production influences fermentation activity and gas production, which in turn stretches the gluten network. Protease enzymes, as mentioned earlier in the context of sourdough, break down protein chains.
In a controlled environment, the activity of protease enzymes can be beneficial, gently modifying the gluten structure to improve extensibility and dough handling, especially during long fermentation periods. However, excessive protease activity (often due to very long, warm fermentation or certain types of flour) can lead to gluten degradation, resulting in a weak, sticky, or soupy dough. Bakeries sometimes use malted barley flour, which is high in amylase, to ensure sufficient sugar production for fermentation and aid in crust browning. Managing fermentation time and temperature helps control enzymatic activity for optimal gluten development.
Using Pre-Ferments for Enhanced Flavor and Gluten Structure
Pre-ferments, such as a poolish, biga, or levain (sourdough starter), are mixtures of flour, water, and a small amount of leavening (commercial yeast or natural starter) that are allowed to ferment for several hours or overnight before being added to the main dough. Using a pre-ferment offers multiple advantages, including enhancing flavor complexity through longer fermentation and positively impacting gluten structure.
When a pre-ferment is incorporated into the final dough, it brings hydrated flour and pre-developed gluten into the mix. This can kickstart gluten development in the main dough and contribute to a stronger, more extensible network. The slight acidity developed in some pre-ferments (like a poolish or biga, and certainly a levain) can also have the beneficial enzymatic effects discussed earlier, improving dough handling and crumb structure. Incorporating a pre-ferment is an excellent way to build both flavor and a robust gluten network in your bread.
Gluten-Free Baking: Understanding the Alternatives (Brief Overview)
While this article focuses on gluten development in wheat-based baking, it's worth briefly mentioning that delicious bread is also possible without gluten. Gluten-free baking relies on different ingredients and techniques to mimic the structure and texture that gluten provides.
Gluten-Free Flour Blends and Their Properties (Mention Only)
Gluten-free flours, such as rice flour, tapioca starch, potato starch, almond flour, and sorghum flour, lack the gliadin and glutenin proteins needed to form gluten. Gluten-free bread recipes typically use a blend of several different flours and starches to achieve a balanced structure and flavor.
Techniques for Mimicking Gluten Structure in Gluten-Free Baking (Mention Only)
To provide structure and elasticity in gluten-free baking, ingredients like xanthan gum, psyllium husk, or ground flaxseed are often added. These ingredients absorb water and create a gel-like substance that helps bind the dough and trap gases, compensating for the absence of a gluten network.
Beyond Bread: Applying Gluten Development Principles to Other Bakes (Brief Overview)
The principles of gluten development aren't limited to bread making. Understanding how to control this protein network is valuable for other types of baking as well.
Gluten Development in Pizza Dough
For chewy, elastic pizza dough, proper gluten development is essential. Mixing and kneading (or using techniques like cold fermentation) build a strong gluten network that allows the dough to be stretched thin without tearing and provides that satisfying chew in the crust.
Gluten Development in Pasta Making
Pasta dough, typically made with durum wheat flour (semola rimacinata), relies on gluten for its structure and ability to hold its shape during cooking. Kneading pasta dough develops a tight, strong gluten network, preventing it from becoming mushy when boiled.
Conclusion: Unlock Your Baking Potential with Gluten Mastery
Mastering gluten development is a fundamental skill for any baker aspiring to create delicious, well-structured bread. By understanding what gluten is, how it forms, and the factors that influence its development – from initial mixing and hydration to the nuances of long fermentation in a sourdough bread recipe – you gain the power to control the texture and structure of your loaves.
Embrace the process, experiment with different techniques like autolyse and folding, and pay attention to the feel and behavior of your dough. Troubleshooting challenges like over- or under-proofing and sticky dough will become easier as your understanding grows. With practice and patience, you'll consistently achieve the perfect balance of strength and extensibility, leading to beautiful oven spring, a wonderful crumb, and truly satisfying bread straight from your oven. Happy baking!
Frequently Asked Questions
How important is gluten development in a sourdough bread recipe?
Gluten development is crucial for sourdough. It provides the structure and elasticity needed to trap gas, resulting in a chewy texture and open crumb. Without proper gluten development, your sourdough will be flat and dense.
What are some common techniques to encourage gluten development in a sourdough bread recipe?
Common techniques include autolysing (resting flour and water), kneading, and stretch and folds. These methods help align the gluten proteins, creating a stronger and more cohesive dough.
Can you over-develop gluten in a sourdough bread recipe, and what are the consequences?
Yes, over-kneading or excessive stretch and folds can over-develop the gluten, resulting in a tough, rubbery texture. It's important to monitor the dough's strength and stop when it feels smooth and elastic, but not overly tight.
What type of flour is best for achieving optimal gluten development in a sourdough bread recipe?
Bread flour, with its higher protein content, is generally recommended for sourdough. The higher protein content translates to more gluten formation, leading to a better rise and structure.
How does hydration level affect gluten development in a sourdough bread recipe?
Higher hydration levels (more water) can facilitate gluten development, allowing the proteins to move and align more easily. However, it also makes the dough stickier and more challenging to handle.
Final Reflection: The Transformative Power of Gluten
Understanding gluten development isn't just about achieving a perfect sourdough loaf; it's about unlocking the potential within the simplest of ingredients. Mastering this process allows us to move beyond simply following a recipe and truly understand the alchemy of baking, transforming flour and water into something truly extraordinary. This understanding empowers bakers of all levels to create consistently delicious and beautiful bread.
The journey of gluten development, much like the journey of sourdough itself, is a testament to patience, precision, and the rewarding nature of mindful creation. It's a process that connects us to a long tradition of bread making, a tradition built on the understanding of fundamental principles. As the renowned baker, Chad Robertson, once said: Bread baking is a journey of discovery, a constant learning process. There is always something new to learn, always a way to improve.
This quote perfectly encapsulates the ongoing evolution of my own baking practice, and I hope it inspires yours as well.
Now, consider your own baking journey. What have you learned about the delicate balance of gluten development? How has understanding this process changed your approach to baking? I encourage you to experiment, to push your boundaries, and to embrace the imperfections along the way. The more you understand gluten, the more you'll appreciate the artistry and science behind every perfectly risen loaf. Embrace the challenge, and you'll discover a world of flavour and texture waiting to be explored.
Unlock Your Baking Potential: Gluten Mastery Awaits!
Thanks for taking the time to explore the world of gluten development with us! We hope you now feel empowered to create lighter, airier, and more delicious baked goods. Ready to put your newfound knowledge into action?
- Bake a test loaf: Choose your favorite bread recipe and try adjusting the gluten development techniques you learned today. Observe the difference! This is the best way to solidify your understanding.
- Share your baking journey: Post a picture of your gluten-mastered creation on social media and tag us @BakeWithEase – we'd love to see your results!
- Explore our advanced gluten techniques: Dive deeper into the intricacies of gluten development by browsing our other articles on the BakeWithEase website.
What exciting bread recipe are you going to tackle first to perfect your gluten development?