
Simple Decorating Ideas for Beginner Classic Cookies


Welcome to BakeWithEase, where the delightful world of baking is just a click away! Whether you're a novice in the kitchen or looking to refine your cookie artistry, our latest article on Easy Classic Cookie Decorating is here to light your path. With step-by-step guidance and simple decorating ideas, you'll soon transform ordinary cookies into stunning treats that impress friends and family alike. So, roll up your sleeves and get ready to unleash your creativity—there's so much to explore in the realm of baking!
- Simple Decorating Ideas for Beginner Classic Cookies - BakeWithEase
- Introduction to Easy Cookie Decorating for Beginners
- Essential Tools for Beginner Cookie Decorating
- Simple Icing Techniques for Classic Cookies
- No-Fuss Cookie Decorating Ideas: Perfect for Beginners
- Step-by-Step: Decorating Sugar Cookies with Royal Icing
- Creative Cookie Decorating Ideas with Minimal Effort
- Troubleshooting Common Cookie Decorating Problems
- Storing Your Decorated Classic Cookies
- Conclusion: Enjoying the Art of Easy Cookie Decorating
-
Frequently Asked Questions
- How can I make my classic cookies visually appealing without complicated techniques?
- What type of icing is best for easy classic cookie decorating for beginners?
- What are some easy-to-find ingredients for decorating classic cookies?
- How do I prevent my icing from running off the edges of my classic cookies?
- Can I decorate classic cookies ahead of time, and if so, how should I store them?
- Final Reflection: The Sweet Simplicity of Classic Cookie Decorating
- Unleash Your Inner Cookie Artist!
Embarking on your cookie decorating journey doesn't have to be intimidating. In fact, it can be incredibly fun and rewarding, especially when you start with classic cookies like sugar cookies, shortbread, or gingerbread. These sturdy, flat cookies are the perfect canvas for beginners to practice simple techniques.
Our goal at BakeWithEase is to show you just how accessible and enjoyable easy classic cookie decorating can be, even if you've never picked up a piping bag before. Forget the elaborate, multi-day projects you see online; we're focusing on quick wins and beautiful results you can achieve with minimal fuss and basic supplies.
Think of your kitchen as a creative studio, and your baked cookies as blank canvases ready for a touch of sweetness and color. We'll cover everything from gathering your basic tools to applying simple glazes and sprinkles, ensuring you build confidence with each cookie you decorate.
The beauty of starting with classic cookies is their versatility; they hold their shape well and provide a smooth surface that's forgiving for beginner hands. Whether you're decorating for a holiday, a special occasion, or just for fun, these simple cookie decorating methods will help you create treats that look as good as they taste, making you proud of your baking and decorating skills.
At BakeWithEase, we believe that everyone can create stunning baked goods, and that includes decorating them. This guide is specifically designed for those taking their first steps into the world of cookie decoration. We've curated a collection of easy classic cookie decorating techniques that prioritize simplicity and guaranteed success. You won't need fancy equipment or years of practice to achieve lovely results. Our methods focus on leveraging readily available ingredients and tools, making the process approachable and enjoyable.
We'll walk you through different levels of simplicity, starting with the absolute easiest – like dipping cookies in melted chocolate or scattering sprinkles – and gradually introduce slightly more involved techniques, such as simple flood icing using royal icing. Each technique is broken down into easy-to-follow steps, complete with tips and tricks to avoid common pitfalls. Our aim is to demystify the process of beginner cookie decorating, transforming it from a daunting task into a delightful part of your baking routine. Get ready to transform your classic cookies into edible works of art with minimal effort!
Getting started with easy classic cookie decorating doesn't require a massive investment in specialized tools. You likely already have many of the essentials in your kitchen. The most fundamental items include mixing bowls for preparing icings or glazes, spatulas for spreading, and perhaps a few small offset spatulas or butter knives for smoother application. For more controlled decorating, disposable piping bags or even simple zip-top bags with a corner snipped off are incredibly useful for outlining or adding details.
Beyond these basics, consider adding a few simple tools that can significantly enhance your beginner cookie decorating experience. A set of standard piping tips (like a small round tip, size #1 or #2, for fine lines and outlining, and perhaps a larger round tip, size #3 or #4, for flooding) can be very helpful. Squeeze bottles with fine tips are also excellent for flooding larger areas smoothly. Don't forget measuring cups and spoons for accurate icing recipes, and parchment paper or wax paper to protect your workspace and lay out decorated cookies to dry.
One of the best things about starting with easy classic cookie decorating is that the necessary tools are both affordable and widely available. You don't need to visit a specialty baking supply store; most items can be found at your local grocery store, craft store, or even online retailers. For instance, disposable piping bags often come in packs of 100 for around $10-$15, making them a very cost-effective option for various colors of icing. Simple piping tip sets with a few basic tips can be purchased for under $20.
If you're on a tight budget or just want to test the waters, get creative with what you have. As mentioned, a sturdy zip-top bag can substitute for a piping bag in a pinch. Small spoons can be used for flooding areas, and toothpicks are perfect for spreading icing into corners or popping air bubbles. Even everyday items like clean paintbrushes (designated solely for food use!) can be used to apply edible paints or dusts. The key is to start simple and acquire more specialized tools as your interest and skills grow in beginner cookie decorating.
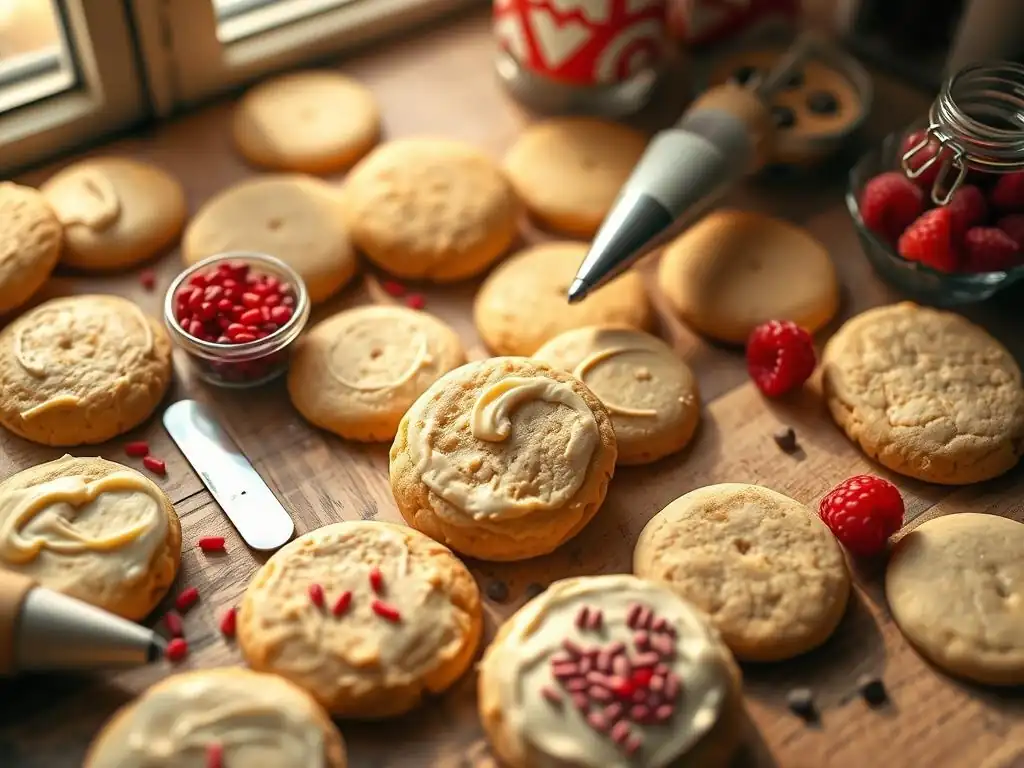
Basic cookie icing is your best friend when learning easy classic cookie decorating. Unlike more complex frostings, simple icings like a basic powdered sugar glaze or a straightforward royal icing are designed to set firmly, creating a smooth surface that's perfect for stacking and handling. The simplest glaze involves just powdered sugar and a liquid like milk, water, or lemon juice. By adjusting the amount of liquid, you can create a thicker consistency for outlining or a thinner consistency for flooding.
Working with a basic icing is forgiving. If your glaze is too thick, add a tiny bit more liquid. If it's too thin, whisk in more powdered sugar. This adjustability makes it ideal for beginner cookie decorating.
Start by practicing on a few less-than-perfect cookies. Get a feel for how the icing flows and how quickly it sets. Once you're comfortable with the basic consistency and application using a spoon or small spatula, you can move on to slightly more controlled methods like using a piping bag or squeeze bottle for finer work. Patience and practice are key, but the results are well worth the effort for achieving a polished look on your classic cookies.
Royal icing is a popular choice for classic cookie decorating because it dries hard with a smooth, matte finish. While it might sound fancy, the basic recipe is quite simple, typically involving powdered sugar, meringue powder (or egg whites), and water. Meringue powder is often preferred by beginners as it's shelf-stable and avoids the need for raw egg whites, offering greater consistency and safety. A standard recipe might call for 4 cups of powdered sugar, 3 tablespoons of meringue powder, and about 1/2 cup of water, adjusted for desired consistency.
Understanding different consistencies is crucial for easy classic cookie decorating with royal icing. A thicker consistency (often called "outline" consistency) is like toothpaste or peanut butter; it holds its shape well and is used to create borders. A thinner consistency (called "flood" consistency) is like honey or thick syrup; it spreads easily and fills in areas within the outline. You achieve these by adding more water (to thin) or more powdered sugar (to thicken). Learning to eyeball or test these consistencies is a fundamental skill in beginner cookie decorating.
Flooding is the technique used to fill the outlined areas of your cookie with a smoother, runnier icing. It's essential for creating that clean, solid background color seen on many decorated cookies. For easy classic cookie decorating, flooding can be done using a piping bag with a medium-sized tip, a squeeze bottle, or even just a spoon.
The key is to have your royal icing at the correct flood consistency – it should be thin enough to flow and spread easily, but not so thin that it runs off the cookie or seeps under the outline. A good test is to drizzle some icing back into the bowl; it should sink back and disappear within 10-15 seconds.
To flood, first ensure your outline is completely dry (this might take 20-30 minutes, depending on humidity). Then, starting from the edges and working inwards, apply the flood consistency icing. Use a toothpick or a scribe tool (or even a clean sewing needle) to gently guide the icing to the edges and pop any air bubbles that appear. Don't overfill; the icing should level itself out. This technique is fundamental for achieving a polished look in beginner cookie decorating and provides a perfect base for adding further details once dry.
When it comes to easy classic cookie decorating, nothing beats the simplicity and fun of sprinkles and decorative sugars. This is arguably the most beginner-friendly method available. You don't need any special skills or tools beyond the cookies themselves and your chosen topping. Simply apply a wet base – this could be a simple glaze (powdered sugar mixed with a little milk or water), melted chocolate, or even a thin layer of frosting – to the cookie's surface.
While the base is still wet, generously dip the cookie into a bowl of sprinkles, or sprinkle them over the top. You can use classic jimmies, nonpareils, sparkling sugars, or even edible glitter. The variety of colors and shapes available means you can create endless looks with minimal effort. This method is fantastic for decorating large batches of cookies quickly and is especially great for involving kids in beginner cookie decorating. It's a guaranteed way to add instant color and texture to your classic cookies.
A simple powdered sugar glaze (sometimes called 'drizzle icing') is incredibly versatile for easy classic cookie decorating. Unlike royal icing, it's quicker to make and requires fewer ingredients. You can create simple designs by varying the consistency. A slightly thicker glaze can be spooned into a piping bag or zip-top bag and used to pipe simple lines, dots, or zigzags directly onto a plain baked cookie. These designs dry with a slightly softer set than royal icing, offering a different texture.
For a different effect, make a thinner glaze and dip the entire surface of the cookie into it for a smooth, opaque coating. While the glaze is still wet, you can add sprinkles or drizzle contrasting colors of glaze over the top. For example, dip a sugar cookie in white glaze and then drizzle with pink or chocolate glaze. This technique is forgiving and allows for quick, attractive results, making it a perfect starting point for beginner cookie decorating on classic cookies.
Melted chocolate is another fantastic option for easy classic cookie decorating. It's simple to use, sets quickly, and tastes delicious. You can use chocolate chips (milk, dark, or white), melting wafers, or even chopped chocolate bars. Melt the chocolate gently in a microwave (in 30-second intervals, stirring between each) or over a double boiler. Be careful not to overheat white chocolate, as it can seize easily.
Once melted and smooth, you can use the chocolate in several ways. Dip half or all of a cookie into the chocolate for a quick, even coating. While the chocolate is still wet, add sprinkles, chopped nuts, or other small candies. Alternatively, spoon the melted chocolate into a piping bag or a small plastic bag with a corner snipped off and drizzle it back and forth over the cookies for a simple striped pattern. This method is mess-free (relatively!) and offers immediate gratification, ideal for beginner cookie decorating.

Preparing Your Royal Icing for Decorating
Once you've made your basic royal icing (using powdered sugar, meringue powder, and water), the first step in easy classic cookie decorating with this medium is to divide it and adjust the consistency. Decide how many colors you'll need and separate the icing into different bowls. Add food coloring to each bowl, mixing thoroughly until you achieve your desired shades. Gel food coloring is recommended as it's highly concentrated and won't add too much liquid to your icing.
Next, adjust the consistency of each color based on its intended use. You'll typically need a thicker 'outline' consistency and a thinner 'flood' consistency for each color you plan to use for both outlining and filling. Gradually add small amounts of water (a teaspoon or even half a teaspoon at a time) to a portion of the thick icing, stirring until it reaches the desired flood consistency (remember the 10-15 second test).
Keep the outline consistency icing as is, or adjust it slightly if needed – it should be thick enough to create a distinct line that doesn't spread. Cover the surface of the icing directly with plastic wrap when not in use to prevent it from drying out.
Outlining is the foundational step when using the flood technique in beginner cookie decorating. It creates a dam that prevents the thinner flood icing from running off the cookie. Load your outline consistency icing into a piping bag fitted with a small round tip (like a #1 or #2) or a small hole cut in a zip-top bag. Hold the bag at a 45-degree angle just slightly above the surface of the cookie.
Apply gentle, consistent pressure to the bag and guide the stream of icing along the edge of the cookie. Don't drag the tip on the cookie; let the stream of icing fall onto the surface. This helps create a smoother line. Try to complete the outline in one continuous motion if possible, connecting the start and end points neatly.
For complex shapes, you might need to lift and restart, but aim for smooth transitions. Once the outline is complete, let it dry for at least 20-30 minutes (or longer in humid conditions) before flooding. This is crucial for successful easy classic cookie decorating using this method.
With your outline dry and stable, it's time to flood the cookie with your thinner, flood consistency royal icing. Load the flood icing into a separate piping bag, squeeze bottle, or even use a spoon for larger areas. Begin applying the icing inside the dried outline, starting from the edges and working your way into the center. Don't worry about getting it perfectly smooth initially; the icing will settle.
Once the area is filled, use a toothpick, scribe tool, or needle to gently spread the icing into any corners or gaps and to nudge it right up against the outline. This helps create a smooth, even surface. As you work, watch for air bubbles popping to the surface; simply touch them with your tool to pop them and smooth the area.
Don't overwork the icing, as this can introduce more bubbles. Once flooded, leave the cookies undisturbed on a flat surface (like a baking sheet lined with parchment paper) to dry completely. This can take anywhere from 6 to 24 hours depending on humidity and thickness of the icing – patience is key for achieving that signature smooth finish in classic cookie decorating.
Adding Simple Details: Dots, Lines, and Swirls
Once your flooded base layer of royal icing is completely dry (this is essential! ), you can add simple details to enhance your easy classic cookie decorating. Using outline consistency icing (or a slightly thinner consistency if you prefer), pipe dots, lines, squiggles, or swirls onto the dry base. You can use different colors to create contrast. For example, pipe white dots onto a red base, or blue lines onto a white base.
Simple patterns like polka dots, stripes, or chevron lines are easy to execute and look very effective. For dots, simply touch the piping tip to the surface and squeeze briefly, then lift straight up. For lines, pipe a continuous stream while moving your hand steadily across the cookie. Swirls are created by piping a spiral from the center outwards or the edge inwards.
You can also use the 'wet-on-wet' technique: while the flood icing is still wet, pipe dots or lines of a different color onto it. Then, use a toothpick to swirl the wet colors together for marbled or feathered effects. This technique requires a bit more speed but yields beautiful results quickly, perfect for expanding your beginner cookie decorating skills.
Cookie cutters aren't just for cutting out the cookie dough; they can also be used as guides for easy classic cookie decorating. Once your cookies are baked and cooled, place a clean cookie cutter of the same shape (or a smaller, complementary shape) on top of the cookie. You can then fill the inside of the cutter with sprinkles, nonpareils, or even a thin layer of colored sugar.
To apply sprinkles or sugar neatly using this method, first brush a thin layer of edible glue (or corn syrup thinned slightly with water) or a very thin glaze onto the cookie surface where you want the decoration. Carefully place the cutter on top, ensuring it sits flat. Pour your sprinkles or sugar into the cutter opening, gently tapping to distribute evenly. Carefully lift the cutter straight up to reveal your perfectly shaped sprinkle design. This is a fantastic way to add clean shapes and patterns with minimal fuss, making it great for beginner cookie decorating.
Edible markers are a game-changer for easy classic cookie decorating, especially for those who love to draw but are less confident with piping. These markers are essentially food coloring in a pen format and can be used directly on a dry cookie surface. They work best on smooth, dry surfaces like those created by royal icing or a firm glaze.
You can use edible markers to draw outlines, add facial features to character cookies, write messages, or create simple patterns like dots, dashes, or cross-hatching. They are incredibly easy to control, much like drawing on paper. This method is perfect for adding personalized touches quickly. Just ensure the cookie surface is completely dry before drawing, as moisture can cause the colors to bleed. Edible markers are a fun and mess-free way to get creative with beginner cookie decorating.
Stencils offer a way to achieve intricate or repetitive designs on your classic cookies with minimal effort, making them ideal for easy classic cookie decorating. Cookie stencils are thin sheets of plastic or acetate with designs cut out. They can be used with various mediums like royal icing, airbrush colors (if you venture into that), or powdered sugar/cocoa powder.
For beginners, using stencils with a thin layer of royal icing or simply dusting with powdered sugar or cocoa powder is the easiest approach. Place the stencil carefully on top of a completely dry iced cookie. Hold it firmly in place (or use small magnets if decorating on a metal tray). If using icing, apply a thin, even layer of medium-consistency royal icing over the stencil using a small offset spatula or scraper.
Scrape off any excess icing to reveal the design. If dusting, simply sift powdered sugar or cocoa powder over the stencil. Carefully lift the stencil straight up to avoid smudging. This technique allows even novices to create beautiful, professional-looking patterns quickly in beginner cookie decorating.
Dealing with Icing Bleeding
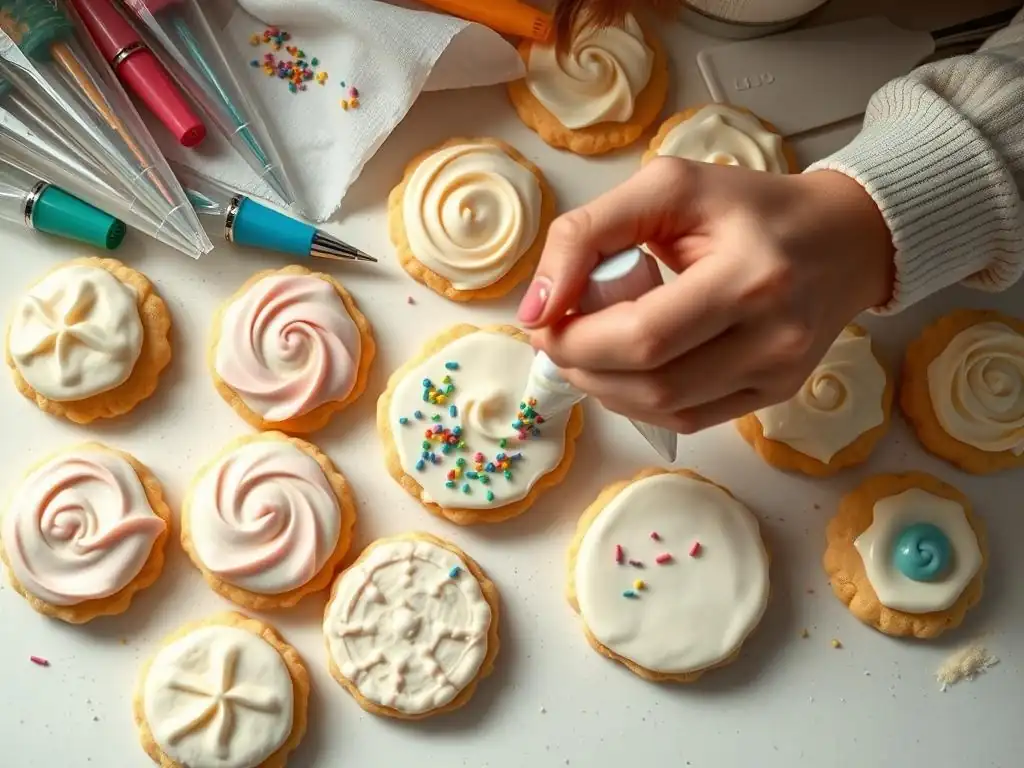
One frustrating issue in classic cookie decorating is when colors bleed into each other, especially with royal icing. This often happens when a new color is applied to a base layer that isn't completely dry, or when using too much liquid food coloring, particularly red or black. Humidity can also exacerbate bleeding. To minimize this, ensure your base layer of icing is fully hardened before adding new colors or details on top. This might mean waiting several hours or even overnight.
Using high-quality gel food colors instead of liquid ones can also help, as they are more concentrated and require less product to achieve vibrant hues, thus adding less moisture. If you anticipate bleeding might be an issue, test your colors on a spare cookie first. For particularly troublesome colors like red, consider using specific "no-bleed" red food colorings available from some suppliers.
If minor bleeding occurs, sometimes it can be incorporated into the design, or you might need to gently scrape off the affected area if possible and re-apply the icing once the underlying layer is dry. Learning to manage drying times is key to successful easy classic cookie decorating.
Preventing Air Bubbles in Royal Icing
Air bubbles are tiny pockets of air trapped in royal icing that can leave unsightly craters on your smooth surface if not dealt with. They are often introduced during the mixing process or when stirring the icing. To prevent them, mix your royal icing on a low speed if using a stand mixer. Once mixed, cover the bowl tightly with plastic wrap and let the icing rest on the counter for 10-15 minutes before coloring or using it. This allows many bubbles to rise to the surface.
Before putting icing into piping bags or squeeze bottles, gently stir it with a spatula, pressing the spatula against the side of the bowl to help push out trapped air. When flooding cookies, once the area is filled, gently tap the cookie against the counter. This helps the icing settle and encourages bubbles to surface. Use a toothpick or scribe tool to gently swirl through the wet icing and pop any bubbles you see. Popping bubbles immediately after flooding is essential for achieving a smooth finish in beginner cookie decorating.
Fixing Mistakes: Easy Correction Techniques
Making mistakes is part of the learning process in easy classic cookie decorating, especially when you're a beginner. The good news is that many errors are fixable! If you make a mistake with wet icing (like a wobbly line or a misplaced dot), quickly use a clean toothpick or the tip of a small knife to gently lift or scrape away the wet icing. You can then smooth the underlying layer (if it's still wet) or wait for it to dry and try again.
If you've made a mistake on dry royal icing, you have a few options. For small errors, you can sometimes gently scrape away the offending detail with a sharp, thin knife or craft blade (use caution!). Then, you can re-pipe or cover the area.
For larger mistakes on a dry flooded area, you might need to carefully scrape off the entire layer of icing from that section or even the whole cookie and start over. While frustrating, sometimes restarting is the best way to achieve a clean result. Don't be discouraged; think of it as extra practice for your beginner cookie decorating skills!
Once your beautifully decorated classic cookies are completely dry (this is crucial, especially for royal icing, which needs to be hard to the touch), proper storage is key to maintaining their appearance and freshness. The best way to store most decorated cookies is in an airtight container at room temperature. Avoid stacking cookies decorated with royal icing before they are fully dry, as this will smudge the designs. Even when dry, consider separating layers with parchment or wax paper to prevent sticking and protect delicate details.
Humidity is the enemy of crisp cookies and smooth icing. Store containers in a cool, dry place away from direct sunlight or heat sources. Depending on the ingredients used in your cookies and icing, properly stored cookies can stay fresh for 1-2 weeks. Cookies decorated with simple glazes or melted chocolate might have a slightly shorter shelf life than those with royal icing. Always ensure the container is sealed tightly to prevent air exposure, which can make cookies stale. This simple step preserves your hard work in easy classic cookie decorating.
Maintaining the quality of your decorated classic cookies involves more than just airtight storage. Avoid storing them in the refrigerator unless your recipe specifically requires it (like some cream cheese frostings), as the moisture and temperature changes in a fridge can cause condensation, which can damage royal icing and make cookies soft. Freezing decorated cookies, especially those with delicate royal icing details, is generally not recommended as thawing can also cause condensation and potential damage to the decoration.
If you need to transport your decorated cookies, pack them carefully in single layers in a sturdy box, ideally with dividers or cushioning like crumpled parchment paper between them to prevent shifting and breakage. For easy classic cookie decorating, where designs might be less intricate, they are often quite robust for transport. By following these simple storage tips, you ensure that your classic cookies remain delicious and their decorations stay pristine until they are ready to be enjoyed or shared.
You've learned the basics, gathered your simple tools, and explored various techniques for easy classic cookie decorating. Now it's time to fully embrace the fun! Don't strive for perfection on your first try. The beauty of beginner cookie decorating lies in the process – the mixing, the coloring, the piping, and the simple joy of transforming a plain cookie into something visually appealing. Each cookie is an opportunity to practice and experiment.
Remember that even simple designs like dots, stripes, and sprinkles can create stunning results on classic cookies. The most important thing is to enjoy the creative process and be proud of what you create. Decorating cookies is a wonderful activity to do alone for a relaxing pastime or with family and friends for a fun group activity. So, grab your cookies and icing, put on some music, and let your creativity flow.
One of the most rewarding parts of classic cookie decorating is sharing your creations! Whether you've mastered the simple glaze, perfected your sprinkle application, or successfully flooded your first sugar cookie with royal icing, your decorated cookies are meant to be enjoyed by others. Package them up for gifts, bring them to a party, or simply share them with loved ones at home.
We encourage you to share your easy classic cookie decorating successes! While we can't include links here, imagine being able to share photos of your work with the BakeWithEase community online. Your journey in beginner cookie decorating can inspire others to start their own. So, bake, decorate, and share the joy that comes from creating beautiful, delicious classic cookies!
Frequently Asked Questions
Focus on simple icing techniques like flooding with a single color and adding sprinkles. You can also use cookie stamps for easy designs or royal icing dots for a polished look.
Royal icing is a popular choice because it dries hard and is easy to color. However, simple glaze icing made with powdered sugar and milk is also a great, more forgiving option for beginners.
Common ingredients include powdered sugar, milk or water, food coloring, sprinkles, and chocolate chips. These are readily available at most grocery stores and are versatile for various decorating styles.
Make sure your icing is the correct consistency – not too thin. Pipe a border of thicker icing around the edge of the cookie before flooding the center with thinner icing.
Yes, you can. Store fully decorated cookies in an airtight container at room temperature. Properly iced cookies can last for several days or even a week, depending on the icing type.
The art of classic cookie decorating, once perceived as an intimidating skill, is now more accessible than ever. With a few simple techniques and readily available supplies, anyone can transform ordinary cookies into delightful edible masterpieces. This accessibility opens up a world of creative expression and joy, perfect for beginners and seasoned bakers alike.
The enduring appeal of classic cookie decorating lies in its ability to connect us to cherished memories and traditions. These simple designs, often passed down through generations, evoke feelings of warmth, nostalgia, and shared experiences. Baking is at once child's play and adult joy. And love, of course.
– Alma Flor Ada. This quote perfectly encapsulates the emotional resonance of creating and sharing these decorated treats, fostering connection and strengthening bonds.
Now, it's your turn. Don't be intimidated by the seemingly perfect cookies you see online. Grab your favorite cookie recipe, gather some simple decorating tools, and unleash your inner artist. Experiment with different colors, techniques, and designs. Most importantly, have fun! The beauty of classic cookie decorating lies not in flawless execution, but in the joy of the process and the delicious results you share with loved ones. Remember, even the simplest design can hold immense meaning and bring a smile to someone's face.
Thanks for taking the time to explore these simple decorating ideas! We hope you've gained some inspiration and confidence to create stunning classic cookies. Now it's time to put those skills to the test!
- Master your first masterpiece: Choose your favorite cookie recipe and try one of the decorating techniques featured in this article. Don't be afraid to experiment!
- Share your creations: Post a picture of your decorated cookies on social media and tag us – we'd love to see your baking journey! Use #BakeWithEaseClassics
- Challenge yourself: Try a new decorating technique next week – maybe try adding a different color or a more intricate design.
What's your favorite cookie decorating technique, and what will you be baking next?