
Your Ultimate Guide to Easy Drop Cookie Baking

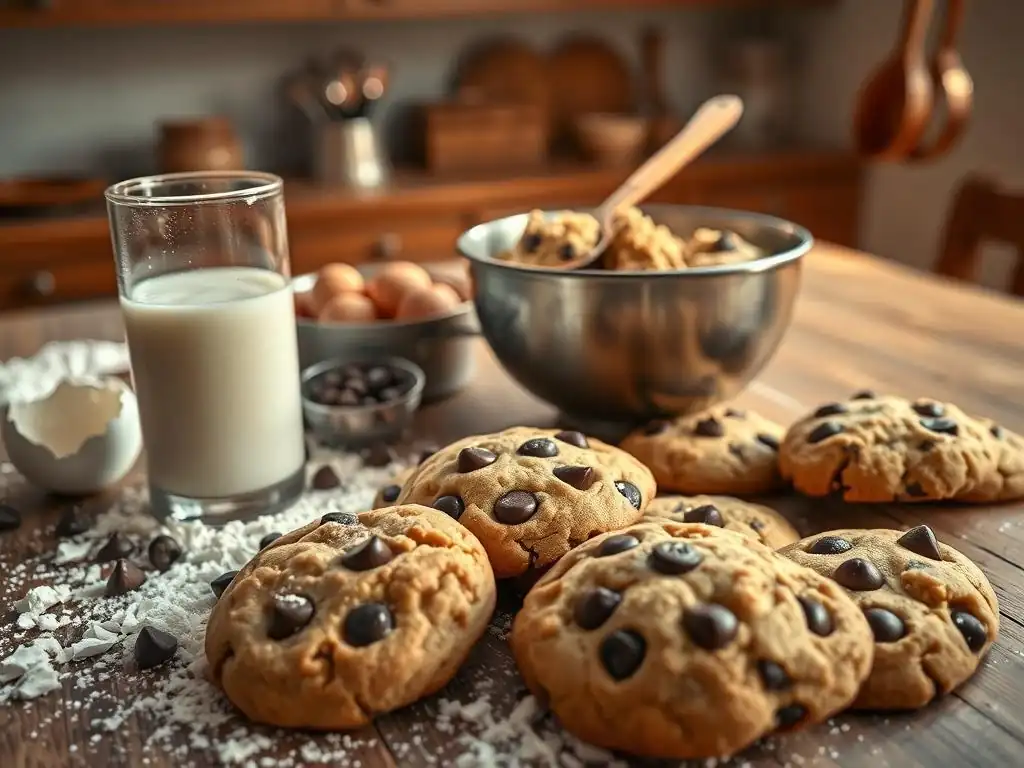
Welcome to BakeWithEase, your kitchen companion for unlocking baking brilliance! Are you ready to transform simple ingredients into delectable delights? Dive into our ultimate guide to easy drop cookie baking and discover how effortlessly you can create mouthwatering treats. What secret ingredient makes these cookies so irresistible? Keep reading to find out and embark on your baking adventure today!
- Mastering Chocolate Chip Cookies: A Baker's Guide
- Bake It Better: Elevate Your Chocolate Chip Cookie Game
- Why Chocolate Chip Cookies Are the Perfect Baking Project
- Essential Equipment and Ingredients for Perfect Chocolate Chip Cookies
- The Ultimate Chocolate Chip Cookie Recipe: Step-by-Step
- Chocolate Chip Cookie Recipe Variations: Expanding Your Flavor Profile
- Troubleshooting Common Chocolate Chip Cookie Baking Problems
- Tips and Tricks for Perfect Chocolate Chip Cookies Every Time
- Beyond the Basics: Chocolate Chip Cookie Innovations
- Conclusion: Embrace the Art of Chocolate Chip Cookie Baking
-
Frequently Asked Questions
- What exactly is a drop cookie, and why is it considered "easy"?
- What are the essential ingredients for a basic easy drop cookie recipe?
- Can I substitute ingredients in an easy drop cookie recipe? For example, butter for oil?
- What's the best way to prevent my drop cookies from spreading too thin while baking?
- How do I know when my easy drop cookies are perfectly baked?
- Final Reflection: The Sweet Simplicity of Baking
- Unleash Your Inner Baker: Bake Amazing Drop Cookies Today!
Chocolate chip cookies are a beloved classic, often the first cookie many people learn to bake. They are the quintessential easy drop cookie recipe guide for beginners, offering a perfect entry point into the world of baking. While seemingly simple, mastering the chocolate chip cookie involves understanding a few key principles that can elevate them from good to absolutely incredible. This guide will walk you through those principles, ensuring your next batch is your best batch yet.
This comprehensive guide serves as your ultimate easy drop cookie recipe guide, covering everything from essential tools and ingredients to troubleshooting common issues and exploring delicious variations. Whether you're aiming for chewy centers, crisp edges, or a perfect balance of both, we'll delve into the science and art behind crafting the ideal chocolate chip cookie, making the process straightforward and enjoyable for bakers of all skill levels.
Chocolate chip cookies hold a special place in the baking world, and for good reason. They represent an accessible yet rewarding project, making them an ideal subject for an easy drop cookie recipe guide. Their popularity is a testament to their simple charm and the pure joy they bring.
Embarking on an easy drop cookie recipe guide means choosing a forgiving project. The process is relatively quick, and the results are almost always satisfying, even for novice bakers. It's a fantastic way to build confidence in the kitchen before tackling more complex pastries or breads.
Simple Ingredients, Exceptional Flavor
One of the reasons chocolate chip cookies are such a staple in any easy drop cookie recipe guide is their reliance on basic pantry ingredients. Flour, sugar, butter, eggs, vanilla, baking soda, salt, and chocolate chips are typically all you need. These simple components, when combined correctly, create a complex and comforting flavor profile that is universally loved.
The magic lies in the interaction of these few ingredients during the baking process. The sugars caramelize, the butter provides richness and helps with browning, the flour provides structure, and the leavening agent creates lift. Even with minimal ingredients, you can achieve remarkable depth of flavor and texture, making them a perfect subject for any easy drop cookie recipe guide.
Fast Baking, Instant Gratification
Baking chocolate chip cookies is a relatively quick process from start to finish. The dough often requires minimal chilling, and each batch typically bakes in 9 to 12 minutes. This rapid turnaround time means you can go from craving cookies to enjoying warm, fresh-baked treats in under an hour, depending on chilling time.
This speed makes them perfect for impromptu baking sessions or when you need a quick dessert. Following an easy drop cookie recipe guide allows you to experience the satisfaction of baking without a significant time commitment, providing almost instant gratification as the aroma fills your kitchen and you pull golden cookies from the oven.
Beginner-Friendly, Endlessly Customizable
As an easy drop cookie recipe guide favorite, chocolate chip cookies are incredibly forgiving. Minor errors in measurement or technique often don't ruin the batch entirely, unlike more delicate bakes. This resilience makes them ideal for beginners learning the fundamentals of mixing and baking.
Beyond their ease, chocolate chip cookies offer endless possibilities for customization. You can swap in different types of chocolate (dark, milk, white, chips, chunks), add nuts (walnuts, pecans), mix in dried fruit, or incorporate spices like cinnamon or nutmeg. This adaptability ensures that even experienced bakers find joy in experimenting with this classic, making any easy drop cookie recipe guide a starting point for creativity.
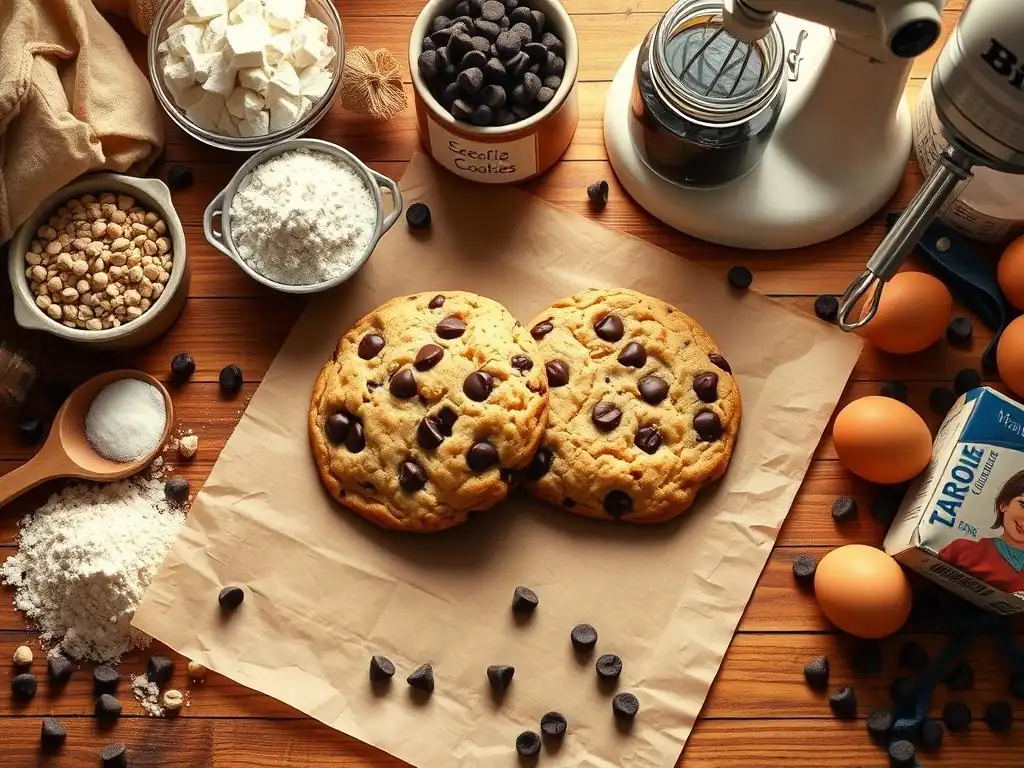
Success with any easy drop cookie recipe guide starts with having the right tools and understanding your ingredients. While you don't need a professional kitchen setup, a few key items and a grasp of ingredient roles will significantly improve your results.
Having the proper equipment streamlines the process and helps ensure consistency, which is crucial for baking. Similarly, knowing how each ingredient functions allows you to troubleshoot issues and even adapt recipes to your preferences. This foundation is key to mastering any easy drop cookie recipe guide.
Must-Have Baking Tools
Certain tools make the process of following an easy drop cookie recipe guide much smoother and more consistent. These items are standard in most kitchens but are worth highlighting for their importance in cookie making.
Investing in a few quality basic tools can dramatically improve your baking experience and the outcome of your cookies. They help with everything from accurate measurement to ensuring even baking.
Baking Sheets: Gauge and Material Impact
The type of baking sheet you use significantly impacts how your cookies bake. Light-colored, heavy-gauge aluminum baking sheets are generally recommended for an easy drop cookie recipe guide. Heavy gauge prevents warping at high temperatures, and the light color prevents the bottoms of the cookies from browning too quickly or burning.
Darker or thinner sheets absorb more heat, which can lead to burnt bottoms before the tops are fully baked. If you only have dark sheets, you might need to reduce your oven temperature by about 25°F (approx. 15°C) or bake for slightly less time and monitor closely. Consider investing in a couple of standard half-sheet pans (approx. 13x18 inches) for best results.
Parchment Paper: Ensuring Clean Release
Parchment paper is a baker's best friend, especially when following an easy drop cookie recipe guide. Lining your baking sheets with parchment paper prevents cookies from sticking, ensuring easy release without breaking. This is particularly important for delicate or chewy cookies.
Beyond preventing sticking, parchment paper also promotes even baking and makes cleanup a breeze. It helps regulate the heat transfer from the baking sheet to the cookie dough, contributing to a more consistent bake across the batch. Reusable silicone baking mats are another excellent alternative, offering similar benefits.
Cookie Scoops: Achieving Uniform Size
Using a cookie scoop is a simple but effective tip found in many an easy drop cookie recipe guide. Scoops, also known as disher scoops, come in various sizes and help portion dough consistently. Uniformly sized cookies bake more evenly, meaning you won't have some cookies burnt while others are underbaked on the same sheet.
A standard medium scoop (often labeled #40, holding about 1.5 tablespoons) is perfect for classic chocolate chip cookies. For larger bakery-style cookies, a larger scoop (#20 or #24, holding 2-3 tablespoons) works well. Consistency in size is key to managing baking time accurately.
Understanding the role of each ingredient is vital for mastering an easy drop cookie recipe guide. Subtle variations in ingredient ratios or states (like butter temperature) can lead to significant differences in texture and flavor.
Using fresh, quality ingredients is always recommended. Pay attention to details like butter temperature and sugar types, as they dramatically influence the final outcome of your chocolate chip cookies.
Flour: All-Purpose vs. Bread Flour
Most easy drop cookie recipe guides call for all-purpose flour, which contains a moderate protein content (around 10-12%). This protein develops gluten, providing structure to the cookie. Using the correct amount is critical; too much flour can result in dry, dense cookies, while too little can cause excessive spreading.
Some recipes, particularly those aiming for a chewier texture, might incorporate a small amount of bread flour (higher protein, around 12-14%). The increased protein develops more gluten, contributing to a chewier bite. When measuring flour, spoon it lightly into your measuring cup and level it off with a straight edge, rather than scooping directly from the bag, which can compact the flour and lead to using too much by weight (a common issue).
Sugar: Brown Sugar vs. Granulated Sugar Ratios
The combination and ratio of granulated sugar and brown sugar heavily influence cookie texture and flavor, a key point in any good easy drop cookie recipe guide. Granulated sugar contributes to spread and crispness because it melts readily. Brown sugar, which contains molasses, adds moisture, chewiness, and a richer, caramel-like flavor.
Recipes with a higher ratio of brown sugar to granulated sugar will yield softer, chewier cookies, often with less spread. Conversely, a higher ratio of granulated sugar will result in crispier cookies that spread more. A typical ratio for a classic chewy chocolate chip cookie might be slightly more brown sugar than granulated sugar (e.g., 1.25 cups brown sugar to 0.5 cups granulated sugar per standard batch).
Butter: Browned vs. Creamed for Flavor
Butter is foundational to both flavor and texture in an easy drop cookie recipe guide. Most recipes begin with creaming softened butter with sugar, which incorporates air, contributing to the cookie's lift and texture. Softened butter should be pliable but still cool to the touch, not greasy or melted (approx. 65-68°F or 18-20°C).
Using browned butter (butter heated until the milk solids caramelize, giving it a nutty aroma and flavor) is a popular variation for enhancing the complexity of the cookie. Browned butter adds a depth of flavor that plain butter doesn't provide, but it also changes the moisture content slightly. If using browned butter, allow it to cool and solidify slightly before creaming with the sugars.
Eggs: Room Temperature vs. Cold
Eggs play multiple roles in an easy drop cookie recipe guide: they bind ingredients, add moisture, and contribute to leavening and richness. Using room-temperature eggs (approx. 68-70°F or 20-21°C) is generally recommended because they emulsify more easily with the creamed butter and sugar, creating a smoother, more cohesive dough.
Cold eggs can cause the fat in the creamed mixture to seize up, resulting in a less homogenous batter. To quickly bring eggs to room temperature, place them in a bowl of warm (not hot) water for 5-10 minutes. Using room temperature eggs ensures better incorporation and contributes to a better texture in the final cookie.
Leavening Agents: Baking Soda and Salt Balance
Baking soda (sodium bicarbonate) is the primary leavening agent in most chocolate chip cookies, especially when combined with acidic brown sugar. It reacts when heated, producing carbon dioxide gas that causes the cookies to rise and spread. Too much baking soda can lead to excessive spread and a soapy flavor, while too little results in dense cookies.
Salt is crucial for balancing the sweetness and enhancing the overall flavor profile, a detail often highlighted in a good easy drop cookie recipe guide. It doesn't just make things salty; it brightens the other flavors. Ensure you use the type of salt specified (table salt, fine sea salt, or kosher salt) as their densities differ, affecting measurement. A typical recipe for 2-3 dozen cookies might use 1 teaspoon of baking soda and 0.5-0.75 teaspoons of fine salt.
Following a reliable step-by-step easy drop cookie recipe guide is the surest way to achieve great results. This section breaks down the process into manageable steps, from mixing the dough to cooling the finished cookies.
Each step in the process contributes significantly to the final texture and appearance of your cookies. Paying attention to details like mixing times and temperatures is key to mastering this easy drop cookie recipe guide.
Preparing the Dough: The Art of Mixing
Mixing the dough correctly is fundamental to achieving the desired cookie texture. Over-mixing can lead to tough cookies, while under-mixing can result in uneven distribution of ingredients. This stage is critical in any easy drop cookie recipe guide.
The goal of mixing is to combine the ingredients just until they are incorporated, developing just enough gluten for structure but not so much that the cookies become hard.
Creaming Butter and Sugar: Achieving Lightness and Aeration
The first step in most easy drop cookie recipe guides involves creaming softened butter and sugars together. This process is vital for incorporating air into the mixture. As the paddle or whisk beats the butter and sugar crystals, it creates tiny air pockets. This aeration contributes to the cookie's rise and texture during baking.
Cream the butter and sugars on medium speed until the mixture is lightened in color and fluffy, typically 2-3 minutes. Scrape down the sides and bottom of the bowl occasionally to ensure even mixing. Properly creamed butter and sugar are essential for achieving a tender crumb and good spread.
Adding Eggs and Vanilla: The Emulsification Process
After creaming the butter and sugar, eggs and vanilla extract are added. It's best to add eggs one at a time, beating after each addition just until the yolk disappears into the mixture. This allows the egg to emulsify properly with the fat, creating a stable and cohesive dough.
Vanilla extract adds a crucial layer of flavor. Ensure it's fully mixed in. Over-beating after adding eggs can start to overdevelop gluten, so mix only until the ingredients are combined. This step is simple but important for the dough's structure and moisture content, as highlighted in any good easy drop cookie recipe guide.
Incorporating Dry Ingredients: Preventing Gluten Development
The final stage of mixing involves adding the dry ingredients (flour, baking soda, salt) to the wet ingredients. This is where gentle mixing is paramount in an easy drop cookie recipe guide. Too much mixing at this stage develops excess gluten, resulting in tough cookies.
Add the dry ingredients in one or two additions and mix on low speed just until no streaks of dry flour are visible. The dough might still look a little shaggy or not perfectly smooth – that's okay! Fold in the chocolate chips (or other add-ins) by hand with a spatula. This minimal mixing ensures a tender cookie.
Baking is where the magic happens, and temperature and time are critical factors. Following the baking instructions precisely in an easy drop cookie recipe guide will determine whether your cookies are perfectly chewy, crisp, or soft.
Understanding how heat interacts with your dough is key to achieving consistent results and the desired texture.
Preheating the Oven: Ensuring Consistent Results
Always preheat your oven fully before baking. Most easy drop cookie recipe guides specify an oven temperature between 350°F (175°C) and 375°F (190°C). A properly preheated oven ensures that the cookies start baking immediately upon entering, promoting even spread and consistent leavening.
Opening the oven door frequently releases heat and causes temperature fluctuations, which can lead to unevenly baked cookies. Trust your oven thermometer (if you have one, as oven thermostats can be inaccurate by 25-50°F or 15-30°C) and resist the urge to peek too often during the first half of the baking time.
Dropping the Dough: Creating the Perfect Shape
Using a cookie scoop (as discussed earlier) helps create uniformly sized dough balls. Drop the dough onto your prepared baking sheets, leaving adequate space between them – typically 2-3 inches (5-7.5 cm) for standard-sized cookies – to allow for spreading. Don't flatten the dough balls unless the specific easy drop cookie recipe guide instructs you to.
The shape of the dough ball slightly influences the final cookie shape and texture. A round ball will spread into a classic circular cookie. For thicker cookies, some bakers lightly press the tops of the dough balls or even freeze them briefly before baking.
Monitoring for Doneness: The Golden Brown Rule
Knowing when your chocolate chip cookies are done is crucial. Most easy drop cookie recipe guides suggest baking until the edges are set and golden brown, but the centers still look slightly soft or pale. This usually takes 9 to 12 minutes at 350°F (175°C) for average-sized cookies.
Cookies continue to bake slightly from residual heat after they are removed from the oven. Removing them when the centers look just slightly underdone is often the key to achieving a chewy interior. If you wait until the tops look fully set and golden, they might be overbaked and crispy once cooled. Look for a subtle change in color and texture from the edges inward.
Proper cooling and storage are the final steps to ensuring your hard work results in delicious, fresh-tasting cookies. These steps are simple but important for texture and longevity, relevant for any easy drop cookie recipe guide.
Mishandling cookies after baking can ruin their texture. Follow these simple steps to keep them at their best.
Cooling on Wire Racks: Maintaining Texture
Once removed from the oven, let the cookies rest on the baking sheet for 1-2 minutes before transferring them to a wire cooling rack. This brief resting period allows the cookies to set slightly, making them less likely to break when moved.
Transferring them to a wire rack allows air to circulate around the entire cookie, cooling them down evenly. Cooling cookies on the hot baking sheet for too long will continue the baking process and can lead to overcooked or hard bottoms. Ensure cookies are completely cool before storing.
Storing for Freshness: Airtight Containers and Freezing
Store fully cooled chocolate chip cookies in an airtight container at room temperature. A cookie jar or plastic container with a tight-fitting lid works well. Proper storage keeps them fresh and prevents them from drying out or becoming stale. They typically stay fresh for 3-5 days stored this way.
For longer storage, you can freeze baked cookies or unbaked dough. Freeze baked cookies in a single layer on a baking sheet until solid, then transfer to a freezer bag or container. Unbaked dough balls can be frozen the same way; bake from frozen, adding a few minutes to the baking time. Frozen baked cookies last 2-3 months, and frozen dough lasts 3-6 months, making it easy to have fresh cookies anytime.
Once you've mastered the basic easy drop cookie recipe guide, the world of variations opens up. Chocolate chip cookies are incredibly versatile and serve as a fantastic base for countless flavor combinations.
Experimenting with different additions and tweaks allows you to personalize your cookies and discover new favorites, building upon your easy drop cookie recipe guide foundation.
For the serious chocolate lover, double chocolate chip cookies take the classic to a new level of richness. This variation typically involves adding cocoa powder to the dough, alongside the chocolate chips.
Adding cocoa powder not only intensifies the chocolate flavor but also affects the dough's texture and color. Choosing between Dutch-process and natural cocoa powder influences the color and slight acidity of the cookie.
Using Cocoa Powder: Dutch Process vs. Natural
Most recipes for double chocolate chip cookies specify either natural or Dutch-process cocoa powder. Natural cocoa powder is acidic and reacts with baking soda, aiding in leavening. It has a sharper, slightly fruity chocolate flavor. Dutch-process cocoa powder has been treated to reduce acidity, has a darker color, and offers a smoother, mellower chocolate flavor.
If the recipe uses baking soda as the sole leavening agent, natural cocoa powder is usually required for the chemical reaction. If it uses baking powder or a combination, Dutch-process might be specified. Using approx. 0.5 cups of cocoa powder per standard batch of dough is common. Ensure it's sifted to prevent lumps.
Adding Chocolate Chunks: Melting vs. Adding Whole
Using chocolate chunks instead of or in addition to chocolate chips is a popular technique for double chocolate cookies. Chocolate chips contain stabilizers that help them hold their shape during baking. Chocolate chunks, especially from a chopped bar of good quality chocolate, melt more readily, creating pockets of molten chocolate within the cookie.
Adding both cocoa powder and a generous amount of chocolate chunks (e.g., 1.5 cups total chocolate per batch) ensures an intense chocolate experience. Some bakers even reserve a few chunks to press into the tops of the dough balls before baking for a more visually appealing finish.
Combining sweet caramel with a hint of salt and rich chocolate creates a wonderfully complex flavor profile. This variation builds upon the easy drop cookie recipe guide by incorporating caramel.
The interplay of sweet, salty, and bitter from the chocolate is incredibly addictive. Adding caramel requires careful consideration of moisture.
Making Caramel Sauce: From Scratch or Store-Bought
Incorporating caramel into cookies can be done by swirling in cooled caramel sauce or adding soft caramel bits. Making caramel sauce from scratch (heating sugar until it caramelizes, then adding butter and cream) provides the freshest flavor, but requires careful attention to prevent burning. Store-bought caramel sauce or soft caramels (like Kraft or Werther's chewy caramels, chopped) are convenient alternatives.
If using sauce, swirl cooled, thick caramel sauce into the dough just before adding chocolate chips, or dollop small amounts onto the dough balls before baking. If using chopped soft caramels, fold them in with the chocolate chips. Be aware that soft caramels will melt significantly during baking. Using approx. 0.5 cups of caramel sauce or 0.75 cups of chopped caramels per batch is a good starting point.
Adding Sea Salt: Enhancing Flavors
A sprinkle of flaky sea salt (like Maldon or Fleur de Sel) after baking is the key to achieving that perfect sweet and salty balance in this variation of an easy drop cookie recipe guide. The salt crystals provide pops of salinity that contrast beautifully with the sweetness of the cookie and caramel.
Sprinkle the salt over the warm cookies immediately after they come out of the oven. The residual heat helps the salt adhere. A light sprinkling is usually sufficient; start with about 0.25 teaspoons per batch and adjust to your preference.
The pairing of peanut butter and chocolate is a timeless favorite. Integrating peanut butter into an easy drop cookie recipe guide creates a cookie with a unique texture and nutty flavor alongside the chocolate.
This variation adds richness and density. Using natural or conventional peanut butter affects the dough consistency.
Swirling Peanut Butter: Creating Visual Appeal
One way to make peanut butter chocolate chip cookies is to make a standard chocolate chip cookie dough and swirl in dollops of peanut butter just before adding the chocolate chips. This creates beautiful streaks of peanut butter throughout the cookie, adding visual appeal and pockets of pure peanut butter flavor.
Use about 0.5 cups of creamy or slightly softened natural peanut butter and gently swirl it into the dough with a spatula. Don't overmix, or the swirl effect will be lost. This technique works best with a slightly thicker dough.
Adding Peanut Butter Chips: Amplifying the Peanut Butter Flavor
Alternatively, or in addition to swirling, you can add peanut butter chips to the dough along with the chocolate chips. Peanut butter chips provide concentrated bursts of peanut butter flavor throughout each bite.
A common ratio is using half chocolate chips and half peanut butter chips (e.g., 0.75 cups of each per batch). Combining chocolate chips and peanut butter chips is often simpler than swirling and ensures a more consistent peanut butter flavor throughout the batch, fitting easily into an easy drop cookie recipe guide framework.
Adding a touch of coffee enhances the flavor of chocolate, making it taste richer and more intense. Incorporating espresso powder into your easy drop cookie recipe guide is a simple way to add this complexity.
Coffee doesn't just add its own flavor; it amplifies the chocolate notes, resulting in a deeper, more sophisticated cookie.
Adding Espresso Powder: Enhancing Chocolate Notes
Finely ground espresso powder or instant coffee granules can be dissolved in the wet ingredients (like the vanilla or with the eggs) or whisked into the dry ingredients. About 1-2 teaspoons of espresso powder per standard batch is usually enough to enhance the chocolate without making the cookie taste overtly like coffee.
Ensure the powder is fully dissolved if adding to wet ingredients or evenly distributed if adding to dry. High-quality espresso powder provides the best flavor. This subtle addition is a secret weapon for many bakers looking to elevate their easy drop cookie recipe guide results.
Topping with Coffee Beans: Aromatic and Flavorful
For an extra touch of coffee aroma and a slight crunch, you can press a few chocolate-covered espresso beans or plain roasted coffee beans into the tops of the dough balls before baking.
While not essential for flavor throughout the cookie, this adds an aromatic element and indicates the coffee variation. It's an optional step but adds a professional finishing touch to this variation on an easy drop cookie recipe guide.
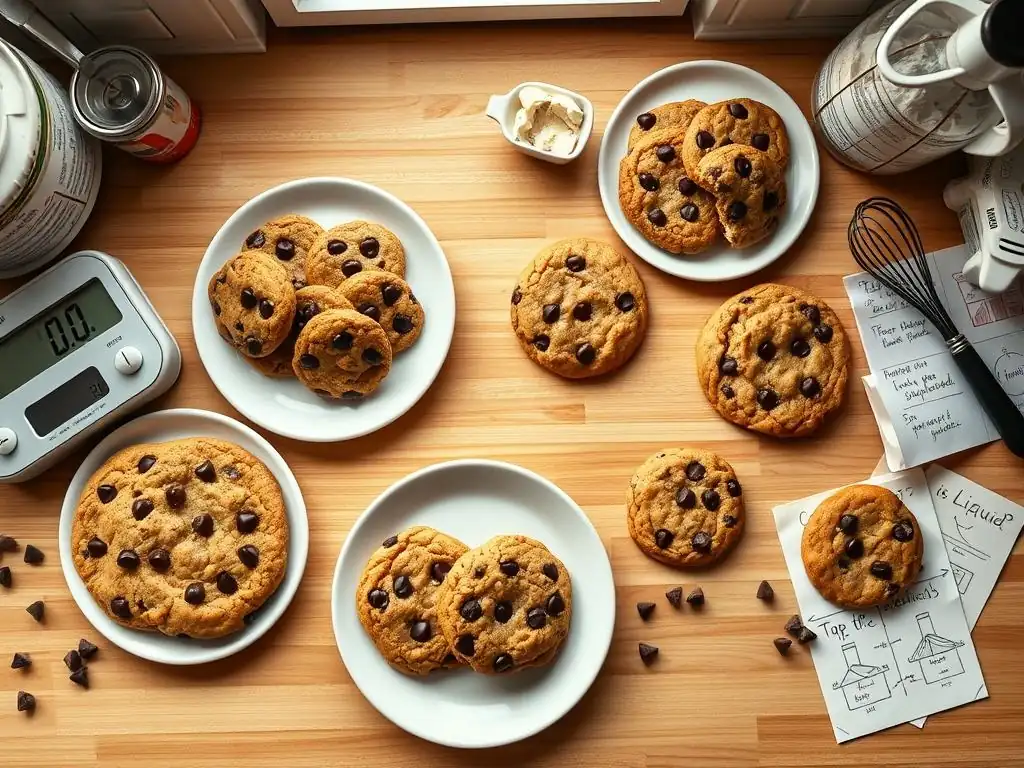
Even when following an easy drop cookie recipe guide, things can sometimes go wrong. Knowing how to identify and fix common issues will save your cookies and reduce frustration.
Most cookie problems stem from ingredient ratios, mixing technique, or oven temperature. Understanding the causes helps you prevent them next time.
Cookies that spread into flat, greasy discs are a common complaint. This issue often arises when the dough is too warm or contains too much fat relative to the dry ingredients.
Over-spreading can be disappointing, but it's usually fixable with simple adjustments to your technique or ingredients based on your easy drop cookie recipe guide.
Possible Causes: Melted Butter, Too Much Sugar
One primary cause of excessive spread is using butter that is too soft or partially melted when creaming. Over-creaming the butter and sugar can also incorporate too much air, leading to collapse during baking. Another cause is an imbalance in the recipe, specifically too much sugar (especially granulated sugar) or not enough flour. For example, using butter that is 75°F (24°C) instead of the recommended 65-68°F (18-20°C) will result in significantly more spread.
A recipe with a very high sugar-to-flour ratio (e.g., 1.5 cups total sugar to 1.5 cups flour) will inherently spread more than one with a lower ratio (e.g., 1.25 cups total sugar to 2 cups flour). Ensure your ingredient measurements, particularly flour, are accurate, preferably by weight if possible (1 cup all-purpose flour is approx. 120-130 grams).
Solutions: Chill the Dough, Reduce Sugar
The easiest fix for dough that is spreading too much is to chill it. Refrigerating the dough for at least 30-60 minutes (or even several days) solidifies the fat, which slows down the spread during baking. For severely spreading dough, chilling for several hours or overnight might be necessary.
If the recipe consistently produces flat cookies despite chilling, consider slightly reducing the amount of granulated sugar (by 1-2 tablespoons) or adding 1-2 tablespoons more flour (measured accurately). Ensure your baking soda hasn't expired; old leavening can also affect spread and rise.
On the other end of the spectrum are cookies that stay in tight, puffy mounds, failing to spread out properly. This results in thick, often cakey or dense cookies.
Lack of spread is usually related to the dough being too stiff or cold, or issues with leavening.
Possible Causes: Over-Mixing, Too Much Flour
Over-mixing the dough, particularly after adding the flour, is a common culprit. This develops too much gluten, making the dough tough and resistant to spreading. Using too much flour, often due to scooping directly from the bag instead of spooning and leveling, also results in a dry, stiff dough that won't spread adequately in the oven. For example, a cup of scooped flour can weigh 150-160 grams, while spooned and leveled is 120-130 grams, a significant difference.
Using butter that is too cold (hard, not softened) when creaming will not incorporate enough air, leading to less spread. Ensure your butter is properly softened before starting.
Solutions: Gently Fold Ingredients, Measure Flour Accurately
Ensure you are mixing the dry ingredients into the wet ingredients just until combined, folding gently if necessary, rather than beating vigorously. Always spoon and level your flour or, ideally, weigh it for precision. If you've already made the dough and it seems too stiff, you might be able to gently mix in a teaspoon or two of milk or melted butter, but this can be tricky.
If your cookies consistently don't spread, your oven might not be reaching the correct temperature, or your baking soda might be old. Check your oven temperature with a thermometer and ensure your baking soda is fresh by testing a pinch in hot water – it should fizz vigorously.
Burnt bottoms with pale tops are frustrating. This indicates uneven heat distribution, where the bottom of the cookie is getting too much direct heat too quickly.
This issue is often related to your baking sheet or oven calibration.
Possible Causes: Dark Baking Sheet, Oven Imbalance
Dark-colored baking sheets absorb and transfer heat more efficiently than light-colored ones, leading to faster browning (or burning) on the bottom. Using a thin baking sheet can also contribute to this issue as it provides less insulation. An oven that runs hot, especially towards the bottom element, is another common cause. Ovens can be off by as much as 50°F (30°C).
Placing the baking sheet on the lowest rack in the oven will also expose the bottoms of the cookies to more direct heat.
Solutions: Use Parchment Paper, Rotate Baking Sheet
Lining your baking sheet with parchment paper or a silicone mat provides a layer of insulation that helps prevent the bottoms from burning, even on dark sheets. Using a light-colored, heavy-gauge baking sheet is the ideal solution.
If your oven has hot spots or tends to burn bottoms, try baking on the middle or upper-middle rack instead of the lower one. Rotating the baking sheet halfway through the baking time (e.g., after 5-6 minutes) ensures more even exposure to heat and helps prevent one side or the bottoms from cooking faster than the rest. If you suspect your oven runs hot, try reducing the temperature by 25°F (15°C).
Beyond the basic easy drop cookie recipe guide steps, a few simple tips can consistently elevate your cookie game, helping you achieve bakery-quality results.
These are small details that make a big difference in texture, flavor, and consistency.
Measuring Ingredients Accurately: The Baker's Golden Rule
Baking is a science, and accuracy matters. While an easy drop cookie recipe guide is forgiving, precise measurement is the single most important factor for consistent results. Using measuring cups designed for dry ingredients (leveled off) and separate cups for liquids is crucial.
For dry ingredients like flour and sugar, spooning the ingredient into the cup and leveling with a straight edge prevents compaction, which can lead to using significantly more than intended (e.g., a difference of 20-30 grams per cup of flour). For best accuracy, especially with flour, use a digital kitchen scale and measure by weight. This eliminates variability based on how densely you pack or scoop.
The Importance of Room Temperature Butter and Eggs
As mentioned earlier, using room temperature butter and eggs is vital for proper emulsification and aeration, key elements in an easy drop cookie recipe guide. Softened butter (approx. 65-68°F or 18-20°C) creams correctly with sugar, incorporating air. Cold butter won't cream properly, and melted butter will result in flat, greasy cookies.
Room temperature eggs incorporate smoothly into the batter, creating a uniform dough texture. Cold eggs can cause the butter to seize and create a lumpy batter. Planning ahead to let these ingredients sit out for 30-60 minutes before baking is a simple step that yields significant benefits.
Properly Preheating Your Oven: Consistent Heat is Key
Ensuring your oven is fully preheated to the correct temperature before you put cookies in is non-negotiable for uniform baking. An underheated oven will cause cookies to spread excessively before they set, while an oven that hasn't reached temperature will bake inconsistently.
Most ovens take 10-15 minutes to preheat, but some can take longer. Using an oven thermometer is highly recommended, as built-in thermostats can be inaccurate. Wait until the oven has held the target temperature for at least 5-10 minutes before baking your first batch.
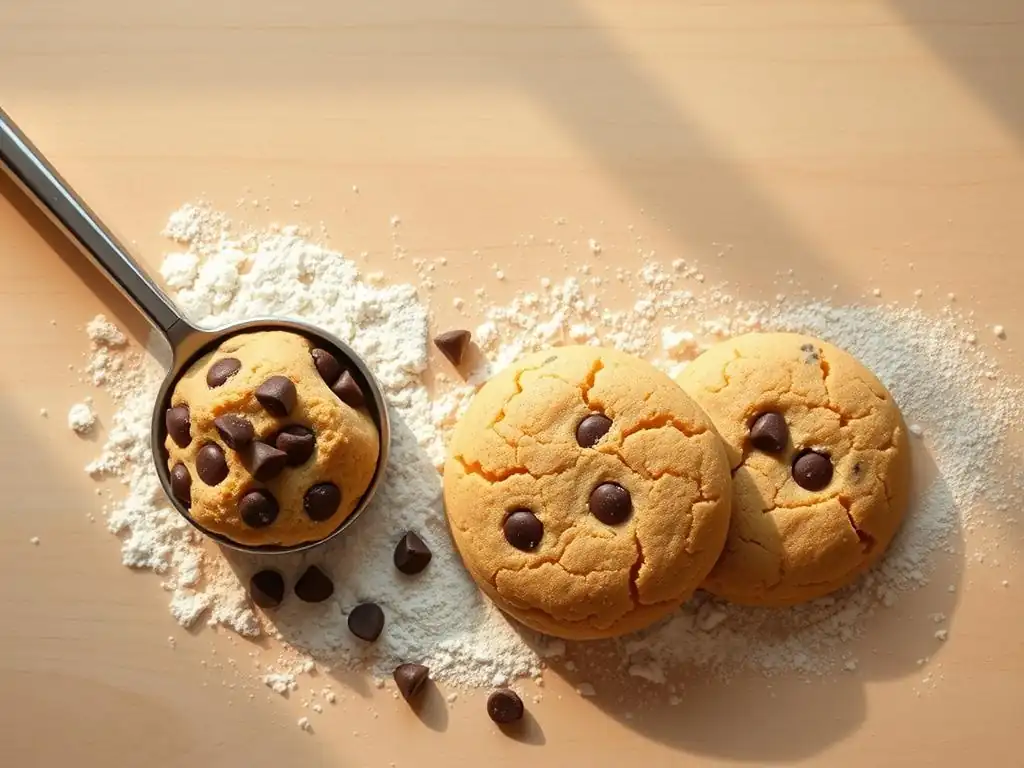
Using a cookie scoop (disher) is a simple tool that guarantees uniformly sized dough balls. Uniform size means all cookies on the sheet will bake at the same rate, preventing some from being underdone while others are overdone.
Consistency in size (e.g., using a #40 scoop for approx. 1.5 tbsp dough) is particularly helpful when following baking times provided in an easy drop cookie recipe guide. It removes guesswork and ensures that each cookie in the batch has the same opportunity to bake perfectly.
Proper storage is essential for maintaining the texture you worked hard to achieve. Once completely cooled, store cookies in an airtight container. If you prefer softer cookies, you can add a slice of bread or a marshmallow to the container; the cookies will absorb moisture from it.
If you prefer crisp cookies, store them separately from any soft cookies or other baked goods. Avoid storing warm cookies, as the trapped steam will make them soggy. Storing in a cool, dry place away from direct sunlight helps maintain freshness for several days.
Once you are comfortable with an easy drop cookie recipe guide, you can explore exciting variations that put new twists on the classic. These innovations often involve altering ingredients or adding unique components.
These ideas push the boundaries of the traditional recipe, offering new textures and flavor profiles to explore.
Elevating the flavor of the butter by browning it before adding it to the dough is a popular technique. Browning butter involves melting it and cooking it gently until the milk solids at the bottom turn golden brown and nutty-smelling.
This process removes some moisture and adds a deep, caramelized, nutty flavor that significantly enhances the cookie's overall taste. The browned butter needs to be cooled slightly before proceeding with the recipe, sometimes even chilled back to a semi-solid state depending on the specific easy drop cookie recipe guide variation.
Combining the flavors of s'mores – graham crackers, chocolate, and marshmallow – into a chocolate chip cookie is a fun and delicious innovation. This typically involves adding crushed graham crackers, chocolate chunks (milk chocolate works well here), and marshmallow pieces to the cookie dough.
Adding marshmallows can be tricky as they puff up and melt significantly during baking. Some recipes suggest adding marshmallow pieces towards the end of the baking time or pressing large marshmallows onto the partially baked cookies. Using mini marshmallows or marshmallow bits designed for baking can also work.
Adapting the classic easy drop cookie recipe guide to be vegan involves replacing dairy butter and eggs with plant-based alternatives. This requires understanding how different substitutes affect texture and flavor.
Common substitutes include vegan butter or oil (like coconut oil) for butter, and flax eggs (ground flaxseed mixed with water), applesauce, mashed banana, or commercial egg replacers for eggs. Vegan recipes often require slightly different ratios of dry to wet ingredients and sometimes additional leavening to achieve a desirable texture without the structure provided by eggs and dairy.
Mastering the chocolate chip cookie is a rewarding journey, starting with a solid easy drop cookie recipe guide and building from there. It's a perfect blend of simple ingredients and techniques that yield consistently delicious results.
Whether you stick to the classic or venture into exciting variations, the process of baking chocolate chip cookies is a joyful one. With this easy drop cookie recipe guide, you have the knowledge to troubleshoot issues, perfect your technique, and create cookies that will impress everyone. So, preheat your oven, gather your ingredients, and enjoy the process of baking these timeless treats!
Frequently Asked Questions
A drop cookie is a cookie made by simply dropping spoonfuls of dough onto a baking sheet. It's considered easy due to its simple mixing and baking process, requiring no rolling or shaping. This makes it perfect for beginners.
The essential ingredients typically include flour, butter or oil, sugar, eggs, and a leavening agent like baking soda or baking powder. You'll also usually need vanilla extract and sometimes chocolate chips or other mix-ins.
Yes, substitutions are often possible! Butter can often be swapped for oil (and vice versa), though it may slightly affect the texture. Just be mindful of the fat content and moisture levels.
To prevent excessive spreading, ensure your butter isn't too soft, and chill the dough before baking. Using parchment paper and avoiding overcrowding the baking sheet are also helpful techniques.
Drop cookies are usually done when the edges are lightly golden brown, and the centers appear set. A toothpick inserted into the center should come out clean, or with a few moist crumbs. Don't overbake them!
Final Reflection: The Sweet Simplicity of Baking
The enduring appeal of a perfectly baked drop cookie lies not just in its deliciousness, but in its accessibility. Anyone, regardless of baking experience, can achieve delightful results with the right guidance. This guide aimed to provide precisely that – a straightforward path to cookie baking success, demystifying the process and empowering you to create sweet treats with confidence.
The joy of baking, particularly the simple act of creating drop cookies, transcends mere culinary skill; it's a deeply personal and often communal experience. It's about sharing warmth, creating memories, and finding solace in the rhythmic process of mixing, scooping, and baking. As the renowned baker, Julia Child, once said, >“Cooking is at once child’s play and adult joy. And cooking done with care is an act of love.” This sentiment perfectly encapsulates the heart of this guide – to share the love of baking, one delicious drop cookie at a time.
Now, I invite you to roll up your sleeves, gather your ingredients, and embark on your own cookie-baking adventure. Don't be afraid to experiment, to personalize the recipes, and to share your creations with loved ones. Remember the simple pleasure found in the process, the satisfaction of a perfectly golden-brown cookie, and the joy of sharing something homemade. Let the sweet simplicity of baking fill your kitchen with warmth and your heart with happiness.
Thanks for joining us on this delicious journey into the world of drop cookies! We hope you've gained the confidence and skills to create perfectly baked treats every time. Now it's time to put your newfound knowledge into action.
- Bake your first batch of amazing drop cookies using your favorite recipe (or one of ours!). This is your chance to shine! Experiment with different flavors and share your creations with loved ones.
- Share your baking success (or even your baking fails!) on social media using #BakeWithEase. Let's build a community of passionate bakers!
- Consider trying a new and unusual cookie recipe— maybe a unique flavor combination or a special technique you've discovered? Expand your baking horizons!
What exciting cookie flavor are you going to create first? Let us know in the comments!