
Easy Simple Cake Glaze Recipes for Beginners


Welcome to BakeWithEase, your trusted guide to the delightful world of baking! Ever dreamt of creating a perfectly glazed cake that's both beautiful and delicious? This is where your journey begins. Discover the secrets to crafting an easy beginner cake glaze that will elevate your baking from simple to stunning. Get ready to unlock simple recipes and expert tips that will have you glazing like a pro in no time! What are you waiting for? Let's get baking!
- Easy Beginner Cake Glaze Recipes for Simple Cakes
- Introduction to Easy Cake Glazes for Beginners
- Essential Ingredients for Easy Beginner Cake Glazes
- Recipe 1: Classic Vanilla Cake Glaze for Beginners
- Recipe 2: Simple Chocolate Cake Glaze for Beginners
- Recipe 3: Lemon Cake Glaze: A Zesty Beginner Option
- Recipe 4: Maple Cake Glaze
- Troubleshooting Common Cake Glaze Problems for Beginners
- Tips for Applying Cake Glaze
- Storing Your Easy Beginner Cake Glaze
- Conclusion: Mastering Easy Cake Glazes for Beginner Bakers
-
Frequently Asked Questions
- What exactly is a "cake glaze," and why is it different from frosting?
- What makes a cake glaze "easy" for beginners?
- What are the basic ingredients I'll need to make an easy cake glaze?
- Can I use different types of liquids to change the flavor of my glaze?
- How do I know if my cake glaze is the right consistency?
- Final Reflection: The Sweet Simplicity of Glaze
- Unlock Your Inner Cake Artist: Glaze Game Strong!
Easy Beginner Cake Glaze Recipes for Simple Cakes
Introduction to Easy Cake Glazes for Beginners
Welcome to the delightful world of baking! If you've just baked your first simple cake, you might be wondering how to add that extra touch of sweetness and shine without getting complicated. That's where an easy beginner cake glaze comes in. These simple glazes are fantastic for adding moisture and flavor to cakes like pound cakes, loaf cakes, or even cupcakes, and they require minimal ingredients and effort. Unlike frosting, which is often thick and fluffy, a glaze is typically thinner and poured or drizzled over the cake, creating a beautiful, slightly translucent coating.
Mastering an easy beginner cake glaze is a great stepping stone in your baking journey. It allows you to practice basic mixing techniques and understand how different ingredients interact to create a smooth, pourable consistency. Plus, it's incredibly rewarding to see your simple cake transformed with a glossy finish. We'll walk you through several foolproof recipes designed specifically for those new to baking, ensuring your first attempts are successful and delicious.
Why Cake Glaze is Perfect for Beginner Bakers
Cake glaze offers several advantages for beginner bakers. Firstly, it's incredibly forgiving. If your glaze is a little too thick, you can easily add a touch more liquid. If it's too thin, a bit more powdered sugar solves the problem. This adjustability makes it far less intimidating than trying to achieve the perfect consistency for buttercream or other complex frostings. Many easy beginner cake glaze recipes require just two or three ingredients, making them quick to whip up while your cake cools.
Another reason an easy beginner cake glaze is ideal is the minimal equipment needed. You typically only need a bowl and a whisk or spoon. There's no need for stand mixers, piping bags, or special spatulas.
This simplicity reduces the barriers to entry and allows you to focus on the core techniques of mixing and consistency. It's a low-stress way to elevate the appearance and flavor of your baked goods, building confidence with each successful application. For instance, a simple vanilla glaze over a basic yellow cake can turn an ordinary dessert into something special with just a few minutes of effort.
Understanding the Basics of a Simple Cake Glaze
At its core, a simple cake glaze is a mixture of a powdered sweetener (most commonly powdered sugar) and a liquid. The powdered sugar provides the structure and sweetness, while the liquid allows it to be mixed into a pourable consistency. The ratio of sugar to liquid is key to achieving the desired thickness.
A typical starting point for many easy beginner cake glaze recipes is about 1 cup of powdered sugar to 1-2 tablespoons of liquid. Adjusting this ratio is how you control whether the glaze is thick enough to coat opaquely or thin enough to create a delicate drizzle.
The type of liquid used significantly impacts the flavor and sometimes the color of the easy beginner cake glaze. Milk is a popular choice for a classic, creamy glaze. Water creates a very clear, neutral glaze. Fruit juices, like lemon or orange, add tang and a hint of color. Extracts, such as vanilla or almond, infuse the glaze with additional flavor without altering the consistency much. Learning how these basic components interact is fundamental to mastering simple glazes and opens the door to countless flavor variations.
Essential Ingredients for Easy Beginner Cake Glazes
Creating a delicious and easy beginner cake glaze starts with understanding the few essential ingredients you'll need. These are typically pantry staples, making glazes a convenient last-minute addition to your simple cakes. The primary components are almost always powdered sugar and a liquid, with flavorings playing a crucial supporting role. Using fresh, good-quality ingredients will always yield the best results, even in something as simple as a glaze.
Beyond the basics, having a few common flavor enhancers on hand can transform a plain glaze into something spectacular. Vanilla extract is a classic for a reason, adding warmth and depth. Citrus zest provides a bright, fresh counterpoint to sweetness. Even a pinch of salt can balance the sweetness and enhance the overall flavor profile. Stocking these simple items ensures you're always ready to whip up a fantastic easy beginner cake glaze for any occasion.
The Best Sugar for Cake Glazes: A Beginner's Guide
For almost all easy beginner cake glaze recipes, the absolute best sugar to use is powdered sugar, also known as confectioners' sugar or icing sugar. This is because powdered sugar is incredibly fine, ground into a powder that dissolves almost instantly when mixed with liquid. This fineness is what allows you to create a smooth, lump-free glaze without heating the mixture. Granulated sugar, on the other hand, has larger crystals that would remain gritty unless dissolved through heating, which is typically not done for simple pourable glazes.
Powdered sugar often contains a small amount of cornstarch (usually around 3%) to prevent clumping. This cornstarch also helps stabilize the glaze slightly, preventing it from separating as it sits. When measuring powdered sugar for your easy beginner cake glaze, it's generally recommended to sift it first, especially if it's been sitting for a while and has compacted or formed lumps. Sifting ensures you get an accurate measurement and helps guarantee a perfectly smooth glaze consistency. A standard 1-pound box of powdered sugar contains roughly 3 ¾ cups, providing plenty for multiple batches of easy beginner cake glaze.
Liquids for Cake Glaze: Milk, Juice, and Water Explained
The liquid component is crucial for transforming powdered sugar into a pourable easy beginner cake glaze. The choice of liquid allows for customization of flavor and appearance.
- Milk: Whole milk is a popular choice as it adds a touch of richness and creates a slightly opaque, creamy-looking glaze. You can use lower-fat milk, but whole milk provides the best texture. Approximately 1-2 tablespoons of milk per cup of powdered sugar is a common ratio for a pourable glaze.
- Water: Water creates a very clear, translucent glaze that lets the cake's color show through. It's ideal when you want a neutral flavor or are adding strong flavorings like extracts or citrus juice. Use filtered water for the best taste. The ratio is similar to milk, starting with about 1-2 tablespoons per cup of powdered sugar.
- Juice: Lemon juice is perhaps the most common juice used, adding a wonderful tangy flavor that pairs well with many cakes. Orange juice or lime juice can also be used. Juices add flavor and acidity, which can cut through sweetness. Be mindful that juices can sometimes make the glaze slightly thinner than milk or water due to their acidity, so you might need slightly less liquid or a bit more sugar. Start with 1-2 tablespoons of juice per cup of powdered sugar and adjust as needed.
Experimenting with different liquids is part of the fun of making an easy beginner cake glaze!
Flavor Enhancers: Extracts and Zests for Easy Glazes
While the base of an easy beginner cake glaze is simple, flavor enhancers are where you can really make it shine. These ingredients add depth and complexity without significantly altering the glaze's texture, provided you use them in appropriate amounts.
- Extracts: Vanilla extract is the most common flavor enhancer. Just a teaspoon per batch of glaze can make a big difference. Other extracts like almond, rum, maple, or even peppermint can be used depending on the cake's flavor profile. Use pure extracts for the best flavor. Be cautious not to add too much, as extracts are potent and can make the glaze bitter or too thin if overused. For a standard batch using 1-2 cups of powdered sugar, 1 teaspoon of extract is usually sufficient.
- Zests: Citrus zest (lemon, orange, lime) adds a bright, fresh burst of flavor from the oils in the peel. Unlike juice, zest adds flavor without adding much liquid, making it excellent for controlling consistency. Use a fine grater or microplane to remove just the colored part of the peel, avoiding the bitter white pith. A teaspoon of finely grated zest can add significant flavor to an easy beginner cake glaze batch. It also adds tiny flecks of color, which can be visually appealing.
Combining extracts and zests can create even more complex flavors, such as lemon-vanilla or orange-almond. These simple additions turn a basic powdered sugar glaze into a truly memorable component of your simple cake.
Recipe 1: Classic Vanilla Cake Glaze for Beginners
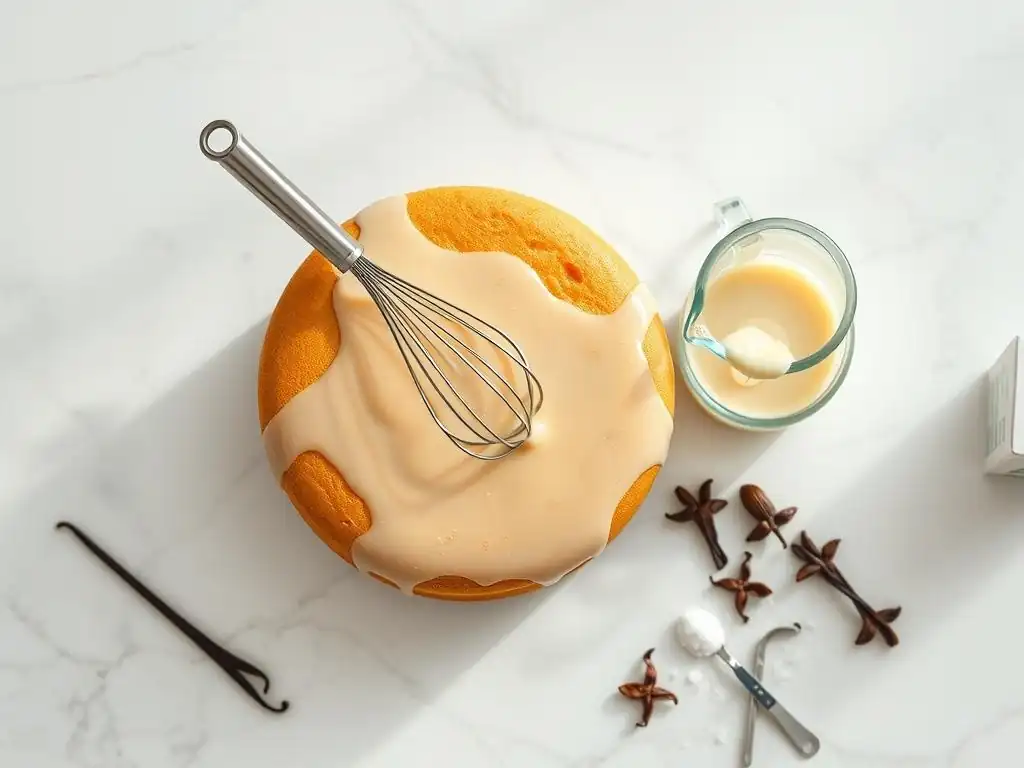
This classic vanilla glaze is the perfect starting point for anyone learning to make an easy beginner cake glaze. It's incredibly versatile, pairing well with almost any simple cake, from vanilla loaf cakes to chocolate cupcakes. Its mild, sweet flavor enhances the cake without overpowering it, and the smooth, opaque finish looks beautiful. This recipe is designed to be foolproof, requiring minimal effort and yielding consistent results.
Making this easy beginner cake glaze takes less than 5 minutes, making it ideal for when you need a quick finishing touch. The key is using good quality powdered sugar and a pure vanilla extract for the best flavor. The consistency can be easily adjusted to be thicker for a more opaque coating or thinner for a light drizzle, simply by adding more powdered sugar or liquid, respectively.
Ingredients for the Classic Vanilla Glaze
To make a classic vanilla easy beginner cake glaze, you will need just three simple ingredients. These are readily available in any grocery store.
- 1 cup (approximately 115g) powdered sugar, sifted
- 1 ½ to 2 tablespoons milk (whole milk recommended)
- ½ teaspoon pure vanilla extract
Using sifted powdered sugar is highly recommended to prevent lumps. If you don't have a sifter, you can whisk the powdered sugar vigorously in a bowl before measuring. Start with the smaller amount of milk (1 ½ tablespoons) and add more a tiny bit at a time if you need a thinner consistency. This ratio is designed for a glaze that is thick enough to coat a spoon but thin enough to drizzle easily.
Step-by-Step Instructions: Making Vanilla Glaze
Making this easy beginner cake glaze is incredibly simple. Just follow these steps:
- Sift the powdered sugar: Place the sifted powdered sugar in a medium-sized bowl.
- Add liquid and extract: Pour in 1 ½ tablespoons of milk and the ½ teaspoon of vanilla extract.
- Whisk until smooth: Using a whisk or a fork, start mixing the ingredients together in the center of the bowl, gradually incorporating the sugar from the sides. Whisk until the mixture is completely smooth and all the sugar is dissolved. There should be no lumps.
- Check consistency: Lift the whisk or spoon. The glaze should drizzle slowly and steadily off the utensil. If it's too thick, add milk, ½ teaspoon at a time, whisking after each addition, until the desired consistency is reached. If it's too thin, add more sifted powdered sugar, 1 tablespoon at a time, whisking until smooth.
- Use immediately: Once the desired consistency is achieved, the glaze is ready to use. Pour or drizzle it over your cooled cake right away, as it will start to set as it sits.
**Classic Vanilla Glaze Steps:**
- [ ] Sift 1 cup powdered sugar into a bowl.
- [ ] Add 1.5 tbsp milk and 0.5 tsp vanilla extract.
- [ ] Whisk until smooth and lump-free.
- [ ] Check consistency; adjust with more milk or powdered sugar if needed.
- [ ] Apply glaze to cooled cake.
Tips for Achieving the Perfect Vanilla Glaze Consistency
Achieving the perfect consistency for your easy beginner cake glaze is key to a beautiful finish. The ideal consistency depends on how you plan to use it. For a thick, opaque coating, you'll want a glaze that drips slowly. For a thin, delicate drizzle, you'll want it to flow more freely.
- Too Thick? If your glaze is too thick and doesn't drizzle easily, add more liquid (milk or water) just a half teaspoon at a time. Whisk thoroughly after each addition. It's easy to add more liquid, but harder to recover if you add too much at once. You only need a tiny amount to make a big difference in consistency. For example, adding just one extra teaspoon of milk to a batch using 1 cup of sugar can noticeably thin the glaze.
- Too Thin? If your glaze is too thin and runs off the spoon like water, add more sifted powdered sugar, one tablespoon at a time. Whisk thoroughly until smooth after each addition. Keep adding until the glaze reaches the desired thickness. Adding just 2-3 tablespoons of extra powdered sugar to a thin glaze can make it thick enough to coat a cake effectively. Remember to sift the extra sugar to avoid lumps.
- Lumps? Lumps usually come from unsifted powdered sugar or not whisking enough. If you have lumps, keep whisking vigorously. If they persist, you can try pressing the glaze through a fine-mesh sieve, though this is rarely necessary if you start with sifted sugar.
Always mix your easy beginner cake glaze just before you plan to use it, as it can start to set or separate slightly if left sitting for too long.
Recipe 2: Simple Chocolate Cake Glaze for Beginners
For chocolate lovers, this simple chocolate glaze is an absolute must-try. It's incredibly easy, requiring just a few ingredients, and delivers a rich, glossy chocolate finish perfect for pound cakes, chocolate loaf cakes, or even vanilla cupcakes that need a chocolate kick. This easy beginner cake glaze is much simpler than making ganache and sets up beautifully with a nice shine.
Unlike some chocolate glazes that use cocoa powder, this recipe uses melted chocolate for a richer flavor and smoother texture. It's a quick way to add decadence to your simple bakes. Using good quality chocolate will make a noticeable difference in the final taste of this easy beginner cake glaze.
Ingredients for the Easy Chocolate Glaze
This simple chocolate easy beginner cake glaze requires only a few ingredients, making it very accessible.
- 1 cup (approximately 170g) semi-sweet chocolate chips or finely chopped chocolate bar
- 2 tablespoons butter
- 2 tablespoons milk (whole milk recommended)
- ½ teaspoon vanilla extract (optional, but recommended)
- Pinch of salt (optional)
Using chocolate chips is convenient as they are already in small pieces, but finely chopped bar chocolate often provides a richer flavor. Semi-sweet chocolate is a good balance, but you could use dark or milk chocolate depending on your preference. Ensure your butter and milk are at room temperature or slightly warmed, as this helps everything melt and combine smoothly.
How to Melt Chocolate for a Smooth Glaze
Properly melting the chocolate is a crucial step for a smooth easy beginner cake glaze. Overheating chocolate can cause it to seize (become grainy and stiff), which is difficult to fix. There are two easy methods for beginners:
- Microwave Method: Place the chocolate chips or chopped chocolate in a microwave-safe bowl. Microwave on 50% power for 30-second intervals, stirring thoroughly after each interval. Chocolate retains its shape even when melted, so stirring is essential to check progress and prevent burning. Stop microwaving when the chocolate is mostly melted, with just a few small lumps remaining. Stirging the residual heat will melt the rest, resulting in a perfectly smooth chocolate. This typically takes 1.5 to 3 minutes total for 1 cup of chocolate, depending on your microwave's power.
- Double Boiler Method: Place the chocolate in a heatproof bowl set over a pot of simmering water. Ensure the bottom of the bowl does not touch the water. Stir the chocolate constantly as it melts from the steam's heat. Remove the bowl from the heat as soon as the chocolate is almost fully melted and stir until completely smooth. This method is gentler and reduces the risk of burning, though it takes slightly longer than the microwave.
Whichever method you choose, be patient and use low heat or short intervals. A smooth melted chocolate base is essential for a glossy easy beginner cake glaze.
Step-by-Step Instructions: Creating a Rich Chocolate Glaze
Once your chocolate is perfectly melted, assembling this easy beginner cake glaze is quick.
- Melt the chocolate: Follow the instructions above to melt the chocolate chips or chopped chocolate until smooth.
- Combine with butter: Add the 2 tablespoons of butter to the warm melted chocolate. Stir until the butter is completely melted and incorporated. The residual heat from the chocolate should be enough to melt the butter.
- Add milk, extract, and salt: Stir in the 2 tablespoons of milk, ½ teaspoon of vanilla extract (if using), and a pinch of salt (if using).
- Whisk until smooth and glossy: Whisk the mixture gently but continuously until the glaze is smooth, homogenous, and has a beautiful glossy sheen. It should be thick enough to coat the back of a spoon but pourable.
- Adjust consistency (if needed): If the glaze seems too thick, you can add another teaspoon of milk. If it's too thin, you can try letting it cool for a minute or two to see if it thickens slightly, or add a tiny amount (like a teaspoon) of sifted powdered sugar and whisk very gently to incorporate without making it dull.
- Pour immediately: This glaze starts to set as it cools. Pour or drizzle it over your cooled cake or cupcakes right away for the best finish.
**Simple Chocolate Glaze Steps:**
- [ ] Melt 1 cup chocolate chips/chopped chocolate.
- [ ] Stir in 2 tbsp butter until melted.
- [ ] Whisk in 2 tbsp milk, 0.5 tsp vanilla (optional), pinch salt (optional).
- [ ] Mix until smooth and glossy.
- [ ] Apply glaze to cooled cake immediately.
This easy beginner cake glaze provides a rich, satisfying chocolate flavor that complements both chocolate and vanilla cakes beautifully.
Recipe 3: Lemon Cake Glaze: A Zesty Beginner Option
For a bright and refreshing alternative to classic sweet glazes, a lemon cake glaze is a fantastic choice. This easy beginner cake glaze adds a lovely tang that cuts through the sweetness of the cake, making it taste lighter and more vibrant. It's particularly wonderful on pound cakes, simple loaf cakes, or muffins. The natural acidity of the lemon juice provides both flavor and the liquid needed for the glaze.
This recipe is just as simple as the vanilla version, primarily relying on powdered sugar and fresh lemon juice. Adding lemon zest boosts the citrus flavor significantly and adds visual appeal. It's a great way to learn how to incorporate fruit flavors into an easy beginner cake glaze.
Ingredients for the Bright Lemon Glaze
Making a zesty lemon easy beginner cake glaze requires minimal ingredients, focusing on fresh citrus flavor.
- 1 cup (approximately 115g) powdered sugar, sifted
- 2 to 3 tablespoons fresh lemon juice
- ½ teaspoon finely grated lemon zest (optional, but highly recommended)
Using fresh lemon juice is key for the best flavor; bottled juice often lacks the same brightness. You'll likely need about 1-2 medium lemons to get 2-3 tablespoons of juice and ½ teaspoon of zest. Make sure to wash the lemons thoroughly before zesting. Start with 2 tablespoons of juice and add more as needed to achieve the desired consistency, as the acidity can thin the glaze.
Getting the Perfect Lemon Flavor: Juice vs. Zest
Both lemon juice and lemon zest contribute to the flavor of this easy beginner cake glaze, but they do so in different ways. Understanding their roles helps you achieve your desired level of tanginess.
- Lemon Juice: This provides the primary liquid and the tartness. The more juice you add, the tangier the glaze will be, and the thinner its consistency. Approximately 2-3 tablespoons per cup of powdered sugar creates a pourable glaze with a noticeable lemon flavor. If you want it very tangy, you might need to add a little extra powdered sugar to maintain thickness after adding more juice. For example, using 3 tablespoons of juice might require an extra 1-2 tablespoons of powdered sugar compared to using only 2 tablespoons of juice.
- Lemon Zest: This contains the essential oils of the lemon peel, which hold the most intense lemon aroma and flavor. Zest adds a bright, aromatic note that juice alone cannot provide, without adding significant liquid. Using ½ teaspoon of finely grated zest in a batch of glaze made with 1 cup of powdered sugar and 2 tablespoons of juice will give a wonderful depth of flavor. Zest is particularly good if you want a strong lemon taste but need to control the glaze's thickness precisely.
For a balanced flavor, it's often best to use a combination of both juice and zest in your easy beginner cake glaze.
Step-by-Step Instructions: Making a Tangy Lemon Glaze
Whipping up this tangy easy beginner cake glaze is as quick and easy as the vanilla version.
- Prepare ingredients: Sift the powdered sugar into a bowl. Measure out 2 tablespoons of fresh lemon juice. If using, finely grate ½ teaspoon of lemon zest.
- Combine: Add the lemon juice (start with 2 tablespoons) and lemon zest (if using) to the sifted powdered sugar.
- Whisk until smooth: Whisk vigorously until the mixture is completely smooth and free of lumps.
- Check and adjust consistency/flavor: The glaze should be pourable but not watery. If it's too thick, add more lemon juice, ½ teaspoon at a time, whisking after each addition. If it's too thin, add more sifted powdered sugar, 1 tablespoon at a time, whisking until smooth. Taste the glaze – if you want it tangier, add a little more lemon juice or zest.
- Apply to cake: Once the perfect consistency is reached, pour or drizzle the glaze over your cooled cake immediately.
**Tangy Lemon Glaze Steps:**
- [ ] Sift 1 cup powdered sugar into a bowl.
- [ ] Add 2 tbsp fresh lemon juice and 0.5 tsp lemon zest (optional).
- [ ] Whisk until smooth.
- [ ] Adjust consistency with more juice or powdered sugar.
- [ ] Apply glaze to cooled cake.
This easy beginner cake glaze is a refreshing way to finish a simple cake, adding a burst of citrus flavor that's sure to be a hit.
Recipe 4: Maple Cake Glaze
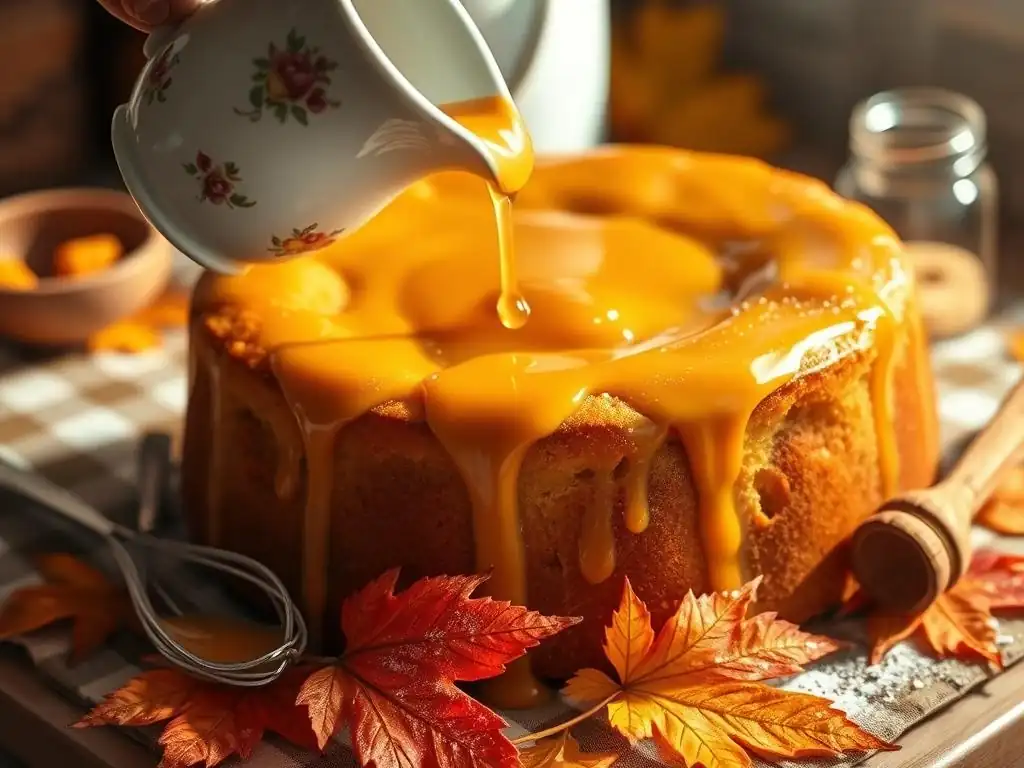
For a cozy, comforting flavor, a maple cake glaze is a wonderful choice, especially for simple cakes like apple or spice cakes, or even pumpkin bread. This easy beginner cake glaze uses real maple syrup as the primary flavor and part of the liquid, combined with powdered sugar. It's incredibly quick to make and adds a lovely warmth and sweetness.
Using real maple syrup is essential for this recipe to get the true maple flavor. Imitation syrups won't provide the same depth. This easy beginner cake glaze offers a different flavor profile than the others, moving into warm, caramel-like notes.
Ingredients for a Quick Maple Glaze
This maple easy beginner cake glaze requires just two main ingredients, plus a touch of flavor enhancer if you like.
- 1 cup (approximately 115g) powdered sugar, sifted
- 2 to 3 tablespoons pure maple syrup (Grade A Dark or Very Dark for stronger flavor)
- ½ teaspoon vanilla extract (optional)
- Pinch of salt (optional)
Choose a good quality, pure maple syrup for the best results. Dark or Very Dark grades usually have a more robust maple flavor which comes through nicely in the glaze. Start with 2 tablespoons of maple syrup and adjust the consistency as needed.
Step-by-Step Instructions: Making a Maple Glaze
Making this easy beginner cake glaze is one of the fastest options available.
- Sift powdered sugar: Place the sifted powdered sugar in a medium-sized bowl.
- Add maple syrup and optional ingredients: Pour in 2 tablespoons of pure maple syrup. Add the vanilla extract and pinch of salt if using.
- Whisk until smooth: Whisk the mixture until it is completely smooth and all the powdered sugar is incorporated.
- Check and adjust consistency: The glaze should be thick enough to coat a spoon but still pourable. If it's too thick, add more maple syrup, ½ teaspoon at a time, whisking well after each addition. If it's too thin, add more sifted powdered sugar, 1 tablespoon at a time, whisking until smooth.
- Apply immediately: Pour or drizzle the glaze over your cooled cake as soon as it reaches the desired consistency.
**Quick Maple Glaze Steps:**
- [ ] Sift 1 cup powdered sugar into a bowl.
- [ ] Add 2 tbsp pure maple syrup, 0.5 tsp vanilla (optional), pinch salt (optional).
- [ ] Whisk until smooth.
- [ ] Adjust consistency with more maple syrup or powdered sugar.
- [ ] Apply glaze to cooled cake.
This easy beginner cake glaze is perfect for adding a touch of autumnal warmth or just enjoying the unique flavor of maple any time of year.
Customizing Your Maple Glaze
While simple, the maple easy beginner cake glaze can be customized further to enhance its flavor profile.
- Spice it up: Add a tiny pinch (⅛ teaspoon) of ground cinnamon or nutmeg to the glaze along with the maple syrup. These warm spices complement the maple flavor beautifully, making it even better suited for spice cakes or pumpkin bread. Be careful not to add too much, as spices can make the glaze slightly gritty if not fully dissolved.
- Add a touch of coffee: For a richer, more complex flavor, replace half a teaspoon of the maple syrup with half a teaspoon of strong brewed coffee or espresso. This adds a subtle depth that pairs wonderfully with the maple and is excellent on chocolate or coffee-flavored cakes.
- Brown butter base: For an extra layer of nutty flavor, you could slightly brown the butter before adding it to the warm maple glaze (if you decided to gently warm the maple syrup and powdered sugar together, which is an advanced technique not strictly necessary for this easy version). However, for a simple beginner glaze, sticking to just maple syrup and powdered sugar is easiest.
These simple tweaks allow you to adapt the basic maple easy beginner cake glaze recipe to perfectly match the cake you've baked.
Troubleshooting Common Cake Glaze Problems for Beginners
Even with easy beginner cake glaze recipes, you might encounter a few common issues. Don't worry, most problems with simple glazes are easily fixable! The most frequent challenges involve getting the consistency just right – either too thick or too thin – or dealing with lumps. Understanding how to adjust the mixture is key to success.
Think of making an easy beginner cake glaze as a balancing act between the dry ingredient (powdered sugar) and the liquid. Adding more of one will always counteract the effect of the other. This simple principle allows you to correct most consistency issues quickly and effectively.
Glaze Too Thick: How to Thin it Out
A glaze that is too thick won't pour or drizzle smoothly; it might just sit in a blob. This usually happens if you haven't added enough liquid relative to the amount of powdered sugar, or if the powdered sugar was very compacted when measured. Fortunately, thinning out an easy beginner cake glaze is straightforward.
Simply add more liquid, a very small amount at a time. Use the same type of liquid you used in the recipe (milk, water, juice, or maple syrup). Add just ½ teaspoon of liquid, then whisk thoroughly until smooth. Lift the whisk to check the consistency. Does it drizzle more easily?
If not, add another ½ teaspoon and whisk again. Continue this process, adding tiny amounts and whisking, until the glaze reaches your desired pourable consistency. For a batch made with 1 cup of powdered sugar, you might only need an extra 1-2 teaspoons of liquid total to get it just right. Adding liquid gradually is crucial to avoid making it too thin accidentally.
Glaze Too Thin: How to Thicken it Up
Conversely, a glaze that is too thin will run right off the cake and likely be too translucent. This happens if you've added too much liquid. Thickening an easy beginner cake glaze requires adding more powdered sugar.
To thicken a thin glaze, add more sifted powdered sugar, 1 tablespoon at a time. Whisk thoroughly after each addition until the sugar is fully incorporated and the glaze is smooth. Check the consistency. Is it starting to coat the back of the spoon better and drizzle more slowly?
If not, add another tablespoon of sifted powdered sugar and whisk again. Continue adding powdered sugar one tablespoon at a time and whisking until the glaze reaches the desired thickness. For a glaze made with 1 cup of sugar, adding 2-4 extra tablespoons of sifted sugar is often enough to correct a thin consistency. Always sift the sugar you add to avoid introducing lumps.
Achieving a Smooth, Lump-Free Glaze: Tips and Tricks
Lumps are the enemy of a beautiful, smooth easy beginner cake glaze. They most commonly occur if the powdered sugar wasn't sifted, or if the ingredients weren't whisked together thoroughly enough.
- Start with Sifted Sugar: This is the most important step. Sifting breaks up any clumps that have formed in the powdered sugar. If you don't have a sifter, vigorously whisking the powdered sugar in a dry bowl for a minute before measuring can help aerate it and break up small clumps.
- Whisk Thoroughly: Once you combine the powdered sugar and liquid, whisk them together vigorously using a whisk or a fork. Make sure to scrape down the sides and bottom of the bowl to incorporate all the sugar. Keep whisking until the mixture is perfectly smooth and glossy. This might take 1-2 minutes of continuous whisking.
- Warm Liquid (Optional): While not strictly necessary for most easy beginner cake glaze recipes, using slightly warm milk or juice (not hot!) can sometimes help the powdered sugar dissolve more easily, reducing the chance of lumps.
- Strain (Last Resort): If you've whisked thoroughly and still have stubborn lumps, you can carefully press the glaze through a fine-mesh sieve set over another bowl. Use a spoon or spatula to push the glaze through. This is a last resort, as it can be a bit messy for a beginner, but it works!
By starting with sifted sugar and whisking properly, you should be able to achieve a perfectly smooth easy beginner cake glaze every time.
Tips for Applying Cake Glaze
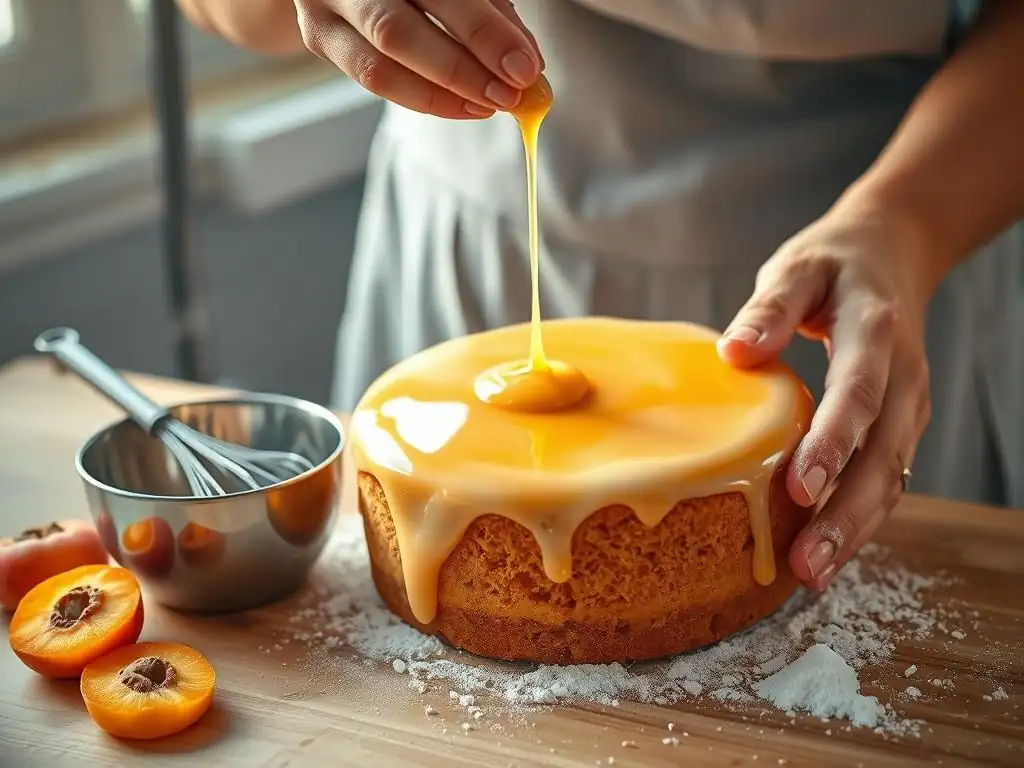
Once your easy beginner cake glaze is mixed to the perfect consistency, the next step is applying it to your cooled cake. The method you use depends on the type of cake and the look you want to achieve. Glazes are best applied to cakes that have cooled completely, as applying them to a warm cake can cause the glaze to melt and run off excessively, or the cake to crumble.
Applying an easy beginner cake glaze is usually less precise than frosting, which is part of its charm and simplicity. You can go for a neat, even coating or a rustic, drippy look. Don's be afraid to experiment with different tools and techniques to see what you like best!
Choosing the Right Tool for Glazing: Spoons, Whisks, and More
Selecting the right tool can make applying your easy beginner cake glaze much easier and help you achieve the desired finish.
- Spoon: A simple spoon is excellent for drizzling glaze over a cake. Dip the spoon into the glaze and let it drip off the tip in a controlled manner, creating lines or patterns. This is great for a rustic or decorative effect on loaf cakes or bundt cakes.
- Whisk: A whisk, particularly a balloon whisk, can be used to dip into the glaze and then gently shake or tap it over the cake. This creates finer, more scattered drizzles, which can look quite elegant.
- Offset Spatula or Butter Knife: If you want a slightly thicker, more opaque coating on a flat-topped cake (like a sheet cake or brownies), you can pour the glaze onto the center and then use an offset spatula or butter knife to gently spread it towards the edges. Work quickly, as the glaze starts to set.
- Pouring: For bundt cakes or loaf cakes, you can simply place the cooled cake on a wire rack set over a baking sheet (to catch drips) and slowly pour the glaze over the top, letting it run down the sides naturally. This creates a beautiful, even coating with classic drips. This is a very popular method for applying an easy beginner cake glaze.
Choose the tool that best suits the type of cake and the visual effect you're aiming for with your easy beginner cake glaze.
Techniques for Achieving an Even Glaze
Getting an even coating with an easy beginner cake glaze can be tricky, especially on rounded or irregularly shaped cakes. Here are a few techniques to help:
- Cool the Cake Completely: This is non-negotiable. A warm cake will melt the glaze and prevent it from setting properly. Ensure your cake is fully cooled to room temperature, ideally on a wire rack.
- Elevate the Cake: Place your cooled cake on a wire rack set over a baking sheet or parchment paper. This catches any drips and allows the excess glaze to run off, preventing a thick puddle at the bottom. This is essential when pouring an easy beginner cake glaze over a bundt or loaf cake.
- Pour or Drizzle While Moving: When pouring or drizzling, keep your hand moving over the cake. For an even coating, start pouring in the center and spiral outwards, or pour back and forth across the top. For drizzles, move the spoon or whisk rhythmically.
- One Layer is Often Enough: Many easy beginner cake glazes are designed to be a single, thin layer. Trying to apply multiple layers can sometimes lead to a messy, uneven finish.
- Work Quickly: Simple glazes made with powdered sugar set relatively fast as the liquid evaporates. Have your cake ready and apply the glaze immediately after mixing it to the right consistency.
Practice makes perfect! Your first attempt at applying an easy beginner cake glaze might not be flawless, but you'll get the hang of it quickly.
Adding Decorations to Your Glazed Cakes: Nuts, Chocolate Shavings, etc.
Adding decorations is a fun way to personalize your glazed cakes and add extra flavor and texture. The key is to add decorations before the easy beginner cake glaze sets completely.
- Sprinkles: The simplest decoration! Sprinkle them over the wet glaze immediately after applying it.
- Nuts: Chopped nuts (like walnuts, pecans, or almonds) add crunch. Sprinkle them over the wet glaze. For a neater edge, you can press nuts onto the sides of a cake after glazing the top.
- Chocolate Shavings or Mini Chocolate Chips: These add extra chocolate flavor and a lovely look to chocolate or vanilla glazes. Sprinkle them over the wet glaze.
- Citrus Zest: For lemon or orange glazes, a final sprinkle of fresh zest adds color and boosts the aroma. Add this right after glazing.
- Candied Fruit or Ginger: Small pieces can be placed decoratively on top of the wet glaze.
Have your decorations ready before you mix your easy beginner cake glaze. That way, you can apply the glaze and then immediately add the decorations before it hardens, ensuring they stick properly.
Storing Your Easy Beginner Cake Glaze
While it's generally best to make an easy beginner cake glaze fresh right before you need it, you might occasionally have leftovers or want to prepare a batch slightly ahead of time. Knowing how to store it properly is important to maintain its quality and usability. The storage method and shelf life depend largely on the ingredients used in the glaze.
Simple glazes made primarily from powdered sugar and liquid are quite stable, but they can change consistency over time as the liquid evaporates or separates slightly. Chocolate glazes behave differently due to the fat content from butter and chocolate.
How to Store Leftover Glaze Properly
If you have leftover easy beginner cake glaze, proper storage will help keep it usable, although the consistency might need a slight adjustment before its next use.
- Vanilla, Lemon, or Maple Glazes (Powdered Sugar Based): Transfer any leftover glaze to an airtight container. Press a piece of plastic wrap directly onto the surface of the glaze before putting the lid on. This prevents a skin from forming. Store at room temperature for up to 2 days, or in the refrigerator for up to 5 days. If storing in the fridge, let it come to room temperature before using again. It will likely be thicker than when first made; you'll need to whisk in a tiny amount of liquid (milk, water, or juice, depending on the glaze type), ½ teaspoon at a time, until it's pourable again.
- Chocolate Glaze: Transfer leftover chocolate glaze to an airtight container. Store at room temperature for up to 2 days. Chocolate glaze will firm up significantly as it cools. To use again, gently warm it. The best way is to place the container (if microwave-safe) in the microwave on low power (30%) for very short bursts (10-15 seconds), stirring well in between, until it becomes pourable again. Alternatively, you can place the container in a bowl of warm water, stirring until softened. Avoid overheating.
Always store glazes away from direct sunlight or heat sources.
Shelf Life of Different Types of Cake Glazes
The shelf life of an easy beginner cake glaze is generally quite short compared to something like buttercream frosting, primarily because they don't contain ingredients that inhibit bacterial growth over long periods.
- Powdered Sugar Glazes (Vanilla, Lemon, Maple): These are best used within 2-3 days if stored at room temperature (in a cool pantry). If stored in the refrigerator, they can last up to 5-7 days. While they might be safe to consume for longer, the quality and consistency can degrade.
- Chocolate Glaze: Due to the butter and chocolate content, chocolate glaze is best consumed within 2-3 days at room temperature. Refrigeration can extend this to about 1 week, but the texture will become very firm and require gentle reheating.
Always check for any signs of spoilage, such as off smells, discoloration, or mold, before using stored glaze. When in doubt, it's always best to whip up a fresh batch, as easy beginner cake glazes are so quick to make!
Conclusion: Mastering Easy Cake Glazes for Beginner Bakers
You've now explored four simple and delicious easy beginner cake glaze recipes and learned the fundamental techniques for making and applying them. From the classic simplicity of vanilla to the bright tang of lemon, the rich depth of chocolate, and the cozy warmth of maple, there's a perfect easy beginner cake glaze for almost any simple cake you bake. These glazes offer a fantastic way to add flavor, moisture, and a professional-looking finish to your creations without the complexity often associated with other types of cake decoration.
Remember that the key to a successful easy beginner cake glaze lies in using powdered sugar, selecting the right liquid, and whisking until smooth. Don't be afraid to adjust the consistency slightly by adding more liquid or powdered sugar, a skill that will serve you well in all your baking endeavors. With a little practice, you'll be able to whip up a perfect easy beginner cake glaze in minutes, transforming your simple cakes into delightful treats that look as good as they taste. Keep baking, keep experimenting, and enjoy the sweet rewards!
Frequently Asked Questions
What exactly is a "cake glaze," and why is it different from frosting?
A cake glaze is a thin, pourable coating that adds shine and flavor. Unlike frosting, which is thicker and often piped on, glaze is simple and quick to prepare.
What makes a cake glaze "easy" for beginners?
Easy beginner cake glazes typically require few ingredients and minimal cooking. They often involve simply mixing ingredients together, requiring no complex techniques.
What are the basic ingredients I'll need to make an easy cake glaze?
Most easy glazes rely on a combination of powdered sugar and a liquid like milk, juice, or water. Flavorings such as vanilla extract or lemon zest are common additions.
Can I use different types of liquids to change the flavor of my glaze?
Absolutely! Using fruit juice (like lemon or orange) will create a citrus-flavored glaze. Coffee or even liqueurs can also be used for unique flavor profiles.
How do I know if my cake glaze is the right consistency?
The glaze should be pourable but not too thin. It should coat the cake evenly without running off completely. If it's too thick, add a little more liquid.
Final Reflection: The Sweet Simplicity of Glaze
The accessibility of delicious desserts is more important than ever, and mastering a simple cake glaze is the key to unlocking a world of baking joy. This isn't just about frosting a cake; it's about empowerment, about transforming a simple bake into something truly special with minimal effort. The recipes explored in this article prove that achieving professional-looking results doesn't require years of experience or a complex arsenal of ingredients.
The impact of simple recipes like these extends far beyond the individual baker. They foster creativity in the kitchen, encouraging experimentation and a sense of accomplishment. They bridge the gap between aspiration and achievement, proving that anyone can create something beautiful and delicious. The best things in life are simple,
a sentiment perfectly reflected in the ease and satisfaction of these cake glaze recipes. This simple act of glazing a cake can become a cherished memory, a shared experience, a moment of joy in an often-hectic world.
Now, I invite you to take this newfound knowledge and run with it! Don't be afraid to experiment with flavors, colors, and techniques. The next time you bake a cake, remember the simplicity and satisfaction of a perfectly applied glaze. Let it be a symbol of your own creative potential, a testament to the power of accessible recipes, and a delicious treat to share with those you love. Go forth and glaze!
Unlock Your Inner Cake Artist: Glaze Game Strong!
Thanks for joining us on this sweet journey into the world of easy cake glazes! We hope you’ve found some delicious inspiration and newfound confidence in your baking skills. Ready to take your cake decorating to the next level?
- Master your favorite glaze: Pick one glaze recipe from the article and try it out today! It's easier than you think.
- Share your masterpiece: Post a picture of your glazed creation on social media and tag us – we'd love to see it!
- Experiment with flavors: Try adding different extracts, spices, or fruits to personalize your glaze and create your signature flavor.
What surprising flavor combination will you create with your newfound glaze expertise?